Discover a curated collection of 20 artisan bread recipes crafted especially for beginner bakers ready to try their hand at homemade bread, highlighting artisan loaves that are typically hand-shaped and developed with long fermentation (often 8-24 hours of bulk or cold fermentation) for depth of flavor. These selections bring together a range of approachable and satisfying loaves made from simple ingredients.
This collection features a variety of bread styles, from crusty French baguettes to soft focaccia and no-knead rustic loaves. Each recipe is designed to offer authentic artisan flavors and textures without requiring professional tools or complicated techniques, making them perfect for everyday baking.
You'll find options suited to different tastes and occasions, including whole grain choices, flavored varieties, and classic favorites like sourdough and brioche.
These recipes work well as a group because they balance ease with rich, homemade flavor and appeal. They require minimal cleanup and include straightforward instructions that build confidence while fitting seamlessly into a busy home cook's routine.
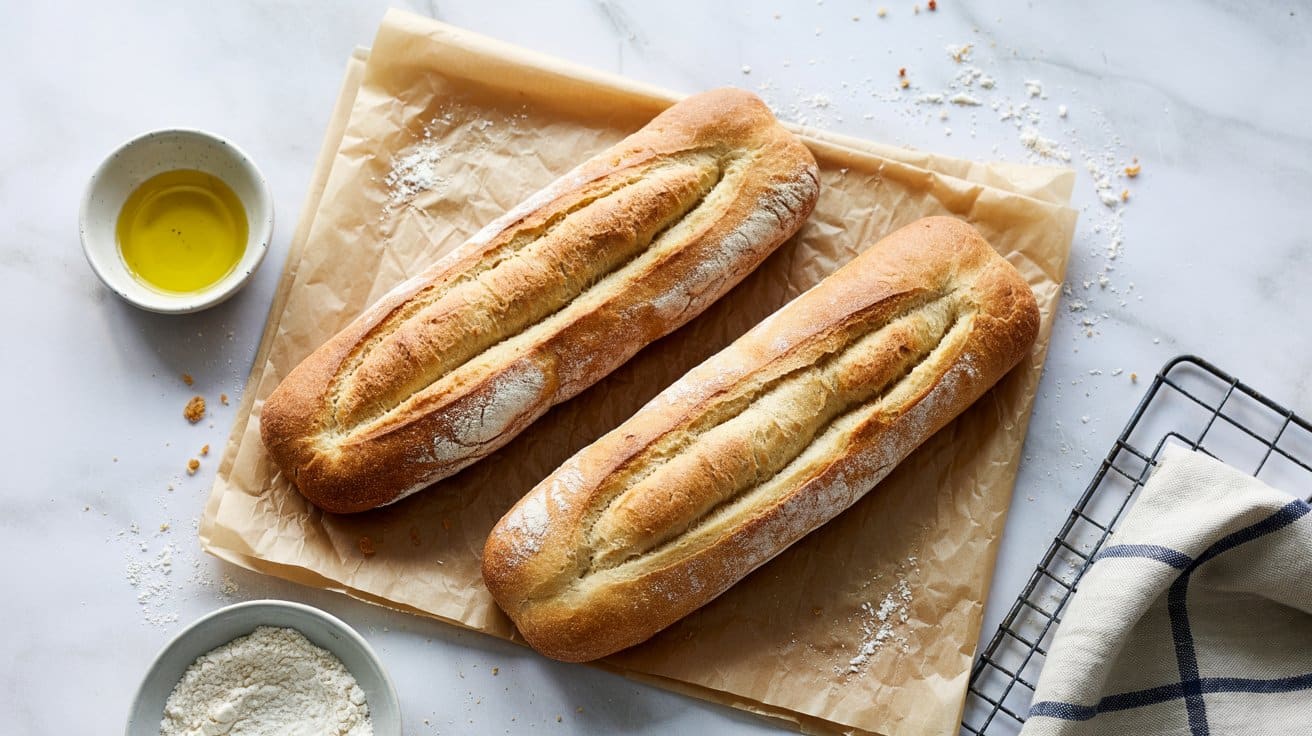
1. Classic French Baguette
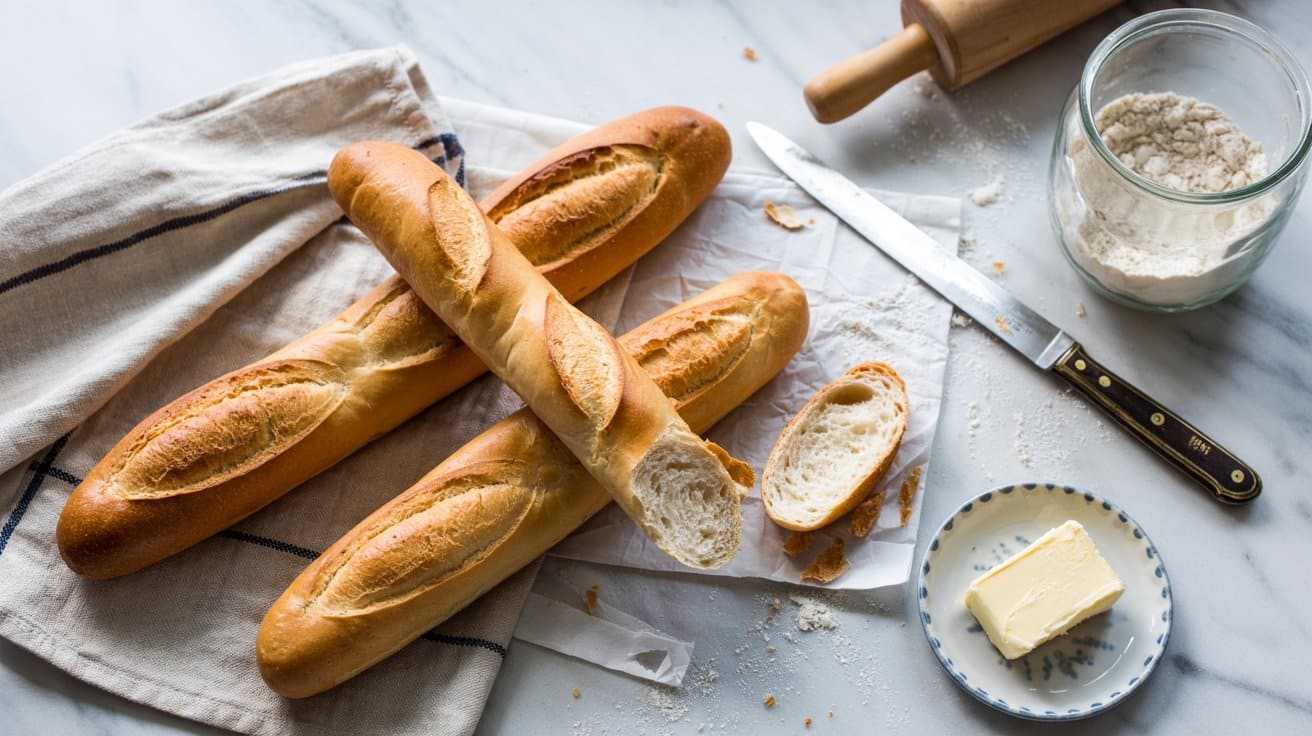
The classic French baguette is one of the simplest breads you can make at home, using just a few staple ingredients, and follows traditional French boulangerie methods that rely on steam and high-heat baking (typically 475-500°F) for its signature crust. It has a crisp and crackly crust with a light, airy crumb inside, offering a satisfying texture in every bite.
This long, thin loaf is perfect to accompany any meal or to enjoy on its own with some butter or cheese, or if you need alternatives, try baguette substitutes for easy swaps, and it's at its crispiest on the day it's baked.
Why This Recipe Works
This recipe combines straightforward steps with very accessible ingredients to create an authentic French-style baguette.
- Convenience - Uses basic pantry staples and relies on simple mixing and resting times.
- Texture - Features a crisp, golden crust paired with a chewy, open crumb.
- Flavor balance - Mild, slightly nutty notes develop from slow fermentation.
- Appeal - Ideal for sandwiches, toasts, or as a side to soups and salads.
Ingredient Swap Ideas
Adjusting ingredients can help adapt this recipe for dietary preferences or to add a slight twist without losing its essence.
- Flour - Substitute all-purpose flour with bread flour to get an even chewier texture.
- Yeast - Use instant yeast instead of active dry yeast to save time on proofing.
- Water - Replace tap water with filtered or spring water for a cleaner taste.
- Salt - Swap regular table salt for sea salt to add subtle flavor complexity.
Ingredients
- 3 ½ cups all-purpose flour
- 1 ¼ cups warm water
- 2 teaspoons active dry yeast
- 2 teaspoons salt
Instructions
- In a large mixing bowl, combine the warm water and active dry yeast. Let it sit for 5 minutes until the yeast dissolves and becomes foamy.
- Add the flour and salt to the yeast mixture. Stir with a wooden spoon until a shaggy dough forms, then knead by hand on a lightly floured surface for about 8-10 minutes until smooth and elastic.
- Place the dough in a lightly oiled bowl and cover it with a clean towel. Let it rise in a warm spot for 1 to 1 ½ hours, or until it doubles in size.
- Gently punch down the dough, then divide it into two equal portions. Shape each portion into a long, slender loaf, about 14 inches long. Place them on a baking sheet lined with parchment paper. Cover and let rise for another 30 to 45 minutes.
- Preheat the oven to 450°F (230°C). Just before baking, make several diagonal slashes on each loaf with a sharp knife. Bake for 20 to 25 minutes until the crust is deep golden and crisp. Remove from the oven and cool on a wire rack before slicing.
2. No-Knead Artisan Bread
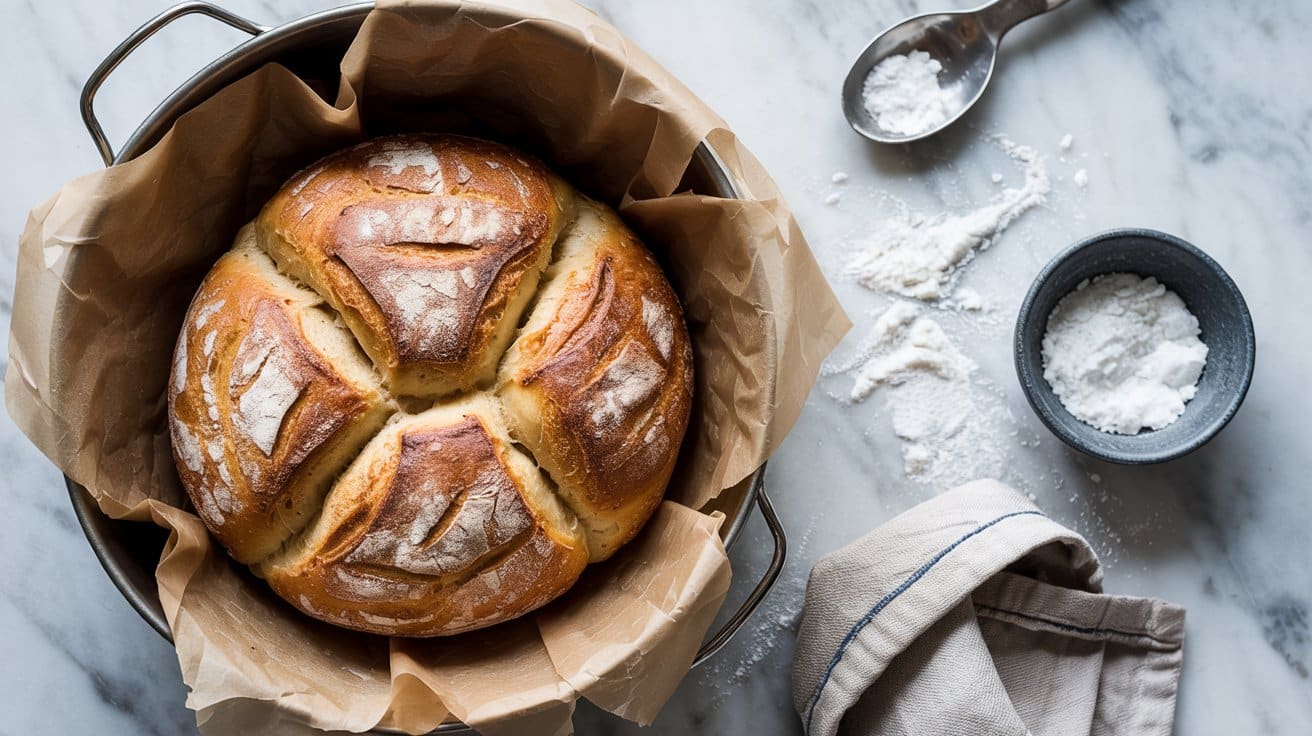
Making homemade bread can seem intimidating, especially with kneading and long preparation times. This No-Knead Artisan Bread recipe simplifies the process by using a slow fermentation method that develops great flavor and texture without any kneading.
The bread comes out with a crispy, crackly crust and a soft, airy crumb inside, closely resembling what you'd find at a bakery, especially when baked in a preheated Dutch oven at 450°F (232°C) to trap steam during the first portion of the bake (typically the first 20 minutes). It's a straightforward recipe that fits well into a busy schedule and gives you satisfying, bakery-style results at home.
If you want a flatbread alternative for quick meals, explore naan bread substitutes for quick swaps.
Why This Recipe Works
This no-knead bread is a wonderful option if you want fresh homemade bread without complicated steps. The long rise develops flavor deeply, and the minimal handling saves time.
- Convenience - Requires no kneading, only a few minutes of mixing, and then long rest periods.
- Flavor development - The slow fermentation enhances the natural taste of the flour and yeast.
- Texture - Produces a crisp crust and tender, open crumb typical of artisan loaves.
- Accessibility - Uses simple ingredients that are easy to find and requires basic equipment.
Ingredient Swap Ideas
Adjusting this recipe can suit different preferences or dietary needs while keeping the core process intact. Using alternatives can keep the bread just as satisfying.
- Flour swap - Use whole wheat flour for a nuttier flavor and more fiber, but consider mixing with all-purpose to maintain lighter texture.
- Salt-free option - Omit salt if on a low-sodium diet; the bread might taste milder but will still rise well.
- Yeast alternatives - Try active dry yeast if instant yeast is unavailable; increase proofing time accordingly.
- Add-ins - Incorporate herbs or olives into the dough during mixing for extra flavor without changing the technique.
Ingredients
- 3 cups all-purpose flour
- ¼ teaspoon instant yeast
- 1 ¼ teaspoons salt
- 1 ½ cups warm water
Instructions
- In a large mixing bowl, stir together the flour, instant yeast, and salt until evenly combined.
- Pour in the warm water and mix with a wooden spoon or spatula until a sticky dough forms. The dough will be shaggy but well-mixed.
- Cover the bowl tightly with plastic wrap or a damp towel and let it rise at room temperature for 12 to 18 hours. The dough should become bubbly and double in size.
- Lightly flour a work surface and turn the dough out. Fold it over on itself once or twice and shape it into a rough ball. Cover and let rest 30 minutes while heating your oven to 450°F (230°C) with a heavy lidded pot inside.
- Carefully place the dough into the hot pot, cover with the lid, and bake for 30 minutes. Remove the lid and bake an additional 15 minutes until the crust is deep golden and crisp. Cool completely before slicing.
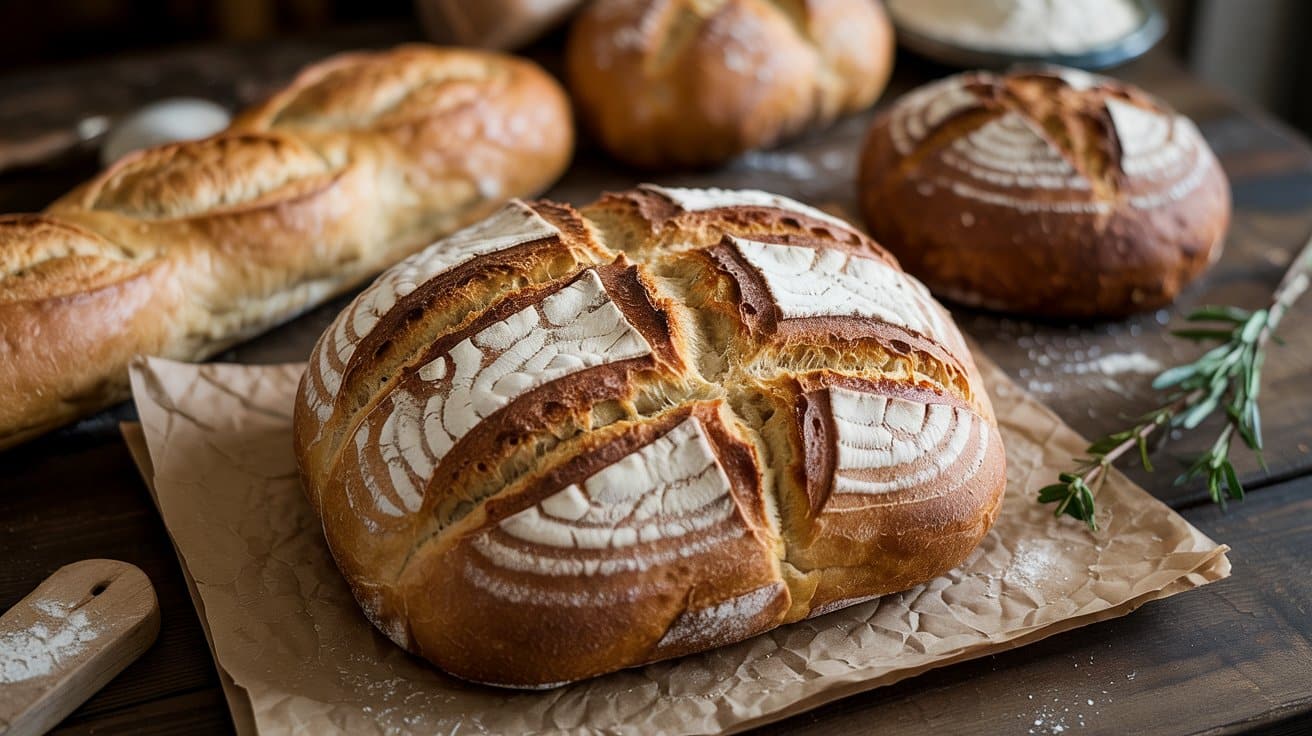
3. Basic Country White Bread (Pain de Campagne)
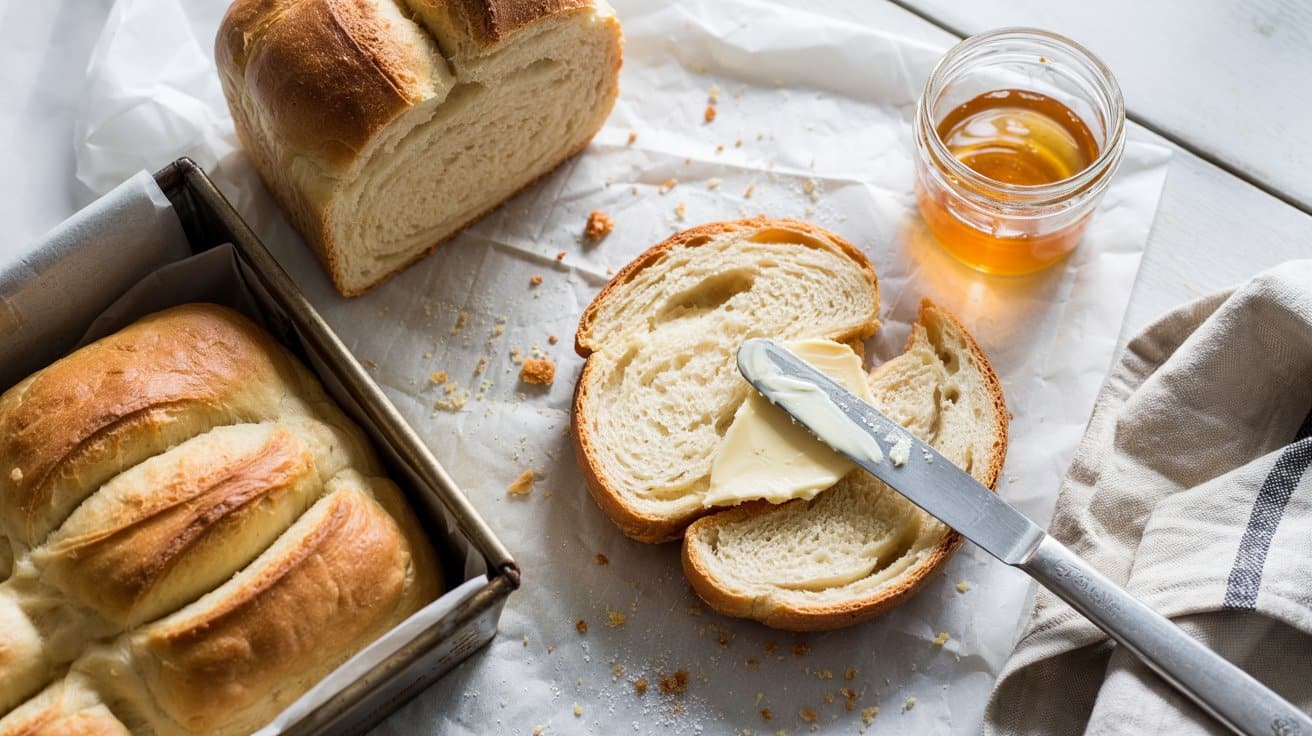
This basic country white bread, often called Pain de Campagne, offers a rustic, round loaf with a thick crust and a mild, comforting flavor. Its texture strikes a nice balance between a chewy crumb and a crunchy exterior, making it a versatile choice for sandwiches, toasting, or simply enjoying with butter.
You don't need many ingredients (just flour, water, yeast, and salt) or complicated techniques to create this bread. It's an inviting recipe for anyone looking to bake a simple, traditional loaf that fills your home with warm, fresh bread aroma.
Why This Recipe Works
This recipe delivers a straightforward method to make a classic French-style white bread with a satisfying texture and subtle flavor.
- Convenience - Requires minimal hands-on time and basic kitchen staples.
- Texture - Thick crust with a tender and chewy crumb inside.
- Flavor balance - Mild, slightly tangy taste that pairs well with savory or sweet toppings.
- Appeal - Suitable for everyday meals and adaptable to various uses such as sandwiches or toast.
Ingredient Swap Ideas
Swapping ingredients can help customize this recipe to different dietary preferences or to match what you have available in your pantry.
- All-purpose flour replaced with bread flour - Increases gluten content for a chewier texture.
- Replace water with milk - Adds a softer crumb and richer flavor.
- Use honey or maple syrup instead of sugar - Provides natural sweetness and a subtle aroma.
- Add seeds or nuts - Mix in sunflower seeds or chopped walnuts for extra crunch and nutrition.
Ingredients
- 3 ½ cups all-purpose flour
- 1 ¼ cups warm water
- 2 teaspoons active dry yeast
- 1 ½ teaspoons salt
- 1 tablespoon sugar
- 1 tablespoon olive oil
Instructions
- In a large bowl, mix the warm water, sugar, and yeast. Let it sit for about 5 to 10 minutes until the mixture becomes foamy, signaling the yeast is active.
- Add the flour and salt to the yeast mixture, then stir until a dough forms. Add olive oil and knead the dough on a lightly floured surface for 8 to 10 minutes, or until it becomes smooth and elastic.
- Place the dough in a lightly oiled bowl, cover it with a clean kitchen towel, and let it rise in a warm spot for about 1 to 1.5 hours, or until it doubles in size.
- Punch the dough down gently to release air. Shape it into a round loaf and place it on a baking sheet lined with parchment paper. Cover again, and let it rise for 30 to 45 minutes.
- Preheat your oven to 450°F (230°C). Just before baking, make a few shallow slashes on the top of the loaf with a sharp knife. Bake for 25 to 30 minutes or until the crust is golden brown and sounds hollow when tapped.
- Let the bread cool on a wire rack before slicing. This resting time ensures the crumb finishes setting and keeps the texture just right.
4. Simple Sourdough Bread
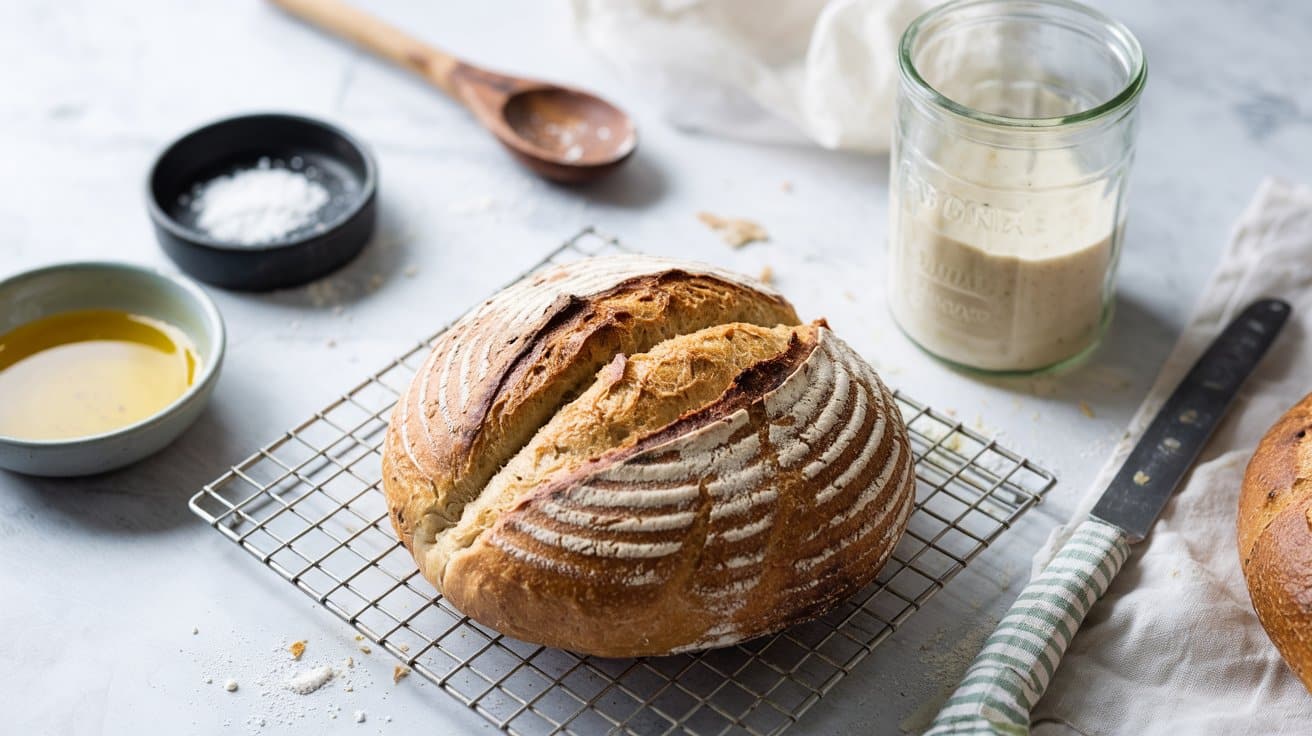
Making sourdough bread might seem complicated at first, but this simple recipe breaks it down into manageable steps anyone can follow. The bread has a gentle tang from the starter and an open, airy crumb that feels light without losing hearty texture.
You'll get a crust that's crisp and golden while the inside stays soft and chewy. It's a straightforward way to enjoy homemade sourdough without needing specialized equipment or lengthy processes.
Why This Recipe Works
This recipe offers a reliable way to bake a flavorful sourdough loaf with minimal fuss. It balances tangy taste with a tender crumb, making it a satisfying choice for daily bread.
- Convenience - Uses a simple feeding schedule that's easy to maintain even for beginners.
- Flavor balance - Mild sourness complements both savory and sweet toppings.
- Texture - Achieves an open crumb with a delightfully crisp crust.
- Approachability - Straightforward method avoids complicated techniques or timing.
Ingredient Swap Ideas
Adjusting ingredients can make the recipe fit your pantry or dietary preferences without losing the essence of sourdough bread.
- Flour - Substitute part or all of the bread flour with whole wheat or spelt for a nuttier flavor and denser texture.
- Starter feed - You can use rye flour in the starter for increased fermentation activity and extra depth in flavor.
- Water - Try filtered or mineral water if your tap water tastes heavily chlorinated, as water quality can affect the starter and dough.
- Salt - Use sea salt or kosher salt as alternatives; both will season the bread well.
Ingredients
- 150 grams sourdough starter
- 375 grams bread flour
- 275 grams water
- 10 grams salt
Instructions
- In a large bowl, combine the sourdough starter with water. Stir gently until the starter is mostly dissolved.
- Add the bread flour and mix using your hands or a spoon until no dry flour remains. Cover and let rest for 30 minutes to autolyse.
- Sprinkle the salt over the dough and fold it in by stretching and folding the dough over itself repeatedly until salt is incorporated. Let the dough rest covered for 4 to 5 hours at room temperature, folding every 30 minutes during the first 2 hours to build strength.
- Shape the dough into a round loaf, cover it, and let it proof for 1 to 2 hours until slightly puffy. Meanwhile, preheat the oven to 450°F (230°C) with a Dutch oven or baking stone inside.
- Carefully transfer the loaf to the hot Dutch oven or baking surface. Score the top with a sharp knife or razor blade. Cover with the lid and bake for 20 minutes. Remove the lid and bake for another 20 to 25 minutes until the crust is deep golden and crisp.
- Let the bread cool completely on a wire rack before slicing to ensure the crumb sets properly.
Enjoy this simple sourdough loaf with your favorite spreads or alongside soups and salads.
5. Olive and Rosemary Focaccia
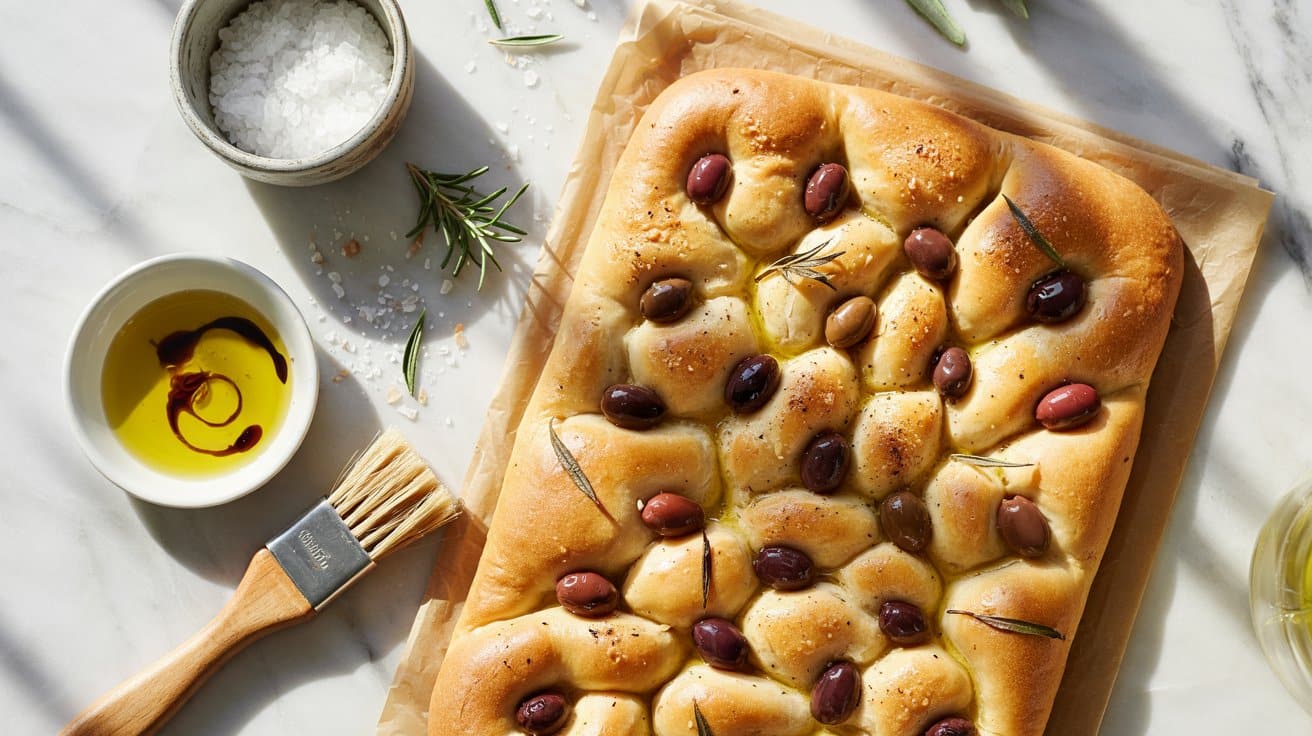
This olive and rosemary focaccia is a soft, flavorful Italian bread that's perfect for serving as a side or enjoying as a snack. It combines the richness of olive oil with the bright, earthy aroma of fresh rosemary and the salty bite of olives, making each bite comforting and satisfying.
The dough is easy to work with, and the process doesn't take long, even if you factor in the rising time. It's a great choice to prepare in advance and have on hand for meals, picnics, or casual gatherings.
Why This Recipe Works
This focaccia recipe balances savory flavors with a tender yet slightly crispy texture, making it satisfying every time. It offers practical preparation steps without requiring unusual ingredients or complicated techniques.
- Convenience - The dough can be made ahead and refrigerated, saving time on baking day.
- Flavor balance - The combination of olives and rosemary enhances the bread without overpowering it.
- Texture - Soft and airy inside with a lightly crisp, golden top.
- Appeal - Works well as a side, appetizer, or snack, suiting family meals and casual entertaining.
Ingredient Swap Ideas
Swapping ingredients helps you tailor the focaccia to your flavor preferences or dietary needs without losing its essential character. These substitutions keep the bread wholesome and flavorful while accommodating different tastes.
- Olives - Use Kalamata or black olives if you prefer a milder or fruitier flavor.
- Rosemary - Substitute with thyme or oregano for a slightly different herbal note.
- Flour - Use whole wheat flour for a nuttier taste and added fiber.
- Olive oil - Replace with avocado oil for a neutral taste with similar texture.
Ingredients
- 3 ½ cups all-purpose flour
- 1 tablespoon active dry yeast
- 1 ¼ cups warm water (about 110°F)
- ¼ cup extra-virgin olive oil, plus extra for drizzling
- 1 teaspoon salt
- 1 tablespoon fresh rosemary leaves, chopped
- 1 cup pitted olives, halved (green or black)
- Coarse sea salt for sprinkling
Instructions
- In a large mixing bowl, combine the warm water and yeast. Let it sit for 5 minutes until the yeast is frothy.
- Add the flour, salt, and ¼ cup olive oil to the yeast mixture. Stir with a wooden spoon or dough hook attachment until a sticky dough forms.
- Turn the dough onto a lightly floured surface and knead for about 5-7 minutes until smooth and elastic. Place it in a lightly oiled bowl, cover with a damp towel, and allow it to rise in a warm spot for 1 hour or until doubled in size.
- Preheat the oven to 425°F. Gently press the dough into a well-oiled baking sheet or pan about 9x13 inches. Use your fingers to create dimples all over the surface.
- Drizzle additional olive oil over the dough, then evenly scatter the chopped rosemary and olives on top. Sprinkle coarse sea salt to improve the flavor.
- Bake the focaccia for 20-25 minutes, until golden brown on top. Remove from the oven and let it cool in the pan for 10 minutes before slicing.
- Serve warm or at room temperature as a side with salads, soups, or enjoy as a flavorful snack.
6. Ciabatta Bread (Beginner Version)
This beginner-friendly ciabatta bread recipe offers a light and airy texture with those sought-after large holes inside and a crisp crust on the outside. It's designed to be straightforward, requiring minimal kneading to let the dough develop character over time.
The result is a flavorful loaf that works wonderfully for sandwiches, dipping in olive oil, or alongside soups.
The rustic appeal of ciabatta makes it versatile for everyday meals or special gatherings. It's a rewarding bread to make at home, especially if you want to enjoy fresh European-style bread without the usual complexity.
Why This Recipe Works
This ciabatta bread recipe balances ease of preparation with satisfying texture and flavor, making it a great choice for home bakers who want authentic results.
- Minimal Kneading - The dough is designed for a simple mixing process, that builds gluten over several hours with less hands-on work.
- Airy Texture - The high hydration helps create those distinctive large holes and a soft crumb inside.
- Crisp Crust - Baking at a high temperature builds a golden, crackly crust that contrasts nicely with the soft interior.
- Versatile Use - Great for sandwiches, dipping, or serving alongside a variety of meals.
Ingredient Swap Ideas
Changing up some ingredients can help tailor this recipe to your dietary preferences or what you have available without losing the characteristic ciabatta qualities.
- All-Purpose Flour to Bread Flour - Using bread flour adds extra protein for better gluten development and a chewier texture.
- Active Dry Yeast to Instant Yeast - Instant yeast can be used directly with the flour, saving time without affecting the rise.
- Olive Oil to Vegetable Oil - Substitute vegetable oil if you want a more neutral flavor while retaining loaf softness.
- Water to Sparkling Water - Using sparkling water can sometimes improve the airiness of the dough.
Ingredients
- 3 cups all-purpose flour
- 1 ½ teaspoons salt
- 1 teaspoon active dry yeast
- 1 ¼ cups warm water
- 2 tablespoons olive oil
Instructions
- In a large mixing bowl, combine the flour, salt, and yeast. Stir briefly to distribute the ingredients evenly.
- Add the warm water and olive oil to the dry ingredients. Mix with a wooden spoon or spatula until a wet, sticky dough forms.
- Cover the bowl loosely with plastic wrap or a kitchen towel. Allow the dough to rest at room temperature for 12 to 18 hours. This long fermentation develops flavor and gluten without kneading.
- After resting, dust a work surface with flour. Gently turn the dough onto it and fold it over itself a couple of times to shape roughly into a rectangular loaf. Avoid excessive handling to preserve air bubbles.
- Place the shaped dough on a floured baking sheet or parchment paper. Let it rise for 1 to 2 hours until it puffs up noticeably.
- Preheat the oven to 450°F (230°C). Place a shallow pan of water on the oven floor to create steam, which helps develop the crust.
- Bake the bread for about 20 to 30 minutes until golden brown and hollow-sounding when tapped on the bottom.
- Cool the ciabatta on a wire rack before slicing.
This no-knead ciabatta bread approach allows you to enjoy fresh, rustic Italian bread with minimal fuss, delivering character and texture worth savoring.
7. Whole Wheat Honey Oat Bread
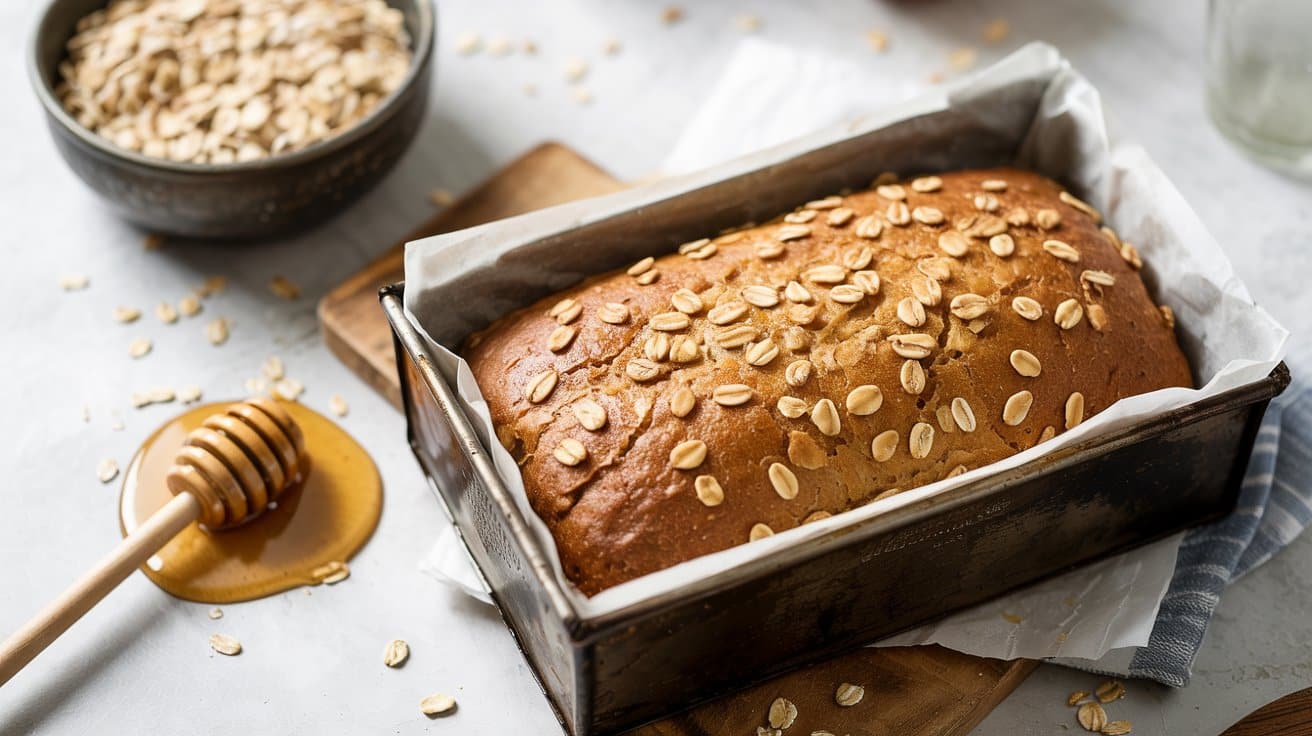
This whole wheat honey oat bread offers a comforting balance of slightly sweet and hearty flavors, making it a wholesome choice for sandwiches or breakfast toast. The use of whole grains and oats adds a satisfying texture and a subtle nutty taste that pairs well with both sweet and savory toppings.
Making this bread is straightforward, and its nourishing qualities make it especially suitable for busy mornings or casual lunches. It's a versatile loaf that fits nicely into a health-conscious routine without sacrificing flavor or texture.
Why This Recipe Works
This bread combines the benefits of whole grains with a touch of honey for mild sweetness and oats for added texture. Its straightforward preparation and balanced flavor make it suitable for everyday meals.
- Convenience - Simple mix-and-rise method keeps prep manageable for weeknight or weekend baking.
- Flavor balance - Mild sweetness from honey goes with the nuttiness of whole wheat and oats.
- Texture - Soft crumb with a slightly chewy crust enriched by rolled oats inside and on top.
- Appeal - Suitable for a wide range of uses from sandwiches to toasted breakfast slices, pleasing most palates.
Ingredient Swap Ideas
Adjusting certain ingredients can help you tailor this recipe to your preferences or dietary needs without losing its core qualities. Here are some smart substitutions you might try.
- Honey - Replace with maple syrup or agave nectar for a vegan-friendly sweetener.
- Whole wheat flour - Use a mix of whole wheat and all-purpose flour if you prefer a lighter texture.
- Rolled oats - Try steel-cut oats for more chew or quick oats for faster mixing, though texture will vary.
- Milk - Swap dairy milk for almond, oat, or soy milk to keep it dairy-free while maintaining moisture.
Ingredients
- 2 cups whole wheat flour
- 1 cup rolled oats
- 1 packet (2 ¼ teaspoons) active dry yeast
- 1 ½ teaspoons salt
- ¼ cup honey
- 1 ¼ cups warm milk
- 2 tablespoons unsalted butter, melted
Instructions
- Activate the yeast by combining warm milk and honey in a small bowl. Sprinkle the yeast over the top and let it sit for about 5 minutes until foamy.
- Mix dry ingredients in a large bowl: whole wheat flour, rolled oats, and salt. Stir to combine evenly.
- Add melted butter and yeast mixture to the dry ingredients. Use a spoon or your hands to form a soft dough. If the dough feels too sticky, add a little more flour, a tablespoon at a time.
- Knead the dough on a lightly floured surface for about 8 to 10 minutes until smooth and elastic. Place it in a greased bowl, cover with a clean towel, and let it rise in a warm spot until doubled in size, about 1 to 1 ½ hours.
- Shape the dough into a loaf and place it in a greased 9x5-inch loaf pan. Sprinkle extra rolled oats on top for a rustic finish. Cover and let rise again until nearly doubled, about 30 to 45 minutes.
- Preheat the oven to 375°F (190°C). Bake the bread for 30 to 35 minutes until the crust is golden brown and the loaf sounds hollow when tapped. Remove from the pan and cool on a wire rack before slicing.
This bread stays fresh for several days when wrapped tightly and can also be frozen for longer storage. Toasting brings out the oats' flavor even more, making it a great base for your favorite spreads or sandwich fillings.
8. Garlic Parmesan Pull-Apart Bread
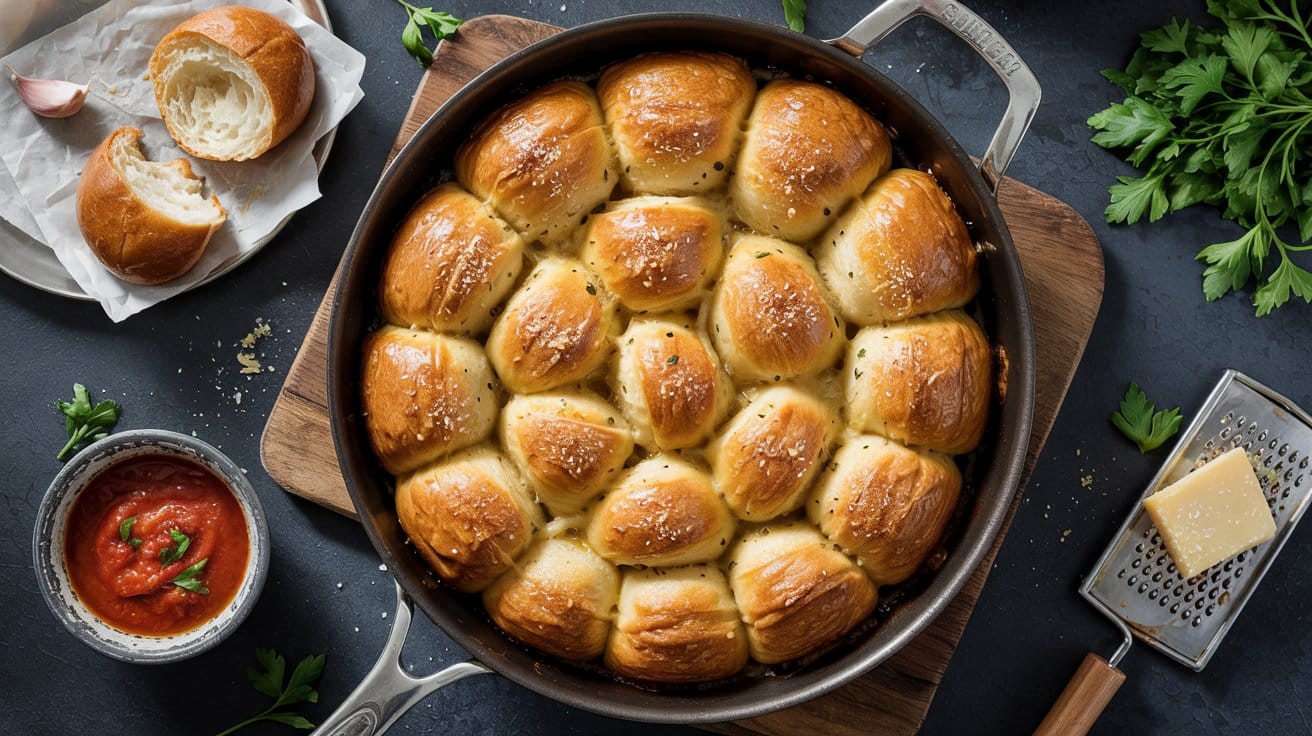
Garlic Parmesan Pull-Apart Bread is a crowd-pleasing treat with soft, buttery dough layered with garlic and Parmesan cheese. It's perfect as a snack, side dish, or for sharing at gatherings.
The combination of crisp edges and tender, cheesy layers creates a wonderful texture that's satisfying to pull apart and enjoy.
This bread is straightforward to make, using enriched dough that rises beautifully. Once baked, it fills your home with a rich, comforting aroma.
It's a fun recipe for busy cooks wanting to bring something tasty and a bit special to the table without much hassle.
Why This Recipe Works
This recipe blends ease and flavor in an inviting way that's hard to resist. Pull-apart rolls make serving simple, and the garlic and cheese go well with the soft bread.
- Convenience - Dough can be made ahead or used from store-bought bread dough for faster prep.
- Flavor balance - The roasted garlic and sharp Parmesan add a savory punch without overpowering the soft bread.
- Texture - Crisp, cheesy edges go well with tender, pillow-like pull-apart bites.
- Appeal - Ideal for sharing at meals or parties, offering a hands-on eating experience everyone can enjoy.
Ingredient Swap Ideas
Swapping ingredients can easily customize this recipe for different preferences or dietary needs without losing its essence. Here are some ideas to try.
- Cheese - Use Pecorino Romano or Asiago as alternatives for a different sharpness and depth.
- Herbs - Add fresh rosemary or basil instead of traditional parsley for a unique twist.
- Butter - Substitute with olive oil for a lighter, dairy-free option that still delivers rich flavor.
- Garlic - Roasted garlic or garlic powder can replace fresh garlic for milder or quicker flavoring.
Ingredients
- 3 ½ cups all-purpose flour
- 2 ¼ teaspoons active dry yeast
- 1 cup warm water
- 2 tablespoons granulated sugar
- 1 teaspoon salt
- ¼ cup unsalted butter, melted
- ½ cup grated Parmesan cheese
- 4 cloves garlic, minced
- 2 tablespoons chopped fresh parsley
- Extra melted butter for brushing
Instructions
- In a large bowl, combine warm water, sugar, and yeast. Let it sit for 5-10 minutes until frothy, indicating the yeast is active.
- Stir in melted butter, salt, and gradually add flour, mixing until a soft dough forms. Knead on a floured surface for about 8 minutes until smooth and elastic.
- Place the dough in a greased bowl, cover, and let it rise in a warm spot until doubled in size, about 1 to 1 ½ hours.
- Punch down the dough and roll it into a large rectangle about 12x16 inches. Brush with melted butter, then evenly sprinkle minced garlic, Parmesan cheese, and parsley over the surface.
- Slice the dough into squares, stack them loosely, and arrange the pieces standing vertically in a greased loaf pan. Cover and let rise for 30 minutes.
- Preheat the oven to 350°F (175°C). Bake the bread for 30-35 minutes until golden brown on top and cooked through. Brush with extra butter as soon as it comes out of the oven.
- Allow to cool slightly before pulling apart and serving warm.
This pull-apart bread works great warm, fresh from the oven, with a salad or soup - a simple way to bring bold flavor and fun texture to any meal.
9. Herbed Pretzel Bread
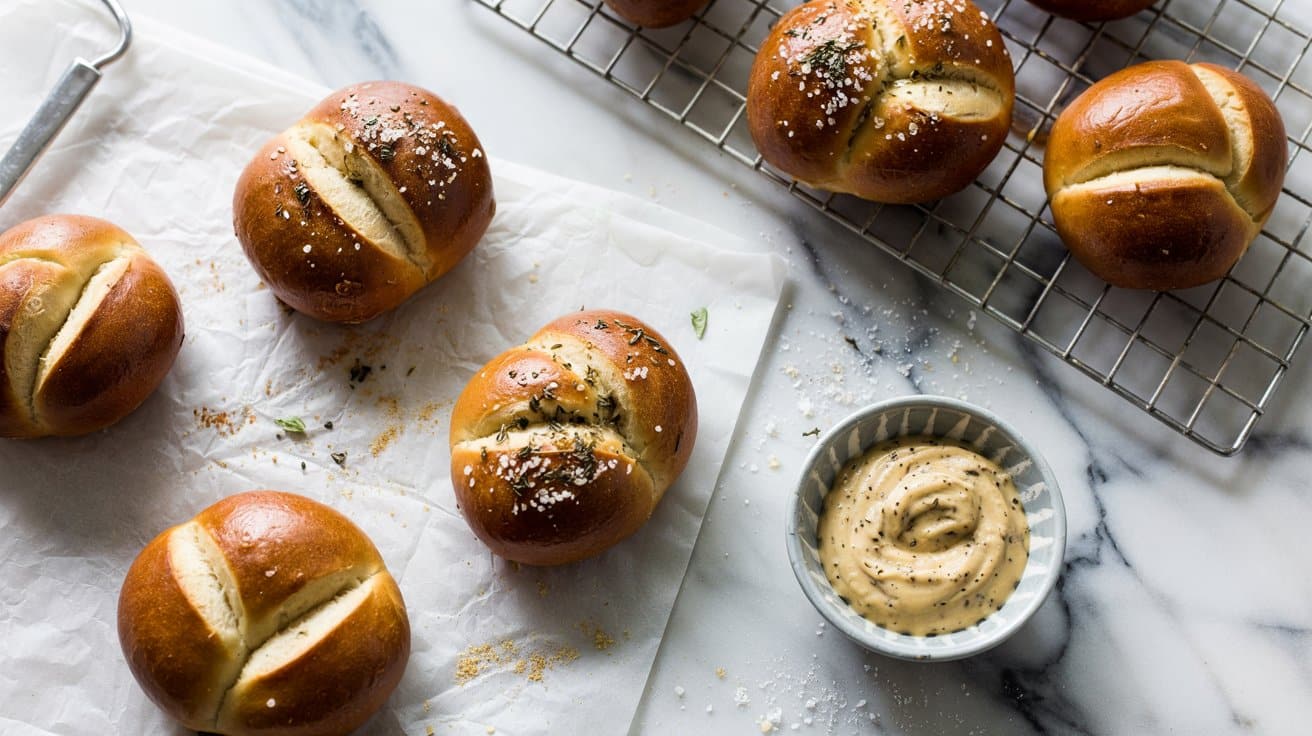
Herbed Pretzel Bread brings together the familiar flavor of soft pretzels with the rustic charm of fresh herbs and tender bread rolls. These rolls have a chewy texture with a golden crust, coated in a rich herb butter that adds a wonderful savory note.
This recipe is straightforward and rewarding, perfect for baking a batch to enjoy throughout the week or sharing at your next gathering.
You'll find that making these rolls is quite manageable, even if you're not an experienced baker. The combination of herbs and that classic pretzel flavor make these rolls especially inviting alongside soups, salads, or as a snack all on their own.
Why This Recipe Works
This recipe combines appealing flavor and convenient prep with a pleasing, chewy texture, making it a great choice for varied meals.
- Convenience - Simple dough ingredients come together quickly, and the rolls bake in a reasonable time.
- Flavor balance - The soft pretzel flavor goes well with an herbed butter glaze, giving a fresh and savory taste.
- Texture - Soft and chewy interior goes with the slightly crisp exterior crust.
- Appeal - These rolls have a warm, handcrafted look ideal for family meals or entertaining guests.
Ingredient Swap Ideas
Swapping certain ingredients here lets you customize the rolls for different tastes or dietary needs without losing the core pretzel essence.
- Gluten-free flour blend - Substitute for all-purpose flour to make gluten-free rolls, adjusting liquid as needed.
- Dairy-free butter - Use a plant-based butter or margarine to keep the herbed glaze vegan-friendly.
- Fresh herbs variations - Try rosemary, thyme, or chives instead of the suggested parsley for a flavor twist.
- Coarse salt alternatives - Use sea salt or kosher salt if pretzel salt is unavailable for that classic salty crunch.
Ingredients
- 4 ½ cups all-purpose flour
- 1 tablespoon sugar
- 2 teaspoons salt
- 1 packet (2 ¼ teaspoons) active dry yeast
- 1 ½ cups warm water (110°F to 115°F)
- ¼ cup baking soda
- 10 cups water
- ¼ cup unsalted butter
- 2 tablespoons fresh parsley, finely chopped
- 1 teaspoon garlic powder
- Coarse pretzel salt or kosher salt
Instructions
- In a large bowl, combine the warm water, sugar, and yeast. Stir gently and let it sit for about 5 minutes until foamy. This confirms the yeast is active.
- Add the flour and salt to the yeast mixture. Stir with a wooden spoon until a shaggy dough forms, then knead on a floured surface for about 8-10 minutes until smooth and elastic. Place the dough in a greased bowl, cover, and let it rise in a warm spot for 1 hour or until doubled in size.
- Preheat your oven to 450°F. In a large pot, bring the 10 cups of water and baking soda to a boil. While waiting, punch down the dough and divide it into 12 equal pieces. Roll each piece into a ball.
- Boil the dough balls in the baking soda water, about 30 seconds on each side. Use a slotted spoon to remove and place them onto a parchment-lined baking sheet. Brush each roll with the melted herb butter mixture and sprinkle generously with pretzel salt.
- Bake the rolls for 12-15 minutes or until deep golden brown. Remove from the oven, brush again with the herb butter, and serve warm or at room temperature.
This herbed pretzel bread offers a unique twist on classic soft pretzels while remaining approachable and satisfying to make and enjoy.
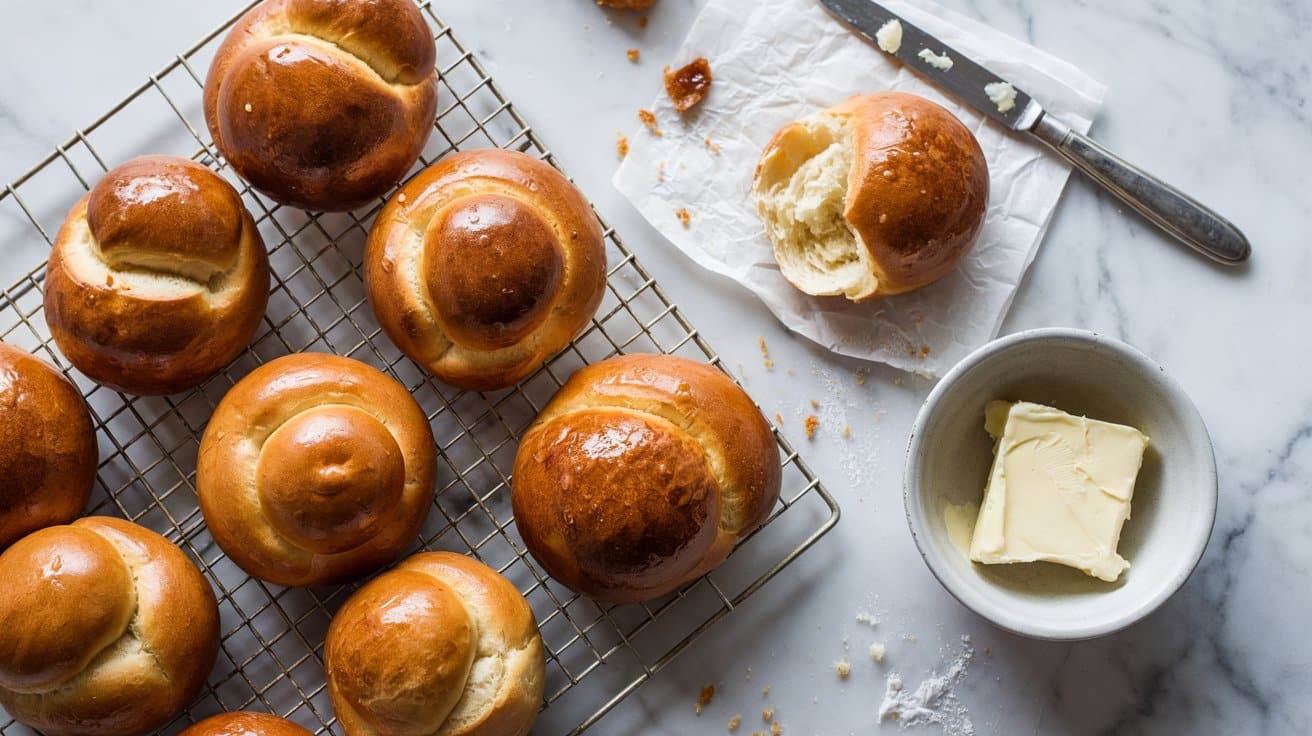
10. Basic Dinner Rolls
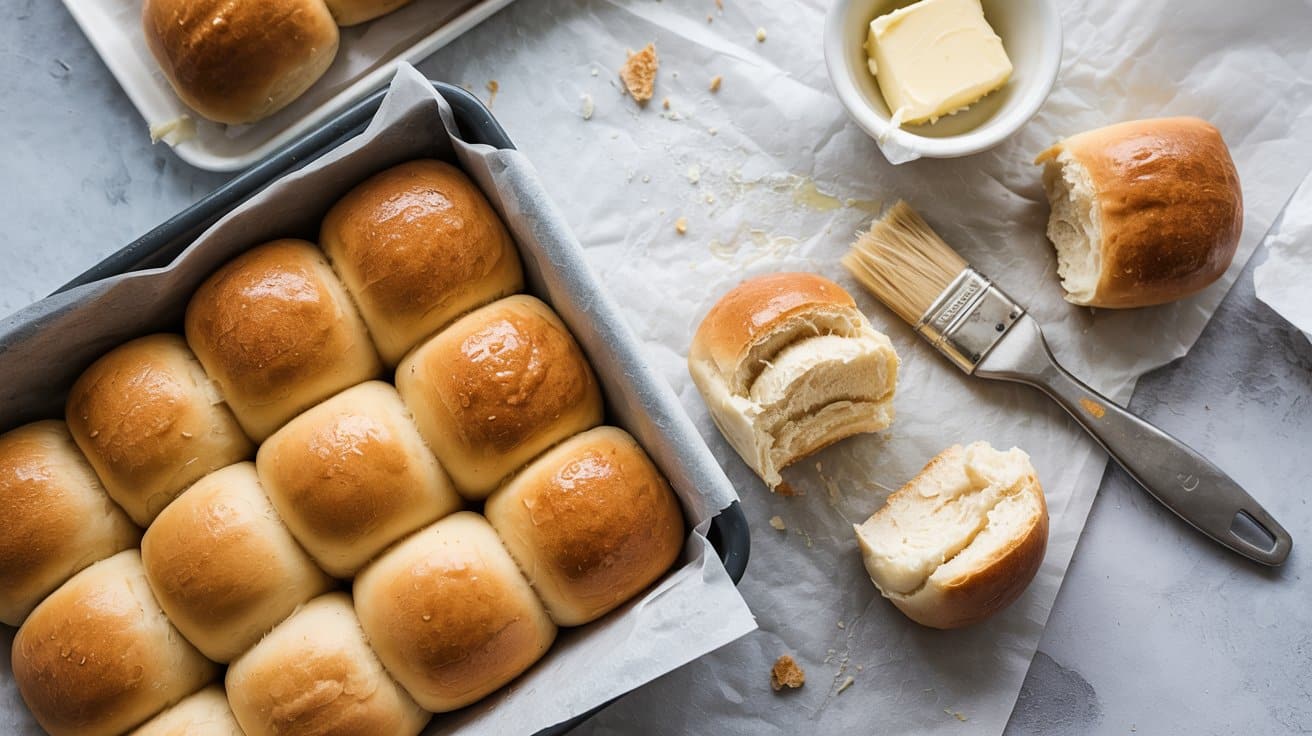
These basic dinner rolls are soft and fluffy with a lightly golden crust that's appealing alongside any meal. They come together with simple ingredients and don't require complicated techniques, making them a great choice for a reliable homemade bread.
The rolls have a tender texture that holds up well whether served plain, with butter, or alongside stews and roasts. Shaping them into small rounds is straightforward, so you'll have fresh bread ready in no time.
Why This Recipe Works
This recipe strikes a great balance between simplicity and achieving a satisfying texture and flavor. It's a classic that suits many occasions and meal types.
- Convenience - Straightforward method with easy-to-find ingredients and no special equipment needed.
- Texture - Soft interior with a slightly chewy but tender crust.
- Flavor balance - Mild, buttery taste that complements savory and sweet dishes.
- Versatility - Ideal for dinners, sandwiches, or as a snack with spreads.
Ingredient Swap Ideas
Switching up some ingredients can help adjust the recipe to dietary preferences or to add more flavor variety while keeping the character of the rolls intact.
- Butter - Use olive oil or a vegan butter substitute to make the rolls dairy-free.
- Milk - Swap whole milk for almond, soy, or oat milk for a plant-based alternative.
- Flour - Use half whole wheat flour to increase fiber and add a subtle nuttiness.
- Sweetener - Replace sugar with honey or maple syrup for a natural touch.
Ingredients
- 1 cup whole milk warm (around 110°F to 115°F)
- 2 ¼ teaspoons active dry yeast (one packet)
- 3 tablespoons granulated sugar
- ¼ cup unsalted butter melted, plus extra for brushing
- 1 large egg
- 3 ½ to 4 cups all-purpose flour, plus more for dusting
- 1 teaspoon salt
Instructions
- In a large bowl, combine warm milk, yeast, and sugar. Stir gently and let it sit for about 5 minutes until it becomes foamy.
- Add melted butter and the egg to the yeast mixture, whisking to combine. Gradually add 3 ½ cups of flour and salt, stirring until a shaggy dough forms.
- Turn the dough onto a floured surface and knead for about 8-10 minutes, adding more flour if necessary, until the dough is smooth and elastic but still soft.
- Place the dough in a lightly oiled bowl, cover with a clean towel, and let it rise in a warm place until doubled in size, about 1 to 1 ½ hours.
- Punch down the dough and divide it into 12 equal pieces. Shape each piece into a smooth ball and place them on a greased or parchment-lined baking sheet, leaving some space between each roll. Cover and let them rise again until puffy, about 30-45 minutes.
- Preheat the oven to 375°F (190°C). Brush the tops of the rolls with melted butter. Bake for 15-18 minutes or until the rolls are golden brown. Remove from the oven and brush with more butter while warm.
- Let the rolls cool slightly on a wire rack before serving.
11. Multigrain Seeded Bread
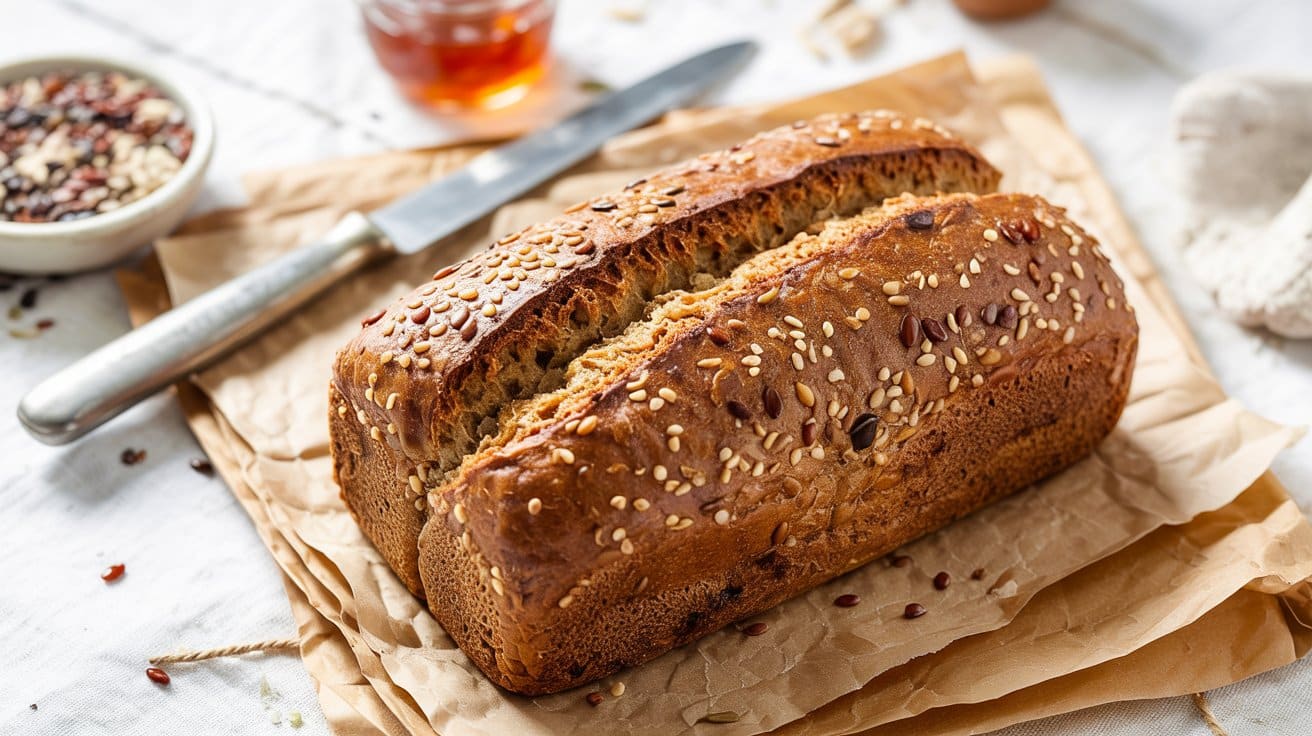
This multigrain seeded bread brings together a wholesome mix of grains and seeds, giving you a satisfying crunch with every bite. It's a nourishing option that feels substantial enough for breakfast toast or a sandwich, while packing in fiber and nutrients naturally.
The bread has a filling texture with a nutty flavor from the seeds, and a golden crust adds just the right crispiness. While it involves a few steps, the recipe is straightforward and reliable for anyone who wants a nutritious homemade loaf.
Why This Recipe Works
This multigrain seeded bread offers a balanced combination of nutrition, texture, and flavor that suits daily meals or special gatherings.
- Convenience - The dough can be made ahead, and it's simple to shape and bake at home.
- Flavor balance - Nutty seeds blend well with the mild, multigrain base for a rich taste.
- Texture - Crunchy seeds contrast with the soft, tender bread crumb inside.
- Appeal - It's a wholesome loaf that's great for families and health-focused eaters.
Ingredient Swap Ideas
Adjusting the grains or seeds lets you customize this bread for personal preferences or dietary requirements without losing its essence.
- Seed mix - Swap pumpkin seeds and sunflower seeds with flaxseeds or chia seeds for different flavors and textures.
- Flour blend - Use whole wheat flour instead of bread flour for a denser, more rustic loaf.
- Sweetener - Replace honey with maple syrup or agave nectar for a vegan-friendly option.
- Fat - Use olive oil instead of butter for a lighter version and a subtle fruity note.
Ingredients
- 1 ½ cups warm water
- 2 ¼ teaspoons active dry yeast
- 3 tablespoons honey
- 2 cups bread flour
- 1 cup whole wheat flour
- ½ cup rolled oats
- ¼ cup sunflower seeds, toasted
- ¼ cup pumpkin seeds, toasted
- 2 tablespoons flaxseeds
- 1 ½ teaspoons salt
- 2 tablespoons unsalted butter, melted
Instructions
- In a large bowl, combine warm water, yeast, and honey. Stir gently and let the mixture rest for 5 to 10 minutes until it becomes foamy.
- Add bread flour, whole wheat flour, rolled oats, salt, and melted butter to the yeast mixture. Stir with a wooden spoon or dough hook attachment until the dough starts to come together.
- Knead the dough on a lightly floured surface for 8 to 10 minutes until smooth and elastic. Incorporate the toasted sunflower seeds, pumpkin seeds, and flaxseeds during the last few minutes of kneading.
- Place the dough in a greased bowl, cover it with a clean towel or plastic wrap, and let it rise in a warm place for 1 to 1.5 hours until doubled in size.
- Punch down the dough gently, shape it into a loaf, and place it into a greased 9x5-inch loaf pan. Cover it again and let rise for another 30 to 45 minutes until it has risen slightly above the pan's edge.
- Preheat your oven to 375°F (190°C). Bake the bread for 30 to 35 minutes or until the top is golden brown and the loaf sounds hollow when tapped.
- Remove the bread from the pan and transfer it to a wire rack to cool completely before slicing.
This multigrain seeded bread keeps well for several days and freezes nicely if you want to bake ahead. It's delicious as a base for both sweet and savory toppings.
12. Japanese Milk Bread (Hokkaido Bread)

Japanese Milk Bread, also known as Hokkaido Bread, is famous for its soft, pillowy texture and slightly sweet flavor. This bread has a smooth, glossy crust and a tender crumb that makes every slice feel like a small treat.
Making this bread at home might seem intimidating at first, but with a little patience, you can enjoy fresh, bakery-style loaves. It's perfect for sandwiches, toast, or simply enjoying plain with butter or jam.
Why This Recipe Works
This Japanese Milk Bread recipe combines convenience with exceptional fluffiness and flavor, making it a versatile addition to your baking repertoire.
- Texture - Achieves a cloud-like, airy crumb with a delicate chew.
- Flavor Balance - Slight sweetness balanced by a rich, milky undertone.
- Ease of Preparation - Uses the tangzhong method for moisture and lightness without complicated steps.
- Versatility - Ideal for sandwiches, French toast, or as a soft dinner roll alternative.
Ingredient Swap Ideas
Adjusting ingredients can help cater to dietary preferences or ingredient availability while keeping the bread's characteristic softness intact.
- Milk - Replace whole milk with almond or soy milk for dairy-free options.
- Butter - Use plant-based margarine or coconut oil instead of butter for a vegan twist.
- Flour - Substitute all-purpose flour with bread flour if you prefer a chewier texture.
- Sugar - Swap granulated sugar with honey or maple syrup for a natural sweetener choice.
Ingredients
- 3 ½ cups bread flour, sifted
- ¼ cup granulated sugar
- 1 teaspoon salt
- 2 teaspoons instant dry yeast
- ½ cup whole milk, warmed
- ½ cup heavy cream, warmed
- 1 large egg, room temperature
- ¼ cup unsalted butter, softened
For the tangzhong (water roux):
- 3 tablespoons bread flour
- ½ cup water
Instructions
- Make the tangzhong by whisking the 3 tablespoons of bread flour with ½ cup of water in a small saucepan. Heat over medium-low heat, stirring constantly until it thickens into a pudding-like consistency. Remove from heat and let cool to room temperature.
- In a large mixing bowl, combine bread flour, sugar, salt, and instant yeast. Mix well to distribute ingredients evenly.
- Add the cooled tangzhong, warmed milk, cream, and egg to the dry ingredients. Stir until the mixture comes together into a rough dough.
- Knead the dough by hand or with a stand mixer using a dough hook for about 10 minutes until smooth and elastic. Gradually add softened butter and continue kneading until fully incorporated and the dough is shiny and stretchy.
- Place the dough in a lightly greased bowl, cover with a clean towel or plastic wrap, and let it rise in a warm spot until doubled in size, roughly 1 to 1 ½ hours.
- Punch down the dough and divide it into equal portions. Shape each into smooth balls and place them in a greased loaf pan or on a baking sheet. Cover and allow to rise until puffed, about 40 minutes.
- Preheat the oven to 350°F (175°C). Bake the bread for 25 to 30 minutes until golden brown and the top feels firm to the touch. Remove from the oven and cool slightly before slicing.
Enjoy slices of this soft, luscious bread for breakfast, snacks, or light meals.
13. French Brioche
French brioche is a beautifully rich and buttery bread that feels special but is surprisingly approachable. Its tender crumb and delicate texture make it a versatile treat that works well for breakfast toast, a base for French toast, or even a snack on its own.
Making brioche at home may seem intimidating, but with clear steps, it's more manageable than you might think.
This recipe guides you through creating that irresistible golden loaf with a soft, buttery crumb and mild sweetness. The dough requires some resting time, which allows the flavors to develop and the dough to rise perfectly, rewarding you with a wonderfully airy bread.
Why This Recipe Works
This brioche recipe combines rich flavor with practical preparation, creating a bread that's both delicious and satisfying.
- Flavor balance - Offers a mild sweetness paired with buttery richness.
- Texture - Produces a soft, tender crumb with a light, airy feel.
- Approachability - Clear, easy-to-follow steps make the process manageable.
- Versatility - Great for sweet or savory uses, from sandwiches to French toast.
Ingredient Swap Ideas
Adjusting ingredients can help you fit this recipe to your dietary preferences or what you have on hand, without losing that classic brioche appeal.
- Butter - Use European-style butter for extra richness or substitute with a dairy-free spread for a vegan option.
- Milk - Swap whole milk for almond or oat milk to accommodate lactose intolerance.
- Eggs - Replace eggs with a commercial egg replacer or flax eggs for an egg-free version, though texture will be more dense.
- Flour - Substitute all-purpose flour with bread flour for a slightly chewier dough.
Ingredients
- 3 ½ cups all-purpose flour
- ¼ cup granulated sugar
- 1 teaspoon salt
- 2 ¼ teaspoons active dry yeast
- ½ cup whole milk, warmed
- 4 large eggs
- 1 cup unsalted butter, softened
- 1 egg yolk mixed with 1 tablespoon water, for egg wash
Instructions
- Combine the flour, sugar, salt, and yeast in a large mixing bowl. Ensure the yeast doesn't come into direct contact with the salt to avoid inhibiting its activity.
- In a separate bowl, whisk the warm milk with eggs. Gradually add this mixture to the dry ingredients, stirring until a soft dough forms.
- Knead the dough on a floured surface for about 10 minutes until smooth and elastic. Incorporate the softened butter in small pieces, kneading until the butter is fully absorbed and the dough feels silky.
- Place the dough in a greased bowl, cover with a clean towel or plastic wrap, and let it rise at room temperature for about 1 to 2 hours or until it doubles in size.
- Punch down the dough, shape it into a loaf or divide it into smaller portions for rolls, then place it into a greased pan. Cover and allow it to rise again for about 1 hour until puffed.
- Preheat the oven to 350°F (175°C). Brush the loaf with the egg wash to create a glossy crust. Bake for 25 to 30 minutes until golden brown and cooked through. Cool before slicing.
This brioche delivers a soft, buttery texture that's well worth the time spent preparing it. Enjoy it fresh or toasted with your favorite spread or fillings.
14. Challah Bread (Egg Bread)
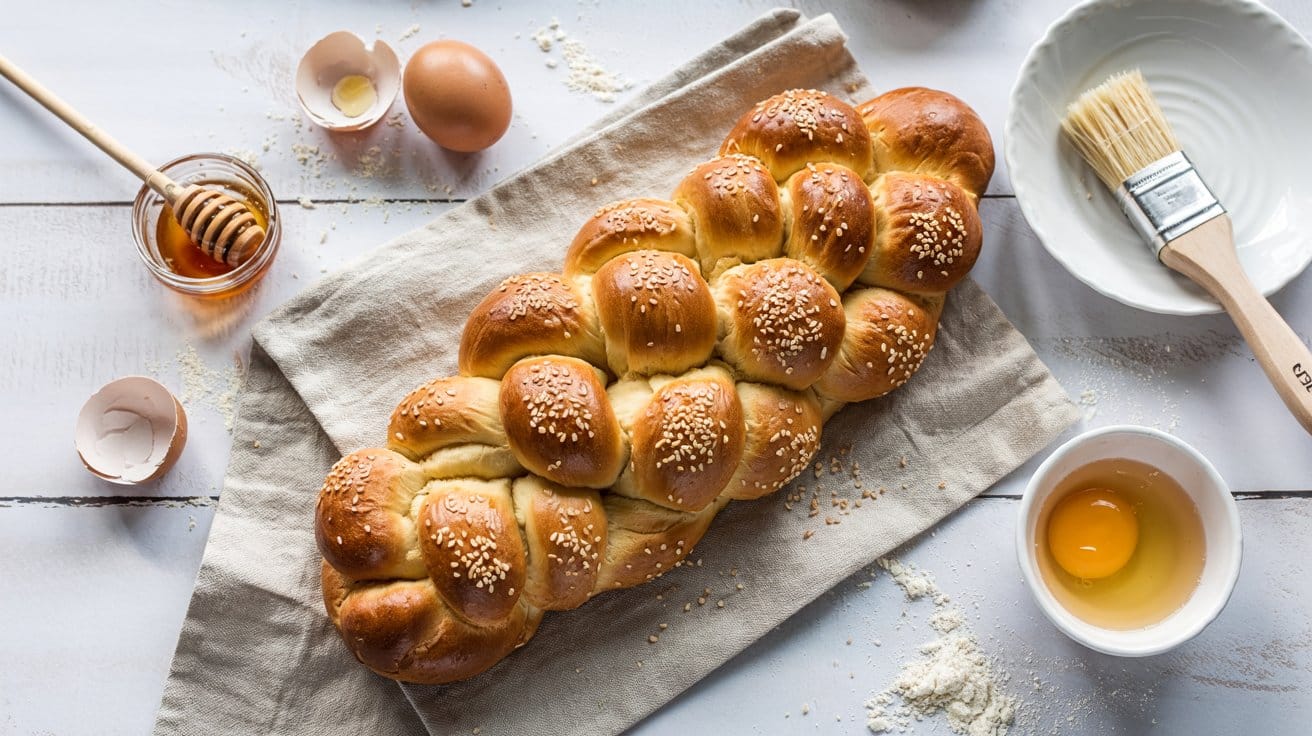
Challah bread is a beautifully braided loaf known for its slightly sweet flavor and soft, tender crumb. It's a classic that works well for both everyday meals and special occasions, bringing a touch of warmth and tradition to your table.
This bread is surprisingly approachable to make from scratch. With just a few ingredients and some simple steps, you can fill your home with the rich aroma of fresh-baked challah.
The texture is soft but has enough structure to hold up well for sandwiches or French toast.
Why This Recipe Works
This recipe offers a straightforward way to make authentic challah with a nice balance of sweetness and richness that appeals to many.
- Easy to follow - The method breaks down the process into manageable steps that fit well into a busy schedule.
- flavor - Mild sweetness from honey goes with the richness of eggs and oil, creating depth without overpowering.
- Texture - Soft, pillowy crumb with a slightly shiny crust from the egg wash makes it inviting and satisfying.
- Versatile - Works wonderfully for slicing, toasting, or even transforming into bread pudding or French toast.
Ingredient Swap Ideas
Adapting challah can meet various dietary preferences or ingredient availabilities without losing its essence.
- Honey substitution - Use maple syrup or agave nectar as an alternative natural sweetener.
- Oil alternative - Swap vegetable oil with mild olive oil or melted coconut oil for a different flavor twist.
- Flour choice - Use bread flour for extra chewiness or all-purpose flour if you prefer a softer crumb.
- Egg replacement - For an egg-free version, consider a flaxseed or chia seed "egg" substitute, though it will affect the texture.
Ingredients
- 4 cups all-purpose flour
- ¼ cup granulated sugar
- 1 packet (2 ¼ teaspoons) active dry yeast
- 1 teaspoon salt
- ½ cup warm water
- ¼ cup vegetable oil
- 2 large eggs, room temperature
- 1 large egg yolk
- 2 tablespoons honey
Instructions
- In a large mixing bowl, combine warm water, yeast, and a pinch of sugar. Stir gently and let it sit for 5 to 10 minutes until foamy. This activates the yeast and signals it's ready.
- Add sugar, oil, eggs, honey, and salt to the yeast mixture. Slowly incorporate the flour, mixing until a rough dough forms. Transfer to a lightly floured surface and knead for about 8 to 10 minutes until smooth and elastic.
- Place the dough in a lightly greased bowl, cover with a clean towel or plastic wrap, and let it rise in a warm spot until doubled in size-about 1 to 1.5 hours.
- Punch down the risen dough and divide it into three equal parts. Roll each into long strands, braid them together, and tuck the ends neatly underneath. Place the braided loaf onto a baking sheet lined with parchment paper. Cover and let it rise again for 30 to 45 minutes until puffy.
- Preheat your oven to 350°F (175°C). Brush the loaf with beaten egg yolk for a shiny, golden crust. Bake for 30 to 35 minutes until the bread sounds hollow when tapped and has a rich, glossy color. Cool completely on a wire rack before slicing.
15. Cheddar Jalapeño Artisan Bread

This cheddar jalapeño artisan bread combines a tangy, flavorful crust with a soft, chewy interior speckled with spicy jalapeños and sharp cheddar cheese. It's an excellent choice for snacking or serving alongside soups and salads.
You'll find the balance of heat from the jalapeños and the richness of melted cheddar creates a satisfying bite. The artisan crust adds a rustic touch without requiring complicated techniques, making it approachable for everyday baking.
Why This Recipe Works
This bread offers a winning combination of spice and cheese wrapped in an easy-to-make artisan-style loaf.
- Convenience - Uses a simple no-knead method that fits well with busy schedules.
- Flavor balance - The sharp cheddar goes with the mild heat from jalapeños beautifully.
- Texture - Crispy crust goes well with a soft and airy crumb.
- Appeal - A crowd-pleasing snack or side for family meals and gatherings.
Ingredient Swap Ideas
Modifying a few ingredients can adjust the heat level or accommodate preferences while keeping the bread's character.
- Cheese swaps - Use Monterey Jack or pepper jack for a different cheese flavor and melt.
- Pepper adjustments - Replace jalapeños with milder poblano peppers or add more for extra spice.
- Milk alternatives - Substitute water for milk if you want a lighter dough texture.
- Flour options - Try half whole wheat flour to add nuttiness and fiber.
Ingredients
- 3 ½ cups all-purpose flour
- 1 ½ teaspoons salt
- ½ teaspoon instant yeast
- 1 ½ cups warm water (about 110°F)
- 1 cup sharp cheddar cheese, shredded
- 2 jalapeños, seeded and finely chopped
- 1 tablespoon olive oil, for greasing
Instructions
- In a large bowl, mix the flour, salt, and yeast together. Stir in the warm water until a sticky dough forms. Cover the bowl with plastic wrap and let it rest for 12 to 18 hours at room temperature until bubbly and risen.
- Once the dough has risen, gently fold in the shredded cheddar cheese and chopped jalapeños until evenly distributed without deflating the dough too much.
- Turn the dough onto a well-floured surface and shape it into a round loaf by folding the edges under. Place it seam-side down on a floured kitchen towel, cover it, and let it proof for 1 to 2 hours until it puffs up.
- Meanwhile, preheat your oven to 450°F. Place a heavy Dutch oven with its lid inside the oven to heat up for 30 minutes.
- Carefully remove the Dutch oven, transfer the loaf into it seam-side up, cover with the lid, and bake for 30 minutes. Remove the lid and bake for an additional 10 to 15 minutes until the crust is golden and crisp.
- Let the bread cool completely on a wire rack before slicing. This helps the crumb set and enhances flavor.
This cheddar jalapeño artisan bread works beautifully as a snack on its own or as an accompaniment to meals that could use a spicy, cheesy touch.
16. Easy Rye Bread
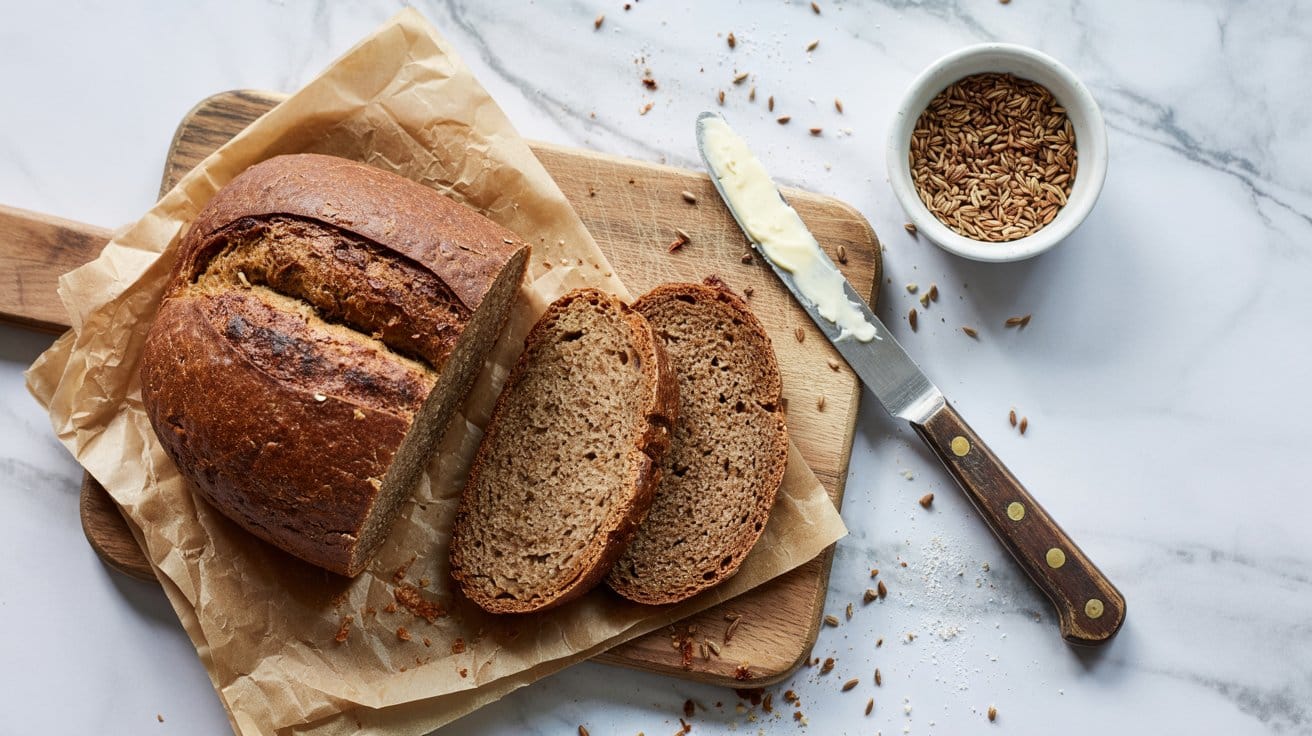
This easy rye bread brings a taste of traditional European baking into your home with minimal fuss. Its slightly dense texture and the warm, earthy flavor of rye flour combine nicely with aromatic caraway seeds, creating a loaf that feels both familiar and satisfying.
You don't need to be an experienced baker to make this bread. The straightforward recipe guides you through every step, resulting in a rustic loaf that works beautifully for sandwiches, toast, or alongside soups and salads.
Why This Recipe Works
This rye bread strikes a balance between rustic charm and approachable baking. It's a recipe that delivers classic flavors without demanding complicated techniques.
- Simplicity - Uses common ingredients and a clear, manageable process for easy preparation.
- Authentic Flavor - Incorporates rye flour and caraway seeds for a traditional, slightly tangy taste.
- Texture - Offers a pleasant density and chewy crumb that holds up well to toppings.
- Versatility - Pairs well with savory spreads, cheeses, or as a filling base for sandwiches.
Ingredient Swap Ideas
Swapping ingredients here lets you tailor the bread to your pantry or dietary preferences without losing its character. Adjustments help create variations that still preserve the rye's flavor and texture.
- Whole Wheat Flour - Replace part or all of the rye flour to lighten the density while keeping a filling flavor.
- Fennel Seeds - Use fennel or caraway seeds interchangeably for a slightly different aromatic note.
- Honey or Molasses - Substitute the sweetener to deepen the flavor or suit dietary needs.
- Gluten-Free Flour Blend - Use a gluten-free baking mix with xanthan gum to make this bread suitable for gluten sensitivity (texture will be different but still enjoyable).
Ingredients
- 2 cups rye flour
- 1 cup all-purpose flour
- 1 ½ teaspoons active dry yeast
- 1 tablespoon caraway seeds
- 1 teaspoon salt
- 1 tablespoon brown sugar or honey
- 1 ¼ cups warm water
- 1 tablespoon olive oil or vegetable oil
Instructions
- In a large bowl, combine the rye flour, all-purpose flour, yeast, caraway seeds, salt, and brown sugar or honey. Mix well to distribute all dry ingredients.
- Pour in the warm water and oil, then stir with a spoon until the dough begins to come together.
- Turn the dough onto a lightly floured surface and knead for about 8 to 10 minutes until smooth and elastic. Add a bit more flour if the dough is too sticky.
- Place the dough in a lightly oiled bowl, cover it with a clean towel or plastic wrap, and let it rise in a warm spot for about 1 to 1 ½ hours, or until doubled in size.
- Punch down the dough, shape it into a loaf, and place it on a baking sheet lined with parchment paper. Cover again and let it rest for 30 minutes.
- Preheat your oven to 375°F (190°C). Slash the top of the loaf a few times with a sharp knife for steam release during baking.
- Bake the bread for 35 to 40 minutes until the crust is deep golden and sounds hollow when tapped. Remove from the oven and let cool completely on a wire rack before slicing.
This rye bread makes a nice everyday staple with a nod to timeless flavors. It's worth trying out for any meal where you want something wholesome, textured, and flavorful.
17. Cinnamon Swirl Breakfast Loaf
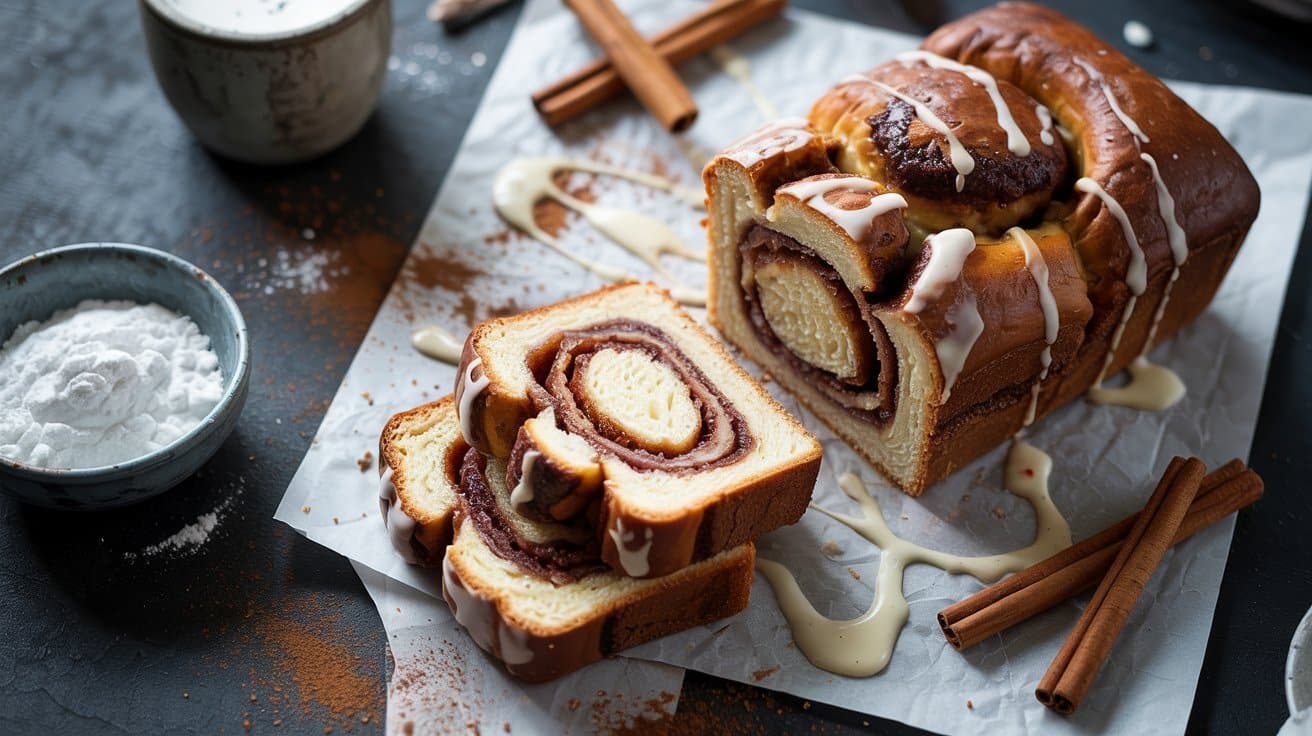
This cinnamon swirl breakfast loaf is a soft, slightly sweet yeast bread with a lovely spiral of cinnamon sugar running through each slice. It has a tender crumb that goes well with a morning cup of coffee or tea.
The recipe is straightforward to prepare and yields an impressive loaf that feels special but doesn't take too much time or complicated techniques. Its inviting aroma and sweet, warm cinnamon flavor make it a great choice for a weekend breakfast or brunch.
Why This Recipe Works
This recipe combines simple ingredients to create a flavorful and comforting breakfast bread that feels a little indulgent without being overly rich.
- Convenience - The dough comes together easily, and the loaf can be made a day ahead.
- Flavor balance - The cinnamon sugar swirl adds just the right amount of sweetness and spice without overwhelming the bread.
- Texture - The crumb is soft and fluffy, contrasted by a lightly crisp crust.
- Appeal - It's a crowd-pleaser ideal for family breakfasts, brunch gatherings, or a special treat.
Ingredient Swap Ideas
Swapping certain ingredients lets you adjust the loaf to suit dietary needs or flavor preferences while maintaining its signature cinnamon swirl.
- All-purpose flour - Substitute with whole wheat flour for a nuttier taste, keeping in mind the loaf may be slightly denser.
- Butter - Use a dairy-free margarine or coconut oil to make the bread dairy-free without losing richness.
- Brown sugar - Replace with coconut sugar for a subtler caramel note that works well with cinnamon.
- Egg - Omit or replace with a flax or chia egg to make the recipe vegan-friendly (note: texture may change slightly).
Ingredients
- 1 cup whole milk, warmed to about 110°F (43°C)
- 2 ¼ teaspoons (1 packet) active dry yeast
- ¼ cup granulated sugar
- 3 tablespoons unsalted butter, melted and cooled
- 1 large egg
- 3 cups all-purpose flour
- ½ teaspoon salt
For the cinnamon sugar filling
- ½ cup brown sugar, packed
- 2 tablespoons ground cinnamon
- 3 tablespoons unsalted butter, softened
- 1 tablespoon melted butter
Instructions
- In a small bowl, combine the warm milk and yeast. Stir gently and let it sit for about 5 minutes until foamy. This confirms the yeast is active.
- In a large mixing bowl, whisk together sugar, melted butter, and egg. Add the yeast mixture and stir to combine. Gradually add flour and salt, stirring until a soft dough forms.
- Turn the dough onto a lightly floured surface and knead for about 8 minutes until smooth and elastic. Place the dough in a greased bowl, cover with a kitchen towel, and let it rise in a warm spot until doubled in size, about 1 to 1 ½ hours.
- Meanwhile, mix the brown sugar and cinnamon in a small bowl for the filling. Punch down the dough, roll it into a 12x15-inch rectangle. Spread softened butter evenly over the dough, then sprinkle the cinnamon sugar mixture across it. Tightly roll up the dough lengthwise to form a log. Pinch the seams to seal.
- Place the loaf seam-side down in a greased 9x5-inch loaf pan. Cover and let it rise again until nearly doubled, about 45 minutes. Preheat the oven to 350°F (175°C). Brush the top of the loaf with melted butter before baking.
- Bake for 30 to 35 minutes, or until the top is golden and the loaf sounds hollow when tapped. Remove from the oven, let cool slightly before slicing. Serve warm or at room temperature.
18. Pumpkin Seed Loaf

This pumpkin seed loaf brings the cozy flavors of autumn right to your table. It combines warm spices, a tender crumb, and the satisfying crunch of toasted pumpkin seeds throughout.
It's straightforward to prepare and makes a wholesome choice whether you slice it for breakfast, a snack, or alongside a meal.
The loaf balances subtle sweetness with earthy pumpkin seeds and aromatic hints of cinnamon and nutmeg. You'll enjoy a moist texture that's sturdy enough to hold together but delicate enough to be light and comforting.
Why This Recipe Works
This loaf offers a simple way to bring seasonal flavors into everyday baking with minimal fuss. It's versatile enough for various occasions, delivering both taste and nutrition.
- Convenience - Uses common pantry ingredients and comes together quickly.
- Flavor balance - Combines warm spices with natural pumpkin seed earthiness.
- Texture - Moist crumb with crisp, toasty pumpkin seeds on top and inside.
- Appeal - Suitable for breakfast, snack time, or light dessert.
Ingredient Swap Ideas
Swapping ingredients allows you to adapt the loaf for dietary preferences or ingredient availability without losing its autumn character.
- Whole wheat flour - Substitute half or all-purpose flour for a heartier, fiber-rich loaf.
- Maple syrup - Use honey or brown sugar to change the sweetness profile.
- Greek yogurt - Swap with sour cream or buttermilk for a slight tang and moisture.
- Pumpkin seeds - Replace with sunflower seeds or chopped nuts if preferred.
Ingredients
- 2 cups all-purpose flour
- 1 teaspoon baking soda
- ½ teaspoon baking powder
- ½ teaspoon salt
- 1 teaspoon ground cinnamon
- ½ teaspoon ground nutmeg
- ¼ teaspoon ground cloves
- ½ cup unsalted butter, softened
- ¾ cup brown sugar packed
- 2 large eggs
- 1 cup pumpkin puree
- ½ cup Greek yogurt
- 1 teaspoon vanilla extract
- ¾ cup pumpkin seeds, divided
Instructions
- Preheat your oven to 350°F (175°C) and grease a standard 9x5-inch loaf pan. Set aside.
- In a medium bowl, whisk together the flour, baking soda, baking powder, salt, cinnamon, nutmeg, and cloves.
- In a larger bowl, cream the softened butter and brown sugar until light and fluffy. Beat in the eggs one at a time, then mix in the pumpkin puree, Greek yogurt, and vanilla extract until combined.
- Gradually add the dry ingredients to the wet ingredients, folding gently until just incorporated. Fold in ½ cup of the pumpkin seeds.
- Pour the batter into the prepared loaf pan and sprinkle the remaining ¼ cup of pumpkin seeds on top.
- Bake for 50 to 60 minutes, or until a toothpick inserted into the center comes out clean.
- Allow the loaf to cool in the pan for 10 minutes before transferring it to a wire rack to cool completely. Slice and serve.
19. Zucchini Herb Bread
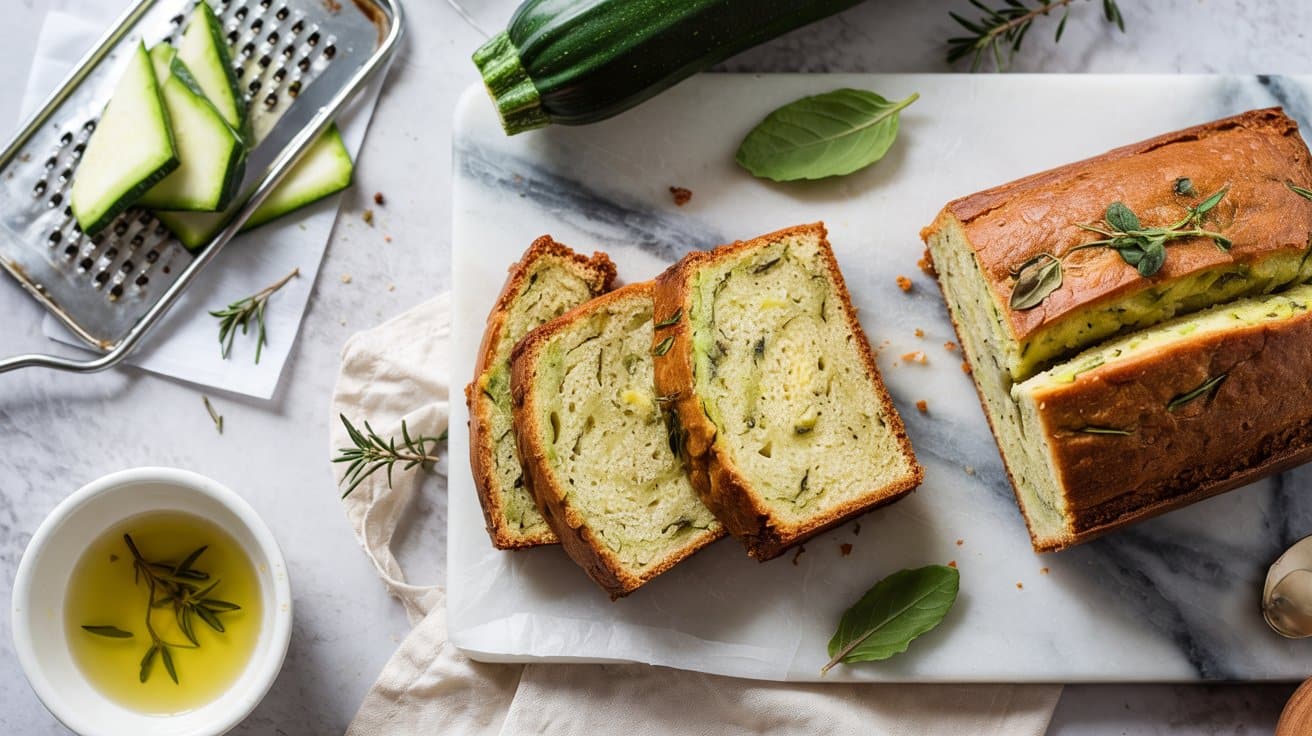
Zucchini herb bread brings together fresh vegetables and fragrant herbs in an easy, savory quick bread. The grated zucchini keeps the bread moist and tender, while the herbs add a fresh, earthy flavor that brightens every bite.
This bread is straightforward to prepare and makes a good addition to any meal, serving as a snack or a side to soups and salads.
The texture is soft yet slightly dense, with a golden crust that holds everything together. It's a practical recipe for making use of garden zucchini or buying fresh at the market, offering a healthy twist on traditional quick breads.
Why This Recipe Works
This zucchini herb bread is a reliable choice for a savory treat that combines moist texture with fresh flavors. It's versatile and approachable, fitting well into everyday menus and offering a subtle herbaceous note paired with garden-fresh zucchini.
- Convenience - Quick to mix and bakes in under an hour, requiring minimal prep work.
- Flavor balance - The delicate zucchini flavor pairs with herbs to create a well-rounded, savory profile.
- Texture - Moist and tender crumb with a slightly crisp crust for a satisfying bite.
- Appeal - Suitable for family meals or as a portable snack, easy to slice and serve.
Ingredient Swap Ideas
Adjusting the ingredients can help accommodate dietary preferences or availability while keeping the essence of this zucchini bread intact.
- Use dairy-free milk such as almond or oat milk instead of regular milk for a lactose-free version.
- Swap all-purpose flour for whole wheat flour to boost fiber and add a nuttier flavor.
- Replace fresh herbs with dried if fresh ones aren't on hand, reducing the amount since dried herbs are more concentrated.
- Omit cheese or substitute with a plant-based cheese for those avoiding dairy.
Ingredients
- 1 ½ cups grated zucchini
- 2 cups all-purpose flour
- 1 tablespoon baking powder
- ½ teaspoon baking soda
- 1 teaspoon salt
- 2 teaspoons dried Italian herbs
- ⅓ cup olive oil
- ¾ cup plain yogurt or sour cream
- 2 large eggs
- ½ cup grated Parmesan cheese
- 2 cloves garlic, minced
- Optional freshly ground black pepper
Instructions
- Preheat your oven to 350°F (175°C). Grease a standard 9x5-inch loaf pan or line it with parchment paper.
- In a large bowl, whisk together the flour, baking powder, baking soda, salt, and dried herbs.
- In another bowl, beat the eggs with the olive oil and yogurt or sour cream. Stir in the zucchini, garlic, and Parmesan until combined.
- Mix the wet ingredients into the dry, folding gently until just combined.
- Transfer the batter to the prepared pan and smooth the top. Bake for 50 to 60 minutes until a toothpick comes out clean.
- Cool in the pan for 15 minutes, then cool completely on a wire rack before slicing.
20. No-Knead Beer Bread
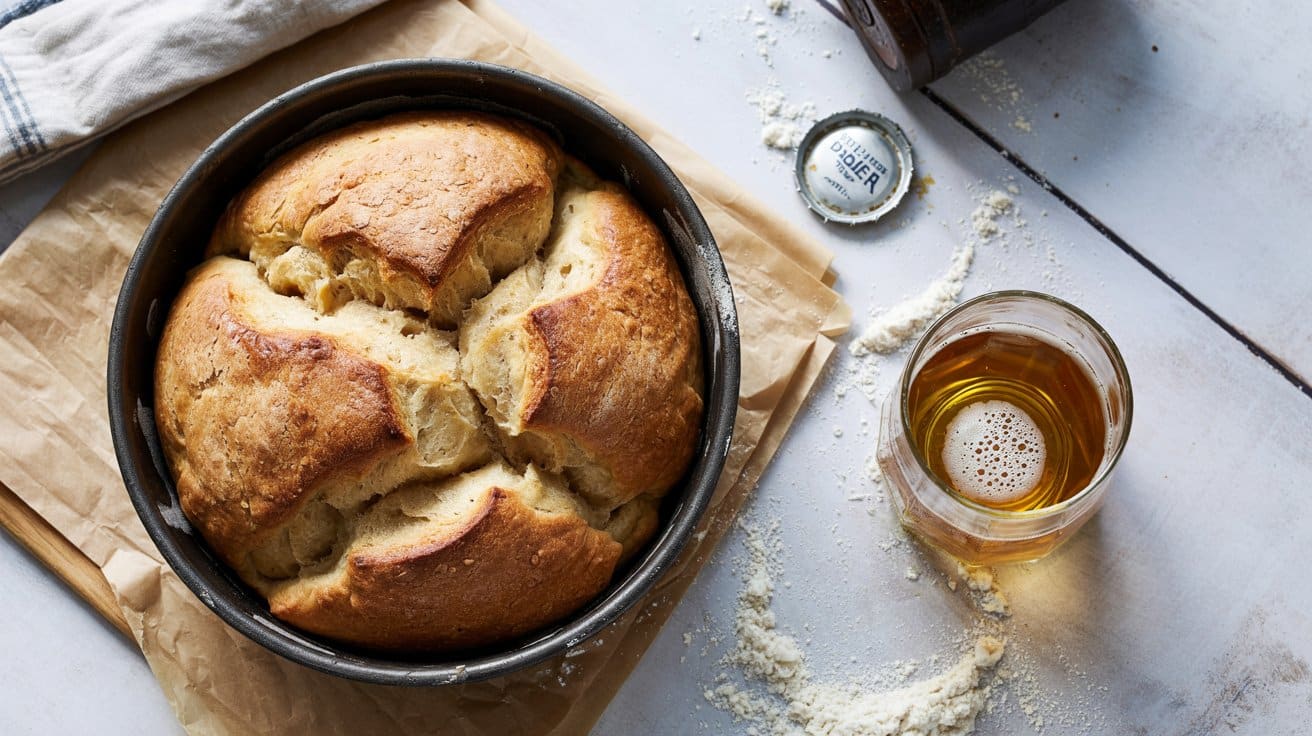
This no-knead beer bread is a straightforward recipe that brings homemade bread to your table with minimal fuss. The beer adds a subtle depth of flavor and helps create a filling crust, while the interior stays soft and tender.
You don't need a bread machine or mixing bowls full of dough that require constant attention. Just mix, wait, and bake.
It's a great option for busy days or those new to bread baking who want a solid loaf without complicated steps.
Why This Recipe Works
This recipe combines convenience and flavor with simple ingredients to yield a satisfying loaf that fits easily into your routine.
- Convenience - No kneading or special equipment needed; it comes together with just a quick mix and a resting period.
- Flavor balance - The beer brings a mild, malty note that goes with the richness of the bread without overpowering it.
- Texture - It develops a crisp, golden crust with a soft, moist crumb inside.
- Appeal - This bread pairs well with soups, stews, or as a base for sandwiches, making it a family-friendly staple.
Ingredient Swap Ideas
Adjusting the basic recipe can help accommodate different dietary needs or flavor preferences without losing the bread's character.
- Beer variations - Use a lighter lager for a milder taste or a stout for a deeper, toastier flavor.
- Gluten-free option - Substitute with a gluten-free all-purpose flour blend designed for baking bread.
- Add-ins - Mix in herbs like rosemary or thyme, or even shredded cheese for a savory twist.
- Milk replacement - Replace beer with sparkling water for a similar rise without the beer flavor if preferred.
Ingredients
- 3 cups all-purpose flour
- 1 tablespoon baking powder
- 1 teaspoon salt
- 12 ounces beer at room temperature
- ¼ cup sugar
Instructions
- Preheat your oven to 375°F (190°C). Grease a 9x5-inch loaf pan or line it with parchment paper for easy removal.
- In a large mixing bowl, whisk together the flour, baking powder, salt, and sugar until evenly combined.
- Pour in the beer and stir with a wooden spoon or spatula until just mixed. The batter will be thick and sticky; do not overmix.
- Transfer the batter to the prepared loaf pan, smoothing the top slightly. Place it in the oven and bake for 45 to 50 minutes, or until the crust is golden brown and a toothpick inserted in the center comes out clean.
- Remove the bread from the oven and let it cool in the pan for 10 minutes before transferring to a wire rack to cool completely. Slice and serve warm or at room temperature.
If you want flatbread options to round out weeknight meals, explore pita bread alternatives for fresh flavors. For different protein and gluten structures that affect chew and crumb, see bread flour substitutes to boost texture.

Andrew Gray is a seasoned food writer and blogger with a wealth of experience in the restaurant and catering industries. With a passion for all things delicious, Andrew has honed his culinary expertise through his work as a personal chef and caterer.
His love for food led him to venture into food writing, where he has contributed to various online publications, sharing his knowledge and insights on the culinary world. As the proud owner of CooksCrafter.com, Andrew covers a wide range of topics, including recipes, restaurant reviews, product recommendations, and culinary tips.
Through his website, he aims to inspire and educate fellow food enthusiasts, offering a comprehensive resource for all things food-related.