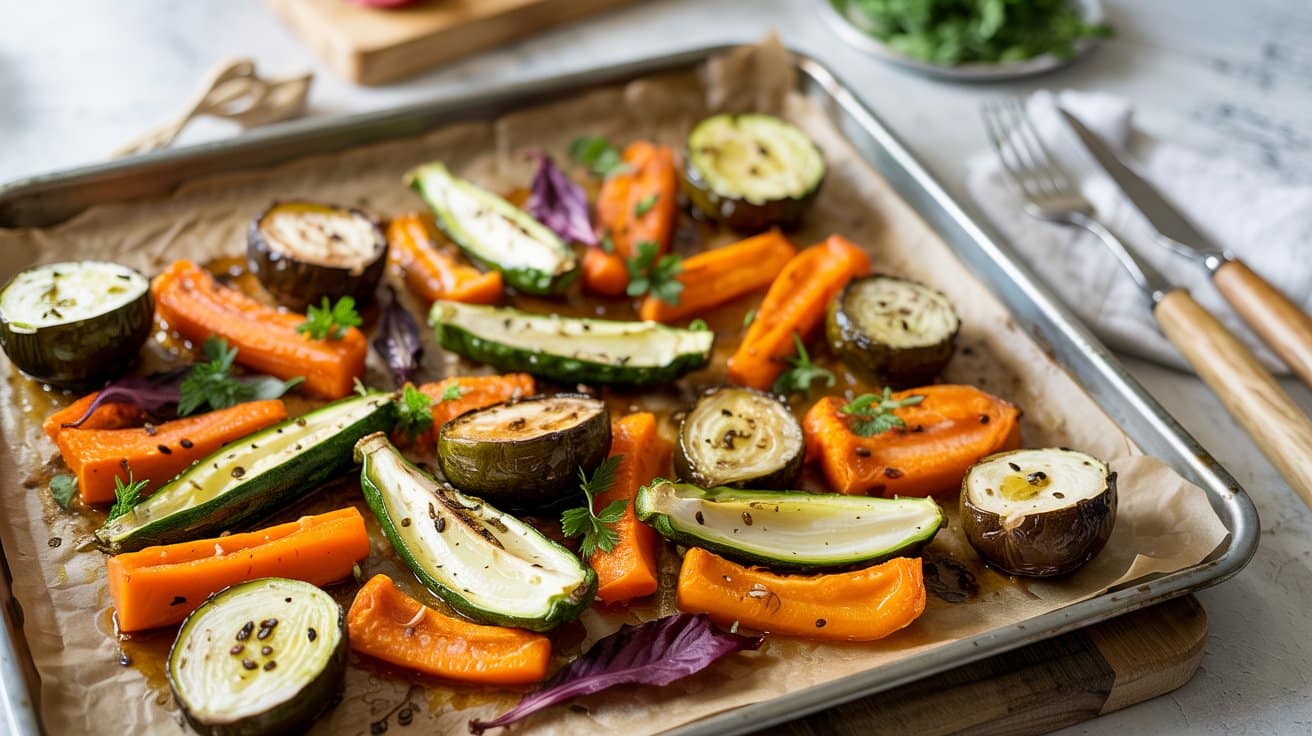
Roasted vegetables have a way of showing up on just about every dinner table-and for good reason. When they're cooked at high, dry heat (usually somewhere around 400-425°F), their natural sugars concentrate, edges turn golden, and the flavor deepens in a way steaming or boiling just can't compete with.
This collection of 20 Roasted Veggie Recipes That Don't Get Mushy pulls together dependable favorites that actually hold up in the oven.
The key? It's a mix of smart technique and the right produce. Firmer vegetables are chosen intentionally, then cut into uniform pieces so everything cooks evenly.
Higher heat helps evaporate excess moisture quickly, which keeps the texture intact and prevents that soft, soggy outcome nobody's excited about. The result is vegetables that stay structured-tender inside, lightly crisp or caramelized outside.
Inside the collection, you'll find a little bit of everything. There are quick sheet pan dinners that make weeknights easier, simple sides that pair with almost anything, and a few dishes that feel special enough to set out when you're feeding a crowd. The seasonings lean straightforward and flavorful-think classic herbs and well-balanced spice blends that enhance the vegetables' natural sweetness and savoriness rather than overpower them.
And from a practical standpoint, these recipes are built for busy kitchens. They're easy to prep, mostly hands-off once they're roasting, and refreshingly light on cleanup.
With consistent techniques that deliver reliable results, they're the kind of dependable dishes you'll find yourself turning to again and again.
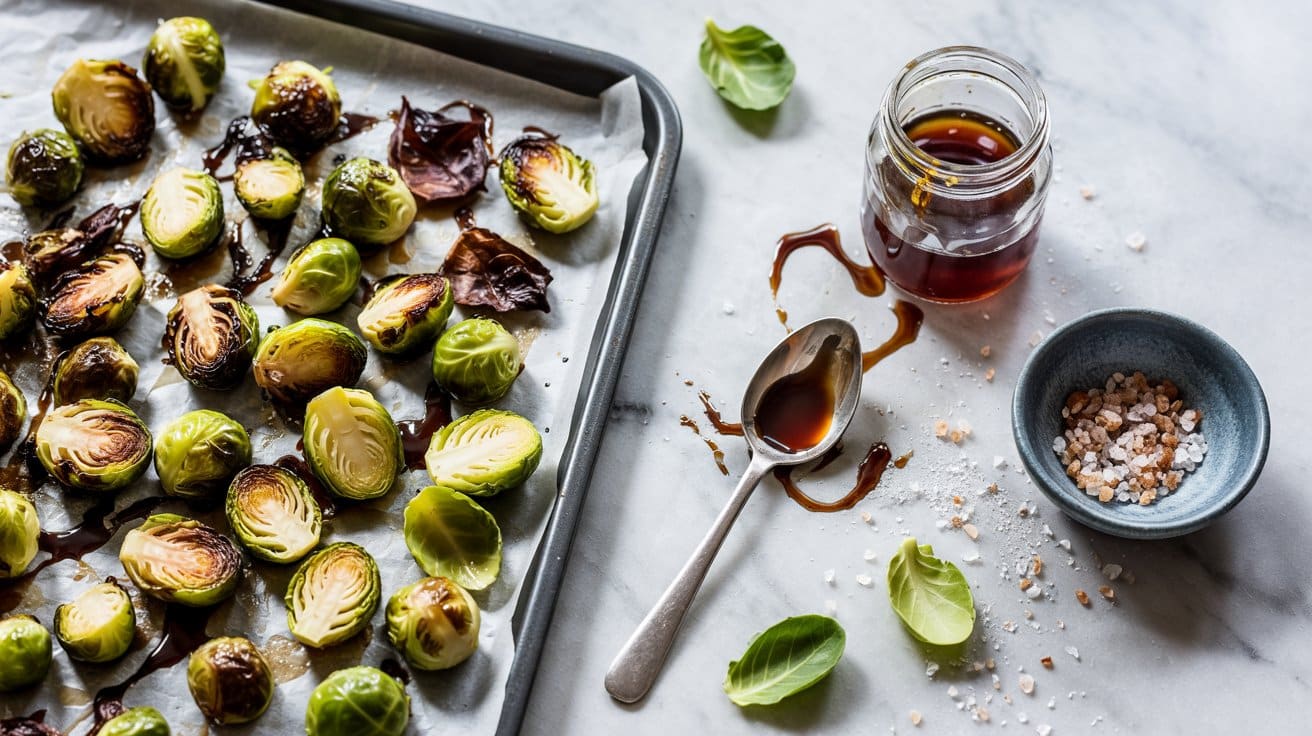
1. Crispy Roasted Brussels Sprouts with Balsamic Glaze
A bright, top-down food photography shot of corn cut into small ribs or segments roasted and brushed with chili lime butter. Lime wedges sit squeezed nearby with juice droplets on the marble.
Chili powder is dusted randomly, and a butter knife rests with residual butter streak, keeping the scene messy and believable.
Roasted Brussels sprouts are a simple side dish that brings out the best in this often underrated vegetable, developing a nutty, caramelized flavor when roasted at high heat. When roasted, Brussels sprouts develop a crisp, caramelized exterior while staying tender inside.
Adding a balsamic glaze at the end introduces a tangy sweetness that complements their natural earthiness.
It pairs well with a range of mains, such as roasted pork or pan-seared chicken, and adds a satisfying crunch and bright flavor to any meal, and can be served alongside crispy fried sides to elevate meals (for complementary ideas, try best side dishes for roasted vegetables).
Why This Recipe Works
Roasting at around 400°F brings out deep, nutty flavors, and the balsamic glaze adds a bright contrast. This dish offers a tasty and practical way to enjoy vegetables without fuss, and can be roasted sheet-pan style for easy cleanup.
- Convenience - Quick roasting process with simple ingredients requires little hands-on time.
- Flavor balance - Caramelized sprouts with a tangy, slightly sweet glaze create a satisfying combination.
- Texture - Crispy edges and tender insides provide pleasing mouthfeel variety.
- Appeal - Works well for weeknight dinners or as a special occasion side dish.
Ingredient Swap Ideas
Adjusting ingredients can help you cater to different dietary preferences or find variations that suit your taste, and these sprouts also work well as part of three-ingredient appetizers for quick entertaining.
- Olive oil - Use avocado oil for a higher smoke point if you prefer.
- Balsamic glaze - Substitute with a drizzle of honey or maple syrup mixed with a splash of apple cider vinegar for similar tang and sweetness.
- Brussels sprouts - Try halved baby broccoli or cauliflower florets for a different veggie option.
- Seasonings - Add a sprinkle of chili flakes or garlic powder for an extra kick.
Ingredients
- 1 pound Brussels sprouts - trimmed and halved for even roasting.
- 2 tablespoons extra-virgin olive oil - helps crisp the sprouts while roasting.
- ½ teaspoon salt - enhances natural flavors.
- ¼ teaspoon black pepper - adds mild heat.
- 3 tablespoons balsamic vinegar - to make the glaze.
- 1 tablespoon brown sugar - sweetens the balsamic for glaze consistency.
Instructions
- Preheat the oven to 425°F (220°C). Line a baking sheet with parchment paper for easy cleanup.
- In a large bowl, toss the halved Brussels sprouts with olive oil, salt, and black pepper until evenly coated. Spread them cut-side down on the baking sheet in a single layer.
- Roast for 20-25 minutes, turning once halfway through, until the edges are deeply browned and crisp, and the sprouts are tender inside.
- While the sprouts roast, combine the balsamic vinegar and brown sugar in a small saucepan over medium heat. Stir until the sugar dissolves, then simmer for 5-7 minutes until the mixture thickens into a glaze. Remove from heat and let cool slightly.
- Drizzle the balsamic glaze over the roasted Brussels sprouts before serving. Toss gently to coat and enjoy warm.
2. Honey-Roasted Carrots with Thyme
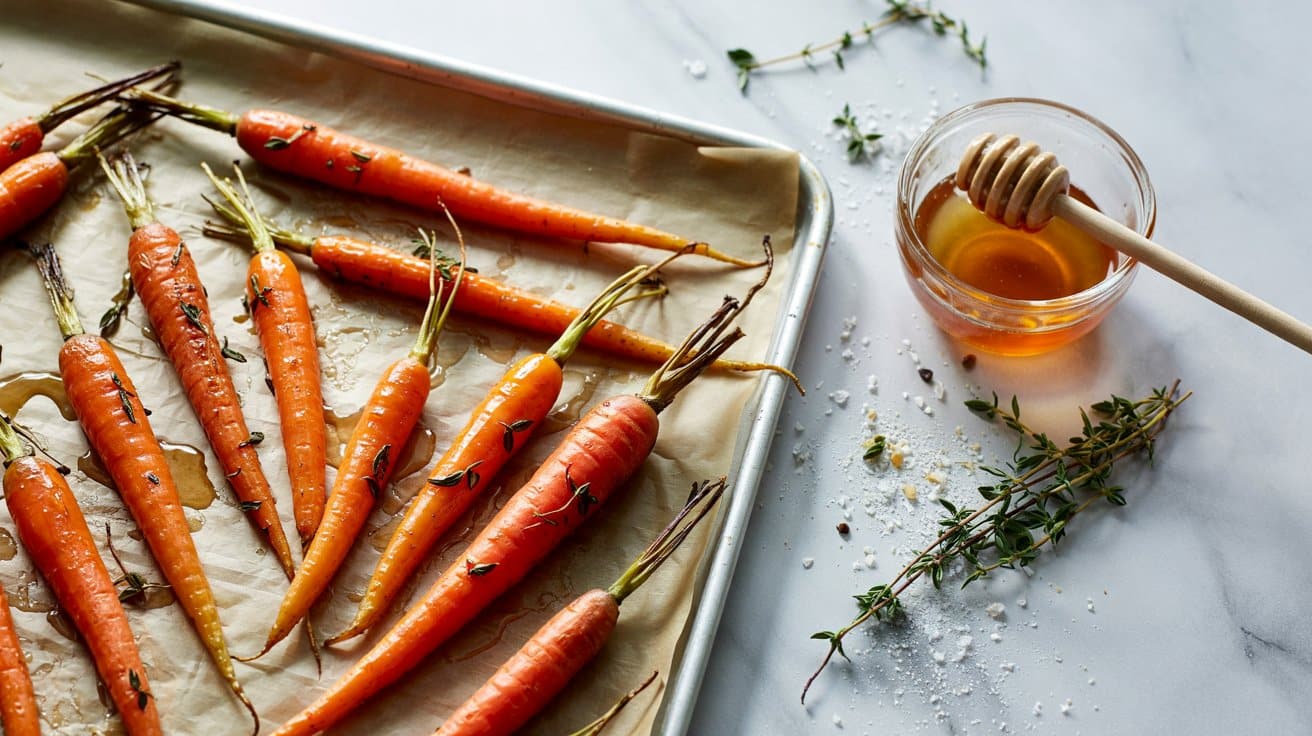
Honey-roasted carrots with thyme offer a simple way to bring out the natural sweetness of carrots, a root vegetable high in beta-carotene, while adding a subtle herbal note. The honey caramelizes beautifully, creating edges that are lightly crisp but still keeping the carrots tender and firm inside.
This recipe comes together quickly and requires minimal ingredients, making it a convenient side dish that pairs well with many main courses. The fresh thyme adds some earthiness that balances the sweetness perfectly.
Why This Recipe Works
This recipe combines simplicity and depth of flavor, making it a reliable choice for both weeknight dinners and special occasions.
- Convenience - Requires only a handful of ingredients and minimal prep time.
- Flavor balance - The sweetness of honey complements savory thyme without overpowering the carrots.
- Texture - Carrots roast to tender with lightly caramelized edges, offering a nice contrast in each bite.
- Appeal - Bright, colorful, and wholesome enough to appeal to all ages.
Ingredient Swap Ideas
Adjusting ingredients can help fit different dietary preferences or add variety without losing the core taste of the dish.
- Honey replacement - Use maple syrup for a vegan-friendly option with a similar sweetness.
- Fresh herbs - Swap thyme for rosemary or oregano to change the herbal profile slightly.
- Root vegetables - Substitute carrots with parsnips or sweet potatoes for another roasted vegetable variation.
- Oil choice - Use avocado oil instead of olive oil if you prefer a higher smoke point and neutral flavor.
Ingredients
- 1 pound carrots - peeled and cut into uniform sticks or halves.
- 2 tablespoons honey - to add sweetness and help caramelize the carrots.
- 2 tablespoons olive oil - helps coat the carrots for roasting and crispness.
- 1 teaspoon fresh thyme leaves - chopped or whole sprigs for aroma and herbal flavor.
- ½ teaspoon salt - enhances all other flavors.
- ¼ teaspoon black pepper - adds mild spice and depth.
Instructions
- Preheat your oven to 400°F (200°C) and line a baking sheet with parchment paper or foil for easy cleanup.
- In a large bowl, toss the peeled and cut carrots with olive oil, honey, salt, pepper, and thyme until evenly coated.
- Spread the carrots in a single layer on the prepared baking sheet, leaving space so they roast evenly instead of steaming.
- Roast for 20 to 25 minutes, stirring once halfway through. Watch for the edges to turn golden and caramelized while the carrots become fork-tender.
- Remove from the oven and transfer to a serving dish. Optionally, sprinkle a few fresh thyme leaves on top before serving to brighten the flavor.
3. Garlic Roasted Broccoli Florets
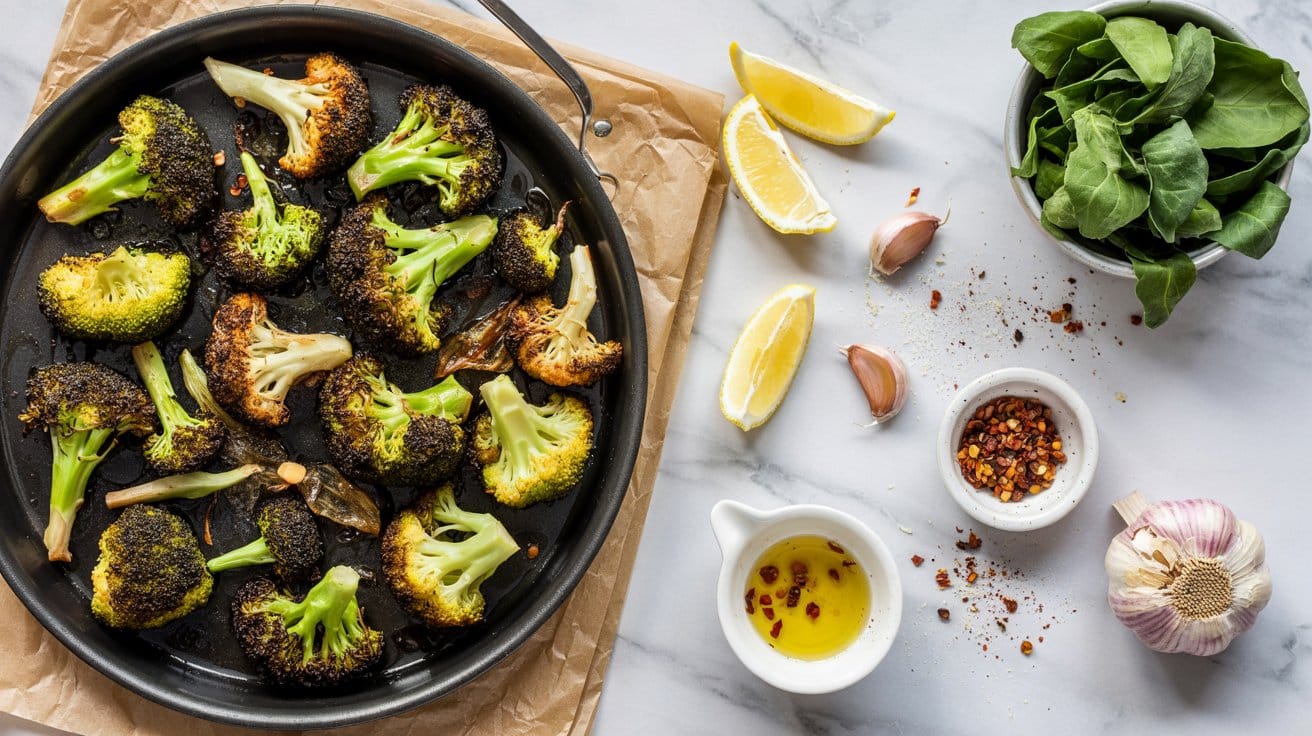
This garlic roasted broccoli recipe makes an easy, flavorful side dish that pairs well with a variety of meals, and can also be served alongside shrimp entrees-see best side dishes for garlic butter shrimp.
The garlic adds a punch of savoriness without overpowering the vegetable. Roasting also concentrates the flavors while keeping the broccoli's satisfying texture intact.
It's quick to prepare and requires just a few ingredients you likely have on hand.
Why This Recipe Works
This recipe combines convenience and bold flavor, making roasted broccoli an attractive vegetable option. It delivers a great balance of savory garlic and caramelized broccoli with a satisfying bite.
- Convenience - Minimal prep and fast roasting time make this easy to fit into busy weeknights.
- Flavor balance - Roasting mellows broccoli's bitter notes while garlic adds depth and complexity.
- Texture - The florets become tender yet maintain a slight crispness for a pleasant mouthfeel.
- Versatility - Works well as a side or tossed into salads, bowls, or pastas for extra flavor.
Ingredient Swap Ideas
Swapping certain ingredients can adapt this recipe to different preferences or dietary needs without losing its appeal. This helps keep it flexible and inclusive.
- Garlic powder instead of fresh garlic - Use if you want a milder, less pungent garlic flavor.
- Olive oil replaced with avocado or grapeseed oil - For a different but still healthy fat option with a subtle taste.
- Add red pepper flakes - To introduce a gentle heat if you prefer some spice.
- Use lemon zest or juice - For a bright, citrusy twist that goes with the roasted notes.
Ingredients
- 1 large head of broccoli - cut into bite-sized florets
- 3 tablespoons olive oil - for coating and roasting
- 4 cloves garlic - thinly sliced or minced for maximum flavor
- ½ teaspoon salt - to season evenly
- ¼ teaspoon black pepper - freshly ground for mild heat
- Optional: ¼ teaspoon red pepper flakes - if you like a bit of spice
Instructions
- Preheat your oven to 425°F (220°C) and line a baking sheet with parchment paper for easy cleanup.
- Toss the broccoli florets with olive oil, garlic, salt, and pepper in a large bowl until everything is well coated.
- Spread the broccoli evenly on the prepared baking sheet in a single layer, making sure the pieces aren't overcrowded.
- Roast for 18 to 22 minutes, stirring halfway through, until the broccoli is tender with golden, crispy edges.
- Remove from the oven and taste for seasoning. Add more salt or pepper if needed, then serve warm.
4. Sheet Pan Roasted Asparagus with Lemon Zest

This roasted asparagus recipe is a quick and straightforward way to enjoy fresh, bright vegetables with bright, zesty flavors. Roasting the asparagus at high heat locks in its natural snap, while the lemon zest adds a fresh aroma that lifts the dish.
It's an ideal side for busy weeknights or to complement any main course without spending much time in the kitchen. The result is tender asparagus with slightly crisp tips and a lively citrus finish that makes every bite refreshing.
Why This Recipe Works
This dish combines simplicity and flavor in a way that makes it easy to prepare but impressive at the table. The balanced seasoning keeps the asparagus fresh and flavorful.
- Convenience - Uses one pan and roasts quickly at high heat for easy prep and cleanup.
- Flavor balance - The lemon zest adds bright freshness that goes with the natural earthiness of asparagus.
- Texture - Roasting creates a tender-crisp bite with lightly caramelized edges.
- Appeal - Works as a healthy, family-friendly side that pairs well with a variety of meals.
Ingredient Swap Ideas
Adjusting ingredients can help accommodate what you have on hand or suit dietary preferences without losing the essence of the dish.
- Asparagus - Substitute thin asparagus with thicker stalks cut into similar lengths or use green beans for a comparable texture.
- Lemon zest - Use orange or lime zest for a different but still citrusy note.
- Olive oil - Swap for avocado oil or melted coconut oil if preferred for roasting.
- Seasoning - Add a sprinkle of garlic powder or crushed red pepper flakes for added flavor and a touch of heat.
Ingredients
- 1 pound asparagus - Thin asparagus stalks trimmed at the ends.
- 2 tablespoons olive oil - For coating asparagus to ensure even roasting.
- 1 teaspoon lemon zest - Freshly grated for bright, citrus aroma.
- ½ teaspoon salt - To improve the natural flavor of the asparagus.
- ¼ teaspoon black pepper - Freshly ground for subtle heat.
Instructions
- Preheat the oven to 425°F (220°C). Line a sheet pan with parchment paper or lightly grease it.
- Arrange the asparagus in a single layer on the prepared pan. Drizzle with olive oil and toss to coat evenly.
- Sprinkle lemon zest, salt, and black pepper evenly over the asparagus.
- Roast in the preheated oven for 8 to 10 minutes, checking that the tips become slightly crispy but the stalks remain tender.
- Remove from the oven and serve immediately. The lemon zest aroma will be most bright when served warm.
5. Spiced Roasted Cauliflower Bites
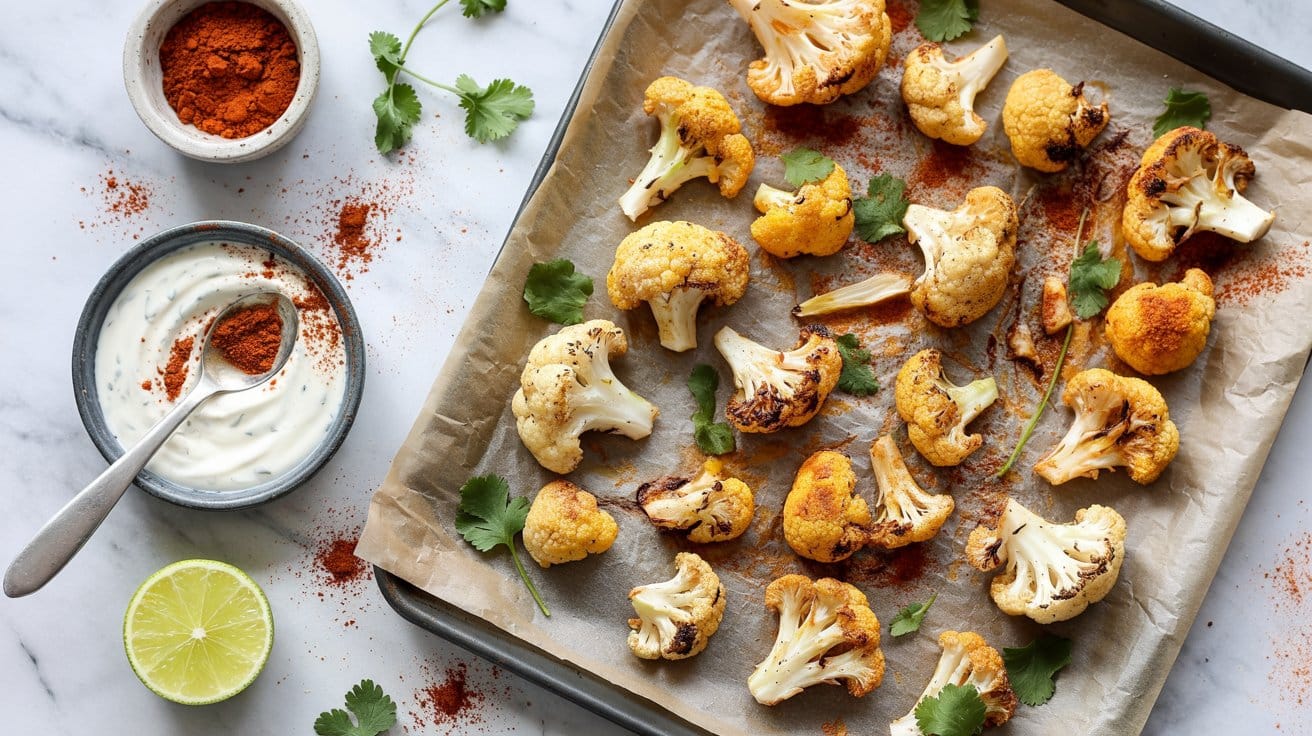
Roasted cauliflower is a fantastic way to enjoy this flexible vegetable, and adding bold spices takes it to another level. These spiced roasted cauliflower bites have a lovely golden color and deliver a satisfying flavor without becoming mushy.
They make a great side dish or a snack that feels a bit special but requires minimal hands-on time. You can toss the florets in the seasoning, pop them in the oven, and let the heat work its magic while you take care of other things.
Why This Recipe Works
This recipe is straightforward and rewarding, offering strong flavors with an easy cooking process. The texture and spices make it an appealing choice for busy days or casual gatherings.
- Convenience - Quick to prepare and roast with minimal cleanup.
- Flavor balance - Combines warmth from spices with the natural sweetness of cauliflower.
- Texture - Roasting keeps the florets firm with a slight crispness on the edges.
- Appeal - Works well as a family-friendly side or a tasty snack option.
Ingredient Swap Ideas
Adjusting ingredients can help tailor this snack for different dietary preferences or flavors without losing what makes it great. Consider these substitutions to keep things fresh or accommodate needs.
- Cauliflower - Substitute broccoli florets for a similar texture but different flavor.
- Spices - Use smoked paprika instead of regular for a smoky depth.
- Oil - Swap olive oil with avocado oil for a higher smoke point and neutral taste.
- Heat - Add cayenne pepper for a spicier version or reduce chili powder for mildness.
Ingredients
- 1 medium head of cauliflower - cut into bite-sized florets.
- 2 tablespoons olive oil - to coat the florets evenly.
- 1 teaspoon ground cumin - adds warm, earthy flavor.
- 1 teaspoon smoked paprika - provides mild smokiness and color.
- ½ teaspoon chili powder - lends a gentle heat.
- ½ teaspoon garlic powder - for subtle savory notes.
- ½ teaspoon salt - enhances all the flavors.
- ¼ teaspoon black pepper - adds some spice.
Instructions
- Preheat the oven to 425°F (220°C). Line a baking sheet with parchment paper or lightly grease it.
- In a large bowl, combine olive oil, cumin, smoked paprika, chili powder, garlic powder, salt, and black pepper. Mix well to create the spice coating.
- Add cauliflower florets to the bowl and toss until each piece is evenly coated with the spiced oil mixture.
- Spread the coated florets in a single layer on the prepared baking sheet, giving them enough space to roast properly.
- Roast for 25 to 30 minutes, turning the florets halfway through, until they are golden brown and crisp on the edges but still tender inside. Serve warm.
6. Oven-Roasted Sweet Potato Wedges with Rosemary

Oven-roasted sweet potato wedges make a simple, satisfying side dish that balances softness inside with a crisp exterior. Their natural sweetness is enhanced by fragrant rosemary, adding a subtle earthiness that pairs well with many main dishes.
This recipe is straightforward, requiring minimal hands-on time and delivering consistent results. With the right slicing and roasting method, you get wedges that are tender without turning mushy, perfect for a wholesome weeknight meal or gathering.
Why This Recipe Works
This recipe offers a practical, flavorful way to enjoy sweet potatoes with minimal fuss. The combination of simple ingredients and roasting technique shows the natural taste and texture of the potatoes.
- Convenience - Requires just a handful of ingredients and straightforward prep steps.
- Flavor balance - Sweet potatoes combine with fresh rosemary and olive oil for a fragrant, savory taste.
- Texture - The wedges come out crispy on the outside and tender inside, avoiding mushiness through careful slicing.
- Versatility - Works as a side for a range of meals or as a snack with dips.
Ingredient Swap Ideas
Adjusting ingredients is easy to fit dietary preferences or whatever you have on hand. These swaps keep the spirit of the dish intact while offering variety.
- Rosemary - Replace with thyme or oregano if you prefer a different herb note.
- Sweet potatoes - Use regular potatoes or Yukon gold for a less sweet, earthy flavor.
- Olive oil - Substitute with avocado oil or melted coconut oil for a different richness.
- Seasoning - Add a pinch of smoked paprika or chili powder to introduce a smoky or spicy kick.
Ingredients
- 2 large sweet potatoes - peeled and sliced into evenly sized wedges.
- 2 tablespoons olive oil - to coat the wedges and help crisp them up.
- 1 tablespoon fresh rosemary - finely chopped for a bright herbal flavor.
- ½ teaspoon salt - to season evenly.
- ¼ teaspoon black pepper - freshly ground for a gentle kick.
Instructions
- Preheat your oven to 425°F (220°C). Line a baking sheet with parchment paper for easy cleanup.
- Cut the peeled sweet potatoes into wedges about ½ inch thick. Aim for uniform sizes so they roast evenly without turning mushy inside.
- Place the wedges in a large bowl. Drizzle with olive oil, then add the chopped rosemary, salt, and pepper. Toss well to coat every wedge evenly.
- Arrange the wedges in a single layer on the prepared baking sheet, making sure not to crowd them. This helps create a crisp outer layer.
- Roast for 25-30 minutes, turning halfway through. The wedges should be golden and crispy on the edges, with a soft interior. Remove and serve warm.
7. Roasted Bell Peppers with Herbed Olive Oil
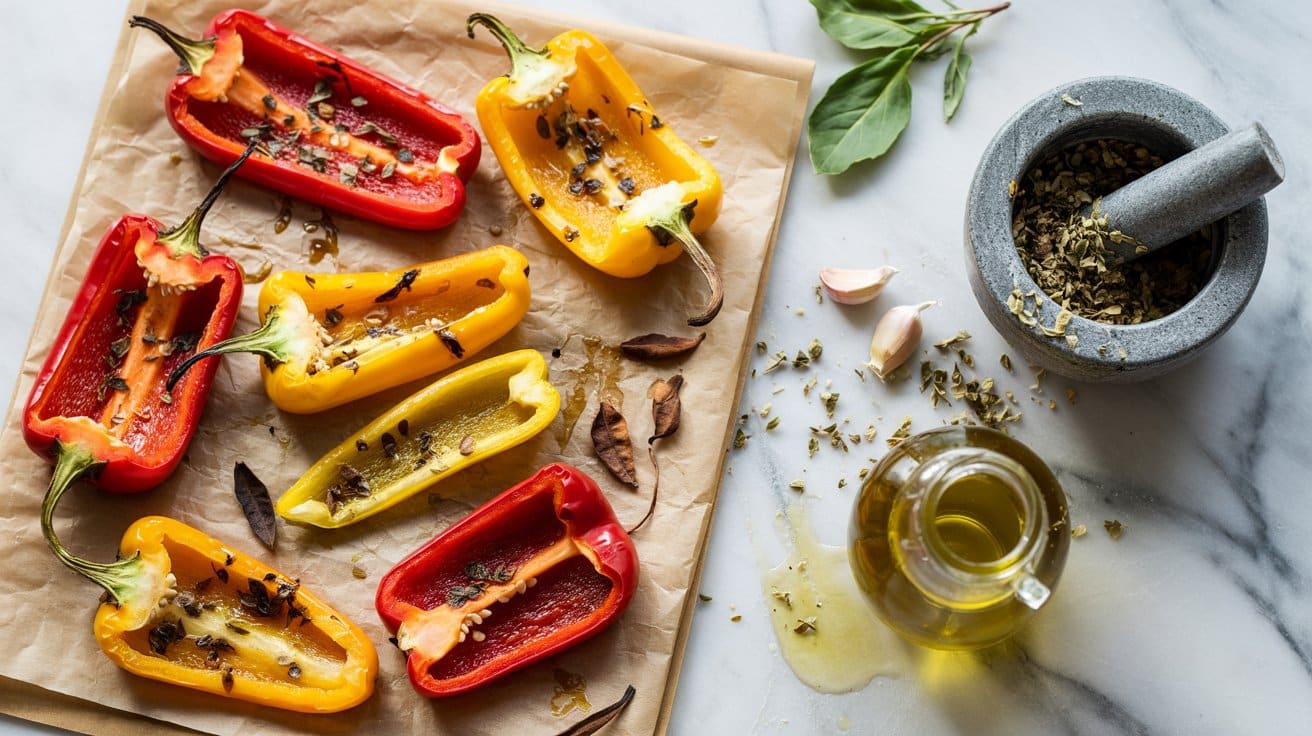
Roasting bell peppers transforms their natural sweetness into something rich and smoky, while keeping their shape intact. This simple recipe brings out the best in sweet peppers, making them tender with just the right amount of char on the skin.
The addition of herbed olive oil adds a fragrant and savory touch that goes with the peppers without overpowering them. This dish works well as a side or a bright addition to salads, sandwiches, or even pasta.
Why This Recipe Works
This recipe shows the natural sweetness of bell peppers enhanced by a subtle, aromatic olive oil. It's a straightforward approach that yields a flavorful, versatile side dish with minimal fuss.
- Convenience - Requires minimal prep and cooks quickly in the oven.
- Flavor balance - Combines sweet and smoky notes with fresh herbal brightness.
- Texture - Soft, tender peppers with a slightly blistered skin for extra character.
- Versatility - Easily served warm or at room temperature alongside various dishes.
Ingredient Swap Ideas
Adjusting ingredients can make this recipe work for different preferences or ingredients on hand. Simple swaps help maintain the core flavors without changing the overall experience.
- Use different herbs - Substitute rosemary or oregano for thyme or basil for a distinct herbal flavor.
- Try different oils - Replace olive oil with avocado or walnut oil for a subtly different richness.
- Peppers variety - Use a mix of red, yellow, and orange bell peppers or include mild poblano peppers for more depth.
- Add garlic - Infuse the oil with crushed garlic cloves before drizzling for a more intense aroma.
Ingredients
- 4 large sweet bell peppers, washed and dried (use a mix of colors if desired)
- ¼ cup extra-virgin olive oil
- 1 tablespoon fresh thyme leaves, chopped (or fresh basil for a milder taste)
- ½ teaspoon salt
- ¼ teaspoon freshly ground black pepper
Instructions
- Preheat your oven to 425°F (220°C). Line a baking sheet with foil or parchment paper for easy cleanup.
- Cut the bell peppers in half lengthwise and remove the seeds and membranes. Arrange them skin-side up on the prepared baking sheet.
- In a small bowl, mix the olive oil, chopped herbs, salt, and black pepper. Brush this mixture generously over the pepper halves.
- Roast the peppers in the oven for 20 to 25 minutes until the skins blister and darken slightly but the peppers remain intact and tender.
- Remove the peppers from the oven and let them cool slightly before serving. Drizzle any remaining herbed oil over the top for extra flavor.
Serve these roasted peppers warm or at room temperature as a side dish, add them to sandwiches, or toss them into salads. They store well in the refrigerator for a couple of days and can be reheated gently.
8. Zucchini and Summer Squash Medley with Parmesan
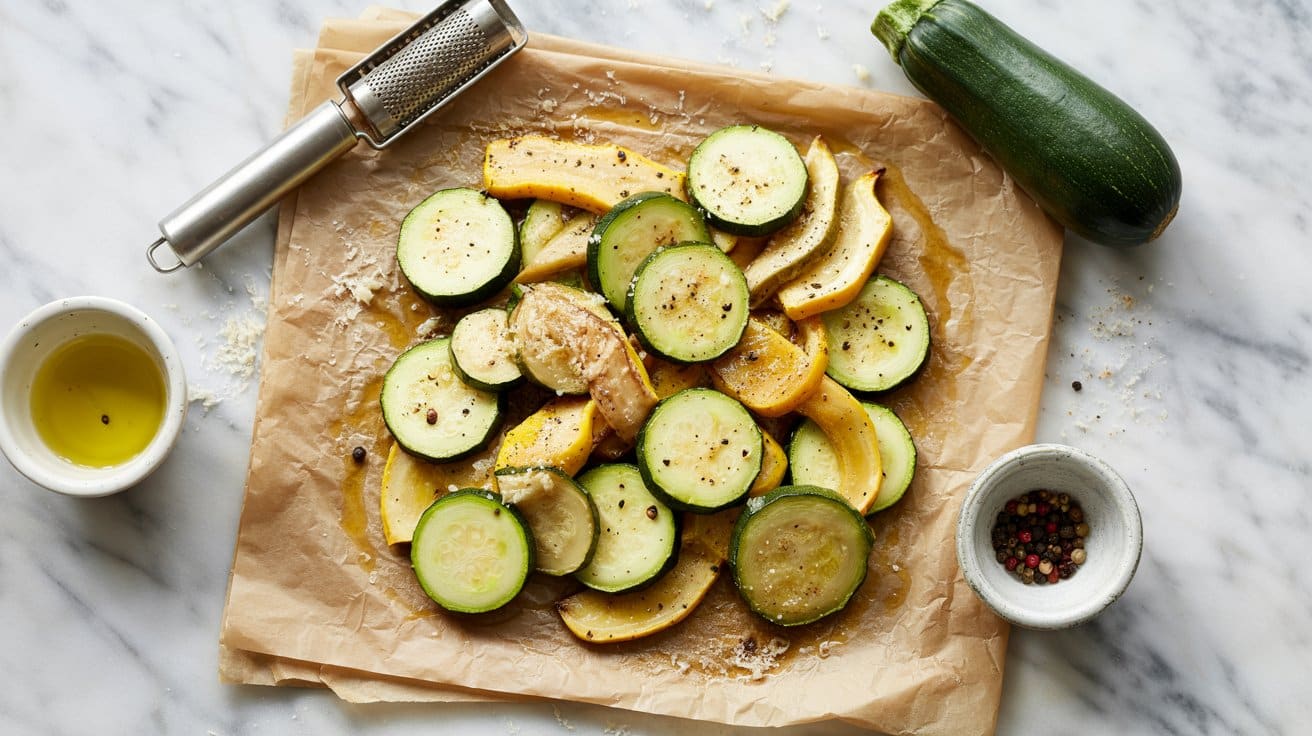
Zucchini and summer squash bring a bright, fresh flavor to this simple medley that's both satisfying and light. The vegetables stay slightly firm after a quick roast, maintaining a nice texture that pairs well with the nutty richness of Parmesan cheese sprinkled on top.
This dish comes together quickly, making it a reliable side for busy weeknights or casual gatherings. Its balance of tender squash and crispy, golden Parmesan provides a pleasing contrast that adds interest to any meal.
Why This Recipe Works
This zucchini and summer squash medley is a straightforward way to enjoy fresh summer vegetables with minimal effort. The Parmesan topping gives a savory boost that goes with the squash's mild taste.
- Convenience - Prepping and roasting take just minutes, perfect for quick meal planning.
- Flavor balance - The mild squash pairs with salty, nutty Parmesan for a well-rounded taste.
- Texture contrast - Slightly firm squash meets a crisp, roasted cheese crust.
- Appeal - A colorful side that works well with grilled meats or as part of a vegetarian spread.
Ingredient Swap Ideas
Swapping ingredients can help tailor this medley to various preferences or dietary needs without sacrificing flavor. Simple changes keep it flexible while preserving the essence of the dish.
- Cheese - Substitute Parmesan with Pecorino Romano or Asiago for a sharper or creamier finish.
- Vegetables - Add or replace with yellow squash, pattypan, or even thinly sliced eggplant for variety.
- Herbs - Fresh basil, thyme, or oregano can replace or go with the seasoning for different herbaceous notes.
- Oil - Use avocado oil or a mild nut oil instead of olive oil for a subtle variation in richness.
Ingredients
- 2 medium zucchini - sliced into ¼-inch thick rounds or half-moons.
- 2 medium yellow summer squash - sliced to match the zucchini size and shape.
- 2 tablespoons extra-virgin olive oil - for roasting and flavor.
- ½ teaspoon salt - to season the vegetable mixture evenly.
- ¼ teaspoon freshly ground black pepper - adds mild heat and depth.
- ½ cup grated Parmesan cheese - for topping and roasting.
- 1 teaspoon garlic powder - optional, for subtle garlic flavor.
- 1 tablespoon fresh parsley - chopped, for garnish and freshness.
Instructions
- Preheat your oven to 425°F (220°C). Line a large baking sheet with parchment paper or lightly grease it.
- In a large bowl, toss the sliced zucchini and yellow squash with olive oil, salt, pepper, and garlic powder if using. Make sure all pieces are coated evenly.
- Spread the squash mixture in a single layer on the prepared baking sheet, trying to avoid overcrowding.
- Roast for about 10 minutes, then sprinkle the grated Parmesan evenly over the squash. Return to the oven and roast for another 5 to 7 minutes, until the cheese melts and develops a golden crust.
- Remove from the oven and transfer to a serving dish. Sprinkle with chopped fresh parsley and serve warm as a flavorful side dish.
This medley highlights fresh summer vegetables with just enough crispness and cheesy richness for satisfying flavor in every bite.
9. Beets Roasted with Orange and Thyme
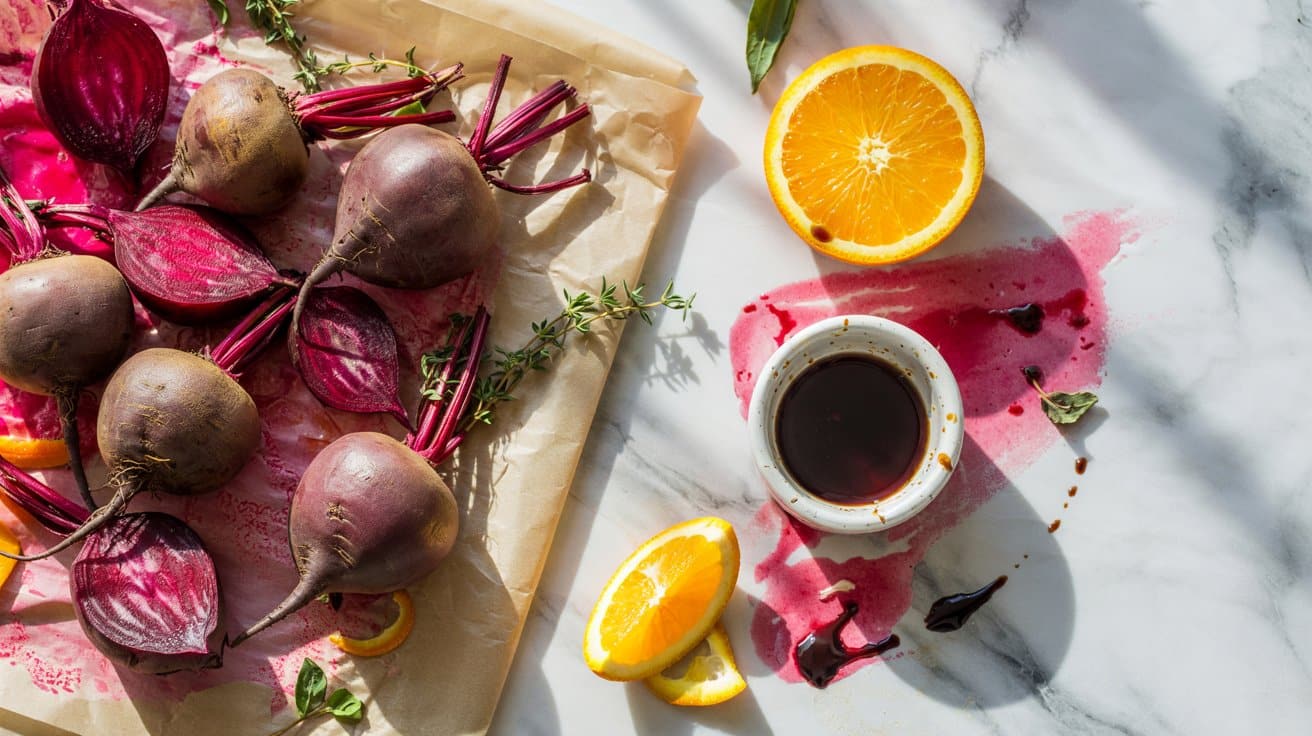
Roasting beets brings out their natural sweetness and tender texture while adding a deliciously earthy flavor. Pairing them with fresh orange and thyme adds a bright citrus note and a gentle herbal aroma that balances the beets' richness beautifully.
This recipe is simple to prepare and works well as a side dish for weeknight dinners or special occasions. The combination of roasted vegetables with zesty orange makes for a bright plate that's both colorful and full of flavor.
Why This Recipe Works
This dish stands out for its balance of flavors and ease of preparation, making it a practical choice for busy cooks wanting a wholesome meal addition.
- Convenience - Easily roasted in one pan with minimal prep and tending.
- Flavor balance - Earthy beets complemented by bright, citrusy orange and fragrant thyme.
- Texture - Tender yet firm roasted beets keep a pleasant bite, not soggy.
- Appeal - Attractive presentation with natural colors that brighten any meal.
Ingredient Swap Ideas
Adjusting a few ingredients can help this recipe suit different dietary preferences or ingredient availability without losing its essence.
- Oranges - Use blood oranges or tangerines as alternatives to add different citrus tones.
- Thyme - Swap fresh thyme for rosemary or sage for an herbal twist.
- Beets - Substitute with golden beets to vary color and flavor while keeping the same texture.
- Oil - Use avocado oil or a mild olive oil in place of extra-virgin olive oil for a different flavor.
Ingredients
- 4 fresh beets - scrubbed clean with greens trimmed.
- 1 large orange - peeled and segmented, retaining juice.
- 2 tablespoons extra-virgin olive oil - adds richness and helps roasting.
- 1 tablespoon fresh thyme leaves - gently bruised to release flavor.
- ½ teaspoon salt - to enhance natural flavors.
- ¼ teaspoon freshly ground black pepper - for mild seasoning.
- 1 teaspoon orange zest - adds concentrated citrus fragrance.
Instructions
- Preheat your oven to 400°F (200°C). Wrap each beet in foil and place on a baking sheet. Roast for about 50 to 60 minutes or until tender when pierced with a fork. Remove from oven and let cool slightly.
- While the beets are roasting, whisk together olive oil, orange juice from the segments, fresh thyme leaves, orange zest, salt, and pepper in a small bowl to create the dressing.
- When the beets are cool enough to handle, peel away the skins using your fingers or a paper towel. Cut the beets into wedges or slices.
- Gently toss the beet pieces with the orange segments and the dressing until well coated.
- Arrange on a serving platter and garnish with a few extra thyme sprigs. Serve warm or at room temperature for the best flavor.
10. Crispy Green Beans with Garlic and Chili Flakes
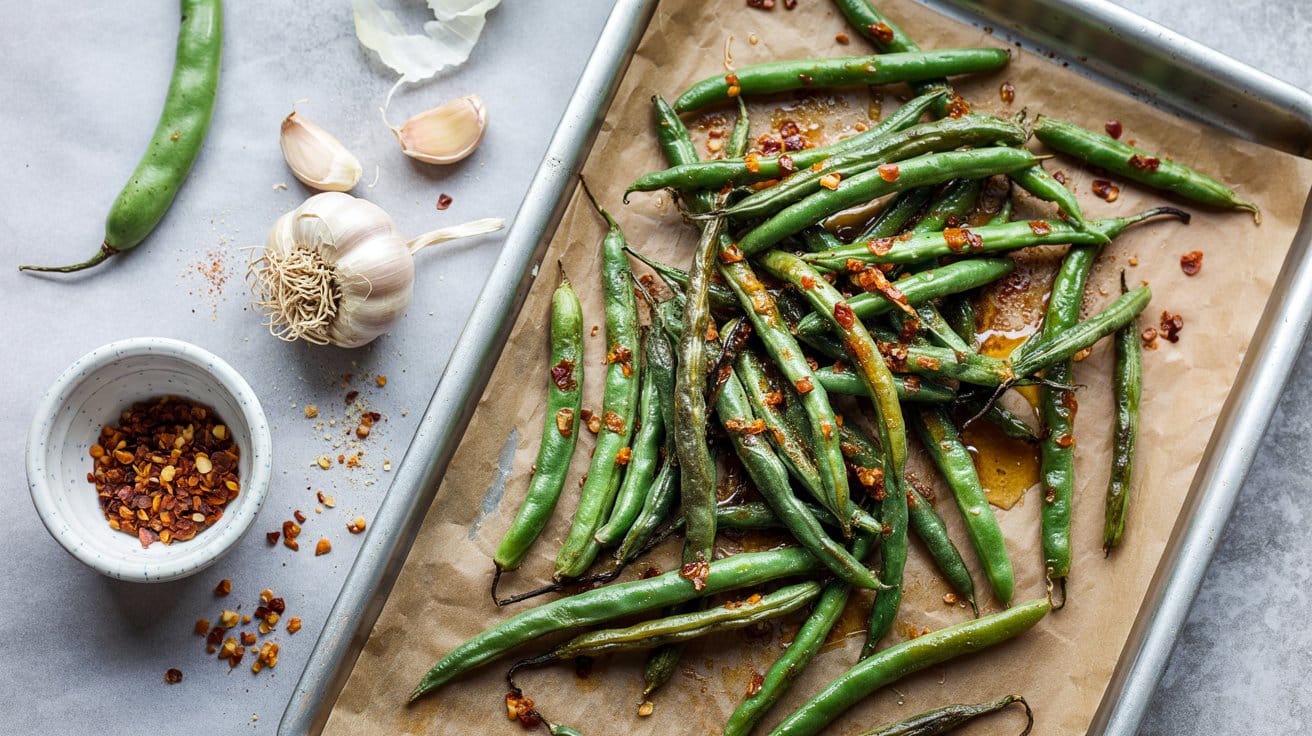
This recipe brings a simple vegetable to life with bold flavors and a satisfying crunch. Roasted green beans come out tender on the inside with just enough crispiness on the edges, enhanced by fragrant garlic and a bit of chili heat.
It's an approachable side dish that adds brightness and texture to any meal, easy enough for busy weeknights but flavorful enough for guests.
The combination of garlic and chili flakes creates a familiar but exciting flavor boost, turning ordinary green beans into something special. You'll appreciate how quickly it comes together and how versatile it is alongside proteins, grains, or as a snack on its own.
Why This Recipe Works
This dish shines because it's straightforward and packed with flavor, making it useful in many meal settings without extra fuss.
- Convenience - Quick to prep and roast, so it fits well into busy schedules.
- Flavor balance - Combines mild bitterness of green beans with smoky garlic and a subtle chili kick.
- Texture - Roasting transforms green beans into crisp-tender bites with caramelized edges.
- Appeal - Works well as a side for family dinners or as a bright appetizer for gatherings.
Ingredient Swap Ideas
Adjusting a recipe to your preferences or dietary needs can keep meals fresh and approachable. Swapping out ingredients offers variety without losing what makes this dish tasty and accessible.
- Green beans - Use snap peas or asparagus for a similar crunch and shape if green beans aren't available.
- Chili flakes - Substitute with smoked paprika for milder smoky warmth or fresh jalapeño slices for a different kind of heat.
- Garlic - Garlic powder works in a pinch if fresh garlic isn't on hand; add it toward the end of cooking.
- Oil - Olive oil is standard, but avocado oil or sunflower oil can substitute for a neutral flavor or higher smoke point.
Ingredients
- 1 pound fresh green beans, trimmed
- 3 tablespoons olive oil
- 3 cloves garlic, thinly sliced
- ½ teaspoon red chili flakes (adjust to taste)
- ½ teaspoon salt
- ¼ teaspoon black pepper
Instructions
- Preheat your oven to 425°F (220°C). Line a baking sheet with parchment paper or a silicone baking mat for easy cleanup.
- Toss the green beans with olive oil, garlic slices, red chili flakes, salt, and pepper until evenly coated. Spread them out in a single layer on the baking sheet.
- Roast for about 15 to 20 minutes, stirring halfway through, until the green beans are tender yet still crisp and edges look lightly browned.
- Remove from the oven and transfer to a serving dish. You can add a squeeze of fresh lemon juice or a sprinkle of grated Parmesan if you like before serving.
- Serve warm or at room temperature as a flavorful side dish or snack.
11. Oven-Roasted Fennel with Lemon and Dill
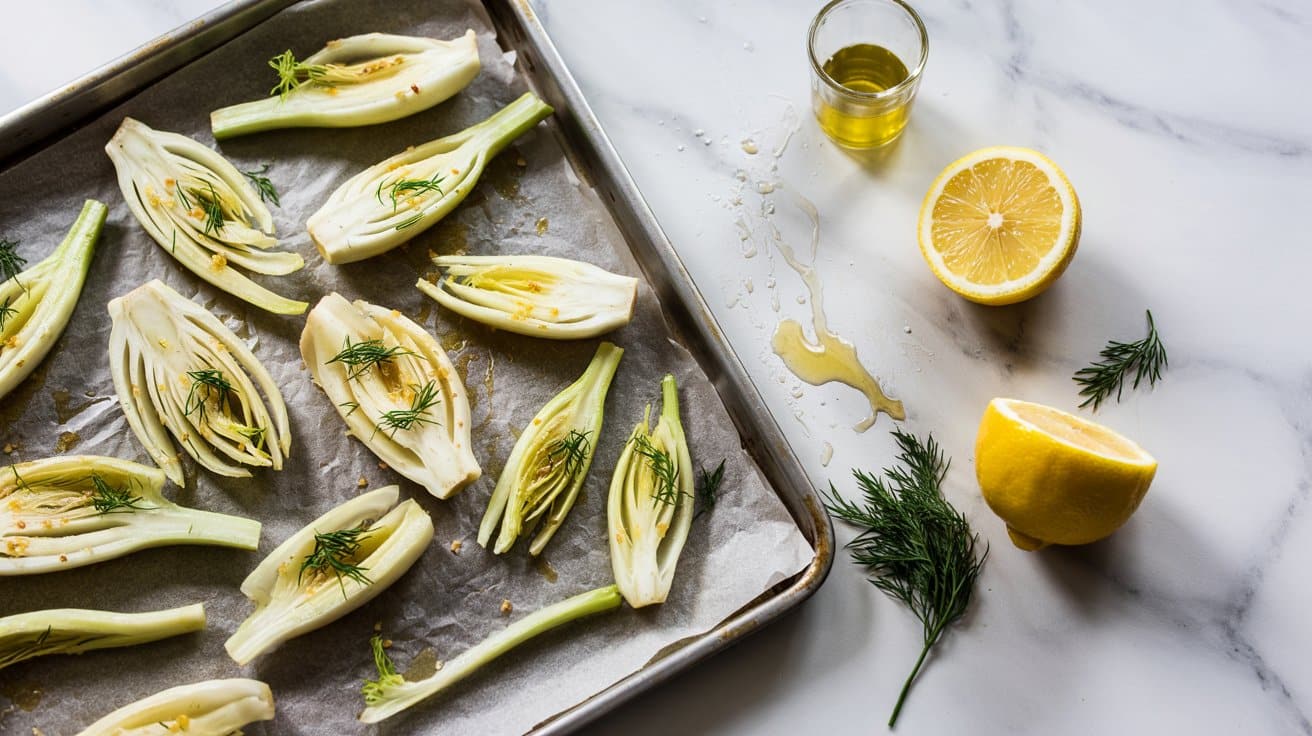
Oven-roasted fennel is a simple way to bring out its natural sweetness and develop a slightly caramelized texture. This recipe uses lemon and fresh dill to highlight the fennel's unique flavor, creating a bright, aromatic side dish that pairs well with a variety of meals.
The fennel slices roast until tender yet still firm, offering a pleasant bite without becoming mushy. It's a straightforward and hands-off preparation that fits well into a busy routine or a relaxed weekend meal.
Why This Recipe Works
This recipe delivers a flavorful and easy vegetable side that's both healthy and appealing. It brings out fennel's natural sweetness and balances it with fresh citrus and herb notes.
- Convenience - Simple prep with minimal ingredients and hands-off roasting.
- Flavor balance - Combines fennel's mild anise notes with zesty lemon and fresh dill.
- Texture - Slightly caramelized edges with tender but firm slices.
- Appeal - Elegant enough for special occasions yet approachable for everyday meals.
Ingredient Swap Ideas
Adjusting ingredients in this recipe can tailor it to your preferences or dietary needs without losing its core charm. These swaps keep the balance of freshness and caramelized flavor intact.
- Swap fresh dill with chopped fresh parsley or tarragon for a different herbal note.
- Replace lemon juice with a balsamic vinegar drizzle for a sweeter tang.
- Use orange zest instead of lemon for a softer, fruity citrus flavor.
- Substitute fennel with bulb fennel or use a mix of fennel and roasted celery root for variety.
Ingredients
- 2 large fennel bulbs - trimmed, halved, and sliced about ½ inch thick.
- 2 tablespoons extra-virgin olive oil - for roasting and flavor.
- 1 tablespoon fresh lemon juice - for brightness and tang.
- 1 teaspoon lemon zest - adds citrus aroma and sharpness.
- 2 tablespoons fresh dill - finely chopped, for fresh herbal notes.
- ½ teaspoon salt - enhances natural flavors.
- ¼ teaspoon black pepper - for subtle heat and depth.
Instructions
- Preheat the oven to 400°F (200°C). Line a baking sheet with parchment paper or lightly grease it with oil.
- Arrange the fennel slices in a single layer on the baking sheet. Drizzle with olive oil, then sprinkle with salt and pepper. Toss gently to coat evenly.
- Roast the fennel in the oven for 25 to 30 minutes, flipping slices halfway through. The fennel should be tender with edges slightly caramelized.
- Remove from the oven and immediately drizzle with fresh lemon juice and sprinkle lemon zest over the top. Toss gently to combine.
- Sprinkle the chopped dill over the fennel while warm and give it a final gentle toss before serving.
Serve this fennel dish warm as a side to fish, chicken, or vegetarian meals. It also works well chilled or at room temperature for a light salad alternative.
12. Parsnip Fries with Smoked Paprika
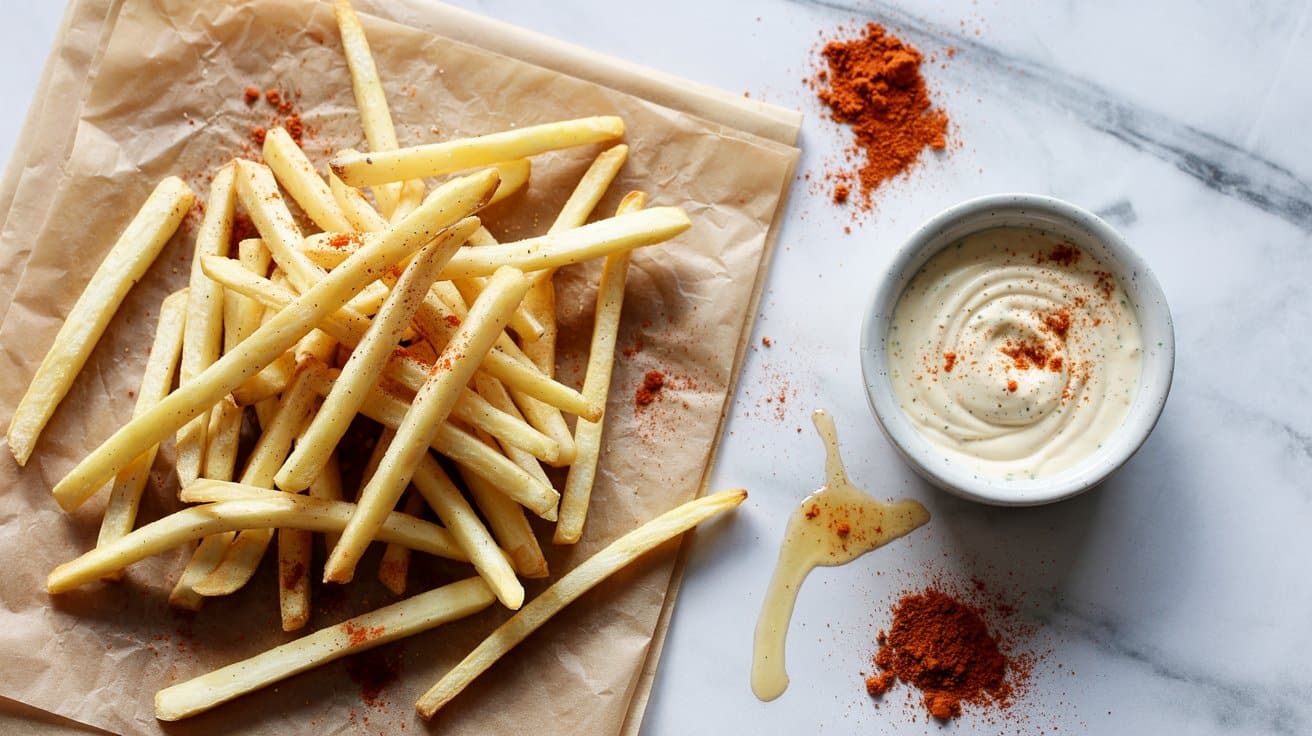
Parsnip fries offer a fresh twist on the traditional potato fries, with a natural sweetness and earthy flavor that goes well with smoky spices. These fries have a crunchy coating that keeps them crisp without turning soggy, making them a great snack or side dish to enjoy any day of the week.
The smoked paprika adds a warm, subtly spicy note that goes with the sweetness of the parsnips, improving their natural taste. Plus, these fries are straightforward to prepare and bake, so you can have a flavorful and healthier alternative to regular fries ready in no time.
Why This Recipe Works
This recipe balances ease and flavor, providing a crispy, savory snack with minimal fuss. Here's why it stands out:
- Convenience - Simple steps and oven baking mean no frying mess and hands-off cooking.
- Flavor balance - The smoky paprika and natural sweetness of parsnips create a well-rounded taste.
- Texture - A crunchy exterior with tender, soft insides prevents sogginess.
- Appeal - A nutritious alternative that works well for casual family meals or entertaining guests.
Ingredient Swap Ideas
Swapping ingredients can help adjust the recipe to suit different tastes or dietary preferences without losing the core flavors and textures.
- Vegetables - Substitute parsnips with carrots or sweet potatoes for a slightly different sweetness and texture.
- Spices - Replace smoked paprika with regular paprika or chili powder for less smokiness or more heat.
- Coating - Use almond flour or gluten-free breadcrumbs to keep the recipe gluten-free.
- Oil - Swap olive oil for avocado oil for a higher smoke point and subtle nutty flavor.
Ingredients
- Parsnips - 4 medium, peeled and cut into thick sticks.
- Olive oil - 2 tablespoons, to coat the fries evenly.
- Smoked paprika - 1 teaspoon, for a deep smoky flavor.
- Garlic powder - ½ teaspoon, adds subtle savory notes.
- Salt - ¾ teaspoon, to taste.
- Black pepper - ¼ teaspoon, freshly ground for mild heat.
- Cornstarch - 1 tablespoon, helps create a crisp coating.
Instructions
- Preheat your oven to 425°F (220°C) and line a baking sheet with parchment paper to prevent sticking.
- Toss the parsnip sticks in a large bowl with cornstarch until they are evenly coated. This step is key to getting a crunchy texture.
- Add olive oil, smoked paprika, garlic powder, salt, and black pepper to the bowl. Mix thoroughly so each stick is well-seasoned.
- Arrange the parsnip fries in a single layer on the baking sheet, making sure they aren't overcrowded to ensure even cooking and crispiness.
- Bake for 25 to 30 minutes, flipping the fries halfway through. They should be golden, crisp on the outside, and tender inside when done.
Serve these fries hot with your favorite dipping sauce or alongside a fresh salad for a balanced meal.
13. Roasted Baby Potatoes with Rosemary and Sea Salt
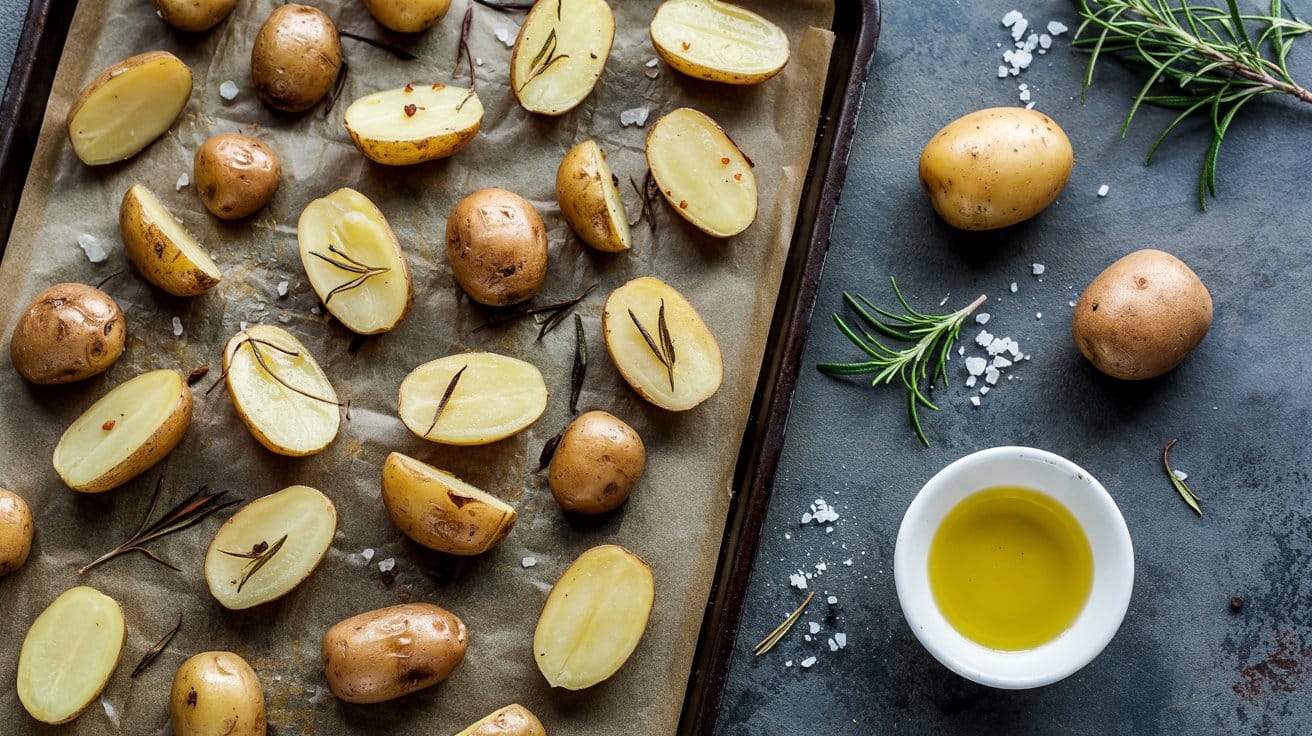
Roasted baby potatoes with rosemary and sea salt are a simple side dish that brings out the best in tender potatoes. The golden, crisp skins contrast beautifully with the creamy interiors, offering a satisfying bite every time.
This recipe is easy to prepare and makes a good addition to any meal, especially when you want something comforting without much fuss.
The fragrant rosemary infuses the potatoes as they roast, giving an earthy aroma that blends perfectly with the subtle crunch from the sea salt. With just a handful of ingredients and straightforward steps, this dish is a reliable choice for busy home cooks.
Why This Recipe Works
This recipe stands out for its simplicity and the classic flavor combination that works with many main courses. Roasted Baby Potatoes with Rosemary and Sea Salt balance ease with delicious results.
- Convenience - Uses basic ingredients and requires minimal prep, making it quick to put together.
- Flavor balance - Combines herbaceous rosemary with savory sea salt to improve the natural potato taste.
- Texture - Delivers crisp skins with tender, fluffy insides for a pleasing contrast.
- Appeal - Family-friendly and versatile enough for casual dinners or special gatherings.
Ingredient Swap Ideas
Swapping ingredients can help tailor the recipe to fit different diets or flavor preferences without losing what makes this side delicious. Here are some ideas to adjust it easily.
- Rosemary - Replace with thyme or oregano for a different herbal note.
- Sea salt - Use kosher salt or flaky Maldon salt to vary the salt texture.
- Baby potatoes - Swap with fingerling potatoes or small Yukon golds if preferred.
- Olive oil - Use avocado oil or melted butter for a richer finish.
Ingredients
- 1 pound baby potatoes - scrubbed and halved if large.
- 2 tablespoons olive oil - to coat the potatoes evenly.
- 1 tablespoon fresh rosemary - finely chopped.
- 1 teaspoon coarse sea salt - to bring out crispness and flavor.
- ½ teaspoon black pepper - freshly ground for mild heat.
Instructions
- Preheat your oven to 425°F (220°C). Line a baking sheet with parchment paper for easier cleanup.
- In a large bowl, toss the baby potatoes with olive oil, chopped rosemary, sea salt, and black pepper until they are evenly coated.
- Spread the potatoes out in a single layer on the prepared baking sheet, cut side down if halved.
- Roast in the oven for 25 to 30 minutes, stirring once halfway through, until the potatoes are golden brown with crispy skins and tender inside.
- Remove from the oven and serve warm, optionally garnished with a few extra rosemary sprigs for presentation.
14. Caramelized Roasted Mushrooms with Thyme
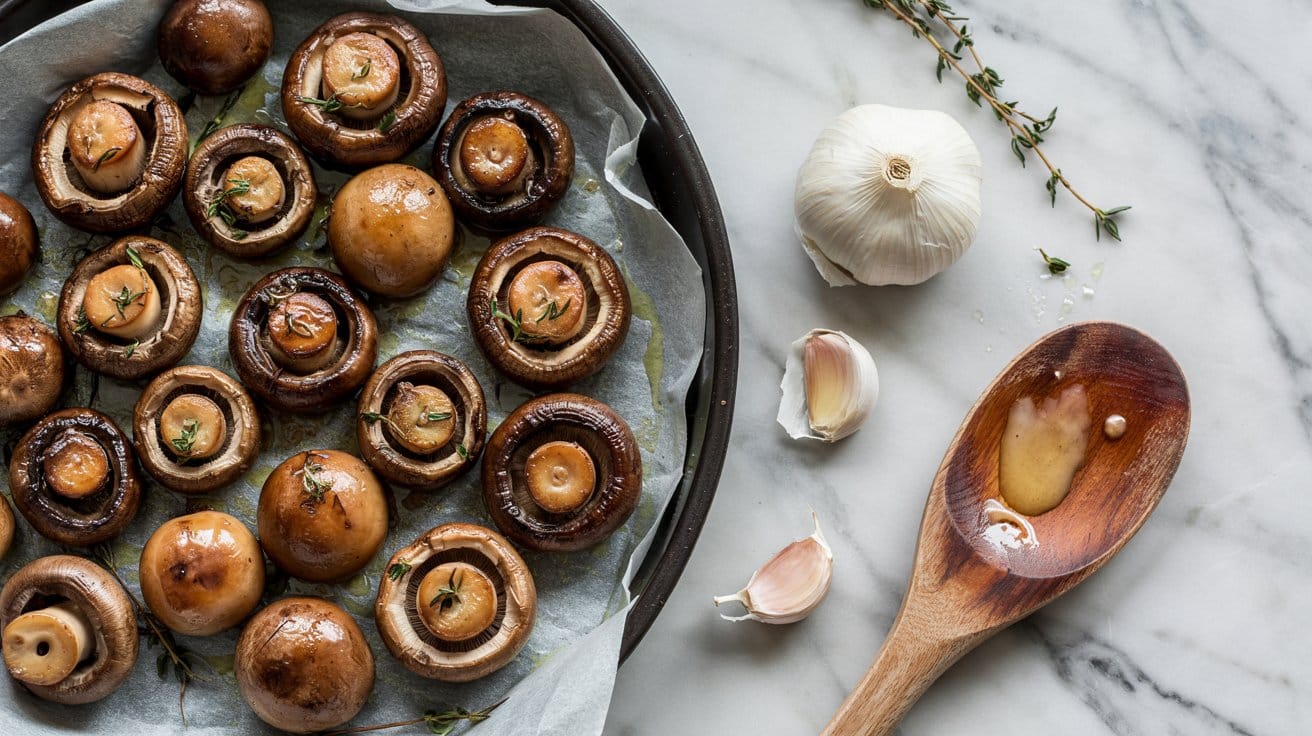
Roasting mushrooms at a high temperature helps them develop a rich, caramelized exterior while keeping the inside tender, avoiding any unwanted sogginess. Adding fresh thyme infuses the dish with a subtle herbaceous note that goes with the mushrooms' natural earthiness beautifully.
This recipe is straightforward to prepare and brings out deep, savory flavors with minimal ingredients and time. It's a fantastic side dish to pair with roasted meats, grain bowls, or even as a warm topping for toasted bread.
Why This Recipe Works
This recipe offers a simple way to bring maximum flavor to mushrooms with just a few ingredients and straightforward steps.
- Convenience - Roasts quickly at high heat, requiring little hands-on time.
- Flavor balance - Combines the deep savoriness of mushrooms with fresh thyme's subtle brightness.
- Texture - Achieves a nicely caramelized exterior and tender interior without becoming mushy.
- Versatility - Serves well as a side or an addition to various dishes, from salads to mains.
Ingredient Swap Ideas
Swapping ingredients can adjust this recipe to suit different preferences or available ingredients without losing its essence.
- Mushroom variety - Use cremini, shiitake, or oyster mushrooms in place of button mushrooms for more texture and flavor complexity.
- Herbs - Substitute fresh rosemary or sage for thyme to change the herbal profile.
- Fat - Use avocado oil or clarified butter instead of olive oil for a different richness or higher smoke point.
- Aromatics - Add minced garlic or shallots before roasting for an extra layer of flavor.
Ingredients
- 1 pound mushrooms - preferably button or cremini, cleaned and halved if large.
- 2 tablespoons extra-virgin olive oil - to coat mushrooms for roasting.
- 1 teaspoon fresh thyme leaves - picked from the stems.
- ½ teaspoon kosher salt - to enhance flavor.
- ¼ teaspoon freshly ground black pepper - for mild heat and seasoning.
Instructions
- Preheat your oven to 425°F (220°C). Line a baking sheet with parchment paper or a silicone mat.
- Toss the mushrooms in a large bowl with olive oil, thyme, salt, and pepper until evenly coated.
- Spread the mushrooms in a single layer on the prepared baking sheet, making sure they're not crowded to allow proper roasting.
- Roast in the oven for 20 to 25 minutes, stirring halfway through, until the mushrooms are deeply browned and caramelized at the edges.
- Remove from the oven and serve warm, garnished with extra thyme if desired.
15. Roasted Butternut Squash Cubes with Sage
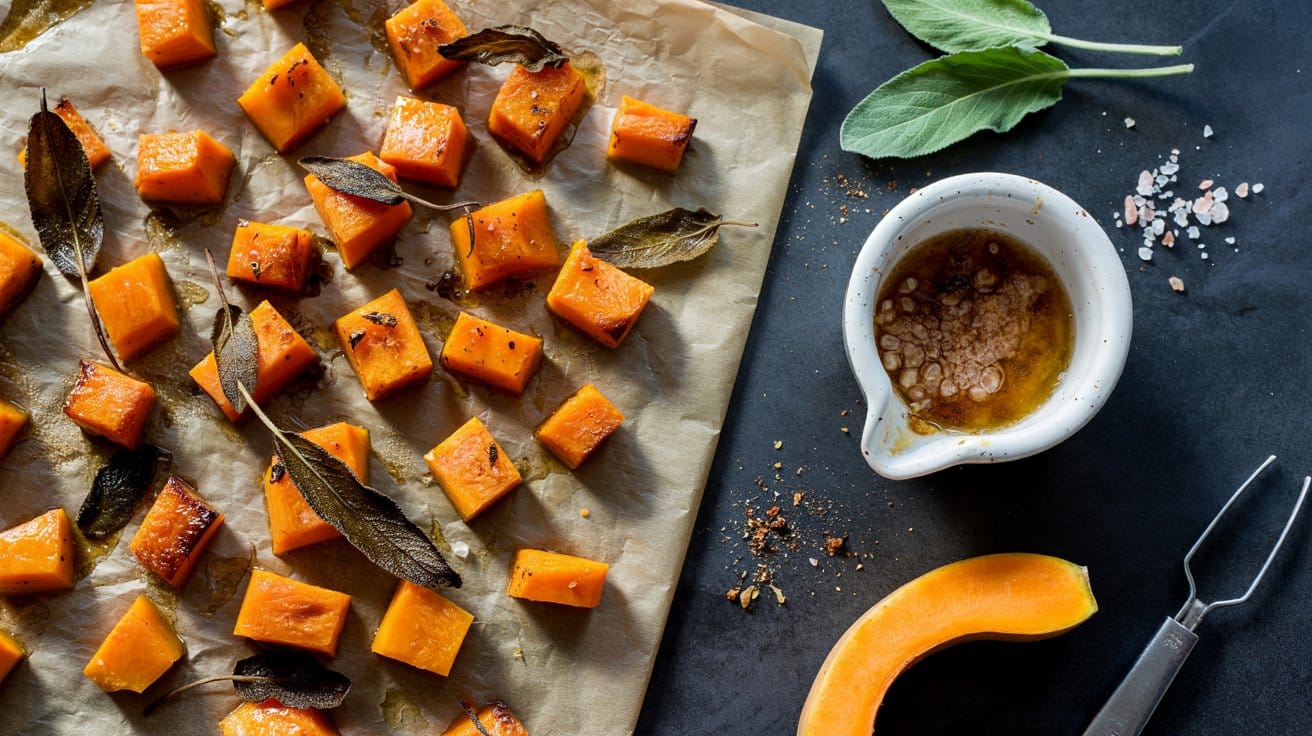
Roasting butternut squash cubes with sage brings out the natural sweetness of the squash while adding a warm, herbal note. The squash cooks until tender on the inside with crispy, caramelized edges that make every bite satisfying.
This recipe is straightforward, requiring minimal prep and just a few ingredients, making it an excellent side dish to accompany a variety of meals.
The balance of sweet squash and earthy sage offers comforting flavors that pair well with roasted meats, grain bowls, or even a simple salad. Plus, it's a wholesome option that fits well into a health-conscious diet without sacrificing taste.
Why This Recipe Works
This recipe offers a delicious and convenient way to enjoy butternut squash with a hint of fresh herb flavor. It's a simple preparation that delivers balanced flavors and appealing textures for a versatile side dish.
- Convenience - Uses straightforward ingredients and a single roasting step for easy prep and cleanup.
- Flavor balance - Combines the natural sweetness of squash with the earthy, aromatic notes of fresh sage.
- Texture - Firm squash cubes develop crispy edges while staying tender inside.
- Appeal - Suitable for family meals and elegant enough for holiday dinners.
Ingredient Swap Ideas
Changing up a few ingredients can help you personalize this recipe or adjust it for dietary preferences without losing the core flavors.
- Herbs - Swap sage for rosemary or thyme to introduce a different herbal aroma.
- Oil - Use avocado oil or melted coconut oil instead of olive oil for varying richness.
- Sweetness - Add a drizzle of maple syrup or honey before roasting to enhance natural sweetness.
- Additional seasoning - Sprinkle with chili flakes or smoked paprika to add subtle heat and depth.
Ingredients
- 1 medium butternut squash - peeled, seeded, and cut into 1-inch cubes.
- 2 tablespoons olive oil - for coating the squash evenly.
- 1 tablespoon fresh sage leaves - roughly chopped or left whole.
- ½ teaspoon salt - to season the squash.
- ¼ teaspoon black pepper - freshly ground for mild heat.
- Optional: 1 teaspoon maple syrup - to add a touch of sweetness if desired.
Instructions
- Preheat your oven to 425°F (220°C). Line a baking sheet with parchment paper or lightly grease it to prevent sticking.
- In a large bowl, toss the butternut squash cubes with olive oil, fresh sage, salt, and black pepper until the pieces are thoroughly coated.
- Spread the squash cubes out in a single layer on the prepared baking sheet, making sure there's some space between them for even roasting.
- Roast in the preheated oven for 25 to 30 minutes, turning the cubes halfway through, until they are tender inside and golden with crisp edges.
- Remove from the oven, and optionally drizzle with maple syrup while still warm. Toss gently, then serve immediately as a flavorful side dish.
16. Spicy Roasted Radishes with Garlic and Herbs
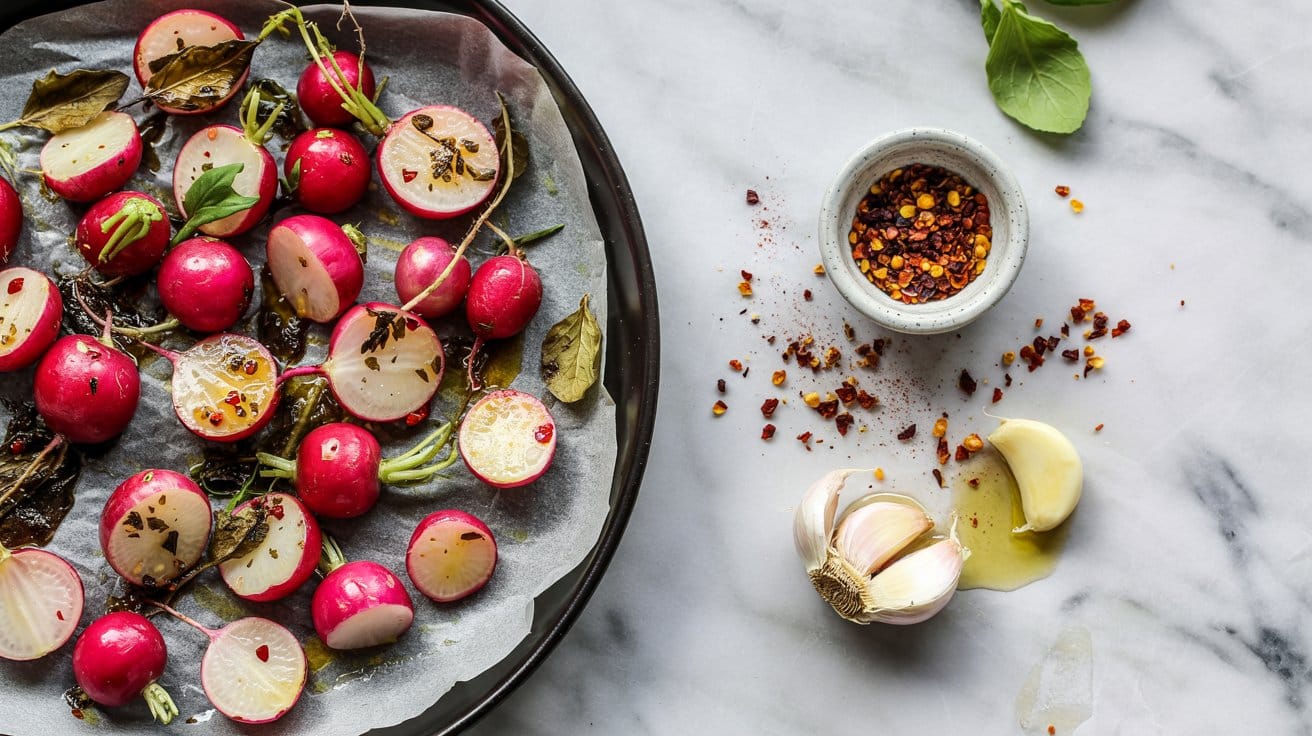
Roasting radishes transforms their sharp, peppery bite into something milder while keeping a satisfying crunch inside. Adding garlic and fresh herbs enhances their natural flavor, giving a warm, mildly spicy note that complements many meals.
This simple recipe makes a great side dish or a healthy snack you can prepare quickly with minimal ingredients.
The combination of heat, garlic, and herbs creates a balanced and inviting taste without overwhelming the radishes' fresh character. You'll find these spicy roasted radishes both comforting and refreshing with every bite.
Why This Recipe Works
This recipe offers a straightforward way to enjoy radishes beyond salads, unlocking new textures and flavors with ease.
- Convenience - Requires few ingredients and cooks in about 20 minutes, making it an easy side for busy evenings.
- Flavor balance - Combines mild spice, savory garlic, and fragrant herbs to create a well-rounded taste.
- Texture - Radishes stay crunchy inside while developing a tender, roasted exterior.
- Appeal - Suits varied palates and pairs well with grilled meats, roasted poultry, or grains.
Ingredient Swap Ideas
Adjusting ingredients allows you to tailor this dish to your preferences or dietary choices while keeping its core qualities intact.
- Spice level - Substitute chili flakes with smoked paprika or omit entirely for a milder flavor.
- Herbs - Swap fresh parsley and thyme with oregano, rosemary, or tarragon to change the herbal note.
- Garlic - Use garlic powder instead of fresh garlic for a subtler, easy-to-mix option.
- Fat - Replace olive oil with avocado oil or melted butter for a different richness.
Ingredients
- 1 pound radishes - ends trimmed and halved or quartered depending on size.
- 2 tablespoons olive oil - for roasting and flavor.
- 3 garlic cloves - minced finely to distribute flavor evenly.
- 1 teaspoon red chili flakes - adjust for desired heat level.
- 1 teaspoon fresh thyme leaves - finely chopped, or ½ teaspoon dried thyme.
- 2 tablespoons fresh parsley - chopped for garnish and fresh herbal note.
- ½ teaspoon salt - enhances natural flavors.
- ¼ teaspoon black pepper - freshly ground for taste.
Instructions
- Preheat your oven to 425°F (220°C). In a mixing bowl, toss the trimmed and cut radishes with olive oil, minced garlic, red chili flakes, fresh thyme, salt, and pepper until evenly coated.
- Spread the radishes on a baking sheet in a single layer to ensure even roasting. Avoid overcrowding to keep them from steaming.
- Roast in the preheated oven for 15 to 20 minutes, stirring halfway through. The radishes should develop a light golden crust while remaining firm inside.
- Remove from the oven and transfer to a serving dish. Sprinkle with freshly chopped parsley for a pop of color and fresh flavor.
- Serve warm as a side dish or snack, enjoying the balance of mild heat and fragrant herbs.
17. Roasted Cherry Tomatoes with Balsamic Drizzle
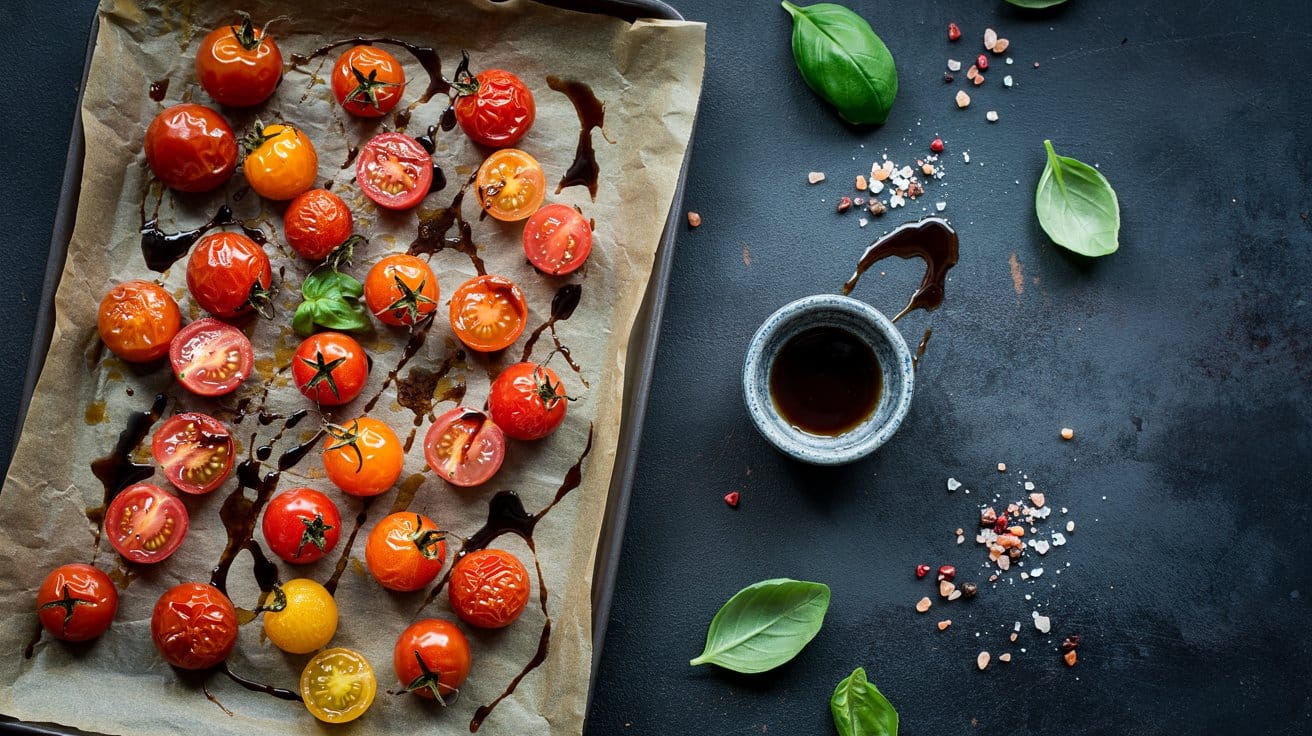
Roasted cherry tomatoes bring out a rich, sweet flavor that bursts with every bite. Cooking them just until their skins begin to split keeps them juicy and tender without turning mushy.
This simple recipe enhances those natural flavors with a tangy balsamic drizzle, making it an ideal side or topping for many dishes.
It comes together quickly and requires minimal ingredients, making it a convenient way to add bright color and taste to your meal. The balance of sweetness from the tomatoes and the acidity from the balsamic vinegar creates a bright and satisfying finish.
Why This Recipe Works
This recipe is a straightforward way to transform humble cherry tomatoes into a flavorful addition suited for a variety of dishes. It combines simplicity and taste with a touch of sophistication that's easy to achieve.
- Convenience - Requires minimal prep and cooks fast in the oven.
- Flavor balance - Sweet roasted notes paired with sharp, tangy balsamic vinegar.
- Texture - Juicy tomatoes with tender flesh and slightly blistered skins.
- Versatility - Excellent as a side, salad topping, or paired with grilled proteins.
Ingredient Swap Ideas
Adjusting ingredients can help tailor the recipe to fit different preferences or dietary needs without losing its core appeal. These swaps keep the dish fresh and adaptable.
- Cherry tomatoes - Substitute with grape tomatoes for a slightly firmer texture.
- Balsamic vinegar - Use red wine vinegar mixed with a touch of honey for a different tangy sweetness.
- Olive oil - Try avocado or grapeseed oil for a neutral flavor or different fat profile.
- Fresh herbs - Replace basil with thyme or oregano depending on the flavor you want to highlight.
Ingredients
- 2 cups cherry tomatoes - Rinsed and drained.
- 2 tablespoons extra-virgin olive oil - For roasting and flavor.
- 1 tablespoon balsamic vinegar - For drizzling after roasting.
- ½ teaspoon salt - To enhance natural tomato flavors.
- ¼ teaspoon black pepper - Freshly ground for seasoning.
- 1 tablespoon fresh basil - Chopped, for garnish.
Instructions
- Preheat your oven to 400°F (200°C). Line a baking sheet with parchment paper for easy cleanup.
- Toss the cherry tomatoes with olive oil, salt, and black pepper, coating them evenly. Spread them out on the baking sheet in a single layer.
- Roast the tomatoes for 15 to 20 minutes, or until their skins begin to split and they're tender but still hold their shape.
- Remove from the oven and transfer the tomatoes to a serving dish. Drizzle evenly with balsamic vinegar.
- Sprinkle chopped fresh basil over the top for a pop of herbaceous flavor. Serve warm or at room temperature.
18. Sheet Pan Roasted Mixed Root Vegetables
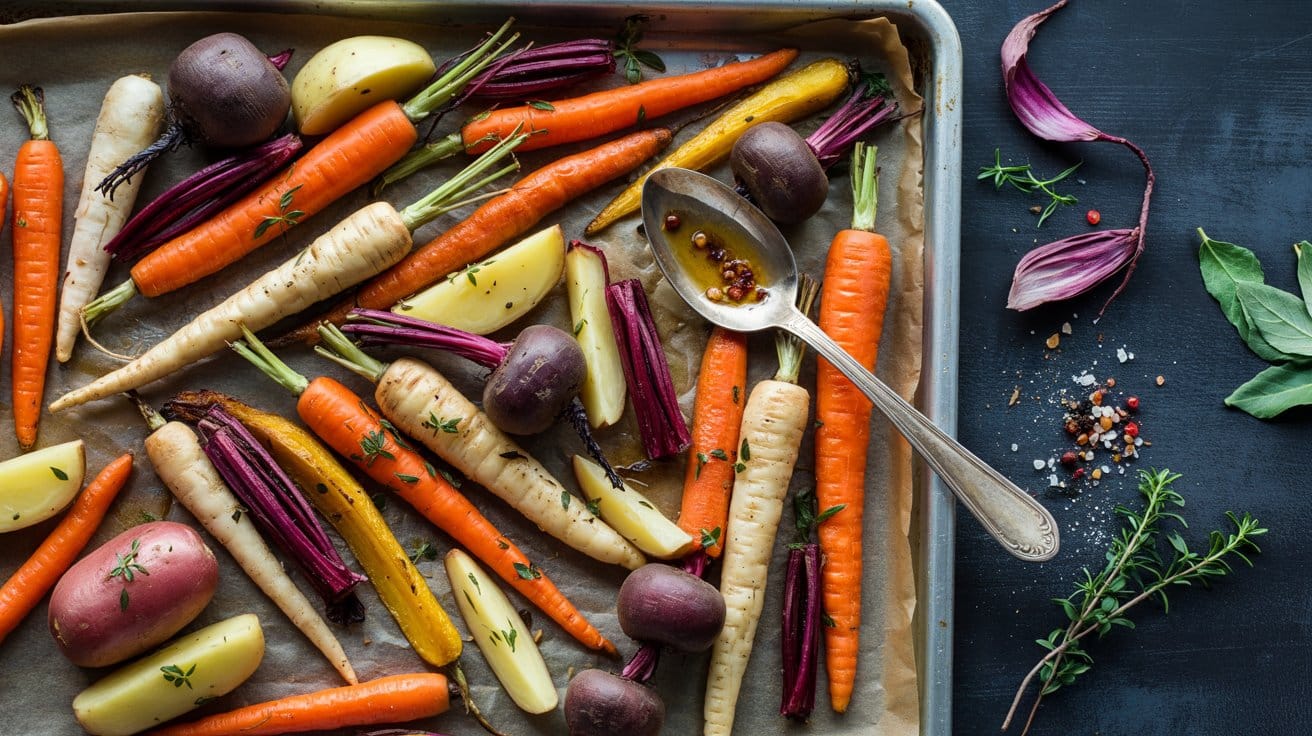
Roasting a mix of root vegetables on a single sheet pan brings out their natural sweetness and deep, earthy flavors. This method lets the vegetables caramelize beautifully on the edges while keeping a pleasant firmness inside.
It's a straightforward way to prepare a colorful, nutritious side dish that pairs well with so many meals.
All you need is to chop your favorite root vegetables into even pieces, toss them with olive oil and seasonings, and then roast them until tender and golden. The result is a warm, comforting dish with a great variety of textures and tastes, from slightly crispy to buttery soft.
Why This Recipe Works
This recipe shows how simple techniques can make vegetables shine both in flavor and texture. It shows the natural sugars in root vegetables through roasting and keeps things easy with a one-pan approach.
- Convenience - Uses one pan for quick prep and cleanup.
- Flavor balance - Sweet, earthy vegetables caramelized with subtle seasoning.
- Texture - Combines tender centers with crisp, caramelized edges.
- Appeal - Makes a colorful, wholesome dish suitable for everyday meals or gatherings.
Ingredient Swap Ideas
Adjusting the ingredients can help meet personal preferences or dietary needs without losing the essence of the dish. You can switch vegetables or seasonings to keep this recipe versatile and accommodating.
- Root vegetables - Substitute parsnips or kohlrabi for variety along with carrots or beets.
- Oil - Use avocado oil or melted coconut oil instead of olive oil for different flavors.
- Seasonings - Add a sprinkle of smoked paprika or dried rosemary for a twist.
- Salt alternatives - Use a pinch of seaweed flakes or lemon zest to reduce sodium but enhance taste.
Ingredients
- 2 large carrots - peeled and cut into 1-inch pieces.
- 2 parsnips - peeled and cut into 1-inch pieces.
- 2 medium beets - peeled and cut into 1-inch chunks.
- 1 small sweet potato - peeled and cut into 1-inch cubes.
- 1 red onion - peeled and cut into wedges.
- 3 tablespoons extra-virgin olive oil - for coating vegetables evenly.
- 1 teaspoon salt - enhances natural flavors of vegetables.
- ½ teaspoon black pepper - freshly ground for mild heat.
- 1 teaspoon dried thyme - adds an earthy, herbal note.
- 2 cloves garlic - minced, for subtle pungency.
Instructions
- Preheat your oven to 425°F (220°C) and line a large sheet pan with parchment paper to prevent sticking.
- In a large bowl, combine all the chopped vegetables with olive oil, salt, black pepper, thyme, and minced garlic. Toss everything to coat evenly.
- Spread the vegetables in a single layer on the prepared sheet pan, making sure pieces are not crowded for even roasting.
- Roast in the oven for about 35 to 40 minutes, turning the vegetables halfway through cooking to ensure all sides brown nicely.
- Remove from the oven when the vegetables are tender inside with golden, slightly crisp edges. Serve warm as a side dish or incorporate into salads or grain bowls.
19. Oven-Roasted Eggplant Slices with Za’atar
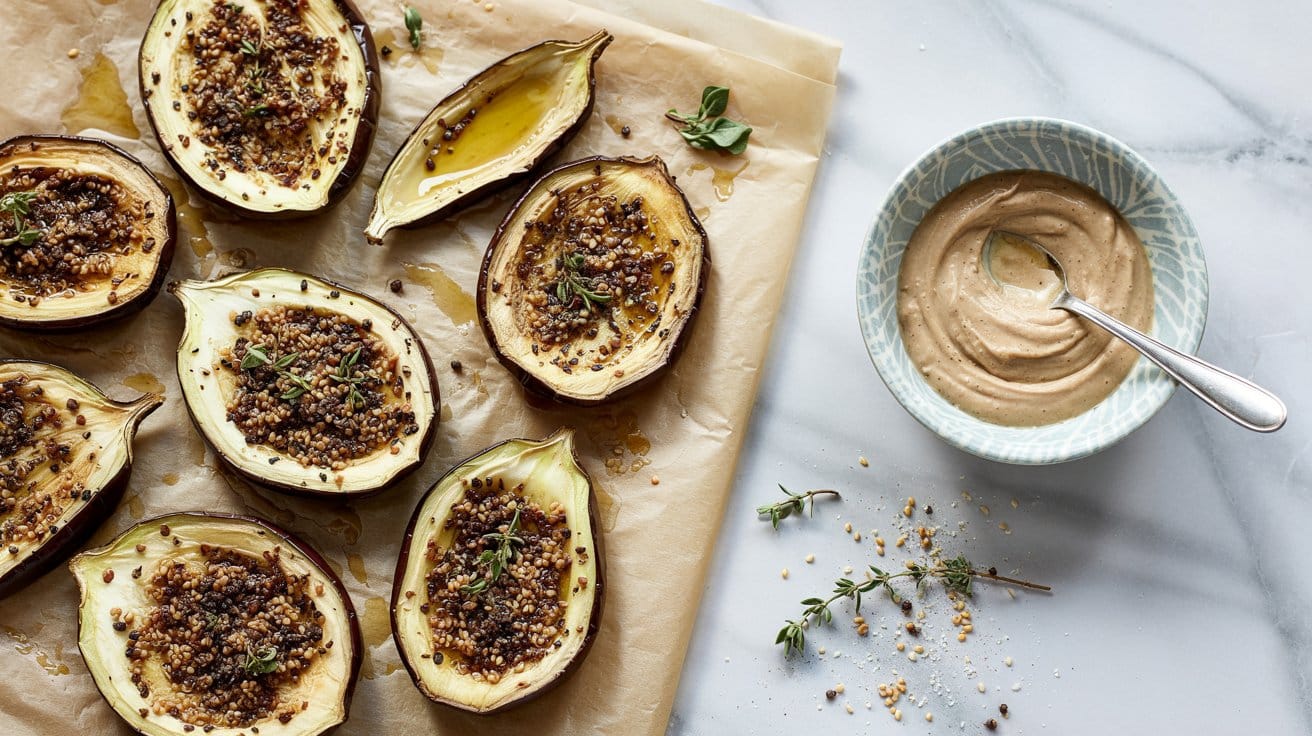
Eggplant slices roasted in the oven until tender yet still firm offer a satisfying texture that's far from mushy. Coated with za'atar, a fragrant Middle Eastern spice blend, these slices carry an earthy, tangy, and slightly nutty flavor that goes well with the natural sweetness of roasted eggplant.
This recipe is straightforward and quick to prepare, making it a great side dish or a base for a warm appetizer.
The combination of simple ingredients comes together with ease, creating a balanced dish that works well for weeknight dinners or when entertaining. Its bold yet familiar flavors appeal to both seasoned cooks and anyone looking to add variety to their vegetable dishes.
Why This Recipe Works
This recipe is both approachable and flavorful, giving you a reliable way to enjoy eggplant with a Middle Eastern twist.
- Convenience - Requires minimal prep and cooks quickly in the oven, freeing you up to work on other parts of your meal.
- Flavor balance - Za'atar spices improve the eggplant without overpowering it, bringing brightness and depth.
- Texture - Roasting keeps the eggplant tender but not soggy, with slightly crisp edges.
- Versatility - Can be served as a side, in salads, or layered in sandwiches and wraps.
Ingredient Swap Ideas
If you want to adjust the recipe for taste preferences or dietary needs, simple swaps will still keep the essence of the dish intact.
- Use sumac instead of za'atar for a tangier, lemony flavor while maintaining that Middle Eastern profile.
- Replace olive oil with avocado oil if you prefer a neutral oil with a high smoke point for roasting.
- Try sliced zucchini or bell peppers in place of eggplant for a different vegetable but with similar roasting ease and spice absorption.
- Add a drizzle of tahini or sprinkle of feta cheese after roasting for creaminess and extra flavor.
Ingredients
- 2 medium eggplants sliced into ¾-inch thick rounds.
- 3 tablespoons extra-virgin olive oil for brushing the slices evenly.
- 2 tablespoons za'atar spice blend for coating the eggplant.
- ½ teaspoon salt to improve the vegetable's natural flavor.
- ¼ teaspoon freshly ground black pepper for mild warmth.
- Fresh lemon wedges for serving, optional.
Instructions
- Preheat your oven to 425°F (220°C). Line a baking sheet with parchment paper or lightly grease it to prevent sticking.
- Arrange the eggplant slices in a single layer on the prepared sheet. Brush both sides of each slice with olive oil to ensure even roasting.
- Sprinkle the za'atar, salt, and pepper evenly over the slices. Use your hands or a spoon to gently press the spices into the eggplant for better adhesion.
- Roast in the oven for 20 to 25 minutes, flipping the slices halfway through. The eggplant should be tender when pierced with a fork and slightly browned on the edges.
- Remove from the oven and transfer to a serving plate. Serve warm with lemon wedges on the side to squeeze over, adding a fresh, bright contrast to the spices.
20. Roasted Corn with Chili Lime Butter
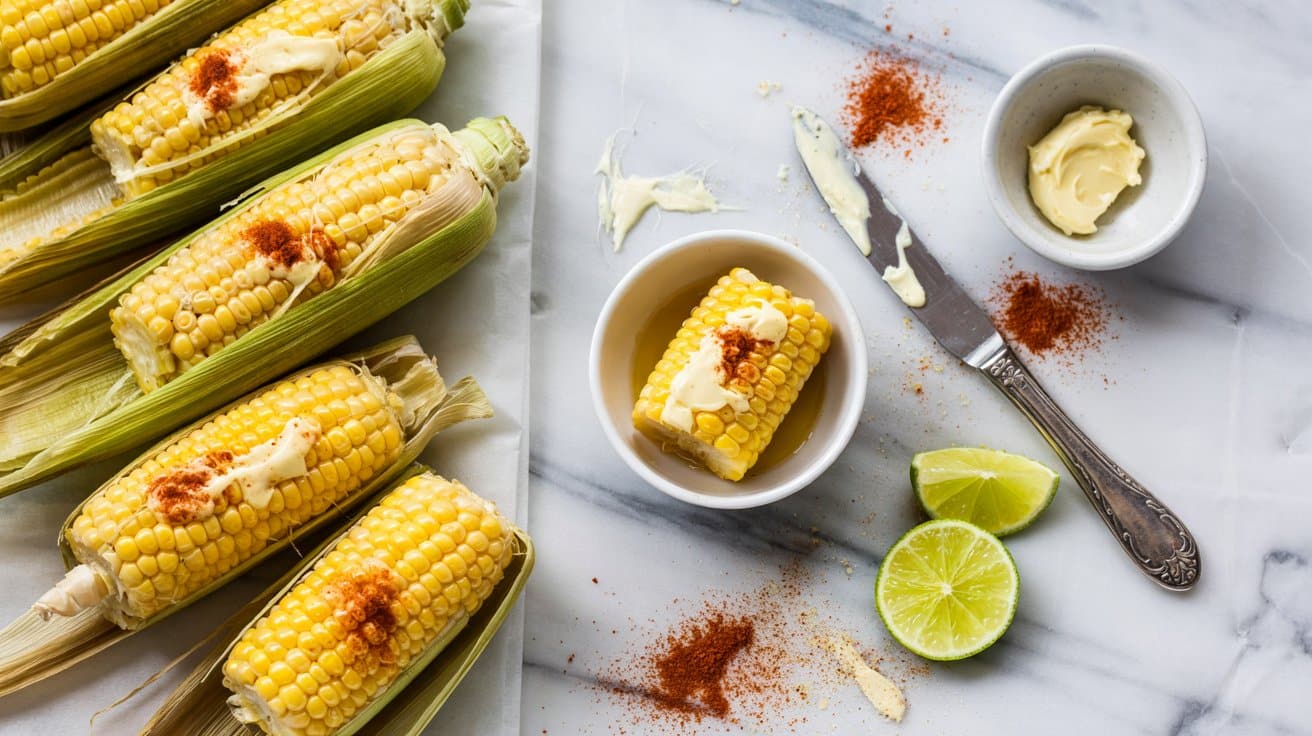
Roasting corn on the cob brings out its natural sweetness and adds a subtle, smoky flavor that's simply irresistible. This recipe finishes the corn with a zesty chili lime butter that perfectly balances heat, tang, and creaminess.
It's a quick and satisfying side that goes well with grilled meats or can stand alone as a tasty snack.
The kernels get slightly crisp as they roast, giving a wonderful texture contrast while staying juicy on the inside. Combining fresh lime juice with chili gives the butter a bright punch that brightens every bite without overpowering the corn's natural flavor.
Why This Recipe Works
This roasted corn recipe combines simplicity and bold flavor to improve a common side dish into something memorable.
- Convenience - The corn roasts directly on the grill or in the oven with minimal prep and clean-up.
- Flavor balance - Creamy butter blends beautifully with spicy chili and tangy lime for a bright, savory taste.
- Texture - Roasting crisps some kernels while keeping others tender, adding appealing contrast.
- Appeal - A family-friendly side that's easy to adjust for milder or spicier preferences.
Ingredient Swap Ideas
Changing up some ingredients can help adjust this recipe for dietary needs or personal taste preferences without losing the core flavors.
- Dairy-free option - Use a plant-based butter substitute to keep it vegan and lactose-free.
- Less heat - Substitute chili powder with smoked paprika for a milder smoky flavor.
- Extra brightness - Add a splash of fresh orange juice along with lime for a sweeter citrus twist.
- Herb variation - Mix chopped cilantro or parsley into the butter for a fresh herbal note.
Ingredients
- 4 ears fresh corn - Husked and cleaned, ready to roast.
- ¼ cup unsalted butter - Softened for easy mixing.
- 1 teaspoon chili powder - Adds gentle heat and smokiness.
- 1 tablespoon fresh lime juice - Provides bright acidity.
- ½ teaspoon salt - Enhances overall flavor.
- ¼ teaspoon black pepper - Adds mild spice and depth.
Instructions
- Preheat your oven to 425°F (220°C) or prepare a grill for medium-high heat. Place the ears of corn directly on the oven rack or grill grates.
- Roast the corn for 15 to 20 minutes, turning occasionally until the kernels begin to brown and blister slightly.
- While the corn is roasting, combine softened butter, chili powder, lime juice, salt, and pepper in a small bowl. Mix until fully blended.
- Remove the corn from the oven or grill and immediately brush each ear generously with the chili lime butter.
- Serve warm, allowing any extra butter to melt and soak into the corn, improving the flavor with each bite.
Roasted vegetables keep best when cooled and stored in an airtight container in the fridge for up to four days, which helps maintain texture and flavor. For related recipe clusters, see moist mug cake recipes for quick desserts and quick replacements for fire-roasted tomatoes.

Andrew Gray is a seasoned food writer and blogger with a wealth of experience in the restaurant and catering industries. With a passion for all things delicious, Andrew has honed his culinary expertise through his work as a personal chef and caterer.
His love for food led him to venture into food writing, where he has contributed to various online publications, sharing his knowledge and insights on the culinary world. As the proud owner of CooksCrafter.com, Andrew covers a wide range of topics, including recipes, restaurant reviews, product recommendations, and culinary tips.
Through his website, he aims to inspire and educate fellow food enthusiasts, offering a comprehensive resource for all things food-related.