If you're looking for desserts that make an impression without requiring a long list of ingredients, this collection of 14 five-ingredient treats is just the thing - each recipe uses five ingredients or fewer (many are no-bake or pantry-friendly, relying on simple techniques like whipped emulsions or stovetop melting). These recipes are designed to bring a touch of elegance to your table with simple ingredients and straightforward methods.
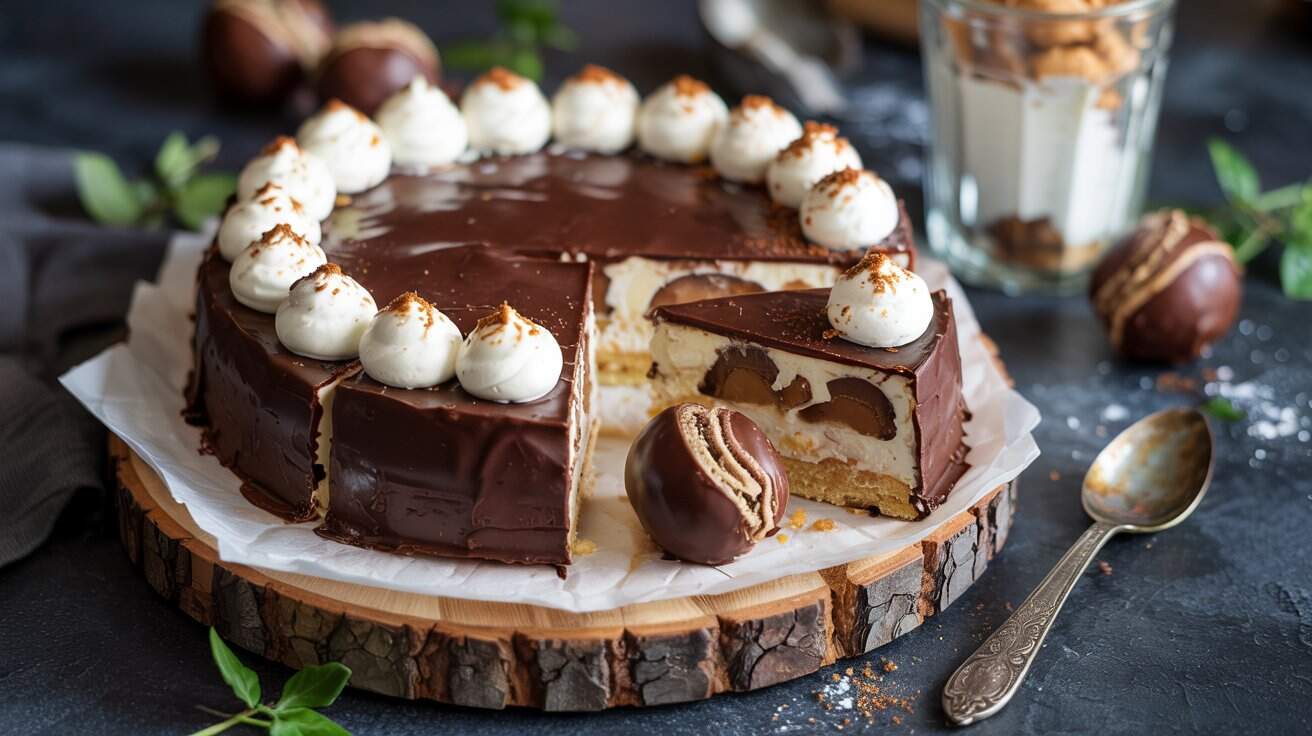
The selection includes a variety of styles-from creamy mousses and no-bake tarts to quick fudge and light parfaits. Each recipe offers a balance of rich flavors and fresh elements, making them suitable for casual gatherings or special occasions alike.
These desserts stand out for their ease and efficiency, allowing you to prepare something impressive without a lot of fuss or cleanup. Using just a few quality ingredients, they deliver delicious results while keeping your time and effort to a minimum.
1. Chocolate Mousse with Whipped Cream

Chocolate mousse is a classic dessert that feels special without requiring complicated steps, originating in French cuisine. Its rich, creamy chocolate flavor goes well with the light, airy texture that makes every spoonful a treat.
This version uses simple ingredients you probably have on hand-chocolate, cream (use heavy cream or whipping cream and bittersweet chocolate 60-70% cacao), a bit of sugar, vanilla, and a pinch of salt; for a quick chocolate treat, see easy air-fryer chocolate bark.
You can prepare this dessert in advance, allowing the flavors to meld and the texture to set just right. It's a wonderful choice for both casual dinners and special gatherings.
For pairing ideas, consider chocolate mousse sides for entertaining to round out the dessert course.
Why This Recipe Works
This chocolate mousse recipe combines convenience with a luxurious flavor and texture that makes it suitable for many occasions.
- Convenience - Quick to prepare with minimal ingredients and no baking required, often ready in under 30 minutes.
- Flavor balance - Deep chocolate richness complemented by the subtle sweetness of whipped cream and other natural sweeteners like honey; see refreshing honey-based dessert ideas.
- Texture - Silky, airy mousse that melts in your mouth with a light and fluffy finish.
- Appeal - Elegant enough for guests but simple enough for everyday enjoyment.
- Make-ahead ease - Can be chilled for several hours or overnight, saving time on the day of serving.
Ingredient Swap Ideas
Adjusting ingredients lets you tailor this mousse to dietary needs or flavor preferences without losing its charm.
- Dairy-free option - Use full-fat coconut milk instead of heavy cream to keep the creaminess but make it plant-based; use canned full-fat coconut milk for best texture.
- Sweetener alternatives - Replace granulated sugar with honey or maple syrup for a different sweetness profile, or adapt these small-batch cupcake ideas for two for bite-sized desserts.
- Chocolate type - Use dark chocolate (60-70% cacao) for a more intense flavor or milk chocolate for a milder taste.
- Whipped cream substitute - Use coconut whipped cream to make it vegan and dairy-free.
Ingredients
- 6 ounces bittersweet or semisweet chocolate - chopped into small pieces for smooth melting.
- 1 ½ cups heavy cream - divided for whipping and folding into the mousse.
- ¼ cup granulated sugar - to sweeten both the mousse and whipped cream.
- 1 teaspoon pure vanilla extract - enhances the chocolate flavor.
- Pinch of salt - balances the sweetness and deepens the chocolate taste.
Instructions
- Place chopped chocolate in a heatproof bowl and melt it gently over a pot of simmering water (double boiler) or microwave in short bursts, stirring until smooth. Set aside to cool slightly.
- Whip 1 cup of heavy cream with half of the sugar until soft peaks form. Gently fold about one-third of this whipped cream into the melted chocolate to lighten it.
- Carefully fold in the remaining whipped cream until fully combined, taking care not to deflate the mixture to keep the mousse airy.
- Spoon the mousse into serving dishes or ramekins, then refrigerate for at least 2 hours to set.
- Before serving, whip the remaining ½ cup of cream with the remaining sugar and vanilla extract until soft peaks form. Dollop or pipe the whipped cream over the chilled mousse.
- Garnish with chocolate shavings or a sprinkle of cocoa powder if desired and serve chilled.
2. Lemon Pudding Parfaits with Berries

This dessert brings together the bright, tangy flavor of lemon pudding (a custard-like pudding thickened with cornstarch or eggs) with the natural sweetness of fresh berries for a refreshing treat; pair it with an easy air-fryer lemon pound cake for more bright citrus desserts - if you need alternatives to lemon juice, try citrus swaps for lemon juice.
You can prepare this dessert quickly, and it doesn't require baking or complicated techniques; assemble in about 10 minutes. Layering the components into parfait glasses makes it visually appealing and easy to portion.
It's an ideal choice for a simple weekday dessert or a casual gathering.
Why This Recipe Works
This recipe delivers a bright, flavorful dessert that's both easy to make and visually inviting. It combines several texture contrasts and fresh ingredients to keep the dish light and fresh.
- Convenience - Quick to assemble with no baking involved, perfect for busy schedules.
- Flavor balance - The tart lemon pudding pairs harmoniously with the naturally sweet, juicy berries.
- Texture - Creamy pudding layered with firm, fresh berries and airy whipped cream for contrast.
- Appeal - Elegant presentation in parfait glasses suitable for guests or everyday enjoyment.
- Cleanup or serving ease - Minimal utensils needed and easy to portion for individual servings.
Ingredient Swap Ideas
Swapping ingredients can help adapt this dessert to different tastes or dietary preferences without losing its refreshing character.
- Dairy-free option - Use coconut milk pudding mix and coconut whipped cream to avoid dairy.
- Sugar alternatives - Substitute regular sugar with honey or maple syrup for a natural sweetener.
- Berry variety - Replace mixed berries with sliced peaches or mango for a seasonal twist.
- Gluten-free option - Include crushed gluten-free cookies or granola for added texture.
- Low-calorie option - Use sugar-free pudding mix and light whipped topping to reduce calories.
Ingredients
- 1 package lemon pudding mix - Typically 3.4 ounces, prepared according to package instructions.
- 2 cups mixed fresh berries - Such as strawberries, blueberries, raspberries, and blackberries.
- 1 cup heavy cream - Chilled, to be whipped.
- 2 tablespoons powdered sugar - To sweeten the whipped cream.
- 1 teaspoon vanilla extract - Added to the whipped cream for subtle flavor.
- Optional garnish - Fresh mint leaves or extra berries for topping.
Instructions
- Prepare the lemon pudding following the package directions. Let it chill in the refrigerator while you prepare the other components.
- In a chilled mixing bowl, whip the heavy cream with powdered sugar and vanilla extract until soft peaks form. Set aside.
- Rinse and gently pat dry the mixed berries. Slice larger berries like strawberries to similar sizes for easier layering.
- In individual parfait glasses or clear serving bowls, spoon a layer of lemon pudding, followed by a layer of mixed berries. Add a layer of whipped cream on top. Repeat the layering if space allows, finishing with a dollop of whipped cream.
- Garnish each parfait with a few fresh berries and mint leaves if desired. Serve immediately or refrigerate for up to 2 hours before serving to keep chilled and fresh.
3. Peanut Butter Chocolate Fudge
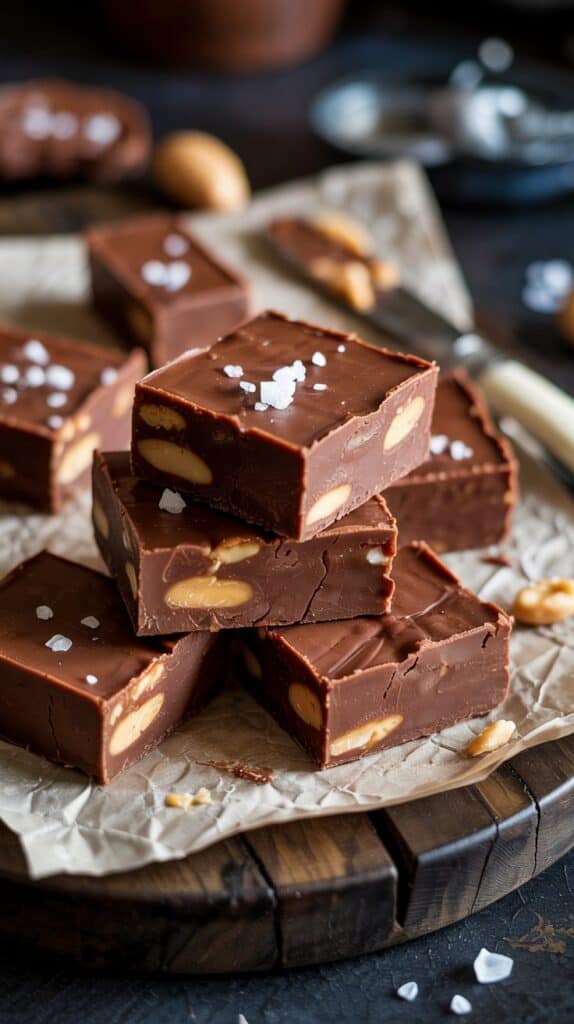
This peanut butter chocolate fudge brings together two classic flavors in a smooth, creamy treat that's quick to make and satisfying (use smooth peanut butter and semi-sweet chocolate, or try tasty substitutes for peanut butter to upgrade recipes).
The texture is silky with just the right amount of firmness to cut into clean squares, making it a great option for gifting or sharing at gatherings. Plus, the straightforward method means you can have it ready in under an hour, using just a few pantry staples.
Why This Recipe Works
This peanut butter chocolate fudge recipe offers a simple way to enjoy a luxurious dessert that requires no oven time. It balances richness and sweetness in a recipe that's accessible for cooks with any skill level.
- Convenience - No baking or special equipment is necessary, making it quick and approachable.
- Flavor balance - The combination of peanut butter's nuttiness with creamy chocolate creates a balanced taste.
- Texture - Smooth and firm enough to hold shape, yet melts pleasantly in your mouth.
- Appeal - Ideal for families and friends, suitable for holidays or everyday treats.
- Cleanup or serving ease - Made in one bowl and chilled, so minimal dishes and easy portions.
Ingredient Swap Ideas
Swapping certain ingredients can help adjust the recipe for dietary preferences or to use what you have on hand without losing the core taste and texture.
- Use natural peanut butter instead of creamy for a slightly grainier texture and more intense peanut flavor.
- Replace semi-sweet chocolate chips with dark or milk chocolate to vary the richness or sweetness.
- Substitute sweetened condensed milk with a vegan version to make the fudge dairy-free.
- Try almond or cashew butter as alternatives to peanut butter for a different nutty profile.
- Use coconut oil instead of butter for a dairy-free option that adds a subtle coconut aroma.
Ingredients
- 1 cup creamy peanut butter - Provides the nutty base and rich flavor.
- 2 cups semi-sweet chocolate chips - Melts smoothly for the chocolaty layer.
- 1 (14-ounce) can sweetened condensed milk - Adds sweetness and creaminess without separate sugar.
- 2 tablespoons unsalted butter - Enhances texture and shine.
- 1 teaspoon vanilla extract - improves the overall flavor.
- Pinch of salt - Balances the sweetness.
Instructions
- Line an 8x8-inch square baking pan with parchment paper, leaving some overhang to lift the fudge out easily later.
- In a medium saucepan, combine the peanut butter, sweetened condensed milk, and unsalted butter. Warm over low heat, stirring often until the mixture is smooth and well combined.
- Remove from heat and stir in the vanilla extract and a pinch of salt.
- Pour half of the peanut butter mixture into a bowl and fold in the chocolate chips until melted and smooth. This creates the chocolate layer.
- Pour the chocolate mixture evenly into the prepared pan. Carefully spread the remaining plain peanut butter mixture over the chocolate layer, creating two distinct layers.
- Refrigerate the pan for at least 2 hours or until the fudge is firm. Use parchment overhang to lift the fudge out, then cut into squares and serve.
4. Berry Almond Crisp

This berry almond crisp is a simple dessert that brings together juicy mixed berries and a crunchy almond flour topping. The natural sweetness of the berries goes well with the nutty, slightly caramelized crumble on top.
It's easy to make with just a few ingredients, making it a great option for busy days or last-minute gatherings. Baking the berries softens them just enough to release their juices, creating a warm, comforting treat that feels satisfying without being heavy.
The almond flour topping adds a lovely texture and flavor contrast and keeps this crisp gluten-free if you choose almond flour carefully. It's a recipe that balances fresh fruit and nutty crumbs in a way that's both delicious and straightforward.
Why This Recipe Works
This berry almond crisp is ideal when you want a quick, wholesome dessert that highlights fresh fruit with a crunchy topping. It offers a comforting, slightly toasted flavor with minimal steps and simple ingredients.
- Convenience - Requires just one dish and minimal prep, perfect for busy cooks.
- Flavor balance - Combines tart berries with a sweet, nutty topping.
- Texture - Soft baked fruit contrasts with crisp, crumbly almond topping.
- Appeal - Suitable for gluten-free diets and easy to portion.
- Serving ease - Can be served warm or at room temperature, no plating fuss.
Ingredient Swap Ideas
Swapping key ingredients can make this crisp adaptable to your pantry or dietary preferences without losing its essence. Changing the type of berries or nuts can offer new flavors easily.
- Use oats instead of almond flour for a more traditional crumble texture if you prefer.
- Swap mixed berries with stone fruits like peaches or plums for a summer variation.
- Replace brown sugar with coconut sugar for a less refined sweetener option.
- Try pecans or walnuts in place of almonds to vary the nutty flavor.
- Use a sugar substitute like maple syrup or honey to adjust sweetness naturally.
Ingredients
- 4 cups mixed berries - Fresh or frozen blueberries, raspberries, and blackberries.
- ½ cup almond flour - Blanched almond flour works best for a fine, crumbly topping.
- ¼ cup brown sugar - Light or dark, for sweetness and a caramelized finish.
- 3 tablespoons unsalted butter - Cold and cubed, to create the crumble texture.
- ½ teaspoon ground cinnamon - Adds warmth and depth to the topping.
- 1 tablespoon lemon juice - Brightens the berry filling and balances sweetness.
- 1 tablespoon cornstarch - Helps thicken the berry juices during baking.
- Pinch of salt - Enhances overall flavor.
Instructions
- Preheat your oven to 350°F (175°C). Lightly grease an 8-inch baking dish or similar sized ovenproof dish.
- In a bowl, gently toss the mixed berries with lemon juice, cornstarch, and a pinch of salt. Spread the berry mixture evenly into the prepared dish.
- In another bowl, combine almond flour, brown sugar, cinnamon, and cold butter cubes. Use your fingers or a pastry cutter to mix until the mixture forms coarse crumbs.
- Sprinkle the almond crumble evenly over the berries. Press lightly to help it adhere.
- Bake for 30 to 35 minutes, or until the topping is golden and the berry filling is bubbling around the edges.
- Remove from the oven and let cool slightly before serving. This crisp is delicious warm on its own or with a scoop of vanilla ice cream.
5. Mascarpone with Honey and Pistachios

This simple dessert combines the richness of mascarpone cheese with the natural sweetness of honey and the satisfying crunch of pistachios. It's a no-cook treat that you can whip up in just minutes, making it an ideal choice when you want something elegant but easy.
You'll appreciate the creamy texture of mascarpone that melts in your mouth, balanced by the floral notes of honey and the bright crunch from toasted pistachios. It's a great option to serve after dinner or as a light, indulgent snack that feels special but requires minimal preparation.
Why This Recipe Works
This recipe stands out for its combination of textures and straightforward preparation. Mascarpone with Honey and Pistachios offers a rich, creamy base with natural sweetness and a crunchy contrast, making it both flavorful and versatile.
- Convenience - No cooking involved; quick to assemble and serve.
- Flavor balance - Creamy mascarpone goes well with fragrant honey and nutty pistachios.
- Texture contrast - Smooth cheese and crunchy nuts create an enjoyable mouthfeel.
- Appeal - Elegant enough for guests yet simple enough for everyday enjoyment.
- Flexible serving - Easy to portion and adaptable as a standalone treat or topping.
Ingredient Swap Ideas
Swapping ingredients can help you adjust this recipe to suit personal preferences or dietary restrictions without losing its essence.
- Mascarpone cheese - Use ricotta or cream cheese for a lighter texture with a similar creamy taste.
- Honey - Replace with maple syrup or agave nectar to suit vegan diets or different flavors.
- Pistachios - Try toasted almonds, walnuts, or hazelnuts for a different nutty crunch.
- Add fruit - Incorporate fresh berries or sliced figs for added freshness and color.
- Herbs - A sprinkle of finely chopped mint or basil can offer a fresh twist.
Ingredients
- 1 cup mascarpone cheese - Rich, creamy Italian cheese for the base.
- 2 tablespoons honey - Use a fragrant variety such as wildflower or clover.
- ¼ cup shelled pistachios - Toasted and roughly chopped for crunch.
- Optional garnish - Fresh mint leaves or lemon zest for added brightness.
Instructions
- Place the mascarpone cheese in a small serving bowl or individual dessert dishes. Smooth the top with a spatula.
- Drizzle the honey evenly over the mascarpone, allowing it to pool slightly for balanced sweetness.
- Sprinkle the toasted pistachios on top, distributing them to cover the surface and add texture.
- If using, garnish with fresh mint leaves or a little lemon zest to enhance aroma and color.
- Serve immediately or chill for up to 1 hour before serving if you prefer it slightly firm.
- Enjoy this simple, elegant dessert on its own or alongside fresh fruit or crisp cookies.
6. No-Bake Coconut Lime Tart
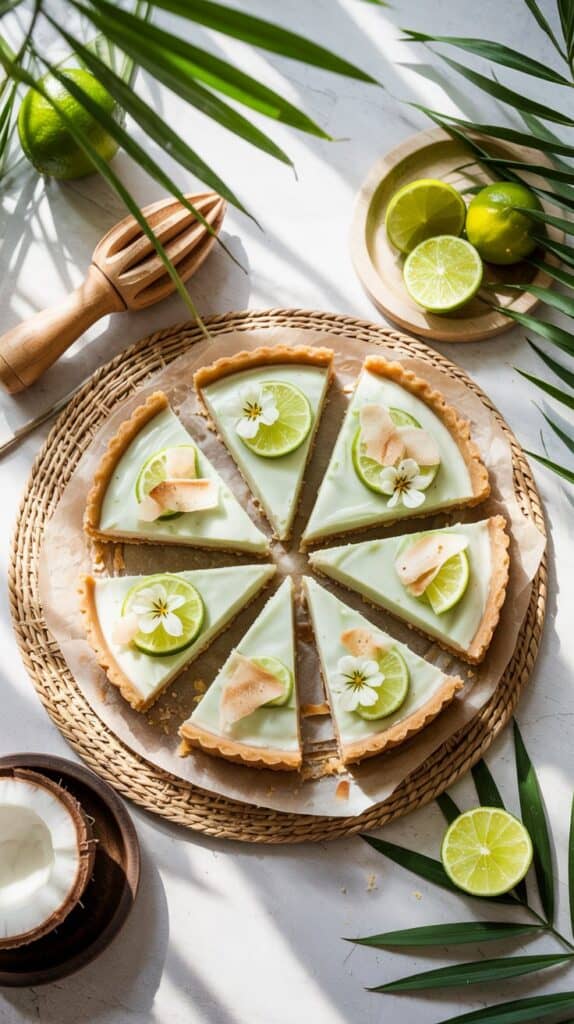
This no-bake coconut lime tart is a refreshing and bright dessert that's easy to make and full of bright flavors. The combination of a crumbly coconut crust with a creamy lime filling creates a balance of sweetness and tanginess that's perfect for any occasion.
The tart has a light texture, which makes it a great choice when you want a luscious treat without feeling too heavy. Plus, because it requires no baking, it comes together quickly and with minimal fuss.
The tropical notes from the coconut paired with the citrusy zing of lime make this dessert both inviting and satisfying. It's an ideal choice for warm days, casual gatherings, or simply whenever you want something fresh and indulgent.
Why This Recipe Works
This dessert checks all the boxes for a simple yet flavorful treat that suits many tastes and needs. It's a bright, creamy tart that you can prepare ahead of time and enjoy chilled.
- Convenience - No baking needed, saving time and effort in the kitchen.
- Flavor balance - Combines creamy sweetness with a fresh lime tang.
- Texture - Crunchy coconut crust contrasts the smooth, silky filling.
- Appeal - Suitable for family gatherings or casual entertaining.
- Make-ahead - Can be refrigerated for several hours or overnight, making it great for planning ahead.
Ingredient Swap Ideas
Adjusting ingredients can help tailor this tart to fit dietary needs or flavor preferences without losing its signature taste.
- Coconut crust - Replace shredded coconut with crushed graham crackers if you prefer a less tropical crust.
- Dairy filling - Use coconut cream instead of cream cheese for a dairy-free version.
- Sweetener - Substitute granulated sugar with honey or maple syrup for natural sweetness.
- Lime flavor - Swap lime juice and zest with lemon for a different citrus twist.
- Graham cracker crumbs - Swap with gluten-free cookies for a gluten-free crust option.
Ingredients
- 1 ½ cups shredded unsweetened coconut - Provides the base for the crumbly crust.
- ¼ cup coconut oil, melted - Helps bind the crust ingredients while improving coconut flavor.
- 2 tablespoons granulated sugar - Adds sweetness to the crust.
- 12 ounces cream cheese, softened - Forms the creamy filling foundation.
- ½ cup powdered sugar - Sweetens the filling for a smooth texture.
- ½ cup fresh lime juice - Gives the tart its bright citrus tang.
- 1 tablespoon lime zest - Adds extra aromatic citrus flavor to the filling.
- 1 cup heavy cream - Whipped to incorporate lightness into the filling.
- Toasted coconut flakes, for garnish - Adds crunch and visual appeal on top.
Instructions
- Combine shredded coconut, melted coconut oil, and granulated sugar in a medium bowl. Press this mixture firmly into the bottom of a 9-inch tart pan to form an even crust. Refrigerate for 15 to 20 minutes to set.
- In a large bowl, beat the softened cream cheese with powdered sugar until smooth and creamy. Add the lime juice and lime zest, mixing well to incorporate bright citrus flavor.
- In a separate bowl, whip the heavy cream until soft peaks form. Gently fold the whipped cream into the cream cheese mixture until fully combined and fluffy.
- Pour the creamy filling over the chilled coconut crust, smoothing the surface with a spatula. Refrigerate the tart for at least 4 hours, or overnight, until the filling is firm.
- Just before serving, sprinkle toasted coconut flakes evenly over the top of the tart for added texture and garnish.
- Slice and serve chilled to enjoy the fresh, creamy, and crunchy layers together.
This no-bake coconut lime tart is a straightforward way to create a fruity, satisfying dessert with minimal time and effort. The bright lime flavor and tropical coconut notes come through in every bite, making this dessert a refreshing finish for any meal.
7. Chocolate-Dipped Strawberries with Sea Salt
Chocolate-dipped strawberries with a sprinkle of flaky sea salt are a classic treat that combines simplicity with indulgence. The sweetness of ripe strawberries goes well with rich, smooth chocolate, while the sea salt adds a subtle touch that enhances the overall flavor.
This recipe is as straightforward as it sounds. It requires just a few ingredients and takes only minutes to prepare, making it a great choice for a last-minute dessert or an elegant snack.
Plus, the combination of textures-the juicy fruit, the crisp chocolate coating, and the delicate salt flakes-makes every bite interesting.
If you want a sweet treat that feels special but doesn't need lots of time or complicated steps, this recipe fits the bill perfectly.
Why This Recipe Works
This recipe delivers a simple yet impressive dessert that balances sweet, salty, and fresh flavors with minimal effort.
- Convenience - Requires only three basic ingredients and little prep time.
- Flavor balance - Combines the natural sweetness of strawberries with rich chocolate and a hint of sea salt.
- Texture - Juicy strawberries with a crisp chocolate shell and flaky salt add contrast.
- Appeal - Attractive for serving at gatherings or as a personal treat.
- Serving ease - Easy to portion and serve without mess or fuss.
Ingredient Swap Ideas
Swapping ingredients can help tailor this recipe to fit dietary needs or personal tastes while keeping the main concept intact.
- Dark chocolate - Use dairy-free or vegan chocolate to make this recipe suitable for lactose intolerance or plant-based diets.
- Strawberries - Substitute with other firm berries like raspberries or blackberries for a different flavor.
- Salt - Replace flaky sea salt with a pinch of chili powder for a spicy twist.
- Chocolate types - Swap traditional chocolate with white chocolate or milk chocolate depending on your preference.
Ingredients
- 1 pint fresh strawberries - Washed and dried thoroughly with stems intact.
- 6 ounces dark or semi-sweet chocolate - Chopped or in chip form for easy melting.
- Flaky sea salt - For sprinkling on top after dipping.
Instructions
- Line a baking sheet with parchment paper to place dipped strawberries on while they set.
- Melt the chocolate gently using a double boiler or microwave in short bursts, stirring often until smooth and fully melted.
- Hold each strawberry by the stem and dip it into the melted chocolate, coating about two-thirds of the strawberry. Let excess chocolate drip off before placing it on the parchment.
- Immediately sprinkle a small pinch of flaky sea salt over the chocolate-coated part while the chocolate is still soft.
- Allow the strawberries to sit at room temperature or refrigerate for about 15-20 minutes until the chocolate hardens completely.
- Serve chilled or at room temperature for a fresh, elegant treat.
8. Salted Caramel Sauce over Vanilla Ice Cream

Salted caramel sauce drizzled over vanilla ice cream transforms a simple dessert into something memorable. The rich, buttery caramel combines with a hint of salt to create a flavor that's both sweet and savory.
This sauce is smooth and glossy, making every scoop of ice cream more indulgent without much extra work.
Making the sauce at home means you control the sweetness and the saltiness, tailoring it just to your taste. It's a quick process, and the ingredients are simple enough to keep on hand, so you can add a touch of luxury to your desserts anytime.
Plus, it's a great way to impress friends or treat your family with minimal fuss.
Why This Recipe Works
This recipe brings a classic dessert sauce into your kitchen with straightforward steps and rich results. Making salted caramel at home delivers a fresh, bright flavor that store-bought options can't match.
- Convenience - Requires just a few ingredients that you probably already have, ready in under 15 minutes.
- Flavor balance - Combines buttery sweetness with a subtle saltiness for a well-rounded taste.
- Texture - Smooth and glossy sauce that coats your ice cream beautifully.
- Appeal - Simple yet elegant dessert upgrade appealing to all ages.
- Serving ease - Drizzle directly on ice cream without extra tools or plating.
Ingredient Swap Ideas
Adjusting the recipe can help suit dietary preferences or available ingredients while keeping that signature caramel taste. Here are some ideas to customize the sauce.
- Butter - Use unsalted butter to control the salt amount more precisely, or try a dairy-free butter substitute to make it vegan-friendly.
- Heavy cream - Replace with full-fat coconut milk for a dairy-free version that still offers creaminess.
- Salt - Use flaky sea salt on top as a garnish instead of mixing it in to enhance texture and visual appeal.
- Sugar - Swap granulated white sugar with light brown sugar for a deeper molasses flavor.
- Vanilla ice cream - Try serving over other ice cream flavors like chocolate or coffee for a different twist.
Ingredients
- 1 cup granulated sugar - The base for caramel, providing sweetness and color.
- 6 tablespoons unsalted butter - Adds richness and smooth texture to the sauce.
- ½ cup heavy cream - Creates a creamy, pourable consistency.
- 1 teaspoon sea salt - Enhances the sweetness with a subtle salty contrast.
- Vanilla ice cream - To serve with the salted caramel sauce.
Instructions
- Place the granulated sugar in a medium saucepan over medium heat. Stir constantly with a heatproof spatula or wooden spoon as the sugar melts and turns a deep amber color.
- Once the sugar is fully melted and evenly browned, carefully add the butter in small pieces. Stir quickly to combine-the mixture will bubble up.
- Slowly pour in the heavy cream while stirring. Continue cooking and stirring until the sauce is smooth.
- Remove the pan from heat and stir in the sea salt. Let the sauce cool slightly before drizzling.
- Scoop the vanilla ice cream into bowls or cones. Pour the warm salted caramel sauce over the ice cream just before serving.
- Store any leftover sauce in an airtight container in the refrigerator for up to two weeks. Reheat gently before using again.
9. Molten Chocolate Mug Cake

This molten chocolate mug cake is a quick way to enjoy a rich, indulgent dessert without the fuss. It has a warm, gooey center surrounded by a slightly firmer cake base, delivering that much-loved molten chocolate experience in just minutes.
Because it's made in a mug and cooked in the microwave, you can whip it up anytime you want a fast chocolate treat without needing to bake an entire cake. The texture is soft and tender, with deep chocolate flavor that feels satisfying but not overwhelming.
This recipe is ideal for solo servings or as a small sweet ending to your meal, combining convenience with deliciousness. You can easily customize it with mix-ins or toppings to suit your taste or occasion.
Why This Recipe Works
Molten chocolate mug cake offers a quick, portion-controlled dessert option with luscious chocolate flavor and minimal cleanup. It's a go-to choice for busy evenings or sudden chocolate cravings.
- Convenience - Ready in under 5 minutes using common pantry ingredients and a microwave.
- Rich Flavor - Deep chocolate notes come from cocoa powder and melted chocolate pieces.
- Texture - Gooey center contrasts perfectly with tender cake edges.
- Single-Serve - Made in a mug, ideal for individual portions without leftovers.
- Easy Cleanup - Just one mug and a spoon to wash afterward.
Ingredient Swap Ideas
Swapping ingredients here can help accommodate dietary preferences or add variety without losing the core molten cake experience. Adjust what you use to fit your needs without changing the texture and flavor too much.
- Cocoa powder - Use Dutch-processed cocoa for a smoother, less bitter taste or raw cacao powder for a more intense flavor.
- Butter - Replace with coconut oil for a dairy-free version that keeps moisture and richness.
- Sugar - Swap granulated sugar for coconut sugar or maple syrup to add subtle flavor notes and lower the glycemic impact.
- Flour - Use almond flour for a gluten-free adaptation, keeping in mind it may create a slightly denser cake.
- Milk - Substitute dairy milk with any plant-based milk like almond or oat milk for dairy-free needs.
Ingredients
- 4 tablespoons all-purpose flour - This provides structure for the cake.
- 4 tablespoons granulated sugar - Adds sweetness to balance the chocolate.
- 2 tablespoons unsweetened cocoa powder - Delivers rich chocolate flavor with slight bitterness.
- ¼ teaspoon baking powder - Helps the cake rise slightly for a light texture.
- 3 tablespoons milk - Moistens the batter and keeps it tender.
- 2 tablespoons unsalted butter, melted - Adds richness and soft crumb.
- ¼ teaspoon vanilla extract - Enhances the chocolate and adds depth.
- 2 tablespoons chocolate chips or chopped chocolate - For the molten core that melts during cooking.
Instructions
- In a microwave-safe mug, whisk together the flour, sugar, cocoa powder, and baking powder until evenly combined.
- Add the milk, melted butter, and vanilla extract to the dry ingredients. Stir thoroughly until you get a smooth batter with no lumps.
- Gently fold in the chocolate chips or chopped chocolate pieces, distributing them evenly through the batter.
- Microwave the mug on high for 60 to 70 seconds. The cake should be set around the edges but still soft in the center-avoid overcooking to keep the molten texture.
- Allow the cake to cool for 1 to 2 minutes, then dig in directly from the mug or serve with a scoop of vanilla ice cream or a dusting of powdered sugar.
10. Orange Almond Biscotti

Biscotti are a classic Italian treat, and this version flavored with bright orange zest and crunchy almonds offers a wonderful twist. These cookies have a firm, crisp texture perfect for dipping into coffee or tea, making them an inviting snack for any time of day.
The aroma of fresh orange combines beautifully with the nutty almonds, creating a balance of sweet and citrus notes. Plus, the recipe is straightforward to follow, giving you a batch of elegant cookies with a satisfying crunch.
Once baked, these biscotti keep well, making them an excellent choice for preparing ahead and sharing during gatherings or as a thoughtful homemade gift.
Why This Recipe Works
This biscotti recipe delivers a flavorful, simple cookie that's easy to prepare and store.
- Convenience - Mix the dough quickly and bake in two stages for a crisp finish.
- Flavor balance - The bright zing of orange zest goes with the toasted almonds nicely.
- Texture - Twice-baked for a firm, crunchy bite that holds up well to dipping.
- Appeal - Elegant enough for guests yet straightforward enough for everyday baking.
- Storage - Keeps fresh for weeks in an airtight container, making it easy to enjoy over time.
Ingredient Swap Ideas
Adjusting this recipe to suit preferences or dietary needs is simple and keeps the biscotti pleasant.
- Nuts - Replace almonds with walnuts, pecans, or hazelnuts to change the flavor.
- Citrus - Use lemon or grapefruit zest in place of orange zest for a different citrus note.
- Sweetener - Swap granulated sugar for coconut sugar or a sugar substitute to lower the glycemic impact.
- Gluten-free - Use a gluten-free flour blend to make gluten-free biscotti without losing texture.
- Dairy-free - Substitute butter with coconut oil or a vegan butter alternative to keep it dairy-free.
Ingredients
- 2 ¼ cups all-purpose flour, plus extra for dusting
- 1 teaspoon baking powder
- ¼ teaspoon salt
- ¾ cup granulated sugar
- Zest of 1 large orange, finely grated
- 3 large eggs
- 1 teaspoon pure vanilla extract
- 1 cup whole almonds, toasted and coarsely chopped
- 2 tablespoons unsalted butter, melted and slightly cooled
Instructions
- Preheat your oven to 350°F (175°C). Line a baking sheet with parchment paper or a silicone baking mat.
- In a medium bowl, whisk together the flour, baking powder, and salt. In a large bowl, combine the sugar and orange zest, then rub them together with your fingers until fragrant.
- Lightly beat the eggs with vanilla extract and melted butter. Add this mixture to the sugar and zest, stirring to combine. Gradually mix in the dry ingredients until a stiff dough forms. Fold in the toasted almonds.
- Divide the dough in half. Shape each half into a log approximately 12 inches long and 2 inches wide on the prepared baking sheet. Flatten the logs slightly.
- Bake for 25 to 30 minutes, until the logs are golden and firm to the touch. Remove from the oven and let them cool for about 10 minutes.
- Reduce the oven temperature to 325°F (160°C). Using a serrated knife, slice the logs diagonally into ½-inch thick slices. Arrange the slices cut side down on the baking sheet.
- Bake the slices for 10 minutes, then flip and bake for another 10 minutes, until the biscotti are crisp and lightly browned. Transfer to a wire rack to cool completely before storing or serving.
11. Vanilla Panna Cotta with Berry Sauce
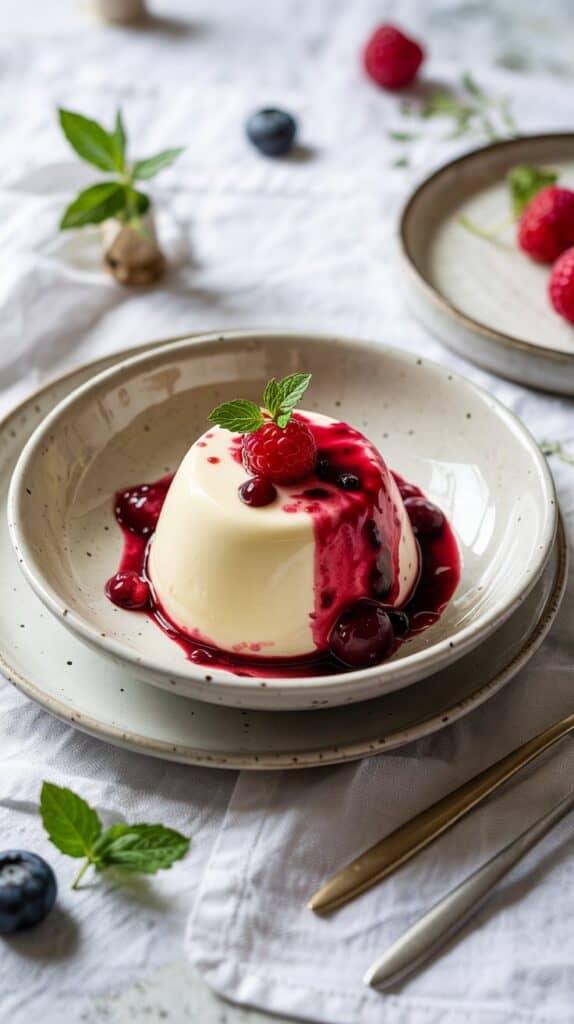
This vanilla panna cotta is a creamy, smooth dessert that feels elegant but is surprisingly easy to make. The gentle sweetness and delicate vanilla flavor combine beautifully with a bright berry sauce, making each bite refreshing and satisfying.
It requires just a few ingredients, and you'll appreciate how the gelatin sets the panna cotta into a silky texture that practically melts on your tongue. The berry sauce adds a fresh contrast, made quickly from mixed berries cooked down with a bit of sugar, bringing a tangy brightness to balance the rich cream.
This dessert works well after dinners, holiday meals, or anytime you want a simple treat that feels special. Because you prepare it ahead, it frees up time and keeps things low-key for your gathering or quiet night in.
Why This Recipe Works
This panna cotta offers a subtle, creamy dessert that pairs smoothly with fresh, tart berries for a balanced flavor. It's a straightforward recipe that fits into busy weeks yet still impresses with its look and taste.
- Convenience - Requires just a handful of ingredients and simple steps to prepare.
- Flavor balance - Creamy vanilla base complemented by bright, tangy berry sauce.
- Texture - Silky and tender panna cotta with a light, juicy fruit topping.
- Appeal - Suitable for both casual and formal occasions due to its clean presentation.
- Make-ahead - Can be prepared in advance, making it stress-free to serve later.
Ingredient Swap Ideas
Swapping a few ingredients lets you tailor this dessert to different diets or flavor preferences without losing its charm.
- Heavy cream - Replace with full-fat coconut milk to create a dairy-free panna cotta.
- Gelatin - Use agar-agar powder for a vegetarian or vegan-friendly alternative.
- Mixed berries - Swap for fresh peaches or mangoes to vary the fruit sauce flavor.
- Sugar - Substitute with honey or maple syrup for a natural sweetener.
- Vanilla bean - Use pure vanilla extract if you don't have a vanilla pod available.
Ingredients
- 2 cups heavy cream - Provides the rich and creamy base for the panna cotta.
- ½ cup whole milk - Lightens the cream slightly for a smoother texture.
- ½ cup granulated sugar - Sweetens the dessert without overpowering.
- 1 vanilla bean - Split and scraped for intense natural vanilla flavor.
- 2 teaspoons powdered gelatin - Sets the panna cotta into a firm but tender texture.
- 3 tablespoons cold water - Used to bloom the gelatin.
- 2 cups mixed berries - Fresh or frozen berries like strawberries, blueberries, and raspberries for the sauce.
- 2 tablespoons sugar - Sweetens the berry sauce.
- 1 tablespoon lemon juice - Adds brightness to the berry sauce.
Instructions
- Sprinkle the gelatin over cold water in a small bowl and let it sit for 5 minutes to soften.
- In a medium saucepan, combine the heavy cream, whole milk, and sugar. Split the vanilla bean lengthwise and scrape the seeds into the mixture, then add the pod as well. Heat over medium heat until it just starts to simmer, stirring occasionally to dissolve the sugar. Remove from heat.
- Remove the vanilla pod, then stir in the softened gelatin until fully dissolved. Let the mixture cool slightly, then pour it into serving glasses or molds. Refrigerate for at least 4 hours or until set.
- Meanwhile, prepare the berry sauce. In a small saucepan, combine the mixed berries, sugar, and lemon juice. Cook over medium heat until the berries break down and the sauce thickens slightly, about 10 minutes. Let it cool before serving.
- To serve, spoon the chilled berry sauce over the set panna cotta. You can garnish with extra fresh berries or mint if you like. Serve cold for a refreshing finish.
12. Salted Honey Ice Cream Sundae

This salted honey ice cream sundae brings together the smooth creaminess of honey-sweetened ice cream with the rich, buttery notes of salted caramel. It's a comforting treat that feels indulgent without being overly complicated.
The sprinkle of toasted nuts adds a satisfying crunch that contrasts beautifully with the creamy base.
Making this sundae requires just a few simple steps, making it an ideal dessert to enjoy after a busy day or to serve at a casual gathering. The flavors are balanced to offer sweetness with a subtle salty edge, keeping each bite interesting.
Why This Recipe Works
This sundae combines easy preparation with a blend of comforting flavors and textures that makes it a total crowd-pleaser. It balances sweetness and saltiness with a crunchy twist for added texture.
- Convenience - Uses readily available ingredients and assembles quickly without complex steps.
- Flavor balance - Honey sweetness goes well with salted caramel and a hint of salt.
- Texture - Creamy ice cream contrasts with crunchy toasted nuts for a layered mouthfeel.
- Appeal - Works well as a simple family dessert or an impressive finish for guests.
- Serving ease - No baking or cooking needed, so cleanup stays minimal and quick.
Ingredient Swap Ideas
Swapping ingredients can help customize this sundae for different dietary needs or flavor preferences. Small changes keep the sundae enjoyable while accommodating what you have on hand or what you like.
- Honey-sweetened ice cream - Swap with vanilla or caramel ice cream if honey flavor isn't preferred.
- Salted caramel drizzle - Use store-bought caramel sauce or drizzle with maple syrup for a different sweetness.
- Toasted nuts - Substitute walnuts or pecans with almonds, hazelnuts, or even granola for crunch.
- Dairy-free option - Choose a non-dairy honey-sweetened ice cream or frozen coconut milk-based ice cream.
- Extra flavor - Add a sprinkle of sea salt flakes on top for a stronger salty contrast.
Ingredients
- Honey-sweetened ice cream - About 4 scoops, slightly softened for easier serving.
- Salted caramel sauce - 3 to 4 tablespoons, warm or room temperature for drizzling.
- Mixed toasted nuts - ⅓ cup, chopped roughly for texture and flavor.
- Sea salt flakes - A pinch, to sprinkle over the sundae for extra seasoning.
Instructions
- Scoop the honey-sweetened ice cream into serving bowls or glasses. Arrange it neatly for an inviting presentation.
- Drizzle the salted caramel sauce evenly over the ice cream scoops. Use as much or as little as you prefer to control sweetness.
- Sprinkle the toasted mixed nuts generously over the caramel and ice cream to add crunch.
- Add a light pinch of sea salt flakes on top to improve the flavors and provide a subtle salty contrast.
- Serve immediately to enjoy the creamy, crunchy, and sweet-salty combination at its best.
13. Date and Walnut Energy Balls

These Date and Walnut Energy Balls offer a naturally sweet and satisfying snack that's easy to prepare and perfect for busy days. Combining the rich, caramel-like sweetness of dates with the crunch and earthiness of walnuts creates a great texture contrast.
We also add a touch of cocoa powder for a subtle chocolate note that makes these bites feel a little like dessert.
The simplicity of the ingredients means you can whip them up quickly, with no baking required. They're ideal for stashing in your bag to fuel afternoon slumps or to serve as a wholesome treat after school or work.
The hint of sea salt enhances the flavors without overpowering the natural sweetness.
Why This Recipe Works
This recipe is a simple, wholesome solution for a quick energy-boosting snack that everyone will enjoy. The combination of natural sweetness and crunchy texture delivers both satisfaction and nutrition.
- Convenience - No baking needed, and ready in under 20 minutes.
- Natural sweetness - Dates provide a healthy source of sugar that's not overwhelming.
- Texture contrast - Crunchy walnuts balance the chewy date base perfectly.
- Flavor depth - Cocoa and sea salt add complexity beyond just sweet.
- Portion control - Bite-sized balls make it easy to track servings.
Ingredient Swap Ideas
Swapping a few ingredients can help tailor these energy balls for dietary preferences or what you have in the pantry while keeping the essence intact.
- Walnuts - Replace with almonds, pecans, or cashews for a different crunch profile.
- Cocoa powder - Swap with carob powder or omit if you prefer a plain date and nut flavor.
- Dates - Use dried figs or prunes if you want a differently textured sweetness.
- Add-ins - Stir in chia seeds or flaxseeds for extra fiber and omega-3s.
- Sea salt - Use regular salt or omit if you want a milder taste.
Ingredients
- 1 cup pitted Medjool dates - Soft and naturally sweet, forming the base.
- 1 cup walnuts - Roughly chopped to add crunch and depth.
- 2 tablespoons unsweetened cocoa powder - Adds a rich chocolate note.
- ¼ teaspoon sea salt - Enhances all the flavors.
- 1 teaspoon vanilla extract (optional) - For a warm, aromatic touch.
Instructions
- Place the dates and walnuts in a food processor and pulse until they break down into small bits and start sticking together.
- Add the cocoa powder, sea salt, and vanilla extract if using. Pulse again until the mixture is well combined and holds together when pressed.
- Scoop out small portions of the mixture and roll them between your hands into bite-sized balls.
- Arrange the balls on a plate or tray lined with parchment paper. Refrigerate for at least 30 minutes to firm up.
- Store in an airtight container in the fridge for up to a week or freeze for longer storage.
These energy balls are ready to fuel you up whenever you need a quick, wholesome snack.
14. Ricotta with Honey and Fresh Figs

Ricotta with honey and fresh figs makes for a nice dessert that is both simple and refreshing. The creamy, mild flavor of the ricotta goes well with the natural sweetness of ripe figs.
Adding a drizzle of honey enhances the dish with a touch of floral sweetness that ties everything together.
This recipe doesn't require much preparation, which makes it easy to serve after a meal or whenever you want a light treat. The combination offers a lovely balance between creamy, juicy, and sweet, making it a crowd-pleaser that feels indulgent yet wholesome.
Why This Recipe Works
This dessert offers a quick way to enjoy seasonal figs with a creamy base, resulting in a satisfying Mediterranean-inspired flavor combination.
- Convenience - Requires no cooking and comes together in minutes.
- Flavor balance - Combines creamy ricotta with naturally sweet figs and honey for a balanced taste.
- Texture - Soft ricotta contrasts with the tender, slightly chewy figs.
- Appeal - Elegant enough for guests yet simple for everyday enjoyment.
- Health-conscious - Uses natural sweetness without added sugar, offering a lighter dessert option.
Ingredient Swap Ideas
Swapping ingredients can help you adjust the recipe for dietary preferences or to try different flavors without losing the essence of this dish.
- Ricotta Substitute - Use mascarpone or Greek yogurt for a creamier or tangier base.
- Honey Alternative - Try maple syrup or agave nectar for a vegan-friendly sweetener.
- Fresh Figs Option - Replace with ripe peaches or plums when figs are out of season.
- Add Nuts - Sprinkle toasted almonds or walnuts for added crunch and flavor.
- Herbs - A few fresh mint or basil leaves can be added for a refreshing twist.
Ingredients
- 1 cup ricotta cheese - Creamy, fresh ricotta for a soft base.
- 4 to 6 fresh figs - Rinsed and quartered, ripe but firm figs work best.
- 2 tablespoons honey - For drizzling, choose a mild-flavored honey.
- Optional fresh mint leaves - A few leaves for garnish and added aroma.
Instructions
- Spoon the ricotta cheese evenly into serving bowls or small plates.
- Arrange the quartered fresh figs on top of the ricotta.
- Drizzle honey over the figs and ricotta to add sweetness and shine.
- Garnish with fresh mint leaves if using, for a hint of herbal freshness.
- Serve immediately as a light dessert or a satisfying snack.
Not all spice blends are interchangeable; for recipes that call for aromatic mixes, explore Chinese five spice substitutes for balanced flavor. For make-ahead presentations and portable desserts, see elegant dessert jar recipes for entertaining.

Andrew Gray is a seasoned food writer and blogger with a wealth of experience in the restaurant and catering industries. With a passion for all things delicious, Andrew has honed his culinary expertise through his work as a personal chef and caterer.
His love for food led him to venture into food writing, where he has contributed to various online publications, sharing his knowledge and insights on the culinary world. As the proud owner of CooksCrafter.com, Andrew covers a wide range of topics, including recipes, restaurant reviews, product recommendations, and culinary tips.
Through his website, he aims to inspire and educate fellow food enthusiasts, offering a comprehensive resource for all things food-related.