Seafood dinners, featuring fish and shellfish like shrimp, salmon, and cod, are meals centered on fish and shellfish that can bring a touch of elegance to the table without requiring complicated steps or hard-to-find ingredients. This collection of 20 easy seafood recipes offers dishes that feel special enough for guests yet simple enough for a weeknight meal.
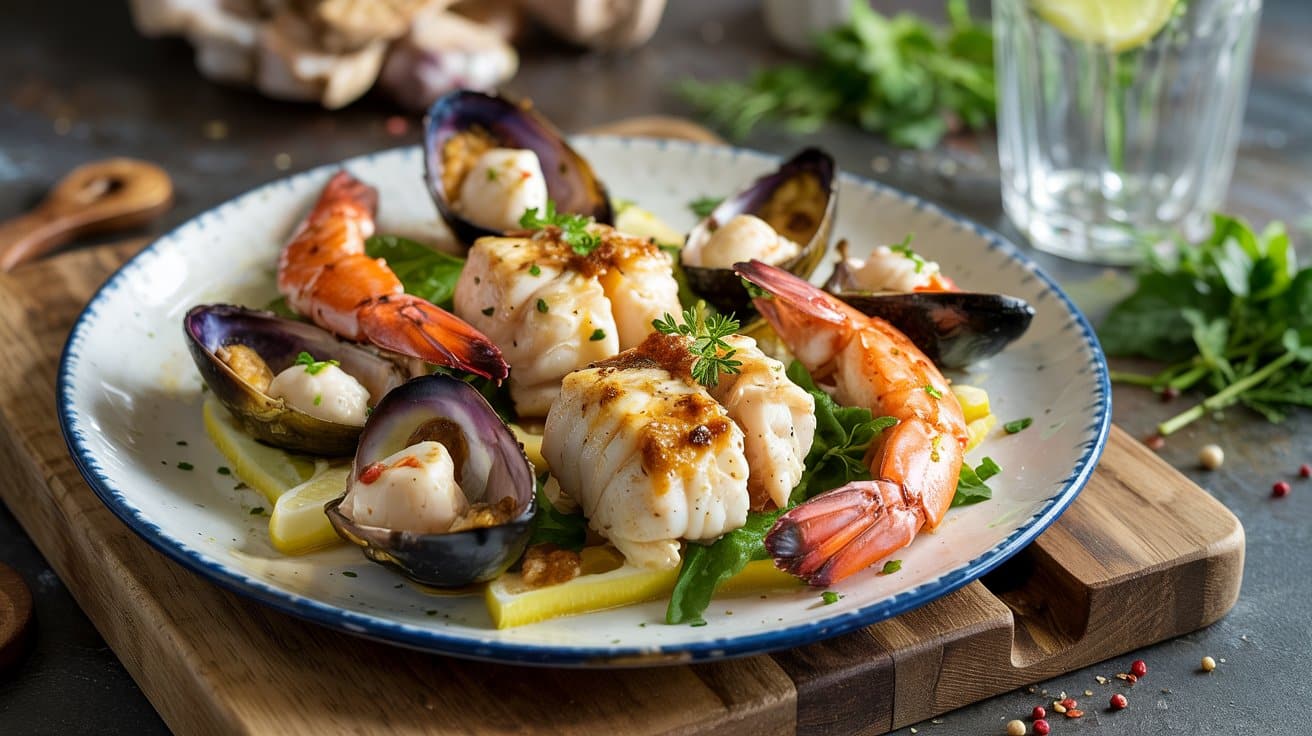
The selection features a variety of styles, including one-pan meals, quick skillet dishes, and light pasta bowls. Many recipes highlight fresh herbs, bright citrus flavors, and straightforward cooking techniques that improve the natural taste of shrimp, salmon, cod, and other popular seafood.
These dishes are designed to satisfy a range of appetites while keeping preparation manageable.
Together, these recipes offer a great balance of convenience and flavor with minimal cleanup. They suit busy cooks who want to enjoy wholesome, appealing meals that impress without adding stress to the evening.
1. Garlic Butter Shrimp Skillet
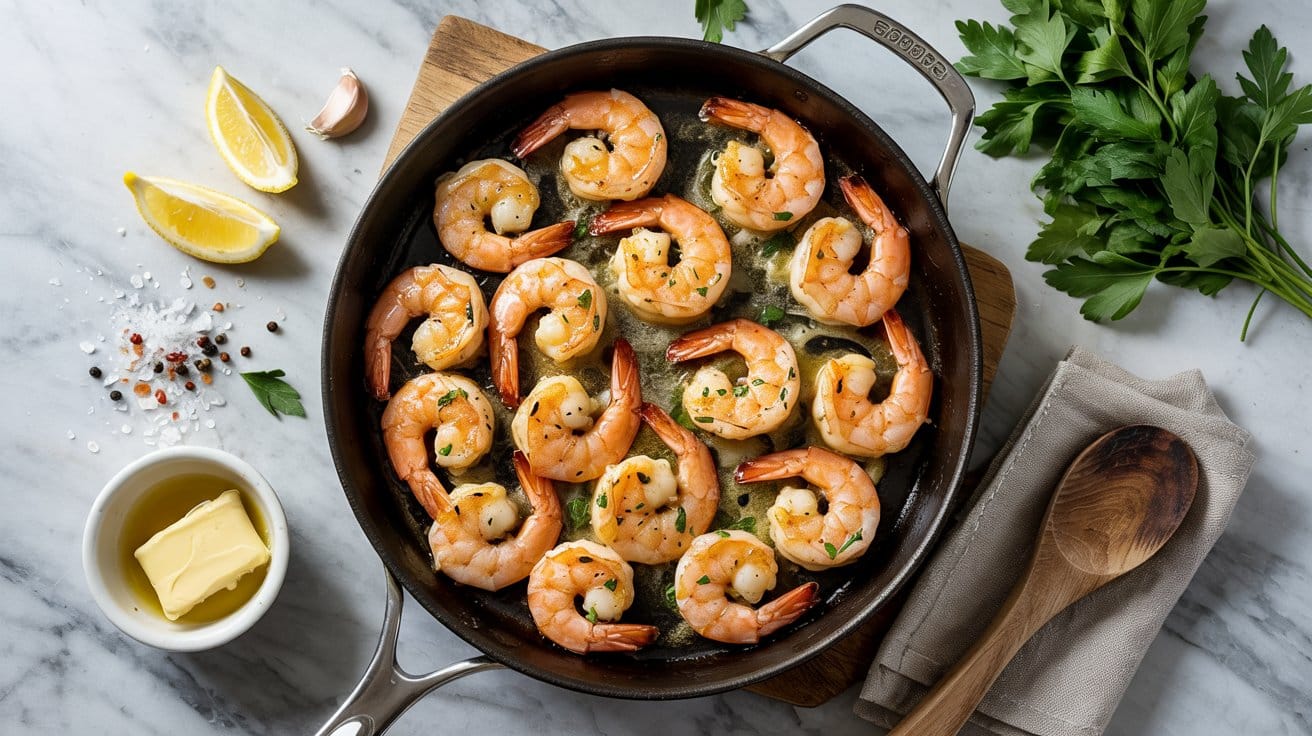
This garlic butter shrimp skillet is a straightforward dish that delivers bold flavors with minimal fuss, a classic weeknight seafood staple in home cooking. Tender shrimp cook quickly in a rich, buttery garlic sauce, accented by fresh parsley that adds a subtle hint of brightness, cooking about 2 minutes per side until opaque.
It's an ideal option for a weeknight dinner when you want something flavorful and satisfying without spending much time prepping; for easy pairings see garlic butter shrimp side dishes for weeknights, and for a warm, savory soup companion try creamy garlic soups for cozy dinners.
Why This Recipe Works
This recipe stands out for combining speed, richness, and simplicity all in one dish.
- Convenience - It comes together in around 15 minutes with just one skillet.
- Flavor balance - The garlic butter sauce adds a savory punch that goes with the mild shrimp perfectly, its browned-butter umami notes deepening the savory profile.
- Texture - Shrimp remain tender and juicy while the sauce is smooth and velvety.
- Appeal - It looks elegant enough for guests but cooks like a weeknight meal.
Ingredient Swap Ideas
Swapping ingredients can make this recipe fit your preferences or dietary needs without losing its essential appeal, or for a non-seafood alternative see rotisserie chicken weeknight dinner ideas.
- Shrimp - Use scallops or firm white fish fillets if you want a seafood variation, since scallops sear in about 2-3 minutes per side and match the shrimp's quick cooking time.
- Butter - Replace with olive oil or a plant-based spread to make it dairy-free.
- Fresh parsley - Try cilantro or basil for a different herbal note.
- Garlic - Garlic powder works if you don't have fresh on hand, adding a milder flavor.
Ingredients
- 1 pound large shrimp - peeled and deveined, tails removed for easier eating.
- 4 tablespoons unsalted butter - to create that rich, creamy base for the sauce.
- 4 cloves garlic - finely minced to release maximum flavor.
- ¼ cup fresh parsley - chopped, for brightness and color.
- ½ teaspoon salt - to season and enhance flavors.
- ¼ teaspoon black pepper - freshly ground for mild heat.
- 1 tablespoon lemon juice - adds a fresh, tangy finish.
Instructions
- Melt the butter in a large skillet over medium heat until it begins to foam. Add the minced garlic and cook for about 1 minute, stirring constantly to avoid burning.
- Place the shrimp in the skillet in a single layer and season with salt and pepper. Cook for 2 to 3 minutes on one side until pink and just opaque.
- Flip the shrimp and cook another 1 to 2 minutes until fully cooked through but still tender.
- Stir in the chopped parsley and lemon juice, tossing the shrimp gently to coat evenly in the sauce.
- Remove from heat and serve immediately, spooning extra garlic butter sauce over the shrimp.
2. Lemon Herb Roasted Salmon
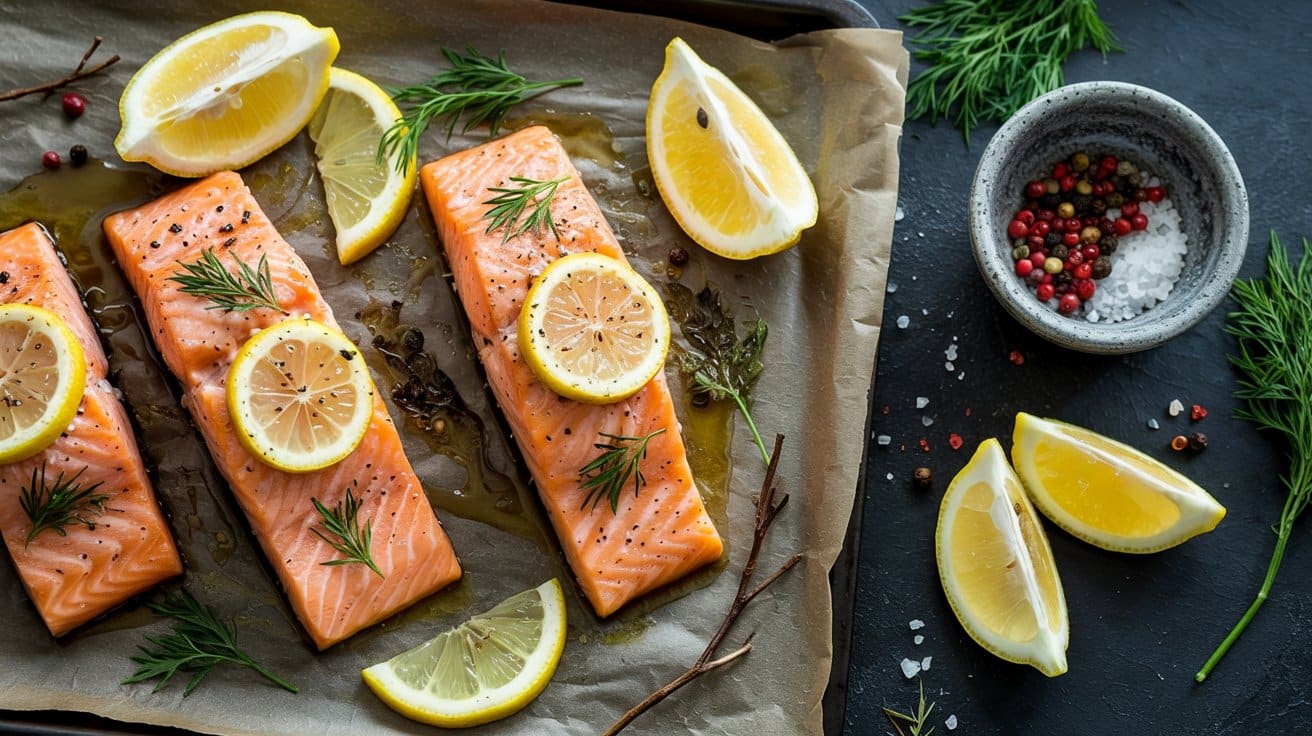
Roasting salmon in the oven with a lemon-herb crust creates a dish that's bright, fresh, and packed with flavor, and similar citrus notes appear in creamy lemon chicken soups for cozy meals.
This quick lemon herb salmon weeknight recipe keeps the preparation simple, which makes it suitable for busy weeknights or when you want a healthy, filling meal ready in under 30 minutes, roasting at 425°F for 10-12 minutes for a tender, slightly crisp finish.
Why This Recipe Works
This roasted salmon recipe combines approachable cooking with bright flavors and nourishing ingredients. It's a balanced dish that fits well into a wholesome lifestyle without requiring complicated steps.
- Convenience - Minimal prep with straightforward roasting in the oven.
- Flavor balance - Bright lemon zest brightens the herbs, complementing the rich salmon.
- Texture - Tender, flaky fish with a lightly crisp herb crust.
- Family-friendly - Simple flavors appeal to many and can be paired easily with sides.
Ingredient Swap Ideas
Adjusting the ingredients can help tailor this recipe for personal tastes or dietary preferences while keeping the main idea intact.
- Salmon substitute - Use trout fillets for a similar texture and flavor.
- Herbs variation - Replace fresh dill and parsley with fresh basil or cilantro if preferred.
- Citrus swap - Replace lemon with lime for a different but still zesty brightness.
- Oil choice - Use avocado or grapeseed oil instead of olive oil for a neutral flavor.
Ingredients
- 1 ½ pounds salmon fillets - skin on, pin bones removed for easy serving.
- 2 tablespoons olive oil - extra virgin to add a fruity finish.
- 1 lemon - zested and juiced for fresh citrus flavor.
- 2 cloves garlic - minced finely to blend with herbs.
- 2 tablespoons fresh parsley - chopped to add herbaceous brightness.
- 2 tablespoons fresh dill - chopped to go with the salmon's flavor.
- Salt - to taste, enhances all the other flavors.
- Black pepper - freshly ground for a gentle kick.
Instructions
- Preheat your oven to 400°F (200°C). Line a baking sheet with parchment paper or lightly oil a roasting pan.
- In a small bowl, combine olive oil, lemon zest, lemon juice, minced garlic, chopped parsley, dill, salt, and pepper. Stir well to create the herb mixture.
- Place the salmon fillets skin side down on the prepared baking sheet. Spoon the lemon-herb mixture evenly over the top of each fillet, pressing lightly to adhere.
- Roast in the oven for 12 to 15 minutes, depending on thickness, until the salmon flakes easily with a fork but remains moist inside.
- Remove the salmon from the oven and let it rest for a couple of minutes before serving. This gives the flavors time to settle and keeps the fish tender.
3. Sheet Pan Mediterranean Cod

This sheet pan Mediterranean cod recipe brings bright flavors to your dinner table with minimal fuss. The combination of olives, cherry tomatoes, and capers creates a tangy, savory sauce that goes with the flaky cod beautifully, a flavor profile typical of Mediterranean cuisine.
Cooking everything on a single pan makes preparation simple and cleanup quick-ideal for busy weeknights or when you want a wholesome meal without extra steps; try other sheet pan dinners for easy cleanup.
The fish stays tender and moist while the burst of roasted tomatoes and briny olives adds texture and bright notes. It pairs well with crusty bread or a side salad to round out a balanced, nourishing dinner the whole family can enjoy.
Why This Recipe Works
This dish delivers a delicious mix of Mediterranean-inspired flavors with straightforward preparation you will appreciate.
- Convenience - Uses one pan for easy prep and quick cooking, saving time and reducing cleanup.
- Flavor balance - Combines tangy capers and olives with sweet roasted tomatoes for a lively yet balanced taste.
- Texture - Roasting cod with fresh vegetables keeps the fish tender while adding a juicy, slightly crispy finish.
- Appeal - Light, healthy, and colorful, making it a great choice for family meals or casual entertaining.
Ingredient Swap Ideas
Swapping ingredients can tailor this recipe to your taste preferences or dietary needs without losing its Mediterranean flair.
- Cod - Replace with halibut, haddock, or other firm white fish if preferred.
- Olives - Use green olives or kalamata for different flavor nuances.
- Capers - Substitute with finely chopped green peppercorns for a milder tang.
- Cherry tomatoes - Swap with grape tomatoes or chopped sun-dried tomatoes to vary sweetness and texture.
Ingredients
- 1 pound cod fillets - Skin removed and cut into portions.
- 1 pint cherry tomatoes - Halved.
- ⅓ cup black olives - Pitted and halved, preferably Kalamata.
- 2 tablespoons capers - Drained.
- 3 tablespoons extra-virgin olive oil - Divided.
- 3 cloves garlic - Minced.
- 1 teaspoon dried oregano - Or use fresh if available.
- ½ teaspoon salt - Adjust to taste.
- ¼ teaspoon black pepper - Freshly ground.
- Juice of half a lemon - For brightness.
- Fresh parsley - Chopped, for garnish.
Instructions
- Preheat the oven to 400°F (200°C). Line a sheet pan with parchment paper or lightly grease it.
- In a bowl, toss cherry tomatoes, olives, capers, garlic, half of the olive oil, oregano, salt, and pepper until well combined. Spread the mixture evenly on the prepared sheet pan.
- Place cod fillets on top of the tomato mixture. Drizzle the remaining olive oil and lemon juice over the fish.
- Roast in the oven for 12 to 15 minutes, or until the cod is opaque and flakes easily with a fork, and the tomatoes are soft and slightly blistered.
- Remove from the oven and sprinkle chopped parsley over the dish before serving. Serve warm with bread or your choice of side.
4. Creamy Tuscan Garlic Salmon
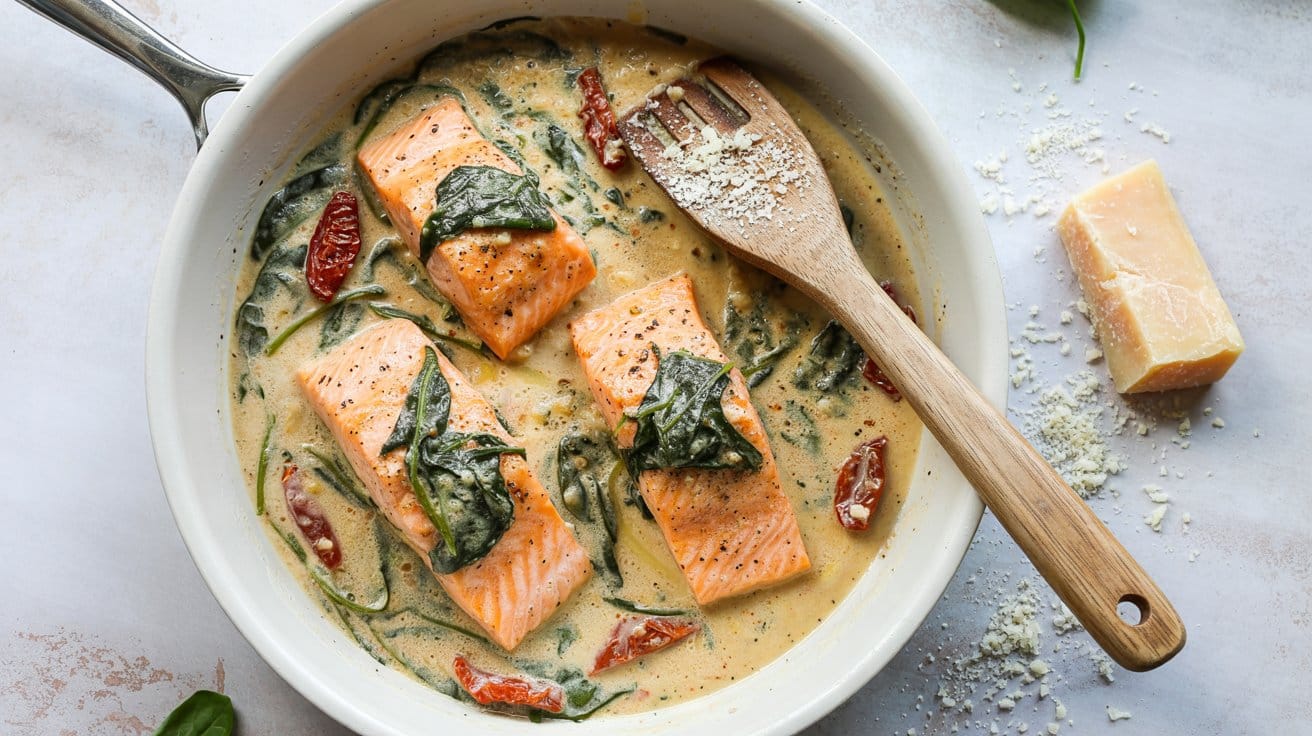
This dish brings together the rich flavors of salmon with a creamy, garlicky sauce that's brightened by sun-dried tomatoes and fresh spinach. It's a satisfying meal that feels special but is straightforward enough to prepare any night of the week.
You get a silky sauce that clings beautifully to the tender salmon, while the spinach adds freshness and a slight earthiness. It's a great way to get a wholesome dinner on the table without too many steps or complicated ingredients.
Why This Recipe Works
This recipe offers a flavorful, quick way to enjoy salmon with a sauce that complements rather than overwhelms. It balances ease and elegance to give you a dish that fits both busy evenings and more relaxed meals.
- Convenience - Salmon cooks quickly, and the creamy sauce comes together in the same pan.
- Flavor balance - The garlic and sun-dried tomatoes add a pleasant tang alongside the creamy sauce.
- Texture - The salmon stays tender and flaky while the sauce remains smooth with a slight bite from spinach.
- Appeal - It's approachable enough for weeknights but impressive enough to serve guests.
Ingredient Swap Ideas
Replacing some ingredients can help adjust this dish for different diets or preferences without changing its core character. These simple swaps keep the essence intact while broadening the recipe's reach.
- Heavy cream - Use canned coconut milk for a dairy-free version that remains creamy.
- Spinach - Kale or Swiss chard work well if you want a different leafy green with a sturdier texture.
- Sun-dried tomatoes - Substitute with roasted red peppers for a milder, sweeter touch.
- Salmon - Swap for cod or halibut for a firmer white fish that pairs nicely with this sauce.
Ingredients
- 4 salmon fillets - Skin on or off, about 6 ounces each.
- 2 tablespoons olive oil - For searing the salmon.
- 4 cloves garlic - Minced for rich, aromatic flavor.
- ⅓ cup sun-dried tomatoes - Chopped, preferably packed in oil for extra richness.
- 1 cup heavy cream - Creates the creamy base for the sauce.
- ½ cup chicken broth - Adds depth and thins the sauce slightly.
- 3 cups fresh baby spinach - Adds color and mild earthy notes.
- ½ cup grated Parmesan cheese - For savory, nutty flavor.
- Salt and black pepper - To taste for seasoning.
Instructions
- Heat olive oil in a large skillet over medium-high heat. Season salmon fillets with salt and pepper, then place them in the pan skin-side down if the skin is on. Cook for 4 to 5 minutes until crisp and golden, then flip and cook an additional 3 to 4 minutes until cooked through. Remove the salmon and set aside.
- Reduce the heat to medium and add minced garlic to the same pan. Sauté for about 1 minute until fragrant, being careful not to brown it.
- Stir in chopped sun-dried tomatoes, then pour in heavy cream and chicken broth. Bring the sauce to a gentle simmer, letting it thicken slightly, about 3 to 4 minutes.
- Add the fresh spinach and cook until wilted, about 2 minutes. Stir in Parmesan cheese until melted and smooth. Taste and adjust seasoning with salt and pepper.
- Return the salmon to the pan, spoon some sauce over the fillets, and warm through for a minute or two. Serve the salmon topped with the creamy spinach sauce immediately.
5. Cajun Blackened Tilapia
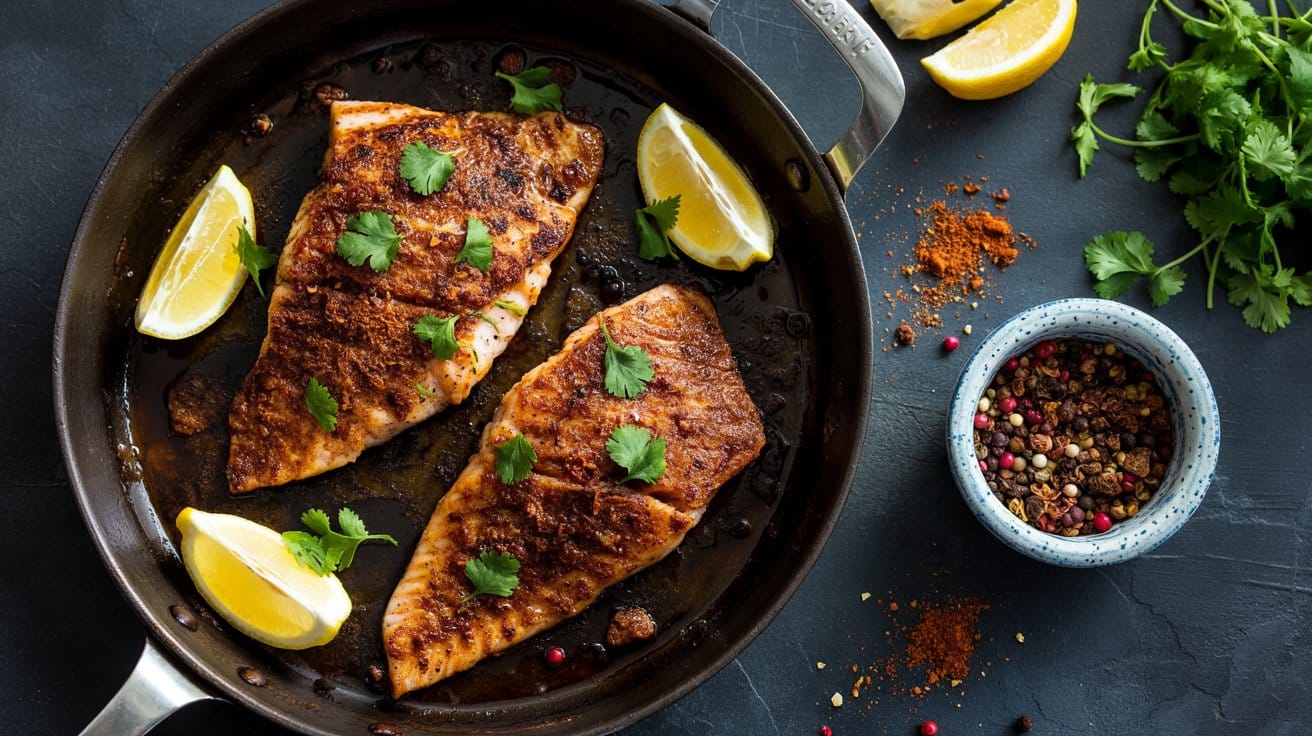
Cajun Blackened Tilapia brings bold, smoky spice to a mild, flaky white fish in a dish that comes together quickly. This pan-seared recipe delivers intense flavor with a crisp, charred crust while keeping the fish tender inside.
It's a great choice for an easy weeknight dinner or a casual gathering with friends, offering a satisfying kick without needing complicated ingredients or techniques.
With a few simple pantry spices and fresh tilapia fillets, you can prepare a dish that feels special yet remains approachable. The combination of paprika, cayenne, and herbs layers warm heat with aromatic notes, making every bite memorable.
Why This Recipe Works
This recipe stands out for its simplicity and striking flavor. It fits perfectly into busy schedules without sacrificing a punch of taste.
- Convenience - Quick to prepare and cook in a single skillet, minimizing cleanup.
- Flavor balance - Spicy, smoky seasoning complements mild fish without overwhelming it.
- Texture - Blackened crust provides a crisp outer layer that contrasts with the tender interior.
- Appeal - Works well as a main dish paired with various sides, suitable for casual or slightly fancier meals.
Ingredient Swap Ideas
Swapping out ingredients can help tailor this recipe to your preferences or dietary requirements while keeping its core essence intact.
- Fish choice - Substitute tilapia with catfish, snapper, or cod for a similar texture and flavor absorption.
- Spice level - Adjust cayenne pepper amount to reduce or increase heat according to your tolerance.
- Oil choice - Use avocado oil or light olive oil as alternatives to vegetable oil for cooking.
- Seasoning mix - Add smoked paprika for a deeper smoky flavor or omit black pepper for a milder taste.
Ingredients
- 4 tilapia fillets - Fresh or thawed, about 6 ounces each, patted dry.
- 2 teaspoons smoked paprika - Adds smoky depth and bright color.
- 1 teaspoon cayenne pepper - Provides heat; adjust to taste.
- 1 teaspoon garlic powder - Enhances savory notes.
- 1 teaspoon onion powder - Adds mild sweetness and complexity.
- ½ teaspoon dried thyme - Brings herbal nuance.
- ½ teaspoon dried oregano - Adds earthiness and balance.
- ½ teaspoon salt - Enhances all flavors.
- ¼ teaspoon black pepper - Provides subtle heat and spice.
- 2 tablespoons vegetable oil - For searing the fish.
- Lemon wedges - For serving, brings brightness.
Instructions
- In a small bowl, mix together smoked paprika, cayenne pepper, garlic powder, onion powder, thyme, oregano, salt, and black pepper until combined well.
- Pat the tilapia fillets dry with paper towels to ensure the seasoning sticks and the fish sears properly. Coat each fillet evenly on all sides with the seasoning mix, pressing lightly.
- Heat the vegetable oil in a large skillet over medium-high heat until shimmering but not smoking. Carefully add the fillets to the pan without crowding.
- Cook the tilapia for 3 to 4 minutes on the first side, allowing the blackened crust to form. Turn gently and cook for another 3 minutes until the fish flakes easily with a fork and the crust is nicely charred.
- Remove the fillets from the pan and serve immediately with lemon wedges to squeeze over the top for a fresh, tangy finish.
6. Honey Garlic Glazed Scallops
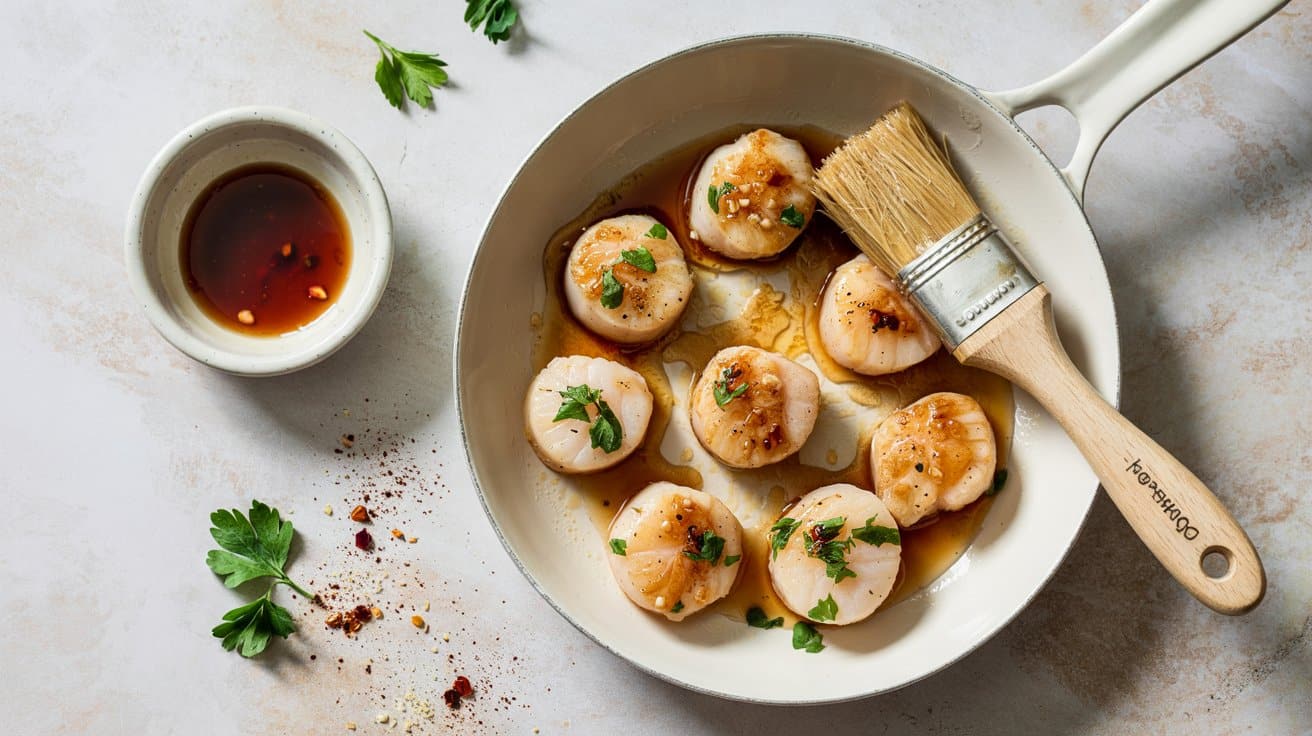
Scallops cook quickly and make for a satisfying meal with a touch of elegance. This recipe combines pan-seared scallops with a honey garlic glaze that is sticky, flavorful, and slightly sweet.
It's an easy dish that looks impressive on the plate but comes together fast, making it ideal for busy weeknights or a special occasion.
The scallops develop a golden crust when seared properly, which goes well with the rich, glossy sauce. The flavors balance well-the natural sweetness of the scallops enhanced by honey and contrasted by the garlic's warmth.
This dish works well served alongside simple steamed vegetables or over rice for a complete dinner.
Why This Recipe Works
This recipe stands out because it delivers a restaurant-quality dish with minimal fuss, combining bold flavors and swift cooking.
- Convenience - Uses pantry staples and cooks in under 15 minutes.
- Flavor balance - Sweet honey and pungent garlic create an appealing glaze.
- Texture - Scallops develop a tender, juicy interior with a caramelized crust.
- Appeal - Elegant presentation that works well for everyday meals or guests.
Ingredient Swap Ideas
Swapping ingredients can help customize this dish for dietary preferences or availability, without losing the core appeal.
- Honey - Substitute with maple syrup or agave nectar for a different natural sweetness.
- Garlic - Use garlic powder or shallots if fresh garlic is unavailable or to soften the flavor.
- Scallops - Try large shrimp or firm white fish fillets if scallops aren't on hand.
- Butter - Replace with olive oil or a plant-based butter for a dairy-free version.
Ingredients
- 1 pound sea scallops - patted dry to ensure a good sear.
- 2 tablespoons unsalted butter - for frying and adding richness to the sauce.
- 3 cloves garlic - minced, providing pungent flavor.
- 3 tablespoons honey - adds natural sweetness and a sticky glaze.
- 1 tablespoon soy sauce - enhances umami and balances sweetness.
- 1 tablespoon fresh lemon juice - brightens and lifts the glaze.
- Salt - to taste, seasoning the scallops.
- Black pepper - freshly ground, to taste.
- 1 tablespoon olive oil - helps achieve a golden sear without burning butter.
Instructions
- Heat olive oil and 1 tablespoon butter in a large skillet over medium-high heat until hot but not smoking. Season scallops on both sides with salt and pepper.
- Place scallops in the skillet, spacing them evenly. Sear for about 2 minutes per side without moving them, until a golden crust forms. Remove scallops from the pan and set aside.
- Lower the heat to medium, add minced garlic to the pan, and sauté until fragrant, about 30 seconds. Add honey, soy sauce, lemon juice, and remaining butter. Stir gently to combine and let the sauce thicken slightly, about 1-2 minutes.
- Return the scallops to the pan and toss in the glaze to coat evenly. Cook for an additional 1 minute to warm the scallops through and let flavors meld.
- Remove from heat and serve immediately, spooning extra glaze over the scallops. Pair with your choice of side for a quick, flavorful meal.
7. Shrimp and Asparagus Stir-Fry
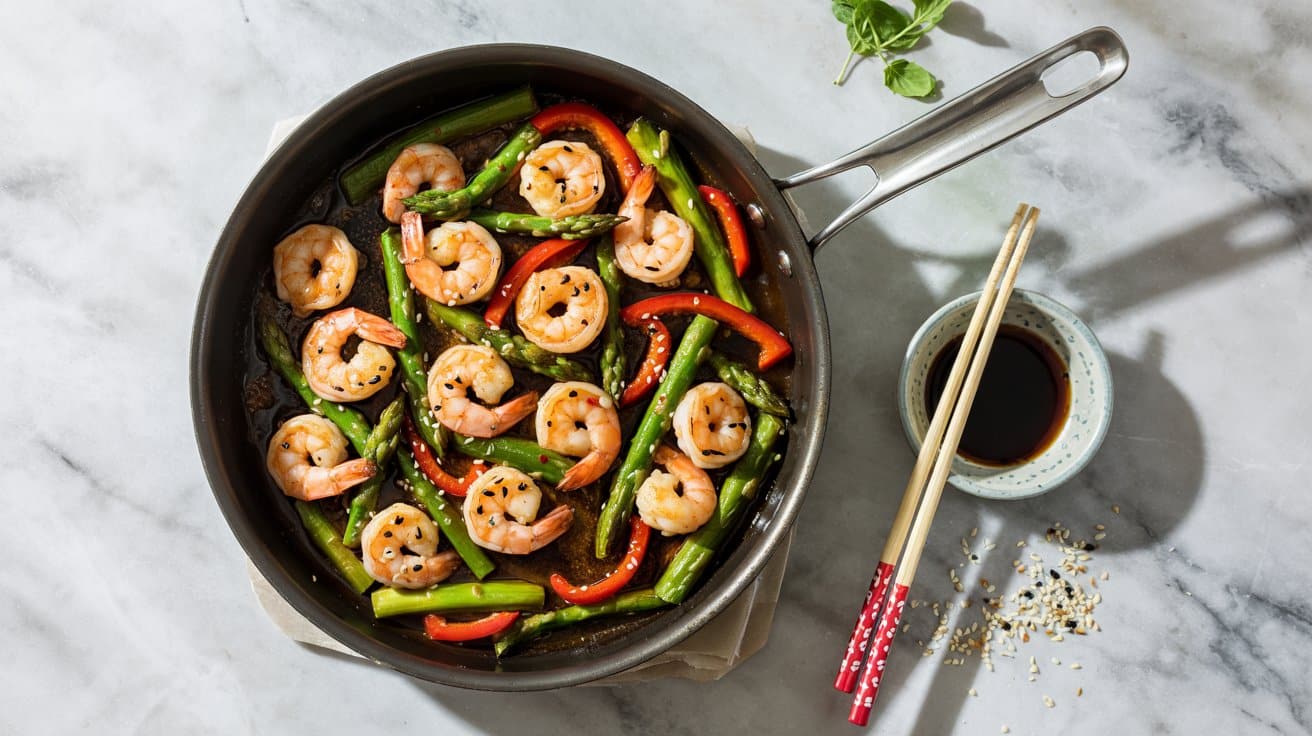
This shrimp and asparagus stir-fry brings together tender shrimp and crisp asparagus in a bright ginger-soy sauce that's both refreshing and satisfying. It's a quick dish to prepare, making it a great choice for busy weeknights when you want something flavorful without spending too much time cooking.
The combination of ginger and soy adds a lively, savory note that goes well with the natural sweetness of the shrimp. The asparagus keeps the dish light and adds a pleasant crunch, giving each bite a nice balance of textures.
Why This Recipe Works
This recipe comes together quickly and balances fresh, bright flavors with nutritious ingredients for a satisfying meal you can rely on.
- Convenience - Uses simple ingredients and cooks in about 20 minutes.
- Flavor balance - Bright ginger and soy sauce go with the sweetness of shrimp and freshness of asparagus.
- Texture - Tender shrimp and crisp asparagus provide a pleasing contrast.
- Healthy appeal - Low in carbs and packed with protein and vegetables.
Ingredient Swap Ideas
Adjusting ingredients can help tailor this dish to your preferences or dietary needs without losing the core flavors.
- Shrimp swap - Use scallops or firm white fish fillets if you prefer a different seafood option.
- Vegetable swap - Replace asparagus with broccoli, snap peas, or green beans for another crisp vegetable.
- Sauce variation - Use tamari or coconut aminos instead of soy sauce for a gluten-free version.
- Aromatic swap - Add fresh garlic or a pinch of chili flakes for an extra kick.
Ingredients
- 1 pound shrimp - peeled and deveined, tails removed for easier eating.
- 1 bunch asparagus - trimmed and cut into 2-inch pieces.
- 2 tablespoons vegetable oil - for stir-frying.
- 2 teaspoons fresh ginger - finely grated or minced for bright flavor.
- 2 cloves garlic - minced for aroma.
- 3 tablespoons soy sauce - adds savory depth (use low sodium if preferred).
- 1 tablespoon rice vinegar - adds a subtle tang.
- 1 teaspoon sugar - balances the acidity and saltiness.
- ¼ teaspoon black pepper - freshly ground for mild heat.
- ¼ cup water or broth - helps steam the asparagus and blend flavors.
Instructions
- Heat vegetable oil in a large skillet or wok over medium-high heat until shimmering. Add the shrimp and cook for 2 minutes on each side until pink and just cooked through. Remove shrimp from the pan and set aside.
- In the same pan, add the ginger and garlic. Stir-fry for about 30 seconds until fragrant but not browned.
- Add the asparagus pieces and stir-fry for 3 minutes until they turn bright green and begin to soften.
- Stir together soy sauce, rice vinegar, sugar, pepper, and water or broth. Pour this sauce over the asparagus, stirring to coat and cook for another 2 minutes until the asparagus is tender but still crisp.
- Return the cooked shrimp to the pan, toss everything together, and cook for an additional minute to heat through. Remove from heat and serve immediately.
8. Shrimp Scampi with Zucchini Noodles
This shrimp scampi recipe offers a fresh twist on a classic favorite by swapping traditional pasta with zucchini noodles. The combination of tender shrimp cooked in a garlicky, lemony butter sauce goes well with the light, crisp texture of zucchini ribbons.
It's a quick dish to prepare, making it great for busy weeknights or casual dinners. You'll enjoy the bright, savory flavors alongside a low-carb alternative that keeps the meal balanced without feeling heavy.
Why This Recipe Works
This shrimp scampi with zucchini noodles is flavorful and convenient, offering a delicious, lighter meal option that doesn't sacrifice on taste.
- Convenience - Quick to make with simple ingredients and minimal prep.
- Flavor balance - Bright citrus and garlic go with the natural sweetness of shrimp.
- Texture - Tender shrimp contrast nicely with crisp zucchini ribbons.
- Healthy alternative - Low-carb zucchini noodles replace pasta for a nutritious twist.
Ingredient Swap Ideas
Adjusting ingredients can help suit your dietary needs or introduce new flavors without losing the dish's core appeal. Here are a few ideas to try.
- Shrimp - Use scallops or chunks of firm white fish instead for variety.
- Zucchini noodles - Substitute with spaghetti squash or shirataki noodles for different textures.
- Butter - Replace with olive oil or avocado oil for a dairy-free version.
- Parmesan cheese - Omit or swap for nutritional yeast to keep it vegan-friendly.
Ingredients
- 1 pound large shrimp - peeled and deveined, tails removed for easy eating.
- 4 medium zucchini - spiraled or sliced into thin noodles.
- 3 tablespoons unsalted butter - for richness in the sauce.
- 3 cloves garlic - minced to infuse garlic flavor.
- ¼ teaspoon red pepper flakes - optional, for a gentle heat kick.
- ¼ cup dry white wine - adds acidity and depth; chicken broth can substitute.
- Juice of 1 lemon - brightens the sauce with freshness.
- ¼ cup chopped fresh parsley - for garnish and a fresh herbal note.
- Salt and black pepper - to taste, for seasoning.
Instructions
- Heat butter in a large skillet over medium heat until melted. Add minced garlic and red pepper flakes, cooking for about 1 minute until fragrant but not browned.
- Add the shrimp to the pan in a single layer. Cook for 2-3 minutes per side until shrimp turn pink and opaque. Remove shrimp from the skillet and set aside.
- Pour in white wine and lemon juice, scraping the bottom of the pan to loosen any browned bits. Let the sauce simmer for 2-3 minutes to reduce slightly.
- Toss the zucchini noodles into the skillet and cook for 2 minutes just to soften slightly while retaining crunch. Return shrimp to the pan and stir to coat everything in the sauce.
- Season with salt and black pepper to taste. Remove from heat and sprinkle with chopped parsley before serving immediately.
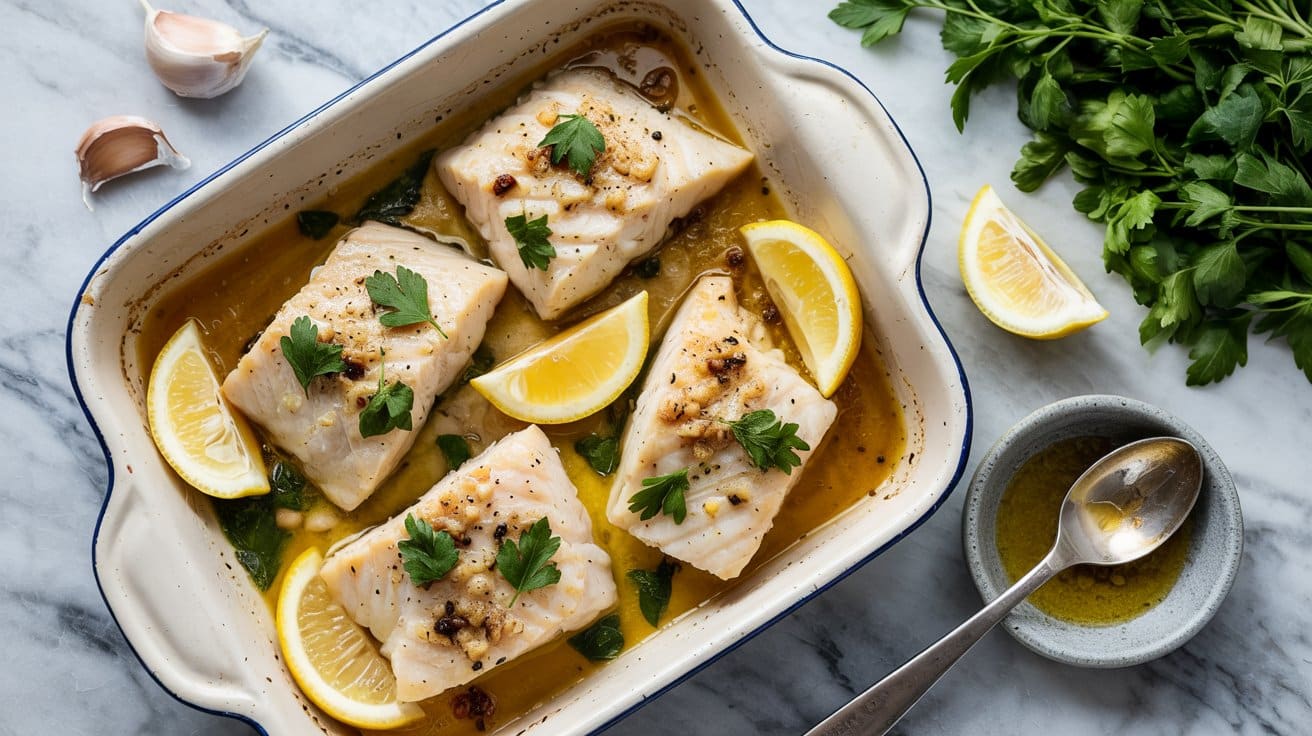
9. Baked Lemon Dill Cod
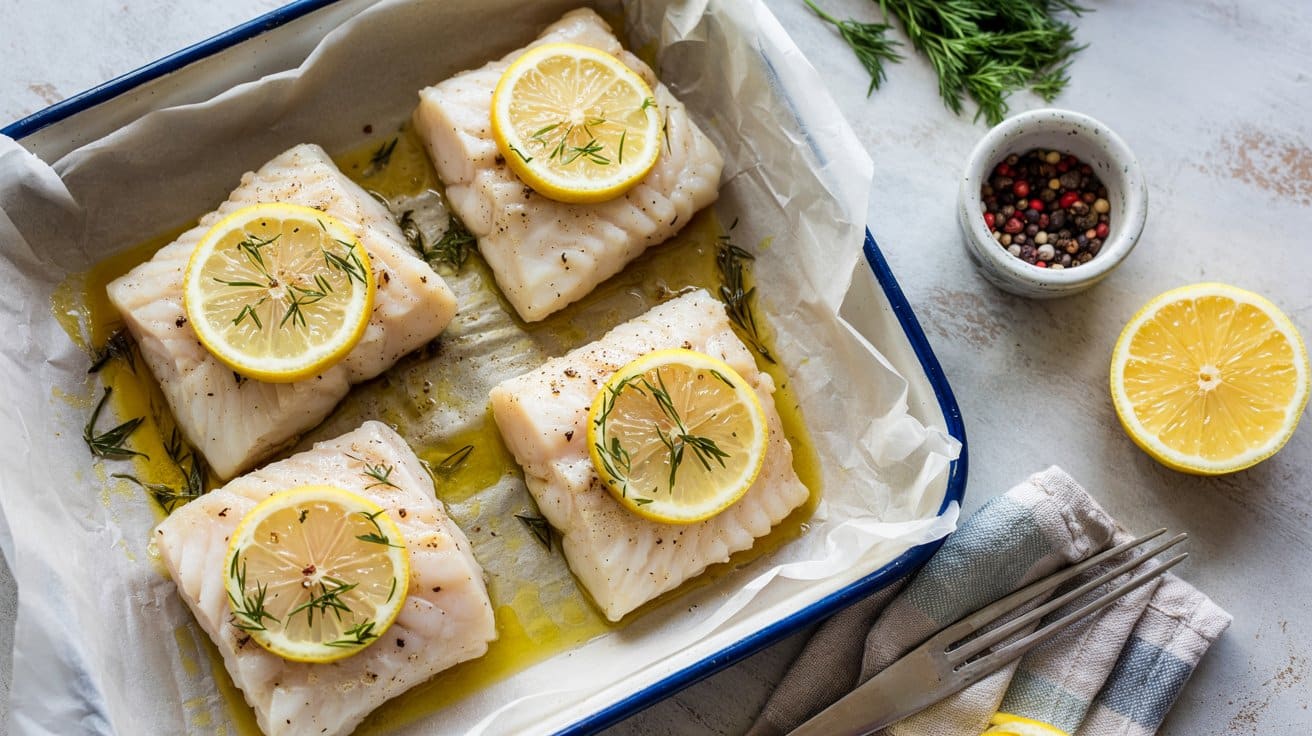
This baked lemon dill cod recipe brings a simple and fresh approach to seafood dinner. Delicate cod fillets bake gently with lemon slices and fresh dill, resulting in tender fish infused with bright citrus and herbal notes.
It's a straightforward dish that comes together quickly, making it an excellent choice for busy weeknights or a light weekend meal. The clean flavors keep the preparation fuss-free and satisfying without overpowering the natural texture of the cod.
Why This Recipe Works
This recipe shines for its ease, flavor clarity, and healthful appeal. It balances zesty lemon and aromatic dill with the mild sweetness of cod.
The simple method keeps cleanup minimal and the presentation appealing.
- Convenience - Minimal prep and hands-off baking make it ideal for a quick dinner.
- Flavor balance - Bright lemon and fresh dill contrast softly with mild cod.
- Texture - The fish stays tender and flaky without drying out.
- Appeal - Light and wholesome, suitable for family meals or entertaining guests.
Ingredient Swap Ideas
Adjusting ingredients can customize the dish to fit dietary needs or personal preferences without losing its fresh profile. Here are some straightforward swaps to try.
- Cod - Swap with haddock, tilapia, or halibut for a similar texture and flavor.
- Fresh dill - Use fresh parsley or tarragon if dill is unavailable or to change the herb flavor.
- Lemon - Replace lemon slices with lime for a slightly different citrus tang.
- Butter - Use olive oil to keep the recipe dairy-free while maintaining moisture.
Ingredients
- 1.5 pounds cod fillets - Skinless, trimmed, and patted dry for even cooking.
- 1 lemon - Thinly sliced for layering atop the fish.
- 2 tablespoons fresh dill - Chopped finely to release aroma and flavor.
- 2 tablespoons unsalted butter - Melted, for drizzling on the fish.
- Salt - To taste, enhances natural fish flavor.
- Black pepper - Freshly ground, to taste.
- 1 tablespoon olive oil - Optional, to coat the baking dish or drizzle for extra moisture.
Instructions
- Preheat your oven to 400°F (200°C). Lightly grease a baking dish with olive oil or nonstick spray.
- Place the cod fillets in the dish in a single layer, then season both sides with salt and pepper.
- Drizzle melted butter evenly over each fillet. Lay lemon slices on top of the fish, then sprinkle chopped dill over everything.
- Bake uncovered for 12 to 15 minutes, or until the fish flakes easily with a fork and the edges turn opaque.
- Remove from the oven and let the cod rest for a couple of minutes before serving. Spoon some of the pan juices over the fillets for extra flavor.
10. Seafood Pasta Primavera
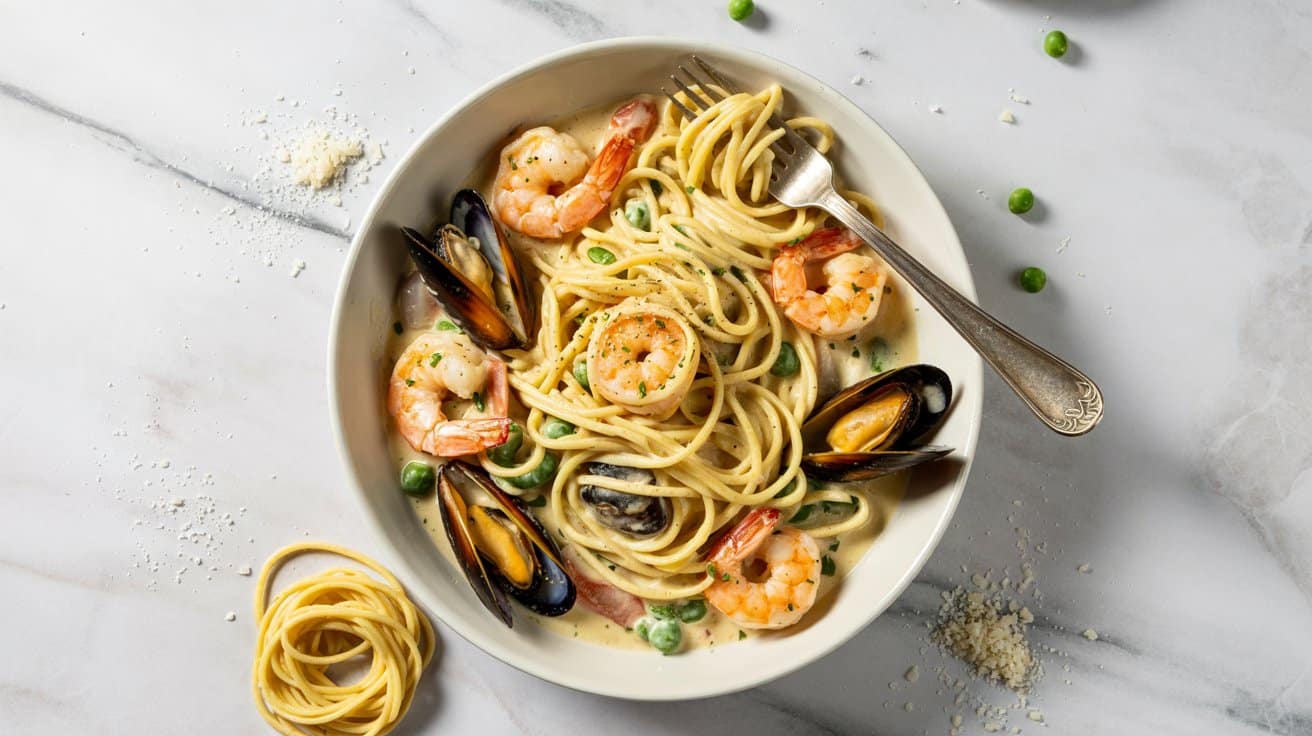
This Seafood Pasta Primavera brings together tender shrimp and scallops with fresh spring vegetables for a dish that's bright and satisfying. The light white wine sauce adds a subtle depth without weighing down the delicate seafood and crisp vegetables.
It's a straightforward recipe that feels special enough for a weekend meal yet simple enough to prepare on a busy weeknight. The combination of flavors and textures keeps every bite interesting and fresh.
Why This Recipe Works
This recipe offers a balanced mix of fresh vegetables and seafood in a light sauce, making it both flavorful and approachable.
- Convenience - Quick cooking seafood and pasta come together in under 30 minutes.
- Flavor balance - Bright vegetables, tender seafood, and a delicate white wine sauce complement each other well.
- Texture - The mix of soft pasta, crisp vegetables, and juicy scallops and shrimp creates a pleasing contrast.
- Appeal - Elegant enough for guests but easy to prepare for family meals.
Ingredient Swap Ideas
Swapping a few ingredients can help tailor the dish to different dietary needs or preferences without losing its fresh and bright character.
- Seafood options - Replace shrimp and scallops with firm fish like cod or halibut if preferred.
- Pasta choice - Use gluten-free linguine or another preferred pasta shape to suit dietary restrictions.
- Vegetables - Substitute spring vegetables with zucchini, bell peppers, or asparagus based on availability.
- Wine substitute - Use vegetable broth with a splash of lemon juice instead of white wine for a non-alcoholic alternative.
Ingredients
- 8 ounces linguine - uncooked pasta, preferably linguine for its flat shape.
- 8 ounces large shrimp - peeled and deveined, tails removed.
- 8 ounces sea scallops - patted dry.
- 1 cup asparagus - trimmed and cut into 1-inch pieces.
- 1 cup sugar snap peas - trimmed.
- 1 cup cherry tomatoes - halved.
- 3 cloves garlic - minced.
- ½ cup dry white wine - such as Pinot Grigio or Sauvignon Blanc.
- 2 tablespoons olive oil - divided, for cooking.
- 1 tablespoon unsalted butter - adds richness to sauce.
- Salt and freshly ground black pepper - to taste.
- ¼ cup fresh parsley - chopped, for garnish.
- Zest of 1 lemon - adds brightness to finish.
Instructions
- Cook linguine according to package instructions until al dente. Reserve ½ cup pasta water, then drain and set aside.
- Heat 1 tablespoon olive oil in a large skillet over medium-high heat. Add shrimp and scallops, seasoning with salt and pepper. Cook about 2 minutes per side until opaque and lightly golden. Remove from skillet and set aside.
- In the same skillet, add remaining olive oil and butter. Sauté garlic for about 30 seconds until fragrant. Add asparagus and sugar snap peas, cooking 3 to 4 minutes until crisp-tender. Toss in cherry tomatoes and cook another minute.
- Pour in white wine, scraping up any browned bits from the pan. Let it reduce slightly for 2 to 3 minutes. Add cooked linguine and seafood back to the skillet. Toss gently to combine, adding reserved pasta water a little at a time to loosen the sauce if necessary.
- Stir in lemon zest and adjust seasoning with salt and pepper. Remove from heat and sprinkle chopped parsley over the top before serving.
11. Spicy Tuna Poke Bowls

Spicy Tuna Poke Bowls bring together fresh, bright flavors in a dish that's both satisfying and light. The combination of diced raw tuna with creamy avocado, crunchy cucumber, and a zingy poke sauce creates a harmony of textures and tastes.
This bowl is quick to assemble and perfect for a nutritious lunch or dinner that feels a little special without requiring too much time.
The spicy kick from the sauce balances perfectly with the richness of the fish and the freshness of the veggies. It's a balanced meal you can customize easily, making it a great option for anyone who enjoys fresh seafood with a flavorful twist.
Why This Recipe Works
This recipe stands out because it's quick to put together, full of fresh flavors, and offers a satisfying balance of textures. It's an accessible way to create a restaurant-quality poke bowl at home without complicated steps.
- Convenience - Ready in under 20 minutes with no cooking involved.
- Flavor balance - Spicy, savory sauce goes with the creamy avocado and fresh tuna.
- Texture - Contrasting tender fish, crisp cucumber, and soft rice create a pleasing mouthfeel.
- Customizable - Easily adapted with different toppings or protein options.
Ingredient Swap Ideas
Changing up ingredients can help suit this poke bowl to different dietary preferences or simply mix up the flavors. Small adjustments keep the essence of the dish intact while making it your own.
- Tuna - Substitute with cooked shrimp, salmon, or tofu for a different protein source.
- Poke sauce - Use a spicy mayo or a citrus-soy dressing to vary the sauce flavor.
- Vegetables - Swap cucumber for radish, edamame, or shredded carrots to change the crunch and color.
- Base - Use cauliflower rice or mixed greens instead of white rice for a lower-carb option.
Ingredients
- 8 ounces sushi-grade fresh tuna - cut into small cubes for poke.
- 2 cups cooked white sushi rice - cooled to room temperature.
- ½ cup cucumber - peeled and diced for crunch.
- 1 small avocado - diced for creaminess.
- 2 tablespoons soy sauce - provides the salty umami base for the poke sauce.
- 1 tablespoon sesame oil - adds to the rich flavor of the sauce.
- 1 teaspoon sriracha sauce - for the spicy kick in the poke sauce.
- 1 teaspoon honey - balances the heat with a bit of sweetness.
- 1 tablespoon toasted sesame seeds - for garnish and texture.
- 2 green onions - thinly sliced, adds freshness and mild sharpness.
- Optional: pickled ginger or seaweed salad for topping.
Instructions
- In a medium bowl, whisk together soy sauce, sesame oil, sriracha, and honey until well combined to make the poke sauce.
- Add the cubed tuna to the sauce and gently toss until the fish is evenly coated. Let it marinate for 5 to 10 minutes.
- Divide the cooked sushi rice between two bowls. Arrange the diced cucumber, avocado, and marinated tuna on top of the rice.
- Sprinkle green onions and toasted sesame seeds evenly over the bowls. Add pickled ginger or seaweed salad if using.
- Serve immediately, allowing the fresh ingredients and spicy sauce to shine.
12. Miso Glazed Salmon
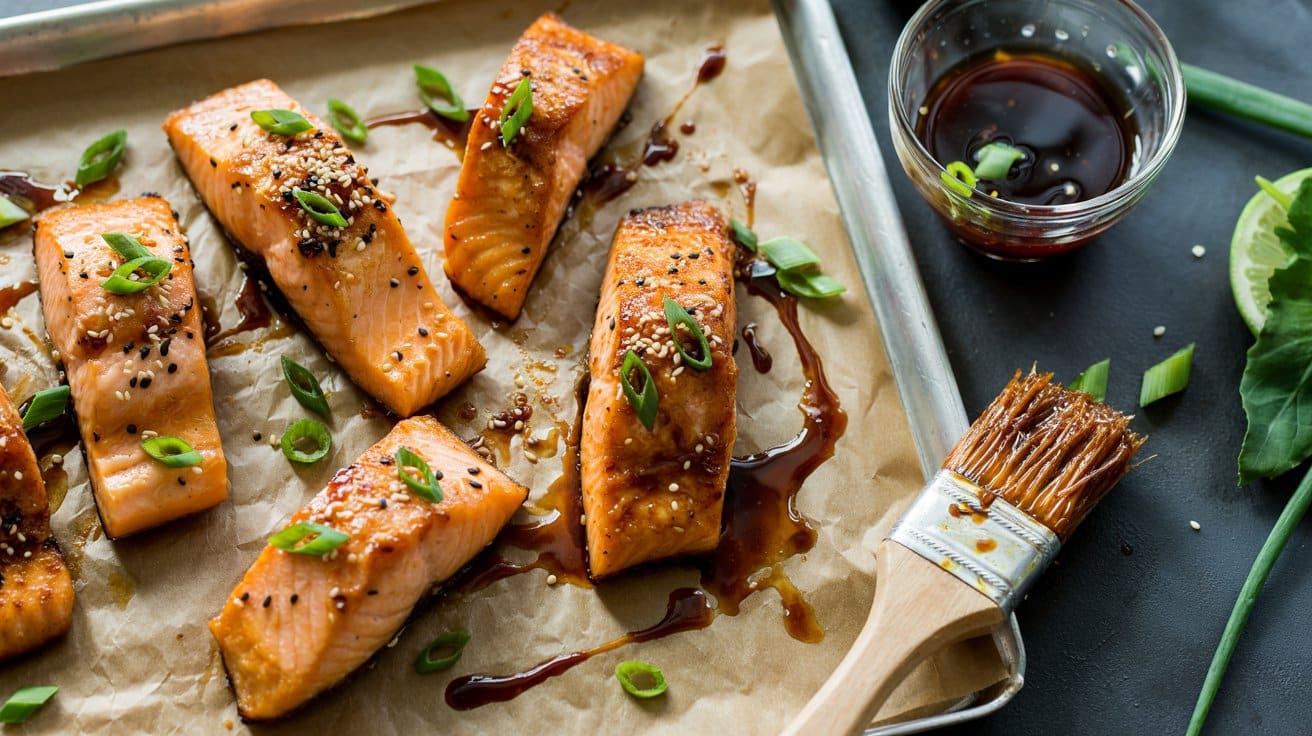
This Miso Glazed Salmon combines a sweet and savory miso glaze with tender, flaky salmon for an Asian-inspired dish that feels special without much fuss. The glaze caramelizes slightly under the broiler, adding a nice depth of flavor and a beautiful golden finish.
It's a simple yet elegant way to enjoy salmon, offering rich umami notes with a subtle sweetness and a hint of warmth from the miso. This recipe comes together quickly, making it perfect for weeknight dinners or casual entertaining.
Why This Recipe Works
This recipe offers a tasty and straightforward way to prepare salmon with an exciting glaze that enhances natural flavors.
- Convenience - Minimal prep and quick broiling make this an easy main dish for busy evenings.
- Flavor balance - The miso adds umami and sweetness while balancing the richness of the salmon.
- Texture - The glaze forms a slightly caramelized crust while keeping the fish moist and tender inside.
- Appeal - Elegant enough for guests but simple enough for everyday meals.
Ingredient Swap Ideas
Swapping ingredients in this recipe can help accommodate different diets or simply add variety without losing the core flavors.
- Miso paste - Use white miso for a milder flavor or red miso for a deeper, earthier taste.
- Salmon - Swap with trout or cod fillets for a different texture and flavor.
- Sweetener - Substitute honey with maple syrup or brown sugar depending on your preference or dietary needs.
- Soy sauce - Choose tamari for a gluten-free alternative while keeping the umami punch.
Ingredients
- 4 salmon fillets - Skin-on, about 6 ounces each.
- 3 tablespoons miso paste - White or yellow miso works best for a balanced glaze.
- 2 tablespoons mirin - A sweet Japanese rice wine that adds depth.
- 1 tablespoon soy sauce - Regular or low sodium for taste and saltiness.
- 1 tablespoon honey - Provides natural sweetness to balance the miso's saltiness.
- 1 teaspoon grated fresh ginger - Adds subtle warmth and spice.
- 1 teaspoon sesame oil - For a nutty aroma and richness.
Instructions
- Preheat your broiler to high and line a baking sheet with foil or parchment for easy cleanup.
- In a small bowl, whisk together the miso paste, mirin, soy sauce, honey, grated ginger, and sesame oil until smooth and well combined.
- Pat the salmon fillets dry with a paper towel, then place them skin-side down on the prepared baking sheet.
- Spread a generous layer of the miso glaze over the top of each fillet, covering the flesh evenly.
- Broil the salmon about 6 inches from the heat for 6 to 8 minutes, or until the glaze is bubbling and caramelized, and the salmon flakes easily with a fork. Keep a close eye to prevent burning.
- Remove from the oven and let the salmon rest for a couple of minutes before serving.
13. Crispy Air Fryer Shrimp
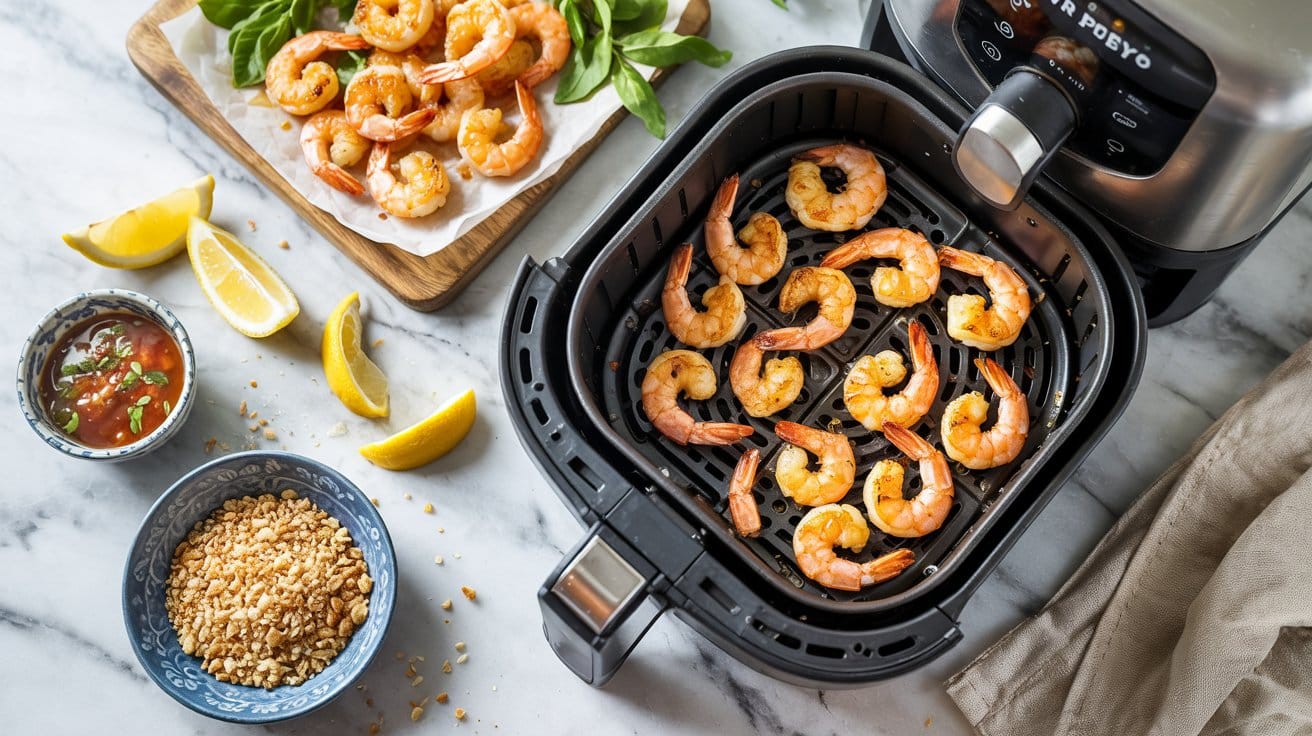
This Crispy Air Fryer Shrimp recipe is the kind of quick, tasty dish you can whip up any night of the week. The shrimp turn out beautifully crisp on the outside and tender inside, without deep frying or standing over the stove.
Served with a fresh, zingy lemon aioli, this shrimp dish brings a touch of elegance without extra fuss. It's great as a main course alongside a simple salad or as a crowd-pleasing appetizer for gatherings.
Why This Recipe Works
This recipe offers a fast and flavorful way to enjoy shrimp with an added crunch, thanks to the air fryer. The lemon aioli adds a creamy, zesty contrast that brightens the dish.
- Convenience - Uses the air fryer for quick cooking and easy cleanup.
- Texture - Delivers a satisfyingly crisp exterior that is hard to get without frying in oil.
- Flavor balance - Combines savory, lightly spiced shrimp with fresh lemon and garlic notes in the aioli.
- Appeal - Easy enough for weeknight dinners but elegant enough for guests or special occasions.
Ingredient Swap Ideas
Swapping ingredients can help adapt this recipe to your preferences or dietary needs without losing its core appeal. These options keep the texture crisp and flavors balanced.
- Panko breadcrumbs - Use gluten-free breadcrumbs or crushed cornflakes for a gluten-free version with similar crunch.
- Shrimp - Substitute with peeled, deveined scallops or firm white fish chunks for a delicious seafood variation.
- Lemon aioli - Replace with a dairy-free garlic mayo or serve with a simple squeeze of fresh lemon to lighten the fat content.
- Seasonings - Swap paprika for smoked paprika or chili powder to adjust the spice level to your taste.
Ingredients
- 1 pound large shrimp peeled and deveined, tails removed
- ½ cup panko breadcrumbs for a light, crispy coating
- ¼ cup all-purpose flour to help the coating stick
- 1 large egg beaten to bind the coating
- 1 teaspoon paprika adds subtle smoky flavor
- ½ teaspoon garlic powder enhances savory notes
- ½ teaspoon salt for seasoning
- ¼ teaspoon black pepper freshly ground for mild heat
- Cooking spray to help crisp the shrimp in the air fryer
For the lemon aioli:
- ½ cup mayonnaise creamy base for the sauce
- 1 tablespoon fresh lemon juice brightens the flavor
- 1 small garlic clove minced for aromatic punch
- ¼ teaspoon salt balances the acidity
- Pinch of black pepper freshly ground
Instructions
- Preheat your air fryer to 400°F (200°C). This ensures the shrimp start cooking immediately when placed inside.
- In a shallow bowl, mix the flour, paprika, garlic powder, salt, and pepper. In a separate bowl, beat the egg. Place the panko breadcrumbs in a third shallow dish.
- Dip each shrimp first in the flour mixture, shaking off any excess. Then dip into the beaten egg, and finally coat evenly with the panko breadcrumbs.
- Arrange the coated shrimp in a single layer in the air fryer basket, spraying them lightly with cooking spray to encourage browning. Cook for 8 to 10 minutes, flipping halfway through, until shrimp are pink and the coating is golden and crisp.
- While the shrimp cook, whisk together all the lemon aioli ingredients until smooth. Serve the crispy shrimp hot with the lemon aioli on the side for dipping.
14. Lobster Mac and Cheese (using canned lobster)
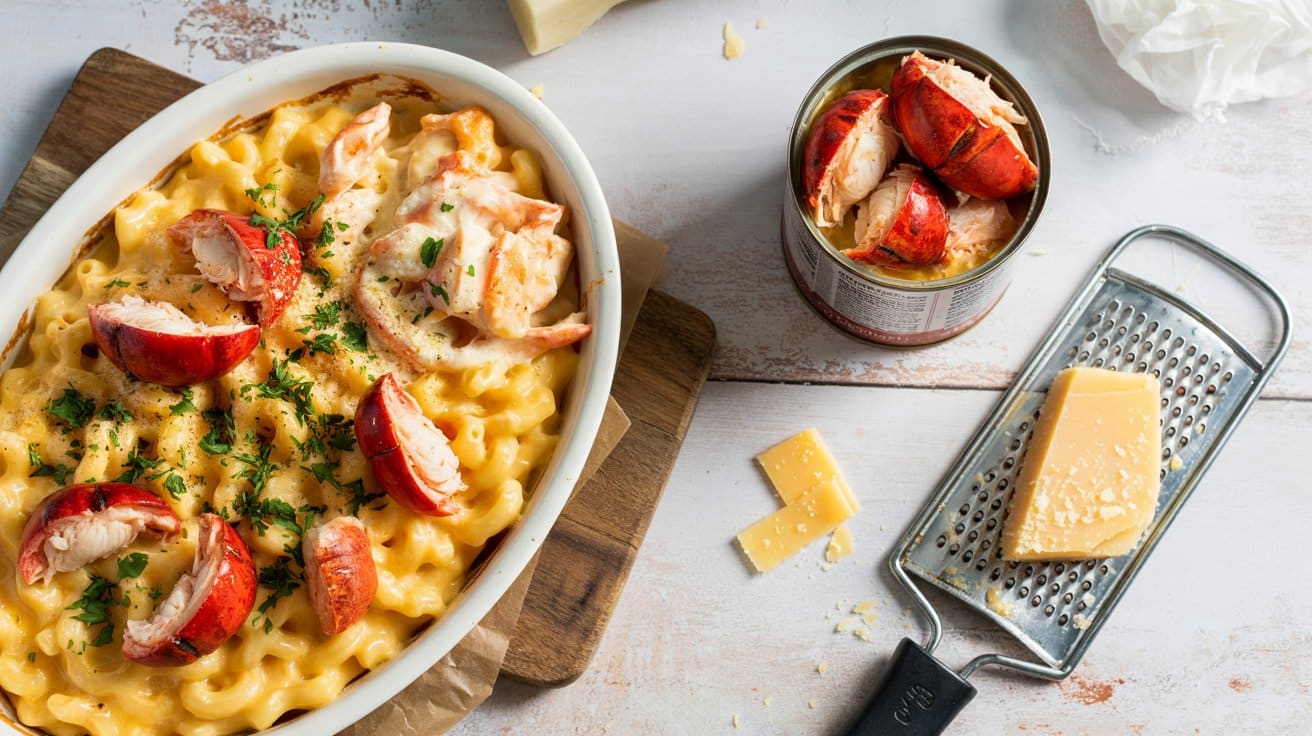
This lobster mac and cheese brings rustic comfort food up a notch by adding tender chunks of lobster to a creamy, cheesy pasta base. Using canned lobster keeps this dish accessible and quick to prepare, making it a great choice for a special dinner without a lot of fuss.
The rich cheese sauce goes well with the delicate lobster, while the baked topping adds a bit of crunch to the smooth texture inside. It's a satisfying dish that works well for both family meals and casual entertaining.
Why This Recipe Works
This recipe combines convenience and indulgence in a way that fits comfortably into a busy schedule without skimping on taste.
- Convenience - Uses canned lobster, which cuts down cooking time and simplifies preparation.
- Flavor balance - Combines creamy, cheesy richness with the subtle sweetness of lobster.
- Texture - Offers a smooth sauce with tender pasta and a crisp breadcrumb topping.
- Appeal - Works as an elegant yet approachable dish suitable for everyday or special occasions.
Ingredient Swap Ideas
Swapping ingredients can help adjust the recipe for dietary needs or flavor preferences without losing its essence.
- Lobster - Substitute canned crab meat or cooked shrimp for a similar seafood profile.
- Cheese - Use a blend of sharp cheddar and Gruyère for a slightly nuttier flavor.
- Milk - Replace whole milk with evaporated milk for a richer sauce or use a dairy-free milk for lactose intolerance.
- Breadcrumbs - Use panko for a lighter, crunchier topping or crushed crackers for extra flavor.
Ingredients
- 8 ounces elbow macaroni pasta
- 3 tablespoons unsalted butter
- 3 tablespoons all-purpose flour
- 2 cups whole milk
- 1 cup shredded sharp cheddar cheese
- 1 cup shredded Gruyère cheese
- ½ teaspoon garlic powder
- ½ teaspoon onion powder
- ¼ teaspoon smoked paprika
- Salt and black pepper to taste
- 1 cup canned lobster meat, drained and chopped
- ½ cup plain breadcrumbs
- 1 tablespoon olive oil
Instructions
- Cook the macaroni pasta according to package instructions until al dente. Drain and set aside.
- In a large saucepan, melt the butter over medium heat. Whisk in the flour and cook for about 2 minutes until it forms a smooth paste without browning.
- Gradually whisk in the milk, stirring constantly until the sauce thickens, about 5 to 7 minutes. Remove from heat and stir in the cheddar and Gruyère cheeses, garlic powder, onion powder, and smoked paprika. Season with salt and pepper.
- Gently fold the chopped canned lobster into the cheese sauce, then add the cooked macaroni and mix until everything is evenly coated.
- Preheat the oven to 350°F (175°C). Transfer the mac and cheese to a baking dish. Toss the breadcrumbs with olive oil and sprinkle over the top. Bake for 20 minutes or until the topping is golden and crisp. Serve warm.
15. Garlic Butter Baked Halibut
This oven-baked halibut dish combines tender, flaky white fish with a rich garlic butter topping that adds a nice touch of luxury without feeling heavy. The garlic and fresh herbs melt into the butter as it bakes, creating a flavorful coating that enhances the mild taste of the halibut.
It's a straightforward recipe that's both light and satisfying, perfect for busy weeknights or a simple weekend dinner. You don't need to fuss over complicated steps to get great results.
Why This Recipe Works
This recipe brings together a straightforward cooking method and bold, complementary flavors that make for an easy, crowd-pleasing main course.
- Convenience - Prep takes just minutes, and everything cooks in the oven all at once.
- Flavor balance - The garlic butter enriches the mild halibut without overpowering it.
- Texture - The fish stays juicy and tender under a slightly crisp, buttery crust.
- Appeal - It's elegant enough for guests but simple enough for weeknight dinners.
Ingredient Swap Ideas
Switching up ingredients can help tailor this recipe if you want to suit allergies, preferences, or what you have on hand.
- Halibut - Use cod or haddock as a more affordable white fish alternative with a similar flaky texture.
- Butter - Substitute with olive oil or a dairy-free spread to make it lactose-free.
- Fresh herbs - Basil, tarragon, or dill work well instead of parsley for a different flavor.
- Garlic - Use garlic powder if fresh garlic isn't available; just sprinkle it evenly on the butter.
Ingredients
- 1 pound halibut fillets - Skin removed, fresh or thawed if frozen.
- 4 tablespoons unsalted butter - Softened to room temperature for easy mixing.
- 3 cloves garlic - Minced finely for even flavor distribution.
- 2 tablespoons fresh parsley - Chopped finely to add brightness.
- 1 tablespoon fresh lemon juice - To add slight acidity and freshness.
- ¼ teaspoon salt - Enhances overall taste.
- ¼ teaspoon black pepper - Freshly ground if possible for best aroma.
- Lemon wedges - Optional, for serving.
Instructions
- Preheat your oven to 400°F (200°C) and line a baking dish with parchment paper or lightly grease it.
- In a small bowl, combine the softened butter, minced garlic, chopped parsley, lemon juice, salt, and pepper. Mix until well blended.
- Place the halibut fillets in the prepared dish and spread the garlic butter mixture evenly over the tops of each fillet.
- Bake in the preheated oven for 12 to 15 minutes, or until the fish flakes easily with a fork and the top has a light golden crust.
- Remove from oven and serve immediately with lemon wedges on the side for squeezing over the fish.
16. Chili Lime Grilled Shrimp Tacos
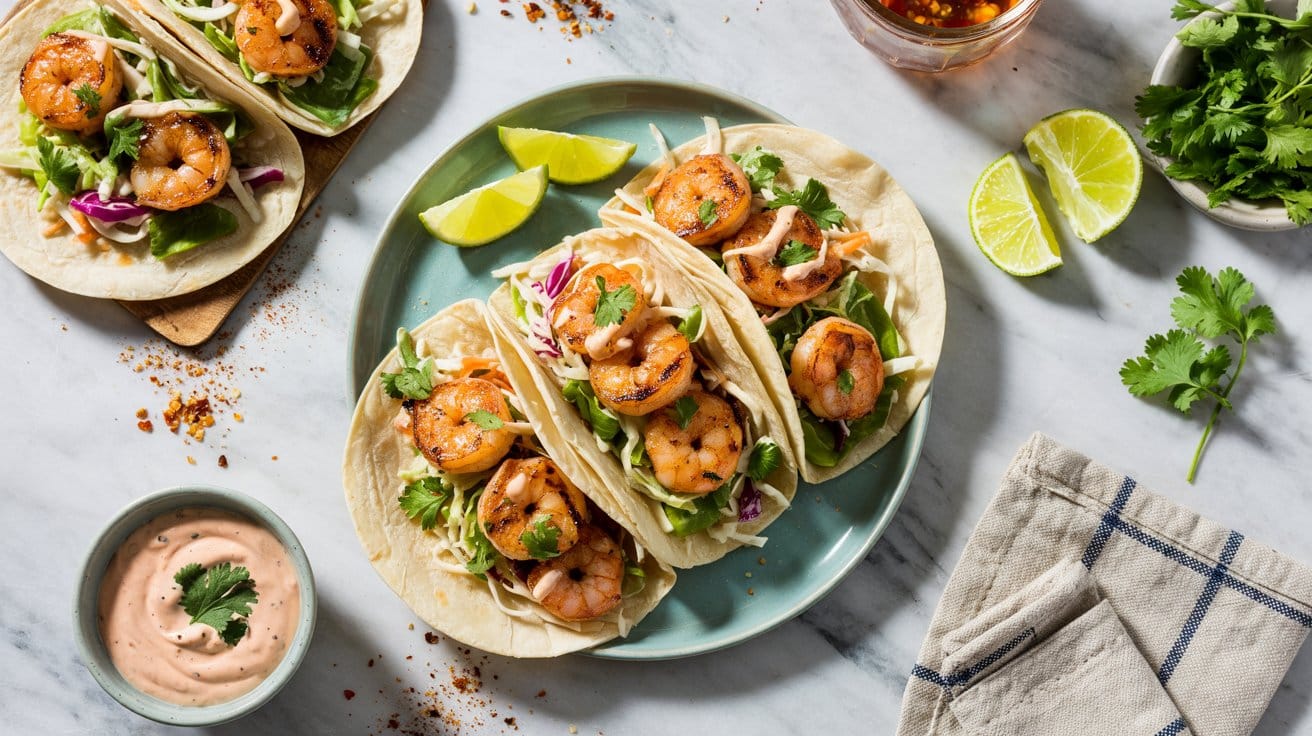
Shrimp tacos with a chili lime twist bring a bright and zesty flavor that's both refreshing and satisfying. The shrimp absorb the tangy marinade perfectly, while the fresh slaw adds a crisp contrast.
Topped with creamy avocado crema, these tacos come together quickly and make a flavorful meal that works for busy weeknights or casual gatherings.
Grilling the shrimp gives them a smoky char that deepens the taste, and the combination of spices with fresh lime juice brightens every bite. You'll appreciate how easy this recipe is to prepare without sacrificing any of the bright flavors.
Why This Recipe Works
This recipe combines ease and bold flavor, making it a quick and tasty dinner option that feels special.
- Convenience - Shrimp cooks fast on the grill or stovetop, and the marinade comes together quickly with common pantry ingredients.
- Flavor balance - The spicy chili, tangy lime, and creamy avocado work together for a well-rounded taste.
- Texture - Juicy, lightly charred shrimp paired with crisp slaw creates a satisfying contrast.
- Family-friendly appeal - These tacos are approachable and can be customized easily for different spice levels or toppings.
Ingredient Swap Ideas
Swapping ingredients can help you tailor this recipe for diet preferences or ingredient availability without losing the fresh, bright profile.
- Protein swap - Use firm white fish or chicken strips if you prefer a milder option.
- Dairy-free cream - Replace the avocado crema with a dollop of coconut yogurt or a simple lime-infused olive oil drizzle for a dairy-free topping.
- Spice adjustment - Swap chili powder for smoked paprika or mild cayenne to adjust the heat.
- Tortilla choice - Use corn or flour tortillas depending on preference or to accommodate gluten sensitivities.
Ingredients
- 1 pound raw shrimp peeled and deveined
- 2 tablespoons olive oil
- 1 teaspoon chili powder
- ½ teaspoon ground cumin
- ¼ teaspoon cayenne pepper
- Juice of 2 limes
- Salt and black pepper to taste
- 8 small corn or flour tortillas
- 2 cups shredded cabbage or coleslaw mix
- ¼ cup chopped fresh cilantro
- 1 ripe avocado peeled and pitted
- ½ cup plain Greek yogurt
- Juice of 1 lime
- 1 clove garlic minced
- Salt to taste
Instructions
- In a medium bowl, whisk together olive oil, chili powder, cumin, cayenne, lime juice, salt, and pepper. Add shrimp and toss to coat evenly. Let marinate for 15-20 minutes.
- Preheat the grill or a grill pan over medium-high heat. Thread shrimp onto skewers for easy handling or place directly on the grill surface. Grill shrimp for 2-3 minutes per side until pink and cooked through. Remove from grill.
- While the shrimp cook, prepare the avocado crema by blending avocado, Greek yogurt, lime juice, garlic, and salt until smooth. Adjust seasoning as needed.
- Warm tortillas briefly on the grill or in a skillet. Assemble tacos by dividing the shrimp among the tortillas, topping with shredded cabbage and cilantro. Drizzle with avocado crema.
- Serve immediately with extra lime wedges on the side for an added burst of citrus flavor.
17. Saffron Seafood Risotto

Saffron Seafood Risotto brings together tender shrimp and scallops with a rich, creamy base that feels special enough for guests but is simple enough for a weeknight. The subtle floral notes of saffron gently flavor the rice, creating a warm color and an inviting aroma that makes this dish stand out without extra fuss.
This risotto balances silky textures and fresh seafood nicely, offering a satisfying meal that feels indulgent yet wholesome. It's a dish you can prepare step-by-step with confidence, and the ingredients come together in a way that rewards your attention with truly comforting flavors.
Why This Recipe Works
This seafood risotto combines accessible ingredients with a simple process that delivers impressive flavor and texture in one dish.
- Convenience - The recipe uses straightforward steps with minimal prep, making it manageable for busy cooks.
- Flavor balance - The delicate saffron enhances the creamy risotto without overpowering the seafood's natural sweetness.
- Texture - The dish features tender, juicy shrimp and scallops alongside perfectly cooked, creamy rice.
- Appeal - It is an elegant meal for any occasion, pleasing both seafood lovers and those new to risotto.
Ingredient Swap Ideas
Swapping ingredients can tailor this risotto to suit dietary preferences or whatever you have on hand, while keeping the core comforting qualities intact.
- Seafood options - Use firm white fish or mussels instead of shrimp and scallops if preferred or more available.
- Rice alternatives - Substitute Arborio rice with Carnaroli or Vialone Nano rice for the same creamy risotto effect.
- Broth choices - Use vegetable broth instead of seafood stock for a lighter, vegetarian-friendly version.
- Dairy substitute - Replace butter with olive oil to reduce dairy or if you want a slightly lighter finish.
Ingredients
- 2 tablespoons olive oil - for sautéing and flavor.
- 1 small onion, finely chopped - adds mild sweetness and depth.
- 1 ½ cups Arborio rice - the classic risotto rice that becomes creamy.
- ½ cup dry white wine - brings acidity and brightness.
- 4 cups seafood stock, kept warm - enhances the seafood flavor of the dish.
- Pinch of saffron threads - provides color and delicate floral notes.
- 8 ounces large shrimp, peeled and deveined - for tender seafood bites.
- 8 ounces scallops, cleaned and patted dry - adds a sweet, delicate texture.
- 3 tablespoons unsalted butter - enriches the risotto and adds creaminess.
- ½ cup grated Parmesan cheese - delivers depth and subtle saltiness.
- Salt and black pepper, to taste - for seasoning.
- Fresh parsley, chopped (optional) - for garnish and a fresh finish.
Instructions
- Heat the olive oil in a large skillet or heavy-bottomed pan over medium heat. Add the chopped onion and cook until translucent and soft, about 4 minutes.
- Stir in the Arborio rice and cook, stirring constantly, for 2 minutes until the grains are well coated and slightly toasted.
- Pour in the white wine and cook, stirring, until it mostly evaporates. Then add the saffron threads soaked in a little warm stock for better color release.
- Gradually ladle in the warm seafood stock, one cup at a time, stirring often. Wait until the liquid is mostly absorbed before adding the next cup. Continue this process for about 18 minutes, until the rice is tender but still has a slight bite.
- While the risotto cooks, heat a separate pan with a small amount of olive oil over medium-high heat. Sear the shrimp and scallops until opaque and just cooked through, about 2 minutes per side. Remove from heat and set aside.
- Once the risotto is creamy and cooked, remove from heat. Stir in the butter and grated Parmesan until melted and combined. Fold in the cooked shrimp and scallops. Season generously with salt and pepper.
- Serve immediately, garnished with fresh parsley if you like, enjoying the rich texture and balanced flavors.
18. Parmesan Crusted Tilapia
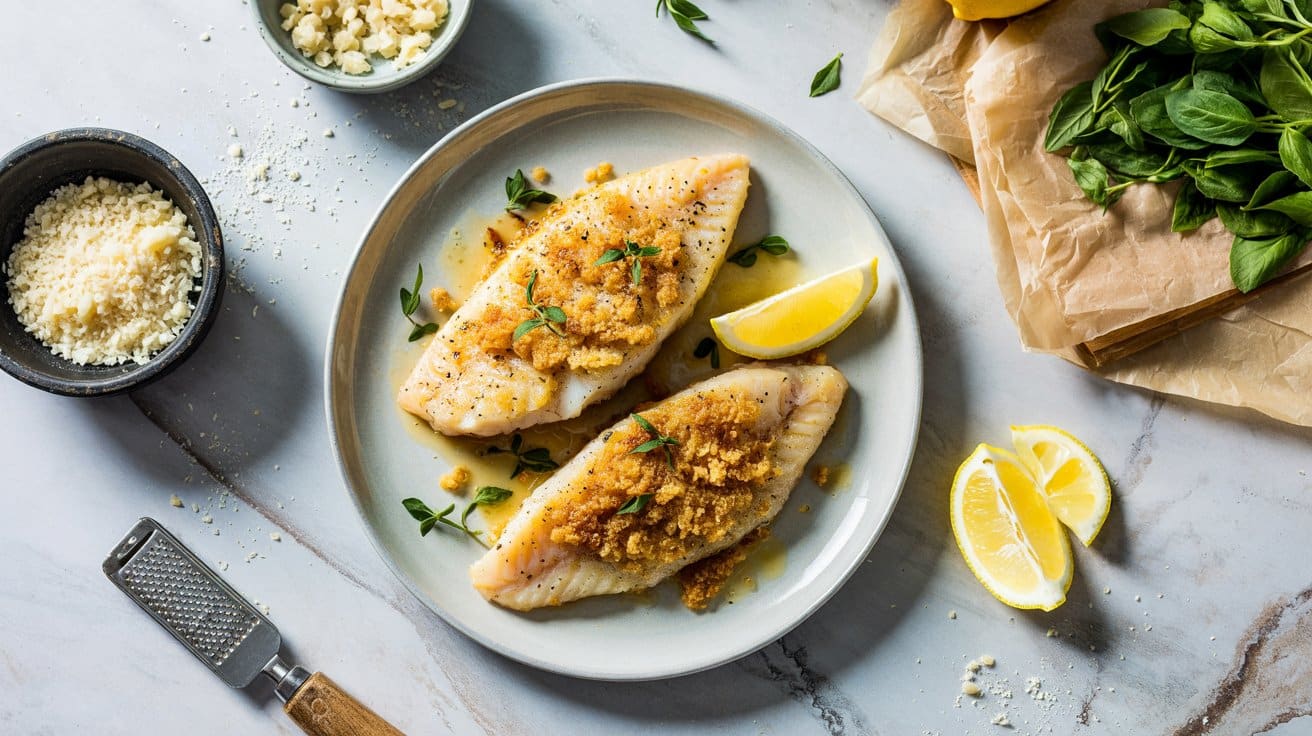
This Parmesan Crusted Tilapia offers a simple way to enjoy tender white fish with a crispy, flavorful topping. The golden crust made from Parmesan cheese adds a satisfying crunch while showing the mild, flaky texture of the tilapia.
It's a straightforward bake that works well for busy weeknights or anytime you want a light but tasty meal. Plus, it pairs nicely with a variety of sides, making it easy to serve up a well-rounded plate.
Why This Recipe Works
This recipe combines quick preparation with a rich, savory crust that enhances the natural flavor of tilapia.
- Convenience - The dish comes together quickly with minimal ingredients and simple steps.
- Flavor balance - The salty, nutty Parmesan goes with the mild fish without overpowering it.
- Texture - A crisp topping contrasts with the soft, flaky fish underneath.
- Appeal - It's light and family-friendly, fitting well into a healthy meal plan.
Ingredient Swap Ideas
Adjusting ingredients can accommodate taste preferences or dietary needs without losing the essence of the recipe.
- Parmesan cheese - Swap with Pecorino Romano for a sharper, more intense flavor.
- Tilapia - Use cod or haddock as a firm white fish alternative.
- Breadcrumbs - Replace with crushed gluten-free crackers or panko for added crunch without gluten.
- Butter - Use olive oil for a dairy-free option or a lighter finish.
Ingredients
- 4 tilapia fillets - about 6 ounces each, fresh or thawed if frozen.
- ½ cup grated Parmesan cheese - finely grated for a crisp crust.
- ½ cup breadcrumbs - plain or Italian seasoned, for texture.
- 2 tablespoons unsalted butter - melted to bind the crust.
- 1 teaspoon garlic powder - for subtle savory depth.
- ½ teaspoon paprika - adds mild color and warmth.
- ¼ teaspoon black pepper - freshly ground for seasoning.
- ¼ teaspoon salt - to enhance flavors.
- Lemon wedges - for serving alongside the fish.
Instructions
- Preheat your oven to 425°F (220°C). Line a baking sheet with parchment paper or lightly grease to prevent sticking.
- In a bowl, combine the grated Parmesan, breadcrumbs, garlic powder, paprika, salt, and pepper. Mix well.
- Brush both sides of the tilapia fillets with melted butter. Press the fillets into the Parmesan mixture, coating the top and sides evenly.
- Place the coated fillets on the prepared baking sheet, crust side up. Bake for 12 to 15 minutes, or until the fish flakes easily with a fork and the crust is golden brown.
- Serve immediately with lemon wedges to squeeze over the fish, adding brightness and balancing the savory crust.
19. Tuna Nicoise Salad Dinner
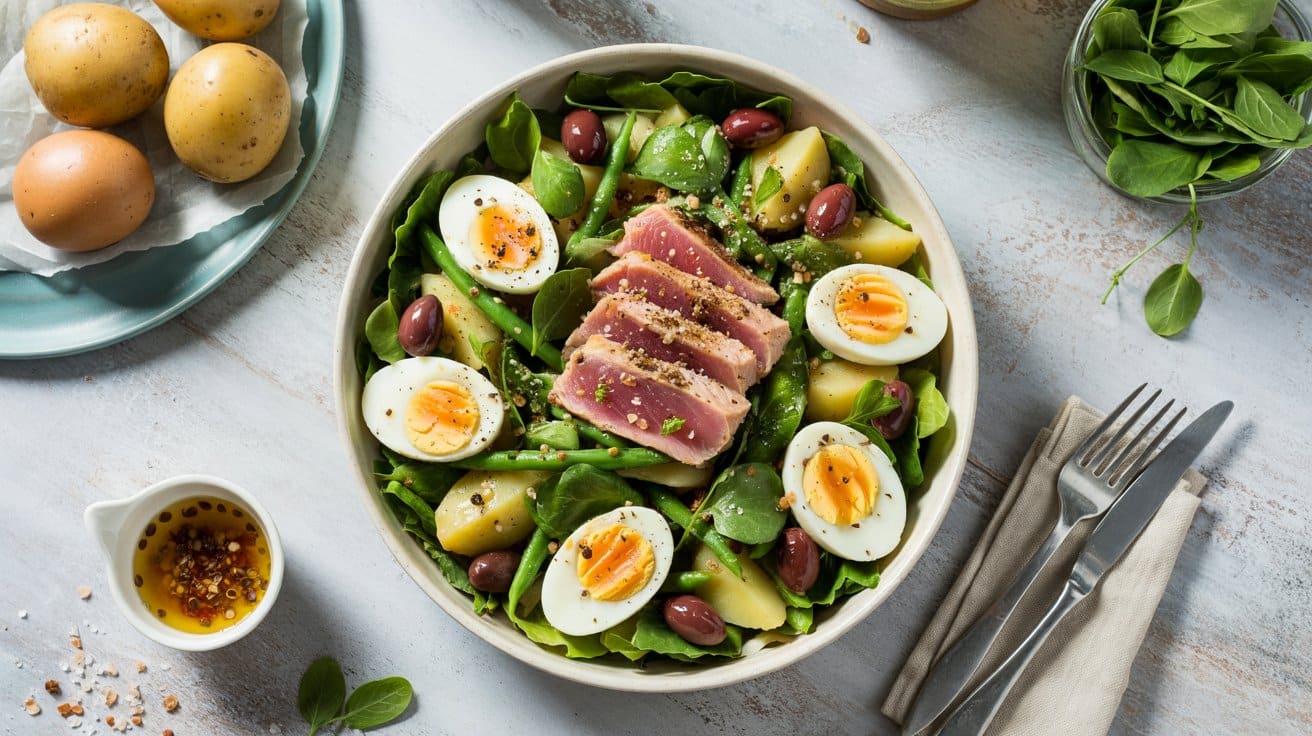
This Tuna Nicoise Salad offers a bright mix of flavors and textures that combine into a satisfying dinner dish. You'll find fresh green beans, boiled eggs, tender seared tuna, and briny olives all coming together on a bed of crisp greens.
It's a balanced meal that feels fresh and hearty without being heavy. Preparing the components is straightforward, and the salad comes together quickly, making it a great choice for busy evenings.
Why This Recipe Works
This salad delivers a well-rounded dinner option that combines protein, veggies, and bold Mediterranean flavors. It's easy to assemble and pleasing both visually and on the palate.
- Convenience - Quick cooking tuna and simple prep on vegetables make this salad easy to put together.
- Flavor balance - The rich tuna and eggs are complemented by tangy olives and a light vinaigrette dressing.
- Texture - Tender fish and eggs contrast nicely with the crunchy green beans and crisp salad greens.
- Appeal - It makes an elegant yet accessible meal perfect for everyday dining or small gatherings.
Ingredient Swap Ideas
Swapping ingredients lets you adjust the salad to dietary preferences or availability while keeping its essential character intact.
- Tuna - Use canned tuna packed in water for a faster, less expensive option.
- Green beans - Substitute blanched asparagus or snap peas for a different crisp vegetable.
- Olives - Use capers or green olives if you prefer a milder briny flavor.
- Greens - Try baby kale or arugula instead of mixed salad greens for a peppery bite.
Ingredients
- 8 ounces fresh tuna steak - About 1-inch thick for searing.
- 4 large eggs - Hard-boiled and peeled.
- 8 ounces green beans - Trimmed and blanched until crisp-tender.
- 4 cups mixed salad greens - Washed and dried.
- ½ cup Niçoise olives - Or Kalamata olives, pitted.
- ¼ cup cherry tomatoes - Halved (optional).
- 2 tablespoons extra-virgin olive oil - For dressing.
- 1 tablespoon red wine vinegar - For dressing.
- 1 teaspoon Dijon mustard - For dressing.
- 1 small garlic clove - Minced, for dressing.
- Salt and black pepper - To taste.
Instructions
- Bring a pot of water to a boil and cook the green beans for 3 to 4 minutes until crisp-tender. Drain and immediately plunge into ice water to stop the cooking. Set aside.
- Hard-boil the eggs by placing them in boiling water for 9 to 10 minutes. Drain and cool before peeling and slicing in halves or quarters.
- Heat a drizzle of olive oil in a nonstick skillet over medium-high heat. Season the tuna steak with salt and pepper, then sear for 2 to 3 minutes per side for medium-rare, or longer as preferred. Remove from heat and let rest briefly, then slice.
- In a small bowl, whisk together olive oil, red wine vinegar, Dijon mustard, minced garlic, salt, and pepper to form a vinaigrette.
- Arrange the salad greens on plates. Top with green beans, sliced tuna, egg pieces, olives, and cherry tomatoes if using. Drizzle with the vinaigrette and serve immediately.
20. Shrimp and Grits with Cajun Butter Sauce
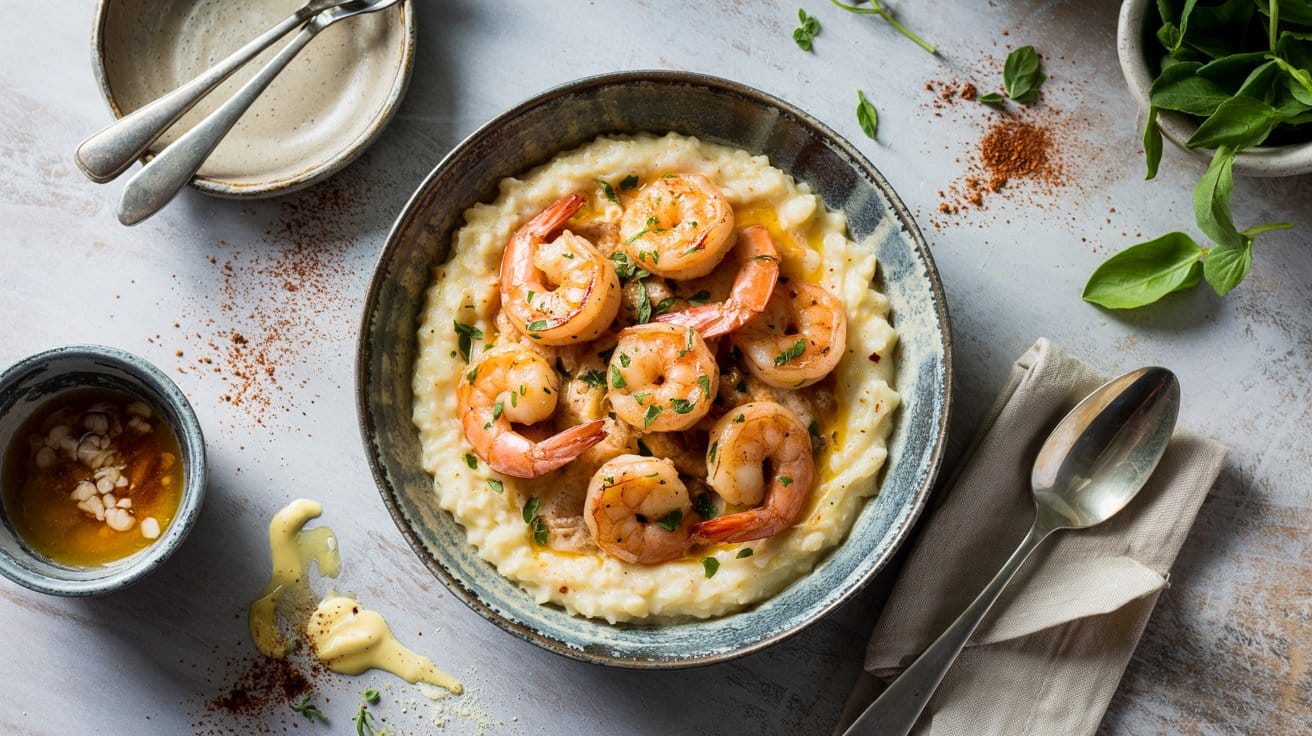
This Southern-inspired dish brings together tender shrimp and creamy grits in a comforting yet flavorful way. The shrimp are cooked in a buttery sauce with just enough Cajun spice to add a kick without overpowering the mild, smooth grits.
It's a great meal that feels special but is surprisingly straightforward to make. The creamy texture of the grits goes well with the richness of the shrimp and the buttery sauce, making this a balanced and satisfying dish to enjoy any day of the week.
Why This Recipe Works
This recipe stands out by combining comfort food textures with bold, layered flavors. Shrimp and grits is a classic Southern favorite, easy to prepare but impressive enough to serve to guests or for family dinners.
- Convenience - Quick-cooking shrimp and stovetop grits keep this meal on the table without lengthy prep.
- Flavor balance - Creamy grits mellow the spicy, buttery Cajun sauce for a balanced taste.
- Texture - Silky grits provide a soft base against the tender, slightly crisp shrimp.
- Appeal - Familiar ingredients come together in a dish that's both filling and elegant.
Ingredient Swap Ideas
Adjusting ingredients can turn this dish into different versions depending on dietary needs or what's on hand, without losing its essence.
- Shrimp swap - Use scallops or firm white fish like cod for another seafood option.
- Dairy alternatives - Substitute butter with olive oil and use a non-dairy milk such as almond or oat milk for lactose-free grits.
- Grits variety - Try quick or instant grits for faster cooking, or use polenta for a slightly different texture.
- Spice level - Reduce Cajun seasoning or swap it with smoked paprika and garlic powder for a milder flavor.
Ingredients
- 1 cup stone-ground grits - Provides the creamy, hearty base for the dish.
- 4 cups water - Used to cook the grits until tender.
- 1 teaspoon salt - Enhances the flavor of the grits and shrimp.
- 1 pound large shrimp, peeled and deveined - Main protein, adds sweetness and substance.
- 4 tablespoons unsalted butter - Forms the base of the Cajun butter sauce.
- 1 tablespoon Cajun seasoning - Brings a spicy, smoky flavor to the sauce and shrimp.
- 2 cloves garlic, minced - Adds aroma and depth to the sauce.
- ¼ cup chopped green onions - Fresh garnish that adds brightness.
- Juice of half a lemon - Lightens and balances the sauce with acidity.
- Fresh parsley, chopped (optional) - For garnish and a touch of color.
Instructions
- Bring water to a boil in a medium saucepan. Add salt and gradually whisk in the grits. Reduce heat to low, cover, and cook for about 20 to 25 minutes, stirring occasionally, until thick and creamy.
- While the grits cook, heat 2 tablespoons of butter in a large skillet over medium heat. Add the minced garlic and cook for about 1 minute until fragrant but not browned.
- Add the shrimp and sprinkle with Cajun seasoning. Cook for 2 to 3 minutes on each side until the shrimp turn pink and opaque. Remove shrimp from the pan and set aside.
- In the same skillet, stir in the remaining 2 tablespoons of butter until melted. Squeeze in lemon juice and mix with the pan juices to create the Cajun butter sauce. Return the shrimp to the pan, toss gently to coat, and heat through for 1 minute.
- Spoon the creamy grits onto plates. Top with the Cajun shrimp and spoon extra sauce over everything. Garnish with chopped green onions and parsley if using. Serve immediately.
If you're planning a larger spread, pair crusty mains with seafood boil side dishes for gatherings that hold up well to bold flavors. For more flavor inspiration, explore Mediterranean dinners for weeknight cooking that highlight olives, citrus, and fresh herbs.

Andrew Gray is a seasoned food writer and blogger with a wealth of experience in the restaurant and catering industries. With a passion for all things delicious, Andrew has honed his culinary expertise through his work as a personal chef and caterer.
His love for food led him to venture into food writing, where he has contributed to various online publications, sharing his knowledge and insights on the culinary world. As the proud owner of CooksCrafter.com, Andrew covers a wide range of topics, including recipes, restaurant reviews, product recommendations, and culinary tips.
Through his website, he aims to inspire and educate fellow food enthusiasts, offering a comprehensive resource for all things food-related.