Planning meals can be simpler with a collection of side dishes ready in advance, so we've gathered 20 make-ahead recipes designed to ease the process, featuring dishes prepared ahead (often refrigerated up to 4 days or frozen up to 3 months) and refrigerated or frozen, then reheated or served cold. These dishes are suited for a range of occasions, making mealtime less stressful without sacrificing flavor.
This collection includes a variety of options, from hearty baked casseroles to fresh, bright salads and roasted vegetables. Each recipe offers a straightforward approach using familiar ingredients, with choices that suit busy weeknights, casual dinners, or special gatherings.
Many can be prepared ahead and quickly reheated or served cold, offering flexibility to accommodate different schedules and preferences.
These recipes work well together because they prioritize ease and taste while keeping cleanup minimal. By preparing sides ahead of time, it's possible to focus on the main course and enjoy more relaxed, balanced meals.
1. Oven-Roasted Garlic Parmesan Potatoes
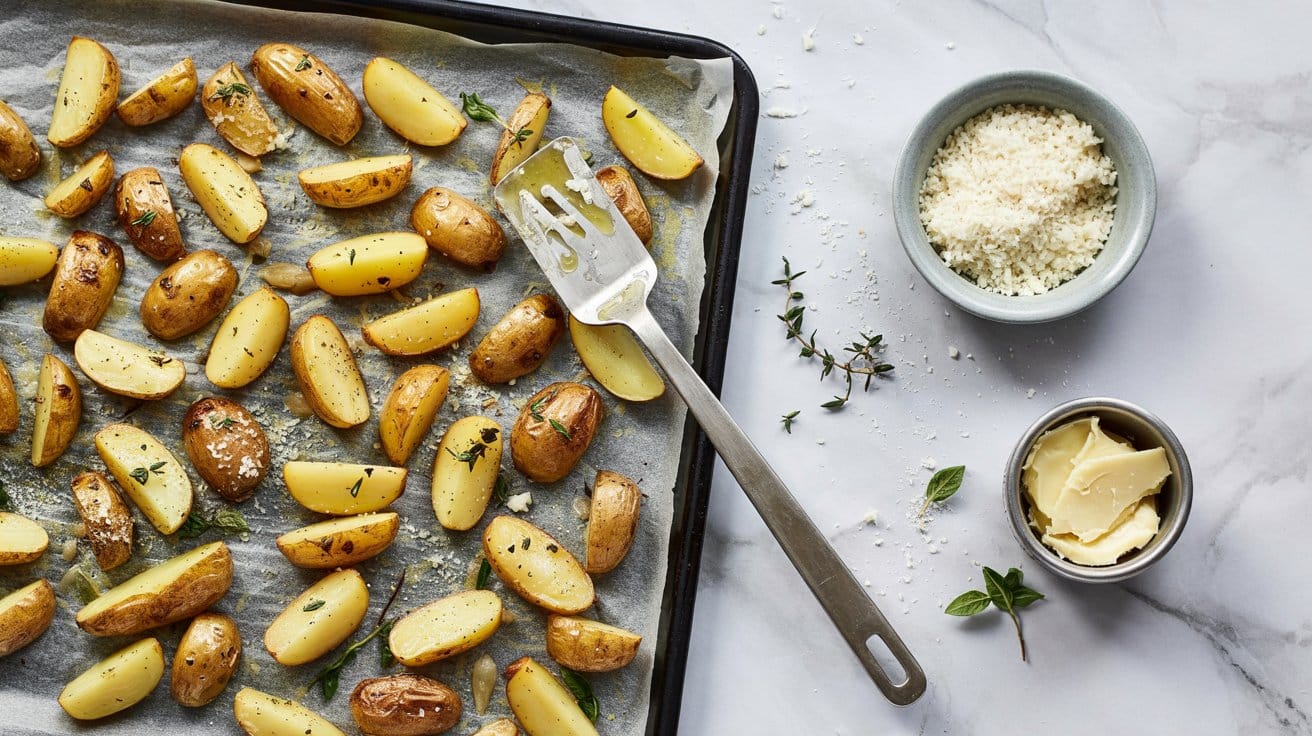
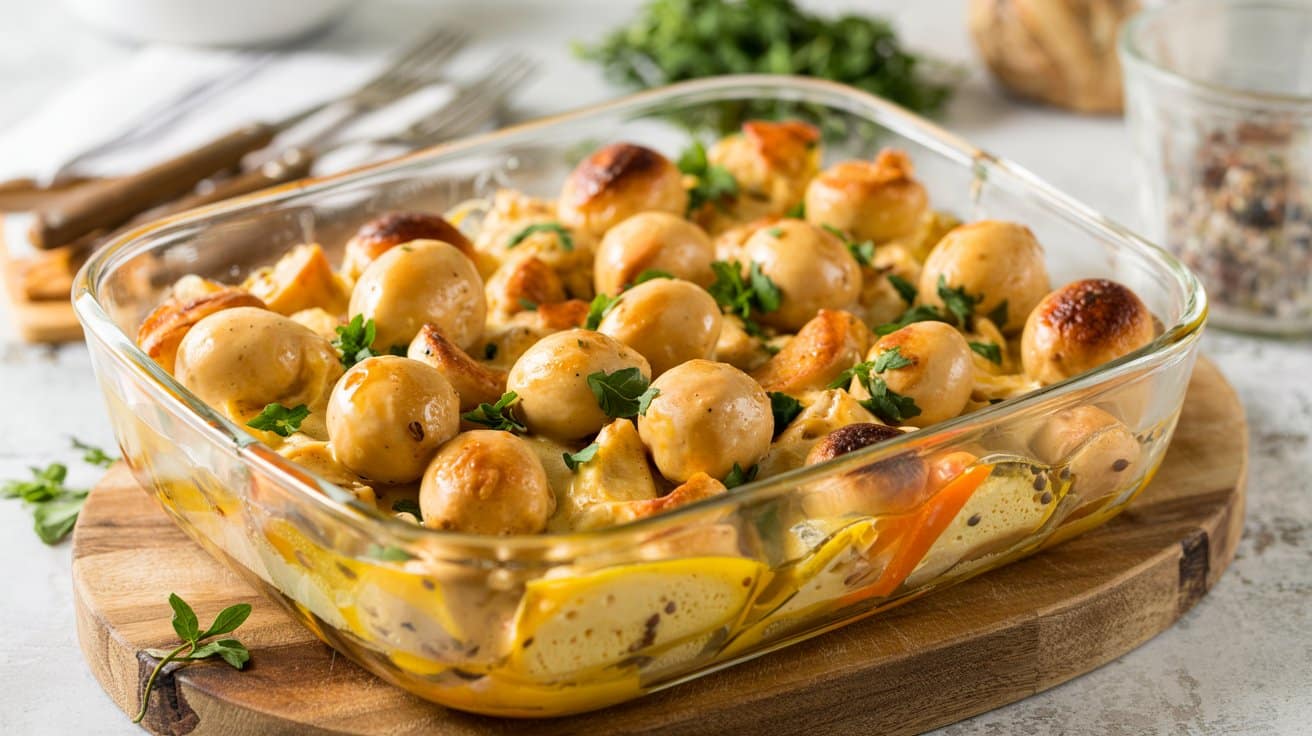
Oven-roasted garlic Parmesan potatoes offer a straightforward way to bring out the best in simple ingredients, producing a classic roasted side, popular in American home cooking, with crispy skins and fluffy interiors. These potatoes turn beautifully crispy on the outside while staying tender inside, thanks to the roasting process.
The garlic adds a satisfying punch, while the Parmesan sprinkles on top give a savory, slightly nutty finish.
You only need a handful of ingredients and some time in the oven, roasting at 425°F for about 35-45 minutes. This recipe fits well into busy weeknights or weekend meals where something filling and flavorful is welcome without much fuss.
It also pairs well with shrimp-based mains; see garlic butter shrimp side suggestions.
Why This Recipe Works
This dish combines simple preparation with delicious, consistent results, with high-heat roasting encouraging Maillard browning for deep flavor. You get a tasty, versatile side that pairs well with a variety of mains, making it a dependable choice for many occasions.
- Convenience - Requires minimal prep and cooks entirely in the oven.
- Flavor balance - The sharpness of garlic and the richness of Parmesan blend perfectly.
- Texture - Crispy edges and soft interiors provide a satisfying contrast.
- Appeal - Suitable for family dinners or casual gatherings, pleasing a wide range of tastes.
- Cleanup - One-pan baking reduces dishes and hassle.
Ingredient Swap Ideas
Adjusting ingredients here can help you fit specific dietary needs or put a personal spin on the dish, and for quick starters see simple 3-ingredient appetizers for parties, many of which take under 10 minutes to assemble.
- Parmesan - Substitute with Pecorino Romano for a sharper flavor or nutritional yeast for a dairy-free option.
- Garlic - Use garlic powder if fresh garlic is unavailable, or roasted garlic for a milder taste.
- Potatoes - Try Yukon Gold for creamier results or sweet potatoes to vary sweetness and color.
- Oil - Olive oil is standard, but avocado oil or melted butter can be used to add richness or a different flavor.
Ingredients
- 2 pounds baby potatoes - halved or quartered depending on size for even roasting.
- 3 tablespoons olive oil - provides fat needed for crispiness and flavor absorption.
- 4 cloves garlic - minced finely to infuse the potatoes with strong garlic flavor.
- ½ cup grated Parmesan cheese - adds savory and slightly nutty notes.
- 1 teaspoon dried Italian herbs - such as oregano, basil, and thyme for subtle herbaceous depth.
- ½ teaspoon salt - to enhance and balance flavors.
- ¼ teaspoon black pepper - fresh cracked for a bit of warmth.
- Fresh parsley - chopped, for garnish and freshness (optional).
Instructions
- Preheat your oven to 425°F (220°C). Line a baking sheet with parchment paper or a silicone mat to prevent sticking.
- In a large bowl, toss the halved potatoes with olive oil, minced garlic, dried herbs, salt, and pepper until every piece is well coated.
- Spread the potatoes in a single layer on the prepared baking sheet, making sure they aren't crowded to allow proper roasting.
- Roast in the oven for 25-30 minutes, stirring halfway through, until the potatoes turn golden brown and crisp on the edges.
- Remove the baking sheet from the oven, immediately sprinkle the grated Parmesan evenly over the hot potatoes, and give them a gentle toss.
- Return the potatoes to the oven for an additional 3-5 minutes to let the cheese melt and crisp slightly.
- Take the potatoes out, garnish with fresh parsley if using, and serve warm alongside your favorite main dishes.
2. Quinoa Tabbouleh Salad

Quinoa Tabbouleh Salad is a fresh, herb-filled dish that brings together bright flavors and satisfying textures, with quinoa adding a nutty flavor and a complete plant protein (quinoa contains all nine essential amino acids). It's a bright mix of fluffy quinoa, crisp vegetables, and plenty of fresh herbs, all tossed in a zesty lemon dressing.
This salad is easy to make and keeps well, making it a handy option for busy days or meal prepping, and it pairs nicely with zesty sides like zesty dill pasta salad ideas or other options such as taco salad side pairings.
Why This Recipe Works
This quinoa tabbouleh offers a refreshing twist on the traditional recipe by swapping bulgur wheat with quinoa, improving its nutritional profile and making it gluten-free. It balances fresh, tangy, and savory notes with a satisfying texture that stays lively even after chilling.
- Convenience - Quick-cooking quinoa combines with raw vegetables for a fast assembly.
- Flavor balance - Bright lemon and fresh herbs contrast with mild quinoa and juicy tomatoes.
- Texture - The dish features a pleasant mix of tender quinoa and crunchy cucumbers and herbs.
- Make-ahead friendly - Keeps well in the fridge for several days without losing freshness.
- Appeal - Nutrient-rich and suitable for gluten-free diets.
Ingredient Swap Ideas
Swapping ingredients can customize this salad to different diets or flavor preferences without losing its essence. You can adjust the herbs, grains, or even the dressing for variety.
- Quinoa - Use couscous or bulgur for a traditional texture if gluten is not a concern.
- Fresh herbs - Swap parsley with cilantro or mint for a different herbaceous taste.
- Cucumber - Replace with diced zucchini or celery for crunch and freshness.
- Lemon juice - Use lime juice for a slightly different citrus punch.
Ingredients
- 1 cup quinoa, rinsed and drained
- 2 cups water
- 1 cup cherry tomatoes, halved
- 1 medium cucumber, finely diced
- ½ red onion, finely chopped
- 1 cup fresh parsley, finely chopped
- ½ cup fresh mint leaves, chopped
- ¼ cup fresh lemon juice
- ¼ cup extra-virgin olive oil
- ½ teaspoon salt
- ¼ teaspoon black pepper
Instructions
- Rinse the quinoa thoroughly under cold water. In a medium saucepan, combine the quinoa and water. Bring to a boil, then reduce heat to low, cover, and simmer for about 15 minutes or until the water is absorbed and quinoa is fluffy. Remove from heat and let it cool.
- In a large bowl, combine the cooled quinoa, cherry tomatoes, cucumber, red onion, parsley, and mint. Mix gently to distribute evenly.
- In a small bowl, whisk together the lemon juice, olive oil, salt, and black pepper until well combined.
- Pour the dressing over the quinoa mixture and toss carefully to coat all ingredients. Taste and adjust seasoning if needed.
- Chill the salad for at least 30 minutes before serving to allow flavors to meld. Serve cold or at room temperature.
3. Sweet Potato Casserole with Pecan Topping
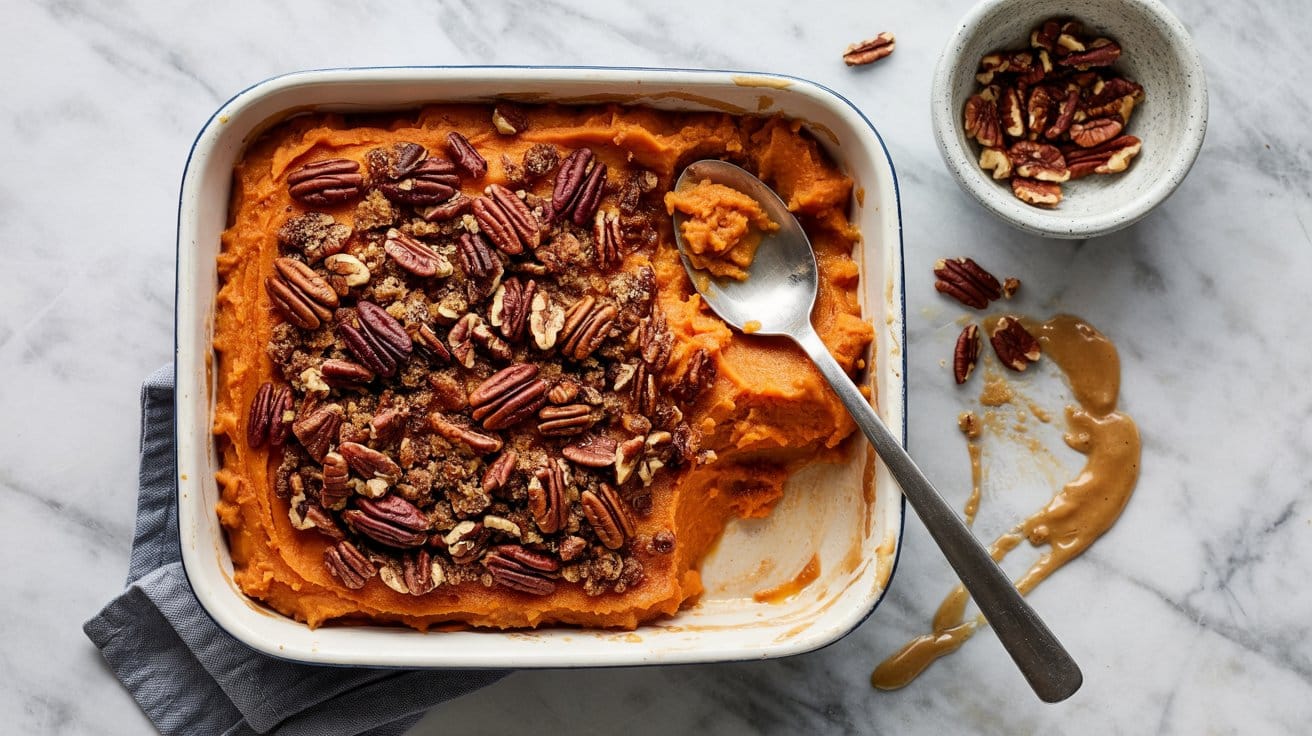
This sweet potato casserole brings together creamy, naturally sweet potatoes and a crunchy, buttery pecan topping for a fantastic contrast in texture, often served at Thanksgiving in the U.S. It's a familiar dish that feels comforting and festive without requiring complicated steps, making it a reliable choice for busy days and special gatherings alike.
You can prepare it a day in advance, which helps save time on the day you plan to serve it. Baking it fresh just before mealtime creates a lovely warm aroma that fills your home and makes this dish even more inviting.
If you want soup pairings, try sweet potato soup side suggestions for complementary textures and flavors.
Why This Recipe Works
This casserole balances smooth, sweet potatoes with a crisp, nutty layer that adds a welcome crunch. It's practical to prepare ahead and highlights familiar, crowd-pleasing flavors.
- Convenience - Assembles easily in advance and bakes quickly before serving.
- Texture Contrast - Soft, creamy sweet potatoes topped with crunchy pecans and a buttery crumble.
- Flavor Balance - Natural sweetness from the potatoes pairs well with warm spices and nutty topping.
- Appeal - Family-friendly dish enjoyed for holidays or everyday meals.
- Make-ahead - Great for preparing the day before to ease mealtime stress.
Ingredient Swap Ideas
Adjusting ingredients lets you customize the dish for dietary needs or to suit your pantry without losing its core character. Simple swaps can keep the casserole just as comforting and tasty.
- Dairy-Free Version - Use coconut oil or plant-based butter instead of regular butter in the topping and filling.
- Nut-Free Option - Replace pecans with toasted oats or crispy breadcrumbs for a crunchy topping.
- Sweetener Alternatives - Maple syrup or agave syrup can substitute for brown sugar for a different sweetness profile.
- Spice Variation - Add a pinch of nutmeg or ginger along with cinnamon for a more complex spice blend.
Ingredients
- 4 cups sweet potatoes peeled and cubed
- ½ cup granulated sugar
- 2 large eggs beaten
- ½ cup milk whole or 2%
- ⅓ cup unsalted butter melted
- 1 teaspoon vanilla extract
- ½ teaspoon ground cinnamon
- ¼ teaspoon salt
- 1 cup pecans chopped
- ½ cup packed brown sugar
- ⅓ cup all-purpose flour
- ¼ cup unsalted butter cold and cut into small pieces
Instructions
- Preheat your oven to 350°F (175°C). Boil sweet potatoes in a large pot of water until tender, about 15 minutes, then drain well.
- Mash the cooked sweet potatoes in a large bowl. Mix in granulated sugar, beaten eggs, milk, melted butter, vanilla extract, cinnamon, and salt until smooth and well combined.
- Pour the sweet potato mixture into a greased 9x13-inch baking dish and spread evenly.
- In a separate bowl, combine chopped pecans, brown sugar, flour, and cold butter. Use your fingers or a pastry cutter to mix until the topping forms coarse crumbs. Sprinkle this evenly over the sweet potato layer.
- Bake uncovered for 30 to 35 minutes or until the topping is golden brown and crisp. Let it cool for a few minutes before serving to allow the casserole to set.
This dish is ideal to bring along to a potluck or to serve as a warm side alongside roasted meats or vegetables. Leftovers keep well covered in the refrigerator for a few days and reheat nicely in the oven.
4. Creamy Baked Macaroni and Cheese

This creamy baked macaroni and cheese is a reliable classic that feels comforting and indulgent. The rich cheese sauce coats the pasta perfectly, while the crispy topping adds a satisfying contrast in texture.
You can prepare this dish ahead of time, which makes it a great choice for busy days or when you want a homemade meal ready to go in the oven. It's familiar, straightforward, and a crowd-pleaser for any occasion.
Why This Recipe Works
This baked macaroni and cheese combines ease of preparation with rich, comforting flavors that appeal to many tastes.
- Convenience - The dish can be assembled in advance and baked just before serving, saving time.
- Flavor balance - A smooth, creamy cheese sauce pairs nicely with a golden, crunchy topping.
- Texture - Tender pasta and melty cheese contrast with a crisp breadcrumb crust.
- Appeal - It's a family-friendly meal that satisfies both kids and adults alike.
- Make-ahead - Perfect for preparing in advance and baking when ready.
Ingredient Swap Ideas
Adjusting ingredients can help this recipe fit your dietary preferences or pantry items while keeping its core appeal intact.
- Pasta swap - Use gluten-free macaroni or small pasta shapes if you need a gluten-free option.
- Dairy alternatives - Substitute regular milk with unsweetened almond or oat milk, and use a dairy-free cheese for a lactose-intolerant friendly dish.
- Cheese variations - Try sharp cheddar mixed with Gruyère for extra depth, or use mozzarella for a milder, stretchier texture.
- Topping options - Replace breadcrumbs with crushed cornflakes or panko for a different crunch.
Ingredients
- 8 ounces elbow macaroni - dry pasta, cooked al dente according to package instructions.
- 3 tablespoons unsalted butter - divided between sauce and topping.
- 3 tablespoons all-purpose flour - to thicken the cheese sauce.
- 3 cups milk - whole milk preferred for creaminess, warmed.
- 2 cups shredded sharp cheddar cheese - for strong, classic flavor.
- 1 cup shredded mozzarella cheese - adds stretchiness and meltiness.
- ½ teaspoon salt - to season the cheese sauce.
- ¼ teaspoon black pepper - freshly ground for mild heat.
- ½ teaspoon dry mustard powder - optional, to enhance cheese flavor.
- 1 cup breadcrumbs - for topping, can use plain or seasoned.
Instructions
- Preheat your oven to 350°F (175°C). Cook the macaroni in boiling salted water until just tender. Drain well and set aside.
- Melt 2 tablespoons of butter in a medium saucepan over medium heat. Stir in flour and cook for about 1 minute, whisking constantly until smooth and bubbly.
- Gradually whisk in the warmed milk and cook, stirring frequently, until the sauce thickens and coats the back of a spoon, about 5 to 7 minutes.
- Remove the sauce from heat. Stir in the shredded cheddar, mozzarella, salt, pepper, and mustard powder until melted and smooth. Then fold in the cooked macaroni until fully combined.
- Pour the macaroni and cheese mixture into a greased baking dish. Melt the remaining 1 tablespoon of butter and mix it with the breadcrumbs, then sprinkle evenly over the top. Bake for 25 to 30 minutes, or until the top is golden and crisp.
- Serve warm, spooned into bowls or sliced into portions for easy serving.
5. Roasted Brussels Sprouts with Balsamic Glaze
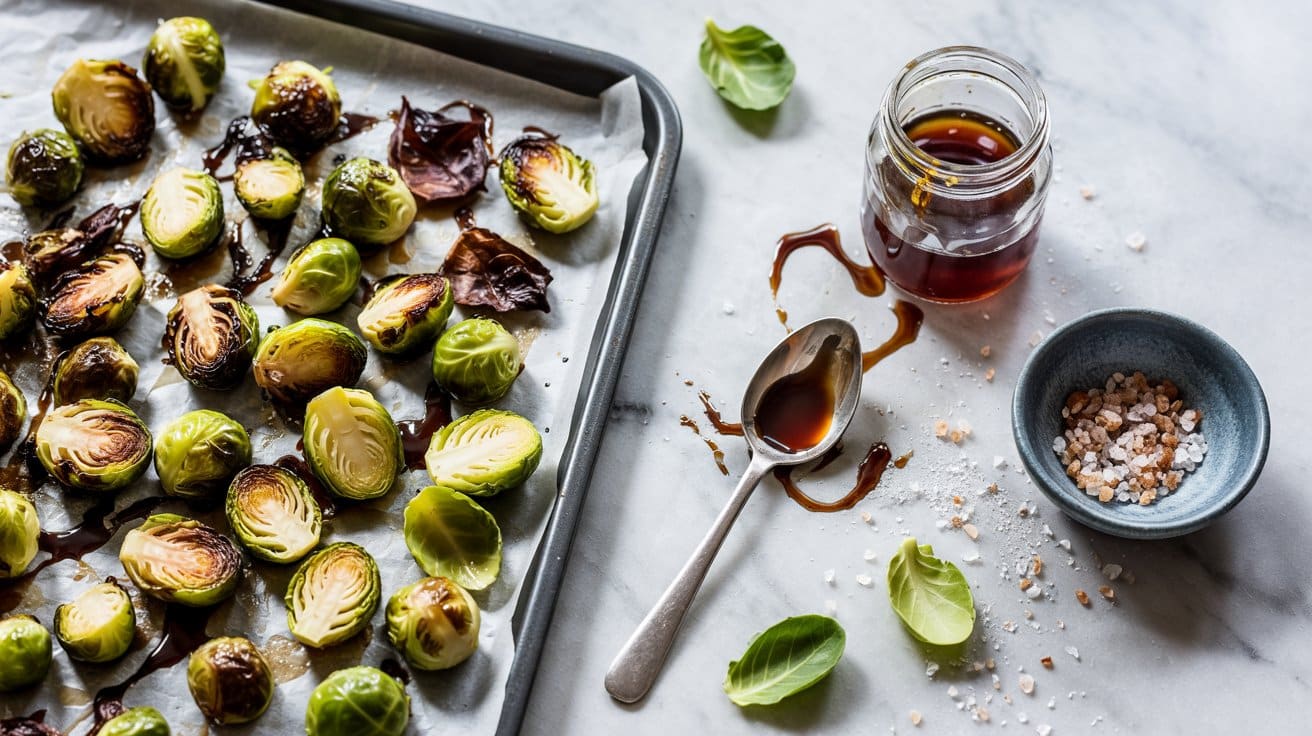
Roasted Brussels sprouts bring out a rich, nutty flavor that's hard to beat. When you add a balsamic glaze, the sprouts get a lovely tangy-sweet finish that complements their natural earthiness.
This recipe is straightforward and comes together quickly, making it a great choice for busy weeknights or an easy side dish for gatherings.
The sprouts turn tender with crisp, caramelized edges, offering a pleasant texture contrast. You can serve them warm or at room temperature, which is convenient if you need to prepare ahead or reheat gently.
Why This Recipe Works
This recipe delivers a satisfying balance of bold flavors and simple preparation, making it a reliable choice for any meal.
- Convenience - Minimal prep with quick roasting, plus easy reheating or room temperature serving.
- Flavor balance - The balsamic glaze adds a tangy sweetness that brightens the savory sprouts.
- Texture - Crisp edges with a tender inside create a pleasant contrast in every bite.
- Appeal - a flexible dish that works well for family dinners or casual entertaining.
- Make-ahead friendly - Can be prepared in advance and served cold or reheated.
Ingredient Swap Ideas
Swapping ingredients can help tailor the recipe to your preferences or dietary needs without losing the core flavors.
- Balsamic glaze - Use a drizzle of honey or maple syrup with a splash of apple cider vinegar for a different sweet-tart note.
- Brussels sprouts - Substitute with roasted broccoli or cauliflower if you prefer a milder taste.
- Olive oil - Swap for avocado oil or melted coconut oil for a different flavor and cooking fat.
- Seasoning - Add crushed red pepper flakes or smoked paprika for a spicy or smoky twist.
Ingredients
- 1 pound Brussels sprouts - trimmed and halved for even roasting.
- 2 tablespoons extra-virgin olive oil - to coat and help crisp the sprouts.
- ½ teaspoon salt - enhances the natural flavors.
- ¼ teaspoon freshly ground black pepper - adds mild heat.
- 3 tablespoons balsamic vinegar - for the glaze with a tangy sweetness.
- 1 tablespoon honey - balances the vinegar's acidity and thickens the glaze.
Instructions
- Preheat the oven to 400 degrees Fahrenheit (200 degrees Celsius). Line a baking sheet with parchment paper or lightly grease it.
- Toss the halved Brussels sprouts with olive oil, salt, and pepper until evenly coated. Spread them in a single layer on the prepared baking sheet.
- Roast in the oven for 20 to 25 minutes, shaking or turning halfway through, until the sprouts are tender and edges are nicely caramelized.
- While the sprouts roast, combine the balsamic vinegar and honey in a small saucepan over medium heat. Bring to a simmer and cook for 3 to 5 minutes, stirring occasionally, until the mixture reduces to a thick glaze.
- Remove the sprouts from the oven and drizzle the balsamic glaze over them. Toss gently to coat, then serve warm or at room temperature.
6. Greek Orzo Salad with Feta and Olives
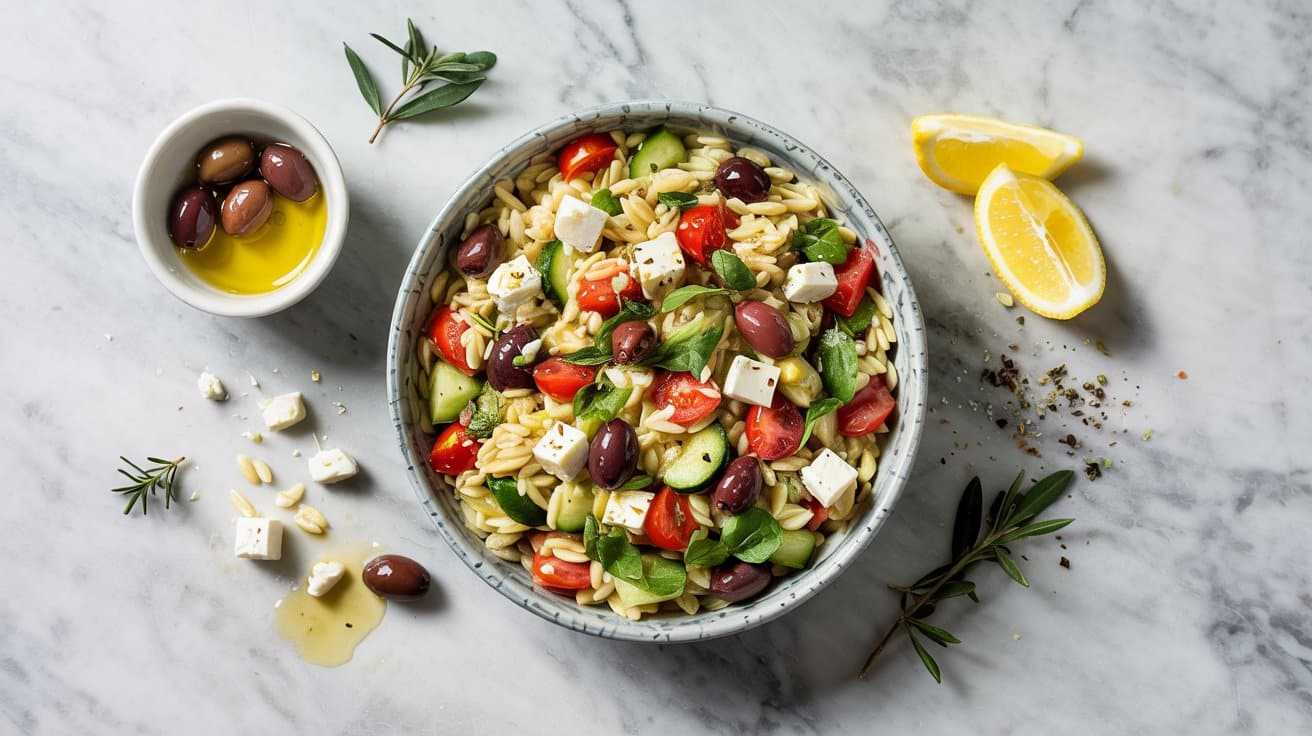
This Greek Orzo Salad comes together quickly and offers a fresh, bright mix of flavors. The combination of tender orzo pasta, salty olives, and creamy feta cheese gives it a classic Mediterranean feel, while crisp cucumbers and cherry tomatoes add just the right amount of crunch.
It's a versatile salad that works well as a light lunch, a side dish with grilled meats, or even a make-ahead option for gatherings. Plus, it holds up well in the fridge, making it a great choice for busy days when you want something flavorful yet simple.
Why This Recipe Works
This orzo salad balances bright, savory, and creamy flavors with a range of fresh textures. It's practical for everyday meals or casual entertaining and keeps well without sogginess.
- Convenience - Cooks quickly and can be prepared in advance for easy meal planning.
- Flavor balance - Combines briny olives, tangy feta, and fresh vegetables for a lively taste mix.
- Texture - Provides a pleasing contrast with tender pasta and crisp veggies.
- Appeal - Suitable for family meals and casual get-togethers, pleasing to many palates.
- Make-ahead - Holds well in the refrigerator without losing texture.
Ingredient Swap Ideas
Adjusting ingredients can help suit dietary preferences or offer variety without losing the salad's Mediterranean character. Consider these swaps to customize the dish.
- Pasta - Use gluten-free or whole wheat orzo for a different texture or dietary needs.
- Cheese - Substitute feta with vegan cheese or omit it for a dairy-free salad.
- Olives - Swap kalamata olives for green olives or capers to change the flavor slightly.
- Vegetables - Add or replace cucumbers and tomatoes with bell peppers or radishes for extra crunch and freshness.
Ingredients
- 1 ½ cups orzo pasta - uncooked, rinsed under cold water after cooking.
- 1 cup cherry tomatoes - halved for bright color and juiciness.
- 1 cup cucumber - diced small to add crispness.
- ½ cup kalamata olives - pitted and halved for salty, briny flavor.
- ½ cup crumbled feta cheese - adds creaminess and tang.
- ¼ cup red onion - finely chopped for a mild sharpness.
- ¼ cup fresh parsley - chopped for herbal freshness.
- 3 tablespoons extra-virgin olive oil - to coat the salad lightly.
- 2 tablespoons lemon juice - fresh for a bright acidity.
- 1 teaspoon dried oregano - for classic Mediterranean flavor.
- ½ teaspoon salt - to enhance all flavors.
- ¼ teaspoon black pepper - freshly ground for subtle heat.
Instructions
- Cook the orzo pasta in salted boiling water according to package instructions until al dente. Drain and rinse with cold water to stop the cooking process and cool the pasta.
- In a large bowl, combine the cooked orzo, cherry tomatoes, cucumber, kalamata olives, red onion, and parsley.
- In a small bowl, whisk together the olive oil, lemon juice, dried oregano, salt, and black pepper until well blended.
- Pour the dressing over the orzo mixture and toss gently to coat everything evenly.
- Fold in the crumbled feta cheese just before serving, or refrigerate the salad covered for up to 3 days and add feta when ready to eat to keep it fresh.
Serve this salad chilled or at room temperature as a flavorful, fresh addition to your meal rotation.
7. Crispy Oven-Baked Zucchini Fries
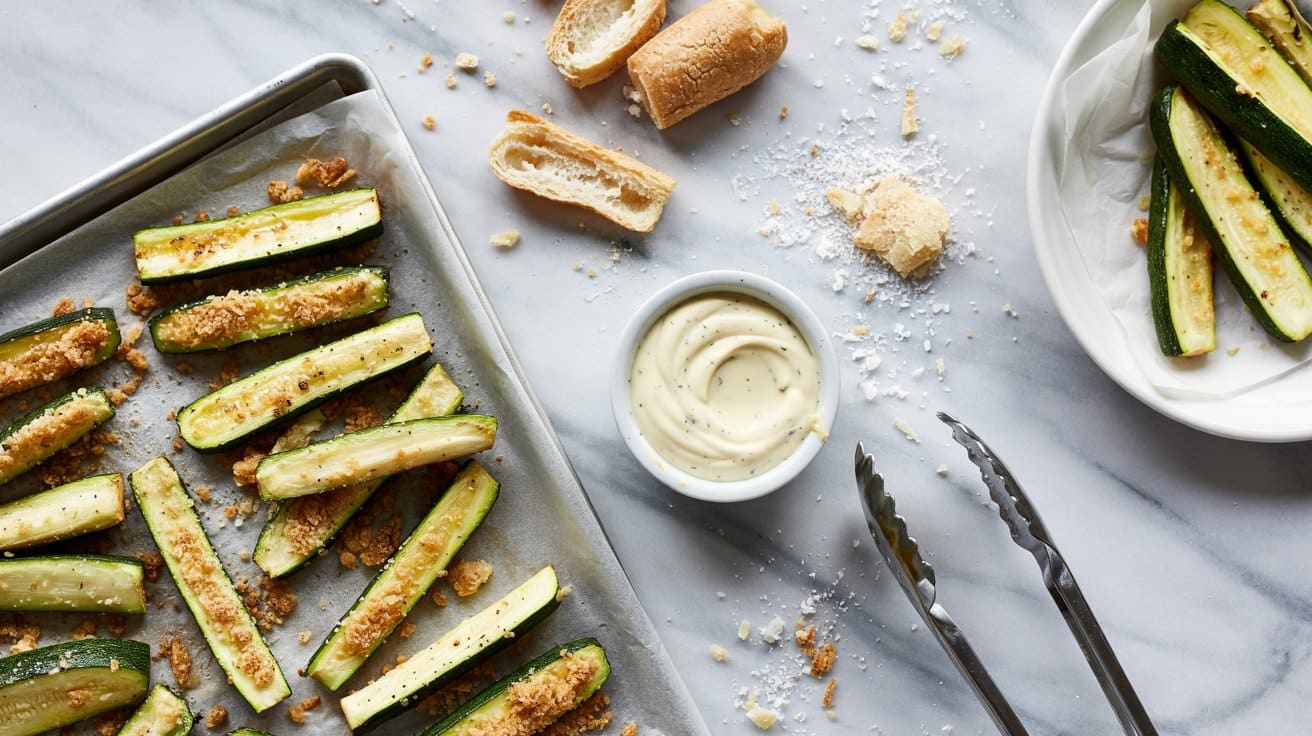
These crispy oven-baked zucchini fries make a great snack or side dish that brings a satisfying crunch without the added fat of frying. The zucchini sticks are lightly coated in a seasoned breadcrumb mixture, giving them a golden, crisp exterior while keeping the inside tender and juicy.
They are easy to prepare and can be made ahead of time, then reheated without losing their texture. This recipe is a lighter alternative to classic fries, offering a tasty way to enjoy more vegetables in your meals.
Why This Recipe Works
This recipe balances convenience with flavor and texture, making it a reliable option for busy weeknights or casual gatherings. It's a crowd-pleasing option that works well for all ages and can easily be customized to fit your tastes.
- Convenience - Quick preparation and oven baking require minimal hands-on time.
- Flavor balance - The light seasoning enhances the natural sweetness of zucchini.
- Texture - The crispy breadcrumb coating contrasts nicely with the soft zucchini interior.
- Make-ahead friendly - Fries hold up well when cooked in advance and reheated.
- Appeal - Suitable for kids and adults seeking a healthier fry option.
Ingredient Swap Ideas
Adjusting this recipe can make it suitable for different dietary preferences or to add variety without losing its core appeal. Swapping ingredients allows you to explore flavors while keeping the fries crispy and tasty.
- Breadcrumbs - Use gluten-free breadcrumbs to make the recipe gluten-free.
- Cheese - Replace Parmesan with nutritional yeast for a dairy-free, vegan option.
- Zucchini - Try yellow squash or eggplant strips as an alternative vegetable base.
- Seasoning - Add smoked paprika or cayenne for a bit of smoky or spicy kick.
Ingredients
- 3 medium zucchini - sliced into 3-inch sticks about ½ inch thick.
- 1 cup panko breadcrumbs - for a light, crispy coating.
- ¼ cup grated Parmesan cheese - adds a subtle, savory flavor.
- 1 teaspoon garlic powder - enhances the seasoning mix.
- ½ teaspoon salt - balances the flavors.
- ¼ teaspoon black pepper - adds mild heat and depth.
- 2 large eggs - beaten, used for dipping the zucchini.
- Cooking spray or olive oil - to lightly coat the fries before baking.
Instructions
- Preheat your oven to 425°F (220°C). Line a baking sheet with parchment paper or a silicone mat to prevent sticking.
- In a shallow dish, combine the panko breadcrumbs, Parmesan cheese, garlic powder, salt, and black pepper. In another bowl, beat the eggs until smooth.
- Dip each zucchini stick first into the beaten eggs, letting the excess drip off, then coat thoroughly with the breadcrumb mixture. Place the coated fries on the prepared baking sheet in a single layer.
- Lightly spray or brush the fries with cooking spray or olive oil to help them crisp up during baking. Bake for 20 to 25 minutes, flipping halfway through, until golden brown and crispy.
- Remove from the oven and let the fries cool for a few minutes before serving. They pair well with a simple dipping sauce like marinara or a garlic aioli.
8. Cauliflower Rice Pilaf with Herbs and Pine Nuts
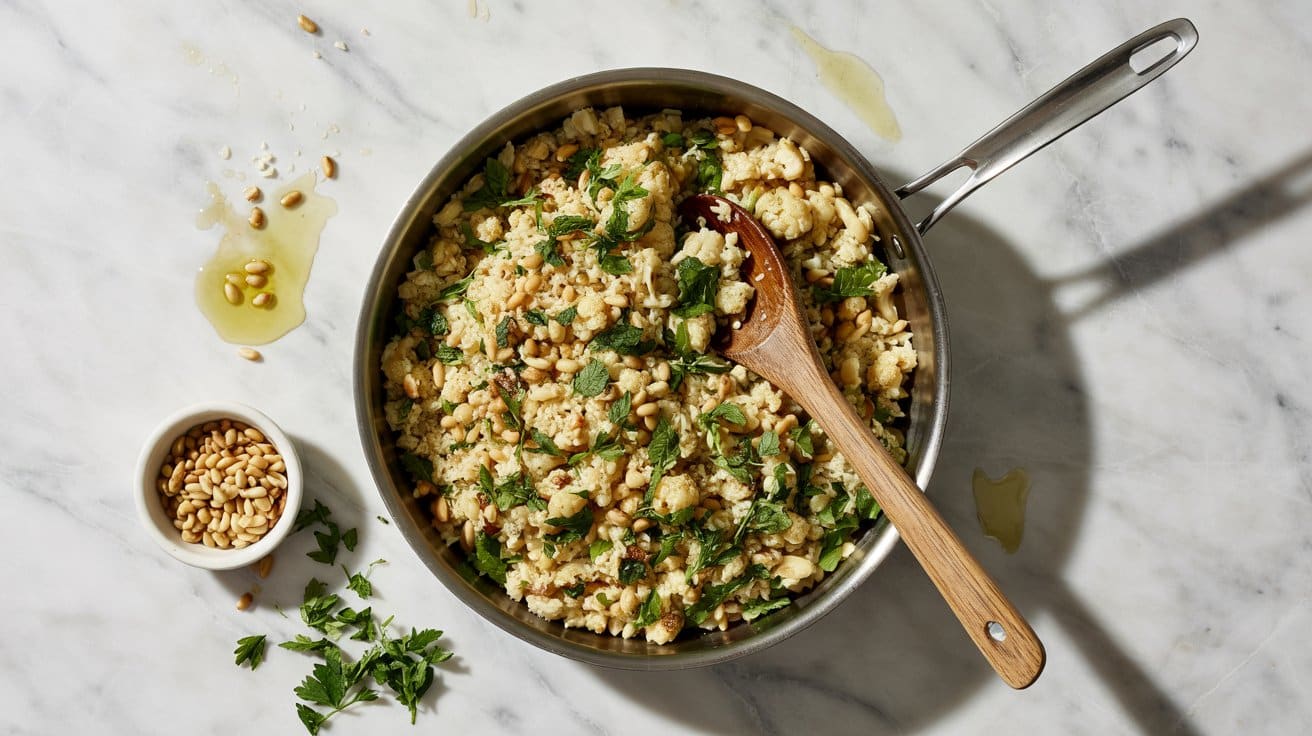
This cauliflower rice pilaf is a flavorful, low-carb alternative to traditional rice dishes. It brings together the delicate nuttiness of pine nuts and the fresh brightness of herbs, making it an inviting side or light main.
The texture is pleasantly tender with a bit of crunch from the toasted pine nuts.
It's straightforward to prepare and can be made ahead, which makes it a practical option for busy days. The recipe pairs well with a variety of proteins or can be enjoyed on its own as a wholesome, satisfying dish.
Why This Recipe Works
This cauliflower rice pilaf combines convenience with fresh flavors and varied textures, making it a worthy addition to everyday meals.
- Convenience - Quick to prepare and easy to make ahead for busy schedules.
- Flavor balance - Bright herbs go with the mild cauliflower and rich pine nuts.
- Texture - Tender cauliflower with crunchy pine nuts adds interest in every bite.
- Appeal - Suitable for low-carb and health-conscious eaters without sacrificing flavor.
- Make-ahead - Keeps well for several days in the fridge.
Ingredient Swap Ideas
Adjusting ingredients can help cater to different dietary needs and flavor preferences while keeping the recipe's essence intact.
- Pine nuts - Substitute with toasted almonds or walnuts for a slightly different crunch and flavor.
- Fresh herbs - Use parsley, cilantro, or dill instead of a mix for a different herbal note.
- Cauliflower - Swap for finely chopped broccoli florets for a similar texture with a new taste.
- Oil - Replace olive oil with avocado oil or light coconut oil for a subtle variation in richness.
Ingredients
- 1 medium head cauliflower - grated or processed into rice-sized pieces.
- 2 tablespoons olive oil - for sautéing and toasting.
- ¼ cup pine nuts - toasted lightly to bring out flavor.
- 1 small onion - finely chopped.
- 2 cloves garlic - minced.
- ¼ cup fresh parsley - chopped.
- 2 tablespoons fresh mint - chopped.
- Salt - to taste.
- Black pepper - freshly ground, to taste.
- Juice of ½ lemon - adds brightness and balance.
Instructions
- Heat 1 tablespoon of olive oil in a large skillet over medium heat. Add the pine nuts and toast them while stirring frequently for about 2 to 3 minutes until golden and fragrant. Remove and set aside.
- In the same skillet, add the remaining olive oil and sauté the chopped onion until translucent, about 3 to 4 minutes. Stir in the garlic and cook for another minute until fragrant.
- Add the grated cauliflower to the skillet. Cook for 5 to 7 minutes, stirring occasionally, until the cauliflower softens slightly but remains somewhat firm.
- Remove the skillet from heat. Stir in the toasted pine nuts, chopped parsley, mint, lemon juice, salt, and black pepper. Mix everything well to combine and adjust seasoning if needed.
- Serve warm as a side dish or let it cool and refrigerate for an easy make-ahead option. The pilaf keeps well for up to 3 days.
9. Classic Coleslaw with a Tangy Vinaigrette
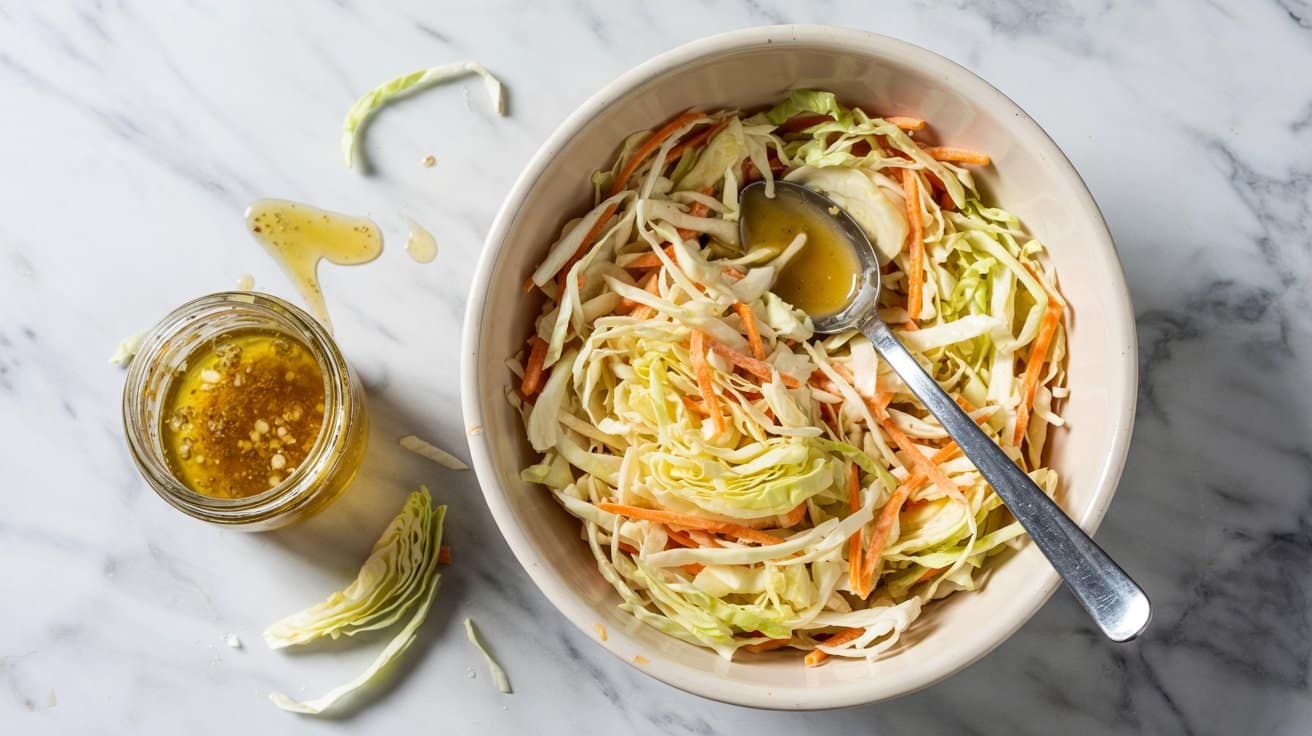
This classic coleslaw combines crisp cabbage with a bright, tangy vinaigrette for a refreshing salad that holds up well over time. It's a great side to pair with grilled meats, sandwiches, or picnic dishes.
The dressing is light but flavorful, soaking into the cabbage and other vegetables as it rests, which helps the flavors meld nicely. You can make it a day ahead, allowing the salad to develop even more depth.
Why This Recipe Works
This coleslaw recipe offers a simple, fresh take on a familiar favorite that's easy to make and keeps well.
- Convenience - Prep ahead and store overnight for enhanced flavor and stress-free serving.
- Flavor balance - Bright and tangy vinaigrette goes with the natural sweetness of the cabbage.
- Texture - Crisp vegetables provide a satisfying crunch in every bite.
- Appeal - Refreshing and versatile, making it a family-friendly side at any meal.
- Make-ahead - Improves in flavor after resting.
Ingredient Swap Ideas
Adjusting ingredients can help tailor this coleslaw to different tastes or dietary preferences without losing its classic character.
- Use green cabbage only for a milder flavor or substitute part with red cabbage for bright color.
- Replace white vinegar with apple cider vinegar to add a touch of fruitiness to the dressing.
- Swap the sugar with honey or maple syrup for a natural sweetener option.
- Add shredded carrots or thinly sliced bell peppers for extra color and crunch.
Ingredients
- 4 cups green cabbage finely shredded
- 1 cup red cabbage finely shredded (optional for color)
- ½ cup grated carrot peeled
- ¼ cup red onion thinly sliced
- 2 tablespoons white vinegar or apple cider vinegar
- 1 tablespoon Dijon mustard smooth
- 1 tablespoon granulated sugar or honey/maple syrup
- ¼ cup extra-virgin olive oil or neutral vegetable oil
- ½ teaspoon salt
- ¼ teaspoon black pepper freshly ground
Instructions
- In a large bowl, combine the green cabbage, red cabbage (if using), grated carrot, and sliced red onion. Toss gently to mix evenly.
- In a separate small bowl, whisk together the vinegar, Dijon mustard, sugar, salt, and pepper until the sugar dissolves fully.
- Slowly drizzle in the olive oil while whisking vigorously to emulsify the vinaigrette.
- Pour the dressing over the cabbage mixture and toss thoroughly to coat all the vegetables evenly.
- Cover and refrigerate the coleslaw for at least 2 hours or ideally overnight to allow the flavors to develop. Stir before serving.
10. Herbed Mushroom and Spinach Sauté
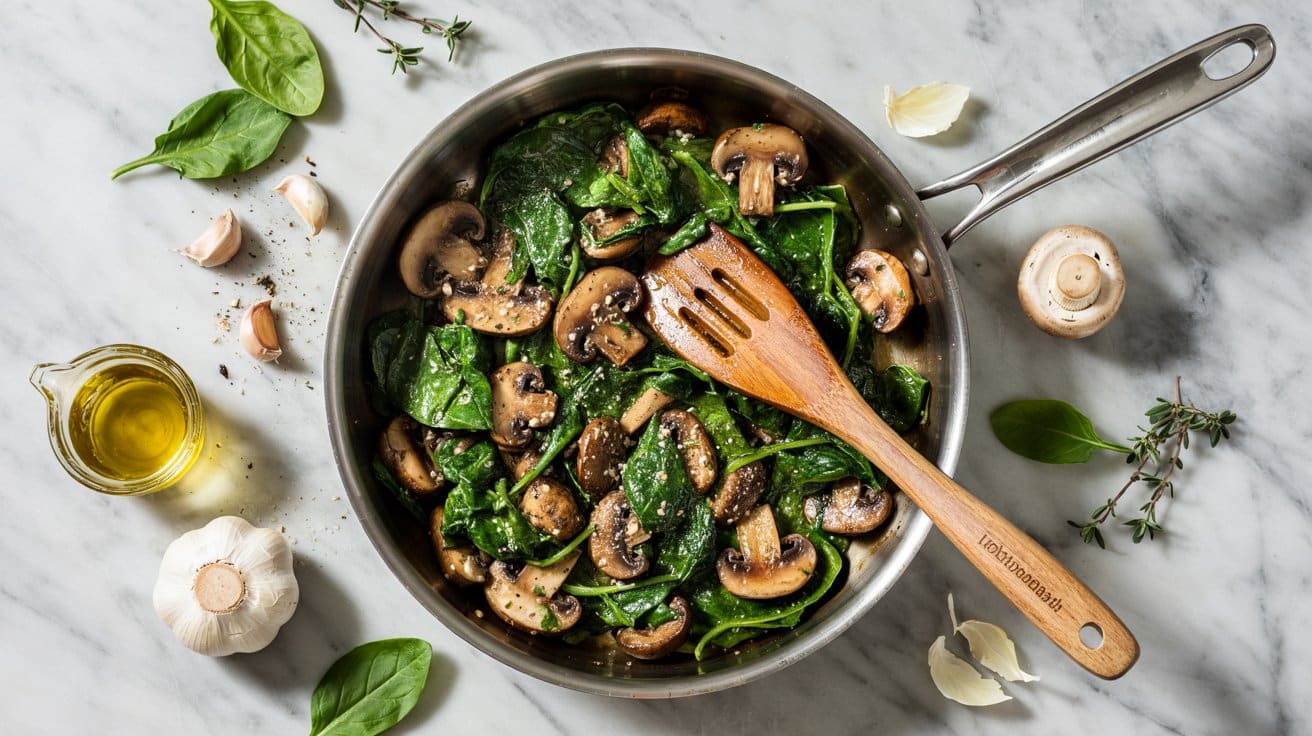
This herbed mushroom and spinach sauté makes a quick, nutritious side dish that pairs well with a variety of main courses. The earthy mushrooms combined with fresh spinach create a wonderful balance of flavors and textures.
It comes together in just minutes, using simple ingredients to create something that's both flavorful and wholesome. This sauté also reheats well, making it a versatile addition to your meal rotation.
Why This Recipe Works
This recipe stands out for its ease and depth of flavor that complement many dishes. Its versatility means you can enjoy it alongside anything from grilled meats to roasted vegetables.
- Convenience - Quick prep and cooking time make it ideal for busy weeknights.
- Flavor balance - Earthy mushrooms and aromatic herbs improve the fresh spinach taste.
- Texture - Tender sautéed mushrooms mix nicely with wilted, but still bright, spinach.
- Appeal - A simple yet elegant side that can suit casual dinners or weekend gatherings.
- Make-ahead - Reheats well without losing texture.
Ingredient Swap Ideas
Switching up ingredients lets you easily adapt this sauté to suit dietary preferences or what you have on hand. Here are a few swap options that keep the recipe's basic charm intact.
- Mushrooms - Use cremini or shiitake in place of button mushrooms for a deeper flavor.
- Greens - Substitute kale or Swiss chard instead of spinach for a different texture.
- Herbs - Try rosemary or oregano instead of thyme for a fresh herbal twist.
- Oil - Replace olive oil with avocado oil or butter for a slightly different richness.
Ingredients
- 8 ounces mushrooms - sliced, preferably button or cremini mushrooms.
- 4 cups fresh spinach leaves - washed and roughly chopped.
- 2 tablespoons olive oil - for sautéing.
- 2 cloves garlic - minced, to add a fragrant base.
- 1 teaspoon fresh thyme leaves - chopped, for herbaceous flavor.
- Salt - to taste.
- Freshly ground black pepper - to taste.
Instructions
- Heat the olive oil in a large skillet over medium heat until shimmering. Add the sliced mushrooms and cook for about 5 to 6 minutes, stirring occasionally, until they release their moisture and start to brown.
- Stir in the minced garlic and chopped thyme, cooking for another 1 to 2 minutes until fragrant but not burnt.
- Add the spinach leaves to the pan and toss gently. Cook for 2 to 3 minutes until the spinach wilts but retains its bright color.
- Season with salt and freshly ground black pepper to taste, stirring to combine all the flavors.
- Remove from heat and serve warm as a side dish or part of a larger meal.
11. Loaded Baked Potato Casserole

Loaded baked potato casserole is a comforting dish that brings together some of the best flavors of a classic baked potato in an easy-to-make casserole form. It combines tender layers of potatoes with creamy cheese, tangy sour cream, savory bacon, and green onions for a dish that is both filling and crowd-pleasing.
This casserole is not only delicious but also practical for busy days. You can prepare it ahead of time and bake it when you're ready, making it a great option for family dinners or potlucks.
The mix of creamy textures and crispy, flavorful bacon makes every bite satisfying.
Why This Recipe Works
This recipe delivers a cozy, satisfying meal with minimal fuss and maximum flavor.
- Convenience - Easy to assemble in advance, then bake at your convenience.
- Flavor balance - Combines creamy, tangy, and smoky elements for well-rounded taste.
- Texture - Offers tender potatoes and melted cheese with crispy bacon on top.
- Appeal - Family-friendly and familiar, making it a hit with adults and kids alike.
- Make-ahead - Prep beforehand and bake when needed for stress-free serving.
Ingredient Swap Ideas
Swapping ingredients can help tailor this casserole for different dietary preferences or ingredient availability without sacrificing the dish's essence.
- Sour cream - Use Greek yogurt instead to add protein and a lighter tang.
- Bacon - Try turkey bacon or smoked tempeh strips for a leaner or vegetarian option.
- Cheese - Substitute sharp cheddar with mozzarella or a blend of cheeses for a milder flavor.
- Potatoes - Use sweet potatoes for a slightly sweeter, nutrient-rich version.
Ingredients
- 4 cups peeled and diced russet potatoes - Provides a starchy, fluffy base for the casserole.
- 1 cup sour cream - Adds creaminess and a slight tang.
- 1 cup shredded sharp cheddar cheese - Gives rich, melty flavor.
- 6 slices cooked bacon, crumbled - Contributes smoky saltiness and crunch.
- ½ cup diced green onions - Offers a fresh, mild onion flavor.
- ½ cup milk - Helps make the casserole creamy.
- 2 tablespoons unsalted butter, melted - Adds richness to the potato mixture.
- 1 teaspoon garlic powder - Enhances savory depth.
- ½ teaspoon salt - Balances flavors.
- ¼ teaspoon black pepper - Adds mild heat.
Instructions
- Preheat your oven to 350°F (175°C). Grease a 9x13-inch baking dish with butter or nonstick spray.
- In a large bowl, mix the diced potatoes, sour cream, melted butter, milk, garlic powder, salt, and black pepper until the potatoes are evenly coated.
- Transfer half of the potato mixture into the baking dish and spread it evenly. Sprinkle half of the shredded cheese, crumbled bacon, and green onions over the potatoes.
- Layer the remaining potato mixture on top, then finish with the remaining cheese, bacon, and green onions.
- Cover the dish with foil and bake for 40 minutes. Remove the foil and bake an additional 15 minutes until the cheese is bubbly and golden.
- Let the casserole rest for 5 minutes before serving to allow it to set slightly.
Loaded baked potato casserole makes a satisfying side or a filling main for family meals or gatherings. Enjoy!
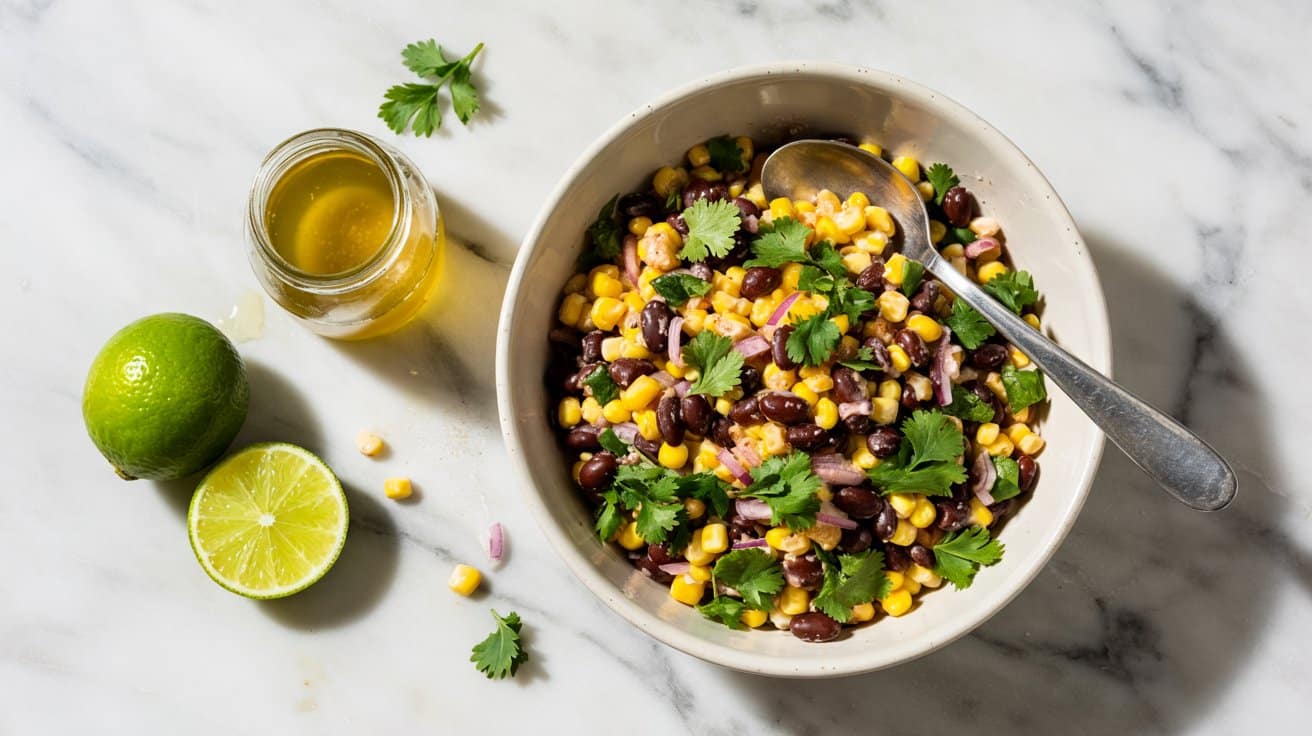
12. Sweet Corn and Black Bean Salad

This Sweet Corn and Black Bean Salad brings together bright, fresh flavors with a satisfying mix of textures that feels both filling and light. It combines the natural sweetness of corn with the rich, creamy texture of black beans.
The salad requires minimal cooking-just a bit of sautéing or roasting to improve the corn's flavor-making it a straightforward choice for busy days.
The salad holds up well in the fridge, so you can prepare it a day or two ahead without losing freshness. Its colorful appearance adds a cheerful note to any meal or gathering, and it goes well with grilled dishes or stands out as a nutritious vegetarian option on its own.
Why This Recipe Works
This salad delivers a practical yet flavorful way to enjoy a protein-packed, veggie-rich side dish that is quick to make and versatile.
- Convenience - Requires little active prep and keeps well in the fridge for several days.
- Flavor balance - Combines sweet corn with savory black beans and fresh herbs for a lively taste.
- Texture - Offers a satisfying crunch from corn and bell peppers alongside the creamy beans.
- Appeal - Colorful and bright, it fits well into family meals or casual get-togethers.
- Make-ahead - Holds flavors well after chilling.
Ingredient Swap Ideas
Adjusting this salad to suit different preferences or dietary needs is easy and keeps the core flavors intact. Swapping ingredients can also add variety if you're making it regularly.
- Corn - Use grilled or roasted corn for a smokier flavor instead of boiled or canned.
- Beans - Substitute black beans with kidney beans or chickpeas for a different texture and taste.
- Herbs - Swap fresh cilantro with parsley or basil if cilantro isn't preferred.
- Peppers - Replace bell peppers with diced cucumbers or cherry tomatoes for a lighter crunch.
Ingredients
- 2 cups fresh or frozen corn kernels - thawed if frozen, or roasted/grilled for added flavor.
- 1 can (15 oz) black beans - rinsed and drained well to remove excess sodium.
- 1 red bell pepper - finely diced for sweetness and crunch.
- ½ red onion - finely chopped to add a mild sharpness.
- 1 jalapeño pepper - seeded and minced, optional for gentle heat.
- ¼ cup fresh cilantro - chopped for brightness.
- 3 tablespoons fresh lime juice - adds a zesty, tangy note.
- 2 tablespoons olive oil - to bring everything together with a light richness.
- ½ teaspoon ground cumin - provides warm, earthy undertones.
- Salt and black pepper - to taste, for seasoning balance.
Instructions
- If using fresh corn, sauté the kernels in a skillet over medium heat with a little olive oil for about 5 minutes until they start to char slightly. Alternatively, roast or grill the corn for added flavor. Let it cool.
- In a large bowl, combine the cooled corn, black beans, diced red bell pepper, chopped red onion, jalapeño (if using), and cilantro.
- In a small bowl, whisk together lime juice, olive oil, ground cumin, salt, and pepper until the dressing is well combined.
- Pour the dressing over the salad and toss gently to coat all the ingredients evenly.
- Taste and adjust seasoning if necessary. Chill in the refrigerator for at least 30 minutes before serving to let flavors meld together.
This salad pairs well with grilled meats or can be enjoyed as a light vegetarian meal on its own. It also keeps well for a couple of days, making it convenient for meal prep or leftovers.
13. Warm Farro Salad with Roasted Vegetables
This warm farro salad blends the nutty flavor of farro with the rich sweetness of roasted seasonal vegetables. It's a filling dish with a satisfying texture that feels both wholesome and comforting, making it an excellent side or light main.
The preparation is straightforward, and making it ahead means the flavors meld beautifully by serving time. It's a versatile recipe that suits busy weeknights or casual gatherings alike.
Why This Recipe Works
This recipe stands out for its practical approach to nourishing meals and inviting flavors. It offers a balanced combination of whole grains and vegetables that appeal to those looking for simple, tasty, and healthful food options.
- Convenience - Farro cooks relatively quickly, and roasting vegetables requires minimal hands-on time.
- Flavor balance - The natural sweetness of roasted veggies goes with the earthy farro.
- Texture - Chewy farro and tender vegetables create a pleasant contrast.
- Appeal - A colorful presentation that works well as a side or main dish for any meal.
- Make-ahead - Can be prepared ahead and served warm or at room temperature.
Ingredient Swap Ideas
Adjusting ingredients helps tailor this salad to various preferences or dietary needs without losing the core flavors. You can easily substitute grains or veggies to keep the dish fresh and exciting.
- Grain swap - Use quinoa or brown rice instead of farro for a gluten-free alternative.
- Vegetable variety - Substitute seasonal vegetables like carrots or sweet potatoes for a different sweetness and texture.
- Dressing change - Swap the olive oil and lemon dressing for a balsamic vinaigrette for a tangier flavor.
- Add protein - Incorporate chickpeas or grilled chicken to make the salad more substantial.
Ingredients
- 1 cup farro - rinsed under cold water.
- 3 cups mixed vegetables - such as zucchini, bell peppers, and cherry tomatoes, cut into bite-sized pieces.
- 3 tablespoons olive oil - divided.
- 1 teaspoon dried thyme - or mixed Italian herbs.
- ½ teaspoon salt - plus more to taste.
- ¼ teaspoon black pepper - fresh ground.
- 1 tablespoon lemon juice - freshly squeezed.
- 2 cloves garlic - minced.
- ¼ cup fresh parsley - chopped, for garnish.
- Optional: ¼ cup toasted pine nuts - for added crunch.
Instructions
- Preheat the oven to 425°F (220°C). Toss the mixed vegetables with 2 tablespoons of olive oil, dried thyme, salt, and pepper. Spread them evenly on a baking sheet and roast for 20-25 minutes, stirring halfway through until they are tender and lightly caramelized.
- While the vegetables roast, bring a large pot of salted water to a boil. Add the rinsed farro and cook according to package instructions, about 20-25 minutes, until tender but still chewy. Drain and set aside.
- In a small bowl, whisk together the remaining 1 tablespoon olive oil, lemon juice, and minced garlic. Season with a pinch of salt and pepper.
- In a large bowl, combine the cooked farro and roasted vegetables. Pour the dressing over the salad and toss gently to combine.
- Garnish with chopped parsley and toasted pine nuts for extra texture before serving warm or at room temperature.
14. Parmesan Garlic Roasted Carrots
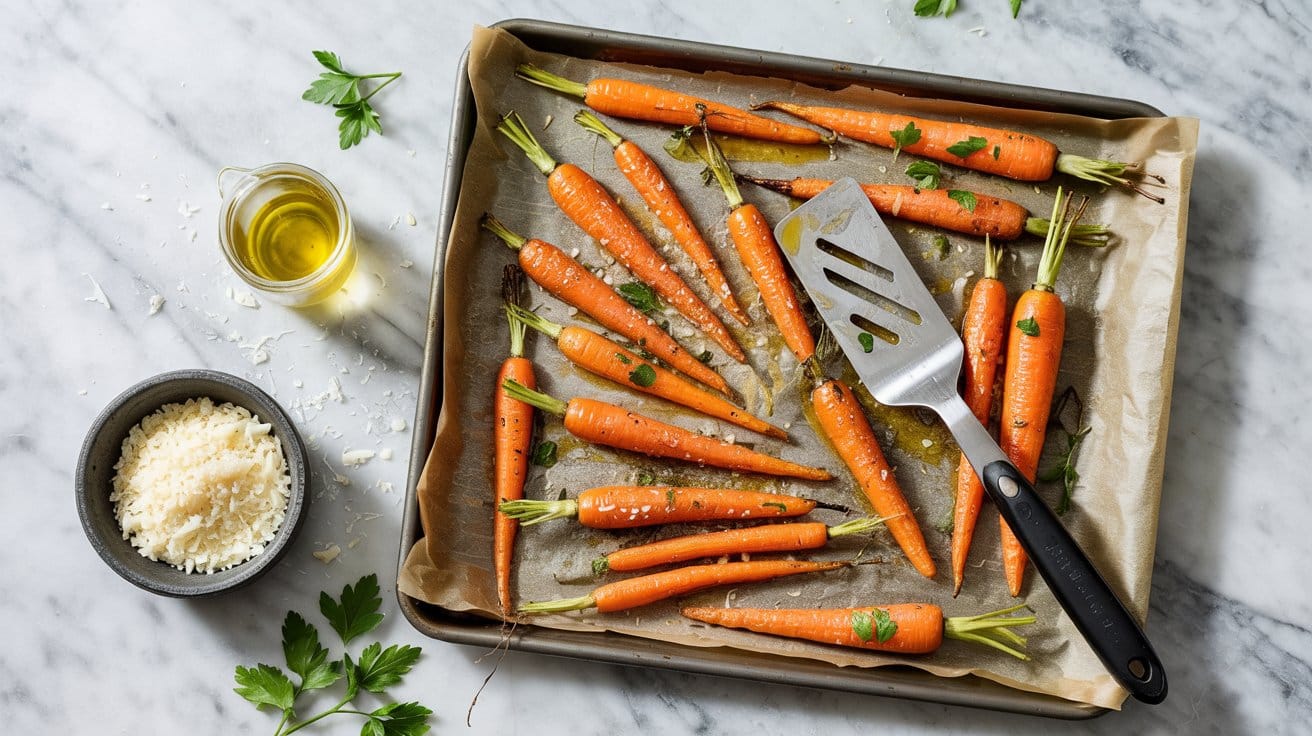
Roasted carrots are a simple side dish that brings out their natural sweetness and soft texture. Adding garlic and Parmesan not only enhances the flavor but also gives the carrots a savory, slightly nutty finish that feels a little special without extra effort.
This recipe is straightforward and fast, perfect for busy home cooks who want a wholesome vegetable side dish. The combination of herbs alongside Parmesan creates a well-rounded taste that pairs well with many main courses.
Why This Recipe Works
This recipe offers a delicious way to enjoy carrots with minimal prep and a rich, savory glaze.
- Convenience - Quick to prepare with basic ingredients and easy roasting.
- Flavor balance - Sweet carrots complimented by sharp garlic and salty Parmesan.
- Texture - Tender carrots with a slightly crisp, cheesy topping.
- Appeal - Works well for family meals and can complement both casual and formal dining.
- Make-ahead - Prepares easily and reheats well.
Ingredient Swap Ideas
Swapping ingredients can make this dish fit different tastes or dietary needs without losing what makes it great.
- Parmesan cheese - Substitute with Pecorino Romano or a vegan Parmesan alternative for different flavors or diets.
- Garlic - Use garlic powder if fresh garlic is unavailable, adjusting amount to taste.
- Herbs - Replace thyme or parsley with rosemary or oregano for varying herbal notes.
- Carrots - Try using rainbow carrots or baby carrots for different textures and colors.
Ingredients
- 2 pounds carrots - peeled and cut into sticks or halves depending on size.
- 3 tablespoons olive oil - to coat the carrots for roasting.
- 3 cloves garlic - minced finely to infuse flavor.
- ½ teaspoon salt - to season and bring out sweetness.
- ¼ teaspoon black pepper - freshly ground for subtle heat.
- ½ cup grated Parmesan cheese - for topping and flavor enhancement.
- 1 tablespoon fresh thyme leaves - finely chopped; can use parsley or rosemary instead.
Instructions
- Preheat your oven to 400°F (200°C). Line a baking sheet with parchment paper or lightly grease it to prevent sticking.
- In a large bowl, toss the peeled and cut carrots with olive oil, minced garlic, salt, and pepper until evenly coated.
- Spread the carrots in a single layer on the prepared baking sheet. Roast for about 20 minutes, stirring halfway through to ensure even cooking.
- Remove the pan from the oven and sprinkle the grated Parmesan and chopped thyme evenly over the carrots. Return to the oven and roast for an additional 5 to 7 minutes until the cheese melts and forms a golden crust.
- Serve warm as a side dish, garnished with extra fresh herbs if desired.
15. Broccoli Slaw with a Creamy, Tangy Dressing
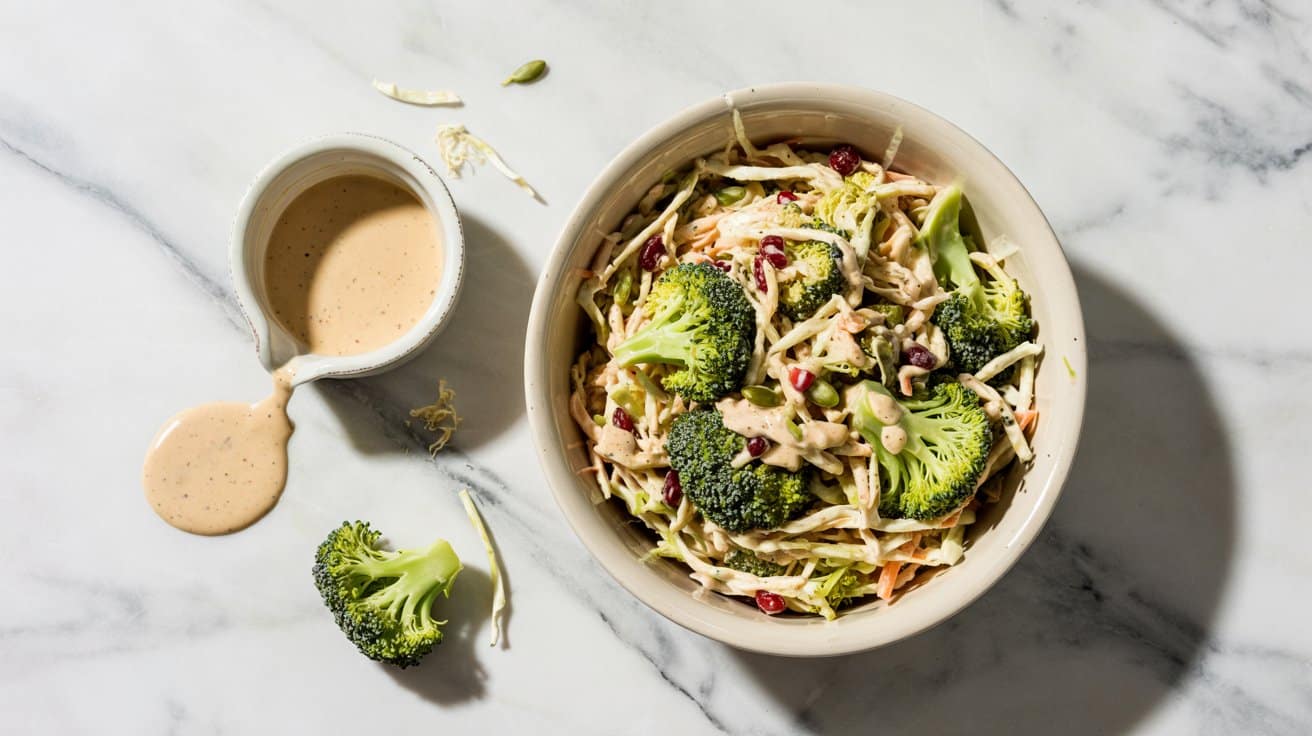
Broccoli slaw offers a fresh twist on classic coleslaw by using shredded broccoli stems and carrots to create a crunchy, bright base. The creamy, tangy dressing ties the flavors together, making this salad a great side dish or light lunch option.
This slaw tastes especially good when chilled, allowing the flavors to meld and the vegetables to soak up the dressing. It's easy to prepare and holds well in the fridge, making it a convenient choice for busy days.
Why This Recipe Works
This broccoli slaw pairs convenience with balanced flavor and texture, making it a reliable addition to any meal. The creamy dressing and crisp vegetables create a refreshing dish that pleases the whole family.
- Convenience - Quick to assemble and can be made ahead, saving time on busy days.
- Flavor balance - Combines tangy, creamy dressing with the natural sweetness of carrots and crunch from broccoli stems.
- Texture - Crisp, crunchy vegetables provide a satisfying bite every time.
- Appeal - Suitable for a variety of occasions, from casual dinners to potlucks or picnics.
- Make-ahead - Improves flavor and texture after chilling.
Ingredient Swap Ideas
Adjusting ingredients can help suit different diets or preferences while keeping the core flavors of this salad intact. Here are some swaps to try if you want to mix things up without losing the essence of the recipe.
- Use Greek yogurt instead of mayonnaise for a lighter, tangier dressing.
- Replace honey with maple syrup to keep the dressing vegan-friendly.
- Add cabbage or shredded kale alongside the broccoli slaw mix for extra greens and texture variety.
- Substitute sunflower seeds for slivered almonds to change up the nutty crunch.
Ingredients
- 4 cups broccoli slaw mix - shredded broccoli stems, carrots, and cabbage blend.
- ½ cup mayonnaise - provides creaminess in the dressing.
- 2 tablespoons apple cider vinegar - adds bright tanginess to balance the cream.
- 1 tablespoon honey - lends subtle natural sweetness to the dressing.
- ½ teaspoon salt - enhances overall flavor.
- ¼ teaspoon black pepper - adds mild heat.
- ¼ cup slivered almonds - adds crunchy texture and a nutty note.
Instructions
- In a large bowl, combine the broccoli slaw mix and slivered almonds. Set aside.
- In a separate small bowl, whisk together mayonnaise, apple cider vinegar, honey, salt, and black pepper until smooth and well blended.
- Pour the dressing over the broccoli mixture and toss thoroughly to coat all ingredients evenly.
- Cover and refrigerate the slaw for at least 30 minutes to allow flavors to develop and vegetables to chill.
- Give the slaw one final toss before serving, adjusting seasoning with extra salt or vinegar if needed. Serve cold as a side dish or light lunch.
16. Classic Ratatouille (Make-Ahead Version)
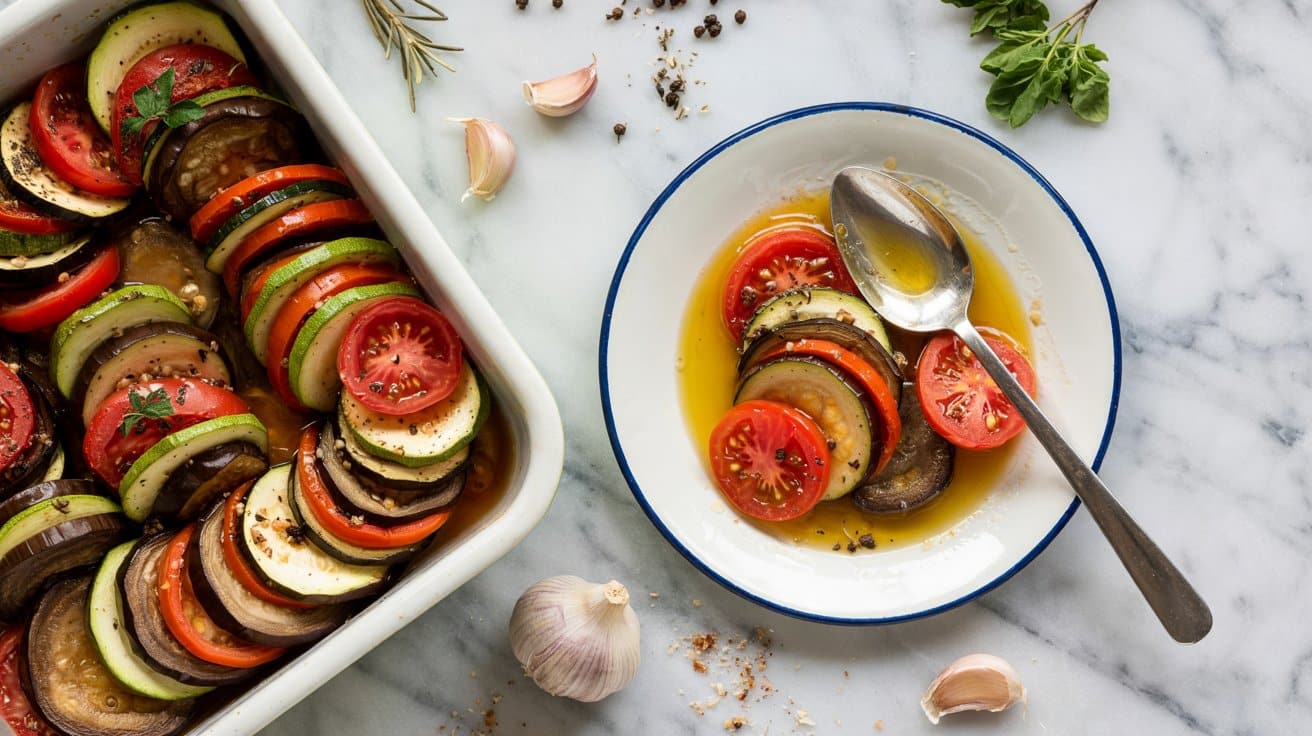
Ratatouille brings together a blend of fresh summer vegetables layered beautifully to create a dish that's both comforting and bright. This make-ahead version allows the flavors to meld overnight, making it an ideal option for busy days or gatherings where you want a delicious dish ready to go.
The combination of tender eggplant, zucchini, and tomato creates a rich mix of textures and tastes. The slow baking process softens the vegetables perfectly, resulting in a warm, savory dish packed with natural sweetness and subtle herbs.
Why This Recipe Works
This ratatouille proves that simple ingredients can produce a deeply satisfying meal with minimal daily preparation.
- Convenience - It can be prepared the day before and baked when you're ready, saving time.
- Flavor balance - The natural sweetness of tomatoes and earthiness of eggplant pair with fragrant herbs.
- Texture - Soft, tender vegetables layered evenly create a balanced mouthfeel.
- Appeal - It's a great side or main dish for family meals, and the presentation looks lovely on the table.
- Make-ahead - Develops deeper flavor when refrigerated overnight.
Ingredient Swap Ideas
Swapping ingredients helps this recipe fit different dietary needs, personal preferences, or what you have on hand, without losing its essence.
- Eggplant substitute - Use yellow squash or extra zucchini if eggplant isn't available or preferred.
- Herbs - Switch thyme for rosemary or basil depending on your flavor preference.
- Tomatoes - Canned crushed tomatoes work well if fresh ones are out of season.
- Olive oil - Use avocado oil as a neutral alternative for a slightly different taste.
Ingredients
- 1 medium eggplant - sliced into ¼-inch rounds.
- 2 medium zucchini - sliced into ¼-inch rounds.
- 4 medium ripe tomatoes - sliced into ¼-inch rounds.
- 1 small onion - finely chopped.
- 3 garlic cloves - minced.
- ¼ cup extra-virgin olive oil - divided for cooking and drizzling.
- 1 teaspoon fresh thyme leaves - or ½ teaspoon dried thyme.
- Salt - to taste.
- Black pepper - to taste.
- ¼ cup tomato sauce - plain or seasoned.
- Fresh basil leaves - for garnish, optional.
Instructions
- Preheat the oven to 375°F (190°C). In a skillet, heat a tablespoon of olive oil over medium heat and sauté the chopped onion and garlic until soft and translucent, about 5 minutes. Spread the cooked onion mixture evenly on the bottom of a baking dish.
- Spread a thin layer of tomato sauce over the onions. Then, arrange the vegetable slices in alternating layers of eggplant, zucchini, and tomato, overlapping slightly in a circular or straight pattern to fit the dish.
- Drizzle the remaining olive oil evenly over the layered vegetables. Sprinkle with thyme, salt, and black pepper to taste.
- Cover the dish tightly with foil and bake for 35 minutes. Remove the foil and bake uncovered for another 20 minutes until the vegetables are tender and slightly caramelized on top.
- Let the ratatouille cool to room temperature, then cover and refrigerate overnight or for several hours to allow the flavors to deepen. Reheat gently before serving and garnish with fresh basil leaves if you like.
17. Baked Spinach and Artichoke Dip

This baked spinach and artichoke dip is a creamy, satisfying appetizer that's easy to prepare and always a crowd-pleaser. The combination of tender spinach with tangy artichokes and melted cheeses creates a rich, comforting flavor that works beautifully as a snack or party starter.
You can prep the ingredients ahead of time and bake the dip just before serving, making it a great choice when you want something warm and inviting without spending too much time in the kitchen.
Why This Recipe Works
This dip offers a tasty, creamy blend that's easy to put together and bake just before guests arrive.
- Convenience - You can prepare the mixture in advance and simply bake it when ready to serve.
- Flavor balance - The tangy artichokes pair nicely with the creamy cheeses and mild spinach.
- Texture - A bubbly, golden top combines with a smooth yet chunky dip inside.
- Appeal - It's a staple for gatherings and family snacks, loved by all ages.
- Make-ahead - Prep in advance and bake to order.
Ingredient Swap Ideas
Swapping a few ingredients can help tailor this dip to different dietary preferences or simply change the flavor.
- Use frozen spinach instead of fresh to save prep time and ensure reliable availability.
- Substitute cream cheese with a vegan cream cheese for a dairy-free variation that keeps the creamy texture.
- Replace Parmesan cheese with nutritional yeast to add a cheesy flavor in a vegan option.
- Swap artichoke hearts with marinated artichokes to add extra flavor and a slight tanginess.
Ingredients
- 10 ounces fresh spinach washed, stems removed, and roughly chopped
- 14 ounces canned artichoke hearts drained and chopped
- 8 ounces cream cheese softened at room temperature
- ½ cup sour cream for creaminess and mild tang
- ½ cup mayonnaise to bind and enrich the dip
- 1 cup shredded mozzarella cheese for melt and stretch
- ½ cup grated Parmesan cheese for sharp, savory flavor
- 2 cloves garlic minced for aromatic depth
- ¼ teaspoon salt to season
- ¼ teaspoon black pepper freshly ground for balance
Instructions
- Preheat your oven to 375°F (190°C). Lightly grease an 8-inch baking dish or similar size casserole.
- In a large mixing bowl, combine the softened cream cheese, sour cream, and mayonnaise until smooth. Stir in the garlic, salt, and pepper.
- Add the chopped spinach, artichokes, mozzarella, and Parmesan cheeses. Mix everything until evenly distributed.
- Transfer the mixture to the prepared baking dish and spread it out in an even layer.
- Bake for 25 to 30 minutes, until the top is bubbly and golden brown. Let it cool for a few minutes before serving so it thickens slightly.
Serve warm with sliced baguette, tortilla chips, or crisp vegetables for dipping.
18. Roasted Beet and Goat Cheese Salad
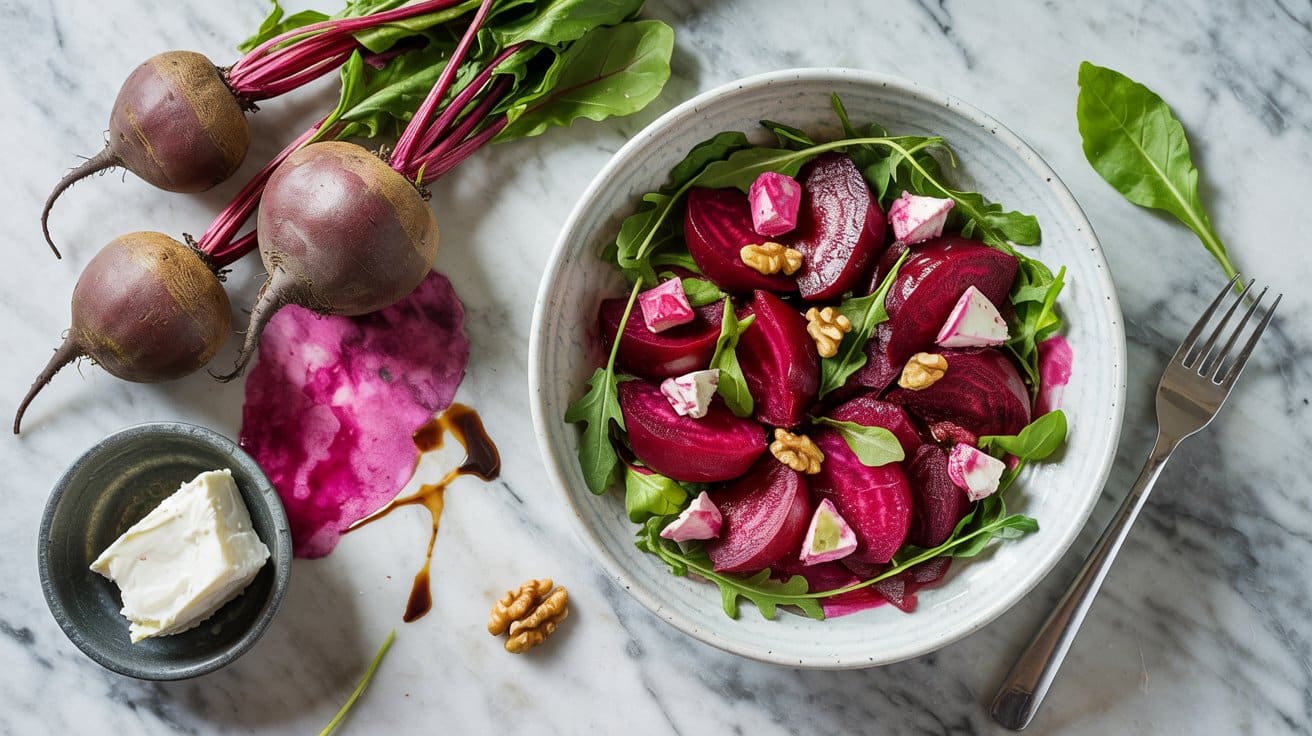
This roasted beet and goat cheese salad is a fresh way to enjoy the earthy sweetness of beets combined with the creamy tang of goat cheese. The salad is simple to put together yet offers a satisfying mix of flavors and textures that work well for a light lunch or a side dish for dinner.
Roasting the beets brings out their natural sugars, while the goat cheese adds a luscious contrast.
The salad stays crisp and bright when you keep the beets and greens separate until serving. A drizzle of balsamic vinegar ties everything together without overpowering the natural taste of the ingredients.
Why This Recipe Works
This salad brings together convenient preparation and fresh, balanced flavors in a dish that feels both nutritious and inviting.
- Convenience - Roasted beets can be prepared ahead and stored for easy assembly.
- Flavor balance - The earthy sweetness of beets goes well with the tangy, creamy goat cheese.
- Texture - Tender roasted beets combined with crisp greens and crumbly cheese create a satisfying mouthfeel.
- Appeal - The bright colors and elegant presentation make it great for casual meals or entertaining.
- Make-ahead - Ideal for prepping components separately and assembling before serving.
Ingredient Swap Ideas
Swapping a few ingredients lets you tailor the salad to personal preferences or dietary needs without losing its essence.
- Goat cheese - Replace with feta for a similar tang and crumbly texture.
- Mixed greens - Use arugula or baby spinach if you prefer a milder or peppery base.
- Nuts - Substitute toasted walnuts with pecans or almonds for a different crunch and flavor.
- Balsamic vinegar - Try a red wine vinegar or lemon juice for a different acidic note.
Ingredients
- 4 fresh beetroot whole, scrubbed - Choose medium-sized beets for even roasting.
- 4 ounces goat cheese torn - Soft and tangy goat cheese adds creaminess.
- 4 cups mixed greens - A blend of arugula, spinach, or baby lettuces works well.
- ½ cup toasted walnuts roughly chopped - Adds crunch and a nutty flavor.
- 3 tablespoons balsamic vinegar - Provides tangy sweetness to the dressing.
- ¼ cup extra-virgin olive oil - Brings richness and smooth texture to the dressing.
- 1 tablespoon honey - Balances the acidity in the dressing naturally.
- ½ teaspoon salt - Enhances overall flavor.
- ¼ teaspoon black pepper - Adds a mild heat and depth.
- 1 tablespoon fresh thyme chopped - Optional garnish to brighten the dish.
Instructions
- Preheat the oven to 400°F (200°C). Wrap each beetroot individually in aluminum foil and place on a baking sheet. Roast for 45-60 minutes until tender when pierced with a fork. Let cool.
- Peel the cooled beets and cut into wedges or cubes. Set aside.
- In a small bowl, whisk together balsamic vinegar, olive oil, honey, salt, and black pepper to make the dressing.
- In a large salad bowl, toss the mixed greens with half the dressing. Arrange the roasted beets on top, then scatter torn goat cheese and toasted walnuts over the salad. Drizzle the remaining dressing before serving.
- Garnish with fresh thyme if using. Serve immediately for the best texture, keeping beets and greens separate if prepping in advance.
19. Cheesy Cauliflower Gratin

This Cheesy Cauliflower Gratin is a simple, satisfying dish that brings together tender cauliflower and a creamy cheese sauce baked to a golden top. It has a comforting texture that holds up well even after refrigeration, making it a great option for preparing in advance and reheating when needed.
The combination of mild cauliflower and rich cheese creates a balanced flavor that appeals to a wide range of tastes. This gratin is straightforward to make and adds a bit of elegance to any meal without demanding too much time or complicated steps.
Why This Recipe Works
This recipe delivers on convenience and flavor, making it a practical choice for busy cooks. It blends creamy and cheesy notes with the slight bite of cauliflower, creating a dish everyone can enjoy.
- Convenience - Easy to prepare with straightforward ingredients and can be made ahead for quick reheating.
- Flavor balance - Combines mild cauliflower with rich, melty cheese for a comforting taste.
- Texture - Has a creamy interior with a crisp, golden cheese crust.
- Appeal - Works well as a side or main dish and is family-friendly.
- Make-ahead - Can be prepared in advance and reheated easily.
Ingredient Swap Ideas
Swapping ingredients can help you adjust this gratin to suit different diets or flavor preferences without losing its essence. Here are some straightforward options.
- Cheese choice - Use Gruyère or mozzarella instead of cheddar for a different cheese flavor and melt.
- Milk alternative - Substitute whole milk with almond milk or oat milk for a dairy-free twist, thickened with a bit more flour.
- Cauliflower substitute - Swap cauliflower for broccoli for a different vegetable take.
- Breadcrumb topping - Use crushed nuts or gluten-free breadcrumbs if you want a gluten-free crunchy topping.
Ingredients
- 1 large head cauliflower - cut into bite-sized florets.
- 3 tablespoons unsalted butter - for making the roux and greasing the baking dish.
- 3 tablespoons all-purpose flour - to thicken the sauce.
- 2 cups whole milk - warmed for the béchamel sauce.
- 1 ½ cups shredded sharp cheddar cheese - divided, for sauce and topping.
- ½ cup grated Parmesan cheese - adds sharpness and helps with browning.
- 1 teaspoon Dijon mustard - enhances the flavor of the cheese sauce.
- Salt and black pepper - to taste.
- ½ cup breadcrumbs - for a crunchy topping.
Instructions
- Preheat the oven to 375°F (190°C). Butter a medium-sized baking dish and set aside.
- Steam or boil the cauliflower florets until just tender, about 5 minutes. Drain well and arrange evenly in the baking dish.
- In a medium saucepan, melt butter over medium heat. Whisk in flour and cook for 1-2 minutes until it forms a smooth paste without browning.
- Gradually whisk in the warm milk, stirring constantly until the sauce thickens and coats the back of a spoon. Remove from heat and stir in Dijon mustard, 1 cup cheddar cheese, and Parmesan. Season with salt and pepper.
- Pour the cheese sauce evenly over the cauliflower. Sprinkle the remaining cheddar and breadcrumbs on top. Bake for 25-30 minutes until bubbly and the topping is golden brown.
- Let the gratin rest for 5 to 10 minutes before serving to allow it to set up slightly. Enjoy warm.
20. Warm Lentil and Herb Salad
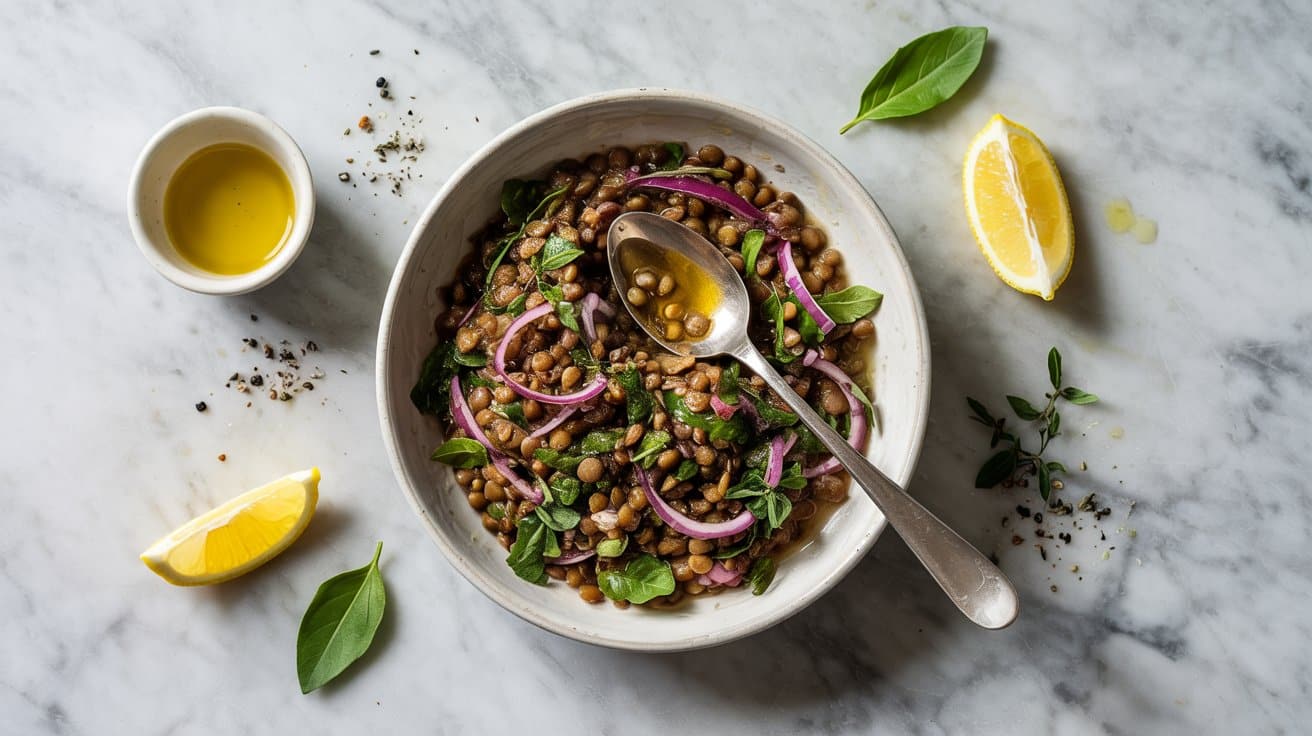
This warm lentil and herb salad is a wholesome, satisfying dish that works well as a main or side. The earthy lentils bring a filling base while fresh herbs brighten the overall flavor.
It's straightforward to make and can be served warm or at room temperature, making it adaptable for different times or occasions.
The combination of tender lentils with aromatic herbs and a simple dressing creates a lovely balance. This salad also fits into a busy lifestyle, offering a nutrient-rich, protein-packed option that doesn't require much fuss.
Why This Recipe Works
This recipe delivers an easy, flavorful dish that combines nourishing lentils with fresh herbs to create a balanced, satisfying salad. It's versatile for meals throughout the day and comes together quickly without compromising taste.
- Convenience - Uses pantry staples and cooks relatively fast for a legume-based dish.
- Flavor balance - Earthy lentils mingle with bright, fresh herbs and a zesty dressing.
- Texture - Tender lentils contrast nicely with crisp herbs and a light vinaigrette.
- Versatility - Suitable for warm or room temperature serving, adaptable as a side or light main.
- Make-ahead - Can be served at various temperatures and prepared ahead.
Ingredient Swap Ideas
Swapping ingredients can help tailor this salad to your preferences or dietary needs without losing its core appeal. Below are some easy alternatives to keep the dish fresh for different occasions.
- Lentils - Use green or brown lentils interchangeably, or try red lentils for a softer texture.
- Herbs - Substitute parsley with cilantro, dill, or mint based on what's available or your taste.
- Dressing - Replace lemon juice with apple cider vinegar or white wine vinegar for a different acidity.
- Add-ins - Incorporate chopped cucumbers, cherry tomatoes, or toasted nuts for extra texture and flavor.
Ingredients
- 1 cup dry brown lentils - rinsed and picked over for any debris.
- 3 cups water - for cooking the lentils.
- ½ cup fresh parsley - chopped finely.
- ¼ cup fresh mint - chopped finely.
- 2 tablespoons extra-virgin olive oil - for the dressing.
- 2 tablespoons fresh lemon juice - adds brightness to the salad.
- 1 small red onion - finely diced.
- 1 clove garlic - minced.
- ½ teaspoon ground cumin - adds warmth to the flavor.
- Salt and black pepper - to taste.
Instructions
- Rinse the lentils thoroughly, then add them to a medium saucepan with 3 cups of water. Bring to a boil, reduce heat, and simmer uncovered for 20 to 25 minutes until lentils are tender but not mushy. Drain any excess water and set lentils aside to cool slightly.
- While lentils cook, prepare the dressing by whisking together olive oil, lemon juice, minced garlic, ground cumin, salt, and pepper in a small bowl.
- In a large mixing bowl, combine the warm lentils, finely chopped parsley, mint, and diced red onion. Pour the dressing over the lentil mixture and toss gently to distribute the flavors.
- Serve the salad warm or at room temperature. Adjust seasoning with more salt or lemon juice if needed before serving.
- Optionally, garnish with a few whole herb leaves or a drizzle of olive oil for presentation.
For warm-weather grilling and picnic menus, summer side dishes for cookouts collects salads, grilled vegetables, and chilled sides suited to outdoor meals. For more ways to spotlight potatoes across meals, explore potato side dishes to elevate meals, which covers mashed, roasted, and casserole-style preparations.

Andrew Gray is a seasoned food writer and blogger with a wealth of experience in the restaurant and catering industries. With a passion for all things delicious, Andrew has honed his culinary expertise through his work as a personal chef and caterer.
His love for food led him to venture into food writing, where he has contributed to various online publications, sharing his knowledge and insights on the culinary world. As the proud owner of CooksCrafter.com, Andrew covers a wide range of topics, including recipes, restaurant reviews, product recommendations, and culinary tips.
Through his website, he aims to inspire and educate fellow food enthusiasts, offering a comprehensive resource for all things food-related.