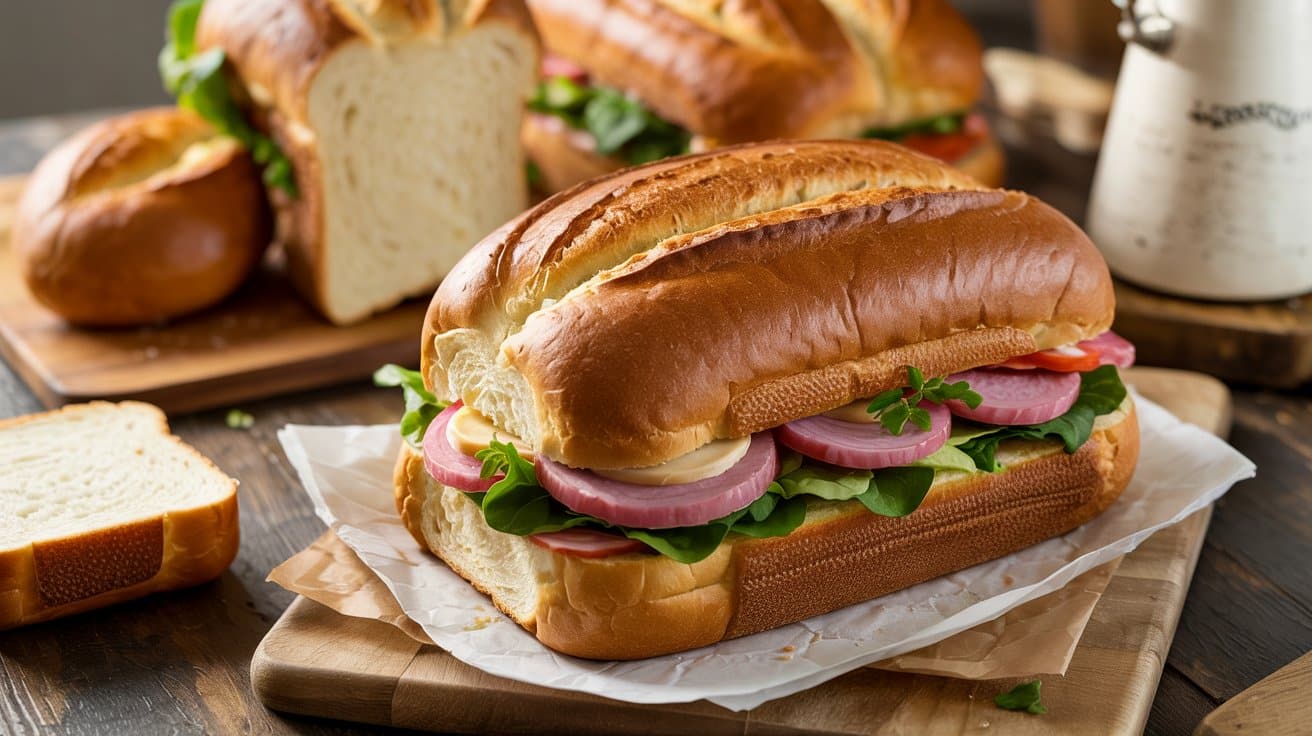
Looking to expand your recipe repertoire with reliable breads you can bake ahead and freeze? This collection of 20 sandwich loaves that freeze beautifully offers a wide range of options suited to everyday meals and special occasions alike; sandwich loaves are medium-sized yeast breads baked in pans to produce uniform slices, ideal for sandwiches, toast, and make-ahead meals.
From classic white sandwich bread to wholesome whole wheat, and from savory herbed loaves to subtly sweet variations, the recipes cover a variety of flavors and textures. Many incorporate nutritious additions like seeds or whole grains, while others provide comforting, familiar tastes that work wonderfully for family lunches, picnics, or quick breakfasts.
These loaves are designed to appeal across different preferences and skill levels, making them accessible choices for any home baker.
What ties these recipes together is their practicality. Each one is crafted for straightforward preparation and baking, producing breads that maintain their quality after freezing and thawing.
This collection supports meal planning and reduces waste, offering flavorful breads with minimal fuss and cleanup.
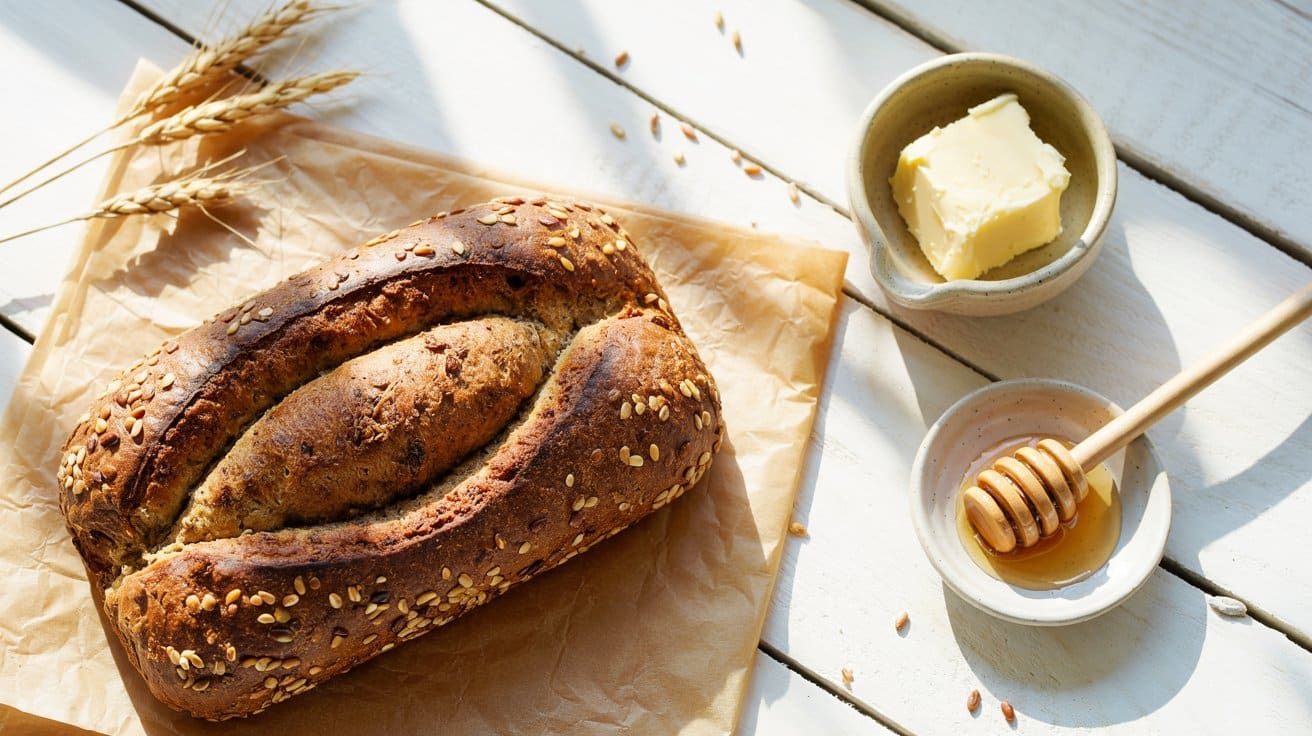
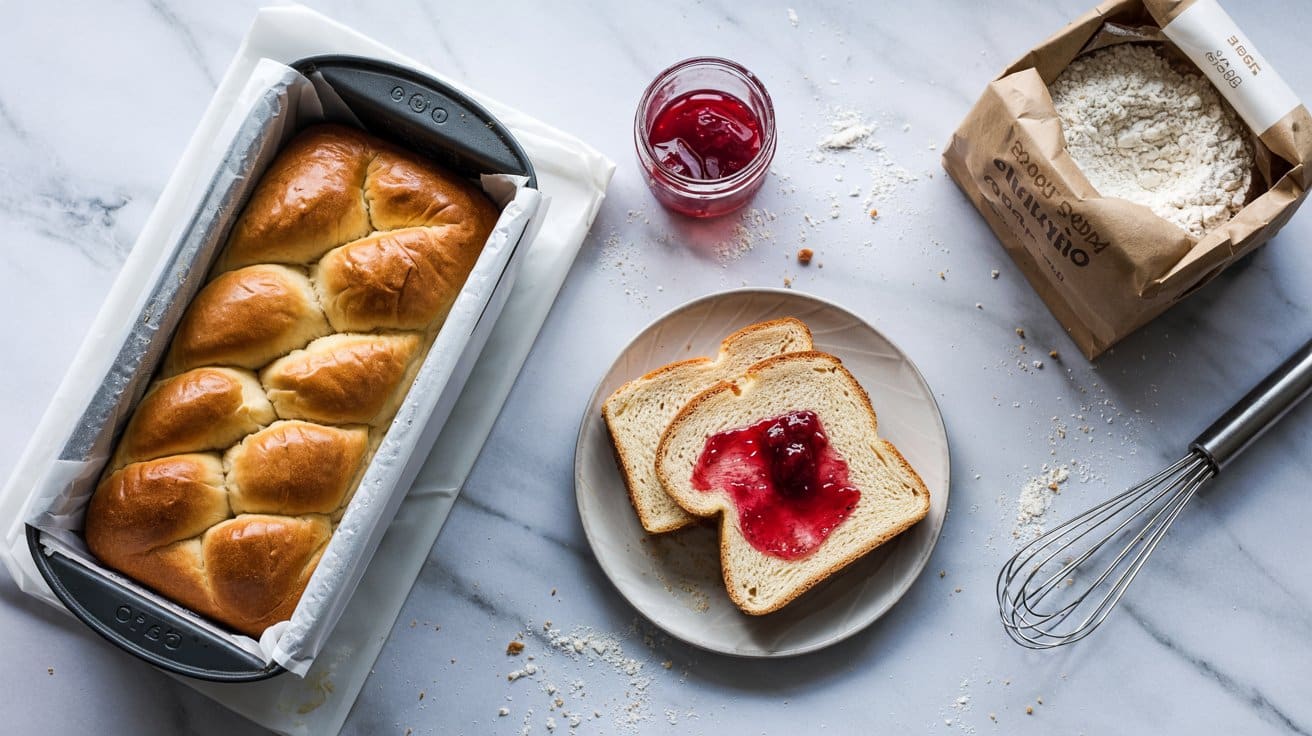
1. Classic White Sandwich Bread
It's soft and tender with a lightly golden crust, making it just right for everyday sandwiches or toast, and pairs especially well with mild, melty cheeses; find white American cheese substitutes for melty sandwiches.
This loaf handles freezing and thawing beautifully, so baking a batch ahead can save time on busy days, and for no-yeast alternatives that also freeze well see no-yeast breads that rise reliably.
The crumb is fluffy and moist, offering a neutral backdrop for any filling or spread. With simple ingredients and straightforward steps, this bread is accessible to anyone wanting that homemade touch without complexity.
Why This Recipe Works
This recipe delivers a soft, pillowy loaf with a gentle crumb and mild flavor that's versatile for many uses. Its simplicity and reliable texture make it a go-to for homemade sandwich bread.
- Convenience - Uses common pantry ingredients and requires only basic mixing and kneading.
- Texture - Soft, airy crumb that holds up well in sandwiches and toasting.
- Flavor balance - Mild sweetness with a subtle yeasty aroma that complements various toppings.
- Make-ahead friendly - Freezes well, allowing easy storage and thawing without losing quality.
Ingredient Swap Ideas
Adjusting ingredients can help tailor this bread to dietary needs or taste preferences without losing its characteristic soft texture.
- All-purpose flour - Substitute with bread flour to create a chewier, more elastic crumb.
- Granulated sugar - Replace with honey or maple syrup for a more natural sweetener.
- Milk - Use any plant-based milk like almond or oat milk for a dairy-free option.
- Butter - Swap with olive oil or vegan margarine to keep it dairy-free and add moisture.
Ingredients
- 3 ½ cups all-purpose flour
- 1 packet (2 ¼ teaspoons) active dry yeast
- 1 cup warm milk (about 110°F)
- ¼ cup granulated sugar
- ¼ cup unsalted butter, melted
- 1 teaspoon salt
- 1 large egg
Instructions
- Activate the yeast by combining warm milk, sugar, and yeast in a large bowl. Let it sit for about 5 minutes until frothy.
- Mix wet ingredients: Add the melted butter and egg to the yeast mixture, stirring to combine.
- Incorporate dry ingredients: Gradually add the flour and salt, mixing until a soft dough forms.
- Knead the dough on a floured surface for about 8-10 minutes until smooth and elastic. Place it in a greased bowl, cover with a towel, and let it rise in a warm place for 1-1.5 hours until doubled in size.
- Shape and bake: Punch down the dough, shape it into a loaf, and place it in a greased 9x5-inch loaf pan. Cover and let rise again for 30-45 minutes. Bake at 350°F (175°C) for 30-35 minutes until golden brown and hollow-sounding when tapped.
Allow the bread to cool completely on a wire rack before slicing. This step ensures the crumb sets nicely for clean slices.
2. Honey Oat Sandwich Bread

This Honey Oat Sandwich Bread brings together a gentle sweetness and a filling oat topping that adds some texture and visual appeal, and for more sweet quick-bread ideas that freeze well try delicious sweet quick bread ideas.
Whether you're making it for quick lunches or a weekend brunch, this bread feels wholesome and satisfying, and it pairs nicely with savory sides like savory honey-sriracha chicken side dishes for bold pairings.
Why This Recipe Works
This bread recipe offers a balance of mild sweetness and wholesome oats, creating a versatile loaf for daily use. It's designed to be moist and tender, with a crust that gives just enough bite without being hard.
- Convenience - Easy to mix and knead with common pantry staples.
- Flavor balance - Subtle honey sweetness goes with the nutty oats on top.
- Texture - Soft crumb inside with a slightly crunchy oat crust.
- Storage - Holds moisture well, perfect for freezing and enjoying later.
Ingredient Swap Ideas
Adjusting ingredients can help fit different diets or change the flavor while keeping the bread's comforting nature. These swaps allow for flexibility depending on what you have on hand or personal preferences.
- Honey - Substitute with maple syrup or agave nectar for a different natural sweetener.
- All-purpose flour - Use whole wheat flour for a nuttier flavor and extra fiber, though the bread will be denser.
- Oats - Replace rolled oats with quick oats if pressed for time, or use a mix of seeds for a nutty crust.
- Milk - Swap dairy milk with almond, oat, or soy milk to make it dairy-free.
Ingredients
- 1 cup warm milk (about 110°F)
- 2 ¼ teaspoons active dry yeast (one packet)
- 2 tablespoons honey
- 3 tablespoons unsalted butter, melted
- 1 large egg
- 3 cups all-purpose flour
- ½ teaspoon salt
- ½ cup rolled oats, plus extra for topping
Instructions
- In a large bowl, combine warm milk, yeast, and honey. Stir gently and let it sit for about 5 minutes until foamy.
- Add melted butter and the egg to the yeast mixture, mixing until smooth. Gradually stir in flour and salt to form a soft dough.
- Turn the dough onto a floured surface and knead for about 8 minutes until it's smooth and elastic. Place the dough in a greased bowl, cover, and let it rise in a warm spot until doubled in size, about 1 hour.
- Punch down the dough and shape it into a loaf. Place it in a greased 9x5-inch loaf pan. Brush the top with a little water or milk, then sprinkle rolled oats evenly over the surface. Cover and let it rise for 30 minutes.
- Preheat your oven to 350°F (175°C). Bake the loaf for 30 to 35 minutes until the top is golden brown and the bread sounds hollow when tapped. Remove it from the pan and cool completely on a wire rack before slicing.
3. Whole Wheat Sandwich Bread
Whole wheat sandwich bread offers a wholesome, nutty flavor with a soft, tender crumb that holds up beautifully to all kinds of fillings, and if you need alternatives, see whole wheat flour swaps for easier baking.
The texture is pleasantly chewy without being dense, and the subtle sweetness balances well with hearty sandwiches or even just a bit of butter. It also freezes well, so you can bake a batch ahead and enjoy fresh slices anytime.
Why This Recipe Works
This whole wheat sandwich bread strikes the right balance between nutrition, flavor, and ease of preparation, giving you a versatile foundation for countless meals.
- Convenience - The straightforward steps and basic pantry ingredients make this bread approachable for most home bakers.
- Flavor balance - The nutty taste of whole wheat is mellowed with a touch of sweetness, appealing to a broad range of palates.
- Texture - Soft and slightly chewy crumb holds sandwich fillings well without crumbling.
- Make-ahead friendly - Bakes into a loaf that freezes nicely, ready to slice and use later without loss of freshness.
Ingredient Swap Ideas
Adjusting ingredients here can tailor the bread for personal preferences or dietary needs without losing its core qualities.
- Whole wheat flour swap - Use half white whole wheat flour to lighten the texture while keeping fiber content.
- Sweetener alternatives - Replace honey with maple syrup or agave nectar for different natural sweeteners.
- Milk choice - Substitute dairy milk with unsweetened almond or oat milk for a dairy-free option.
- Oil options - Use olive oil or avocado oil instead of vegetable oil for a subtle flavor twist.
Ingredients
- 2 ½ cups whole wheat flour
- 1 cup warm water
- 2 tablespoons honey
- 1 tablespoon active dry yeast
- 1 teaspoon salt
- 2 tablespoons vegetable oil
Instructions
- Combine warm water, honey, and yeast in a large mixing bowl. Let stand for 5 minutes until the mixture becomes foamy, indicating the yeast is active.
- Stir in the whole wheat flour, salt, and vegetable oil. Mix until a shaggy dough forms, then turn it out onto a floured surface. Knead for about 8 minutes until the dough is smooth and elastic.
- Place the dough in a lightly oiled bowl, cover it with a damp cloth, and let it rise in a warm spot for about 1 to 1 ½ hours, or until it has doubled in size.
- Punch down the dough and shape it into a loaf. Place it into a greased loaf pan. Cover and let it rise again for 30 to 40 minutes until it puffs up.
- Preheat the oven to 375°F (190°C). Bake the bread for 30 to 35 minutes until the crust is golden brown and the loaf sounds hollow when tapped. Remove from the pan and cool on a wire rack before slicing.
This simple whole wheat bread will be a reliable choice to bring nourishing homemade goodness to your sandwiches and toast alike.
4. Sourdough Sandwich Loaf
This sourdough sandwich loaf delivers a tangy flavor with a tender crumb that stands up well to slicing and toasting. It's an ideal base for all kinds of sandwiches, offering a subtle sour note without overpowering your favorite fillings.
The texture stays soft yet resilient, even after freezing and reheating, making it practical for busy days.
Making this loaf at home means you can enjoy fresh, homemade sourdough bread anytime, with a flavor that feels both familiar and special. The crust develops just enough crispness while the inside remains moist and springy, perfect for both casual lunches and planned meals.
Why This Recipe Works
This recipe strikes a balance between traditional sourdough tang and everyday practicality, making it a reliable choice for home bakers. Here's why it stands out:
- Convenience - The dough can be made ahead and freezes well, allowing you to enjoy fresh bread with minimal daily preparation.
- Flavor balance - It has a pleasant sourness that complements a wide range of sandwich fillings without overwhelming.
- Texture - The crumb is tender yet sturdy, holding its shape after slicing or toasting.
- Appeal - Suitable for family meals or entertaining, this loaf fits seamlessly into a variety of menus.
Ingredient Swap Ideas
Swapping ingredients can help tailor this loaf to your specific taste or dietary requirements without losing the essence of sourdough's flavor and texture. Consider the following options:
- Whole wheat flour - Replace part or all of the white flour with whole wheat for a nuttier flavor and more fiber.
- Spelt flour - Use instead of bread flour for a slightly sweeter, earthy taste and softer crumb.
- Olive oil - Add a tablespoon to the dough for a richer texture and subtle fruitiness.
- Sea salt - Opt for fine sea salt over table salt to improve the crust's flavor and texture naturally.
Ingredients
- 500 grams bread flour
- 350 grams water
- 100 grams active sourdough starter
- 10 grams salt
- Optional: 1 tablespoon olive oil
Instructions
- Combine the bread flour and water in a large bowl. Mix until just combined and cover with a cloth. Let rest for 30 minutes to hydrate the flour.
- Add the active sourdough starter and salt to the dough. Mix thoroughly by hand or with a dough hook until it forms a smooth, elastic ball. Incorporate olive oil if using.
- Transfer the dough to a clean, lightly oiled bowl. Cover and allow it to ferment at room temperature for 4 to 6 hours, folding the dough every 30 minutes during the first 2 hours to develop gluten structure.
- Shape the dough into a tight loaf and place it into a greased loaf pan. Cover and proof the dough for 2 to 3 hours, or until it has visibly risen and springs back slowly when pressed.
- Preheat the oven to 220°C (430°F). Bake the loaf for 20 minutes, then reduce the heat to 190°C (375°F) and bake for an additional 20 minutes or until the crust is golden brown and sounds hollow when tapped.
- Cool the loaf on a wire rack before slicing. You can freeze slices or the whole loaf, thawing as needed while keeping the texture intact.
5. Rustic Multigrain Bread
This rustic multigrain bread combines the wholesomeness of multiple grains and seeds, creating a loaf that feels both nourishing and satisfying. Its hearty texture offers chewiness and a subtle crunch from the seeds, making it excellent for sandwiches or simply toasted with butter.
Making this bread at home is a rewarding process that yields a loaf with a golden crust and a tender crumb that holds up well, even after freezing and thawing. It's a practical choice for anyone wanting a nutritious bread to enjoy throughout the week.
Why This Recipe Works
This multigrain bread blends convenience with deep, nutty flavor and keeps its texture through freeze-thaw cycles, making it a versatile pantry staple.
- Convenience - Uses simple pantry ingredients and doesn't require complicated steps.
- Texture - Offers a filling chew with a crisp crust and soft interior.
- Flavor balance - Combines earthy grains and seeds for a rich, satisfying taste.
- Durability - Retains freshness well after freezing and thawing, ideal for batch baking.
Ingredient Swap Ideas
Customizing this recipe can help accommodate dietary restrictions or personal preferences, while keeping the bread's wholesome character intact.
- Whole wheat flour - Can be replaced with spelt flour for a slightly different nutty flavor.
- Mixed seeds - Substitute with your favorite combination like sunflower seeds, pumpkin seeds, or flaxseeds.
- Honey - Swap with maple syrup or agave nectar for a vegan-friendly version.
- Milk - Use oat milk or almond milk instead of dairy milk for a plant-based option.
Ingredients
- 2 cups whole wheat flour
- 1 cup bread flour
- ½ cup rolled oats
- ¼ cup sunflower seeds
- ¼ cup pumpkin seeds
- 2 tablespoons flaxseeds
- 1 ¼ cups warm water
- 1 tablespoon active dry yeast
- 1 tablespoon honey
- 1 teaspoon salt
- 2 tablespoons olive oil
Instructions
- In a large bowl, combine warm water, yeast, and honey. Stir gently and let sit for 5 to 10 minutes until the mixture becomes frothy.
- Add whole wheat flour, bread flour, rolled oats, seeds, salt, and olive oil to the yeast mixture. Stir with a wooden spoon until a rough dough forms.
- Transfer dough to a floured surface and knead for about 8 to 10 minutes until it becomes smooth and elastic. Add a bit more flour if it's too sticky, but keep the dough slightly tacky.
- Place the dough in a lightly oiled bowl, cover with a clean kitchen towel or plastic wrap, and let rise in a warm spot for 1 to 1½ hours, until it doubles in size.
- Punch down the dough gently, shape it into a round loaf, and place it on a parchment-lined baking sheet. Cover and let rise again for 30 to 40 minutes.
- Preheat the oven to 400°F (200°C). Optional: brush the loaf with water and sprinkle some oats or seeds on top for extra texture.
- Bake the bread for 30 to 35 minutes, until the crust is deeply golden and sounds hollow when tapped on the bottom. Let the loaf cool completely on a wire rack before slicing.
This rustic multigrain bread provides a wholesome texture and rich flavor that you can enjoy all week. It's great toasted or fresh, and the sturdy crumb holds up well to spreads and toppings.
6. Buttermilk Sandwich Bread
This buttermilk sandwich bread brings a tender crumb with a subtle tang that makes every bite interesting. It's enriched with buttermilk, which not only softens the dough but also adds a mild acidity that balances the flavors beautifully.
You will find this bread easy to prepare and versatile enough for everyday sandwiches or toast. It slices well and has a gentle flavor that pairs with both sweet and savory toppings.
Why This Recipe Works
This recipe provides a soft, moist bread with a fine crumb and pleasant tang that enriches the eating experience. It suits a variety of uses and stays fresh longer thanks to the buttermilk enrichment.
- Convenience - Simple ingredients and straightforward steps make it easy to bake at home.
- Flavor balance - Buttermilk lends a mild tang that goes with the natural sweetness of bread flour.
- Texture - Yields a soft and tender crumb that holds together well when sliced.
- Appeal - A versatile loaf suitable for sandwiches, toast, or alongside meals.
Ingredient Swap Ideas
Adjusting ingredients in this recipe can accommodate dietary preferences or ingredient availability without sacrificing texture or flavor.
- Buttermilk substitute - Use plain yogurt thinned with a little milk if buttermilk is unavailable.
- Flour option - Swap bread flour with all-purpose flour for a lighter texture.
- Fat alternative - Replace unsalted butter with olive oil for a dairy-free choice.
- Sweetener swap - Use honey or maple syrup instead of sugar for natural sweetness.
Ingredients
- 3 ½ cups bread flour
- 1 cup buttermilk
- ¼ cup granulated sugar
- 2 ¼ teaspoons active dry yeast
- ¼ cup unsalted butter, softened
- 1 teaspoon salt
- ¼ cup warm water (about 110°F)
Instructions
- In a small bowl, combine warm water, sugar, and yeast. Stir gently and let sit for 5 to 10 minutes until frothy.
- In a large mixing bowl, whisk together bread flour and salt. Add softened butter, buttermilk, and the yeast mixture. Stir until a shaggy dough forms.
- Turn the dough onto a floured surface and knead for about 8 to 10 minutes until smooth and elastic. Alternatively, knead with a stand mixer fitted with a dough hook.
- Place the dough in a lightly greased bowl, cover with a clean towel or plastic wrap, and let rise in a warm place until doubled in size, about 1 to 1 ½ hours.
- Punch down the dough and shape it into a loaf. Place it in a greased 9x5-inch loaf pan. Cover and let rise again until slightly above the top of the pan, 30 to 45 minutes.
- Preheat the oven to 350°F (175°C). Bake the loaf for 30 to 35 minutes until golden brown on top and sounds hollow when tapped.
- Remove from the oven and cool in the pan for 10 minutes, then transfer to a wire rack to cool completely before slicing.
This bread keeps well for several days at room temperature when stored in an airtight container. It also freezes nicely for longer storage.
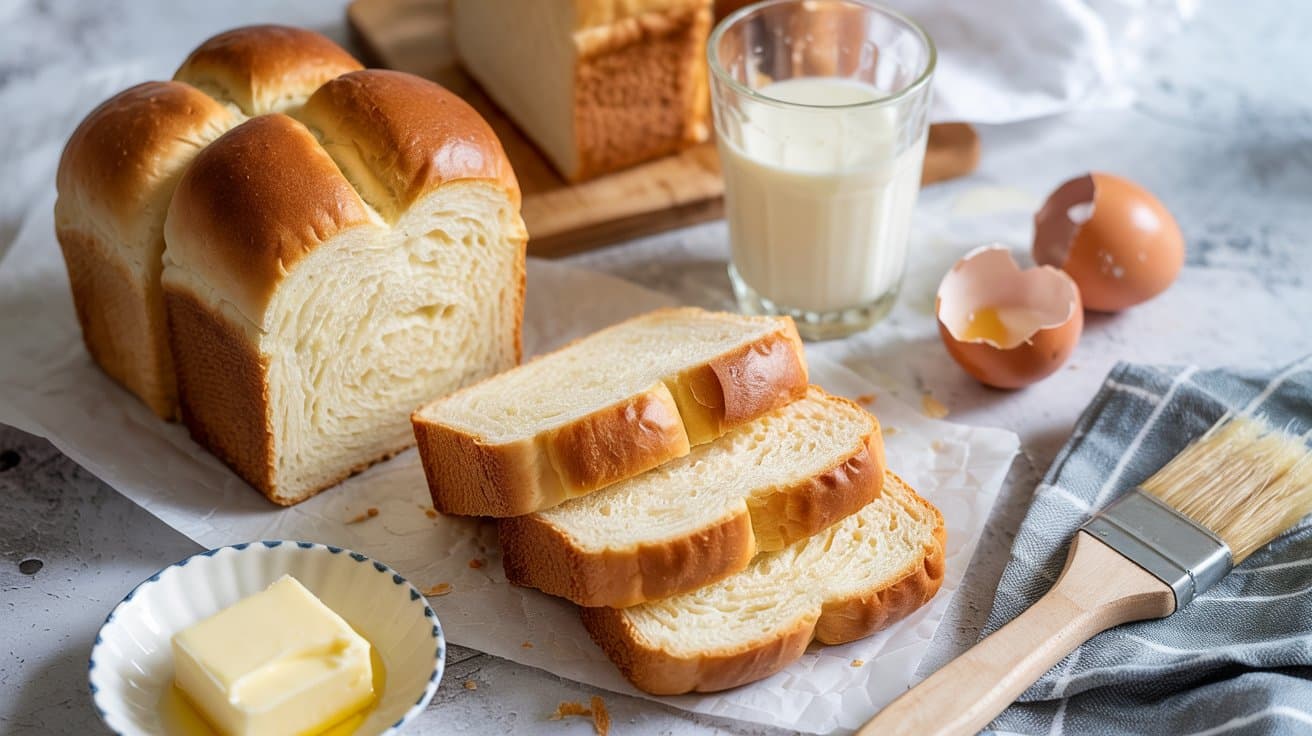
7. Milk Bread (Japanese Shokupan)
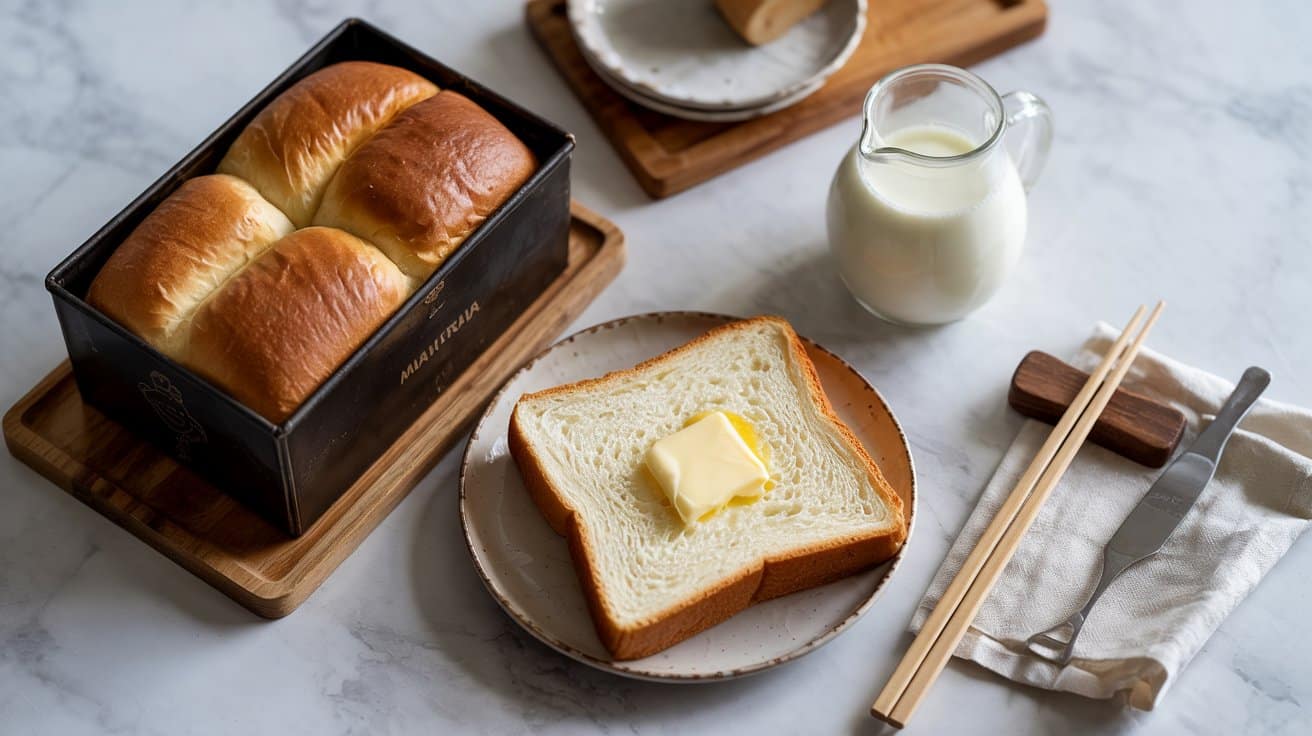
Milk bread, known as Japanese Shokupan, is adored for its remarkably soft, fluffy texture and subtle sweetness. This bread feels light and pillowy, making it ideal for toast and sandwiches that are both comforting and delicious.
Despite its tender crumb, it holds up well during slicing and freezing, so you can prepare a batch ahead of time and enjoy it throughout the week. The recipe balances simple ingredients with straightforward steps, perfect for busy home cooks wanting reliable homemade bread.
Why This Recipe Works
This Milk Bread recipe blends a tender crumb and gentle sweetness with a surprisingly simple preparation method. It yields a loaf that stays fresh longer and handles freezing without losing softness.
- Convenience - The dough is easy to handle and suitable for making ahead or freezing.
- Texture - Exceptionally soft, fluffy crumb with a tight, uniform structure.
- Flavor balance - Mild sweetness with a creamy note that pairs well with any spread or filling.
- Versatility - Ideal for toast, sandwiches, or even a simple snack on its own.
Ingredient Swap Ideas
Adapting this recipe to suit dietary needs or available ingredients can help keep it accessible and enjoyable. Simple swaps let you maintain the bread's signature texture while accommodating preferences.
- Use non-dairy milk such as almond or oat milk - for a dairy-free yet still soft bread.
- Replace all-purpose flour with bread flour - to add more structure and chew if preferred.
- Substitute sugar with maple syrup or honey - to introduce natural sweetness and depth.
- Swap unsalted butter with coconut oil or vegan butter - to make it vegan-friendly without losing richness.
Ingredients
- 2 ½ cups bread flour
- ¼ cup granulated sugar
- 1 teaspoon salt
- 2 teaspoons instant yeast
- ½ cup whole milk, warmed
- ¼ cup heavy cream, warmed
- 1 large egg
- 3 tablespoons unsalted butter, softened
Instructions
- In a large bowl, combine bread flour, sugar, salt, and instant yeast. Mix well so ingredients are evenly distributed.
- In a separate bowl, whisk together the warm milk, heavy cream, and egg. Gradually add this liquid mixture to the dry ingredients while stirring, until a rough dough forms.
- Add softened butter to the dough. Knead by hand or with a stand mixer fitted with a dough hook for about 10 minutes until the dough becomes smooth and elastic.
- Place the dough in a lightly greased bowl, cover it with a clean towel or plastic wrap, and allow it to rise in a warm spot until doubled in size, about 1 to 1 ½ hours.
- Punch down the dough gently to release air. Shape it into a loaf and place it into a greased 9x5-inch loaf pan. Cover again, letting it rise until it's about an inch above the rim-around 45 minutes.
- Preheat the oven to 350°F (175°C). Brush the top of the loaf lightly with milk for a glossy finish. Bake for 30 to 35 minutes until golden brown and the loaf sounds hollow when tapped.
- Remove the bread from the pan and cool completely on a wire rack before slicing.
This milk bread slices beautifully and freezes well, making it practical for everyday use. Enjoy it toasted with butter or use it as a base for your favorite sandwiches.
8. Herbed Garlic Sandwich Loaf

This herbed garlic sandwich loaf brings a fragrant twist to traditional sandwich bread. Infused with fresh garlic and a blend of herbs, it offers a savory aroma that makes every bite satisfying, whether you use it for sandwiches or toast.
The crumb is soft and tender, yet sturdy enough to hold your favorite fillings without falling apart.
It's a straightforward recipe that fits well into a busy schedule. You can prepare the dough ahead of time and freeze the baked loaf, preserving its flavor and texture until you're ready to enjoy it.
This bread is a great way to add a homemade touch to quick lunches or snacks.
Why This Recipe Works
This herbed garlic sandwich loaf combines convenience with bold flavor, making it an excellent choice for everyday meals. The loaf freezes well, so you can bake in advance, saving time on busy days.
- Convenience - The dough is easy to prepare and the loaf stores well both fresh and frozen.
- Flavor balance - Garlic and herbs blend seamlessly for a savory, aromatic bread base.
- Texture - Soft crumb with just enough density to hold sandwich fillings without crumbling.
- Appeal - Versatile enough for simple sandwiches or to accompany savory spreads.
Ingredient Swap Ideas
If you want to adjust this recipe for different dietary needs or flavor preferences, swaps help keep its essence while making it your own. Choose alternatives that maintain the bread's structure and herbal notes.
- Use whole wheat flour instead of all-purpose for a heartier, more fiber-rich loaf.
- Replace fresh garlic with roasted garlic paste for a milder, sweeter flavor.
- Swap fresh herbs for dried to simplify and extend the shelf life of your ingredients.
- Use olive oil in place of butter for a dairy-free option without losing moisture.
Ingredients
- 3 ½ cups all-purpose flour
- 2 teaspoons active dry yeast
- 1 cup warm water (about 110°F)
- 2 tablespoons unsalted butter, softened
- 3 garlic cloves, minced
- 2 teaspoons dried mixed herbs (such as rosemary, thyme, oregano)
- 1 teaspoon salt
- 1 tablespoon sugar
- Optional: extra butter or olive oil for brushing the crust.
Instructions
- In a large bowl, combine warm water, sugar, and yeast. Stir gently and let it sit for about 5 minutes until the mixture becomes frothy, indicating the yeast is active.
- Add in the softened butter, minced garlic, dried herbs, salt, and about half of the flour. Mix together with a wooden spoon or your hands until incorporated.
- Gradually add the remaining flour while kneading the dough on a lightly floured surface for 8 to 10 minutes. Stop when the dough is smooth, elastic, and slightly tacky but not sticky.
- Place the dough in a lightly oiled bowl, cover it with a warm cloth or plastic wrap, and let it rise in a warm place for 1 to 1 ½ hours or until it doubles in size.
- Punch down the dough, shape it into a loaf, and place it in a greased loaf pan. Cover and let it rise again for 30 to 45 minutes. Bake at 375°F (190°C) for 30 to 35 minutes, or until the top is golden brown and sounds hollow when tapped. Brush with extra butter if desired while still warm.
Let the loaf cool completely on a rack before slicing. Store wrapped at room temperature or freeze for longer keeping.
9. Seeded Sandwich Bread
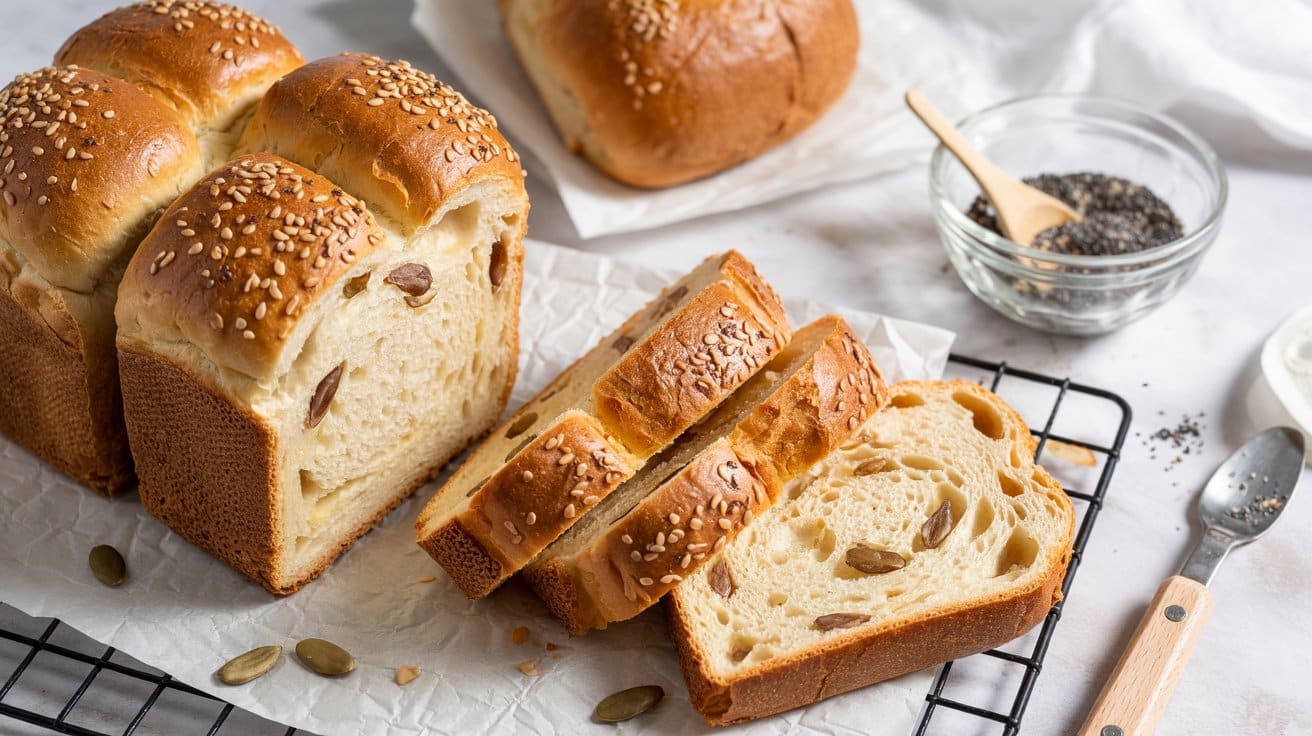
This seeded sandwich bread combines wholesome seeds like sunflower, flax, and chia for a satisfying crunch and a boost of nutrition. It has a soft, tender crumb with a slightly nutty flavor that goes well with a variety of sandwich fillings.
The recipe is straightforward, making it a great option to bake at home. You'll appreciate its heartiness and the way the seeds add both texture and health benefits to every slice.
Why This Recipe Works
This bread is a practical choice for those wanting homemade sandwich bread with extra nutrition and flavor. It delivers a nice balance of softness and crunch, making it versatile for any meal.
- Convenience - Simple preparation with common ingredients and straightforward steps.
- Texture - Soft crumb combined with crunchy seeds throughout the loaf.
- Flavor balance - Mildly nutty taste from the seeds complements savory and sweet sandwich fillings.
- Appeal - Works well for family meals or packed lunches, offering a wholesome bread option.
Ingredient Swap Ideas
Swapping some ingredients can help fit your dietary preferences without losing the bread's qualities. Here are some easy substitutions to try out.
- Whole wheat flour - Use spelt or bread flour if you want a lighter texture.
- Sunflower seeds - Replace with pumpkin seeds or chopped nuts for a different crunch.
- Chia seeds - Substitute with sesame seeds or omit if unavailable.
- Flax seeds - Ground flax can be replaced with whole for more texture or hemp seeds for variety.
Ingredients
- 3 ½ cups all-purpose or bread flour
- 1 ½ cups warm water (about 110°F/43°C)
- 2 ¼ teaspoons active dry yeast (1 packet)
- 2 tablespoons sugar or honey
- 2 tablespoons olive oil or melted butter
- 1 teaspoon salt
- ¼ cup sunflower seeds
- 2 tablespoons flax seeds
- 2 tablespoons chia seeds
Instructions
- In a large bowl, combine the warm water, yeast, and sugar. Stir gently and let sit for 5 to 10 minutes until it becomes foamy.
- Add the flour, salt, and olive oil to the yeast mixture. Mix until roughly combined, then knead the dough on a floured surface for about 8 to 10 minutes until smooth and elastic.
- Gently knead in the sunflower, flax, and chia seeds, making sure they're evenly distributed throughout the dough.
- Place the dough in a lightly oiled bowl and cover with a clean towel or plastic wrap. Let it rise in a warm place for about 1 to 1 ½ hours, or until doubled in size.
- Punch down the dough and shape it into a loaf. Place it into a greased 9x5-inch loaf pan. Cover and allow it to rise again until it doubles, about 45 minutes.
- Preheat your oven to 375°F (190°C). Bake the bread for 30 to 35 minutes until the crust is golden and the bread sounds hollow when tapped.
- Remove from the oven and let cool in the pan for 10 minutes before transferring to a wire rack to cool completely. Slice and enjoy your seeded sandwich bread fresh or toasted.
10. Gluten-Free Sandwich Loaf
This gluten-free sandwich loaf is a great option for those who want to enjoy soft, versatile bread without gluten. The texture is tender yet sturdy enough to hold your favorite sandwich fillings without crumbling apart.
You'll find it simple to prepare with common gluten-free flour blends, and it freezes well, making it practical for prepping ahead and having fresh bread on hand whenever you need it.
Why This Recipe Works
This recipe delivers a reliable gluten-free bread that's easy to make and tastes great with a wide range of uses.
- Convenience - Uses readily available gluten-free blends and freezes well for future use.
- Texture - Soft crumb with enough structure to support sandwiches without falling apart.
- Flavor balance - Mild and slightly sweet, ideal for both savory and sweet toppings.
- Appeal - Works well for family meals and packed lunches, satisfying different dietary needs.
Ingredient Swap Ideas
Swapping ingredients can tailor this loaf to your preferences or dietary restrictions without affecting the core texture and flavor.
- Replace gluten-free all-purpose flour with a homemade blend of rice flour, tapioca starch, and potato starch for a more customized mix.
- Use olive oil instead of vegetable oil for a subtle fruity note.
- Swap milk with any plant-based milk such as almond or oat to make it dairy-free.
- Instead of eggs, try flax eggs (1 tablespoon ground flaxseed + 3 tablespoons water per egg) to keep it vegan-friendly.
Ingredients
- 2 ½ cups gluten-free all-purpose flour
- 1 tablespoon sugar
- 1 teaspoon salt
- 1 tablespoon active dry yeast
- 1 ¼ cups warm milk
- 2 large eggs
- 3 tablespoons vegetable oil
- 1 teaspoon apple cider vinegar
Instructions
- In a large bowl, combine the gluten-free flour, sugar, salt, and yeast. Mix well to distribute the ingredients evenly.
- In a separate bowl, whisk together the warm milk, eggs, vegetable oil, and apple cider vinegar until fully blended.
- Gradually add the wet ingredients to the dry mix, stirring continuously until a smooth, thick batter forms.
- Pour the batter into a greased 9x5-inch loaf pan, smoothing the top with a spatula. Cover loosely and let rise in a warm place for 45 to 60 minutes, or until it has visibly puffed up.
- Preheat your oven to 350°F (175°C). Bake the loaf for 35 to 40 minutes, until the top is golden and a toothpick inserted comes out clean. Let it cool completely in the pan before slicing.
This loaf freezes well sliced or whole, so you can keep portions ready for sandwiches or toast anytime.
11. Honey Whole Wheat & Flax Bread
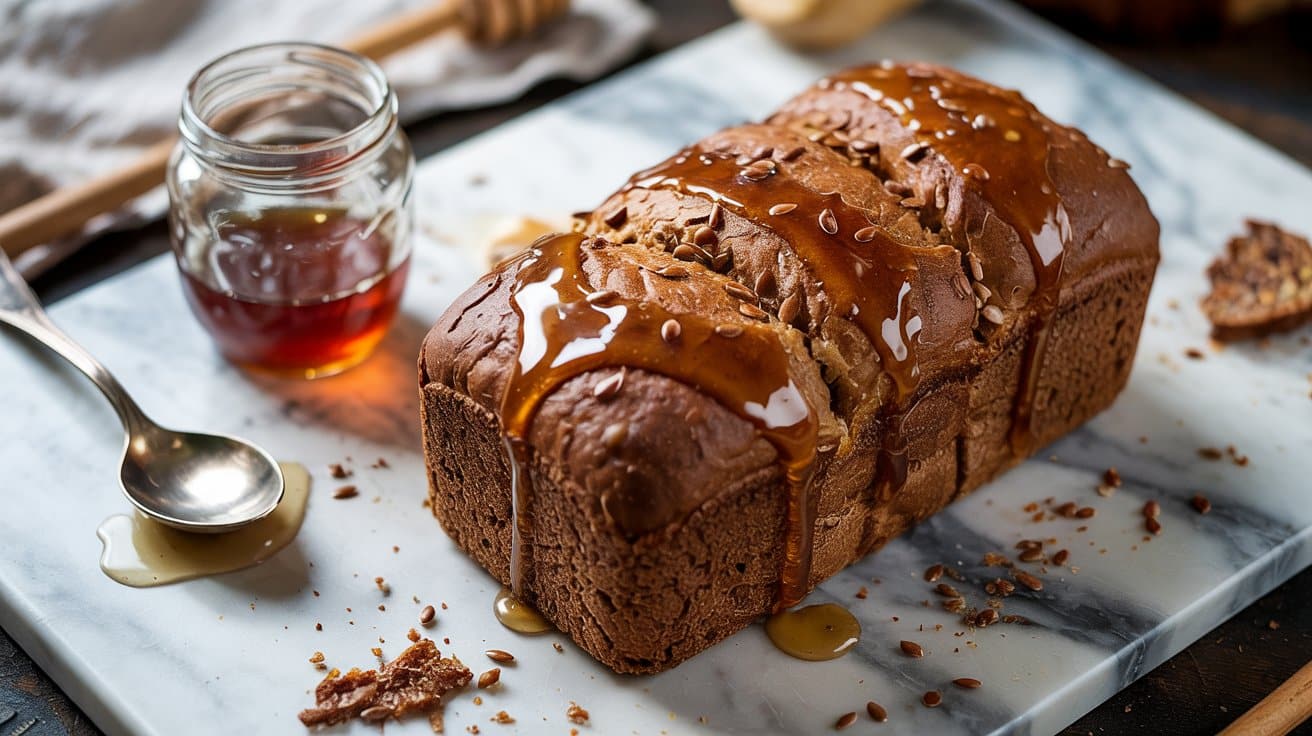
This Honey Whole Wheat & Flax Bread brings a gentle natural sweetness complementing the heartiness of whole wheat flour. The addition of flax seeds introduces a subtle nuttiness and a bit of texture, making each slice satisfying and wholesome.
It's a straightforward recipe that fits well into busy routines. You can prepare the dough ahead and even freeze leftovers, so fresh bread is always within reach.
Why This Recipe Works
This bread recipe balances nutrition, taste, and convenience, making it a great option for everyday baking. The mixture of whole wheat and flax seeds offers a filling texture with a hint of natural sweetness, appealing to those aiming for wholesome meals.
- Convenience - Simple steps with make-ahead and freezer-friendly flexibility.
- Flavor balance - Natural honey sweetness pairs with the nutty richness of flax seeds.
- Texture - Soft yet slightly dense crumb with a light crust and seed crunch.
- Appeal - Suitable for family meals or toasts, sandwiches, and snacks.
Ingredient Swap Ideas
Swapping certain ingredients can tailor this bread to your preferences or dietary needs without changing its essential qualities. Consider these substitutions to adjust flavor, texture, or accommodate restrictions.
- Honey - Substitute with maple syrup or agave nectar for a vegan alternative.
- Whole wheat flour - Use spelt or white whole wheat flour for a lighter texture.
- Flax seeds - Replace with chia seeds or sunflower seeds for a different crunch and nutrition profile.
- Olive oil - Substitute with melted coconut oil or softened butter for varying richness.
Ingredients
- 3 cups whole wheat flour
- ½ cup ground flax seeds
- 2 tablespoons honey
- 1 ¼ teaspoons salt
- 2 teaspoons instant yeast
- 1 ¼ cups warm water (about 110°F/43°C)
- 2 tablespoons olive oil
Instructions
- In a large bowl, combine the whole wheat flour, ground flax seeds, salt, and instant yeast. Mix well to distribute the ingredients evenly.
- Add the warm water, honey, and olive oil to the dry ingredients. Stir until a shaggy dough forms, then knead for about 8 minutes on a floured surface until the dough is smooth and elastic.
- Place the dough in a lightly oiled bowl, cover it with a damp cloth or plastic wrap, and let it rise in a warm place for 1 to 1 ½ hours, until doubled in size.
- Punch down the dough and shape it into a loaf. Transfer it to a greased or parchment-lined loaf pan. Cover and let it rise again for 30 to 45 minutes until it nearly doubles.
- Preheat the oven to 375°F (190°C). Bake the bread for 30 to 35 minutes until the top is golden brown and sounds hollow when tapped. Remove from the oven and let it cool on a wire rack before slicing.
This bread stores well in an airtight container for several days and freezes beautifully for longer keeping. Slice and toast as needed for a wholesome start or any meal accompaniment.
12. Pumpkin Sandwich Bread
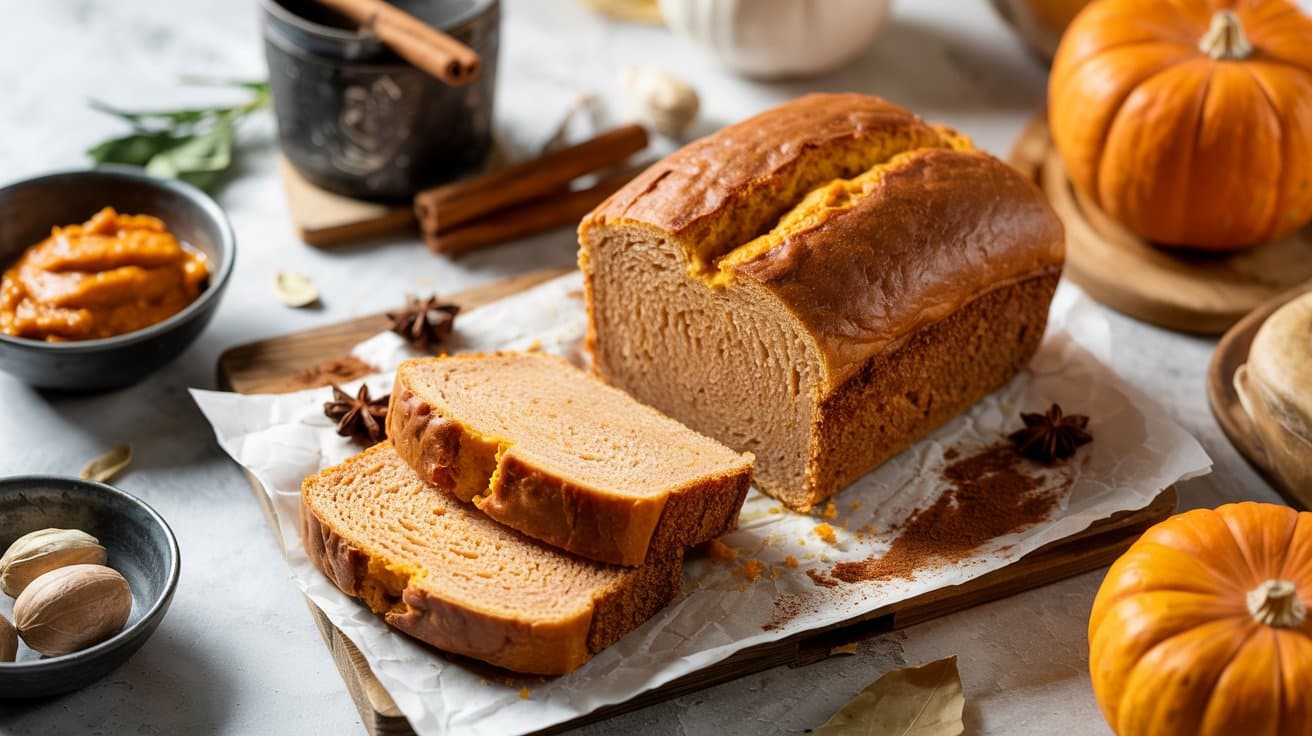
This pumpkin sandwich bread brings a soft, moist texture paired with gentle spice notes that make it an inviting choice for seasonal snacking. It's mild enough to appeal to everyone and versatile enough to enjoy plain, toasted, or as the base for your favorite sandwich fillings.
The loaf freezes well, which makes it convenient to prepare ahead for busy mornings or last-minute gatherings. Baking this bread is straightforward, and it offers subtle autumnal flavors without overwhelming sweetness or spice.
Why This Recipe Works
This recipe delivers a nicely balanced, slightly spiced bread that stays moist thanks to pumpkin puree. It's easy to prepare and stores well, making it practical for weekly meal plans or seasonal variety.
- Convenience - Simple steps with pantry staples and a good freezer-friendly quality.
- Flavor balance - Mild spices go with the pumpkin, keeping the loaf approachable and versatile.
- Texture - Soft crumb with slight moisture, holding up well sliced for sandwiches or toast.
- Family-friendly - Gentle spice profile and familiar bread texture appeal to all ages.
Ingredient Swap Ideas
Swapping certain ingredients can help tailor this loaf to your dietary preferences or pantry options without losing its character. Consider these easy substitutions to suit your needs.
- Pumpkin puree - Use sweet potato or butternut squash puree as an alternative for similar moisture and flavor.
- All-purpose flour - Substitute with whole wheat flour for extra fiber, adjusting liquid slightly for texture.
- Spices - Replace pumpkin pie spice with cinnamon and nutmeg alone if you prefer a simpler spice mix.
- Sweetener - Swap granulated sugar with honey or maple syrup for a more natural sweetness option.
Ingredients
- 2 ½ cups all-purpose flour
- ½ cup granulated sugar
- 1 tablespoon baking powder
- 1 teaspoon baking soda
- 1 teaspoon salt
- 2 teaspoons pumpkin pie spice
- 1 cup canned pumpkin puree
- ⅓ cup vegetable oil
- 2 large eggs
- ½ cup buttermilk
- 1 teaspoon vanilla extract
Instructions
- Preheat your oven to 350°F (175°C). Grease and flour a 9x5-inch loaf pan, or line it with parchment paper.
- In a large bowl, whisk together the flour, sugar, baking powder, baking soda, salt, and pumpkin pie spice until well combined.
- In a separate bowl, mix the pumpkin puree, vegetable oil, eggs, buttermilk, and vanilla extract until smooth.
- Pour the wet ingredients into the dry and stir just until combined. Avoid overmixing to keep the bread tender.
- Transfer the batter to the prepared pan and smooth the top. Bake for 50 to 60 minutes until a toothpick inserted into the center comes out clean.
- Let the bread cool in the pan for about 10 minutes, then remove from the pan and cool completely on a wire rack.
This bread slices easily and goes well with butter, cream cheese, or your favorite sandwich fillings. Store leftovers covered at room temperature for up to three days, or freeze slices for longer storage.
13. Cheddar & Jalapeño Sandwich Loaf

This Cheddar & Jalapeño Sandwich Loaf brings together creamy cheddar and a gentle kick of jalapeño for a bread that's full of flavor without being overpowering. It's a great choice when you want something a little different than your standard sandwich bread-soft and tender with pockets of melted cheese and heat in every bite.
The dough is straightforward to make and the loaf bakes up with a golden crust that's perfect for slicing. Plus, it freezes well, so you can bake ahead and pull it out whenever you need a quick, tasty sandwich option.
Why This Recipe Works
This loaf balances bold flavor with easy prep, delivering a tasty twist on everyday bread.
- Flavor balance - Sharp cheddar and spicy jalapeño work together for a lively but approachable taste.
- Convenience - The dough is simple enough to make on a weekend and freeze for future meals.
- Texture - The bread stays soft and moist, while the cheese melts into lovely pockets inside.
- Family-friendly appeal - It's flavorful but not too spicy, making it a crowd-pleaser for different ages.
Ingredient Swap Ideas
Adjusting ingredients can help fit this recipe to your pantry or dietary needs without losing the core flavors.
- Cheddar cheese - Swap for Monterey Jack or Pepper Jack if you want a milder or differently spiced cheese.
- Jalapeños - Use poblano peppers for a milder heat or canned green chilies for convenience.
- Flour - All-purpose flour can be replaced with bread flour for a chewier texture or a gluten-free blend for special diets.
- Milk - Substitute with a plant-based milk like almond or oat for a dairy-free version, adjusting liquid slightly if needed.
Ingredients
- 3 cups all-purpose flour
- 1 tablespoon sugar
- 2 teaspoons active dry yeast
- 1 teaspoon salt
- 1 cup warm milk (about 110°F)
- 2 tablespoons unsalted butter, melted
- 1 cup sharp cheddar cheese, shredded
- 1 to 2 jalapeños, seeded and finely chopped
- 1 large egg (for egg wash, optional)
Instructions
- Combine warm milk, sugar, and yeast in a large bowl. Let sit for 5 to 10 minutes until foamy.
- Stir in melted butter, then gradually add flour and salt, mixing to form a soft dough. Knead on a floured surface for about 8 minutes until smooth and elastic.
- Fold in shredded cheddar and chopped jalapeños evenly throughout the dough.
- Place dough in a greased bowl, cover, and let rise for 1 to 1¼ hours until doubled in size.
- Punch down the dough and shape it into a loaf. Place it into a greased loaf pan. Let it rise again for 30 to 45 minutes.
- Preheat the oven to 375°F. Brush the top of the loaf with beaten egg if using for a glossy crust.
- Bake for 30 to 35 minutes until the top is golden and the internal temperature reaches about 190°F. Cool in the pan for 10 minutes before transferring to a rack.
The loaf slices beautifully warm or cooled and makes flavorful sandwiches or an excellent accompaniment to soups and salads. It stores well in an airtight container and freezes without losing its texture.
14. Irish Soda Bread Sandwich Loaf

Irish soda bread is a classic quick bread traditionally baked as a round loaf, but turning it into a sandwich loaf makes it easier to slice and use throughout the week. This version keeps the hearty, rustic texture with a soft crumb, perfect for sandwiches or toast.
It's quick to make since it doesn't require yeast or rising time, making it ideal for busy home cooks who want fresh bread with minimal fuss.
The bread has a mild, slightly tangy flavor from the buttermilk and baking soda, paired with a tender crumb and a crisp crust. Baking it in a loaf pan helps create even slices that hold up well when loaded with sandwich fillings or simply spread with butter.
Why This Recipe Works
This Irish soda bread sandwich loaf combines convenience and flavor in a straightforward recipe that fits into a busy schedule.
- Convenience - Does not require yeast or rising time, perfect for quick baking and freezer friendly.
- Texture - Soft crumb with a slightly crisp crust ideal for sandwich making.
- Flavor balance - Mildly tangy from buttermilk, complementing a rustic wheat flavor.
- Versatility - Works well for sandwiches, toast, or alongside soups and salads.
Ingredient Swap Ideas
Swapping a few ingredients can help adjust this recipe for dietary preferences or what's available in your pantry.
- Buttermilk - Use regular milk mixed with a tablespoon of lemon juice or vinegar as a substitute for buttermilk.
- All-purpose flour - Try whole wheat flour for a nuttier taste and added fiber, though the bread will be denser.
- Butter - Substitute with a neutral oil like canola or melted coconut oil to keep the bread dairy-free.
- Sugar - Replace granulated sugar with honey or maple syrup for a natural sweetness variation.
Ingredients
- 4 cups all-purpose flour
- 1 teaspoon baking soda
- 1 teaspoon salt
- 1 tablespoon granulated sugar
- 4 tablespoons unsalted butter, cold and cut into small cubes
- 1 ¾ cups buttermilk, chilled
Instructions
- Preheat the oven to 375°F (190°C). Lightly grease a 9x5-inch loaf pan and set aside.
- In a large bowl, whisk together the flour, baking soda, salt, and sugar until well combined.
- Add the cold butter cubes to the flour mixture. Use your fingers or a pastry cutter to work the butter into the flour until it resembles coarse crumbs.
- Pour in the buttermilk gradually, stirring with a wooden spoon until the dough just comes together. Avoid overmixing to keep the bread tender.
- Transfer the dough into the prepared loaf pan and smooth the top. Bake for 45-50 minutes until golden brown and a toothpick inserted into the center comes out clean.
- Let the loaf cool in the pan for 10 minutes, then turn out onto a wire rack to cool completely before slicing.
This loaf freezes well - slice before freezing for quick sandwiches anytime.
15. Challah Sandwich Bread
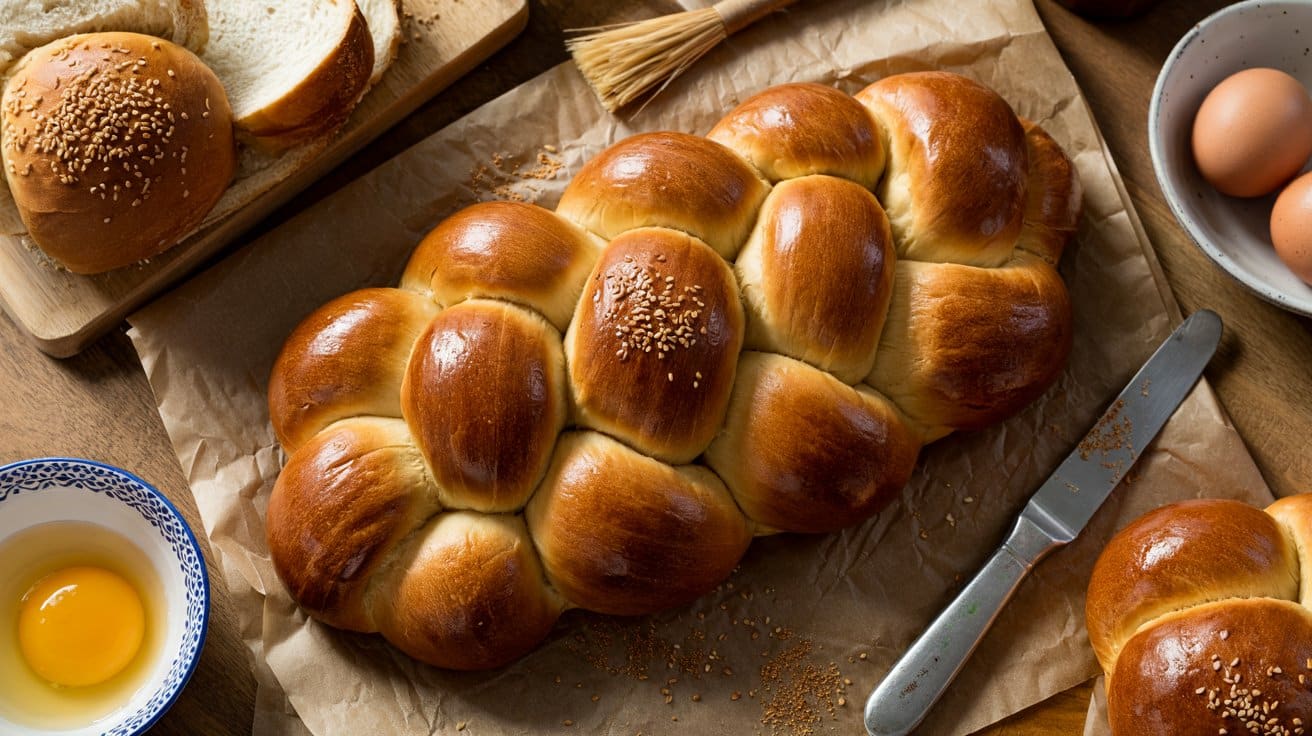
Challah sandwich bread offers a soft, slightly sweet texture that makes it ideal for all kinds of sandwiches. Its rich egg-enriched dough creates a tender crumb and a golden crust, giving familiar sandwiches a touch of homemade warmth.
This version adapts the classic braided challah into loaf pans, making it easier to slice and freeze for later use.
You'll find the bread has just enough sweetness to complement savory fillings without overpowering them. It's a great way to bring a bit of tradition and comfort into everyday meals with manageable prep and baking times.
Why This Recipe Works
This challah sandwich bread combines traditional flavors with practical shaping and storage options, creating a versatile loaf that works well in sandwiches or as toast.
- Convenience - Baked in loaf pans for easy slicing, with dough that can be frozen ahead.
- Flavor balance - A gentle sweetness balanced by egg richness.
- Texture - Soft crumb with a slightly glossy, tender crust thanks to the egg wash.
- Appeal - Kid-friendly and adaptable for breakfasts, lunches, or snacks.
Ingredient Swap Ideas
Adjusting ingredients can help tailor challah bread to your preferences or dietary needs without sacrificing its character.
- All-purpose flour - Substitute up to half with whole wheat flour for a nuttier flavor and added fiber.
- Vegetable oil - Use melted butter instead for a richer taste and softer crumb.
- Honey - Replace with maple syrup or agave nectar for a different natural sweetness.
- Egg wash - Use nondairy milk with a little sugar for a vegan-friendly glaze.
Ingredients
- 4 cups all-purpose flour
- ¼ cup granulated sugar
- 1 packet (2 ¼ tsp) active dry yeast
- 1 teaspoon salt
- ¾ cup warm water
- ¼ cup vegetable oil
- 3 large eggs
- 1 tablespoon honey
Instructions
- In a large bowl, combine warm water, yeast, and a pinch of sugar. Let it sit for 5 to 10 minutes until foamy, indicating the yeast is active.
- Add the sugar, salt, vegetable oil, 2 eggs, and honey to the yeast mixture. Stir in 3 ½ cups of flour gradually until a soft dough forms. Knead on a floured surface for 8 to 10 minutes, adding more flour if needed, until the dough is smooth and elastic.
- Place the dough in a lightly oiled bowl, cover with a clean towel or plastic wrap, and let it rise in a warm spot for 1 to 1 ½ hours, or until doubled in size.
- Punch down the dough and divide it into three equal strands. Braid them, then tuck the ends underneath to keep the shape neat. Place the braid into a greased 9x5-inch loaf pan. Cover and rise again for 30 to 45 minutes until puffy.
- Preheat the oven to 350°F (175°C). Beat the remaining egg and brush it over the bread's surface for a glossy finish. Bake for 30 to 35 minutes until golden brown and sounding hollow when tapped. Let cool in the pan for 10 minutes before transferring to a wire rack.
The bread slices beautifully for sandwiches and freezes well, making it a reliable choice for fresh, homemade meals anytime.
16. Sun-Dried Tomato & Basil Loaf

This Sun-Dried Tomato & Basil Loaf brings the bright, fresh flavors of the Mediterranean straight to your table. The combination of tangy sun-dried tomatoes and fragrant basil creates a loaf that's both savory and satisfying, perfect for snacks, sandwiches, or alongside a simple salad.
The texture is wonderfully moist and slightly dense, giving it a tender crumb that holds up well to slicing. This loaf also freezes nicely, making it a convenient option for busy days when you want something flavorful without extra fuss.
Why This Recipe Works
This loaf offers a delicious Mediterranean twist that's practical to prepare and enjoyable for a variety of meals.
- Convenience - The dough is straightforward to make, and the loaf can be frozen for later use.
- Flavor balance - Sun-dried tomatoes add a tangy burst, while fresh basil offers herbal brightness.
- Texture - It has a moist, tender crumb that isn't dry or crumbly.
- Versatility - This bread pairs well with many dishes or works well on its own as a quick snack.
Ingredient Swap Ideas
Swapping ingredients can help customize this loaf to suit your preferences or dietary requirements without losing its core flavor and texture.
- Sun-dried tomatoes - Use marinated sun-dried tomatoes for an even richer taste or substitute with roasted red peppers for a milder flavor.
- Basil - Fresh oregano or thyme can replace basil for a different herbal note.
- Flour - Use a blend of whole wheat and all-purpose flour for a heartier texture.
- Cheese (optional addition) - Adding shredded mozzarella or feta can create a creamier, more indulgent loaf.
Ingredients
- 2 ¼ teaspoons active dry yeast
- 1 cup warm water
- 1 tablespoon sugar
- 3 cups all-purpose flour
- ½ teaspoon salt
- ¼ cup sun-dried tomatoes
- ¼ cup fresh basil leaves
- 2 tablespoons olive oil
Instructions
- In a small bowl, combine warm water, sugar, and yeast. Stir lightly and let it sit for 5 to 10 minutes until foamy, indicating the yeast is active.
- In a large mixing bowl, whisk together flour and salt. Add the yeast mixture and olive oil, stirring until a rough dough forms.
- Turn the dough onto a floured surface and knead for about 8 to 10 minutes until smooth and elastic. Fold in the chopped sun-dried tomatoes and basil during the last few minutes.
- Place the dough in a lightly oiled bowl, cover it with a clean kitchen towel or plastic wrap, and let it rise in a warm spot for 1 to 1 ½ hours, until doubled in size.
- Punch down the dough and shape it into a loaf. Place it in a greased loaf pan. Cover and let rise for 30 minutes. Preheat the oven to 375°F (190°C).
- Bake the loaf for 30 to 35 minutes until golden brown and sounds hollow when tapped. Remove from the pan and cool on a wire rack before slicing.
This loaf freezes well-wrap tightly and thaw at room temperature when needed.
17. Rustic Rye Sandwich Bread
This rustic rye sandwich bread brings a dense yet moist texture that makes it ideal for heartier sandwiches. Its rich rye flavor holds up well with strong fillings, providing a satisfying bite that isn't overly heavy or dry.
While it's a straightforward bread to prepare, the combination of rye and wheat flours gives it character and depth. You'll find it easy enough to bake on a weekend, with leftovers freezing beautifully for quick use later.
Why This Recipe Works
This bread balances flavor and texture while being versatile for various sandwich styles. It offers a reliable way to bake a dense loaf that remains moist without being crumbly.
- Convenience - Simple mixing and kneading steps make it manageable for home bakers.
- Flavor balance - A deep, slightly tangy rye note goes with the mild wheat base.
- Texture - Dense crumb with moist pockets holds sandwich ingredients well.
- Appeal - Works well for making substantial, strong sandwiches suitable for many tastes.
Ingredient Swap Ideas
Adjusting ingredients can tailor this loaf to dietary preferences or to vary the flavor slightly without losing its essence.
- Whole wheat flour instead of bread flour - Increases fiber and adds nuttiness for a denser texture.
- Caraway seeds - Add for a traditional rye flavor twist, if you enjoy a hint of spice.
- Honey or maple syrup - Use instead of sugar for a natural sweetener with subtle flavor.
- Sourdough starter - Swap part of the yeast with starter for a tangier, more complex loaf.
Ingredients
- 1 cup warm water (about 110°F)
- 2 teaspoons active dry yeast
- 1 tablespoon sugar
- 1 ½ cups bread flour
- 1 ½ cups rye flour
- 1 teaspoon salt
- 2 tablespoons olive oil
Instructions
- In a large mixing bowl, combine the warm water, sugar, and yeast. Stir gently and let it sit for about 5 minutes until it becomes frothy.
- Add the bread flour, rye flour, salt, and olive oil to the yeast mixture. Stir with a wooden spoon until the dough starts to come together.
- Transfer the dough to a floured surface and knead for about 8 to 10 minutes until smooth and elastic. Add a little more flour if the dough feels too sticky.
- Place the dough in a lightly oiled bowl, cover it with a clean kitchen towel, and let it rise in a warm spot for 1 to 1 ½ hours, or until doubled in size.
- Punch down the dough and shape it into a loaf. Place it in a greased loaf pan, cover again, and let it rise for another 45 minutes.
- Preheat the oven to 375°F (190°C). Bake the bread for 35 to 40 minutes until the crust is firm and golden brown. Remove from the oven and cool on a wire rack before slicing.
18. Cinnamon Swirl Sandwich Bread
This cinnamon swirl sandwich bread brings a touch of sweetness to classic homemade bread. The soft, tender crumb contrasts nicely with the spicy cinnamon ribbon running throughout, making each slice a little more interesting.
It's straightforward enough to fit into your regular baking routine and versatile enough to enjoy as toast, sandwiches, or just plain.
Baking this recipe fills your kitchen with a comforting aroma that hints at the warm flavors inside. Plus, the bread freezes well, so you can prepare it ahead of time and have it ready whenever you want a special twist on your sandwiches or breakfast.
Why This Recipe Works
This cinnamon swirl bread combines everyday sandwich bread with a sweet cinnamon touch that pleases both adults and kids. It adds simple variety to your weekly bread without extra trouble.
- Convenience - The dough comes together like regular sandwich bread with an added cinnamon sugar filling that's easy to spread.
- Flavor balance - The soft bread pairs well with the sweet and spicy cinnamon swirl, perfect for sweet or savory toppings.
- Texture - The loaf stays tender and moist, while the swirled sugar adds slight sweetness without overwhelming.
- Freezable - You can freeze the whole loaf or slices, making it easy to store and enjoy later without loss of quality.
Ingredient Swap Ideas
You can adapt the cinnamon swirl bread to different preferences or dietary needs with simple swaps that keep the heart of the recipe intact. Swapping ingredients can also accommodate allergies or make the bread taste a little different each time you bake.
- Use whole wheat flour instead of all-purpose for a nuttier flavor and more fiber, though the bread may be denser.
- Replace white sugar with brown sugar in the cinnamon swirl for a deeper, molasses-like sweetness.
- Swap butter with coconut oil in the dough for a dairy-free version that still retains good moisture.
- Use maple syrup in the swirl instead of sugar for a different natural sweetness and extra moisture.
Ingredients
- 3 ¼ cups all-purpose flour
- 1 packet (2 ¼ teaspoons) active dry yeast
- 1 cup warm milk
- ¼ cup granulated sugar
- ¼ cup unsalted butter, melted
- 1 teaspoon salt
- 1 large egg
- ⅓ cup granulated sugar (for swirl)
- 1 tablespoon ground cinnamon
Instructions
- In a large bowl, combine warm milk and yeast. Let stand for 5 minutes until foamy, showing the yeast is active.
- Add sugar, melted butter, egg, and salt to the yeast mixture. Stir in flour gradually, mixing until a soft dough forms.
- Turn the dough onto a lightly floured surface and knead for about 8 minutes until smooth and elastic. Place it in a greased bowl, cover, and let it rise in a warm spot until doubled in size, about 1 hour.
- Roll the dough into a rectangle roughly 15 by 9 inches. Mix sugar and cinnamon for the swirl and sprinkle evenly over the dough surface. Roll the dough carefully, starting from the long side, to form a tight log. Pinch the seam to seal.
- Place the rolled dough seam side down into a greased 9x5-inch loaf pan. Cover and let rise for 30 to 40 minutes until puffed. Bake at 350°F (175°C) for 30 to 35 minutes until golden brown and firm to the touch. Cool completely before slicing.
19. Whole Wheat Banana Bread Loaf
This whole wheat banana bread loaf is a filling twist on the classic treat we all know. It combines a rich, slightly sweet banana flavor with the nutty depth of whole wheat flour, resulting in a loaf that's both satisfying and nourishing.
The texture is dense enough to hold up well, making it a great option for toasted breakfast slices or even as a sandwich bread alternative.
With simple ingredients and straightforward steps, this loaf is easy to prepare any day of the week. It's a smart way to use ripe bananas, and the wholesome flour gives it more fiber and nutrients than traditional banana bread.
Why This Recipe Works
This banana bread loaf offers practical benefits without sacrificing taste. It keeps well and freezes nicely so you can enjoy a slice anytime.
The natural sweetness from ripe bananas reduces the need for added sugar, making it a slightly healthier choice.
- Convenience - Easy to make and store, ideal for busy mornings or snacks.
- Flavor balance - Sweet bananas go with the slightly nutty whole wheat flour perfectly.
- Texture - Dense and moist crumb that holds together well without being heavy.
- Versatility - Works well toasted, plain, or even as a base for sandwich fillings.
Ingredient Swap Ideas
Sometimes adjustments are helpful to meet taste preferences or dietary needs. Here are some simple ingredient swaps that keep the loaf's integrity intact.
- Whole wheat flour - Substitute with half whole wheat and half all-purpose for a lighter texture.
- Butter - Use coconut oil or olive oil for a dairy-free version.
- Brown sugar - Try maple syrup or honey to add natural sweetness.
- Bananas - Overripe plantains can be mashed instead for a different flavor twist.
Ingredients
- 3 ripe bananas
- ⅓ cup unsalted butter
- ½ cup brown sugar
- 1 large egg
- 1 teaspoon vanilla extract
- 1 teaspoon baking soda
- ½ teaspoon salt
- 1 ½ cups whole wheat flour
Instructions
- Preheat your oven to 350°F (175°C). Grease a 9x5-inch loaf pan or line it with parchment paper for easy removal.
- In a large bowl, mix the mashed bananas with melted butter until combined. Add the brown sugar, beaten egg, and vanilla extract, stirring well after each addition.
- Sprinkle in the baking soda and salt, then gently fold in the whole wheat flour until just blended. Avoid overmixing to keep the loaf tender.
- Pour the batter into the prepared loaf pan, smoothing the top with a spatula. Bake for 60 to 70 minutes, checking with a toothpick inserted in the center; it should come out clean or with just a few crumbs attached.
- Let the loaf cool in the pan for about 10 minutes, then transfer it to a wire rack to cool completely before slicing.
This loaf freezes well, so you can slice and store portions for a quick snack or breakfast option. Toasting slices brings out their flavor and adds a slight crispness that goes with the moist crumb.
20. Cornmeal Sandwich Bread
Cornmeal Sandwich Bread offers a nice texture with its slightly crunchy crust and moist, tender interior. It's a soft bread that holds up well to all kinds of sandwich fillings, making it a versatile choice for busy days or packed lunches.
The addition of cornmeal adds a gentle, nutty flavor and a subtle grainy bite that sets this bread apart from your regular loaf.
Preparing this bread is straightforward, and it freezes beautifully. That means you can bake a batch ahead of time and enjoy fresh slices whenever you need them.
This is a great option for those who want homemade bread without daily baking.
Why This Recipe Works
This recipe strikes a balance between ease and satisfying texture, making it a reliable choice for homemade sandwiches.
- Convenience - The dough comes together easily and can be frozen for future use without losing its texture.
- Texture - The cornmeal creates a slightly crunchy crust with a soft and moist crumb inside.
- Flavor Balance - The mild corn flavor pairs well with both savory and sweet sandwich fillings.
- Family-Friendly - Soft enough for kids but flavorful enough for adults, it suits a range of tastes.
Ingredient Swap Ideas
Switching ingredients can tailor this bread to different dietary preferences or what you have on hand, without compromising its character.
- Cornmeal - Substitute fine yellow cornmeal with white cornmeal or semolina for a similar texture.
- Flour - Use a mix of whole wheat and all-purpose flour for a heartier, more nutritious bread.
- Milk - Replace whole milk with almond or oat milk for a dairy-free version; water also works but may slightly reduce tenderness.
- Butter - Swap butter with olive oil or melted coconut oil to suit vegan diets or preferences.
Ingredients
- 1 cup yellow cornmeal
- 2 cups warm milk
- 2 ¼ teaspoons active dry yeast (1 packet)
- ¼ cup granulated sugar
- ½ cup unsalted butter, melted
- 1 tablespoon salt
- 5 cups all-purpose flour, approximately
Instructions
- In a large bowl, combine warm milk, sugar, and yeast. Stir gently and let sit for about 5 minutes until the mixture is frothy, indicating the yeast is active.
- Add melted butter, salt, and cornmeal to the yeast mixture, stirring to combine well. Incorporate about 3 cups of flour next, mixing until incorporated.
- Gradually add the remaining flour, a little at a time, kneading until the dough is soft but no longer sticky. This usually takes about 6 to 8 minutes of kneading by hand or 4 to 5 minutes in a mixer with a dough hook.
- Place the dough in a lightly greased bowl, cover with a clean cloth, and let it rise in a warm spot for about 1 to 1½ hours, or until doubled in size.
- Punch down the risen dough, shape it into a loaf, and place it into a greased 9x5-inch loaf pan. Cover and let it rise again for 30 to 45 minutes until it springs back slowly when pressed.
- Bake in a preheated 375°F (190°C) oven for 35 to 40 minutes, until the crust turns golden brown and the loaf sounds hollow when tapped. Remove from the pan and cool completely on a wire rack before slicing.
This bread offers enjoyable texture and flavor with every slice, making it a dependable choice for your sandwich needs.
For sweet single-serve desserts that stay moist after freezing, consider this collection of quick moist mug cake recipes. For chilled, dessert-style drinks that feel indulgent yet portable, see these decadent chocolate smoothie recipes.

Andrew Gray is a seasoned food writer and blogger with a wealth of experience in the restaurant and catering industries. With a passion for all things delicious, Andrew has honed his culinary expertise through his work as a personal chef and caterer.
His love for food led him to venture into food writing, where he has contributed to various online publications, sharing his knowledge and insights on the culinary world. As the proud owner of CooksCrafter.com, Andrew covers a wide range of topics, including recipes, restaurant reviews, product recommendations, and culinary tips.
Through his website, he aims to inspire and educate fellow food enthusiasts, offering a comprehensive resource for all things food-related.