Planning meals ahead can save time and reduce stress during busy weeks, and meal-prep dinners are batch-cooked meals meant to be refrigerated and reheated over the next 3-4 days for quick weekday eating. This collection of 20 meal prep dinners is designed to keep flavors fresh and textures just right, even on Day 3, and includes fully cooked or make-ahead components that refrigerate safely for 3-4 days.
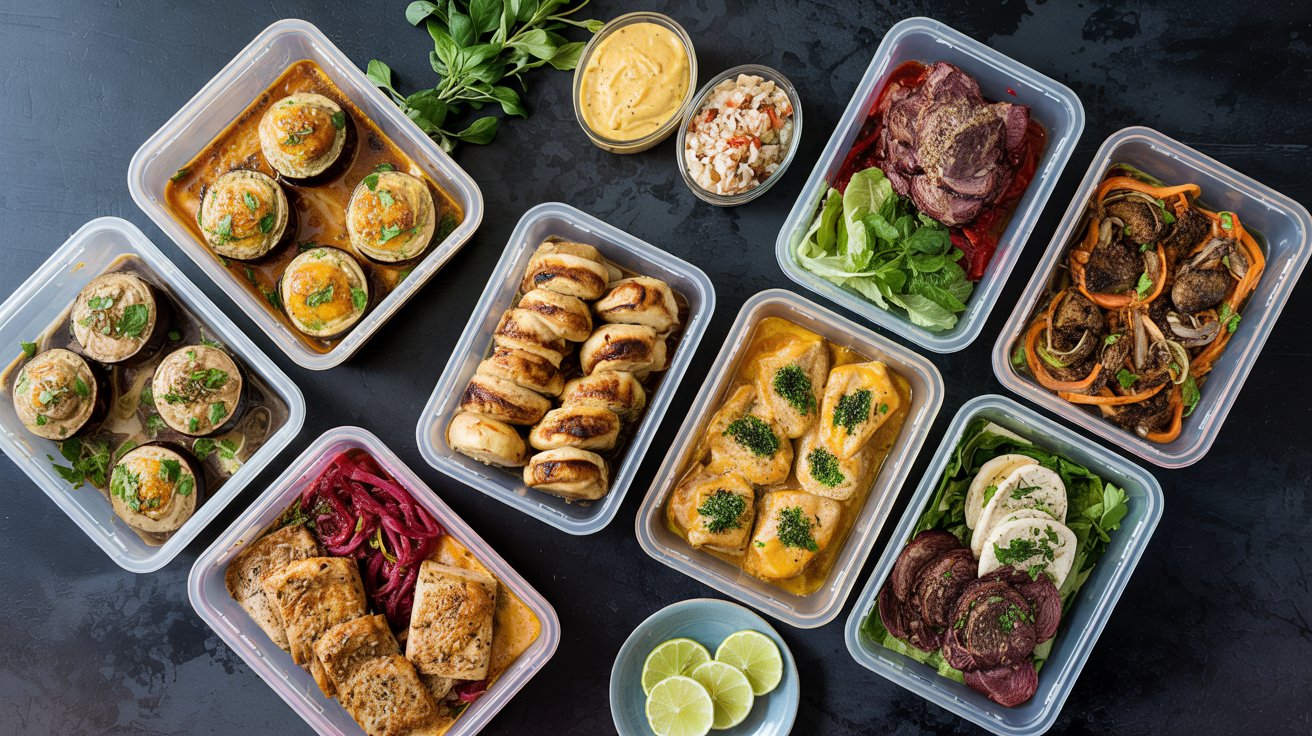
The list includes a mix of quick sheet pan meals, slow cooker favorites, and comforting casseroles. These recipes offer a range of proteins and vegetables, with options that suit different tastes and nutritional needs, all while being easy to prepare in batches.
Each dish is chosen for its ability to hold up well after refrigeration, making mealtime straightforward and satisfying. With minimal cleanup and simple reheating, these dinners bring convenience without compromising taste.
1. Sheet Pan Chicken Fajitas
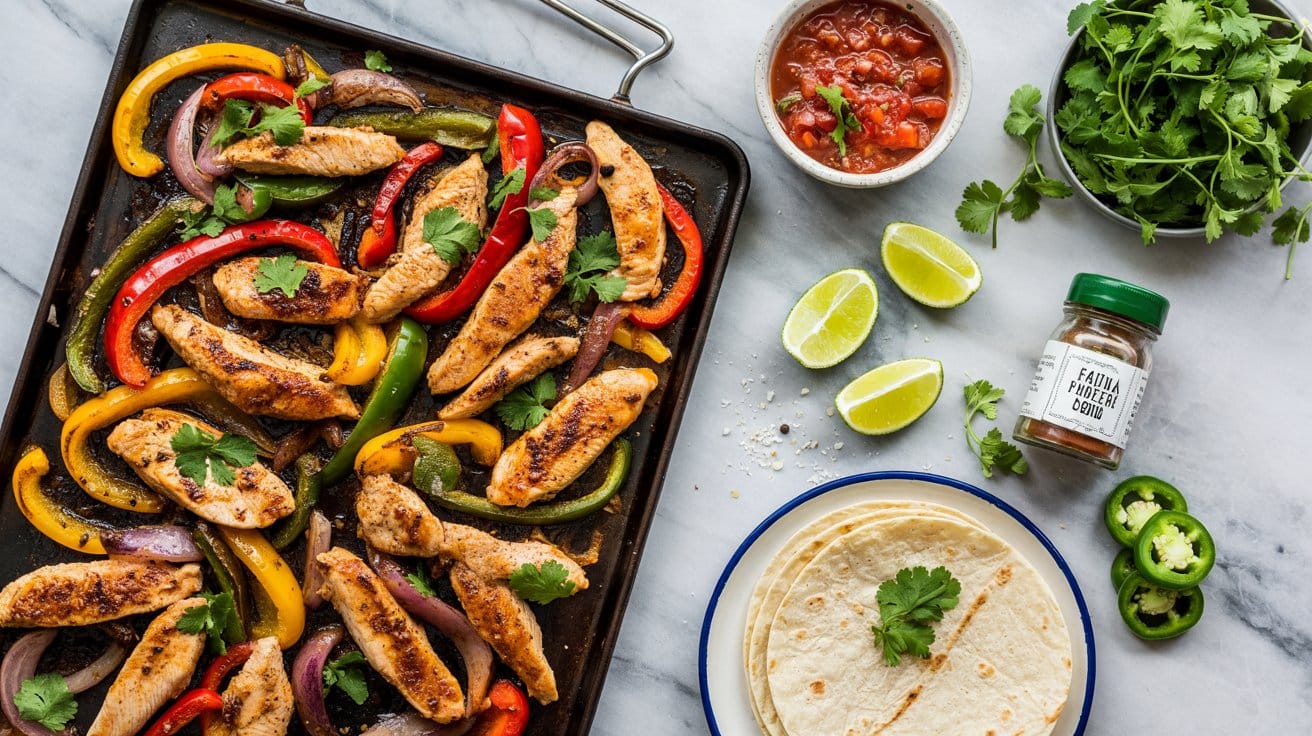
The combination of juicy chicken, sweet bell peppers, and onions roasted together delivers a flavorful and satisfying meal without needing multiple pans or complicated steps, similar to a BBQ sheet pan dinner for busy nights.
The fajita spices bring out a warm, smoky character that goes with the tender chicken and crisp-tender vegetables nicely. It's a balanced dish that's easy to serve alongside tortillas, rice, or a fresh salad for a complete meal, with warm flour tortillas being the traditional choice for serving fajitas.
Why This Recipe Works
This recipe offers a practical way to get a flavorful, wholesome meal on the table quickly, with minimal cleanup and fuss, and roasting at about 425°F helps caramelize the vegetables for better flavor.
- Convenience - All ingredients cook together on one pan, saving time and reducing dishes.
- Flavor Balance - Spiced chicken and caramelized vegetables blend savory and slightly sweet notes.
- Texture - Roasting creates tender chicken and soft but still crisp peppers and onions.
- Appeal - Kid-friendly and great for feeding a family or meal prepping leftovers.
Ingredient Swap Ideas
Swapping some ingredients allows you to customize the dish based on preferences or dietary needs without losing the essence of fajitas.
- Protein Swap - Use turkey breast or firm tofu instead of chicken to vary the protein source, or use leftover rotisserie chicken - see rotisserie chicken meal ideas for leftovers.
- Veggie Alternatives - Substitute bell peppers with zucchini or mushrooms for a different vegetable blend, with zucchini roasting faster and mushrooms adding an earthy umami.
- Spice Mix - Replace fajita seasoning with taco seasoning or a simple mix of cumin and paprika for flavor changes.
- Heat Level - Omit or increase chili powder based on your preferred spice tolerance.
Ingredients
- 1 ½ pounds boneless, skinless chicken breasts - sliced into thin strips.
- 3 bell peppers - assorted colors, sliced into strips.
- 1 large onion - sliced into thin wedges.
- 2 tablespoons olive oil - for coating chicken and vegetables.
- 1 tablespoon chili powder - adds smoky warmth.
- 1 teaspoon ground cumin - enhances the earthiness.
- 1 teaspoon paprika - contributes mild sweetness.
- ½ teaspoon garlic powder - for subtle garlic flavor.
- ½ teaspoon onion powder - deepens the savory notes.
- ¼ teaspoon cayenne pepper - optional, adds heat.
- 1 teaspoon salt - balances seasoning.
- ½ teaspoon black pepper - for mild pungency.
- Flour or corn tortillas - for serving, warmed.
- Optional toppings - sour cream, guacamole, salsa, shredded cheese, chopped cilantro.
Instructions
- Preheat your oven to 425°F (220°C) and line a large sheet pan with foil or parchment paper for easy cleanup.
- In a large bowl, combine sliced chicken, bell peppers, and onion. Drizzle with olive oil and sprinkle with chili powder, cumin, paprika, garlic powder, onion powder, cayenne (if using), salt, and black pepper. Toss everything to coat evenly.
- Spread the chicken and vegetable mixture in a single layer on the prepared sheet pan, making sure the ingredients are well spaced.
- Roast in the oven for 20-25 minutes, stirring halfway through to promote even cooking and browning. The chicken should be cooked through and the peppers should be tender but still slightly crisp.
- Remove from the oven and serve hot with warmed tortillas and your choice of toppings. Wrap ingredients in tortillas for easy eating or serve fajita-style with sides.
2. Beef and Broccoli Stir-Fry
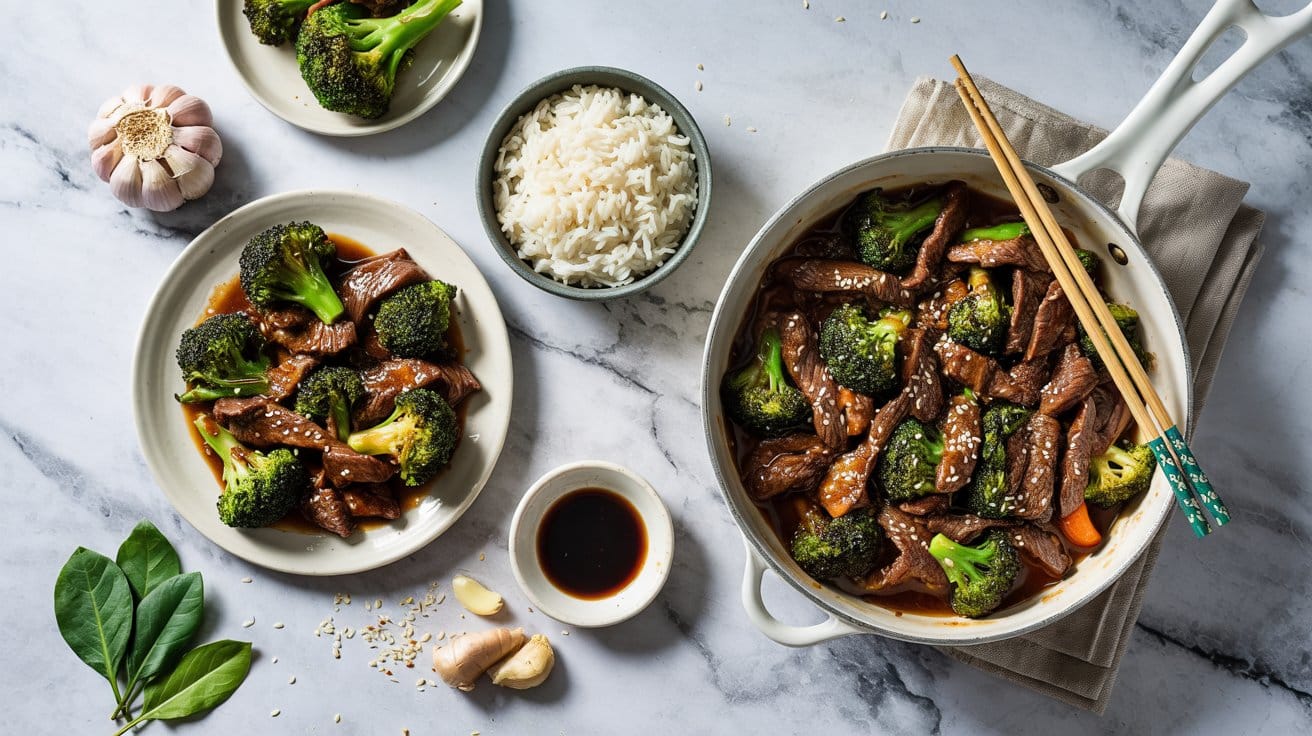
Beef and broccoli stir-fry combines tender slices of beef with crisp broccoli florets, creating a satisfying balance between rich meat and fresh vegetables, a Chinese-American takeout classic often cooked quickly in a hot wok to preserve crispness. It's a quick dish that comes together easily on a weeknight, delivering a flavorful sauce that coats every bite, often built from soy sauce and oyster sauce for deep umami.
The texture plays a big role too. The broccoli stays crunchy, and the beef stays juicy and tender if cooked just right.
This makes it a repeat-worthy dish for a healthy, home-cooked meal, or try slow-cooker beef and barley soup for comfort.
For ideas on what to serve alongside this dish, try these sides to serve with beef and broccoli.
Why This Recipe Works
This beef and broccoli stir-fry stands out for being straightforward and packed with flavor. It fits well into busy schedules while offering a good mix of textures and satisfying taste.
- Convenience - Quick to prepare and cook, ideal for busy evenings.
- Flavor balance - Savory sauce balanced by the mild bitterness and crunch of broccoli.
- Texture - Tender beef contrasts nicely with crisp, bright-green broccoli.
- Appeal - Family-friendly and easy to customize with your favorite sides.
Ingredient Swap Ideas
Adapting this recipe allows you to cater to different dietary needs or flavor preferences without losing the essence of the dish. Simple changes can make a big difference.
- Beef - Substitute thinly sliced chicken breast or firm tofu for a lighter or vegetarian option.
- Broccoli - Use snap peas or green beans if broccoli isn't available or preferred.
- Soy sauce - Replace with tamari or coconut aminos for a gluten-free stir-fry.
- Cornstarch - Swap with arrowroot powder or potato starch as a thickening alternative.
Ingredients
- 1 pound beef sirloin - Thinly sliced against the grain for tenderness.
- 4 cups broccoli florets - Washed and cut into bite-sized pieces.
- 3 tablespoons soy sauce - Use low sodium for a milder saltiness.
- 2 tablespoons oyster sauce - Adds depth and a touch of sweetness.
- 1 tablespoon cornstarch - For thickening the stir-fry sauce.
- ½ cup beef broth or water - To create the stir-fry sauce.
- 2 teaspoons sesame oil - Provides a subtle nutty flavor.
- 2 cloves garlic - Minced, adds fresh aromatic notes.
- 1 teaspoon fresh ginger - Grated, contributes a warm, spicy touch.
- 2 tablespoons vegetable oil - For cooking the beef and vegetables.
- ¼ teaspoon black pepper - For seasoning.
Instructions
- In a medium bowl, combine sliced beef with 1 tablespoon soy sauce and cornstarch. Toss well and let it marinate for 10 minutes. This helps tenderize the beef and creates a glossy sauce.
- Heat 1 tablespoon of vegetable oil in a large skillet or wok over medium-high heat. Add the beef in a single layer and stir-fry until browned and just cooked through, about 2 to 3 minutes. Remove the beef and set aside.
- Add the remaining vegetable oil to the pan. Toss in the minced garlic and grated ginger and cook for about 30 seconds until fragrant. Add the broccoli florets and stir-fry for 3 to 4 minutes, keeping the vegetables crisp-tender.
- Return the beef to the pan and stir to combine. Pour in the beef broth, oyster sauce, remaining soy sauce, and sesame oil. Stir everything and cook for another 2 minutes, allowing the sauce to thicken slightly and coat the ingredients evenly.
- Season with black pepper as needed. Remove from heat and serve warm with steamed rice or noodles to complete the meal.
3. Baked Lemon Garlic Salmon with Quinoa
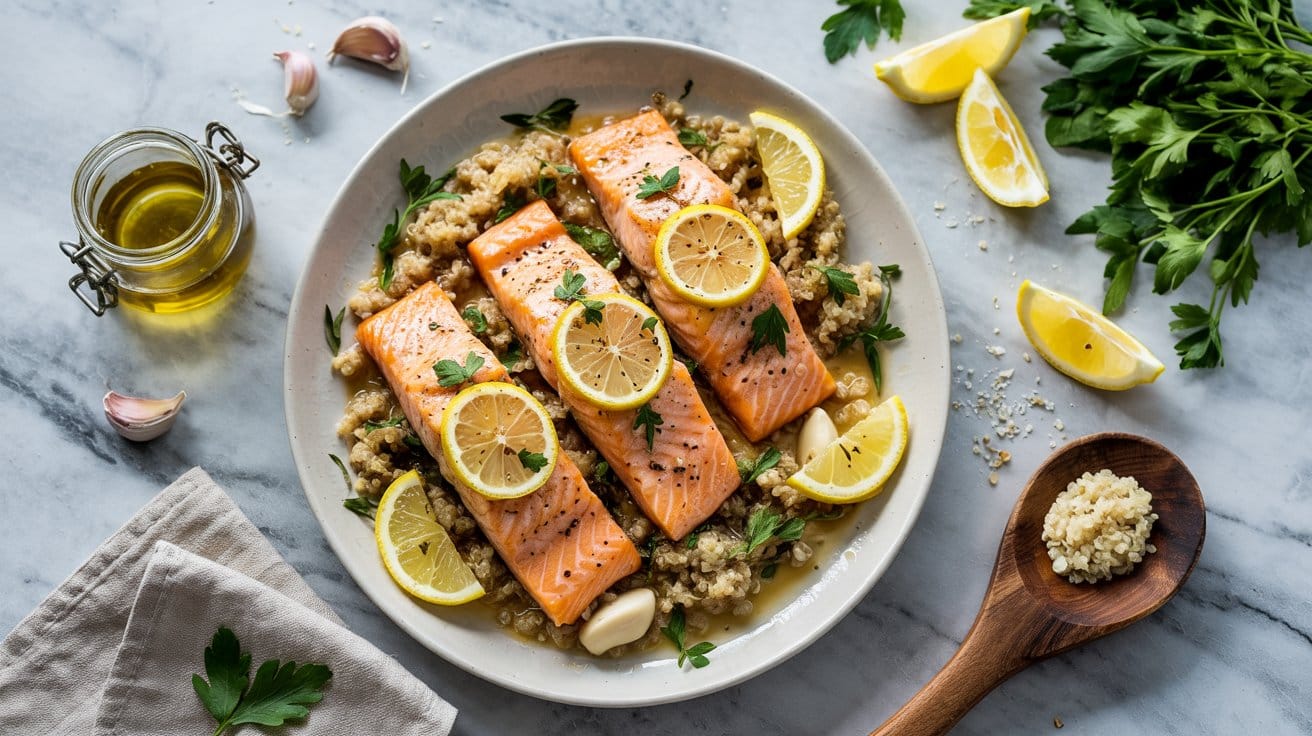
This baked lemon garlic salmon paired with quinoa makes for a delicious and balanced meal that fits easily into a busy lifestyle, and it pairs well with easy sides to serve with baked salmon.
Preparing this dish doesn't require much hands-on time, and both components hold up well when refrigerated, making it a great option for lunch or dinner leftovers, with the salmon typically baked at 400°F for 12-15 minutes until it flakes easily. The freshness of lemon and garlic adds a simple elegance without much fuss, letting the quality of ingredients shine through.
Why This Recipe Works
This salmon and quinoa dish is a practical, flavorful choice that delivers a satisfying meal with minimal effort.
- Convenience - Bakes quickly and requires just one pan for the salmon, plus a simple pot for quinoa.
- Flavor balance - Combines bright lemon, aromatic garlic, and subtle herbs for fresh but hearty flavors.
- Texture - Offers tender, juicy salmon alongside fluffy yet slightly chewy quinoa.
- Meal prep friendly - Stores well and reheats nicely for easy leftovers any day of the week.
Ingredient Swap Ideas
Swapping ingredients in this recipe can help tailor it to your dietary preferences or what you have available, while keeping the overall flavor and nutrition in place.
- Salmon - Use steelhead trout or arctic char instead of salmon for a similar texture and taste.
- Quinoa - Substitute with couscous, bulgur, or brown rice if preferred or for variety.
- Fresh herbs - Try parsley or chives as alternatives to dill for a different herbal note.
- Lemon - Lime juice works well as a replacement to add a slightly different citrus twist.
Ingredients
- 4 salmon fillets, about 6 ounces each, skin on or off as you prefer.
- 2 tablespoons olive oil, divided, plus extra for drizzling.
- 3 cloves garlic, minced finely.
- 1 lemon, zest and juice separated.
- 1 teaspoon dried dill or 1 tablespoon fresh, chopped.
- Salt and black pepper, to taste.
- 1 cup quinoa, rinsed thoroughly.
- 2 cups water or low-sodium vegetable broth for cooking quinoa.
- Fresh parsley or additional herbs, for garnish if desired.
Instructions
- Preheat your oven to 400°F (200°C). Line a baking sheet with parchment paper or foil for easy cleanup.
- In a small bowl, mix together 1 tablespoon olive oil, minced garlic, lemon zest, lemon juice, dried dill, salt, and pepper. Brush this mixture evenly over the salmon fillets and place them on the prepared baking sheet.
- Bake the salmon for 12 to 15 minutes, until it flakes easily with a fork and is cooked through but still moist inside.
- While the salmon bakes, combine rinsed quinoa and water or broth in a medium saucepan. Bring to a boil, then reduce heat to low, cover, and simmer for about 15 minutes, until the quinoa is tender and water is absorbed. Remove from heat and let it sit covered for 5 minutes, then fluff with a fork.
- Serve the baked salmon over a bed of warm quinoa. Drizzle with a little more olive oil or fresh lemon juice if you like, and garnish with chopped parsley or herbs.
This meal pairs well with simple steamed vegetables or a fresh side salad for a complete and nutritious plate.
4. Slow Cooker Chicken Tikka Masala
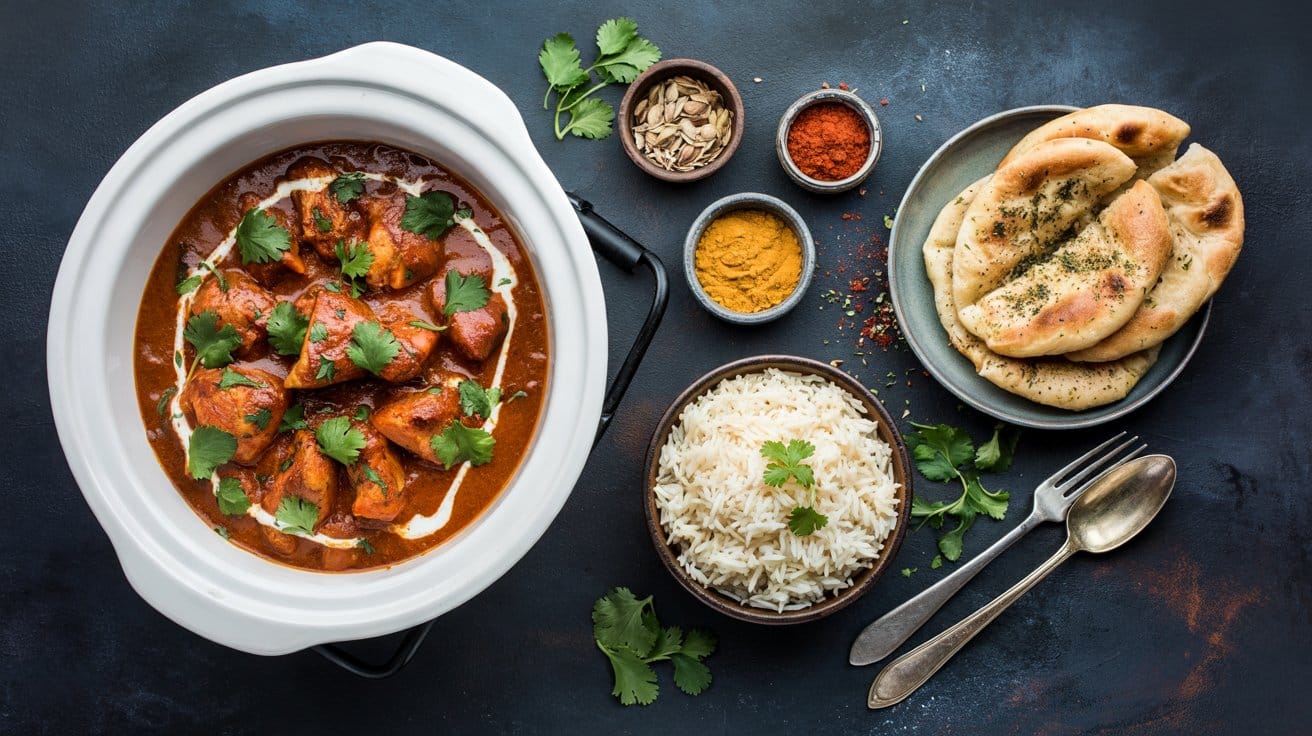
This slow cooker chicken tikka masala creates a creamy, flavorful curry that's easy to make and ideal for busy days. It strikes a nice balance by being rich and satisfying without becoming too saucy or heavy, keeping the flavors bright and fresh.
The recipe simmers gently over time, allowing the spices and chicken to meld beautifully. The result is tender chicken in a tomato-based sauce rich with traditional spices, finished with a touch of cream for smoothness.
It also reheats well, making it a great choice for leftovers.
Why This Recipe Works
Slow cooker chicken tikka masala is a practical option for anyone wanting a comforting meal with minimal hands-on time. It delivers a creamy, well-seasoned curry that stays consistent in flavor, even after reheating.
- Convenience - Prepare ingredients in the morning and let the slow cooker do the work while you tend to your day.
- Flavor balance - The sauce combines tangy tomatoes, warm spices, and creamy richness without overpowering the chicken.
- Texture - Chicken pieces cook slowly to become tender but stay intact, avoiding that mushy feel sometimes found in slow cooker recipes.
- Reheating - The curry maintains its smoothness and depth, making leftovers just as enjoyable as the first serving.
Ingredient Swap Ideas
Adjusting ingredient choices can help accommodate different diets or preferences while keeping the dish close to the original flavor. Try these swaps to suit your needs.
- Dairy - Replace heavy cream with coconut milk for a dairy-free or plant-based version that still feels creamy.
- Protein - Use boneless turkey pieces or firm tofu to vary the protein while preserving texture and taste.
- Spices - Mild spice lovers can reduce chili powder or omit it, starting with paprika for color and mild warmth.
- Tomatoes - Use canned diced tomatoes instead of pureed if you prefer a chunkier sauce texture.
Ingredients
- 2 pounds boneless, skinless chicken thighs - cut into bite-sized pieces for tender, juicy bites.
- 1 cup plain yogurt - is a marinade base to tenderize and flavor the chicken.
- 1 tablespoon lemon juice - brightens and balances the marinade.
- 2 teaspoons ground cumin - brings earthy warmth.
- 2 teaspoons ground coriander - adds floral, citrus notes.
- 1 teaspoon turmeric powder - gives color and subtle flavor.
- 1 teaspoon garam masala - essential spice blend for authentic taste.
- 1 teaspoon chili powder - provides heat and depth.
- 1 teaspoon salt - enhances overall flavor.
- 1 large onion - finely chopped for the sauce base.
- 3 cloves garlic - minced to bring fragrant depth.
- 1 tablespoon fresh ginger - grated to add zing.
- 1 (15-ounce) can tomato puree - rich and smooth for the sauce.
- 1 cup heavy cream - adds creaminess and mild sweetness to finish the curry.
- 2 tablespoons vegetable oil - used to sauté the aromatics.
- Fresh cilantro leaves - chopped, for garnish and fresh herb flavor.
Instructions
- In a large bowl, combine the yogurt, lemon juice, cumin, coriander, turmeric, garam masala, chili powder, and salt. Add the chicken pieces and mix well to coat evenly. Cover and marinate for at least 1 hour, or overnight in the fridge for best results.
- Heat the vegetable oil in a skillet over medium heat. Sauté the chopped onion until translucent, about 5 minutes. Add the garlic and ginger, cooking for another minute until fragrant. Transfer this mixture to the slow cooker.
- Add the marinated chicken and tomato puree to the slow cooker. Stir to combine all ingredients evenly. Cover and cook on low for 5 to 6 hours or on high for 3 to 4 hours, until the chicken is cooked through and tender.
- About 15 minutes before serving, stir in the heavy cream to the slow cooker. Let it warm through, and taste to adjust seasoning if necessary.
- Serve the chicken tikka masala over steamed basmati rice or with warm naan bread, garnished with fresh cilantro leaves.
This recipe brings flavorful, comforting chicken tikka masala to your table while fitting your schedule and taste preferences well.
5. Turkey Meatballs with Zucchini Noodles

This recipe brings a fresh twist to classic meatballs by using ground turkey for lean protein paired with zucchini noodles, creating a light and satisfying meal. The turkey meatballs stay juicy and flavorful, while the zucchini noodles offer a low-carb, crisp base that goes with the dish well.
It's straightforward to prepare and perfect for busy evenings when you want a wholesome, balanced dinner without spending too much time cooking. The blend of herbs and spices in the meatballs adds savory depth, making every bite enjoyable.
Why This Recipe Works
This dish delivers a healthy, tasty option that fits well into a balanced lifestyle with quick prep and versatile ingredients. It combines juicy protein and fresh vegetables for a meal that feels both comforting and light.
- Convenience - Quick to prepare with simple steps and minimal clean-up.
- Flavor balance - Savory, well-seasoned meatballs paired with fresh, mildly sweet zucchini noodles.
- Texture - Tender, juicy meatballs contrast nicely with crisp yet tender noodles.
- Appeal - Family-friendly and perfect for those seeking a low-carb, nutritious dinner.
Ingredient Swap Ideas
Swapping ingredients in this recipe can adapt it for different dietary preferences, flavors, or pantry options without losing its essence.
- Use ground chicken instead of turkey for a slightly different flavor while keeping it lean.
- Replace zucchini noodles with spaghetti squash for a similar low-carb vegetable noodle alternative.
- Try adding fresh basil or oregano to the meatball mix for varied herb notes.
- Substitute grated Parmesan with Pecorino Romano for a sharper cheese flavor in the meatballs.
Ingredients
- 1 pound ground turkey - Lean and moist, forms the base of the meatballs.
- 1 medium zucchini - Spiralized into noodles for a fresh, low-carb substitute for pasta.
- ¼ cup grated Parmesan cheese - Adds umami and richness to the meatballs.
- ¼ cup breadcrumbs - Helps bind the meatballs together for a tender texture.
- 1 large egg - Binds the ingredients evenly.
- 2 cloves garlic - Minced for aromatic flavor.
- 1 teaspoon dried Italian seasoning - A blend of herbs for depth.
- ½ teaspoon salt - Enhances all flavors.
- ¼ teaspoon freshly ground black pepper - Adds mild heat.
- 2 tablespoons olive oil - Used for cooking the meatballs and sautéing noodles.
- 1 cup marinara sauce - To serve with the meatballs and noodles, mild and tangy.
Instructions
- Preheat the oven to 400°F (200°C). In a large bowl, combine ground turkey, Parmesan, breadcrumbs, egg, garlic, Italian seasoning, salt, and pepper. Mix gently until just combined.
- Shape the mixture into evenly sized meatballs, about 1 to 1.5 inches in diameter, and place them on a baking sheet lined with parchment paper.
- Bake the meatballs for 15-20 minutes or until cooked through and lightly browned. While meatballs bake, heat olive oil in a large skillet over medium heat. Add zucchini noodles and sauté for 2 to 3 minutes until just tender but still firm.
- Warm the marinara sauce in a small saucepan or microwave. Once the meatballs are done, add them to the sauce, stirring gently to coat.
- Serve the meatballs and sauce over the zucchini noodles immediately. Garnish with extra Parmesan if desired.
This meal offers a balanced mix of lean protein and fresh vegetables in a simple, flavorful package that you can prepare any night of the week.
6. Vegetarian Chili with Beans and Sweet Potatoes

This vegetarian chili combines hearty beans with sweet potatoes for a warm, filling meal that feels satisfying without meat. The natural sweetness of the sweet potatoes balances the savory spices, creating a rich, comforting dish.
It's a straightforward recipe that comes together easily and simmers slowly to blend the flavors deeply. This chili is great for making ahead and tastes even better the next day, making it ideal for busy days or family meals.
Why This Recipe Works
This chili offers a balanced, nutritious meal packed with flavor and texture from simple, wholesome ingredients. It's a versatile, crowd-pleasing option you can enjoy year-round.
- Convenience - Minimal active cooking time and easy to prepare in one pot.
- Flavor balance - Sweetness from the potatoes goes with the smoky, spicy chili base.
- Texture - Tender beans and soft sweet potatoes create a filling, rich consistency.
- Appeal - Suitable for vegetarians and perfect for both weeknight dinners and meal prep.
Ingredient Swap Ideas
Swapping some ingredients can help accommodate dietary preferences or whatever you have on hand while maintaining the chili's heartiness and flavor.
- Sweet potatoes - Use butternut squash or pumpkin if you prefer a different sweet root vegetable.
- Beans - Swap black beans for kidney or pinto beans for variety or what's in your pantry.
- Spices - Add chipotle powder or smoked paprika if you want a smokier kick.
- Vegetables - Include diced bell peppers or zucchini to increase veggie content and add freshness.
Ingredients
- 2 tablespoons olive oil - For sautéing the vegetables.
- 1 large onion, diced - Adds sweetness and depth to the chili base.
- 3 garlic cloves, minced - Provides aromatic flavor.
- 1 large sweet potato, peeled and diced - Adds natural sweetness and bulk.
- 1 red bell pepper, diced - Offers freshness and color.
- 2 teaspoons ground cumin - Brings warm, earthy notes.
- 1 tablespoon chili powder - Provides classic chili heat and flavor.
- 1 teaspoon smoked paprika - Adds subtle smokiness.
- ½ teaspoon ground cinnamon - Enhances sweetness and complexity.
- 1 (14-ounce) can diced tomatoes - Forms the saucy base.
- 1 (15-ounce) can black beans, drained and rinsed - Adds protein and heartiness.
- 1 (15-ounce) can kidney beans, drained and rinsed - Additional protein and texture.
- 1 cup vegetable broth - Keeps chili moist and flavorful.
- Salt and pepper to taste - Season to preference.
- Fresh cilantro or parsley (optional, for garnish) - Adds bright finish.
Instructions
- Heat olive oil in a large pot over medium heat. Add diced onion and sauté until softened, about 5 minutes. Stir in minced garlic and cook for 1 minute until fragrant.
- Add diced sweet potato and red bell pepper to the pot and cook for another 5 minutes, stirring occasionally.
- Stir in cumin, chili powder, smoked paprika, and cinnamon, cooking for about 1 minute to release their aroma.
- Pour in diced tomatoes, black beans, kidney beans, and vegetable broth. Stir to combine all ingredients well.
- Bring the chili to a simmer, then reduce heat to low and cover the pot. Let it cook for 30 to 40 minutes, stirring occasionally, until the sweet potatoes are tender and flavors have melded. Season with salt and pepper to taste.
- Serve hot, garnished with chopped cilantro or parsley if desired. This chili pairs well with rice, cornbread, or warm tortillas.
7. Roasted Vegetable and Chickpea Buddha Bowl
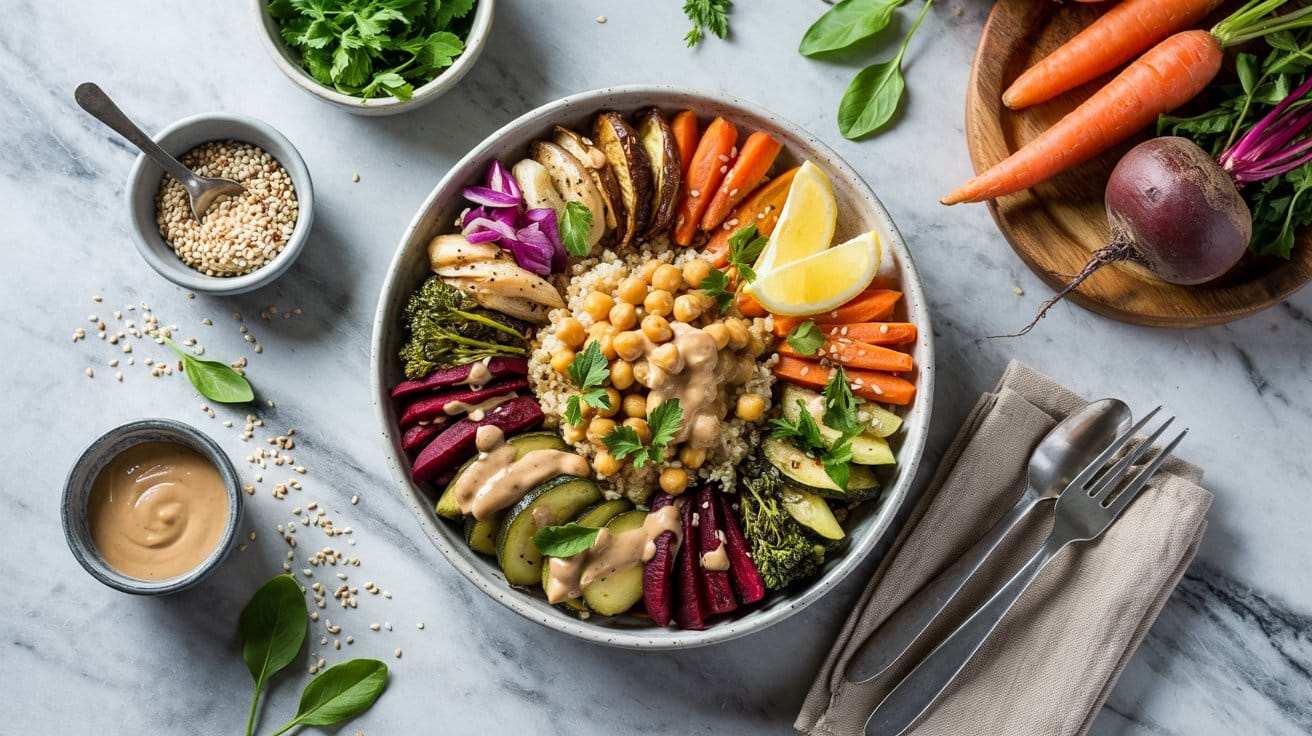
This Roasted Vegetable and Chickpea Buddha Bowl brings together a colorful mix of tender roasted veggies and crispy chickpeas that hold their texture beautifully. It's a satisfying dish with a pleasing variety of flavors-from the natural sweetness of roasted vegetables to the nutty crunch of chickpeas, all complemented by a simple grain on the side.
You'll find it easy to prepare, making it a great option for a nourishing weekday lunch or dinner. The components can be roasted together, saving time while still delivering a wholesome and balanced meal that feels fresh and filling.
Why This Recipe Works
This bowl combines ease, flavor, and nutrition, making it a convenient and tasty way to enjoy plant-based ingredients in a balanced meal. The roasting process intensifies the flavors without requiring constant attention.
- Convenience - Roasting vegetables and chickpeas together simplifies preparation and cleanup.
- Flavor balance - Roasted veggies develop natural sweetness, paired with the mild nuttiness of chickpeas.
- Texture - The mixture offers a pleasing contrast of crisp chickpeas and tender yet firm vegetables.
- Versatility - Easily adapt this bowl by changing up the vegetables or grains to suit seasonal produce or personal preferences.
Ingredient Swap Ideas
Swapping ingredients can make this recipe fit different dietary needs or flavor preferences, all while keeping the heart of the dish intact.
- Chickpeas - Replace with cooked lentils, black beans, or edamame for variety in protein and texture.
- Vegetables - Use sweet potatoes, zucchini, or broccoli instead of the suggested veggies based on what you have on hand.
- Grains - Substitute quinoa or barley for rice to change the texture and nutritional profile.
- Oil - Use avocado oil or a flavored olive oil for a different aroma during roasting.
Ingredients
- 2 cups chickpeas - drained and rinsed if canned, or cooked from dry
- 1 red bell pepper - cut into 1-inch pieces
- 1 zucchini - sliced into half-moons
- 1 red onion - peeled and cut into wedges
- 1 cup cherry tomatoes - halved
- 2 tablespoons olive oil - for roasting
- 1 teaspoon ground cumin - adds warm spice to chickpeas
- ½ teaspoon smoked paprika - enhances flavor depth
- Salt and black pepper - to taste
- 2 cups cooked brown rice - or your choice of grain
- 2 tablespoons fresh lemon juice - for brightness
- ¼ cup chopped fresh parsley - for garnish
Instructions
- Preheat your oven to 425°F (220°C). In a large bowl, toss chickpeas with 1 tablespoon of olive oil, cumin, smoked paprika, salt, and pepper until coated evenly.
- On a large baking sheet, spread the chickpeas and chopped vegetables in a single layer. Drizzle remaining olive oil over the vegetables and season them with a bit of salt and pepper.
- Roast for about 25-30 minutes, stirring halfway through, until the vegetables are tender and slightly caramelized, and the chickpeas are crispy on the outside.
- While the veggies roast, reheat or cook brown rice according to package directions. Stir in fresh lemon juice once cooked.
- To assemble, divide the rice between bowls. Top with the roasted vegetables and chickpeas, and sprinkle with chopped parsley. Serve warm.
8. Garlic Butter Shrimp with Brown Rice
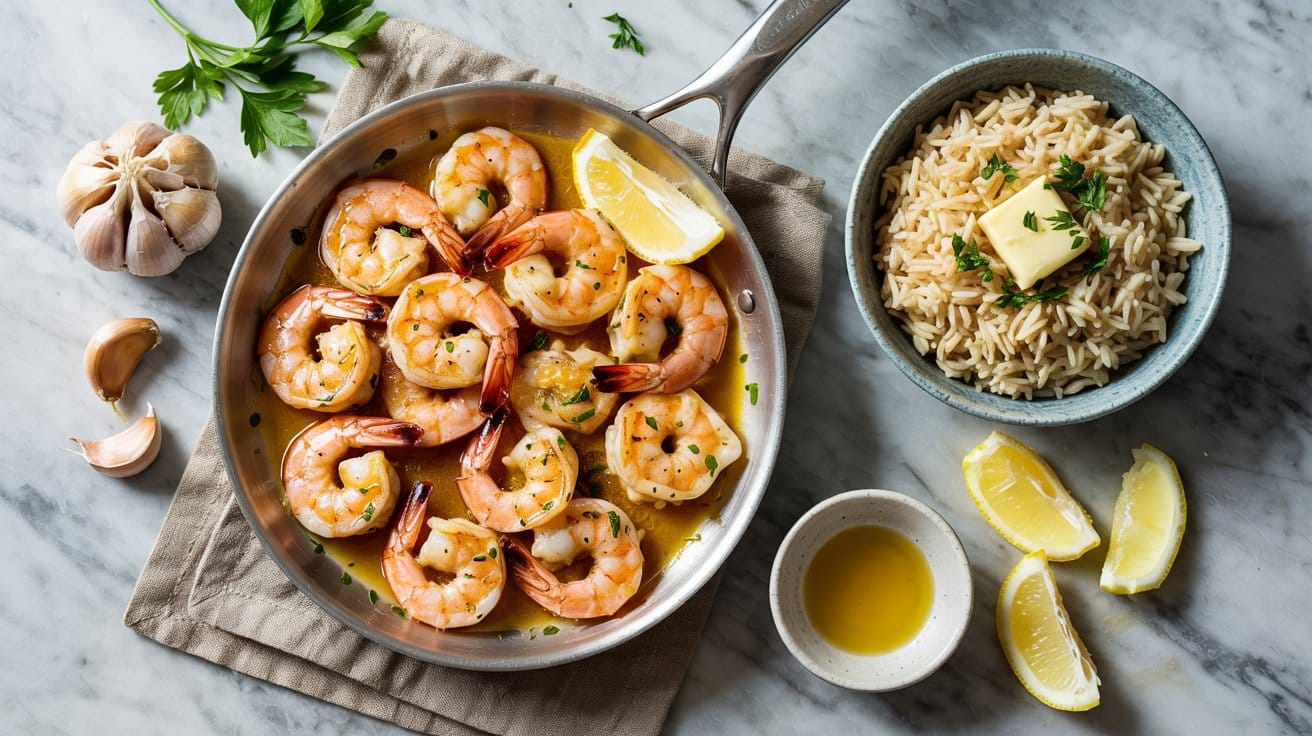
This garlic butter shrimp with brown rice recipe combines a rich and flavorful shrimp sauté with the nutty, wholesome texture of brown rice. The shrimp cook quickly in a buttery garlic sauce that creates a satisfying meal perfect for busy evenings.
It's a balanced dish that offers both protein and whole grains, making it a great choice for a healthy dinner that still feels comforting.
The ingredients come together with simple steps, making this recipe approachable even on a tight schedule. You can easily adjust the seasoning to your taste, making it a flexible dish that you and your family will return to often.
Why This Recipe Works
This recipe delivers a flavorful and nutritious meal that's easy to make and stores well for leftovers. It offers a great balance between buttery richness and bright garlic notes, complementing the heartiness of brown rice.
- Convenience - Quick cooking shrimp paired with brown rice, which can be prepared ahead or used from leftovers.
- Flavor balance - Buttery, garlicky shrimp contrast nicely with the earthiness of brown rice.
- Texture - Tender shrimp and slightly chewy brown rice provide a satisfying mouthfeel.
- Appeal - A family-friendly dish that easily suits weekday dinners or casual entertaining.
Ingredient Swap Ideas
Swapping ingredients here can help tailor the dish to your preferences or dietary needs without losing its essence. These substitutions still capture the rich, garlic-infused flavor while adapting the recipe for different tastes.
- Shrimp - Use scallops or firm white fish as an alternative seafood option.
- Brown rice - Substitute quinoa or cauliflower rice for a gluten-free or lower-carb alternative.
- Butter - Olive oil or avocado oil can replace butter for a dairy-free version.
- Garlic - Roasted garlic adds a milder, caramelized flavor if you prefer less pungency.
Ingredients
- 1 cup brown rice - rinsed and drained.
- 1 pound large shrimp - peeled and deveined.
- 3 tablespoons unsalted butter - divided.
- 4 cloves garlic - minced.
- ¼ teaspoon red pepper flakes - optional, adds mild heat.
- Salt - to taste.
- Black pepper - freshly ground, to taste.
- 1 tablespoon fresh parsley - chopped, for garnish.
- 1 tablespoon lemon juice - freshly squeezed.
Instructions
- Cook the brown rice according to package instructions, usually simmering in water for about 40-45 minutes until tender. Fluff with a fork and set aside.
- In a large skillet, melt 2 tablespoons of the butter over medium heat. Add minced garlic and red pepper flakes, sauté for about 1 minute until fragrant but not browned.
- Increase heat to medium-high and add the shrimp. Season with salt and pepper. Cook shrimp for 2-3 minutes on each side, or until opaque and cooked through.
- Stir in the remaining tablespoon of butter and lemon juice, tossing the shrimp to coat in the garlic butter sauce. Remove from heat.
- Serve the garlic butter shrimp over the cooked brown rice. Sprinkle with chopped parsley for a fresh touch and extra color.
This dish tastes great warm and can be stored in the refrigerator for up to 3 days. Reheat gently to keep shrimp tender.
9. Greek Chicken Bowls with Tzatziki
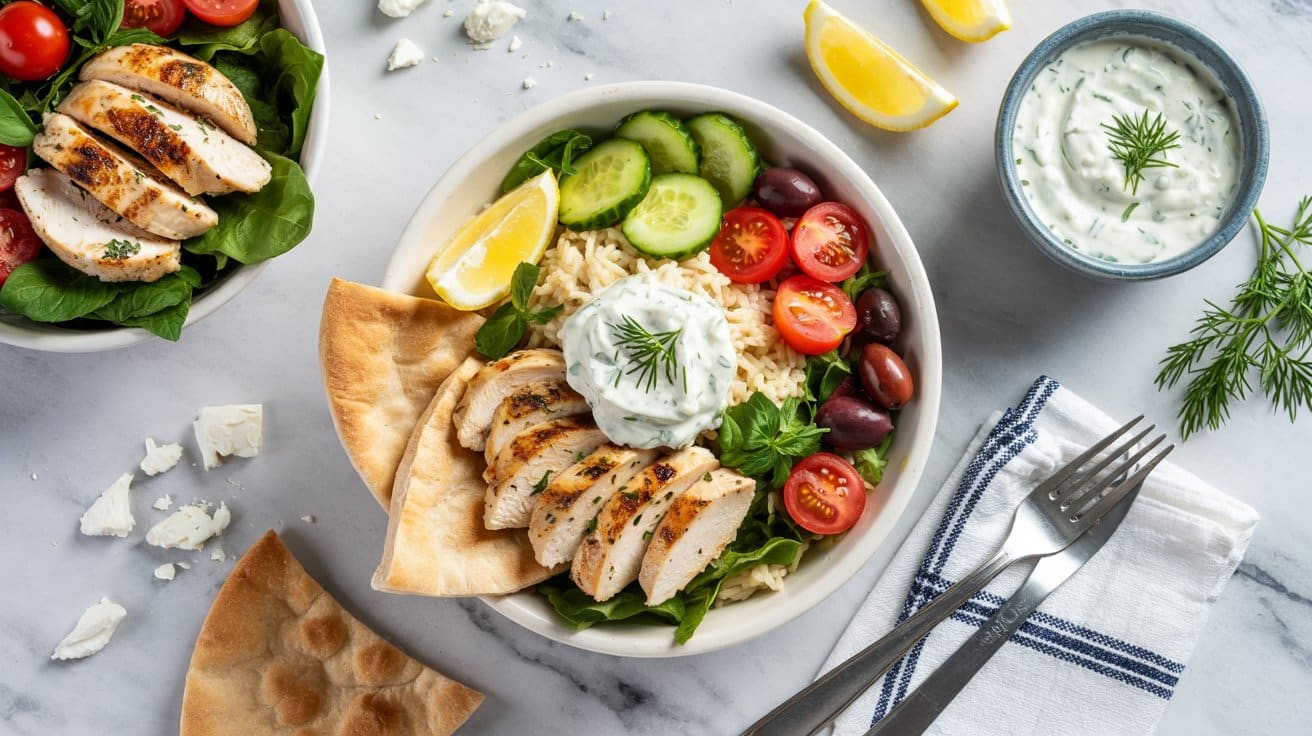
Greek chicken bowls are a fresh, satisfying meal that combines tender roasted chicken with bright cucumber and tomato. The cool, creamy tzatziki sauce adds a bright contrast, keeping the dish light and flavorful.
This bowl balances healthy ingredients with bold Mediterranean flavors, making it an ideal option for a quick lunch or simple dinner. You'll appreciate how easy it is to prepare and how the components come together without creating soggy textures.
Why This Recipe Works
This Greek chicken bowl strikes a balance between fresh vegetables and protein, while the tzatziki brings a tangy creaminess without overwhelming the dish.
- Convenience - Roasting the chicken beforehand speeds up assembly, and the fresh veggies require minimal chopping.
- Flavor balance - The tangy tzatziki goes with the savory chicken and crisp vegetables perfectly.
- Texture - The crunchy cucumber and juicy tomato offset the tender chicken, creating layers in each bite.
- Appeal - This bowl suits lunch or dinner and works well for family meals or meal prep.
Ingredient Swap Ideas
Swapping ingredients can help you tailor these bowls to fit your taste preferences or dietary needs without losing their bright character.
- Chicken - Substitute with grilled turkey breast or chickpeas for a vegetarian twist.
- Tzatziki - Use plain Greek yogurt mixed with a squeeze of lemon and dill if you prefer a lighter sauce.
- Vegetables - Replace cucumber and tomato with bell peppers or radishes for different crunch and color.
- Grains - Serve over quinoa, brown rice, or mixed greens to vary the base of the bowl.
Ingredients
- 2 large boneless, skinless chicken breasts - trimmed and patted dry.
- 1 tablespoon olive oil - for brushing the chicken before roasting.
- 1 teaspoon dried oregano - adds classic Mediterranean flavor.
- Salt and black pepper - to taste, for seasoning the chicken.
- 1 cup cherry tomatoes - halved for freshness and juiciness.
- 1 medium cucumber - diced for a cool crunch.
- ½ cup red onion - thinly sliced for sharpness.
- 1 cup cooked brown rice or quinoa - for the bowl base.
- 1 cup plain Greek yogurt - for the tzatziki sauce.
- ½ cup finely grated cucumber - drained to avoid watery sauce.
- 1 clove garlic - minced, to flavor the tzatziki.
- 1 tablespoon lemon juice - adds brightness to the sauce.
- 1 tablespoon fresh dill - chopped, to infuse the tzatziki.
- Salt and pepper - to taste in the sauce.
Instructions
- Preheat the oven to 400°F (200°C). Brush the chicken breasts with olive oil, then season with salt, pepper, and dried oregano. Place them on a baking sheet and roast for 18-20 minutes until cooked through. Let rest before slicing.
- While the chicken roasts, prepare the tzatziki by combining Greek yogurt, grated cucumber, garlic, lemon juice, and fresh dill in a bowl. Season with salt and pepper, then refrigerate to let the flavors meld.
- Chop the cherry tomatoes, cucumber, and thinly slice the red onion. If using cooked grains like brown rice or quinoa, have them ready at room temperature.
- To assemble each bowl, start with a base of your cooked grains. Add sliced roasted chicken, cucumbers, tomatoes, and red onion on top.
- Spoon a generous amount of chilled tzatziki over the bowl. Serve immediately to maintain the fresh textures and flavors.
10. Slow Cooker Pulled Pork with Coleslaw
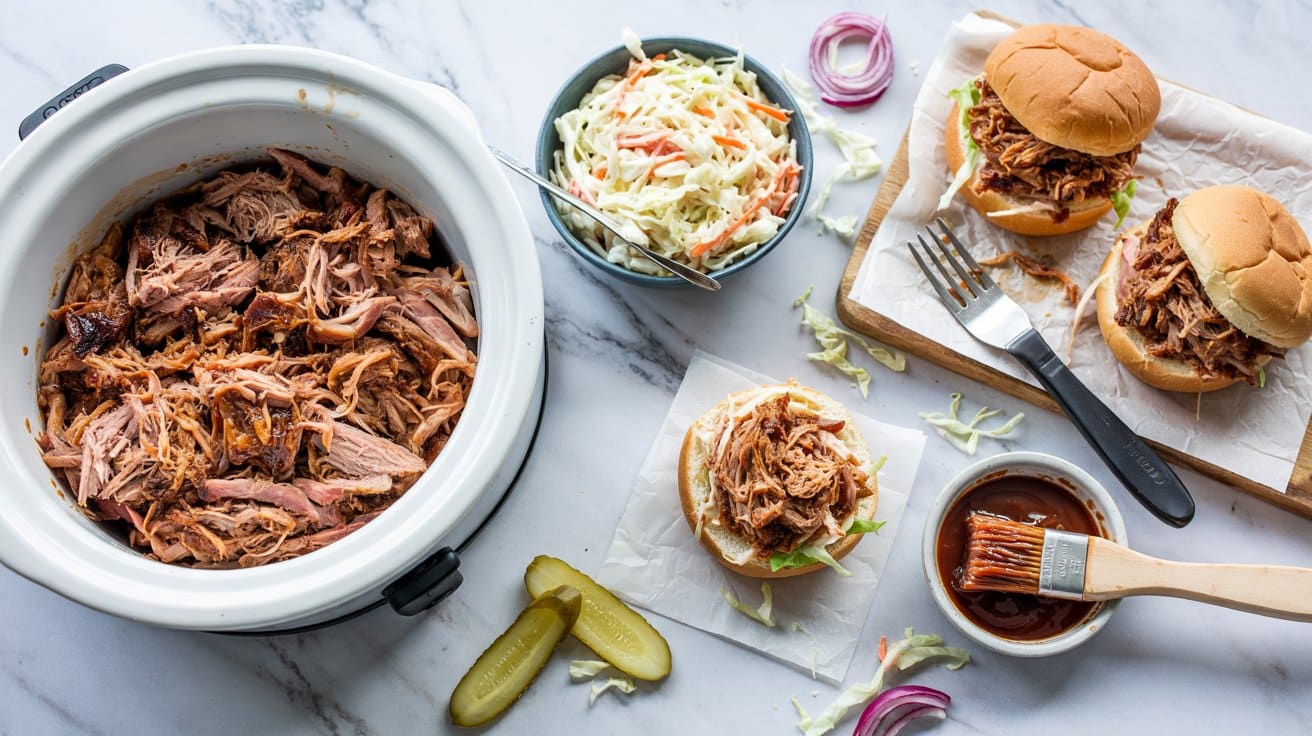
Slow cooker pulled pork is a classic comfort food that's both satisfying and simple to prepare. The pork turns tender and juicy after hours of slow cooking, soaking up all the spices and flavors.
Pairing it with a fresh, crunchy coleslaw adds just the right amount of brightness and texture contrast.
This meal comes together mostly on its own, leaving you free to focus on other tasks or simply relax. It's a great choice for busy days, casual gatherings, or whenever you want a filling dish without complicated steps.
Why This Recipe Works
This slow cooker pulled pork recipe combines hands-off cooking with delicious, balanced flavors, making it a practical option for an easy, crowd-pleasing meal.
- Convenience - Set it in the slow cooker in the morning and come back to perfectly cooked pork hours later.
- Flavor balance - The savory, spiced pork contrasts beautifully with the cool, tangy coleslaw.
- Texture - Tender, shreddable meat pairs with crisp, fresh vegetables in the slaw.
- Family-friendly - This classic combo appeals to a wide range of tastes and ages.
Ingredient Swap Ideas
Swapping ingredients can help tailor this dish for dietary preferences or what you have on hand without losing its charm. Here are a few practical alternatives to consider.
- Pork shoulder - Use boneless pork butt or even a pork picnic roast if needed; both work well in slow cooking.
- Coleslaw dressing - Substitute the mayonnaise with Greek yogurt for a lighter, tangier option.
- Vinegar in slaw - Apple cider vinegar can be swapped for white vinegar or lemon juice, adjusting acidity to taste.
- Spices - If you prefer less heat, reduce or omit the chili powder and use smoked paprika for depth.
Ingredients
- 3 to 4 pounds pork shoulder - Trim excess fat but don't remove all for moisture and flavor.
- 1 tablespoon olive oil - To sear the pork before slow cooking.
- 1 cup barbecue sauce - Use your favorite brand or homemade sauce.
- ½ cup chicken broth - Adds moisture to the slow cooker and helps the pork stay juicy.
- 1 tablespoon chili powder - For a subtle smoky heat.
- 1 teaspoon garlic powder - improves the pork seasoning.
- 1 teaspoon onion powder - goes with the garlic and enhances flavor.
- Salt and black pepper - To taste.
- 4 cups shredded cabbage - Use green, purple, or a mix for the coleslaw.
- 1 large carrot, shredded - Adds sweetness and color to the slaw.
- ½ cup mayonnaise - Base for the coleslaw dressing.
- 2 tablespoons apple cider vinegar - For acidity and tang in the dressing.
- 1 tablespoon sugar - Balances the vinegar's sharpness.
- Salt and pepper - To season the coleslaw dressing.
Instructions
- Pat the pork shoulder dry and rub it all over with chili powder, garlic powder, onion powder, salt, and pepper. Heat olive oil in a large skillet over medium-high heat and sear the pork until browned on all sides, about 3 to 4 minutes per side.
- Transfer the seared pork to your slow cooker. Pour the chicken broth around the meat and spoon the barbecue sauce over the top. Cover and cook on low for 8 hours or on high for 4 to 5 hours, until the pork is tender and easily shreds with a fork.
- While the pork cooks, prepare the coleslaw. In a large bowl, combine shredded cabbage and carrot. In a small bowl, whisk together mayonnaise, apple cider vinegar, sugar, salt, and pepper until smooth. Pour the dressing over the cabbage mixture and toss to coat evenly. Refrigerate until ready to serve.
- Once the pork is done, remove it from the slow cooker and shred it using two forks. Return the shredded pork to the slow cooker and stir it into the juices to keep it moist and flavorful.
- Serve the pulled pork hot with a side of coleslaw. Keep the coleslaw in a separate dish until plated to maintain its crisp texture. This dish pairs well with sandwich buns, tortillas, or simply over rice.
Matzo meal can be substituted with pantry-friendly options like fine breadcrumbs or crushed crackers; see a list of easy matzo meal substitutes to try. For hearty sandwich nights, explore a variety of complementary dishes in delicious sides to elevate a burger meal.

Andrew Gray is a seasoned food writer and blogger with a wealth of experience in the restaurant and catering industries. With a passion for all things delicious, Andrew has honed his culinary expertise through his work as a personal chef and caterer.
His love for food led him to venture into food writing, where he has contributed to various online publications, sharing his knowledge and insights on the culinary world. As the proud owner of CooksCrafter.com, Andrew covers a wide range of topics, including recipes, restaurant reviews, product recommendations, and culinary tips.
Through his website, he aims to inspire and educate fellow food enthusiasts, offering a comprehensive resource for all things food-related.