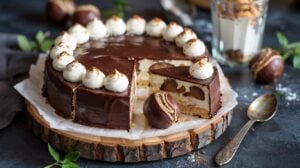
If you're a fan of the classic pairing of chocolate and peanut butter, this collection of 11 recipes will become your go-to source for satisfying that craving, popularized by candies like Reese's Peanut Butter Cups. These combos bring together rich, creamy peanut butter with deep, sweet chocolate in a range of exciting ways (peanut butter is a paste made from ground roasted peanuts and is a staple in American desserts).
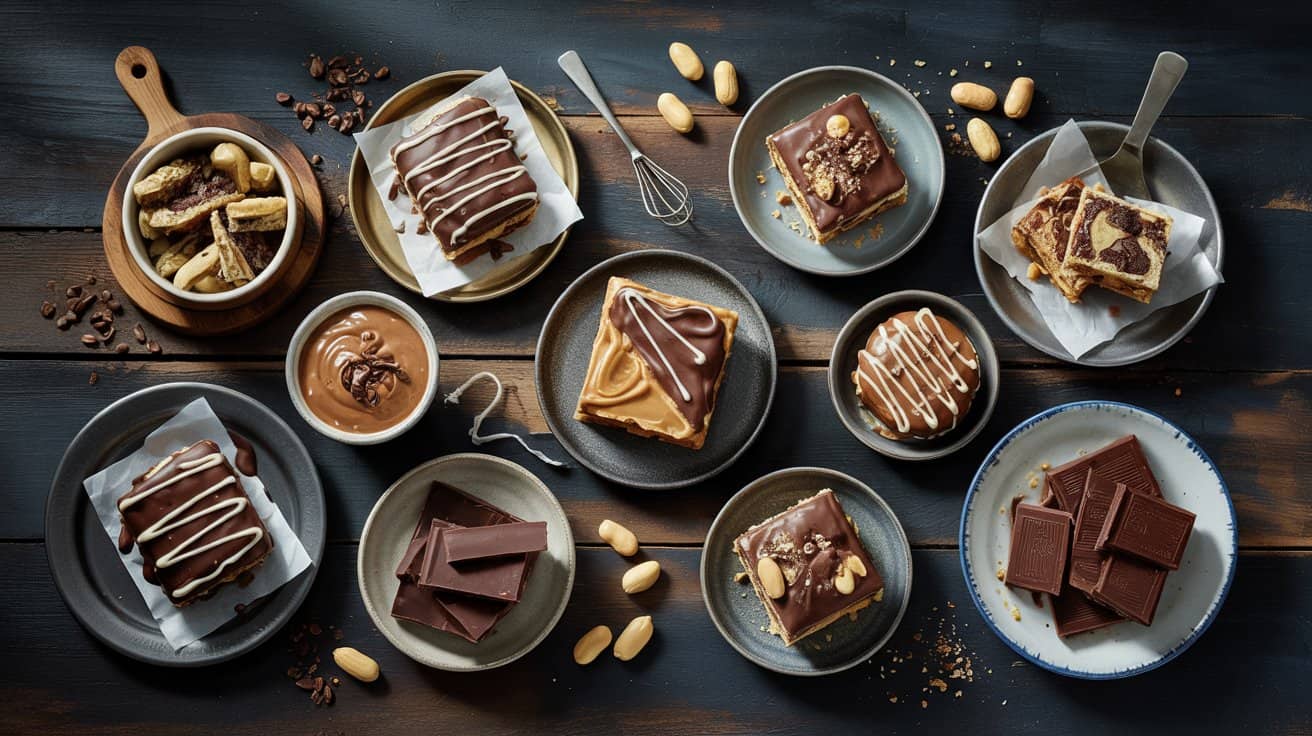
The recipes include everything from chewy cookies and fudgy brownies to no-bake bars and energy bites. Each one offers a different take on the duo, whether you're looking for a quick snack, a make-ahead treat, or a dessert to share with friends and family.
This variety ensures there's something to suit different tastes and occasions.
What makes these recipes especially appealing is their simplicity and straightforward preparation. Most require minimal ingredients and cleanup, letting you enjoy bold flavors without spending hours in the kitchen.
1. Peanut Butter Chocolate Chip Cookies

These Peanut Butter Chocolate Chip Cookies bring together two classic flavors in one chewy, satisfying treat (a staple in American cookie baking), typically baked at 350°F (175°C) for about 10-12 minutes. The richness of peanut butter blends seamlessly with plenty of chocolate chips, offering a taste that's both comforting and indulgent.
Plus, this recipe is straightforward to prepare, making it suitable for busy days when you want something homemade without too much fuss; for an even quicker method try air fryer peanut butter cookies for quick snacks.
Whether you're baking for a quick snack or for sharing with friends and family, these cookies are a reliable choice that delivers big flavor with minimal steps.
For a wider list of swap ideas, see peanut butter substitutes for baking.
Why This Recipe Works
This recipe is a fantastic option for anyone looking to enjoy a familiar flavor combination with simple ingredients and clear instructions. Peanut Butter Chocolate Chip Cookies balance richness and ease, making them a go-to for everyday baking.
- Convenience - Uses common pantry ingredients and requires minimal prep time.
- Flavor balance - Combines creamy peanut butter with sweet chocolate chips for satisfying taste.
- Texture - Chewy center with slightly crisp edges creates a great bite every time.
- Appeal - Loved by both kids and adults, ideal for sharing or a personal treat.
- Portion control - Easy to shape cookies that bake evenly and hold their form.
Ingredient Swap Ideas
Adjusting ingredients can help you customize these cookies to fit preferences or dietary needs without losing the essence of the recipe. Consider these substitutions to tailor the results while keeping the classic flavor intact.
- Peanut butter - Use almond or cashew butter as a nutty alternative with a similar texture.
- Chocolate chips - Swap semi-sweet chips for dark chocolate, white chocolate, or even chunks for variety.
- Flour - Substitute all-purpose flour with gluten-free flour blend for a gluten-free version.
- Sugar - Replace granulated sugar with coconut sugar or a natural sweetener for a different sweetness profile.
- Egg - Use a flax egg or chia egg as a plant-based binder to make the recipe vegan-friendly.
Ingredients
- 1 cup creamy peanut butter - Provides the main flavor and creamy texture for the cookies.
- 1 cup granulated sugar - Sweetens the dough and helps create a chewy texture.
- 1 large egg - Binds the ingredients together for structure.
- 1 teaspoon vanilla extract - Adds a warm, fragrant note to improve the flavors.
- ½ teaspoon baking soda - Helps the cookies rise and spread properly.
- ¼ teaspoon salt - Balances sweetness and intensifies flavor.
- 1 cup chocolate chips - Adds bursts of melted chocolate throughout the cookies.
Instructions
- Preheat your oven to 350°F (175°C) and line a baking sheet with parchment paper. This prevents sticking and helps with easy cleanup.
- In a medium bowl, mix together the peanut butter, granulated sugar, egg, and vanilla extract until smooth and well combined.
- Stir in the baking soda and salt until evenly distributed throughout the mixture.
- Fold in the chocolate chips, making sure they are spread evenly through the dough.
- Scoop dough by tablespoons onto the prepared baking sheet, spacing each cookie about 2 inches apart to allow for spreading.
- Bake in the preheated oven for 10 to 12 minutes, or until the edges are set and lightly golden. Remove from oven and let cookies cool on the pan for a few minutes before transferring to a wire rack to cool completely.
2. No-Bake Peanut Butter Chocolate Bars

This recipe for No-Bake Peanut Butter Chocolate Bars combines two classic flavors in a simple treat that you can prepare quickly and without turning on the oven (often built on a graham cracker or cookie crumb base), chilling until firm (about 1 hour). The creamy peanut butter base goes well with the rich, smooth chocolate topping, creating a satisfying texture contrast.
They are rich yet approachable, offering a homemade feel without too much fuss; for more peanut-butter-focused baking try peanut-butter-forward desserts without chocolate.
Why This Recipe Works
This recipe stands out for its ease and flavor combination, making it a quick go-to snack or dessert that appeals to many tastes. Here's what makes it a great choice:
- Convenience - No baking required, saving time and avoiding heating up the kitchen.
- Flavor balance - The creamy peanut butter filling offsets the sweetness of the chocolate layer.
- Texture - Smooth, firm bars with a silky chocolate topping and a rich, tender base.
- Appeal - A family-friendly treat suited for a variety of occasions and ages.
- Make-ahead friendly - Stores well in the fridge, holding shape and flavor for days.
Ingredient Swap Ideas
Adjusting this recipe is easy to fit different dietary needs or flavor preferences by swapping a few ingredients. Here are some good alternatives to consider:
- Nut butters - Replace peanut butter with almond or cashew butter for a different nutty flavor.
- Chocolate - Use dark chocolate for less sweetness or white chocolate to vary the taste.
- Sweeteners - Substitute granulated sugar with honey or maple syrup to add natural sweetness.
- Crunch additions - Add chopped nuts or seeds to the filling for extra texture.
- Dairy-free options - Choose dairy-free chocolate varieties to make the bars vegan-friendly.
Ingredients
- 1 cup creamy peanut butter - Provides the rich, smooth base layer.
- ¼ cup unsalted butter - Adds richness and helps set the bars.
- 1 cup powdered sugar - Sweetens and firms the peanut butter mixture.
- 1 ½ cups semi-sweet chocolate chips - For the smooth chocolate topping.
- 2 tablespoons unsalted butter - Melts with chocolate to create a glossy finish.
Instructions
- Line an 8x8-inch square pan with parchment paper, leaving some overhang for easy removal later.
- In a medium bowl, mix the peanut butter and ¼ cup softened butter until smooth. Add powdered sugar and stir until fully combined and thick.
- Press the peanut butter mixture firmly into the bottom of the prepared pan, spreading evenly.
- Melt the chocolate chips and 2 tablespoons of butter together in a microwave-safe bowl in 30-second intervals, stirring between each, until smooth.
- Pour the melted chocolate over the peanut butter layer and spread evenly with a spatula.
- Refrigerate the bars for at least 2 hours or until the chocolate topping is firm. Use the overhanging parchment to lift the set bars from the pan and cut into squares before serving.
3. Peanut Butter Chocolate Fudge

This peanut butter chocolate fudge brings together two classic flavors in a smooth, rich treat that's both simple and satisfying. The soft, creamy texture melts in your mouth, giving you a sweet and nutty experience with every bite, with a glossy finish and velvety mouthfeel.
It's a great choice if you want a dessert that feels indulgent without complicated steps.
You can prepare this fudge ahead of time, making it a practical option for busy days or last-minute gatherings. It also holds up well, so you can portion it out and enjoy it over several days.
This recipe is a lovely way to satisfy a sweet tooth with a homemade touch.
If you're adapting recipes that also call for peanut oil, peanut oil alternatives for cooking can help preserve flavor while avoiding allergy concerns.
Why This Recipe Works
This fudge blends rich chocolate and creamy peanut butter into a straightforward recipe that delivers satisfying flavor and texture. It's a versatile treat that anyone can make with just a few ingredients.
- Convenience - Requires minimal ingredients and quick preparation.
- Flavor balance - Combines the sweetness of chocolate with the nutty richness of peanut butter.
- Texture - Smooth and creamy fudge that holds its shape yet melts gently.
- Appeal - Great for sharing and suitable for both everyday snacks and special occasions.
- Storage - Keeps well in the refrigerator, making it easy to portion and serve later.
Ingredient Swap Ideas
Adjusting ingredients can help tailor this fudge to fit your dietary preferences or what you have on hand. Swapping certain items lets you maintain the rich flavor while exploring variations.
- Peanut butter - Use almond or cashew butter for a different nutty profile.
- Chocolate - Replace semi-sweet with dark or milk chocolate depending on your sweetness preference.
- Sweetener - Substitute granulated sugar with coconut sugar or maple syrup for a different texture and flavor.
- Dairy - Use coconut milk or vegan butter if you want a dairy-free option.
- Add-ins - Stir in chopped nuts or a pinch of sea salt for extra crunch and contrast.
Ingredients
- 1 cup - smooth peanut butter, creamy texture works best.
- 2 cups - semi-sweet chocolate chips or chopped chocolate.
- ½ cup - unsalted butter, adds richness and smoothness.
- ¼ cup - packed light brown sugar, for gentle sweetness and moisture.
- 1 teaspoon - vanilla extract, to enhance flavor depth.
- ¼ teaspoon - salt, balances sweetness and intensifies flavors.
Instructions
- Line an 8x8-inch baking pan with parchment paper, leaving an overhang to lift the fudge out easily later.
- In a medium saucepan over low heat, melt the butter, peanut butter, and sugar together. Stir often until the mixture is smooth and well combined.
- Remove the pan from heat and quickly stir in the chocolate chips until fully melted and the mixture is glossy.
- Add the vanilla extract and salt, mixing thoroughly to distribute evenly.
- Pour the fudge mixture into the prepared pan, spreading it evenly with a spatula.
- Refrigerate for at least 2 hours or until firm. Once set, lift the fudge from the pan using the parchment paper and cut into squares.
This peanut butter chocolate fudge makes a sweet treat that's easy to enjoy anytime and share with others. Keep it stored in an airtight container in the fridge to maintain its texture and flavor.
4. Chocolate Peanut Butter Banana Smoothie Bowl

This smoothie bowl blends the rich, comforting taste of chocolate with the creamy depth of peanut butter and the natural sweetness of bananas. It offers a satisfying breakfast that feels indulgent without being heavy or overly sweet.
The texture is thick and smooth, making it perfect for spooning and piling with your favorite toppings. It's a refreshing way to start a busy morning or recharge after a workout.
This recipe comes together quickly and uses simple, wholesome ingredients you likely have on hand.
Why This Recipe Works
This smoothie bowl combines nutrient-rich ingredients in a way that is both filling and flavorful. It's a balanced option that works well for a quick breakfast or a light snack.
- Convenience - Made with frozen bananas and pantry staples, it blends up in minutes with minimal prep.
- Flavor balance - The cocoa powder and peanut butter create a balanced chocolate-peanut flavor that goes with the banana's natural sweetness.
- Texture - Thick and creamy, it holds up well to a variety of toppings without melting too fast.
- Appeal - Bright and visually appealing with added toppings, it's great for sharing or enjoying solo.
- Nutrient-rich - Packed with healthy fats, protein, and natural sugars for sustained energy and fullness.
Ingredient Swap Ideas
Switching up one or two ingredients here can help tailor this bowl for different dietary needs or flavor preferences without losing the essence of the recipe.
- Peanut butter - Use almond or cashew butter for a milder or nuttier flavor.
- Cocoa powder - Substitute with carob powder to avoid caffeine or chocolate while keeping a rich color.
- Bananas - If you want a milder taste, swap half the bananas for frozen mango or avocado for creaminess.
- Milk - Choose any plant-based milk like oat, soy, or almond for a dairy-free version.
- Sweetener - If needed, add a touch of honey, maple syrup, or dates to increase sweetness naturally.
Ingredients
- 2 frozen bananas peeled and sliced for easier blending.
- 1 tablespoon unsweetened cocoa powder for rich chocolate flavor.
- 2 tablespoons peanut butter creamy or crunchy according to your preference.
- ½ cup milk dairy or plant-based for desired consistency.
- 1 teaspoon vanilla extract to improve the flavors.
- Toppings of choice such as sliced fresh banana, chopped nuts, granola, shredded coconut, or cacao nibs.
Instructions
- Place the frozen bananas, cocoa powder, peanut butter, milk, and vanilla extract in a blender. Blend until smooth and thick, stopping to scrape down the sides as needed.
- If the mixture is too thick for your blender, add a splash more milk to help it blend, but keep it thick enough to eat with a spoon.
- Pour the smoothie into a bowl and smooth the surface.
- Decorate with your chosen toppings, arranging them evenly or in sections for a beautiful presentation.
- Serve immediately to enjoy the thick texture and fresh flavors. Store any leftovers in the fridge for up to one day, stirring well before eating.
5. Peanut Butter Chocolate Truffles

Peanut Butter Chocolate Truffles offer a wonderfully simple treat combining rich chocolate with creamy peanut butter in every bite. These small, bite-sized balls provide just the right level of sweetness and satisfy a craving without overwhelming.
The texture is smooth and velvety from the peanut butter filling and has a slight crispiness from the chocolate coating. You'll find these truffles easy to prepare at home with a handful of ingredients, making them a great option for a quick snack or a thoughtful homemade gift.
With their compact size, they are perfect for sharing at gatherings or keeping handy for a quick indulgence. The balance of flavors and textures creates a little luxury without spending much time or effort.
Why This Recipe Works
This recipe combines ease and delicious flavor in a compact snack. It provides a simple way to enjoy a classic flavor pairing without complicated steps or ingredients.
- Convenience - Requires only a few ingredients and minimum prep time.
- Flavor balance - Rich chocolate paired with nutty, creamy peanut butter.
- Texture - Smooth interior with a firm chocolate shell.
- Appeal - Small, portion-controlled bites suitable for any occasion.
- Make-ahead - Can be prepared in advance and stored for freshness.
Ingredient Swap Ideas
Swapping a few ingredients can customize these truffles for your preferences or dietary needs without losing their core flavor. Small changes keep the recipe approachable while giving you flexibility.
- Replace peanut butter with almond or cashew butter for a different nutty flavor.
- Use dark or white chocolate instead of classic milk chocolate for variety.
- Swap powdered sugar with a natural sweetener like coconut sugar or maple syrup powder.
- Add a pinch of sea salt to the coating to improve the flavor contrast.
- Use vegan chocolate and peanut butter for a dairy-free and plant-based option.
Ingredients
- 1 cup creamy peanut butter - Choose natural or your favorite brand for smooth texture.
- ¼ cup unsalted butter, softened - Adds richness and helps with consistency.
- ½ cup powdered sugar - Sweetens the filling to balance peanut butter's saltiness.
- 1 teaspoon vanilla extract - Enhances flavor depth without overpowering.
- 8 ounces milk chocolate chips - For coating the truffles with a smooth, glossy finish.
- 1 tablespoon vegetable oil - Helps melt the chocolate smoothly for dipping.
Instructions
- In a medium bowl, mix the peanut butter, softened butter, powdered sugar, and vanilla extract until well combined and smooth.
- Roll the mixture into small, bite-sized balls (approximately 1 inch in diameter) and place them on a parchment-lined baking sheet. Chill in the refrigerator for about 30 minutes until firm.
- Melt the chocolate chips with vegetable oil in a heatproof bowl over simmering water or in short bursts in the microwave, stirring often until smooth.
- Using a fork or dipping tool, coat each peanut butter ball evenly with the melted chocolate, letting excess drip off. Return to the parchment-lined sheet.
- Refrigerate the coated truffles for at least 1 hour until the chocolate hardens.
- Store in an airtight container in the refrigerator and serve chilled or at room temperature.
These truffles come together simply, offering a rich and satisfying treat you can share or enjoy any time.
6. Chocolate Peanut Butter Oatmeal Energy Bites

Chocolate Peanut Butter Oatmeal Energy Bites offer a simple, wholesome snack that fits into a busy day without any hassle. These no-bake bites combine the heartiness of oats with the creamy richness of peanut butter and the sweet touch of mini chocolate chips.
Their chewy texture and satisfying flavor make them a great option to grab on your way out or to share with family during a quick break. You'll appreciate how fast they come together with just a few basic ingredients, making them a reliable choice when you need a boost.
Why This Recipe Works
This recipe delivers a nutritious snack with minimal preparation and satisfying flavors that everyone can enjoy. It's a smart blend of energy-boosting ingredients wrapped in an easy, transportable bite.
- Convenience - No baking or cooking required, ready in minutes and great for make-ahead.
- Balanced flavor - Combines sweet chocolate with rich peanut butter and hearty oats.
- Texture - Chewy and soft, providing a pleasant mouthfeel without being overly dense.
- Family-friendly - Kid-approved flavors that adults also appreciate for a quick pick-me-up.
- Portion control - Made in small, uniform bites, ideal for on-the-go snacking without mess.
Ingredient Swap Ideas
Swapping ingredients in this recipe helps tailor it to different dietary needs or flavor preferences without losing its core benefits. These substitutions keep the overall taste and texture compatible with the original concept.
- Peanut butter - Use almond butter or sunflower seed butter if you want a nut-free option or prefer a different flavor.
- Mini chocolate chips - Replace with dark chocolate chunks for a richer taste or omit for a lower-sugar snack.
- Old-fashioned oats - Use gluten-free oats to make the recipe suitable for gluten-sensitive diets.
- Honey - Substitute with maple syrup or agave nectar to make the bites vegan-friendly.
- Add-ins - Toss in chia seeds or flaxseeds for extra nutrition and a slight crunch.
Ingredients
- 1 cup old-fashioned rolled oats - Provides a filling, chewy base for the energy bites.
- ½ cup creamy peanut butter - Adds richness and healthy fats for sustained energy.
- ⅓ cup honey - Offers natural sweetness and helps bind the mixture together.
- ½ cup mini chocolate chips - Gives a touch of sweetness and chocolate flavor throughout.
- 1 teaspoon vanilla extract - Enhances overall flavor with a warm, fragrant note.
- ¼ teaspoon salt - Balances the sweetness and brings out the flavors.
Instructions
- In a medium bowl, combine the rolled oats, creamy peanut butter, honey, vanilla extract, and salt. Stir well until all ingredients are thoroughly mixed.
- Fold in the mini chocolate chips, distributing them evenly throughout the mixture.
- Use a tablespoon or a small cookie scoop to portion out the mixture. Roll each portion between your palms to form bite-sized balls.
- Place the formed bites on a baking sheet or plate lined with parchment paper.
- Refrigerate the energy bites for at least 30 minutes to firm up before serving.
- Store the bites in an airtight container in the refrigerator for up to one week, making them easy to grab anytime you need a quick energy boost.
7. Peanut Butter Swirl Brownies

These peanut butter swirl brownies combine a rich, fudgy chocolate base with creamy peanut butter swirls that add a nice contrast. The texture is dense and chewy, making each bite deeply satisfying.
They're a straightforward treat that works well for busy days when you want something homemade without too much fuss.
Mixing the peanut butter into the batter creates a lovely marbled effect, adding visual interest and bursts of nutty flavor throughout. This recipe doesn't require any special ingredients or complicated steps, so you can have fresh brownies ready in less than an hour.
It's an easy way to bring a little something special to your dessert lineup.
Why This Recipe Works
This recipe combines easy preparation with rich and balanced flavors for a dessert that will appeal to chocolate and peanut butter fans alike. It's a great option whether you're baking for family, friends, or an event.
- Convenience - Simple ingredients and quick prep make this recipe accessible for any home cook.
- Flavor balance - Creamy peanut butter swirls go with the deep chocolate base perfectly.
- Texture - Thick, fudgy brownies with smooth peanut butter pockets add variety to each bite.
- Appeal - This crowd-pleaser suits casual gatherings and everyday indulgence.
- Cleanup or serving ease - Baked in one pan, it's easy to portion and serve with minimal mess.
Ingredient Swap Ideas
Adapting this recipe helps suit different dietary preferences or what you have on hand, without losing the core flavor.
- Peanut butter - Use almond or cashew butter for a milder nut flavor or to accommodate peanut allergies.
- Chocolate - Substitute semi-sweet chocolate chips with dark or milk chocolate, depending on your sweetness preference.
- Flour - Swap all-purpose flour for gluten-free flour blends to make it gluten-free.
- Sweetener - Replace granulated sugar with coconut sugar or a natural sweetener that measures cup-for-cup.
- Butter - Use a dairy-free butter alternative to make the brownies vegan-friendly.
Ingredients
- 1 cup unsalted butter - Melted and slightly cooled for rich chocolate flavor.
- 2 cups granulated sugar - Adds sweetness and structure to the brownies.
- 4 large eggs - Provide moisture and help bind the ingredients.
- 1 teaspoon vanilla extract - Enhances the overall flavor.
- 1 cup all-purpose flour - Gives the brownies their body and texture.
- ¾ cup cocoa powder - Provides deep chocolate flavor and color.
- ½ teaspoon salt - Balances sweetness and intensifies chocolate taste.
- ¾ cup creamy peanut butter - Divided between swirling into the batter and topping.
- ½ cup chocolate chips - Optional, for extra pockets of melted chocolate.
Instructions
- Preheat your oven to 350°F (175°C). Grease a 9x13-inch baking pan or line it with parchment paper for easy removal.
- In a large bowl, whisk together melted butter and sugar until well combined. Add eggs one at a time, mixing thoroughly after each addition. Stir in vanilla extract.
- In a separate bowl, sift together flour, cocoa powder, and salt. Gradually add the dry ingredients to the wet mixture, folding gently to combine without overmixing.
- Pour half of the brownie batter into the prepared pan, spreading it evenly. Drop spoonfuls of half the peanut butter over the batter, then gently swirl it using a knife or skewer. Repeat with the remaining batter and peanut butter, creating a marbled effect on top.
- (Optional) Sprinkle chocolate chips evenly across the surface.
- Bake for 30 to 35 minutes, or until a toothpick inserted near the center comes out with moist crumbs. Avoid overbaking to keep the brownies fudgy.
- Allow the brownies to cool completely in the pan before slicing and serving. This helps the swirls set and makes clean cuts easier.
8. Chocolate Peanut Butter Mousse

This chocolate peanut butter mousse blends two classic flavors to create a light, airy dessert that feels indulgent without being heavy. The creamy chocolate base is lightly whipped to give it a fluffy texture, while the peanut butter adds a rich, nutty contrast that goes with the chocolate perfectly.
Making this dessert doesn't take long, and it requires just a few simple ingredients that you might already have on hand. It's an excellent choice when you want something satisfying yet straightforward to prepare, especially if you're looking to treat yourself or guests with a smooth, elegant finish to a meal.
Why This Recipe Works
This mousse offers a wonderful balance between convenience and flavor that fits well into a busy schedule without compromising on taste or presentation.
- Convenience - Quick to whip together using minimal ingredients for a fast dessert.
- Flavor balance - Rich chocolate pairs harmoniously with creamy peanut butter.
- Texture - Light and airy mousse contrasts with the silky peanut butter layer.
- Appeal - Stylish dessert that works well for family occasions or dinner parties.
- Serving ease - Can be portioned into individual cups for fuss-free presentation.
Ingredient Swap Ideas
Adjusting the ingredients in this mousse can easily cater to dietary preferences or ingredient availability without losing the core flavor combination.
- Chocolate - Use dark, milk, or semi-sweet chocolate depending on your preferred sweetness.
- Peanut butter - Swap for almond or cashew butter to vary the nutty flavor.
- Dairy - Replace heavy cream with coconut cream for a dairy-free version.
- Sweetener - Use maple syrup or honey instead of sugar to add natural sweetness.
- Garnish - Top with chopped nuts or a sprinkle of cocoa powder instead of peanut butter for texture contrast.
Ingredients
- 4 ounces bittersweet or semisweet chocolate broken into pieces
- 1 cup heavy whipping cream chilled
- ¼ cup powdered sugar for sweetness
- ½ cup creamy peanut butter smooth texture works best
- 1 teaspoon vanilla extract for enhanced flavor
- Pinch of salt to balance sweetness
Instructions
- Melt the chocolate gently over a double boiler or in short bursts in the microwave, stirring frequently until smooth. Let it cool slightly.
- In a chilled bowl, whip the heavy cream with powdered sugar and vanilla extract until soft peaks form.
- Reserve about 2 tablespoons of the whipped cream, then fold the melted chocolate into the remaining whipped cream gently, maintaining as much air as possible.
- Carefully fold in the salt and half of the peanut butter into the chocolate mousse.
- Spoon half of the mousse into serving dishes, then dollop the reserved whipped cream mixed with the rest of the peanut butter on top or swirl it through.
- Chill for at least 1 hour to let the mousse set before serving.
This chocolate peanut butter mousse offers a nice balance of fluffy texture and creamy richness, making it a rewarding dessert for any occasion.
9. Peanut Butter Chocolate Rice Krispie Treats

Peanut Butter Chocolate Rice Krispie Treats combine the nostalgic crunch of classic marshmallow cereal bars with the rich creaminess of peanut butter. This recipe is a simple twist that brings a wonderful balance of sweet and nutty flavors, finished off with a chocolate dip or drizzle that adds an irresistible touch.
These treats come together quickly, making them ideal for busy days when you want something homemade without a complicated process. The texture is delightfully chewy with crispy cereal bits, complemented by the smooth peanut butter and chocolate layers that add extra indulgence without overwhelming the original concept.
Why This Recipe Works
This recipe offers a quick and accessible way to enjoy a beloved snack with an upgrade to its flavor and texture. It combines familiar ingredients in a way that brings satisfaction without a long preparation time.
- Convenience - Comes together in under 30 minutes with minimal ingredients.
- Flavor balance - Sweet marshmallows paired with creamy peanut butter and rich chocolate for multilayered taste.
- Texture - Combines chewy marshmallow with crispy cereal crunch and smooth chocolate finish.
- Appeal - Family-friendly treat enjoyable for kids and adults alike.
- Serving ease - Handy bars that are perfect for grab-and-go snacks or party platters.
Ingredient Swap Ideas
Adjusting this recipe can suit different dietary needs or personal preferences without losing its character. Simple swaps keep the flavor and structure intact, allowing you to customize as you like.
- Use sunflower seed butter or almond butter - For a nut-free or alternative nut spread option.
- Choose dairy-free chocolate chips - To make the treats vegan or dairy-free friendly.
- Swap Rice Krispies with gluten-free puffed rice cereal - To accommodate gluten sensitivities.
- Replace butter with coconut oil - To add a subtle tropical flavor and make it dairy-free.
- Use natural peanut butter without added sugar - For a less sweet, more wholesome taste.
Ingredients
- 6 cups Rice Krispies cereal - Provides the crispy, crunchy base of the treats.
- 4 cups mini marshmallows - The sticky binder that holds everything together.
- 3 tablespoons unsalted butter - Adds richness and helps melt the marshmallows.
- ½ cup creamy peanut butter - Gives a nutty flavor and smooth texture throughout.
- 1 cup chocolate chips - For melting and dipping or drizzling on top.
- Optional: 1 teaspoon vanilla extract - Enhances the overall flavor subtly.
Instructions
- Prepare a 9x13-inch pan by lightly greasing it or lining it with parchment paper. This prevents sticking and makes removal easier.
- In a large pot, melt the butter over medium heat. Once melted, add the mini marshmallows and stir constantly until they are completely melted and smooth. If using, stir in the vanilla extract at this point.
- Remove the pot from heat and quickly stir in the peanut butter until it's fully combined with the melted marshmallow mixture.
- Add the Rice Krispies cereal and fold gently until every bit is coated evenly with the marshmallow peanut butter mixture. Press the mixture firmly into the prepared pan using a spatula or clean hands. Let it cool for about 10 minutes.
- Melt the chocolate chips in a microwave-safe bowl in 30-second intervals, stirring between each, until smooth. You can either dip the cooled bars into the melted chocolate or drizzle it over the top with a spoon. Allow the chocolate to set completely before cutting.
- Cut into squares or bars and serve. Store any leftovers in an airtight container at room temperature for up to 3 days.
10. Chocolate Peanut Butter Cheesecake Bars

These Chocolate Peanut Butter Cheesecake Bars combine creamy cheesecake, a rich chocolate crust, and a luscious peanut butter topping into one satisfying treat. They offer a wonderful mix of smooth and crunchy textures that come together beautifully in every bite.
The recipe is straightforward, making it easy to prepare ahead of time for a family dessert or a casual gathering. The balance between chocolate and peanut butter feels indulgent without being overly complicated, so you get great flavor with minimal fuss.
Why This Recipe Works
This recipe delivers a good mix of flavors and textures while providing a simple way to create a delicious dessert that appeals to a range of tastes.
- Convenience - You can prepare the bars ahead and store them in the fridge for an easy grab-and-go option.
- Flavor balance - The creamy cheesecake goes well with the rich chocolate crust and nutty peanut butter topping.
- Texture - A crisp chocolate base supports the smooth filling and a slightly crunchy peanut butter layer.
- Appeal - These bars work well for both casual family treats and sharing with guests.
- Serving ease - The bars are portioned and ready to serve, reducing the need for additional plating or cutting.
Ingredient Swap Ideas
Swapping ingredients can help you tailor this recipe to different diets or preferences while keeping the main appeal intact.
- Swap cream cheese with a dairy-free alternative to make the bars vegan-friendly.
- Use almond butter instead of peanut butter to change up the flavor or accommodate allergies.
- Replace the chocolate crust with a gluten-free cookie crust for gluten-sensitive diets.
- Use powdered sugar substitutes like erythritol or monk fruit sweetener for reduced sugar versions.
- Try unsweetened cocoa powder in the crust to lower added sugars and control bitterness.
Ingredients
- 1 ½ cups chocolate cookie crumbs - finely crushed chocolate cookies for the crust.
- ¼ cup unsalted butter - melted, to bind the crust.
- 16 ounces cream cheese - softened, for the cheesecake filling.
- ⅔ cup granulated sugar - to sweeten the cheesecake.
- 2 large eggs - for structure in the cheesecake layer.
- 1 teaspoon vanilla extract - adds flavor depth.
- ½ cup creamy peanut butter - for the topping.
- ¼ cup powdered sugar - to sweeten and thicken the peanut butter layer.
- ¼ cup heavy cream - to smooth the peanut butter topping.
Instructions
- Preheat the oven to 325°F (163°C). In a medium bowl, mix the chocolate cookie crumbs with melted butter until combined. Press the mixture firmly into the bottom of a 9x9-inch baking pan to form the crust.
- In a large bowl, beat the softened cream cheese with granulated sugar until smooth. Add the eggs one at a time, blending well after each addition. Stir in the vanilla extract.
- Pour the cheesecake filling over the prepared chocolate crust and spread evenly. Bake for 35 to 40 minutes until the edges are set and the center is slightly jiggly.
- While the cheesecake cools, combine the peanut butter, powdered sugar, and heavy cream in a bowl. Mix until smooth and spreadable.
- Once the cheesecake layer has cooled to room temperature, spread the peanut butter topping evenly over the surface. Chill the bars in the refrigerator for at least 3 hours before cutting.
- Slice into bars and serve chilled. Store any leftovers covered in the fridge for up to 4 days.
11. Chocolate-Dipped Peanut Butter Pretzel Rods

Chocolate-Dipped Peanut Butter Pretzel Rods offer a simple and tasty combination of salty and sweet that's easy to prepare. These treats bring together crunchy pretzels coated with creamy peanut butter and smooth chocolate for a satisfying texture and flavor contrast.
You can make these snacks in just a few minutes, making them ideal for busy days or last-minute gatherings. Their handheld size also makes them convenient for serving at parties or packing as a quick snack for kids and adults alike.
The rich peanut butter goes well with the slight bitterness of chocolate, while the pretzels add a nice crunch to every bite. These rods provide a great mix of flavors without requiring complicated steps or ingredients.
Why This Recipe Works
This recipe combines ease and flavor to create a quick snack everyone can enjoy. Chocolate-Dipped Peanut Butter Pretzel Rods bring together simple ingredients with a satisfying balance of tastes and textures.
- Convenience - Requires minimal preparation and no baking.
- Flavor balance - Combines creamy peanut butter with sweet chocolate and salty pretzels.
- Texture - Features a crunchy base with smooth, melty coatings.
- Appeal - Great for family snacks, parties, or on-the-go treats.
- Serving ease - Individually portioned rods make for easy handling and serving.
Ingredient Swap Ideas
Swapping ingredients can adjust this recipe to fit dietary preferences or to brighten the flavors in new ways. Here are some accessible substitutions that keep the snack enjoyable.
- Pretzel rods - Use gluten-free pretzels if you need a gluten-free option.
- Peanut butter - Substitute almond butter or sunflower seed butter for nut-free or different nut flavor.
- Chocolate - Try white chocolate or dark chocolate to vary the sweetness level.
- Toppings - Sprinkle with crushed nuts, sea salt, or coconut flakes instead of plain chocolate.
- Sweetener - Add a drizzle of honey or maple syrup on top for extra sweetness and shine.
Ingredients
- 10 pretzel rods - crunchy pretzels for the base.
- ½ cup peanut butter - smooth or crunchy, depending on preference.
- 1 cup chocolate chips - milk, dark, or white chocolate.
- Optional toppings - crushed peanuts, sea salt, or shredded coconut.
Instructions
- Line a baking sheet with parchment paper to prepare a clean surface for dipping and drying the pretzel rods.
- Warm the peanut butter in a microwave-safe bowl for about 20-30 seconds until it softens enough to spread easily.
- Spread peanut butter over each pretzel rod, covering about two-thirds of the rod length.
- Melt the chocolate chips in a microwave-safe bowl in 15- to 20-second intervals, stirring between each until smooth.
- Dip the peanut butter-coated section of each pretzel rod into the melted chocolate, allowing any excess chocolate to drip off.
- Place the dipped rods onto the parchment-lined sheet and add any optional toppings immediately before the chocolate sets.
- Refrigerate the pretzel rods for 15 to 20 minutes until the chocolate hardens.
Serve these snacks chilled or at room temperature for a crunchy, creamy bite with a balance of sweet and salty flavors.
Bean-based swaps can mimic creamy textures in certain desserts and savory sides - see butter bean substitutes for varied textures. If you're balancing rich, cheesy sides with sweet treats, compare butter alternatives in mac and cheese to choose options with similar melting behavior.

Andrew Gray is a seasoned food writer and blogger with a wealth of experience in the restaurant and catering industries. With a passion for all things delicious, Andrew has honed his culinary expertise through his work as a personal chef and caterer.
His love for food led him to venture into food writing, where he has contributed to various online publications, sharing his knowledge and insights on the culinary world. As the proud owner of CooksCrafter.com, Andrew covers a wide range of topics, including recipes, restaurant reviews, product recommendations, and culinary tips.
Through his website, he aims to inspire and educate fellow food enthusiasts, offering a comprehensive resource for all things food-related.