Caprese skewers and mini meatballs lead this list of bite-sized appetizers that travel well. Each recipe packs easily into containers, holds up on a buffet, and ranges from fresh, no-cook bites to warm, make-ahead nibbles - typically 1- to 2-bite portions that travel well for picnics and potlucks.

These appetizers work well together because they hold up during transport and taste great at room temperature -typically single-bite portions ideal for potlucks and picnics. Plus, they keep clean-up minimal while delivering a range of textures and flavors to please any crowd.
1. Caprese Skewers with Balsamic Glaze
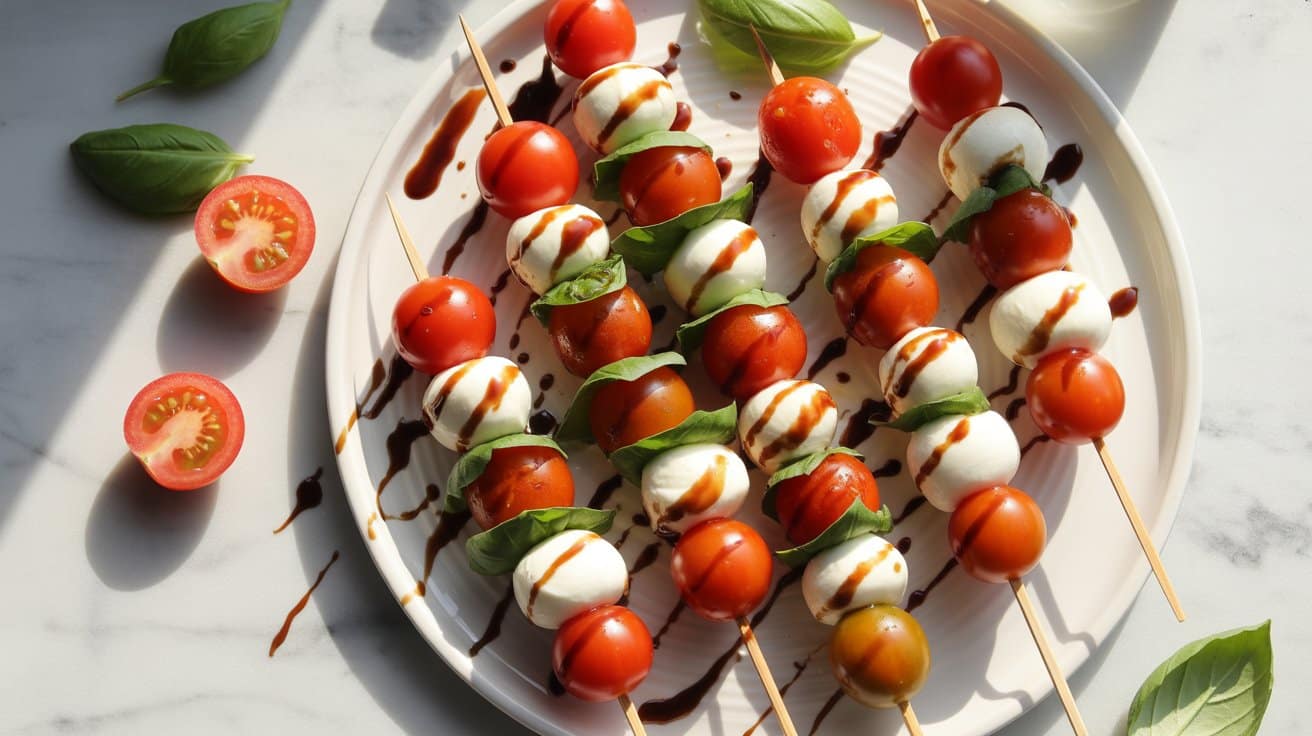
Caprese skewers bring all the fresh flavors of a classic caprese salad into a convenient, bite-sized form. These skewers combine juicy cherry tomatoes, creamy mozzarella balls, and fragrant basil leaves, making for a colorful and refreshing appetizer or snack.
They are quick to assemble and easy to serve, making them a great choice for busy days or casual gatherings; pair them with caprese chicken side suggestions when serving as part of a meal.
For other simple substitutions, see 3-ingredient appetizer ideas for quick swaps.
Why This Recipe Works
This recipe stands out for its simplicity and bright flavor combination that suits any time you want a light yet satisfying bite. It's also visually attractive and mess-free, making it easy to enjoy in any setting.
- Convenience - Simple assembly with no cooking required, ready in minutes.
- Flavor balance - Combines creamy mozzarella, sweet tomatoes, and tangy balsamic glaze.
- Texture - Fresh basil adds a herbaceous punch to smooth cheese and juicy tomatoes.
- Appeal - Perfect for entertaining or an easy snack for the family.
Ingredient Swap Ideas
Swapping ingredients can help adjust the recipe for allergies, preferences, or simply to add variety while keeping the core idea intact. These alternatives keep the essence of the dish but fit your needs better.
- Mozzarella - Substitute with small bocconcini or vegan cheese balls for a dairy-free option.
- Cherry tomatoes - Use grape tomatoes or small heirloom tomatoes for different color and sweetness.
- Basil - Replace with fresh mint or arugula for a different herbaceous flavor.
- Balsamic glaze - Use a drizzle of lemon vinaigrette or aged sherry vinegar if balsamic glaze is not available.
Ingredients
- Mini mozzarella balls (bocconcini) - 1 cup, drained
- Cherry tomatoes - 1 cup, washed
- Fresh basil leaves - 20 medium-sized, washed
- Balsamic glaze - 2 to 3 tablespoons for drizzling
- Toothpicks or small skewers - 20 pieces
Instructions
- Rinse and dry the cherry tomatoes and basil leaves carefully to avoid bruising.
- Thread one cherry tomato onto a toothpick, followed by one mozzarella ball and one basil leaf. Repeat this pattern until all ingredients are used.
- Arrange the skewers on a serving platter in a single layer for easy access.
- Drizzle the balsamic glaze evenly over the skewers, adding just enough to improve the flavors without soaking the ingredients.
- Serve immediately or keep refrigerated for up to 2 hours before serving to maintain freshness.
2. Mini Chicken Salad Cucumber Cups
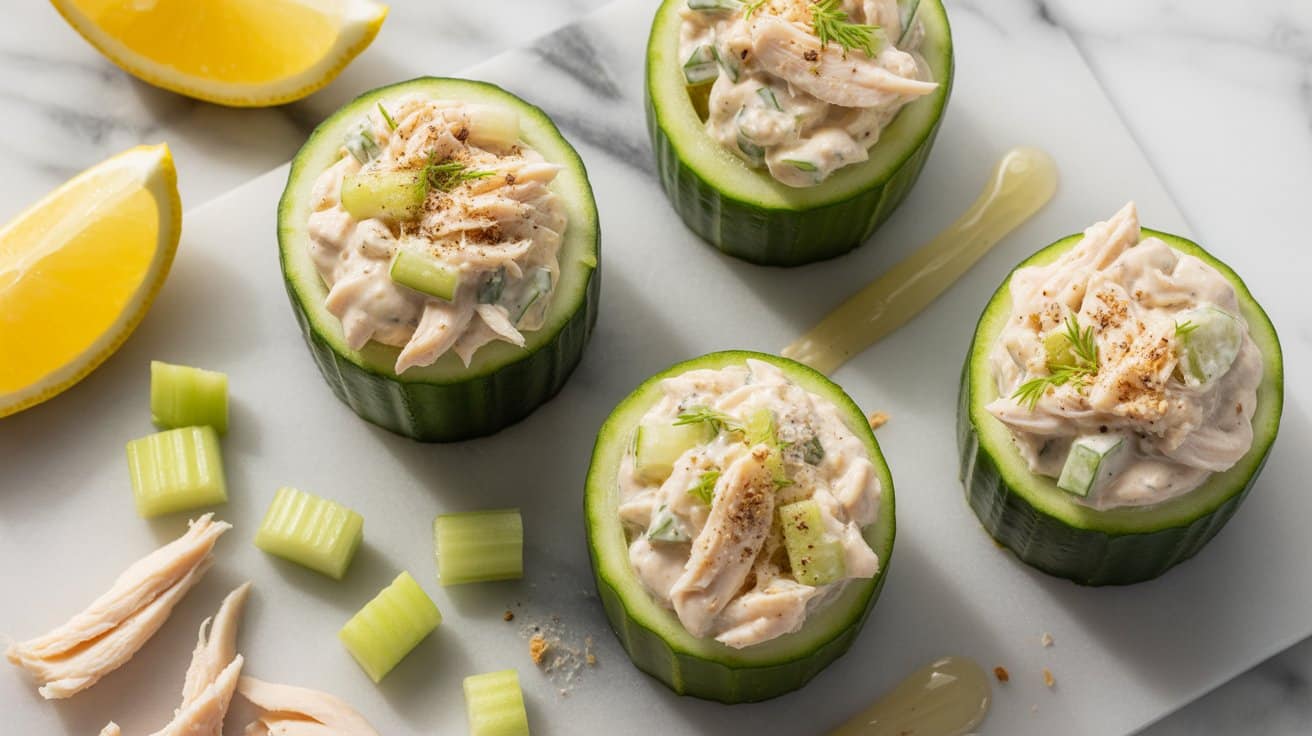
These Mini Chicken Salad Cucumber Cups are a fresh and satisfying bite-sized snack or appetizer. They typically use shredded cooked chicken and a mayonnaise-based dressing for a creamy, tangy filling, often with about a 2:1 chicken-to-mayo ratio for balance. They combine crisp cucumber rounds with a creamy chicken salad that's light but filling.
The crunch from the cucumber goes well with the tender, flavorful chicken salad, making them a refreshing option for casual gatherings or quick lunches.
See a pickle-forward pasta salad for tangy sides for another easy make-ahead option, or pair with chicken salad side suggestions for pairing to complete a spread.
Why This Recipe Works
This recipe shines for its ease and delicious contrast between creamy and crisp elements. It's a practical choice for anyone seeking a nutritious, portable snack that feels both light and satisfying.
- Convenience - Requires minimal prep and uses simple ingredients that come together quickly.
- Flavor balance - Combines savory chicken with a slight tanginess from dressing, complemented by the freshness of cucumber.
- Texture - Crunchy cucumber shells hold creamy, tender chicken salad perfectly.
- Appeal - Elegant enough for entertaining, yet straightforward and family-friendly.
Ingredient Swap Ideas
Swapping ingredients helps tailor these cucumber cups to personal tastes or dietary needs without losing their essence.
- Chicken breast - Try using cooked turkey breast or shredded rotisserie chicken for convenience and variety.
- Mayonnaise - Substitute with Greek yogurt to cut calories and add a boost of protein.
- Cucumber - Use zucchini slices if cucumbers are out of season or to change up the flavor.
- Add-ins - Mix in chopped celery, apple, or nuts for additional crunch and flavor layers.
Ingredients
- 2 large cucumbers - Firm and fresh, washed and dried.
- 2 cups cooked chicken breast - Finely diced or shredded.
- ⅓ cup mayonnaise - Can substitute with plain Greek yogurt.
- 1 tablespoon Dijon mustard - Adds mild tang and depth.
- ¼ cup celery - Finely chopped for crunch.
- ¼ cup red onion - Finely diced for sharpness.
- 1 tablespoon fresh dill - Chopped, optional for fresh herb flavor.
- Salt - To taste.
- Black pepper - Freshly ground, to taste.
Instructions
- Slice the cucumbers into ½-inch thick rounds. Use a small spoon or melon baller to carefully scoop out the center of each round, creating a cup shape but leaving the bottom intact to hold the filling. Set aside on a paper towel to drain any excess moisture.
- In a mixing bowl, combine the cooked chicken, mayonnaise, Dijon mustard, celery, red onion, and dill. Stir until ingredients are evenly incorporated. Season with salt and freshly ground black pepper to your liking.
- Generously spoon the chicken salad mixture into each cucumber cup, pressing slightly so it holds together but does not overflow. Arrange the filled cups on a serving platter.
- Refrigerate for at least 15 minutes before serving to let flavors meld and cups chill. Serve cold as a refreshing appetizer or light snack.
- Store any leftovers covered in the refrigerator for up to 2 days for best freshness.
3. Spinach and Feta Phyllo Triangles (Spanakopita Bites)
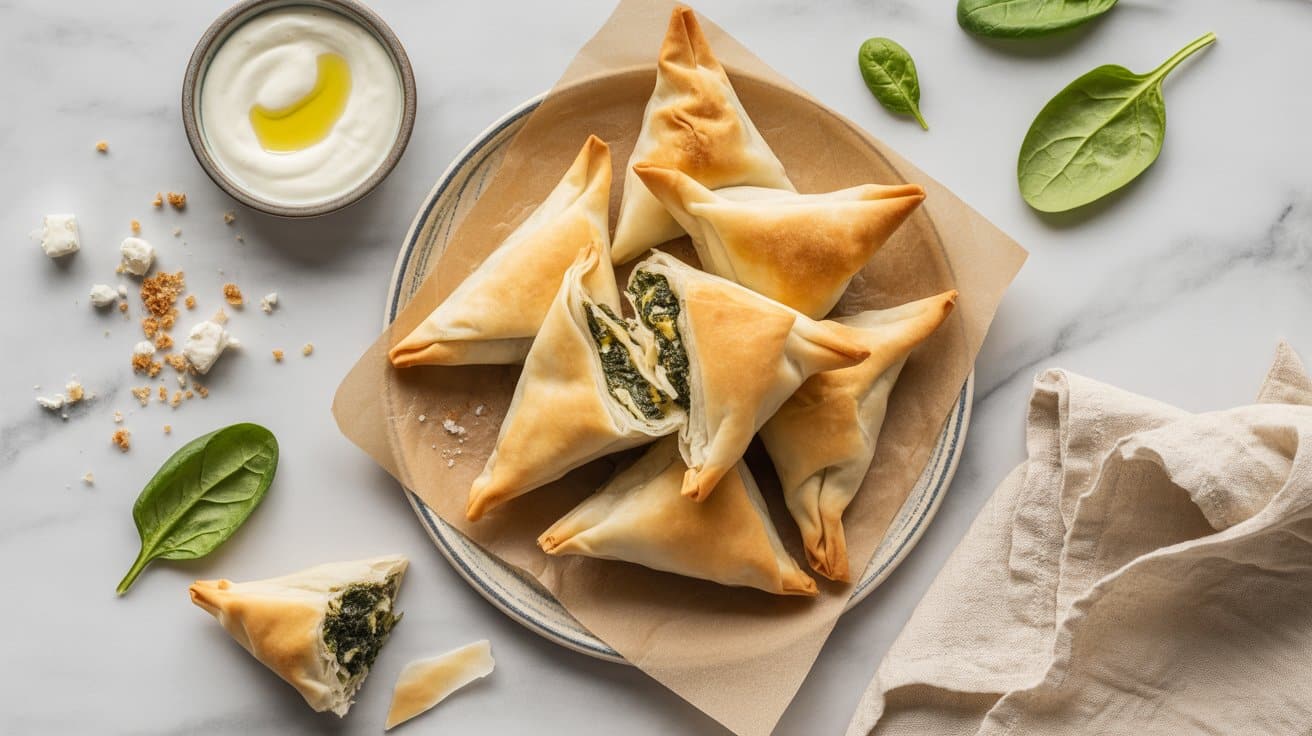
These spinach and feta phyllo triangles are a great option when you want a snack or appetizer that combines flaky, golden layers with a rich, savory filling, a classic Greek appetizer often called spanakopita. The combination of tender spinach and tangy feta cheese offers a satisfying, fresh flavor that feels both light and filling.
They work well served warm straight from the oven or at room temperature, making them ideal for gatherings or quick bites; serve alongside spinach chicken side ideas for meals for a coordinated menu.
Why This Recipe Works
This recipe delivers a delicious bite that is simple to prepare and offers a fresh, savory flavor in every piece.
- Convenience - Uses store-bought phyllo dough for quick assembly and easy baking.
- Flavor balance - Combines tangy feta with mildly sweet, cooked spinach for a rich and satisfying taste.
- Texture - Crisp, buttery phyllo contrasts beautifully with the soft, flavorful filling inside.
- Appeal - Portable and portioned, making these triangles perfect for lunchboxes, parties, or quick snacks.
Ingredient Swap Ideas
Changing up elements in this recipe can help accommodate dietary preferences or just offer some variation in flavor without losing what makes these bites special.
- Use kale or Swiss chard - Replace spinach with these greens for a heartier texture and slightly different flavor.
- Substitute feta with ricotta cheese - For a milder, creamier filling that's less salty but just as rich.
- Choose vegan phyllo dough and plant-based cheese - To make a dairy-free version that keeps the same flaky texture and satisfying flavor.
- Add fresh herbs - Swap or add dill, mint, or parsley to the filling for an herbal twist.
Ingredients
- 10 sheets phyllo dough - Thawed according to package instructions, for wrapping the filling.
- 1 pound fresh spinach - Washed, trimmed, and roughly chopped.
- 8 ounces feta cheese - Crumbled, for the salty cheese flavor.
- 1 small onion - Finely chopped, for sweetness and depth.
- 2 tablespoons olive oil - For sautéing the onion and spinach.
- 2 tablespoons fresh dill - Chopped, for a fragrant herbal note.
- 1 egg - Beaten, used to bind the filling and brush the phyllo.
- Salt and black pepper - To taste, to season the filling gently.
- Butter or olive oil - Melted, for brushing the phyllo layers to ensure crispiness.
Instructions
- Heat olive oil in a large skillet over medium heat. Add the chopped onion and sauté until soft and translucent, about 5 minutes.
- Stir in the chopped spinach and cook until wilted and most of the moisture has evaporated, about 4 to 5 minutes. Remove from heat and let cool slightly.
- Transfer the spinach and onion mixture to a bowl. Add crumbled feta, fresh dill, and the beaten egg. Mix well, then season with salt and black pepper as needed.
- Lay one sheet of phyllo dough on a clean work surface and brush lightly with melted butter or olive oil. Place a second sheet on top and brush again. Cut this layered sheet into 3 to 4 equal strips lengthwise.
- Place a spoonful of filling near one end of each strip, then fold the phyllo over the filling to form a triangle. Continue folding to enclose the filling fully in a triangle shape. Place the triangles on a baking sheet lined with parchment paper. Brush the tops with more melted butter or oil.
- Preheat the oven to 375°F (190°C). Bake the triangles for 20 to 25 minutes, or until golden and crisp. Remove from the oven and allow to cool slightly before serving warm or at room temperature.
4. Bacon-Wrapped Dates Stuffed with Goat Cheese
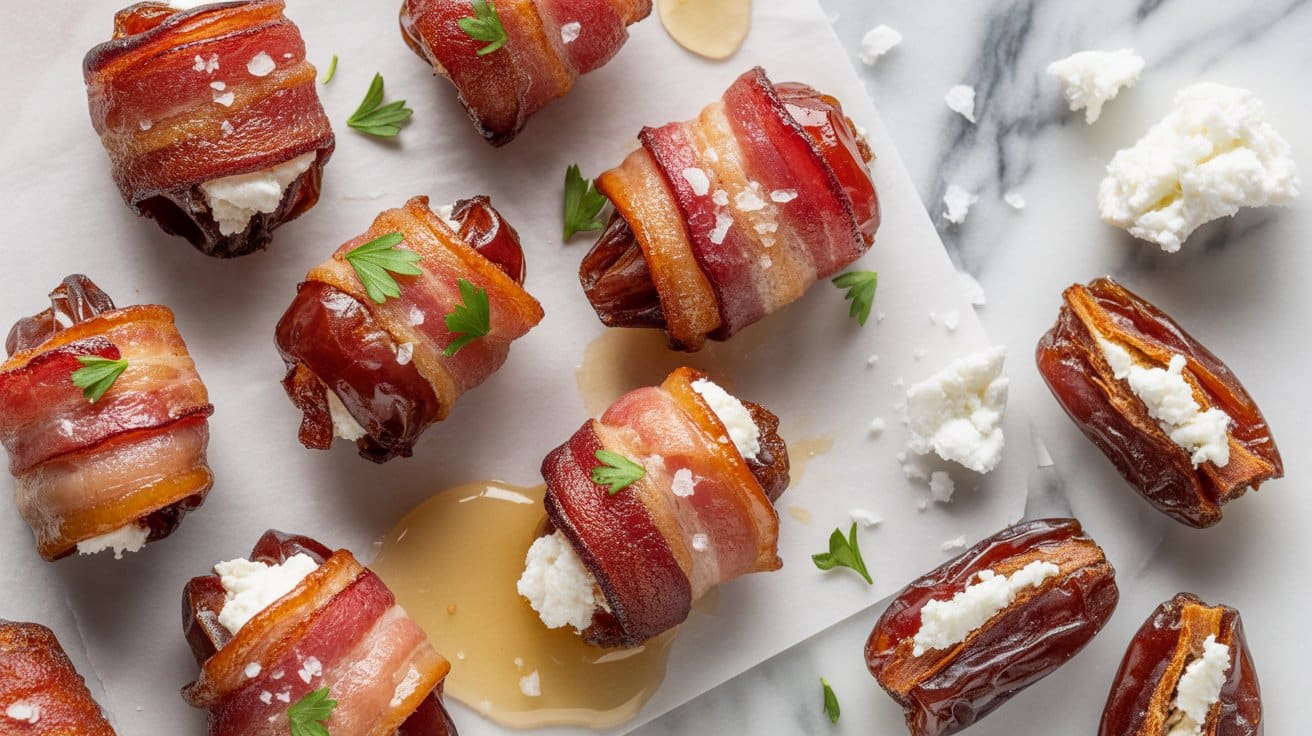
This recipe combines sweet, salty, creamy, and smoky flavors in one bite-sized treat. The natural sweetness of the dates goes well with tangy goat cheese, while the bacon adds a crispy, savory layer that makes every mouthful satisfying.
These bacon-wrapped dates are simple to prepare and ideal for entertaining or as a quick appetizer during the week. They hold up well when packed for travel, making them convenient for picnics or parties.
Why This Recipe Works
This dish offers a nice mix of textures and flavors that come together quickly and easily, making it a practical and flavorful choice.
- Convenience - Requires minimal preparation and cooks in under 20 minutes.
- Flavor balance - Combines sweet dates, creamy tangy cheese, and smoky bacon for rich, contrasting tastes.
- Texture - Offers a crisp bacon exterior with a soft, creamy interior.
- Appeal - Works well for gatherings, looking elegant while still being approachable.
Ingredient Swap Ideas
Swapping ingredients can help match dietary preferences or what you have on hand without losing the essence of this appetizer.
- Goat cheese - Replace with cream cheese or blue cheese for a milder or stronger flavor.
- Bacon - Use turkey bacon or prosciutto for a leaner or different savory twist.
- Dates - Substitute with dried apricots or figs if you want a different sweetness and texture.
- Add nuts - Insert a whole almond or pecan inside the cheese stuffing for extra crunch and flavor.
Ingredients
- 20 Medjool dates - Pitted and ready to be stuffed.
- 4 ounces goat cheese - Soft and spreadable for easy filling.
- 10 slices of bacon - Cut in half crosswise for wrapping.
- Toothpicks - For securing the bacon around the dates.
Instructions
- Preheat the oven to 400°F (200°C). Line a baking sheet with parchment paper or a wire rack.
- Carefully make a small slit lengthwise in each date to create space for filling; remove pits if not already pitted.
- Using a small spoon or your fingers, stuff each date with about a teaspoon of goat cheese.
- Wrap each stuffed date with a half slice of bacon, securing it with a toothpick to hold it in place.
- Arrange the wrapped dates on the prepared baking sheet and bake for 15-18 minutes, turning halfway through, until the bacon is crisp and cooked through.
- Remove from the oven and let cool slightly before serving.
These bacon-wrapped dates are best enjoyed warm but can also be served at room temperature. They make for a satisfying finger food that's sure to impress.
5. Vegetarian Hummus & Veggie Snack Cups
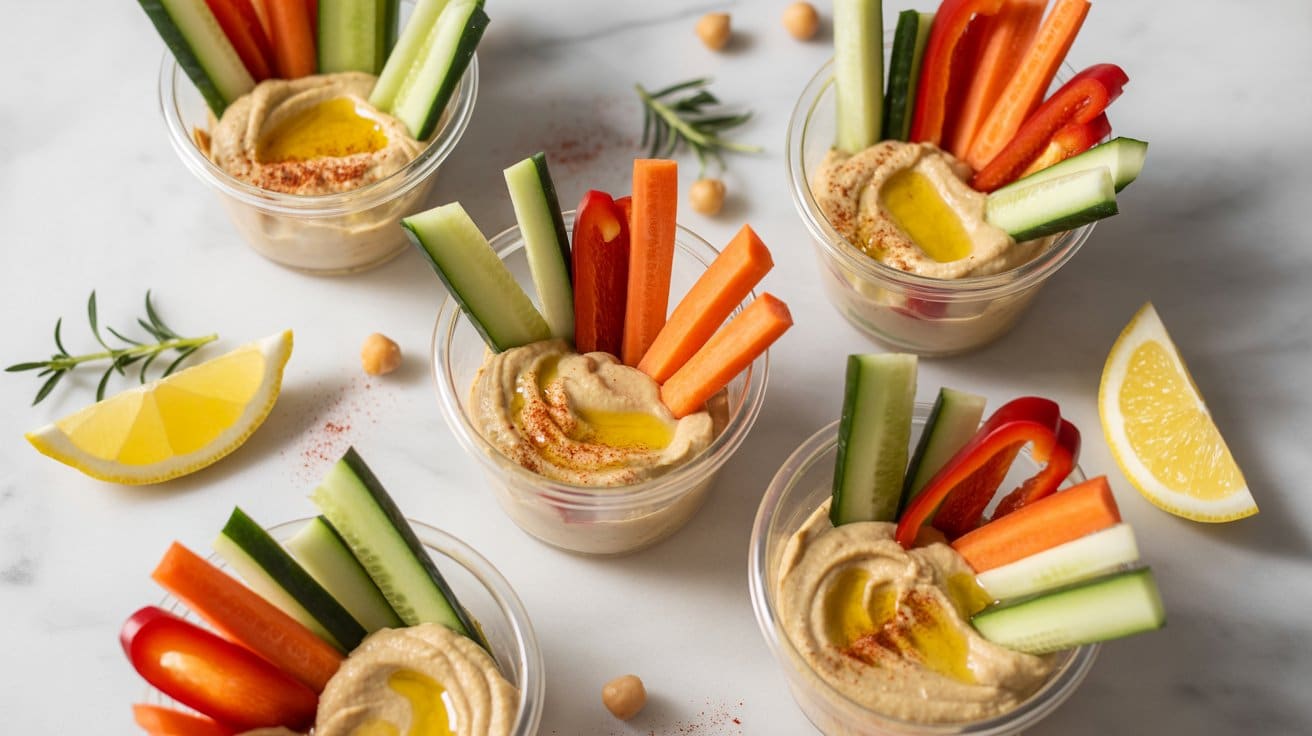
These hummus and veggie snack cups make for a simple, wholesome treat that fits well into busy days or casual gatherings. Each cup is filled with creamy hummus and topped with fresh, crunchy vegetables or olives, offering a bright mix of flavors and textures.
They come together with minimal effort, making them an ideal choice for quick snacks or party appetizers.
The individual portions help with easy serving and prevent mess, and they bring bright color and nutrition to any table. This snack can be ready in minutes yet feels thoughtfully put together.
Why This Recipe Works
This recipe provides a quick, tasty option that pairs creamy hummus with fresh vegetables for satisfying flavor and crunch. It's a versatile, approachable snack suitable for various occasions.
- Convenience - Requires no cooking and comes together very quickly with just a few ingredients.
- Flavor balance - Combines smooth, creamy hummus with crisp, fresh veggies for a pleasing contrast.
- Nutrition - Brings plant-based protein and fiber from chickpeas plus vitamins from fresh vegetables.
- Portion control - Individual cups help with easy serving and reduce waste or mess.
Ingredient Swap Ideas
Adjusting this recipe to personal preferences or dietary needs is simple. You can change up the veggies or the hummus style to create different flavors while keeping it balanced and fresh.
- Hummus variety - Use flavored hummus like roasted red pepper, garlic, or spicy for extra zest.
- Veggie options - Substitute slivered carrots, cherry tomatoes, or cucumber sticks if preferred.
- Add protein - Top with a few cooked chickpeas, toasted pine nuts, or seeds for extra texture.
- Olives - Swap black olives for green ones or capers to change the savory note.
Ingredients
- 1 cup hummus - Plain or flavored, store-bought or homemade.
- ½ cup carrot sticks - Thinly sliced or julienned for easy snacking.
- ½ cup celery sticks - Cut into thin strips.
- ¼ cup cucumber slices - Thin rounds or sticks work well.
- ¼ cup pitted olives - Black or green, sliced.
- 1 tablespoon fresh parsley - Chopped, for garnish.
- Mini plastic or glass cups - About 2 to 3 ounces each for individual servings.
Instructions
- Spoon about 2 tablespoons of hummus into each mini cup, spreading it evenly to cover the bottom.
- Arrange a mix of carrot sticks, celery sticks, and cucumber slices standing upright in the hummus layer.
- Top each cup with a few olive slices for added flavor and color contrast.
- Sprinkle chopped fresh parsley over the top for a touch of freshness and visual appeal.
- Serve the snack cups immediately, or cover and refrigerate them for up to 4 hours before serving.
These snack cups make grabbing a healthy bite quick and simple, perfect for busy moments or small get-togethers.
6. Smoked Salmon and Cream Cheese Cucumbers
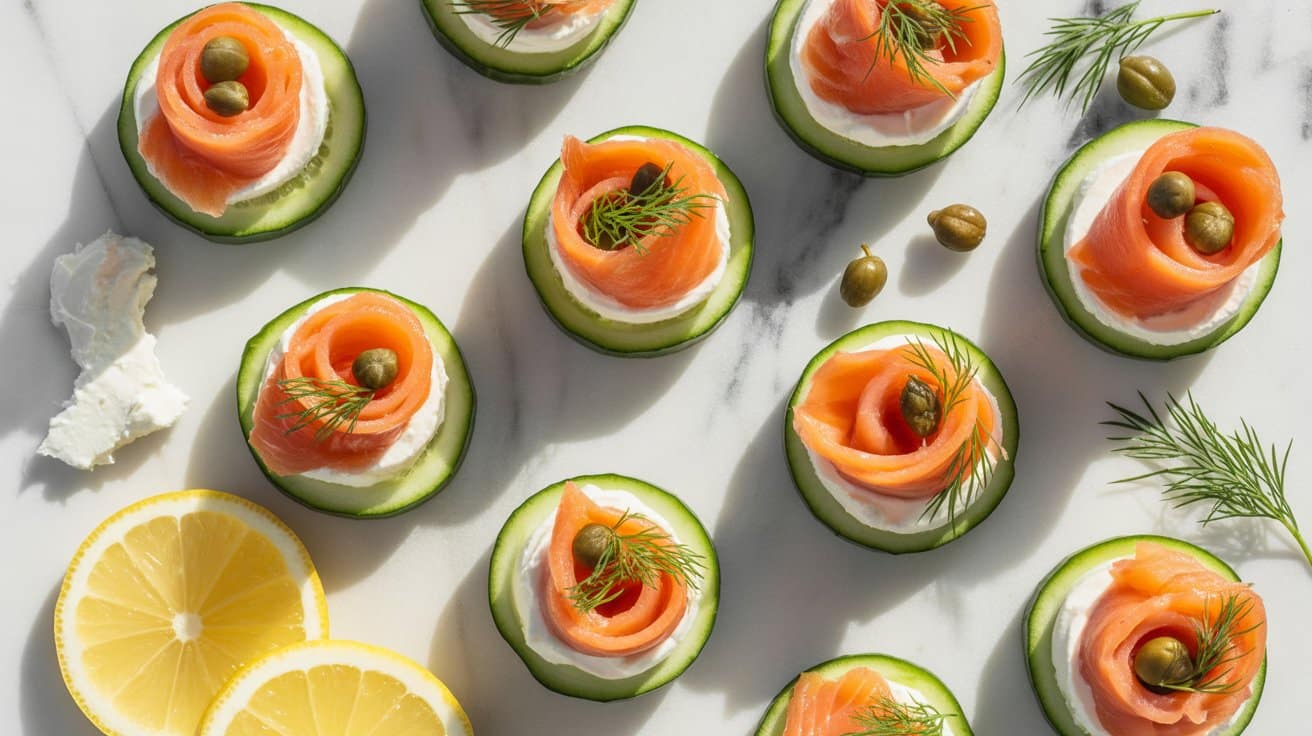
This appetizer shines with simplicity and fresh flavors. Crisp cucumber slices provide a cool, crunchy base that goes well with creamy cheese and the smoky richness of salmon.
It's a straightforward recipe that comes together quickly, making it great for busy days or when you want to impress without spending much time.
Each bite offers a satisfying balance between the cool cucumber, smooth cream cheese, and savory smoked salmon. Fresh dill adds a subtle herby note that ties everything together, improving the overall taste without overwhelming it.
Why This Recipe Works
This dish brings together fresh ingredients with minimal preparation, making it a quick and light snack or starter.
- Convenience - Requires no cooking, just simple assembly in minutes.
- Flavor balance - Combines creamy, smoky, and fresh elements perfectly.
- Texture - Crisp cucumber meets smooth cream cheese and tender salmon slices.
- Presentation - Easy to plate and looks elegant for guests or family alike.
Ingredient Swap Ideas
Adjusting ingredients can make the recipe fit different dietary needs or preferences without losing its fresh character.
- Cream cheese - Use ricotta or mascarpone for a lighter or richer creamy base.
- Smoked salmon - Replace with smoked trout or thinly sliced cooked salmon for a milder flavor.
- Dill - Substitute fresh chives or parsley to vary the herbaceous note.
- Cucumber - Use zucchini or jicama slices for a different crunchy texture.
Ingredients
- 1 large cucumber - sliced into ¼-inch thick rounds.
- 4 ounces cream cheese - softened to spread easily.
- 4 ounces smoked salmon - thinly sliced.
- 1 tablespoon fresh dill - finely chopped, plus extra for garnish.
- 1 teaspoon lemon juice - to brighten the cream cheese mixture.
- Salt and black pepper - to taste.
Instructions
- In a small bowl, combine the softened cream cheese, chopped dill, lemon juice, salt, and pepper. Mix until smooth and well blended.
- Arrange the cucumber slices on a serving platter in a single layer.
- Spread a small amount of the cream cheese mixture over each cucumber slice.
- Top each slice with a piece of smoked salmon, folding or rolling it lightly if needed.
- Garnish with additional dill and serve immediately for the freshest taste and texture.
7. Mini Quiches Lorraine

Mini Quiches Lorraine offer a nice combination of creamy eggs, savory bacon, and melted cheese in a bite-sized form. These small quiches are great for busy days when you want something satisfying and easy to grab.
You'll find that their rich flavor and tender texture make them appealing for breakfast, brunch, or even a light dinner. Plus, they work well served warm or at room temperature, making them practical for gatherings or packed lunches.
The quiches can be made with or without a pastry crust, allowing you to tailor the recipe to your preference for a lighter or more indulgent dish. Preparing several in a muffin tin means you can enjoy portion control and simple reheating without losing any of the taste or appeal.
Why This Recipe Works
This recipe provides a convenient and tasty way to enjoy a classic French dish in a smaller, more portable size.
- Convenience - Mini quiches cook quickly in muffin tins and can be made ahead then stored or frozen.
- Flavor balance - The smoky bacon goes well with creamy eggs and melted cheese for a well-rounded taste.
- Texture - Crisp edges and a slightly golden top contrast with the smooth and tender filling.
- Appeal - These quiches are easy to serve individually and work great for snacks, meals on the go, or entertaining.
Ingredient Swap Ideas
Swapping ingredients in Mini Quiches Lorraine can accommodate different tastes and dietary needs without losing their essence.
- Bacon - Substitute cooked ham or turkey bacon for a milder or leaner option.
- Cheese - Use Gruyère, Swiss, or even cheddar to change the flavor while keeping the cheesy richness.
- Cream - Replace heavy cream with half-and-half or whole milk for a lighter texture.
- Crust - Skip the pastry for crustless mini quiches or use gluten-free pie crust if needed.
Ingredients
- 4 ounces bacon - diced into small pieces and cooked until crisp.
- 4 large eggs - beaten until smooth and combined.
- 1 cup heavy cream - provides richness and creaminess to the custard.
- 1 cup shredded Gruyère cheese - adds a nutty, melted cheese flavor.
- ¼ teaspoon salt - to season the egg mixture.
- ¼ teaspoon black pepper - for a mild heat and depth.
- ¼ teaspoon ground nutmeg - adds a subtle warm spice note.
- 1 refrigerated pie crust - thawed and cut into rounds to line the muffin tins (optional).
Instructions
- Preheat the oven to 375°F (190°C). If using pie crust, lightly grease a 12-cup muffin tin and press crust rounds into each cup.
- In a skillet over medium heat, cook the diced bacon until crispy. Drain on paper towels to remove excess fat.
- In a bowl, whisk together the eggs, heavy cream, salt, pepper, and nutmeg until fully combined.
- Divide the cooked bacon evenly among the muffin cups, then sprinkle shredded cheese over the bacon. Pour the egg mixture carefully over each cup until nearly full.
- Bake for 20 to 25 minutes, or until the quiches are set in the center and the tops are lightly golden. Let them cool for a few minutes before removing from the tin.
Serve warm or at room temperature, and enjoy the rich, savory flavors in each bite.
8. Stuffed Cherry Peppers with Italian Meats and Cheese
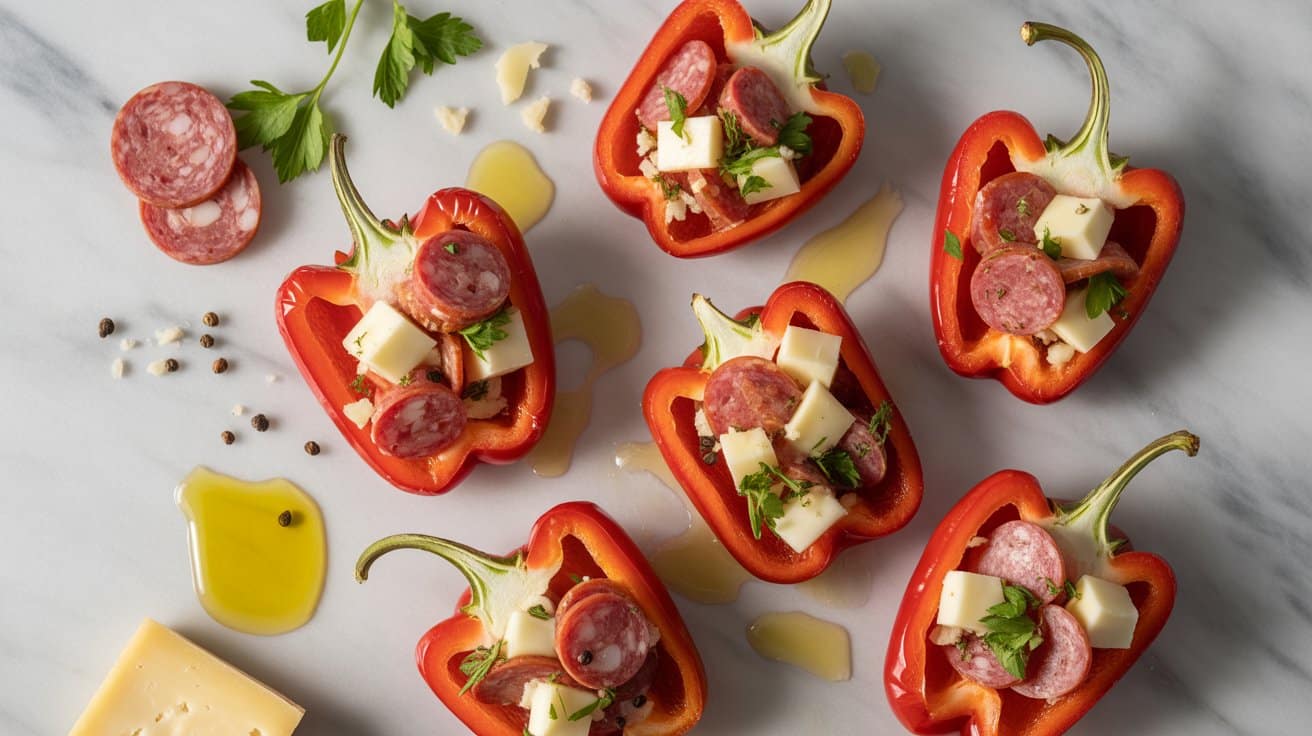
Stuffed cherry peppers offer a pleasing combination of tangy, slightly sweet peppers filled with savory Italian meats and creamy cheese. These bite-sized treats are easy to handle and make great finger food for gatherings or a flavorful snack.
The balance between the crispness of the pickled peppers and the rich filling provides a delicious contrast that keeps each bite interesting.
This recipe takes simple ingredients and turns them into an appealing appetizer or party platter option that's both visually appealing and satisfying. The prep is straightforward, making it easy to whip up in advance and serve when needed.
Why This Recipe Works
This recipe is a smart choice for a quick, flavorful snack that delivers a punch of savory and tangy flavors without complicated steps.
- Convenience - Requires minimal preparation and can be made ahead of time for easy serving.
- Flavor balance - Combines the mild heat and tang of pickled peppers with rich, salty Italian meats and creamy cheese.
- Texture - Offers a crisp pepper exterior with a tender, meaty, and creamy filling inside.
- Appeal - Works well as an elegant appetizer or casual finger food perfect for entertaining.
Ingredient Swap Ideas
Swapping ingredients can help adapt this dish to suit dietary needs or personal preferences without losing its core appeal.
- Peppers - Use small sweet peppers or mild banana peppers if you prefer less heat and tanginess.
- Meats - Replace salami with sliced pepperoni, prosciutto, or even cooked chorizo for a different flavor.
- Cheese - Try mozzarella, provolone, or even a mild sharp cheddar instead of the standard cheese cubes.
- Pickling solution - Opt for fresh, blanched peppers and add a drizzle of vinaigrette to keep them moist if pickled varieties aren't available.
Ingredients
- Pickled cherry peppers - 20 whole, drained and patted dry.
- Italian salami - 6 ounces, cut into small cubes.
- Mozzarella cheese - 4 ounces, cut into small cubes.
- Cream cheese - 2 ounces, softened for easier mixing.
- Olive oil - 1 tablespoon, to toss the filling for extra flavor and moisture.
- Fresh basil leaves - 2 tablespoons chopped, optional for freshness.
- Black pepper - ¼ teaspoon, freshly ground.
Instructions
- Carefully cut a small opening at the stem end of each pickled cherry pepper and remove the seeds to create space for the filling.
- In a medium bowl, combine the cubed salami, mozzarella, and softened cream cheese. Add olive oil, chopped basil, and black pepper. Mix gently until all the ingredients are evenly combined.
- Using a small spoon or your fingers, stuff each pepper with the meat and cheese mixture, filling them just enough to hold together without overstuffing.
- Arrange the stuffed peppers on a serving platter and chill for at least 30 minutes to allow the flavors to meld and the filling to set slightly.
- Serve chilled or at room temperature as a tasty appetizer or snack.
9. Falafel Bites with Tahini Dip
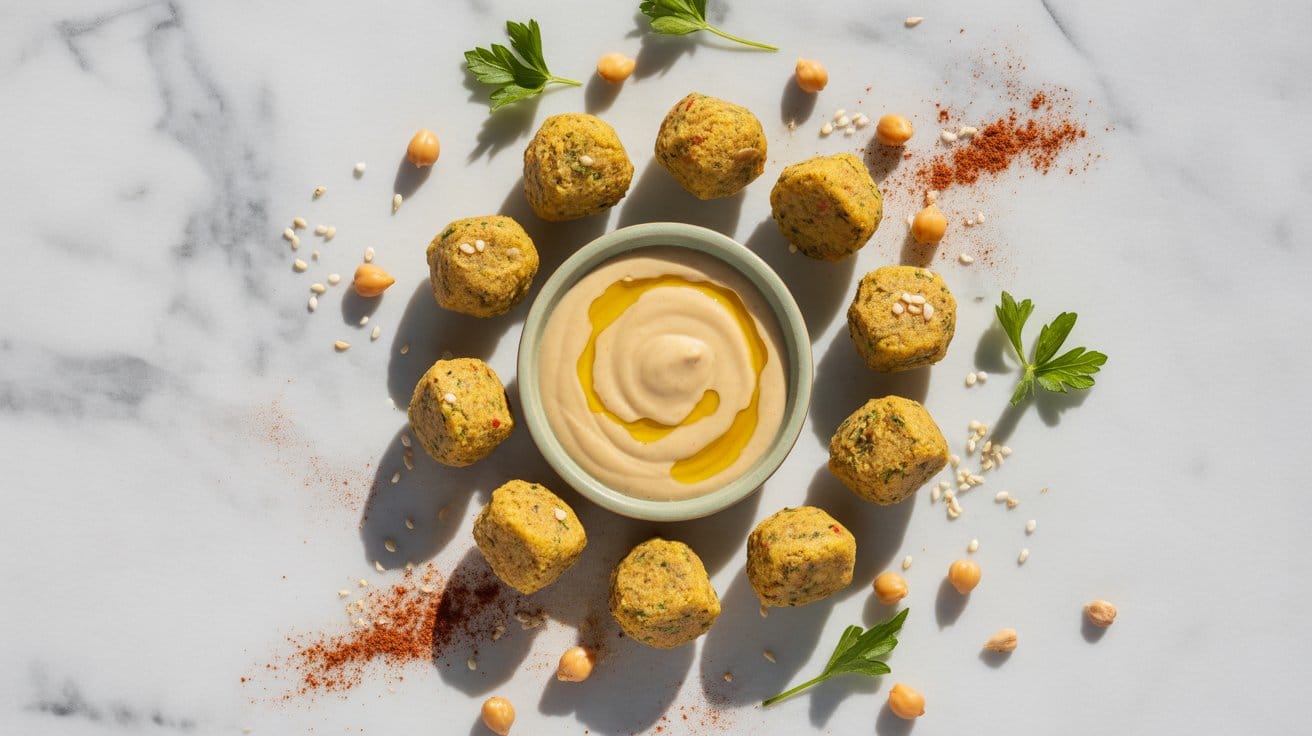
Falafel bites are a small, tasty way to enjoy the classic Middle Eastern snack in a more convenient form. These mini falafel balls hold their shape well and are easy to eat plain or dipped in a creamy tahini sauce.
They deliver a satisfying crunch on the outside and a tender, flavorful center packed with herbs and spices. Making them at home allows you to control the ingredients and enjoy a fresh, wholesome treat that works well for vegetarian and vegan diets.
Why This Recipe Works
This recipe combines practical benefits with bright flavors, making it a go-to option for quick snacks or appetizer platters.
- Convenience - Small falafel bites cook quickly and are easy to prepare in one batch.
- Flavor balance - Bright herbs and warm spices mix with rich tahini dip for a satisfying taste.
- Texture - Crispy exterior with a tender, moist interior creates a pleasant contrast.
- Versatility - Ideal for parties, lunch boxes, or as part of a larger meal spread.
Ingredient Swap Ideas
Adapting ingredients can help tailor these falafel bites to your personal preferences or dietary needs without losing the core flavors.
- Chickpeas - Use cooked fava beans alone or mixed with chickpeas for a slightly different taste and texture.
- Herbs - Swap parsley for cilantro or dill to vary the herbal notes.
- Tahini Dip - Substitute tahini with a plain yogurt dip or a vegan cashew-based sauce for a milder option.
- Flour - Use chickpea flour instead of all-purpose flour for a gluten-free falafel version.
Ingredients
- 1 ½ cups dried chickpeas - Soaked overnight and drained, essential for the falafel base.
- 1 small onion - Roughly chopped for blending into the falafel mix.
- 3 garlic cloves - Minced, to add depth of flavor.
- 1 cup fresh parsley leaves - Packed, for a fresh, bright taste.
- 1 cup fresh cilantro leaves - Packed, complements parsley with bright flavor.
- 1 teaspoon ground cumin - Adds warmth and earthiness.
- 1 teaspoon ground coriander - Enhances aromatic qualities.
- ½ teaspoon baking powder - Helps make falafel lighter and fluffier.
- ¼ cup all-purpose flour - Binds ingredients together for shape retention.
- Salt and black pepper - To taste, rounds out the seasonings.
- Vegetable oil - For frying, enough to fill a pan to about 1 inch deep.
- ½ cup tahini paste - The base of the dip, rich and nutty.
- 2 tablespoons lemon juice - Adds acidity and brightness.
- 2 garlic cloves - Minced, for pungency in the dip.
- ¼ cup water - To thin the tahini to a dipping consistency.
- Salt - To taste, balances flavors.
Instructions
- Drain the soaked chickpeas and pulse them in a food processor along with onion, garlic, parsley, and cilantro. Process until the mixture is finely minced but not pureed; you should still see tiny bits for texture.
- Transfer the mixture to a bowl and stir in cumin, coriander, baking powder, flour, salt, and pepper. Mix well to combine. If the mixture feels too wet, add a little more flour.
- Heat vegetable oil in a deep skillet over medium heat until it reaches about 350°F (175°C). Shape the falafel mixture into small bite-sized balls using your hands or a small scoop.
- Fry the falafel bites in batches for 3-4 minutes or until they turn golden brown and crisp on the outside, flipping as needed to cook evenly. Drain on paper towels to remove excess oil.
- To prepare the tahini dip, whisk together tahini paste, lemon juice, minced garlic, water, and salt in a small bowl. Adjust water amount to reach a smooth, creamy consistency suitable for dipping.
- Serve the falafel bites warm alongside the tahini dip. They work well as a snack, appetizer, or part of a mezze platter.
10. Cranberry Brie Puff Pastry Bites

These Cranberry Brie Puff Pastry Bites combine flaky pastry with creamy brie and tangy cranberry sauce, creating a deliciously balanced snack or appetizer. They are easy to prepare and travel well, making them a great choice for gatherings or simple treats.
The crisp puff pastry contrasts nicely with the soft cheese and the sweetness of the cranberry, offering a nice blend of textures and flavors that everyone can enjoy.
Why This Recipe Works
This recipe offers a straightforward way to deliver a tasty sweet-and-salty combination that's quick to assemble and visually appealing.
- Convenience - Uses store-bought puff pastry for quick prep and minimal fuss.
- Flavor balance - Combines creamy brie with tart cranberry for a pleasing sweet and savory taste.
- Texture - Features flaky, golden pastry encasing smooth, melted cheese.
- Appeal - Works well as finger food for parties or easy snacks that travel well.
Ingredient Swap Ideas
Swapping ingredients can help tailor this recipe to personal preferences or dietary needs without losing its core appeal.
- Cheese Substitute - Use camembert or a mild goat cheese in place of brie for a different but creamy flavor.
- Fruit Twist - Swap cranberry sauce for fig jam or apricot preserves to bring in new fruity notes.
- Pastry Option - Use phyllo dough sheets brushed with butter if you prefer a lighter, crispier shell.
- Fruit Preparation - Use fresh cranberries cooked down with sugar and orange zest if you want a homemade sauce instead of jarred.
Ingredients
- 1 sheet puff pastry - thawed according to package instructions.
- 4 ounces brie cheese - cut into small cubes or slices.
- ⅓ cup cranberry sauce - store-bought or homemade.
- 1 tablespoon fresh thyme leaves - optional, for garnish.
- 1 egg - beaten, for egg wash.
Instructions
- Preheat the oven to 400°F (200°C). Line a baking sheet with parchment paper.
- Roll out the puff pastry sheet on a lightly floured surface and cut it into 12 equal squares.
- Place a small cube of brie in the center of each square, then top with about one teaspoon of cranberry sauce.
- Fold the corners of each square toward the center or simply leave open-faced, depending on your preference. Brush each piece with the beaten egg to help achieve a golden finish.
- Bake for 12 to 15 minutes, or until the pastry is puffed and golden brown and the cheese is melted. Garnish with fresh thyme leaves before serving if desired.
11. Asian Chicken Meatballs with Sesame Seeds

These Asian chicken meatballs bring together fresh ginger, soy sauce, and toasted sesame seeds for a flavorful combination that feels both light and satisfying. They bake up tender and moist, and can be served warm or at room temperature, making them great for snacking or adding to a meal.
The sesame seeds add a pleasant crunch and a subtle nutty flavor, while the soy and ginger create a balance of savory and a hint of spice. This recipe is straightforward and quick, ideal for busy evenings or casual get-togethers.
Why This Recipe Works
This recipe delivers a neat balance of flavors and textures with minimal fuss, making it a reliable choice for any meal or occasion.
- Convenience - The meatballs bake in the oven, saving time and avoiding messy frying.
- Flavor balance - Ginger and soy give a savory, slightly tangy kick, complemented by toasted sesame seeds.
- Texture - The chicken stays juicy and tender inside with a lightly crisp exterior from baking.
- Serving ease - They are delicious served at room temperature, ideal for finger foods or meal prep.
Ingredient Swap Ideas
Swapping a few ingredients can help tailor this recipe to your family's preferences or dietary needs while maintaining its key flavors.
- Chicken - Replace ground chicken with ground turkey or pork for a different taste and texture.
- Soy sauce - Use tamari or coconut aminos to make the recipe gluten-free and slightly sweeter.
- Sesame seeds - Swap with toasted sunflower seeds if you want to avoid sesame but keep a nutty crunch.
- Ginger - Fresh ginger can be replaced with an equal amount of ground ginger in a pinch, though fresh gives a brighter flavor.
Ingredients
- 1 pound ground chicken - Use fresh or thawed ground chicken for tender meatballs.
- 2 teaspoons fresh ginger - Grated or finely minced, adds sharp, aromatic flavor.
- 2 cloves garlic - Minced for savory depth.
- 3 tablespoons soy sauce - Regular or low sodium for seasoning and umami.
- 1 tablespoon toasted sesame oil - For a rich, nutty aroma and flavor.
- ¼ cup panko breadcrumbs - Helps bind and keep meatballs light.
- 1 large egg - Binds ingredients together.
- 1 tablespoon sesame seeds - Toasted, to mix in and garnish.
- ¼ teaspoon black pepper - Freshly ground for subtle heat.
- 2 green onions - Thinly sliced for garnish and fresh bite.
Instructions
- Preheat your oven to 400°F (200°C). Line a baking sheet with parchment paper or lightly oil it.
- In a large bowl, combine the ground chicken, grated ginger, minced garlic, soy sauce, toasted sesame oil, panko breadcrumbs, egg, black pepper, and half of the sesame seeds. Mix gently but thoroughly to combine.
- Shape the mixture into 1-inch meatballs and place them on the prepared baking sheet, spacing evenly. Sprinkle the remaining sesame seeds on top of each meatball.
- Bake the meatballs for 15 to 18 minutes, until they are cooked through and lightly browned on the outside. Use a meat thermometer to check for an internal temperature of 165°F (74°C).
- Remove from the oven and let cool slightly. Garnish with sliced green onions before serving warm or room temperature.
These meatballs pair well with steamed rice, a crisp salad, or as part of a party platter for easy finger eating.
12. Parmesan Garlic Roasted Chickpeas
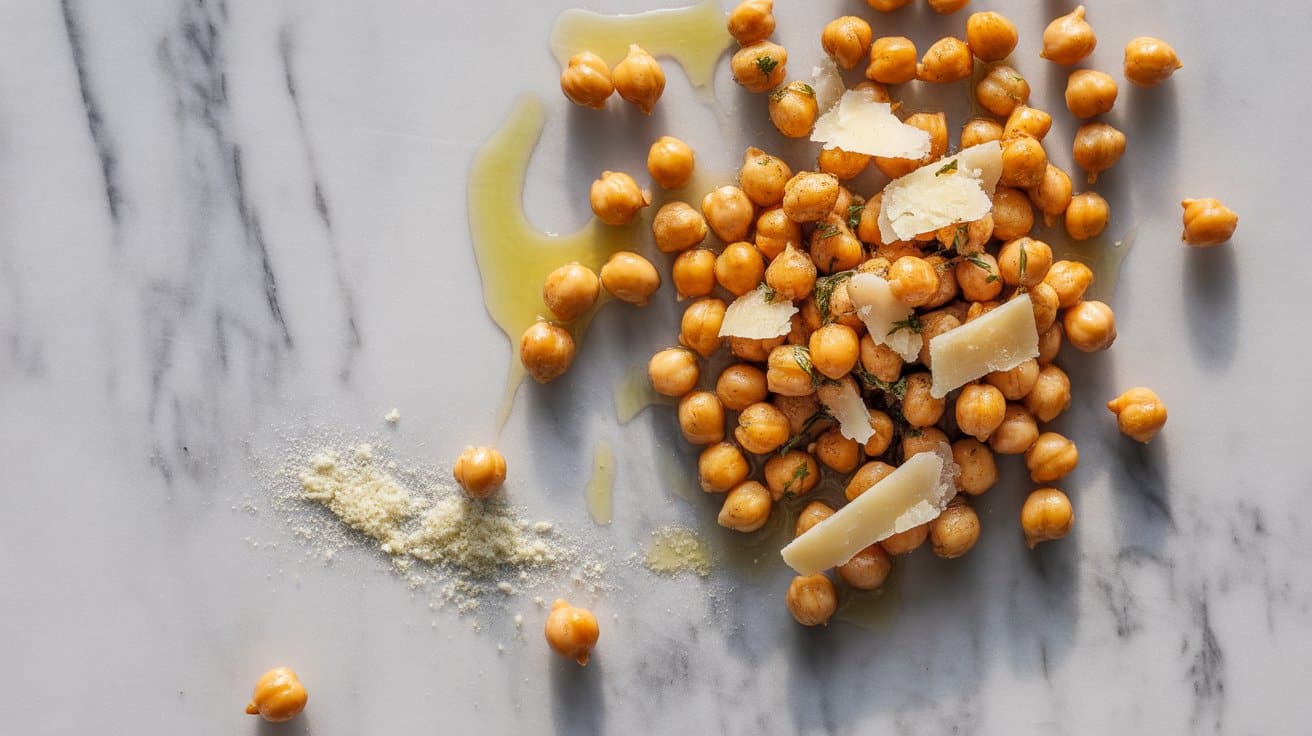
Roasted chickpeas make a fantastic snack that bridges the gap between healthy and satisfying. This Parmesan Garlic Roasted Chickpeas recipe delivers a crunchy texture with a rich, savory flavor from garlic and Parmesan cheese.
You can easily make a batch in under 30 minutes, and they store well for grab-and-go snacking.
These chickpeas offer a great alternative to less nutritious snacks, packing a punch of protein and fiber. The garlic and Parmesan add a delicious depth, giving these crunchy bites an irresistible taste that works well for sharing or enjoying solo.
Why This Recipe Works
This recipe combines simplicity, flavor, and nutrition to create a snack that feels both indulgent and wholesome.
- Convenience - Minimal ingredients and quick oven roasting make this an easy snack to prepare.
- Flavor balance - The sharpness of Parmesan and the mild garlic seasoning go with the natural nuttiness of chickpeas.
- Texture - Roasting turns chickpeas crispy on the outside while keeping them slightly tender inside.
- Versatility - These chickpeas can be eaten alone, added to salads, or served as a party snack.
Ingredient Swap Ideas
Changing a few ingredients can make this snack suitable for different diets or flavor preferences without losing its original spirit.
- Parmesan - Replace with nutritional yeast to keep it cheesy but vegan-friendly.
- Garlic powder - Swap with smoked paprika or chili powder for a different kind of savory kick.
- Olive oil - Use avocado oil or melted coconut oil if preferred for a different fat profile and flavor.
- Chickpeas - Try using white beans or edamame for a variation on texture and flavor.
Ingredients
- 2 (15-ounce) cans chickpeas - drained, rinsed, and thoroughly dried.
- 2 tablespoons olive oil - for coating and roasting.
- ⅓ cup finely grated Parmesan cheese - adds a sharp, savory taste.
- 1 teaspoon garlic powder - provides a mellow garlic flavor.
- ½ teaspoon salt - enhances all the flavors.
- ¼ teaspoon freshly ground black pepper - adds subtle heat.
Instructions
- Preheat your oven to 400°F (200°C). Line a baking sheet with parchment paper or a silicone baking mat.
- Spread the rinsed and dried chickpeas on a clean kitchen towel or paper towels and pat them dry thoroughly. Removing moisture ensures they roast crispy.
- Transfer the chickpeas to a bowl. Drizzle with olive oil and toss to coat evenly. Then sprinkle garlic powder, salt, and black pepper over them. Toss gently to distribute the spices well.
- Spread the seasoned chickpeas in a single layer on the prepared baking sheet. Roast for 25 to 30 minutes, shaking the pan or stirring the chickpeas every 10 minutes for even browning.
- Once they are golden and crunchy, remove from the oven and immediately sprinkle Parmesan cheese over the hot chickpeas. Toss gently while still warm to help the cheese stick. Let them cool completely before serving or storing.
Enjoy these Parmesan Garlic Roasted Chickpeas as a wholesome snack that brings crunchy satisfaction with every bite.
Most of these bite-sized appetizers are designed to hold up at room temperature and fit neatly into standard containers for easy transport; see similar travel-ready options at 12 bite-sized appetizers for travel and parties. For more party-friendly small plates that simplify hosting and scale well for crowds, review 18 party appetizers to make hosting easy and delicious.

Andrew Gray is a seasoned food writer and blogger with a wealth of experience in the restaurant and catering industries. With a passion for all things delicious, Andrew has honed his culinary expertise through his work as a personal chef and caterer.
His love for food led him to venture into food writing, where he has contributed to various online publications, sharing his knowledge and insights on the culinary world. As the proud owner of CooksCrafter.com, Andrew covers a wide range of topics, including recipes, restaurant reviews, product recommendations, and culinary tips.
Through his website, he aims to inspire and educate fellow food enthusiasts, offering a comprehensive resource for all things food-related.