When the temperature rises, having a selection of frozen treats ready to enjoy is a great way to stay cool and refreshed. This collection offers 13 frozen delights ranging from fruity popsicles to creamy bars that are perfect for hot days, covering single-serve chilled desserts such as popsicles, sorbets, and frozen bars (single-serve frozen confections typically made from fruit purées, dairy, or non-dairy bases).
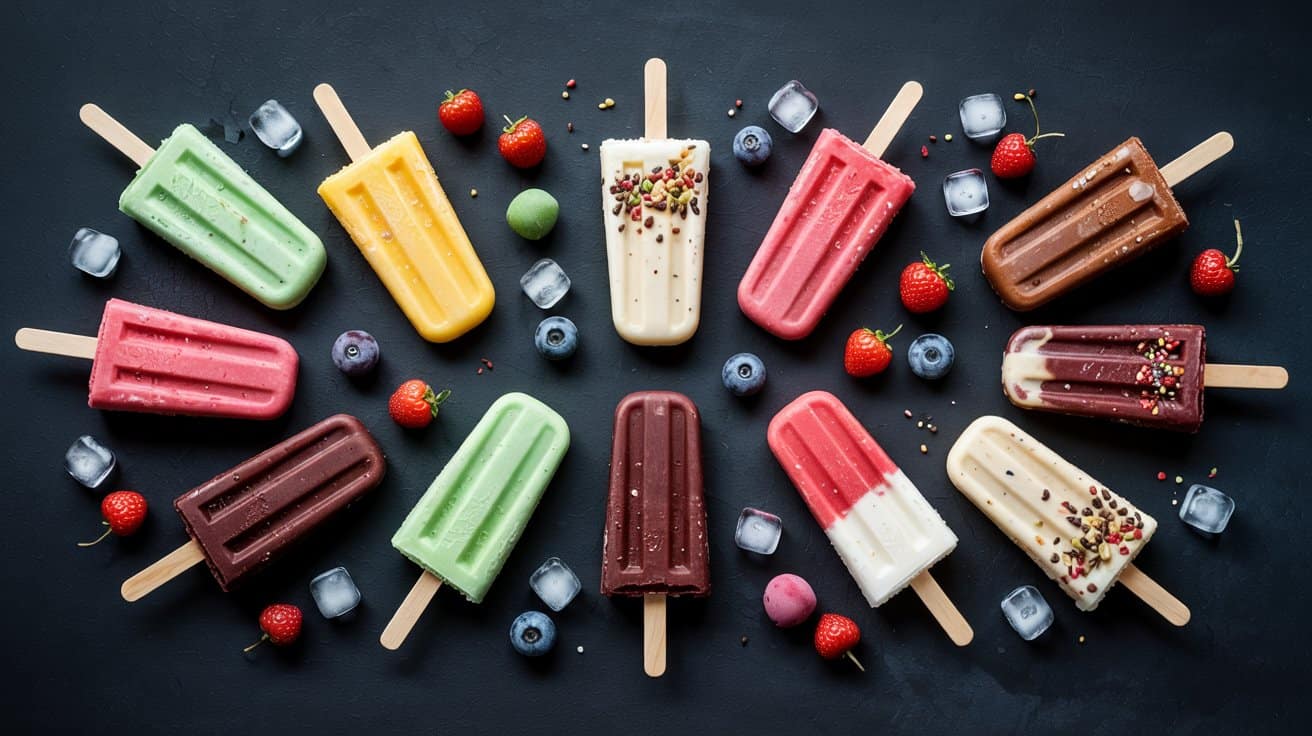
These recipes cover a wide range of styles, including classic fruit popsicles, creamy coconut and yogurt bars, and even chocolate-dipped frozen banana treats. They bring together simple ingredients and straightforward methods, making it easy to create something enjoyable whether you're planning for your family or a casual gathering.
Each recipe is designed to be both flavorful and fuss-free. They require minimal ingredients and common kitchen tools, so the preparation is quick and cleanup is simple, allowing you to focus more on enjoying these cool snacks.
1. Classic Fruit Popsicles (Mixed Berry Blend)

These classic fruit popsicles bring a refreshing burst of mixed berry flavor that's both simple and inviting, and pair well with easy fruit desserts for summer (commonly strawberries, blueberries, and raspberries).
The texture is smooth yet slightly pulpy, letting you enjoy the wholesome taste of the fruits in every bite. Making these popsicles is straightforward, requiring only a few fresh ingredients and minimal prep, which makes them a great choice for busy days when you want something both light and flavorful.
Why This Recipe Works
This recipe offers a fruity, healthy alternative to store-bought frozen treats with straightforward preparation. It balances natural sweetness and bright berry flavors, making it an approachable option for any home cook.
- Convenience - Quick blending and freezing, ideal for make-ahead snacks, with about 4-6 hours of freezing time.
- Flavor balance - Combines tart and sweet notes from mixed berries with mellow honey, and complements refreshing honey-based desserts.
- Texture - Smooth with just enough berry bits to keep it interesting.
- Appeal - Family-friendly and suited for both kids and adults.
- Cleanup ease - Minimal dishes needed, mostly just a blender and popsicle molds.
Ingredient Swap Ideas
Swapping ingredients can tailor these popsicles to different flavors or dietary preferences without losing their charm.
- Try agave syrup or maple syrup instead of honey for a vegan-friendly sweetener, as agave tends to be milder and slightly thinner.
- Use coconut water or almond milk to add a hint of creaminess and extra hydration.
- Replace mixed berries with tropical fruits like mango and pineapple for a different fruit profile.
- Add fresh mint or basil leaves during blending to introduce a refreshing herbal note.
- Use frozen berries if fresh ones aren't available, which will still yield great flavor and texture and can inspire small-batch cupcake ideas for intimate gatherings.
Ingredients
- 2 cups mixed fresh berries - A combination of strawberries, blueberries, raspberries, and blackberries works well.
- 1 tablespoon honey - Adds natural sweetness and balances the tart berries.
- ½ cup water - Adjusts the consistency for smooth blending.
- 1 teaspoon fresh lemon juice - Brightens the flavor and enhances the fruit's natural tang.
Instructions
- Rinse the mixed berries thoroughly and remove any stems or leaves.
- Combine the berries, honey, water, and lemon juice in a blender. Blend until smooth but still slightly textured.
- Pour the mixture evenly into popsicle molds, leaving a little space at the top for expansion.
- Insert the popsicle sticks and freeze the molds for at least 4 hours or until fully solid.
- To release the popsicles, run warm water over the outside of the molds for a few seconds and gently pull them out.
- Serve immediately or store in a sealed container in the freezer for up to two weeks.
2. Creamy Coconut Mango Popsicles

This recipe offers a refreshing way to enjoy tropical flavors (mango is a tropical fruit native to South Asia) with a smooth, creamy texture, similar in mouthfeel to creamy frozen yogurt recipes for light desserts.
The natural sweetness of mango balances beautifully with the subtle richness of coconut milk, using about a 2:1 mango to coconut milk ratio. These popsicles are simple to make and require just a few ingredients, making them a great option for a quick treat or dessert.
They're ideal for warm days or anytime you want a light, fruity snack, and pair well with easy side dishes for creamy mains.
Why This Recipe Works
This recipe combines ease of preparation with a refreshing taste and wholesome ingredients, making it a versatile and crowd-pleasing option.
- Convenience - Requires minimal ingredients and simple blending, with a hands-off freezing step.
- Flavor balance - Combines sweet and tropical mango with creamy, slightly nutty coconut milk.
- Texture - Offers a smooth yet satisfying creaminess without being overly heavy.
- Appeal - Suitable for dairy-free and vegan diets, perfect for families and guests with allergies.
- Serving ease - Individually portioned and mess-free, ready straight from the freezer.
Ingredient Swap Ideas
Swapping a few ingredients here and there can tailor the popsicles to different preferences or what you have on hand, all while keeping their tropical charm.
- Coconut milk - Use almond milk or cashew milk for a less intense coconut flavor but similar creaminess.
- Mango - Substitute with pineapple chunks or peach slices for a different tropical twist.
- Sweetener - Replace honey or maple syrup with agave syrup for a milder sweetness.
- Add-ins - Include a handful of shredded coconut or chia seeds for extra texture.
- Extracts - Add a splash of vanilla or lime juice to enhance flavor depth.
Ingredients
- 2 ripe mangoes - peeled, pitted, and roughly chopped for easy blending.
- 1 can (14 oz) coconut milk - use full-fat for creaminess or light for fewer calories.
- 3 tablespoons maple syrup - adjust to taste according to mango sweetness.
- 1 teaspoon vanilla extract - adds a warm, complementary note.
- Pinch of salt - enhances sweetness and balances flavors.
Instructions
- Place the chopped mangoes in a blender along with the coconut milk, maple syrup, vanilla extract, and a pinch of salt.
- Blend on high until the mixture becomes completely smooth and creamy with no visible chunks.
- Pour the blended mixture evenly into popsicle molds, leaving a little space at the top for expansion.
- Insert sticks into the molds and freeze for at least 4 hours or until fully solidified.
- To release the popsicles, briefly run warm water over the outside of the molds and gently pull on the sticks.
- Serve immediately and enjoy a cool, creamy tropical treat.
3. Greek Yogurt and Honey Frozen Bars

These frozen bars bring together the tanginess of Greek yogurt with the natural sweetness of honey, creating a refreshing snack that feels both nourishing and indulgent. They freeze into a creamy texture that softens just enough to enjoy easily without being icy or hard when frozen for about 3-4 hours.
Making these bars requires minimal ingredients and no baking, which makes them great for quick prep and a cool treat on warmer days. They're ideal for anyone looking to keep things simple while enjoying a wholesome protein boost.
The combination of flavors also keeps the palate interested-there's a subtle tartness from the yogurt paired with the gentle floral sweetness from honey. These bars are perfect when you need a snack that lasts and keeps you feeling full.
For dairy-free or non-dairy swaps that preserve creaminess, see Greek yogurt substitutes for similar texture.
Why This Recipe Works
This recipe balances flavor and nutrition while staying simple to prepare and store. It's a smart choice for busy days or as a family-friendly snack.
- Convenience - Requires just a few ingredients and can be made ahead of time.
- Flavor balance - Offers a creamy and tangy base with a hint of natural sweetness.
- Texture - Smooth and slightly firm, easy to bite into without melting too fast.
- Appeal - Suitable for both kids and adults due to familiar, mild flavors.
- Storage ease - Perfectly portioned bars that keep well in the freezer for a ready snack.
Ingredient Swap Ideas
Swapping ingredients lets you adapt this recipe to different dietary needs or flavor preferences while keeping its core qualities intact.
**
- Greek yogurt - Replace with coconut yogurt for a dairy-free, plant-based version.
- Honey - Use maple syrup or agave nectar to keep it vegan-friendly.
- Add-ins - Mix in chopped nuts or fresh berries for extra texture and flavor.
- Flavor twists - Incorporate a bit of vanilla extract or cinnamon for variety.
Ingredients
- 2 cups Greek yogurt - Plain, full-fat or low-fat for creaminess and protein.
- ¼ cup honey - Natural sweetener that balances the tartness of yogurt.
- 1 teaspoon vanilla extract - Adds a warm, subtle flavor note.
- Optional toppings - Fresh fruit, nuts, or seeds for garnish and extra texture.
Instructions
- In a mixing bowl, combine the Greek yogurt, honey, and vanilla extract. Stir thoroughly until the mixture is smooth and the honey is fully incorporated.
- Pour the yogurt mixture evenly into a square or rectangular baking dish lined with parchment paper. Smooth the top with a spatula for an even surface.
- If using toppings, sprinkle them evenly over the yogurt mixture, gently pressing them in so they stick.
- Cover the dish with plastic wrap or foil and place it in the freezer. Freeze for at least 4 hours or until the mixture is firm.
- Once frozen, remove the dish from the freezer. Lift the frozen block out using the parchment paper and cut it into bars or squares with a sharp knife.
- Store the bars in an airtight container in the freezer. Let them soften slightly at room temperature for a few minutes before serving.
4. Watermelon and Mint Ice Pops

Watermelon and mint ice pops bring a refreshing twist to warm days. The juicy sweetness of watermelon goes well with the cool, herbal notes of fresh mint, creating a light treat that helps you cool down.
These ice pops are incredibly simple to make, with just a few ingredients and no special equipment needed beyond molds or small cups. They are a great option when you want something natural, hydrating, and fun to enjoy with family or friends.
Why This Recipe Works
This recipe combines straightforward preparation with a bright, refreshing flavor that works well for any occasion. The balance of sweet and cool makes these ice pops a standout option.
- Convenience - Requires minimal prep and a few everyday ingredients.
- Flavor balance - Sweet watermelon complemented by cooling mint.
- Texture - Smooth and icy with a pleasant hint of fresh herb.
- Appeal - Kid-friendly and suitable for hot weather or casual gatherings.
- Make-ahead - Freeze in advance for quick access to a cooling treat.
Ingredient Swap Ideas
Adjustments can easily tailor these ice pops to your preferences or what you have on hand. Simple swaps won't change the refreshing feel but offer variety and accommodate dietary needs.
**
- Watermelon - Substitute with cantaloupe or honeydew melon for a different fruity base.
- Mint - Use basil or lemon balm for a slightly different herbal note.
- Sweetener - Replace honey or sugar with agave syrup or maple syrup to suit vegan diets.
- Liquid - Add a splash of coconut water or lime juice for extra flavor depth.
Ingredients
- 4 cups watermelon - Cubed and seeds removed for easy blending
- ¼ cup fresh mint leaves - Washed and lightly packed
- 2 tablespoons honey - Adjust to taste for sweetness
- 1 tablespoon fresh lime juice - Adds brightness and balances sweetness
- ½ cup water - To help blend and loosen the mixture
Instructions
- Combine the watermelon cubes, fresh mint leaves, honey, lime juice, and water in a blender. Blend until the mixture is smooth and uniformly combined.
- Pour the blended mixture into ice pop molds or small paper cups. If using cups, insert popsicle sticks once the mixture is partially frozen (about 1 hour).
- Freeze the molds or cups for at least 4 hours, or until fully solid.
- To serve, run the molds under warm water briefly to release the ice pops easily. Enjoy immediately for the best texture and flavor.
5. Chocolate-Dipped Frozen Banana Bars

Frozen banana bars coated in rich dark chocolate make a refreshing and indulgent snack. These bars combine the natural sweetness of ripe bananas with the satisfying snap of chocolate, offering a treat that feels special without needing fancy ingredients or complicated steps.
You can prepare these bars quickly by using simple ingredients and freezing them until firm. They are great for hot days, or whenever you want a cool dessert that is both tasty and nourishing.
The contrast between creamy banana and crisp chocolate gives every bite a pleasant texture and flavor.
Making these bars is straightforward, so you can customize them by adding toppings or using your favorite type of chocolate. This recipe fits well into a balanced lifestyle, allowing you to enjoy something sweet without overdoing it.
Why This Recipe Works
This recipe delivers an easy, wholesome snack that blends fresh fruit with chocolate flavor. It balances healthiness and indulgence in a way that's practical and appealing for busy cooks.
- Convenience - Quick prep with minimal ingredients and simple assembly.
- Natural sweetness - Uses ripe bananas for a naturally sweet base without added sugar.
- Texture contrast - Creamy frozen banana goes well with firm chocolate coating.
- Make-ahead friendly - Can be stored in the freezer for several weeks and enjoyed anytime.
- Kid-approved - A tasty treat that appeals to both kids and adults alike.
Ingredient Swap Ideas
Swapping ingredients can help tailor these bars to suit dietary needs or flavor preferences, while maintaining their core appeal.
- Bananas - Use plantains or mango slices for a different fruit base with similar texture.
- Dark chocolate - Substitute with milk chocolate or white chocolate for a sweeter coating.
- Toppings - Sprinkle chopped nuts, shredded coconut, or crushed freeze-dried berries over the chocolate before freezing.
- Chocolate alternatives - Use dairy-free chocolate chips or carob for a vegan or allergy-friendly option.
- Add-ins - Incorporate a pinch of cinnamon or a drizzle of nut butter for extra flavor.
Ingredients
- 4 ripe bananas - peeled and cut in half crosswise.
- 6 ounces dark chocolate - chopped or use dark chocolate chips.
- 1 tablespoon coconut oil - to smooth and help set chocolate.
- Optional toppings - chopped nuts, shredded coconut, or freeze-dried fruit.
Instructions
- Line a baking sheet with parchment paper and arrange the banana halves evenly with the flat side down. Freeze for at least 2 hours until firm.
- Melt the dark chocolate with coconut oil in a heatproof bowl set over simmering water, stirring until smooth.
- Remove the frozen bananas from the freezer. Using a fork or skewer inserted into each banana half, dip each one into the melted chocolate, covering it completely.
- Place the chocolate-coated bananas back on the parchment-lined sheet. If using toppings, sprinkle them over the chocolate before it sets.
- Return the tray to the freezer and freeze the banana bars for at least 1 hour, until the chocolate is firm.
- Serve frozen and store any leftovers in an airtight container in the freezer for up to 2 weeks.
6. Key Lime Pie Creamsicles

This Key Lime Pie Creamsicles recipe brings a refreshing twist to a classic dessert by turning it into a frozen treat. The tartness of fresh lime combined with a creamy, smooth base creates a nice balance that brightens up warm days.
What makes this recipe appealing is its simplicity and the familiar flavors that remind us of summertime. Along with the subtle graham cracker swirl, these creamsicles offer a bit of crunch and extra sweetness, making each bite satisfying and interesting.
Why This Recipe Works
This recipe delivers a pop of tangy flavor with a creamy texture while being straightforward enough for anyone to make at home. It balances convenience and flavor in a way that's perfect for busy cooks wanting a tasty, homemade frozen treat.
- Convenience - Simple ingredients and easy blending make it quick to prepare and freeze.
- Flavor balance - The tart lime juice contrasts beautifully with the rich cream and sweet graham cracker.
- Texture - Creamy base with subtle crunchy swirls adds an enjoyable mouthfeel.
- Appeal - A crowd-pleaser suitable for family gatherings and hot weather treats.
- Make-ahead option - Freeze them in advance for a ready-to-eat dessert anytime.
Ingredient Swap Ideas
Changing a few ingredients can customize these creamsicles to suit your dietary preferences or what you have on hand. These swaps keep the essence of the recipe while making it more versatile.
- Use coconut cream - Swap out heavy cream for coconut cream to make it dairy-free and add a tropical hint.
- Opt for honey or maple syrup - Replace granulated sugar with honey or pure maple syrup for a natural sweetener.
- Choose gluten-free graham crackers - Use gluten-free crumbs to keep it friendly for gluten-sensitive eaters.
- Lime juice alternative - Substitute some or all lime juice with lemon juice if you prefer a different citrus punch.
Ingredients
- 1 cup heavy cream - Provides the creamy, rich base for the creamsicles.
- 1 cup sweetened condensed milk - Adds sweetness and creaminess while helping with texture.
- ½ cup fresh lime juice - Brings the tart, bright flavor essential to key lime pie.
- 1 tablespoon lime zest - Enhances lime aroma and flavor.
- ½ cup graham cracker crumbs - Adds a subtle crispy swirl throughout the creamsicles.
- 2 tablespoons granulated sugar - Sweetens the mixture, balanced with the tart lime juice.
- ½ teaspoon vanilla extract - Offers a complementary vanilla note to round out the flavors.
Instructions
- In a mixing bowl, whisk together heavy cream and granulated sugar until soft peaks form, creating a light, airy texture.
- In a separate bowl, combine sweetened condensed milk, fresh lime juice, lime zest, and vanilla extract. Stir until the mixture is smooth and well blended.
- Gently fold the whipped cream into the condensed milk and lime mixture, taking care to maintain the fluffy texture.
- In popsicle molds or small paper cups, spoon a layer of the cream mixture, then sprinkle a small amount of graham cracker crumbs. Repeat layering until molds are full, finishing with a sprinkle of graham cracker crumbs on top.
- Insert popsicle sticks and freeze for at least 6 hours or until completely solid. To unmold, briefly run warm water over the outside of the molds to loosen the creamsicles.
- Serve immediately or keep frozen in an airtight container for up to one week.
7. Strawberry Basil Lemonade Popsicles

Strawberry Basil Lemonade Popsicles offer a bright and refreshing way to cool down on a warm day. The combination of sweet strawberries, tangy lemonade, and fresh basil creates a bright flavor that feels both invigorating and soothing.
These popsicles are simple to prepare and require just a few ingredients, making them an excellent choice for busy home cooks looking for a refreshing treat for themselves and their families. The natural sweetness of the fruit goes well with the herbaceous notes of basil, delivering a balanced and lively taste in every bite.
You can enjoy these popsicles as a light dessert or a fun snack anytime you want a fresh burst of flavor without added sugars or artificial ingredients. They bring a lovely homemade touch to any gathering or casual afternoon at home.
Why This Recipe Works
This recipe combines fresh, natural ingredients into a quick, refreshing dessert that everyone can enjoy. The balance of sweet and tangy flavors alongside the aromatic basil gives these popsicles a unique, appealing character.
**
- Convenience - Requires minimal prep and all you need is to freeze the mixture in molds.
- Flavor balance - Combines sweet strawberries, tart lemonade, and fresh basil for a layered taste.
- Texture - Smooth popsicles with juicy strawberry chunks that add a pleasant bite.
- Appeal - A healthy, family-friendly treat that feels special yet simple.
- Make-ahead friendly - Can be prepared in advance and stored in the freezer until needed.
Ingredient Swap Ideas
Swapping a few ingredients can help customize these popsicles to fit various preferences or dietary needs without losing their refreshing quality. Here are some options to consider for flexibility:
**
- Lemonade - Use sparkling lemonade for added fizz or a low-sugar version to reduce sweetness.
- Strawberries - Substitute with raspberries or blueberries to change the berry profile while maintaining freshness.
- Fresh basil - Try mint for a different herbal twist that pairs well with citrus and berries.
- Sweetener - Add a touch of honey or maple syrup if you prefer a sweeter popsicle.
- Lemon juice - Replace with lime juice for a slightly different citrus flavor.
Ingredients
- 2 cups fresh strawberries, hulled and sliced
- 1 ½ cups lemonade, homemade or store-bought
- ¼ cup fresh basil leaves, roughly chopped
- 1 tablespoon lemon juice, freshly squeezed
- 1 to 2 tablespoons honey or maple syrup, optional for added sweetness
Instructions
- In a medium bowl, combine the sliced strawberries, chopped basil, lemonade, lemon juice, and honey if using. Stir well to blend the flavors.
- Let the mixture sit for 5 to 10 minutes to allow the basil and strawberry flavors to infuse into the lemonade.
- Carefully spoon some of the strawberry and basil mixture into popsicle molds, distributing the fruit evenly.
- Pour the remaining liquid lemonade mixture over the fruit until the molds are nearly full.
- Insert popsicle sticks and freeze the molds for at least 4 hours or until fully solid.
- To serve, run warm water briefly over the outside of the molds to loosen the popsicles before removing them.
These Strawberry Basil Lemonade Popsicles are a naturally refreshing treat that brings a fresh twist to classic summertime flavors. Enjoy them anytime you want a cool and flavorful snack.
8. Peach and Ginger Frozen Yogurt Bars

These Peach and Ginger Frozen Yogurt Bars offer a refreshing combination of sweet and spicy flavors that feel just right on a warm day. The natural juiciness of ripe peaches blends smoothly with the gentle heat of fresh ginger, creating a subtle but intriguing taste experience.
They're simple to prepare, making them an excellent choice for a healthy snack or a light dessert. Freezing the mixture into bars provides a satisfying creamy texture that's easy to enjoy anytime.
With no complicated steps or hard-to-find ingredients, this recipe fits well into any busy routine, helping you refresh your palate with wholesome, bright flavors.
Why This Recipe Works
This recipe delivers a nice balance between fruity sweetness and a hint of spice, packed into a convenient frozen treat everyone can enjoy. It's practical to make ahead and offers a nutritious, flavorful snack option.
- Convenience - Quick to prepare and perfect for making in advance.
- Flavor balance - Sweet peaches and spicy ginger create a pleasant contrast.
- Texture - Creamy yogurt base that freezes into smooth, easy-to-eat bars.
- Appeal - A healthy, family-friendly frozen treat with natural ingredients.
- Portion control - Individually frozen bars make serving and storing simple.
Ingredient Swap Ideas
Swapping ingredients can help suit different diets or flavor preferences without losing the essence of this frozen snack. Consider these easy adjustments depending on what you have on hand or your nutritional goals.
- Greek yogurt - Use coconut yogurt for a dairy-free or vegan alternative.
- Fresh peaches - Replace with mango or pineapple for a different tropical twist.
- Fresh ginger - Ground ginger can substitute if fresh isn't available, using less to avoid overpowering.
- Honey - Swap with maple syrup or agave for a plant-based sweetener.
- Lemon juice - Use lime juice for a slightly different citrus note.
Ingredients
- 3 cups fresh peaches - peeled, pitted, and roughly chopped.
- 2 cups plain Greek yogurt - for a creamy and tangy base.
- 2 tablespoons fresh ginger - peeled and finely grated.
- ¼ cup honey - to naturally sweeten the mixture.
- 1 tablespoon freshly squeezed lemon juice - to brighten flavors and prevent browning.
- ½ teaspoon vanilla extract - for subtle warmth and depth.
Instructions
- In a blender or food processor, combine the chopped peaches, Greek yogurt, grated ginger, honey, lemon juice, and vanilla extract. Blend until the mixture is smooth and fully combined.
- Pour the peach and ginger yogurt mixture evenly into popsicle molds or silicone ice pop trays.
- Insert sticks into the molds and place them in the freezer. Freeze for at least 4 hours or until completely solid.
- To remove the bars, briefly run warm water over the outside of the molds to loosen them. Gently pull out the frozen yogurt bars.
- Serve immediately or store in an airtight container in the freezer for up to two weeks. Enjoy as a refreshing, healthful snack whenever you like.
9. Dairy-Free Avocado Lime Pops
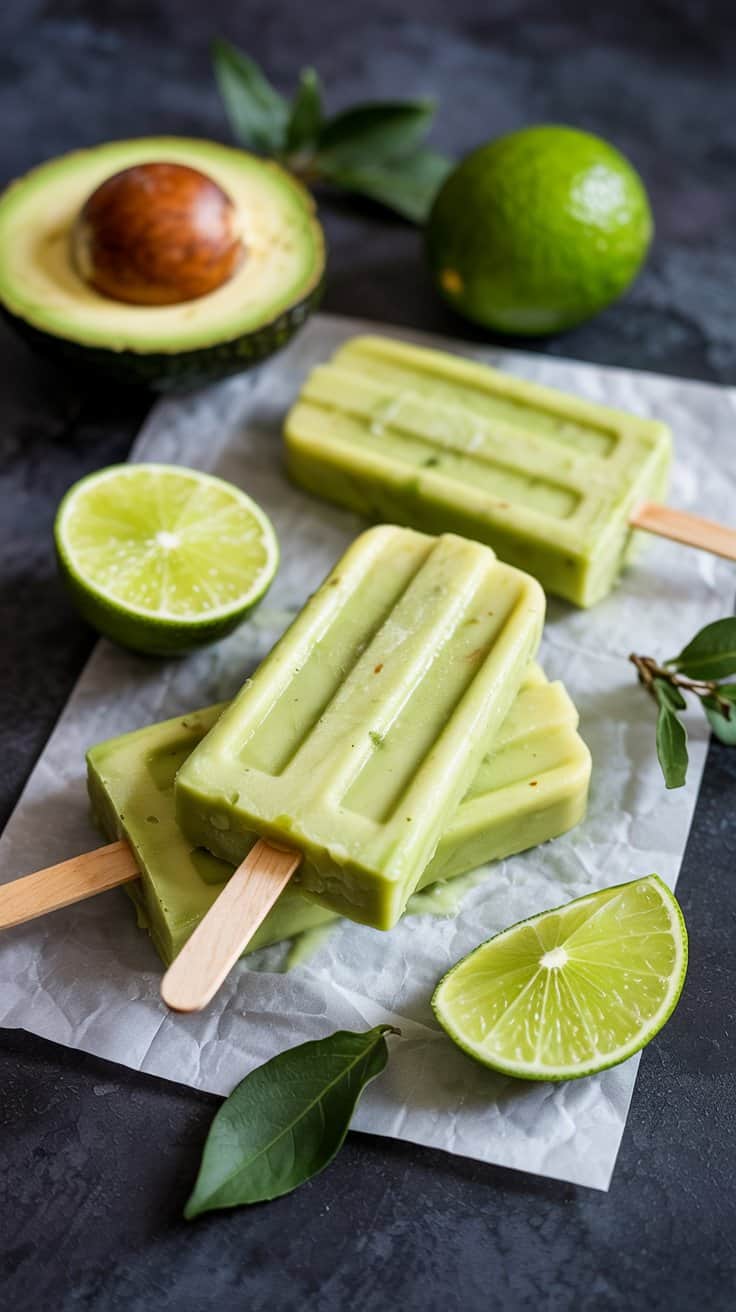
These Dairy-Free Avocado Lime Pops bring together creamy avocado and bright lime for a refreshing treat that's both cooling and satisfying. The avocado adds a smooth, rich texture, while the lime gives each bite a crisp, tangy freshness that balances perfectly.
They're a simple way to enjoy healthy fats without any dairy, making them suitable for anyone avoiding milk or looking for a lighter alternative. Plus, the popsicles are easy to prepare with just a few ingredients and no complicated steps.
This recipe fits well into busy schedules and warm days when you need a quick, wholesome snack that feels indulgent but stays nourishing. The flavor combination is familiar yet interesting, appealing to a broad range of tastes without overwhelming the palate.
Why This Recipe Works
This recipe offers a simple, nourishing treat that combines smooth creaminess with refreshing citrus notes. It stands out for its balance of flavor, ease of preparation, and healthful ingredients.
- Convenience - Requires minimal ingredients and can be made in advance for quick access.
- Flavor balance - Combines the mild richness of avocado with the bright tartness of lime for a clean, fresh taste.
- Texture - Smooth and creamy with just the right firmness from freezing.
- Appeal - Suitable for dairy-free diets and anyone looking for a cooling, guilt-free snack.
- Cleanup ease - Made in a blender with minimal bowls, making cleanup straightforward and fast.
Ingredient Swap Ideas
Adapting this recipe to different preferences or ingredient availability is easy. The swaps maintain the core creaminess and freshness while offering flexibility.
- Avocado - Use frozen banana for an even creamier texture with added natural sweetness.
- Lime juice - Substitute with lemon juice for a slightly different citrus note without losing brightness.
- Sweetener - Replace honey or agave syrup with maple syrup or coconut nectar for variety.
- Non-dairy milk - Use almond, oat, or cashew milk if you want a thinner popsicle texture or different flavor base.
- Add-ins - Blend in fresh mint or basil for an herbal twist that goes with the lime.
Ingredients
- 2 ripe avocados - peeled and pitted for smoothness.
- ½ cup fresh lime juice - about 3 to 4 limes, for bright acidity.
- ½ cup coconut milk - full fat for creaminess and subtle richness.
- ¼ cup agave syrup - or your preferred liquid sweetener.
- ¼ teaspoon salt - enhances the flavors and balances sweetness.
Instructions
- Place the avocados, lime juice, coconut milk, agave syrup, and salt in a blender. Blend until the mixture is completely smooth with no lumps remaining.
- Taste and adjust the sweetness or lime juice if needed for your preferred balance of tart and sweet.
- Pour the mixture evenly into popsicle molds. Insert sticks and freeze for at least 4 hours or until fully firm.
- To unmold, briefly run the molds under warm water to loosen the pops, then gently pull them out.
- Enjoy immediately for a refreshing treat, or store in a freezer-safe container for later.
This simple recipe makes a delicious, dairy-free frozen snack that's full of healthy fats and bright flavor.
10. Chocolate Peanut Butter Frozen Bars

Chocolate and peanut butter form a classic duo that's both rich and satisfying. These frozen bars bring those flavors together in a cool, refreshing treat that's easy to enjoy anytime.
They have a creamy texture with just the right balance between chocolate's deep richness and peanut butter's nutty sweetness.
Making these bars involves simple ingredients and straightforward steps, making them a great option if you want a homemade dessert that feels indulgent without much fuss. You can portion them for snacks or serve them at gatherings, offering a delicious way to cool down and enjoy a timeless flavor combination.
Why This Recipe Works
This recipe offers a balanced, creamy frozen treat that combines two beloved flavors you're likely to keep coming back to. Chocolate Peanut Butter Frozen Bars are straightforward to prepare and deliver satisfying taste with minimal ingredients.
- Convenience - Requires no baking and only a few minutes of prep before freezing.
- Flavor balance - Combines rich chocolate with smooth, nutty peanut butter for a well-rounded taste.
- Texture - Offers a creamy, yet firm consistency that holds well when frozen.
- Appeal - Great for chocolate lovers and peanut butter fans of all ages.
- Make-ahead friendly - Can be stored frozen and served whenever you want a quick treat.
Ingredient Swap Ideas
Swapping ingredients in this recipe can help accommodate dietary restrictions or personal preferences without losing the core flavors. These alternatives maintain the creamy, chocolatey, and nutty profile we want in the bars.
- Peanut butter - Use almond or cashew butter for a different nutty flavor or to avoid peanuts.
- Chocolate - Substitute with dairy-free dark chocolate or cacao nibs for a more intense taste.
- Sweetener - Replace sugar with maple syrup or honey to keep it natural and adjust sweetness.
- Milk - Use coconut, almond, or oat milk for a dairy-free version that stays creamy.
- Add-ins - Mix in chopped nuts or seeds for some crunch if you want added texture.
Ingredients
- 1 cup creamy peanut butter - Provides rich, smooth nutty flavor and texture.
- ½ cup powdered sugar - Adds sweetness and helps with firming the bars.
- ¼ cup unsalted butter, softened - Contributes to the creamy consistency and richness.
- 1 teaspoon vanilla extract - Enhances the overall flavor complexity.
- 1 cup semi-sweet chocolate chips - Offers the deep chocolate flavor and melts smoothly.
- 2 tablespoons heavy cream or milk - Helps melt the chocolate to a smooth consistency.
- Pinch of salt - Balances the sweetness and enhances flavor depth.
Instructions
- In a mixing bowl, combine the peanut butter, powdered sugar, softened butter, vanilla extract, and salt. Stir until the mixture is smooth and well blended.
- Press the peanut butter mixture evenly into an 8x8-inch lined pan. Use a spatula to create a flat surface.
- In a small saucepan over low heat, melt the chocolate chips with the heavy cream, stirring frequently until smooth. Remove from heat as soon as it's melted.
- Pour the melted chocolate evenly over the peanut butter layer, spreading it out gently with a spatula.
- Place the pan in the freezer for at least 2 hours or until the bars are firm.
- Remove the frozen dessert from the pan, slice into bars, and serve immediately or keep stored in an airtight container in the freezer.
11. Pineapple Jalapeño Popsicles

These Pineapple Jalapeño Popsicles offer an exciting twist on a classic frozen treat. The natural sweetness of fresh pineapple blends smoothly with a gentle kick from jalapeño peppers, creating a refreshing snack that keeps things interesting.
They are surprisingly easy to prepare, requiring just a few simple ingredients and a bit of patience while the popsicles freeze. These popsicles are a great way to cool down while waking up your palate, making them a wonderful choice for warm days or gatherings.
Why This Recipe Works
This recipe is a great combination of tropical sweetness and subtle heat, bringing together fresh flavors in a convenient frozen format. It's a straightforward treat that brings excitement without complicated steps.
- Convenience - Simple ingredients and an easy process make these popsicles quick to prepare and freeze.
- Flavor balance - The sweetness of pineapple contrasts nicely with the spice from jalapeño for a refreshing taste.
- Healthier treat - Made with natural fruit and minimal added sugar for a light frozen snack.
- Appeal - Suitable for a variety of occasions, from family days to casual entertaining.
- Portioned servings - Popsicles provide an easy way to enjoy controlled portions without mess.
Ingredient Swap Ideas
Swapping ingredients can help you adjust this recipe to suit your spice preference or accommodate dietary needs. These easy substitutions keep the spirit of the recipe while adding flexibility.
- Jalapeño - Use milder peppers like poblano or serrano for less heat, or add more for a spicier touch.
- Pineapple - Substitute fresh pineapple with mango or peach to explore different tropical flavors.
- Sweetener - Replace honey or sugar with agave syrup or maple syrup as a natural vegan option.
- Citrus - Add lime juice or lemon juice instead of water for an extra tangy layer.
- Water - Use coconut water to introduce a hint of tropical richness and additional hydration.
Ingredients
- 2 cups fresh pineapple - diced into small chunks for smooth blending.
- 1 small jalapeño - seeded and chopped to control the spice level.
- ¼ cup water - to help blend ingredients evenly.
- 2 tablespoons honey - or maple syrup for natural sweetness.
- 1 tablespoon fresh lime juice - adds brightness and balances flavors.
Instructions
- Combine the pineapple, chopped jalapeño, water, honey, and lime juice in a blender. Blend until smooth and fully combined.
- Taste the mixture and adjust sweetness or spice level by adding more honey or jalapeño as preferred.
- Pour the blended mixture evenly into popsicle molds, leaving a small space at the top to allow for expansion.
- Insert popsicle sticks and freeze for at least 4 hours, or until completely solid.
- To serve, run warm water briefly over the outside of the molds to loosen the popsicles before gently removing them.
Enjoy a cool, sweet, and slightly spicy snack that's great for hot days or anytime you want a refreshing twist.
12. Raspberry Lemon Frozé Bars
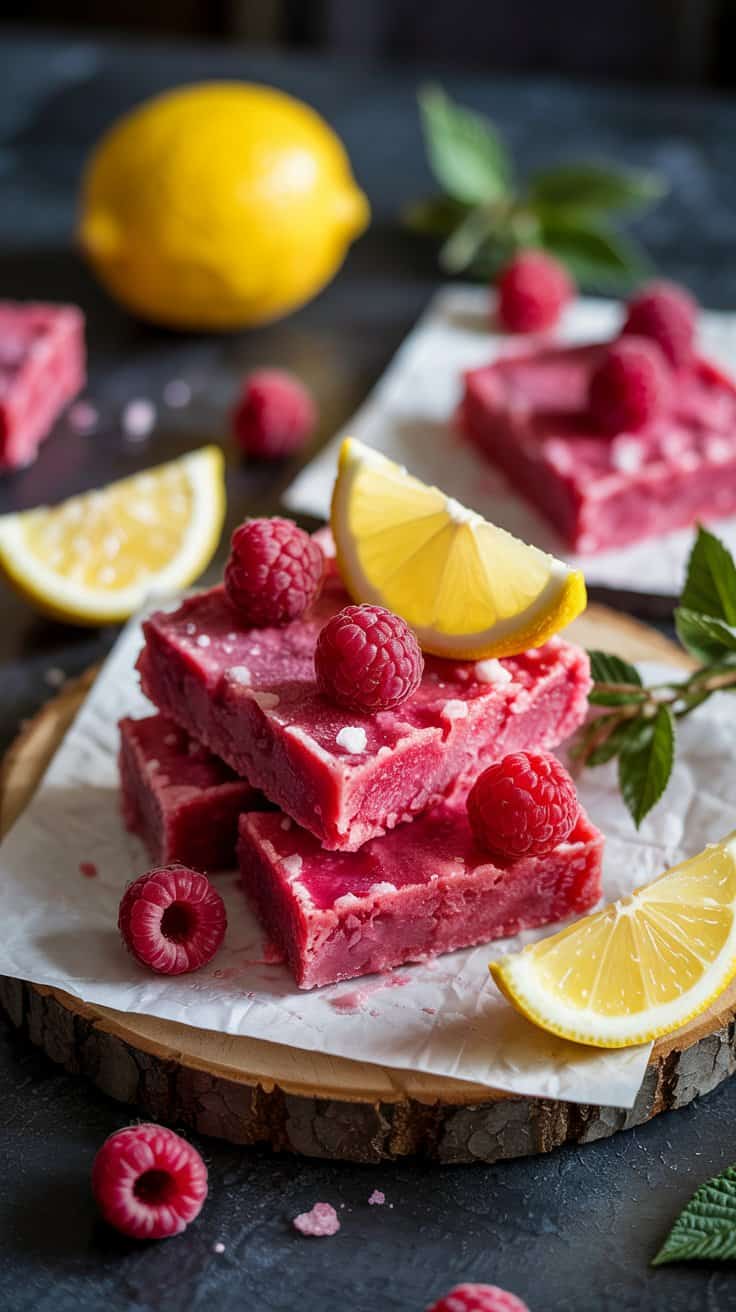
These Raspberry Lemon Frozé Bars combine the refreshing flavors of frozen rosé wine with bright raspberries and zesty lemon. They make an elegant, adult-only treat that's perfect for warm summer days or casual gatherings.
The texture is slightly icy but smooth enough to bite through easily, offering a nice balance of sweet and tart notes. Preparing them takes just a little mixing and freezing time, so you can have a sophisticated dessert without spending long in the kitchen.
With their bright color and fresh fruit flavor, these bars bring a touch of brightness that pairs nicely with sunny afternoons and relaxed moments. They feel special enough for entertaining yet simple enough to enjoy any day.
Why This Recipe Works
This recipe delivers a flavorful and refreshing frozen dessert that's easy to make and enjoy. Raspberry Lemon Frozé Bars strike a great balance between fruitiness, tartness, and subtle sweetness, making them an inviting treat.
- Convenience - Requires minimal prep and can be made ahead, allowing for easy entertaining.
- Flavor balance - Combines tangy lemon, sweet raspberries, and fruity rosé for a lively taste experience.
- Texture - Icy but tender bars provide a cool, satisfying mouthfeel.
- Appeal - Offers an adult-friendly, elegant dessert option for summer gatherings.
- Serving ease - Individual bars serve well without mess or fuss.
Ingredient Swap Ideas
Swapping ingredients can personalize these bars to fit dietary needs or flavor preferences without losing their essence. Consider these options to make the recipe your own.
- Frozen rosé wine - Substitute with frozen white wine or a rosé spritzer for a lighter alcohol content.
- Fresh raspberries - Use frozen raspberries or fresh strawberries as a fruity alternative.
- Lemon juice - Replace with lime juice for a slightly different citrus tang.
- Sweetener - Switch sugar with honey or maple syrup to add a subtle depth of flavor.
- Optional garnish - Top with fresh mint leaves or a dusting of powdered sugar for added presentation.
Ingredients
- 1 cup frozen rosé wine - Provides the base and icy texture for the bars.
- 1 cup fresh raspberries - Adds natural sweetness and bright color.
- ⅓ cup fresh lemon juice - Brings necessary tartness and freshness.
- ½ cup granulated sugar - Balances the acidity with sweetness.
- 1 tablespoon lemon zest - Enhances the citrus flavor.
- ¼ teaspoon salt - improves and balances all other flavors.
Instructions
- In a blender or food processor, combine frozen rosé wine, fresh raspberries, lemon juice, granulated sugar, lemon zest, and salt.
- Blend until the mixture is smooth and well combined, scraping down the sides as needed to ensure even texture.
- Pour the mixture into a lined 8x8-inch baking pan, spreading it evenly.
- Freeze the pan for at least 4 hours or until the bars are firm enough to cut.
- Remove from the freezer and let sit at room temperature for about 5 minutes before slicing into bars.
- Serve immediately or store in an airtight container in the freezer until ready to enjoy.
13. Creamy Banana Coconut Ice Bars

These creamy banana coconut ice bars are a simple and refreshing treat that's both satisfying and wholesome. Made with ripe bananas and coconut milk, they offer a naturally sweet flavor with a smooth, creamy texture that feels like a mini dessert without added sugar.
The recipe comes together quickly, requiring just a few ingredients and no cooking, which makes it ideal for busy days. These ice bars freeze into a silky consistency that kids and adults alike will appreciate on warm afternoons or as a light snack.
Their tropical twist from the coconut milk goes well with the mellow sweetness of banana, making each bite pleasantly rich but never heavy. You can easily make a batch ahead of time and keep them handy for a quick cooling bite anytime.
Why This Recipe Works
This recipe stands out for its simplicity and natural ingredients, delivering a creamy frozen treat that's both tasty and nourishing.
- Convenience - Requires minimal preparation and freezes quickly for easy, make-ahead convenience.
- Flavor balance - Combines the natural sweetness of bananas with the mellow richness of coconut milk for a balanced taste.
- Texture - Smooth and creamy, these bars have a soft bite that's refreshing and enjoyable.
- Appeal - Kid-friendly and naturally sweet, making them a great snack for all ages.
- Healthful option - Uses whole fruits and dairy-free milk, fitting well into balanced, wholesome eating habits.
Ingredient Swap Ideas
Adjusting the main ingredients can help you tailor the bars to specific dietary preferences or flavor preferences without losing their creamy charm.
- Coconut milk - Substitute with almond milk or oat milk for a different nutty or mild flavor while keeping it dairy-free.
- Bananas - Use mango or papaya for a tropical twist with a similar creamy texture.
- Sweetener - Add a touch of honey or maple syrup if you prefer a slightly sweeter bar, especially if your bananas are not very ripe.
- Add-ins - Mix in a tablespoon of nut butter or shredded coconut for added texture and flavor.
- Flavor enhancement - A splash of vanilla extract or a pinch of cinnamon can deepen the taste without overpowering the natural fruitiness.
Ingredients
- 2 large ripe bananas - peeled and sliced for easy blending.
- 1 cup full-fat coconut milk - provides creamy richness and moisture.
- 1 teaspoon vanilla extract - enhances the natural flavors.
- 1 tablespoon honey or maple syrup - optional, adds extra sweetness if needed.
- Pinch of salt - balances the sweetness and brings out flavor.
Instructions
- Place the sliced bananas, coconut milk, vanilla extract, honey or maple syrup (if using), and a pinch of salt into a blender. Blend until smooth and creamy.
- Pour the mixture evenly into popsicle molds or small freezer-safe containers.
- Insert popsicle sticks if using molds, or simply cover the containers tightly with lids or plastic wrap.
- Freeze for at least 4 hours, or until completely solid.
- To serve, briefly run the mold or container under warm water to loosen the bars, then gently remove and enjoy.
- Store any extra bars in the freezer for up to two weeks for a quick, refreshing snack whenever you want.
For more non-dairy options that are freezer-friendly, explore dairy-free frozen treats for hot days. If you're planning a gathering, complement these cool snacks with summer cupcake recipes for parties.

Andrew Gray is a seasoned food writer and blogger with a wealth of experience in the restaurant and catering industries. With a passion for all things delicious, Andrew has honed his culinary expertise through his work as a personal chef and caterer.
His love for food led him to venture into food writing, where he has contributed to various online publications, sharing his knowledge and insights on the culinary world. As the proud owner of CooksCrafter.com, Andrew covers a wide range of topics, including recipes, restaurant reviews, product recommendations, and culinary tips.
Through his website, he aims to inspire and educate fellow food enthusiasts, offering a comprehensive resource for all things food-related.