This collection of 20 dairy-free frozen treats offers a delicious way to enjoy indulgent desserts without using any dairy ingredients, including sorbets, coconut milk ice creams, and fruit-based popsicles, often made with plant milks like coconut or almond and fruit purées. These recipes are designed to be approachable and satisfying, perfect for anyone looking to cool down with something creamy, fruity, or chocolatey.

Inside, you'll find a wide range of frozen desserts, from creamy coconut milk ice creams and avocado-based popsicles to fruit sorbets and layered parfaits. Each recipe combines familiar flavors with simple, wholesome ingredients that cater to various tastes and dietary preferences.
These treats provide both classic comfort and refreshing options, making them suitable for family gatherings, casual snacks, or special occasions.
All these recipes come with straightforward steps and use easy-to-find ingredients, reducing prep time and cleanup. They are thoughtfully selected to balance rich flavors with practical preparation, so you can enjoy decadent dairy-free desserts without added hassle.
1. Creamy Coconut Milk Chocolate Ice Cream
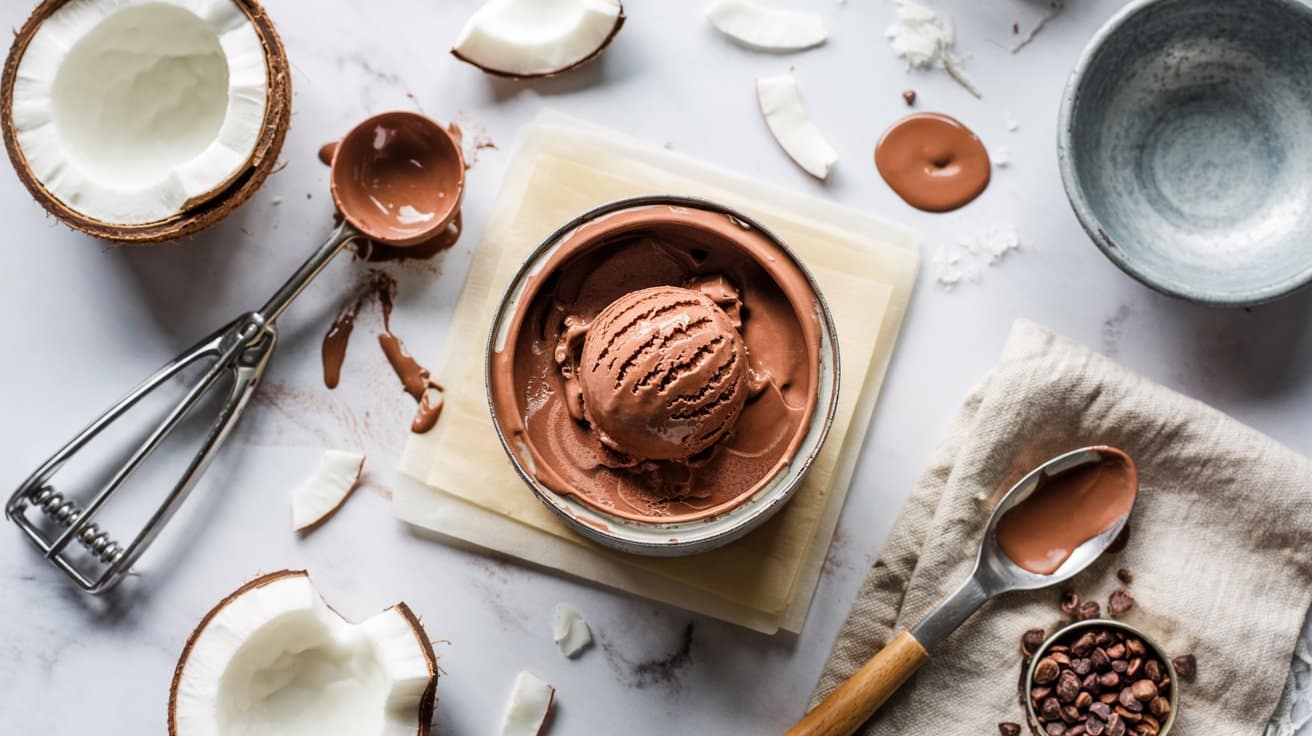
This ice cream brings together rich dark chocolate and the creamy texture of full-fat coconut milk to create a dairy-free treat that feels indulgent. It's smooth and silky, with a satisfying depth of chocolate flavor that works beautifully for those avoiding dairy or seeking a refreshing dessert, made with full-fat coconut milk and bittersweet chocolate (about 70% cacao).
You won't need complicated equipment or ingredients - just simple preparation and a bit of patience while it freezes, then freeze for at least 4 hours to firm; for lighter frozen options, explore no-churn ice cream recipes for creamy treats.
Why This Recipe Works
This ice cream recipe stands out for combining texture, flavor, and dietary flexibility.
- Convenience - Uses coconut milk for creaminess without heavy dairy, and the simple steps make it easy to prepare at home; for similar simple sweets, see honey-based refreshing desserts for summer.
- Flavor balance - The bitterness of dark chocolate is softened by the natural richness of coconut milk.
- Texture - The fat in coconut milk (about 20-24% fat) creates a lush and silky consistency typical of premium ice creams.
- Appeal - Suitable for dairy-free diets without sacrificing indulgence or flavor.
Ingredient Swap Ideas
Swapping certain ingredients allows you to customize the recipe for taste preferences or dietary needs without losing the essence of this ice cream.
- Coconut milk - Use a different full-fat plant-based milk like cashew milk for a milder coconut presence; for small desserts, try small-batch cupcake ideas for two.
- Dark chocolate - Substitute with dairy-free chocolate chips or chopped bittersweet chocolate for variety (look for 55-70% cacao for balanced flavor).
- Sweetener - Replace coconut sugar with maple syrup or agave to adjust sweetness and flavor nuances.
- Vanilla extract - Use almond extract or skip it for a purer chocolate flavor.
Ingredients
- 2 cans (13.5 oz each) full-fat coconut milk - Well-stirred for a smooth base.
- 7 ounces dark chocolate - At least 70% cocoa, chopped or chips.
- ½ cup coconut sugar - Provides gentle sweetness and caramel notes.
- 1 tablespoon vanilla extract - Adds fragrance and rounds out flavor.
- ¼ teaspoon salt - Enhances the chocolate's richness.
Instructions
- In a medium saucepan, heat the coconut milk over medium heat until it begins to steam but does not boil. Remove from heat.
- Add the chopped dark chocolate to the hot coconut milk and whisk until fully melted and smooth.
- Stir in the coconut sugar, vanilla extract, and salt until the sugar dissolves completely and the mixture is uniform.
- Chill the mixture in the refrigerator for at least 2 hours until cold.
- Pour the chilled base into an ice cream maker and churn according to the manufacturer's instructions until soft-serve consistency forms. Transfer to a freezer-safe container and freeze until firm, about 4 hours.
- Scoop and serve chilled for a creamy, dairy-free chocolate treat.
2. Avocado Lime Frozen Popsicles
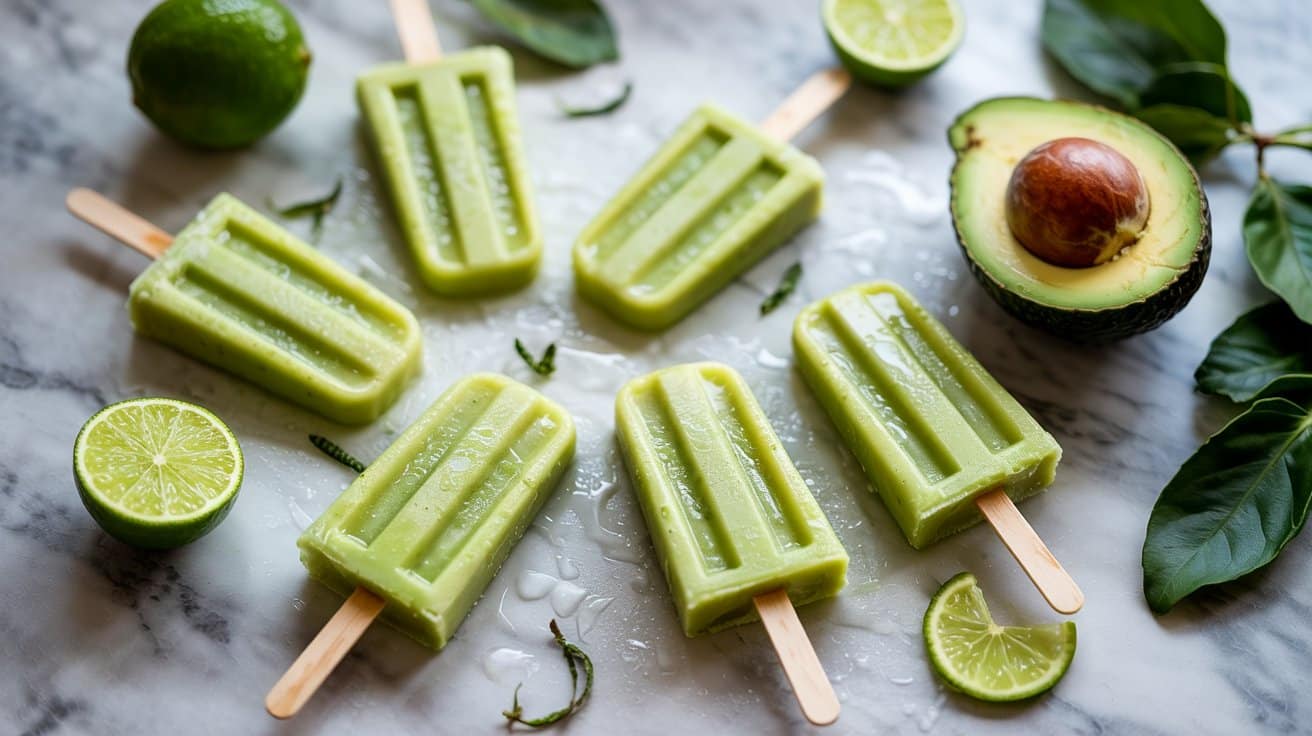
These Avocado Lime Frozen Popsicles offer a creamy and refreshing treat that's both simple and satisfying; explore refreshing frozen treats for hot days for more ideas, similar to Mexican paletas made with fresh fruit and milk alternatives.
They come together quickly and only require a handful of ingredients, making them a great option to prepare ahead for hot days or after-meal snacks.
The texture is delightfully creamy thanks to the avocado, yet the lime adds a crisp, tangy twist that keeps each bite fresh and bright, thanks to the avocado's monounsaturated fats. Whether you're looking for a healthier dessert or a cool pick-me-up, these popsicles strike a lovely balance and are well worth trying.
If you want a more floral, aromatic citrus note in similar recipes, consider kaffir lime leaves substitutes for flavor.
Why This Recipe Works
This recipe offers a refreshing and nutritious frozen treat that's easy to prepare and has a nice blend of flavors.
- Convenience - Requires just a few simple ingredients and minimal prep time.
- Flavor balance - Combines creamy avocado with tangy lime for a fresh, smooth taste.
- Texture - Silky and creamy with a cooling frozen finish that's easy to enjoy.
- Appeal - Healthy enough for a snack yet tasty enough to share with family or friends.
Ingredient Swap Ideas
Swapping ingredients can help tailor the popsicles to fit diet preferences or what you have on hand, while keeping their overall character intact.
- Avocado - Use banana or Greek yogurt instead for a different creamy base with natural sweetness.
- Lime juice - Swap with lemon juice for a similar citrus brightness but a slightly sharper edge.
- Sweetener - Replace honey or sugar with maple syrup or agave nectar to suit vegan diets.
- Coconut milk - Add a splash of coconut milk for a tropical twist and extra creaminess.
Ingredients
- 2 medium ripe avocados - peeled and pitted for smooth creaminess.
- ¼ cup fresh lime juice - about 2 limes, for bright zing.
- ⅓ cup honey - or maple syrup as a natural sweetener.
- ½ cup water - to help blend everything smoothly.
- ¼ teaspoon salt - to improve the natural flavors.
Instructions
- Combine the avocados, fresh lime juice, honey, water, and salt in a blender or food processor. Blend until the mixture is completely smooth with no lumps.
- Taste and adjust the sweetness or lime according to your preference, blending again briefly if needed.
- Pour the avocado mixture evenly into popsicle molds, leaving a small gap at the top to allow for expansion during freezing.
- Insert the sticks and freeze for at least 4 hours, or until fully solid.
- To unmold, briefly run warm water over the outside of the molds to loosen the popsicles, then gently pull them out. Serve immediately or keep frozen until ready to enjoy.
3. Banana and Almond Butter “Nice” Cream

This Banana and Almond Butter "Nice" Cream is a simple and satisfying treat that combines just a few wholesome ingredients, a dairy-free soft-serve made by blending frozen fruit. It offers the natural sweetness of ripe bananas blended into a creamy, soft-serve texture, with swirls of almond butter adding richness and a subtle nutty flavor.
Because it's made from frozen bananas, it feels indulgent without any added sugar or dairy. This recipe is easy to prepare in minutes, making it a great choice for a quick snack or a healthy dessert option.
For savory dishes calling for peppery heat, see banana pepper substitutes for savory recipes.
Why This Recipe Works
This recipe comes together quickly and offers a smooth, creamy texture with natural sweetness and depth from almond butter. It's an ideal option when you want a refreshing treat that's also nourishing.
- Convenience - Requires only a blender and a few common ingredients, ready in moments.
- Flavor balance - Combines sweet bananas with the creamy, slightly salty almond butter.
- Texture - Smooth, soft-serve consistency mimics traditional ice cream without additives.
- Appeal - Suitable for dairy-free and vegan diets, loved by kids and adults alike.
Ingredient Swap Ideas
Swapping ingredients allows you to customize this "nice" cream to suit tastes, allergies, or what's on hand while keeping its creamy feel and sweet profile.
- Almond butter with peanut butter - For a more familiar, bold nut flavor.
- Bananas with frozen mango - To introduce a tropical twist and bright color.
- Add a splash of vanilla extract - To improve the overall sweetness and depth.
- Use sunflower seed butter - A great nut-free option that still adds creaminess.
Ingredients
- 3 large ripe bananas - peeled, sliced, and frozen for at least 2 hours.
- 2 tablespoons almond butter - natural, creamy for swirls and richness.
- ¼ cup unsweetened almond milk - to help blend to a smooth texture.
- ½ teaspoon vanilla extract - optional, for extra flavor depth.
- Pinch of salt - to balance and enhance sweetness.
Instructions
- Place the frozen banana slices, almond milk, vanilla extract (if using), and salt in a high-speed blender or food processor.
- Blend until the mixture becomes smooth and creamy, scraping down the sides as needed. The consistency should resemble soft-serve ice cream.
- Transfer half of the banana cream to a bowl. Add 1 tablespoon of almond butter and gently swirl it into the banana mixture without fully mixing, creating visible swirls.
- Add the remaining banana cream on top and swirl in the remaining almond butter in the same way.
- Serve immediately for soft-serve texture or freeze the "nice" cream for 30 minutes to firm up slightly before scooping. Enjoy!
4. Dairy-Free Matcha Green Tea Ice Cream
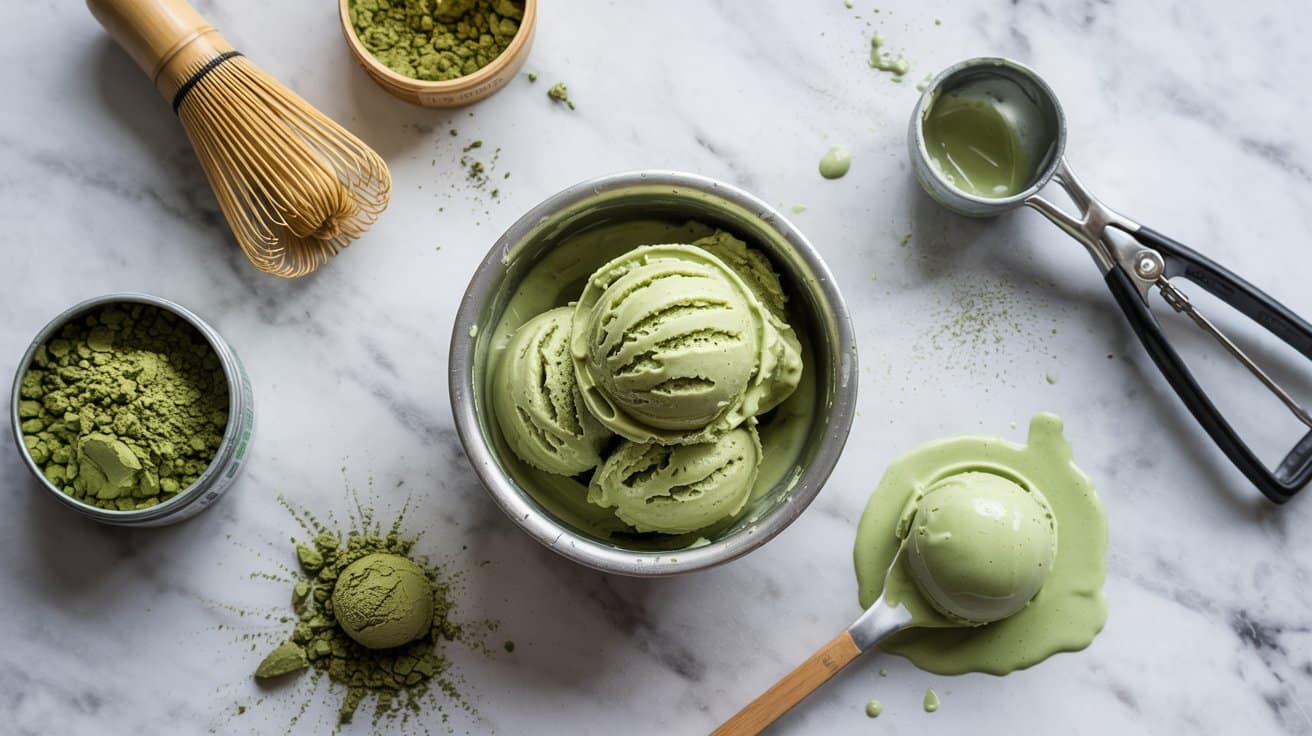
This dairy-free matcha green tea ice cream offers a refreshing twist on traditional ice cream. The natural earthiness of matcha blends smoothly with the rich, creamy texture of coconut cream, creating a treat that's both light and indulgent.
It's simple to make and a great way to enjoy a dessert that's dairy-free without sacrificing flavor or creaminess.
The subtle sweetness balances perfectly with the mild bitterness of the green tea powder, making this ice cream feel elegant yet approachable. Whether you're serving it as a cool afternoon snack or a special ending to a dinner, this recipe comes together with basic ingredients and minimal fuss.
Why This Recipe Works
This recipe is a great choice for anyone looking to enjoy a creamy dessert without dairy. It balances the distinctive flavor of matcha with the smooth richness of coconut cream, making it satisfying and health-conscious.
- Convenience - Uses simple, easy-to-find ingredients with straightforward preparation.
- Flavor balance - Combines the natural bitterness of matcha with gentle sweetness for a fresh taste.
- Texture - Offers a creamy, velvety consistency from coconut cream without any dairy.
- Appeal - Suitable for dairy-free diets and provides an antioxidant boost from matcha powder.
Ingredient Swap Ideas
Adjusting ingredients can help this recipe suit different preferences or dietary needs without losing the core taste and texture.
- Coconut cream - Substitute with cashew cream for a milder flavor and similar creaminess.
- Maple syrup - Use agave nectar or a mild honey alternative to adjust sweetness.
- Matcha powder - Replace with black tea powder (like hojicha) for a different tea flavor.
- Vanilla extract - Try almond or coconut extract to add a different aroma dimension.
Ingredients
- 1 can (13.5 oz) full-fat coconut cream - Provides the creamy base and dairy-free richness.
- 2 tablespoons matcha green tea powder - Adds the distinct green tea flavor and antioxidants.
- ½ cup pure maple syrup - Sweetens gently without overpowering the matcha taste.
- 1 teaspoon vanilla extract - Enhances overall flavor depth.
- ¼ teaspoon salt - Balances sweetness and lifts the other flavors.
Instructions
- Chill the coconut cream in the refrigerator overnight to allow the cream to separate and solidify.
- Scoop the thickened coconut cream into a mixing bowl, leaving any liquid behind. Whisk it until smooth and creamy.
- Add the matcha powder, maple syrup, vanilla extract, and salt to the coconut cream. Whisk thoroughly to combine all ingredients into a consistent mixture without lumps.
- Pour the mixture into an ice cream maker and churn according to the manufacturer's instructions until it reaches a soft-serve texture, about 20-25 minutes.
- Transfer the ice cream to a freezer-safe container and freeze for at least 2 hours to firm up before serving.
Scoop and enjoy a refreshing, creamy dessert that's both wholesome and satisfying.
5. Mango Coconut Sorbet
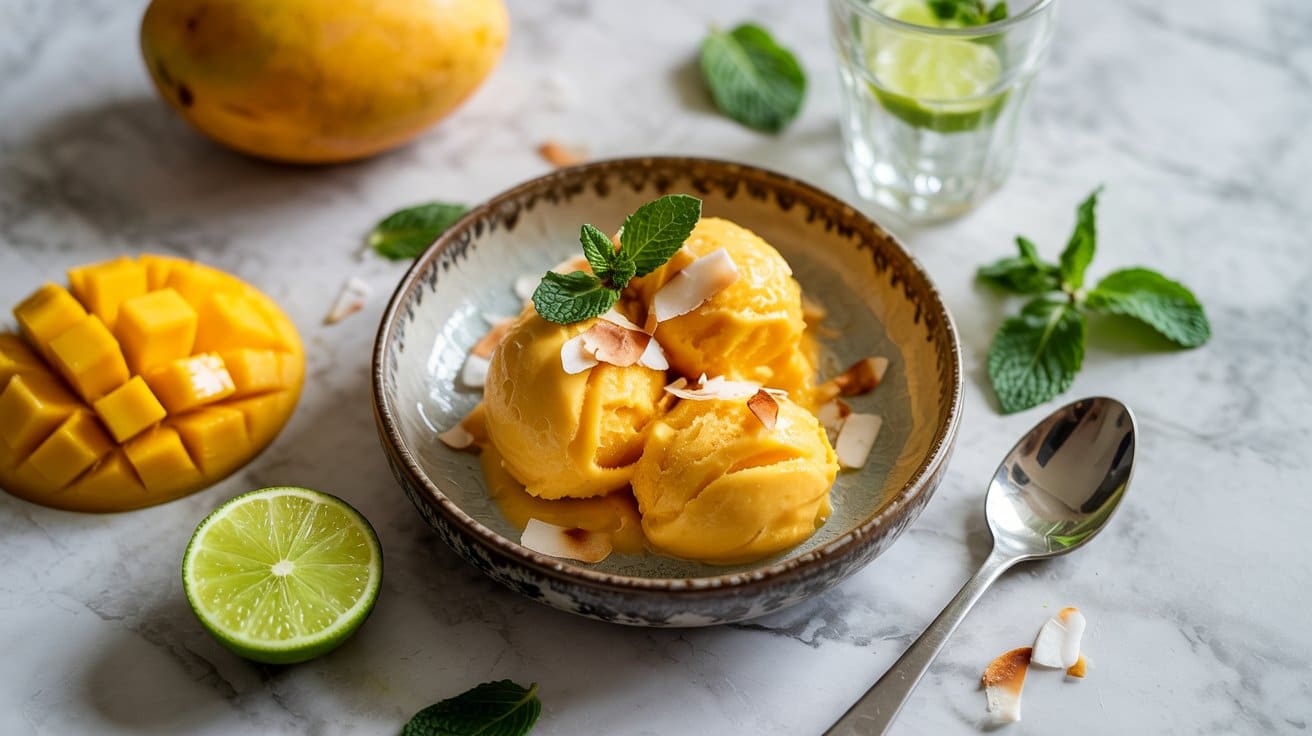
This mango coconut sorbet offers a refreshing and tropical twist to classic frozen desserts. It combines the juicy sweetness of ripe mangoes with the subtle, natural flavor of coconut water, creating a light and bright treat.
The texture is smooth and icy, with just enough creaminess from the mango to feel satisfying without heaviness. You can easily whip this up using a blender and a freezer, making it a straightforward choice for a healthy and crowd-pleasing dessert or snack.
Why This Recipe Works
This mango coconut sorbet delivers a naturally sweet, hydrating, and easy-to-make frozen dessert that everyone can enjoy.
- Convenience - Requires just a few fresh ingredients and no ice cream maker.
- Flavor balance - Combines tropical mango sweetness with the subtle, crisp taste of coconut water.
- Texture - Smooth and icy with a creamy finish from the fruit.
- Appeal - Naturally dairy-free and vegan-friendly, great for a wide range of diets and family-friendly too.
Ingredient Swap Ideas
Swapping ingredients here can help you tailor the recipe to what's on hand or meet dietary preferences while keeping its bright, tropical vibe intact.
- Coconut Water - Replace with pineapple juice for a sweeter, tangier sorbet.
- Mango - Use frozen peaches or papaya for a similar tropical flavor and creamy texture.
- Sweetener - Substitute honey or maple syrup if you prefer a natural sweetener instead of sugar.
- Coconut Milk - Add a splash for extra creaminess if you like a richer sorbet.
Ingredients
- 3 cups fresh mango chunks peeled and chopped
- 1 cup coconut water chilled
- 2 tablespoons sugar or to taste
- 1 tablespoon fresh lime juice
- Pinch of salt
Instructions
- Combine the mango chunks, coconut water, sugar, lime juice, and salt in a high-speed blender. Blend until completely smooth.
- Taste the mixture and adjust sweetness if needed by adding a little more sugar or lime juice. Blend again briefly to mix.
- Pour the mango mixture into a shallow container and freeze for about 1 hour. After that, stir with a fork to break up any ice crystals. Repeat this stirring every 30 minutes for 2 to 3 hours until the sorbet is firm but scoopable.
- Scoop into bowls or cones and serve immediately, or keep covered in the freezer until ready to enjoy.
- For a softer texture, let the sorbet sit at room temperature for 5 minutes before serving.
This sorbet works well as a refreshing snack after a meal or as a fruity option for a summer party.
6. Chocolate Avocado Pudding Pops
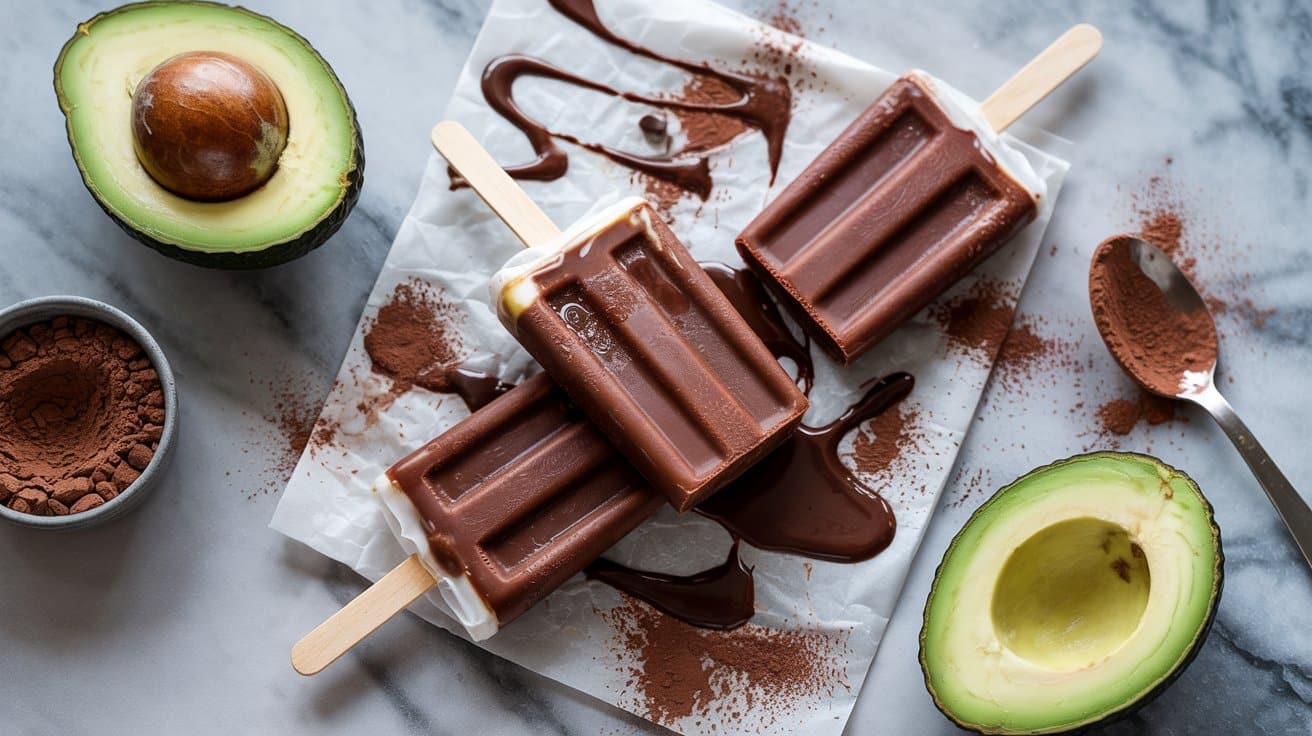
These Chocolate Avocado Pudding Pops make a creamy and chocolatey treat that sneaks in some good-for-you ingredients. They have a rich texture, thanks to avocado, which adds natural creaminess and healthy fats without overpowering the chocolate flavor.
These pops are simple to prepare and are a refreshing option for a snack or dessert that both kids and adults can enjoy.
The combination of cocoa and avocado creates a smooth, velvety taste that feels indulgent yet nourishing. You can easily mix up the ingredients and freeze the mixture in popsicle molds, making this a fuss-free recipe to keep on hand for warm days or whenever a cold treat calls.
Why This Recipe Works
This recipe brings together rich flavors and healthy ingredients in a way that's approachable and delicious. It's a fantastic option if you want to offer a treat that feels indulgent with extra nutrition.
- Convenience - Minimal blending and simple ingredients make for easy prep and quick chilling.
- Flavor balance - Deep chocolate taste goes well with subtly creamy avocado.
- Texture - Smooth and creamy pudding that freezes well into pops.
- Appeal - Kid-friendly and adult-approved, offering a fun way to enjoy healthy fats.
Ingredient Swap Ideas
Swapping ingredients can help adapt this recipe to dietary needs or suit different taste preferences without losing its core appeal. These simple changes keep the pop creamy and delicious while offering variety.
- Avocado - Replace with ripe banana for a naturally sweeter, fruitier flavor.
- Cocoa powder - Use carob powder for a caffeine-free alternative with a milder taste.
- Sweetener - Substitute maple syrup with honey or agave syrup depending on preference.
- Milk - Use almond milk, oat milk, or any plant-based milk instead of dairy milk to keep it vegan or dairy-free.
Ingredients
- 2 ripe avocados - peeled and pitted for smooth creaminess.
- ¼ cup unsweetened cocoa powder - for rich chocolate flavor.
- ¼ cup maple syrup - or another liquid sweetener of your choice.
- 1 teaspoon vanilla extract - to improve the overall flavor.
- ½ cup milk - dairy or plant-based as preferred.
- ¼ teaspoon salt - to balance and intensify the chocolate taste.
Instructions
- Place the peeled avocados, cocoa powder, maple syrup, vanilla extract, milk, and salt into a blender or food processor. Blend until the mixture is completely smooth and creamy, stopping to scrape down the sides as needed.
- Taste the pudding mixture and adjust sweetness or cocoa levels as desired, blending again if you add anything.
- Pour the pudding evenly into popsicle molds, leaving a small gap at the top for expansion during freezing.
- Insert the popsicle sticks and place the molds in the freezer for at least 4 hours, or until fully frozen.
- To serve, run the molds under warm water for a few seconds to loosen the pops, then gently remove and enjoy immediately.
7. Cashew Vanilla Bean Frozen Custard
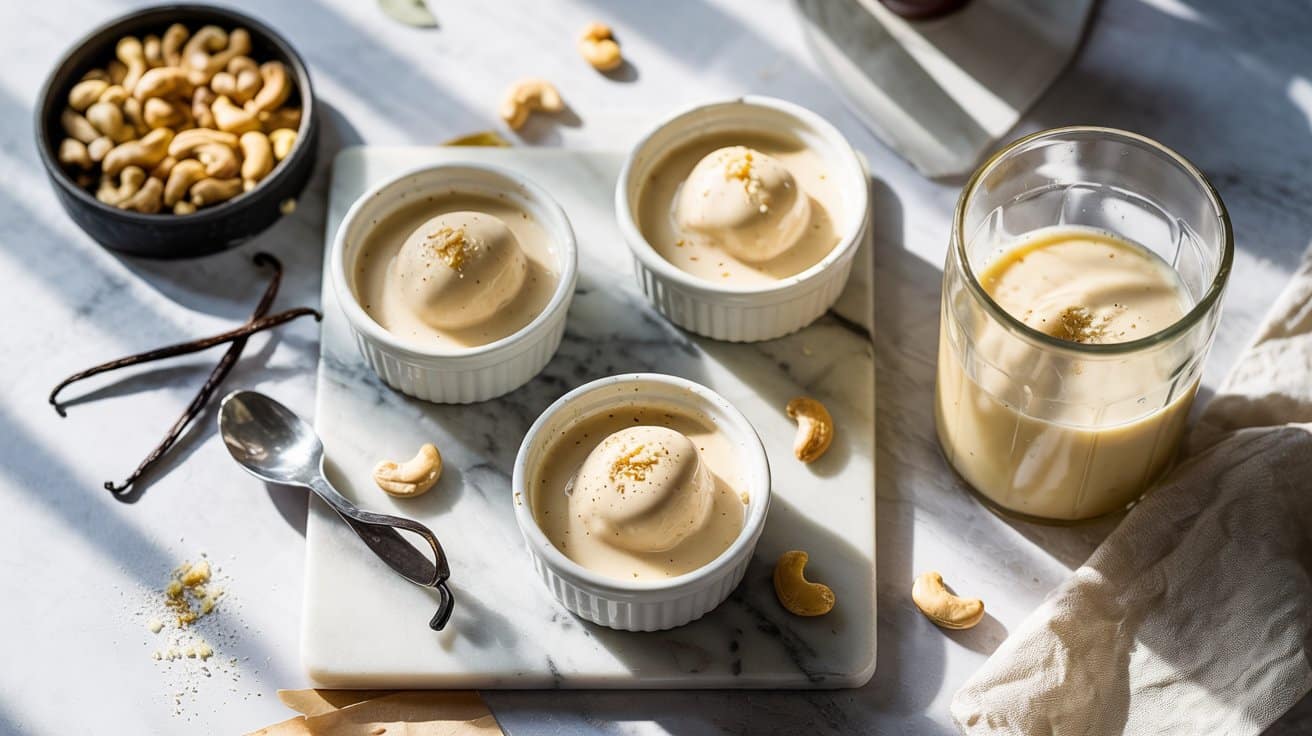
This frozen custard recipe offers a rich, creamy treat without relying on dairy or eggs. Soaking cashews overnight creates a luscious base that blends smoothly with the warm, aromatic flavor of vanilla bean.
The result is a custard-style dessert that feels indulgent yet simple to prepare at home.
The balance of the nutty cashews and sweet vanilla makes every bite comforting and satisfying. This frozen custard is a great option when you want a cool dessert that's a little different but still familiar and inviting.
Why This Recipe Works
This recipe is easy to prepare ahead and offers a smooth, creamy texture that closely mimics traditional custard. It uses whole ingredients that blend into a wholesome, flavorful dessert.
- Convenience - Requires minimal active preparation and can be made ahead by soaking cashews overnight.
- Flavor Balance - Combines the natural sweetness of vanilla bean with the subtle richness of cashews.
- Texture - Achieves a creamy, custard-like consistency without eggs or heavy cream.
- Appeal - Works well for dairy-free or vegan diets while remaining tasty and satisfying.
Ingredient Swap Ideas
Adapting this dessert to suit different preferences or dietary needs is straightforward by making a few simple swaps. These substitutions keep the essence of the frozen custard intact without sacrificing flavor or texture.
- Cashews - Use blanched almonds or macadamia nuts instead for a different nutty flavor and smoothness.
- Vanilla Bean - Replace with 1 tablespoon of pure vanilla extract if you don't have a vanilla bean pod.
- Sweetener - Swap maple syrup for agave syrup or honey (if not strictly vegan) to adjust sweetness and flavor notes.
- Non-Dairy Milk - Use almond milk or oat milk in place of coconut milk to vary the underlying creaminess.
Ingredients
- 1 ½ cups raw cashews - Soaked overnight in water to soften.
- 1 cup canned full-fat coconut milk - Adds richness and creaminess.
- 1 vanilla bean pod - Split and seeds scraped for fresh vanilla flavor.
- ⅓ cup pure maple syrup - For natural, gentle sweetness.
- Pinch of sea salt - Enhances all the flavors.
- 1 tablespoon lemon juice - Balances sweetness with subtle acidity.
Instructions
- Drain the soaked cashews and rinse them under cold water. Place cashews, coconut milk, vanilla bean seeds, maple syrup, salt, and lemon juice into a high-speed blender.
- Blend on high until the mixture is completely smooth and creamy, scraping down the sides as needed to ensure even blending.
- Pour the custard base into an ice cream maker and churn according to the manufacturer's instructions, generally about 20 to 25 minutes, until it reaches a soft-serve consistency.
- Transfer the frozen custard to a freezer-safe container and freeze for at least 2 hours to firm up before serving.
- Scoop the custard into bowls or cones, and enjoy the creamy vanilla richness without any dairy or eggs.
This frozen custard maintains a smooth, velvety texture even after freezing due to the cashews' natural creaminess.
8. Vegan Coffee Frappe Ice Pops
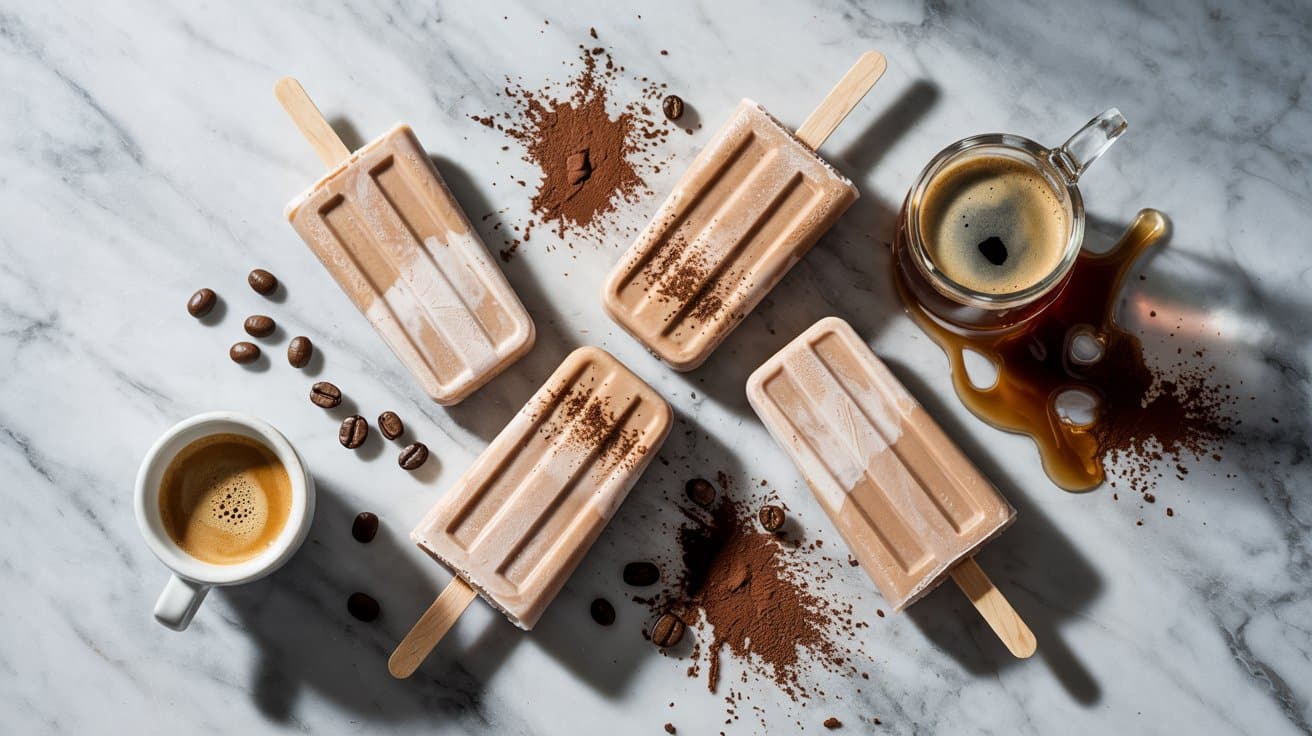
These Vegan Coffee Frappe Ice Pops are a refreshing way to enjoy your favorite midday pick-me-up. Blending bold coffee with creamy coconut milk gives them a smooth, satisfying texture that's both cool and energizing.
Making these ice pops is straightforward, requiring just a few ingredients and no special equipment. They are a great option for anyone looking to keep caffeine intake fun and different during warm days.
Why This Recipe Works
This recipe combines the smooth richness of coconut milk with the strong flavor of coffee, making a chilled treat that's easy to prepare and perfect for hot afternoons. The recipe keeps things simple yet flavorful, providing a balanced mix of creaminess and caffeine.
- Convenience - Quick to mix and freeze with minimal ingredients and steps.
- Flavor balance - Offers a rich coffee taste softened by natural sweetness from coconut milk.
- Texture - Creamy and icy, ideal for a cooling refreshment on warm days.
- Diet-friendly - Completely vegan and dairy-free, suitable for many dietary preferences.
Ingredient Swap Ideas
You can easily adjust these ice pops to suit your personal preferences or dietary restrictions by swapping a few ingredients. These substitutions keep the spirit of the recipe intact while offering variety.
- Milk alternative - Use almond milk, oat milk, or cashew milk instead of coconut milk for a different flavor or lower fat content.
- Sweetener - Replace maple syrup with agave nectar, coconut sugar, or a simple date syrup for natural sweetness.
- Coffee type - Try espresso or cold brew concentrate to intensify the coffee flavor, or use decaf coffee for a caffeine-free version.
- Add-ins - Stir in a pinch of cinnamon, vanilla extract, or cocoa powder before freezing for extra dimension.
Ingredients
- 1 cup brewed strong coffee cooled to room temperature
- 1 cup coconut milk full-fat canned or carton-style for creaminess
- 2 tablespoons maple syrup or preferred liquid sweetener
- 1 teaspoon vanilla extract optional for subtle flavor depth
- Pinch of salt to improve the overall taste
Instructions
- In a bowl or pitcher, combine the brewed coffee, coconut milk, maple syrup, vanilla extract, and salt. Whisk well until the mixture is smooth and the sweetener is fully incorporated.
- Pour the mixture evenly into ice pop molds, leaving a small space at the top for expansion when freezing.
- Insert sticks into the molds and place them in the freezer. Freeze for at least 4 hours, or until fully set.
- To unmold, briefly run warm water over the outside of the molds to loosen the ice pops. Gently pull on the sticks to remove each pop.
- Serve immediately or store in an airtight container in the freezer for up to 2 weeks.
Enjoy these ice pops as a chilled, energizing snack that's easy to make and perfect for a sunny afternoon.
9. Peanut Butter Banana Frozen Yogurt (Dairy-Free)
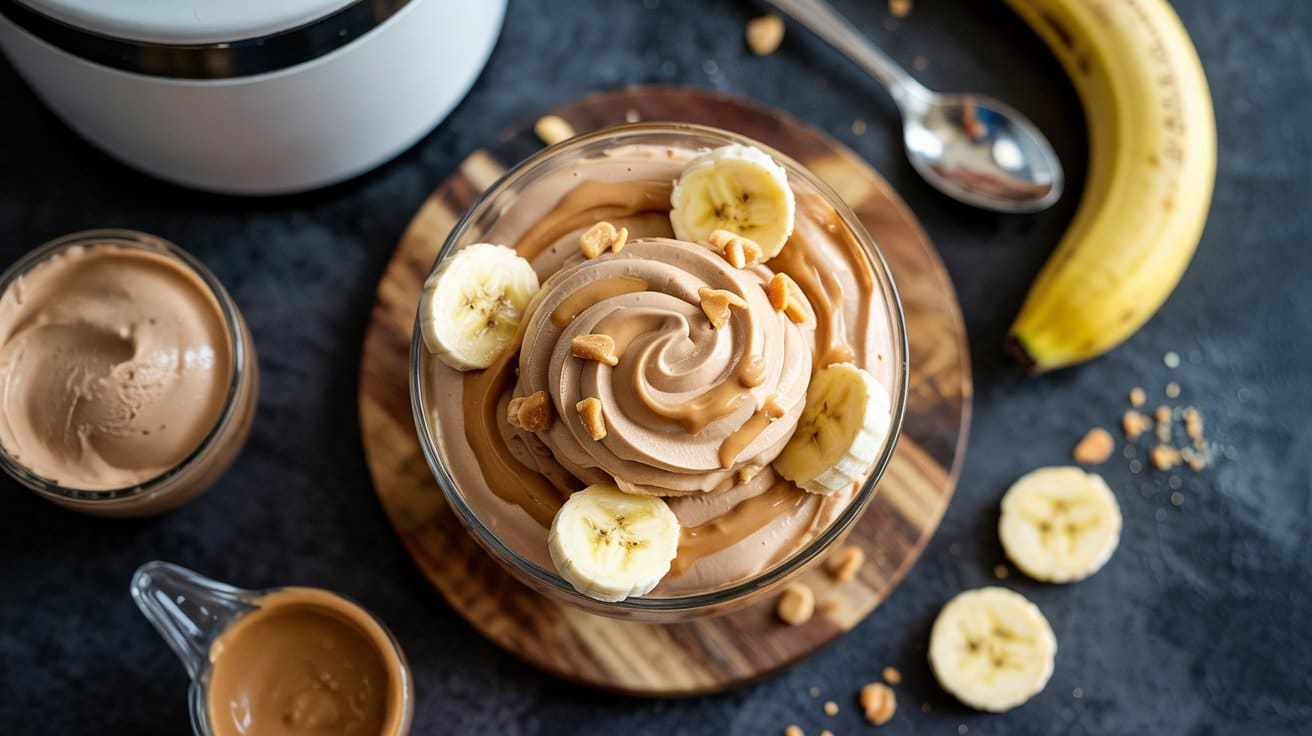
This peanut butter banana frozen yogurt is a refreshing treat that combines creamy textures with natural sweetness. It's made with a dairy-free yogurt base, making it a great option for those avoiding dairy but still wanting a rich and satisfying dessert.
The flavors of ripe banana and natural peanut butter blend smoothly, creating a cool, wholesome snack you'll want to reach for again and again. Plus, it's simple and quick to make with just a few ingredients.
Why This Recipe Works
This frozen yogurt mixes familiar flavors with a healthy dairy-free alternative, keeping things both tasty and light. It's a great option for a cooling treat that feels indulgent without added sugars or dairy.
- Convenience - Uses simple ingredients and requires minimal prep time.
- Flavor balance - Combines the natural sweetness of banana with the nutty richness of peanut butter.
- Texture - Smooth, creamy, and refreshing, similar to traditional frozen yogurt.
- Appeal - Suitable for dairy-free eaters and anyone looking for a cool, healthy dessert option.
Ingredient Swap Ideas
If you want to adapt the recipe to your tastes or dietary preferences, swapping ingredients is easy without losing the intended flavor and texture.
- Yogurt base - Use almond milk yogurt instead of coconut milk yogurt for a milder flavor.
- Nut butter - Swap natural peanut butter with almond or cashew butter for a different nutty profile.
- Sweetener - Add a touch of maple syrup or agave if you prefer a sweeter frozen yogurt.
- Fruit - Replace bananas with mango or avocado for a different creamy base and flavor.
Ingredients
- 1 ½ cups dairy-free yogurt - Choose coconut or almond milk yogurt, unsweetened if possible.
- 2 ripe bananas - Peeled and frozen for best texture and natural sweetness.
- 3 tablespoons natural peanut butter - Smooth or crunchy based on preference.
- 1 teaspoon pure vanilla extract - Adds subtle depth and aroma.
- Pinch of salt - Enhances the peanut butter flavor.
Instructions
- Place the frozen bananas, dairy-free yogurt, peanut butter, vanilla extract, and salt into a food processor or high-speed blender.
- Blend until smooth and creamy, scraping down the sides as needed to ensure even mixing.
- Taste and adjust the flavor, adding a little more peanut butter or vanilla if you want it richer.
- Transfer the mixture into an airtight container and freeze for at least 1 hour to firm up slightly before serving.
- Scoop into bowls and enjoy immediately for a softer texture, or let it thaw a bit for a creamier consistency.
This recipe offers a simple way to enjoy a cool, dairy-free dessert with wholesome ingredients you can feel good about serving.
10. Berry Coconut Milk Fudge Bars
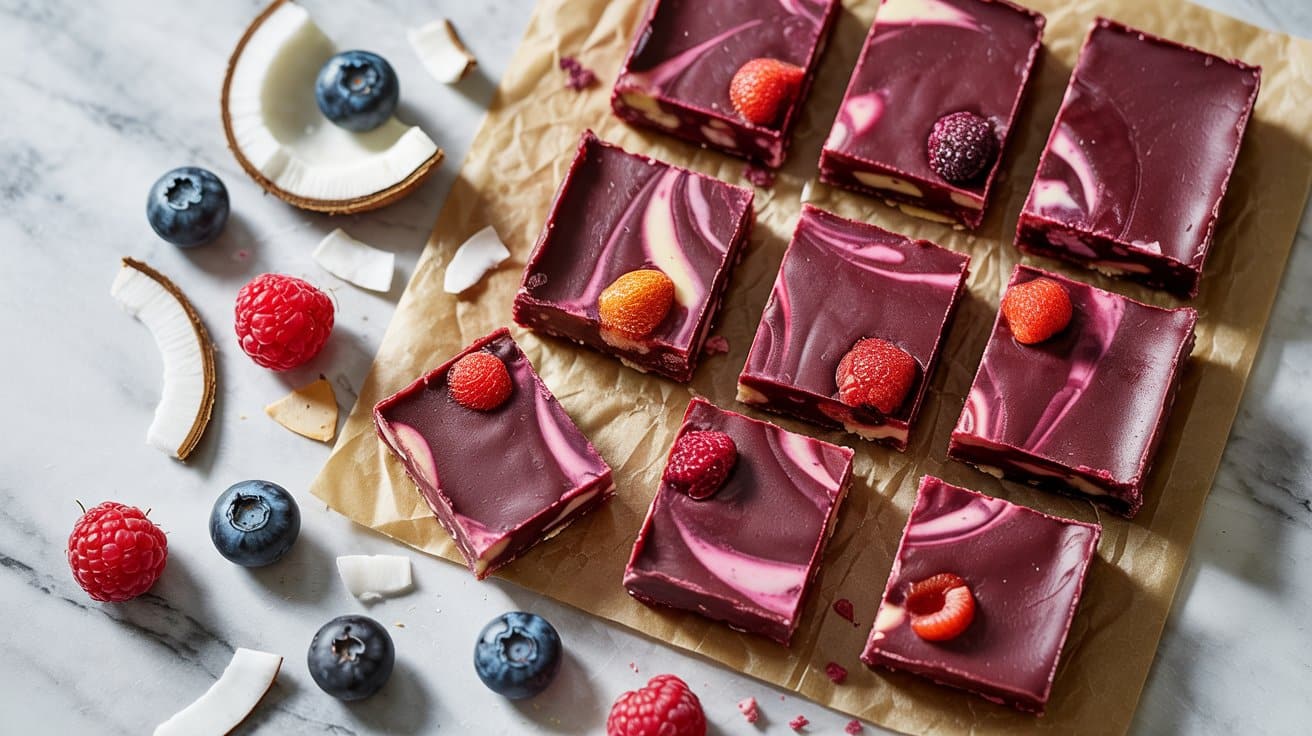
These Berry Coconut Milk Fudge Bars combine rich chocolate flavor with the fresh sweetness of mixed berries, creating a tasty frozen treat that feels both indulgent and refreshing. The fudgy texture goes well with the creamy coconut milk, making the bars a great choice for a cool dessert or snack, especially during warmer days.
The recipe is straightforward, relying on simple ingredients and no-bake preparation to save time without sacrificing flavor or texture. It's a wonderful option for those who want a healthy-ish dessert that still feels satisfying and fun.
Why This Recipe Works
This recipe balances the creamy richness of fudge with the bright, fruity notes from berries, resulting in a dessert that feels special but is easy to prepare. The use of coconut milk lends a smooth texture, and freezing the bars gives them a refreshing firmness.
- Convenience - No-bake and freezer-friendly, you can prepare these bars in advance and enjoy them anytime.
- Flavor balance - Combines sweet chocolate with tart mixed berries for a lively blend.
- Texture - Creamy, fudgy interior with bits of berry adding bursts of freshness.
- Diet-friendly - Dairy-free thanks to coconut milk, appealing to those with dietary preferences.
Ingredient Swap Ideas
Swapping ingredients in this recipe is simple and allows you to tailor the bars to your taste or dietary needs without losing the overall appeal. The flexibility helps you include or exclude certain ingredients based on availability or preference.
- Mixed berries - Use any frozen or fresh berries you have, such as raspberries, blackberries, or blueberries.
- Coconut milk - Swap for any full-fat plant-based milk like almond or cashew milk for a different creamy base.
- Dark chocolate - Replace with dairy-free or vegan chocolate chips to keep the bars dairy-free.
- Sweetener - Use maple syrup, agave nectar, or honey if you prefer a natural liquid sweetener instead of granulated sugar.
Ingredients
- 1 cup mixed berries fresh or frozen (such as strawberries, blueberries, raspberries)
- 1 cup full-fat coconut milk canned for best creaminess
- 1 cup dark chocolate chips or chopped dark chocolate
- ¼ cup coconut oil melted, helps achieve fudgy texture
- ¼ cup maple syrup or preferred liquid sweetener
- 1 teaspoon vanilla extract
- Pinch of salt
Instructions
- Line an 8x8-inch baking dish with parchment paper, leaving excess hanging over the sides for easy removal later.
- In a medium saucepan over low heat, combine coconut milk, coconut oil, maple syrup, and a pinch of salt. Stir gently until the mixture is warm and fully combined.
- Remove from heat and add the dark chocolate chips, stirring until the chocolate melts completely and the mixture is smooth and glossy. Stir in the vanilla extract.
- Allow the chocolate mixture to cool slightly, then gently fold in the mixed berries, taking care not to break them up too much.
- Pour the mixture into the prepared dish and spread evenly. Place in the freezer for at least 4 hours or until firm.
- Once firm, use the parchment paper overhang to lift the fudge out of the dish. Cut into bars and store in an airtight container in the freezer until ready to enjoy.
11. No-Churn Oat Milk & Cinnamon Swirl Ice Cream
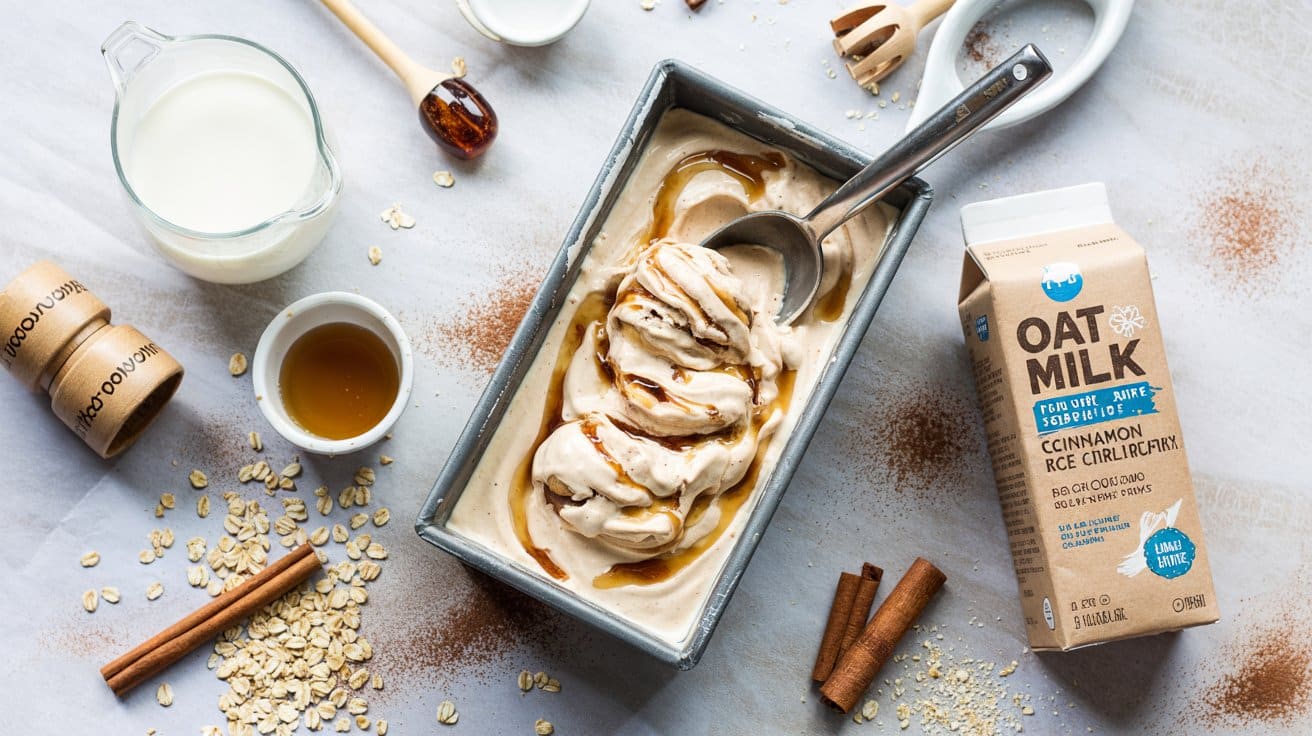
This no-churn oat milk and cinnamon swirl ice cream combines creamy oat milk with warm cinnamon tones, creating a subtly sweet treat that feels just right for autumn. The addition of a maple syrup swirl adds a lovely natural sweetness and a touch of richness without any fuss.
The recipe is straightforward and requires no ice cream maker, making it an accessible option for a simple homemade dessert. It's a comforting yet refreshing way to enjoy plant-based ice cream that brings cozy flavors to your table.
Why This Recipe Works
This recipe offers a tasty, dairy-free spin on classic ice cream with minimal equipment and prep. It's a fantastic way to enjoy smooth, cinnamon-infused ice cream that shows the natural sweetness of maple syrup.
- Convenience - No ice cream maker necessary; simple to prepare and freeze.
- Flavor balance - Gentle cinnamon spice goes with the creamy oat milk base beautifully.
- Texture - Smooth and creamy with a soft swirl of syrup for interest.
- Appeal - Dairy-free and plant-based, suitable for many dietary preferences.
Ingredient Swap Ideas
Adjusting the ingredients makes this recipe flexible enough to suit different tastes or dietary needs without losing the comforting flavor.
- Oat Milk - Substitute with almond or cashew milk if you prefer a nutty note.
- Maple Syrup - Use agave syrup or honey for a different natural sweetness.
- Cinnamon - Experiment with ground nutmeg or ginger for an alternative warm spice.
- Vanilla Extract - Swap with almond extract to add a slight nutty aroma.
Ingredients
- 2 cups oat milk - Use unsweetened for better control of sweetness.
- 1 cup full-fat coconut milk - Adds richness and creaminess.
- ½ cup maple syrup - Provides natural sweetness and the signature autumn flavor swirl.
- 1 teaspoon ground cinnamon - For warm, spicy notes throughout.
- 1 teaspoon vanilla extract - Enhances overall flavor depth.
- ¼ teaspoon salt - Balances sweetness and intensifies flavors.
Instructions
- In a large mixing bowl, whisk together the oat milk, coconut milk, maple syrup, cinnamon, vanilla extract, and salt until fully combined.
- Pour half of the mixture into a freezer-safe loaf pan or container. Drizzle half of the remaining maple syrup over the layer, then gently swirl it with a knife or skewer to create marbled patterns.
- Add the rest of the oat milk mixture on top, followed by the remaining maple syrup. Swirl again gently to get layered cinnamon and syrup ribbons throughout the ice cream.
- Cover the container tightly and freeze for at least 6 hours or overnight until the ice cream is firm and scoopable.
- Remove from the freezer about 5 minutes before serving to soften slightly. Scoop into bowls or cones and enjoy the smooth, spiced flavor with sweet maple swirls.
12. Pineapple Mint Popsicles
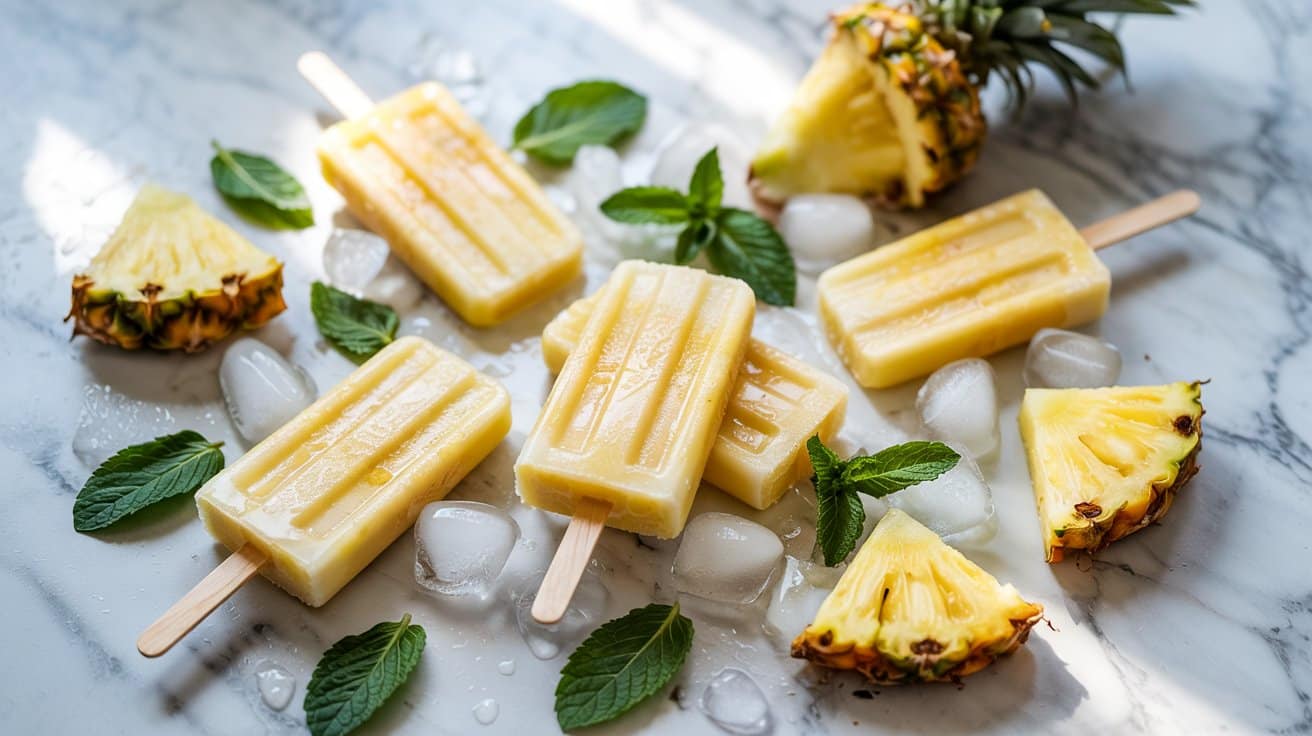
These pineapple mint popsicles are a refreshing way to cool down on a warm day. Combining fresh pineapple juice with crushed mint creates a bright and uplifting flavor that's both sweet and cooling.
The icy texture makes them enjoyable no matter the occasion, and the simple ingredients mean you can prepare them quickly without fuss. They're a fun treat for adults and kids alike.
Why This Recipe Works
This recipe delivers a fresh, bright flavor that wakes up your palate with every bite. It's simple to make and offers a healthy, low-calorie alternative to sugary store-bought popsicles.
- Convenience - Requires minimal prep with just a few ingredients and a freezing step.
- Flavor balance - The sweetness of pineapple goes with the cooling brightness of fresh mint.
- Texture - Icy and smooth popsicles with small bursts of mint leaves for added interest.
- Appeal - Ideal for family-friendly treats and summer gatherings without artificial additives.
Ingredient Swap Ideas
You can easily adapt this recipe to suit different tastes or dietary preferences by swapping a few ingredients while keeping the refreshing character intact.
- Pineapple juice - Use fresh orange or mango juice for a different fruity flavor.
- Mint - Replace with basil or lemon balm for a unique herbal twist.
- Sweetener - Substitute sugar/honey with agave syrup or maple syrup for a vegan option.
- Citrus addition - Add a splash of lime juice to improve the citrusy brightness if you like a bit more tang.
Ingredients
- 2 cups fresh pineapple juice - Strained to remove pulp for a smooth texture.
- ¼ cup fresh mint leaves - Washed and roughly crushed to release flavor.
- 2 tablespoons honey or maple syrup - For natural sweetness, adjust to taste.
- 1 tablespoon fresh lime juice - Adds a subtle tang that balances the sweetness.
- 1 cup water - To dilute the mixture slightly for easy freezing.
Instructions
- In a large bowl, combine the pineapple juice, crushed mint leaves, honey or maple syrup, lime juice, and water. Stir well until the sweetener dissolves completely.
- Let the mixture sit for about 10 minutes at room temperature to allow the mint to infuse its flavor.
- Pour the liquid evenly into popsicle molds, making sure to distribute the mint leaves so they are scattered throughout.
- Insert sticks into the molds and place them in the freezer. Freeze for at least 4 hours, or until fully solid.
- To unmold, briefly run warm water over the outside of the molds to loosen the popsicles, then gently pull them out. Serve immediately and enjoy the refreshing taste.
13. Frozen Coconut Yogurt Fruit Parfaits
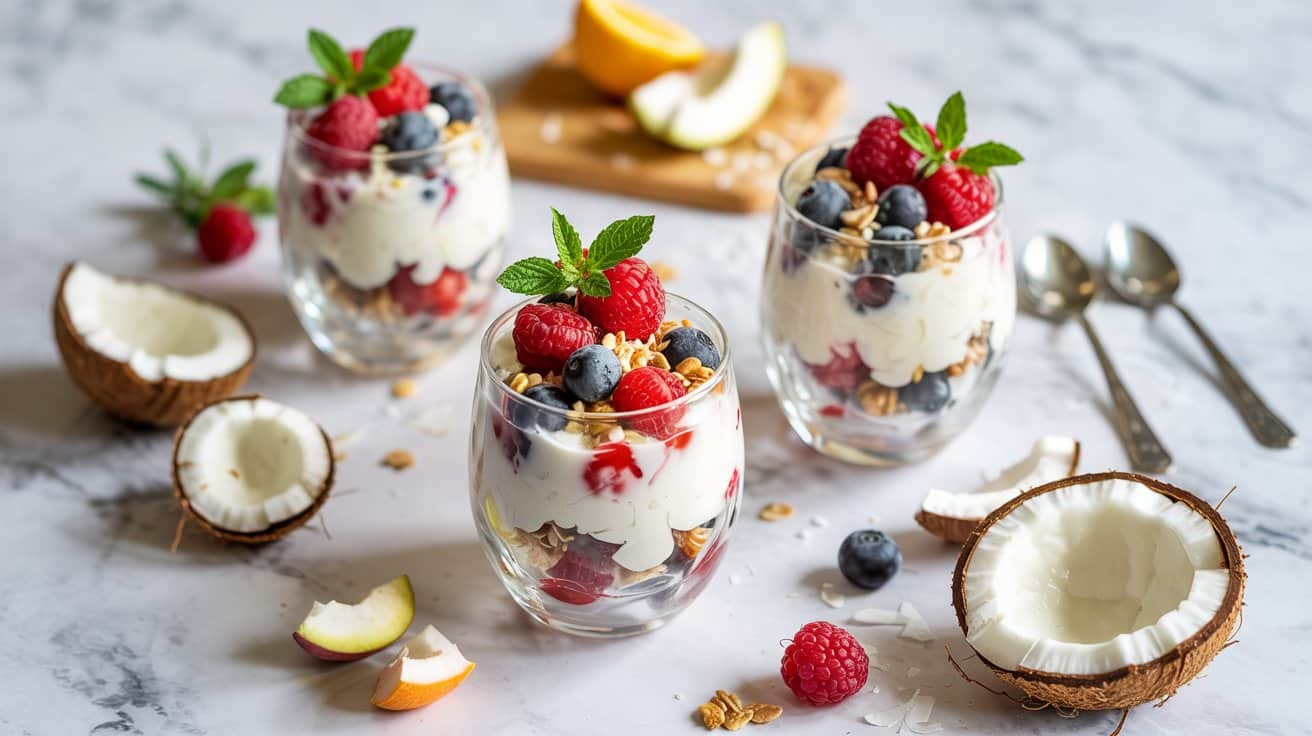
These frozen coconut yogurt fruit parfaits bring together refreshing layers of creamy coconut yogurt, sweet berry compote, and crunchy granola. The combination offers a balance of textures and flavors that make this treat light yet satisfying.
They are simple to prepare, making them a great option for a quick breakfast or a healthy dessert. Plus, the frozen coconut flakes on top add an extra cool and tropical touch that's pleasant on warm days.
Why This Recipe Works
This recipe stands out for its simplicity and well-rounded flavor, providing a wholesome option for busy days or casual gatherings.
- Convenience - The parfaits come together quickly and can be made ahead for easy serving.
- Flavor balance - Creamy coconut yogurt goes well with tart berry compote and sweet granola.
- Texture - Smooth yogurt layers alternate with crunchy granola and crisp frozen coconut flakes.
- Appeal - The visually attractive layers and tropical notes appeal to a wide range of tastes.
Ingredient Swap Ideas
Swapping ingredients helps adapt the parfaits to dietary preferences or flavor variations without losing their core appeal.
- Berry compote substitute - Use mango or peach puree for a different fruity twist.
- Granola choice - Opt for nut-free granola to accommodate allergies or use toasted oats for a simpler crunch.
- Yogurt alternatives - Try almond or soy-based yogurt to keep the parfait dairy-free while maintaining creaminess.
- Frozen coconut flakes - Toasted coconut flakes can replace frozen ones if you prefer a crunchier topping.
Ingredients
- 1 ½ cups coconut yogurt - Choose unsweetened or lightly sweetened for best results.
- 1 cup mixed berry compote - Made from fresh or frozen berries cooked down with a bit of natural sweetener.
- 1 cup granola - Select your favorite variety with nuts or seeds as desired.
- ½ cup frozen coconut flakes - Ready-to-use or homemade by freezing fresh coconut flakes.
Instructions
- Prepare the berry compote by simmering mixed berries with a tablespoon of honey or maple syrup in a small saucepan over medium heat. Let it thicken slightly, then cool completely.
- In clear serving glasses or jars, start by spooning a layer of coconut yogurt to cover the bottom.
- Add a layer of the cooled berry compote over the yogurt, followed by a sprinkle of granola to add crunch. Repeat these layers until the glasses are nearly full.
- Finish with a generous topping of frozen coconut flakes to keep the parfait cool and add extra texture.
- Serve immediately for best texture, or refrigerate for 30 minutes if you prefer it slightly chilled but not fully frozen.
These parfaits are great for a quick, nutritious snack or as a refreshing end to a meal. The components come together easily and offer a balanced mix of creamy, sweet, and crunchy bites.
14. Chocolate Hazelnut Dairy-Free Ice Cream
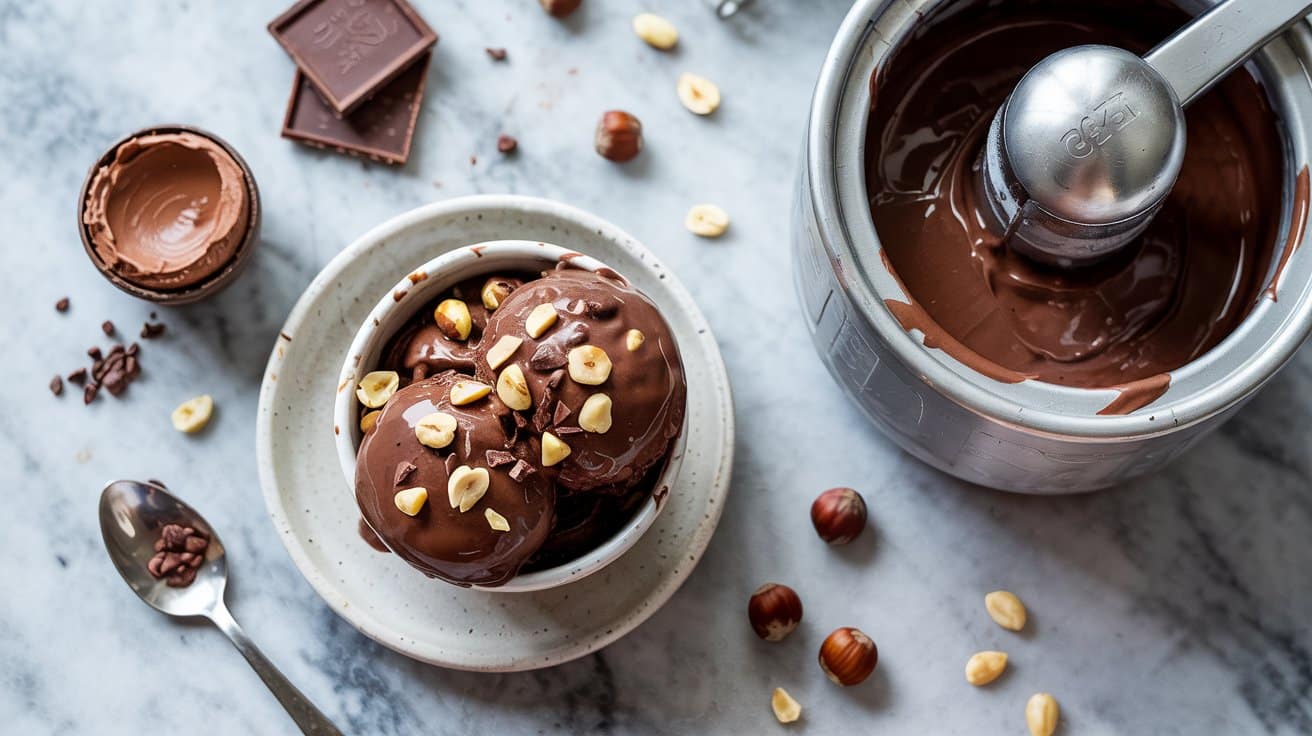
This chocolate hazelnut dairy-free ice cream offers a creamy, rich treat without any dairy ingredients. It combines the deep, roasted flavor of hazelnuts with smooth cocoa for a gelato-inspired dessert that's both satisfying and wholesome.
You can easily make it at home using simple ingredients and an ice cream maker. The result is a velvety texture with a balanced chocolate nuttiness that works well as a sweet snack or a lovely finish to a meal.
Why This Recipe Works
This recipe delivers a luscious and dairy-free ice cream option that's both tasty and versatile. It's ideal for those seeking a plant-based dessert that doesn't compromise on flavor or texture.
- Convenience - Uses pantry-friendly ingredients and a straightforward preparation process.
- Flavor balance - Combines roasted hazelnuts with rich cocoa powder for a deep, satisfying taste.
- Texture - Produces a creamy, gelato-like consistency without using dairy.
- Appeal - Suitable for dairy-free diets while remaining indulgent enough to please chocolate lovers.
Ingredient Swap Ideas
Swapping a few ingredients can help this recipe fit personal preferences or dietary needs while keeping the core flavors intact.
- Hazelnuts - Use roasted almonds or cashews as a nut alternative with a similar creamy texture.
- Cocoa powder - Substitute with carob powder for a milder, caffeine-free chocolate flavor.
- Sweetener - Replace maple syrup with agave nectar or coconut sugar for different sweetness profiles.
- Plant milk - Use oat milk or almond milk instead of coconut milk if you prefer a lighter base.
Ingredients
- 1 cup roasted hazelnuts - Skins removed for a smoother texture.
- 2 cups full-fat coconut milk - Provides creaminess without dairy.
- ⅓ cup unsweetened cocoa powder - Adds rich chocolate flavor.
- ½ cup pure maple syrup - Natural sweetener balancing bitterness.
- 1 teaspoon vanilla extract - Enhances the overall flavor depth.
- ¼ teaspoon salt - Brings out the chocolate and hazelnut notes.
Instructions
- Place the roasted hazelnuts in a food processor and blend until finely ground and starting to form a paste.
- In a mixing bowl, whisk together the coconut milk, cocoa powder, maple syrup, vanilla extract, and salt until fully combined and smooth.
- Stir in the hazelnut paste carefully, making sure it's evenly distributed throughout the mixture.
- Pour the ice cream base into an ice cream maker and churn according to the manufacturer's instructions, usually about 20 to 25 minutes, until thickened and creamy.
- Transfer the ice cream to a freezer-safe container and freeze for at least 2 hours before serving to firm up.
This homemade chocolate hazelnut ice cream offers a nice dairy-free option that's both rich and satisfying, made from real ingredients you can feel good about.
15. Raspberry Almond Butter Ice Cream Sandwiches
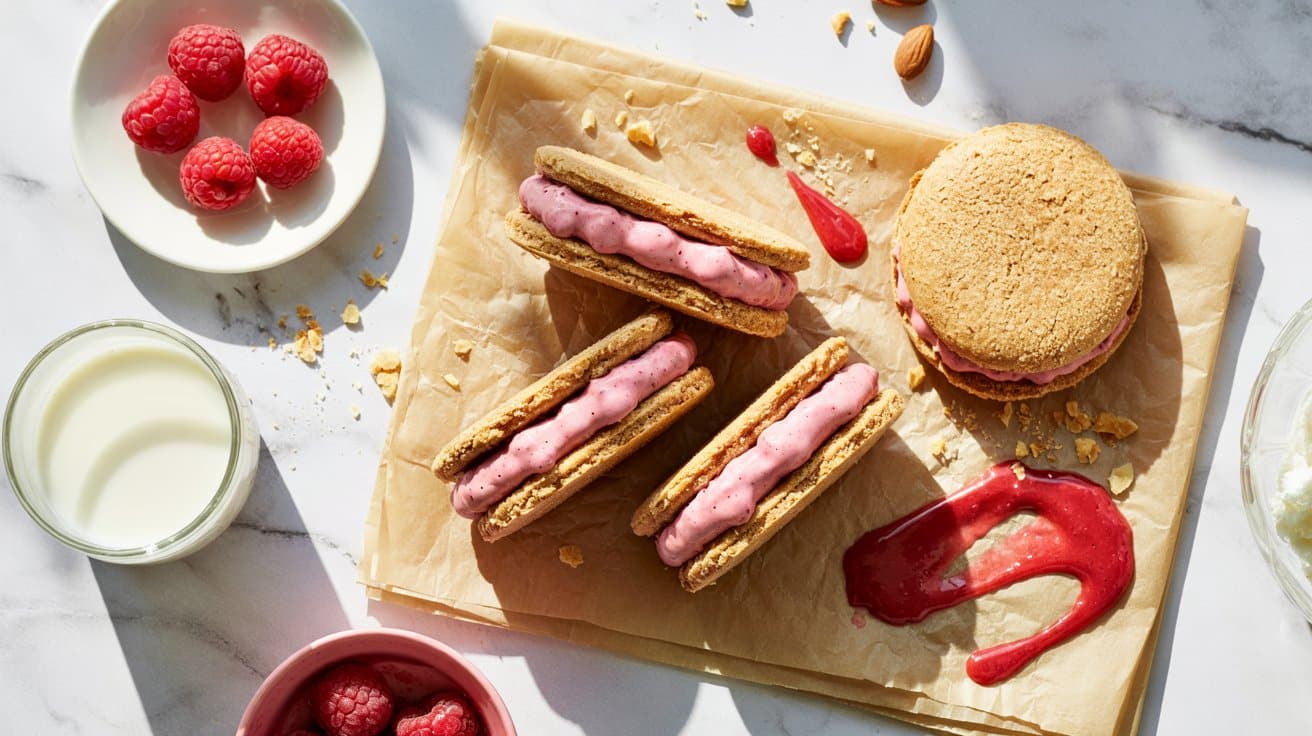
These Raspberry Almond Butter Ice Cream Sandwiches bring together the best of two worlds: crisp, chewy cookies hugging a creamy, flavorful frozen filling. The combination of nutty almond butter and bright, tart raspberry raspberry creates a refreshing yet indulgent treat.
This recipe is straightforward and rewarding, letting you whip up a dessert that feels special without complexity. It's an inviting homemade option for warm days, or anytime you want a satisfying cool snack with a bit of fruit and richness.
Why This Recipe Works
This recipe combines familiar textures and flavors in a way that feels fresh and satisfying. The balance of sweet, tart, and nutty elements makes these sandwiches enjoyable for a range of tastes.
- Convenience - Use store-bought cookies or make your own; assembly is quick and freezer-friendly.
- Flavor balance - Creamy almond butter goes well with bright raspberry for a well-rounded taste.
- Texture - Crisp cookie exterior contrasts with smooth, icy filling for a pleasant bite.
- Appeal - Handheld and portioned, they're ideal for casual serving or a crowd-pleasing dessert.
Ingredient Swap Ideas
You can adjust this recipe easily by swapping a few ingredients to suit dietary preferences or what you have on hand.
- Cookie base - Use gluten-free or nut-free cookies if needed without changing the sandwich concept.
- Almond butter - Try peanut butter or cashew butter to shift the nutty flavor slightly.
- Fruit layer - Fresh or frozen raspberries can be replaced with strawberries or blueberries for a different berry note.
- Dairy-free option - Substitute ice cream with a coconut milk or almond milk based frozen dessert.
Ingredients
- 12 soft chocolate chip cookies - For sandwich bases, homemade or store-bought.
- 1 cup almond butter - Smooth variety for creamy filling.
- 1 cup heavy cream - To whip and enrich the almond butter layer.
- ½ cup powdered sugar - Adds sweetness and helps create a smooth texture.
- 1 cup fresh raspberries - Rinsed and gently mashed for layering.
- 1 teaspoon vanilla extract - Enhances the overall flavor.
- Pinch of salt - Balances the sweetness.
Instructions
- Whip the heavy cream in a chilled bowl until soft peaks form. Set aside.
- In a separate bowl, beat the almond butter, powdered sugar, vanilla extract, and salt together until smooth.
- Gently fold the whipped cream into the almond butter mixture to create a light, creamy filling.
- On the flat side of six cookies, spread a layer of the almond butter mixture about 2 tablespoons thick.
- Add a thin layer of mashed raspberries over the almond butter. Top with remaining cookies to form sandwiches, pressing gently.
- Place the sandwiches on a baking sheet lined with parchment paper and freeze for at least 2 hours, until firm.
- Remove from the freezer about 5 minutes before serving to soften slightly for easier eating.
These sandwiches keep well frozen in an airtight container for up to one week, making them a handy sweet treat ready whenever you want.
16. Spiced Pumpkin Coconut Milk Ice Cream
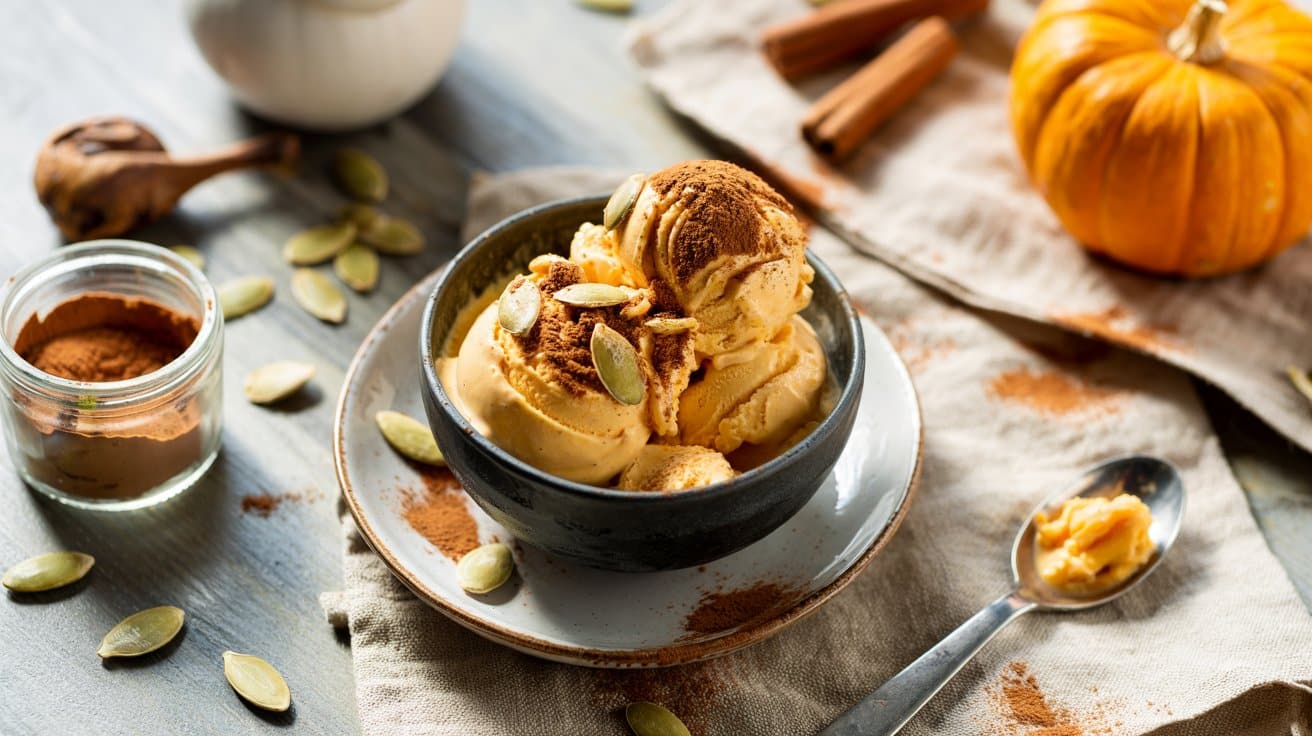
This pumpkin coconut milk ice cream is a seasonal treat that balances warming spices with creamy sweetness. It combines smooth coconut milk with rich pumpkin puree and a hint of cinnamon, nutmeg, and cloves for a comforting flavor that feels like fall in every bite.
Making this ice cream is straightforward and doesn't require fancy equipment. You get a luscious dairy-free dessert that's both satisfying and refreshing after a filling meal or as a cozy snack anytime.
Why This Recipe Works
This ice cream provides a great way to enjoy pumpkin-spiced flavors with a creamy, naturally dairy-free base. It's comforting, simple to make, and versatile across diets.
- Convenience - Uses canned pumpkin and coconut milk, which are pantry-friendly and easy to blend.
- Flavor balance - Combines warm spices with subtle sweetness and rich coconut undertones.
- Texture - Smooth and creamy with a delicate firmness that melts nicely.
- Appeal - Suitable for those avoiding dairy but still craving a traditional feel.
Ingredient Swap Ideas
Swapping ingredients can help adjust this ice cream for specific diets or personal preferences without losing the core taste.
- Pumpkin puree - Substitute canned sweet potato puree for a milder, slightly sweeter flavor.
- Coconut milk - Use almond milk with added coconut extract if you prefer a lighter texture.
- Sweetener - Replace maple syrup with agave or honey depending on sweetness preference or dietary needs.
- Spices - Adjust spices by adding ginger or cardamom for a different warm spice profile.
Ingredients
- 1 cup canned pumpkin puree - Smooth and ready to use, the base for pumpkin flavor.
- 1 ½ cups full-fat coconut milk - Provides creaminess and natural richness.
- ¾ cup maple syrup - Adds natural sweetness with a subtle maple flavor.
- 1 teaspoon ground cinnamon - Core warming spice for fall flavors.
- ½ teaspoon ground nutmeg - Adds a nutty, aromatic depth.
- ¼ teaspoon ground cloves - Gives a hint of spice intensity.
- ½ teaspoon vanilla extract - Enhances sweetness and rounds out flavors.
- ¼ teaspoon salt - Balances the sweetness and boosts flavor.
Instructions
- In a mixing bowl, whisk together the pumpkin puree, coconut milk, maple syrup, cinnamon, nutmeg, cloves, vanilla extract, and salt until the mixture is smooth and uniform.
- Pour the mixture into your ice cream maker and churn according to the manufacturer's instructions, usually about 20 to 25 minutes, until it reaches a soft-serve consistency.
- Transfer the ice cream to a freezer-safe container, smoothing the top with a spatula. Cover with a lid or plastic wrap to prevent ice crystals.
- Freeze for at least 4 hours or until firm enough to scoop. Remove from the freezer a few minutes before serving to soften slightly.
- Serve the ice cream on its own or with a sprinkle of toasted pepitas or a drizzle of melted dark chocolate for added texture and flavor.
17. Lemon Basil Sorbet

Lemon basil sorbet combines the bright, zesty flavor of fresh lemons with the subtle, aromatic sweetness of basil. This sorbet is light and refreshing, making it an excellent palate cleanser or a cool treat on a warm day.
It's straightforward to prepare, requiring just a few fresh ingredients and a bit of time to freeze.
The texture is smooth and slightly creamy, with lively citrus notes balanced by the herbaceous basil infusion. This recipe is perfect if you want a homemade dessert that feels fresh and natural without needing fancy equipment.
Why This Recipe Works
This lemon basil sorbet offers a fresh, bright dessert option that's easy to make at home with minimal ingredients.
- Convenience - Requires only basic ingredients and standard freezing time, ideal for home cooks.
- Flavor balance - Combines tart lemon with aromatic basil for a bright, refreshing sorbet.
- Texture - Smooth, icy texture that melts nicely without being icy or grainy.
- Appeal - Perfect for a light dessert or palate cleanser for gatherings and family meals.
Ingredient Swap Ideas
Adjusting the ingredients helps tailor the sorbet to your dietary preferences or ingredient availability without losing its essence.
- Lemon juice - Use lime juice instead for a slightly different citrus twist.
- Basil - Try mint leaves for a refreshing change or a milder herbal flavor.
- Sugar - Substitute with honey or agave syrup if you prefer a natural sweetener, adjusting quantities to taste.
- Water - Replace half with coconut water for a hint of tropical flavor.
Ingredients
- 1 cup fresh lemon juice - About 4 to 5 lemons, freshly squeezed for bright citrus flavor.
- 1 tablespoon lemon zest - Finely grated to add extra lemon aroma and brightness.
- 1 cup water - Used to make the simple syrup and dilute the mixture.
- ¾ cup granulated sugar - Sweetens the sorbet while allowing the lemon and basil to shine.
- 1 cup fresh basil leaves - Packed, gently washed, and dried for the basil infusion.
Instructions
- Combine the water and sugar in a small saucepan over medium heat. Stir until the sugar dissolves completely and the mixture comes to a gentle simmer. Remove from heat.
- Add the fresh basil leaves to the hot syrup, cover, and let steep for 15 minutes to infuse the syrup with basil flavor. Strain out the basil leaves and discard them.
- Stir the lemon juice and lemon zest into the basil-infused syrup. Mix well to combine all the flavors evenly.
- Pour the mixture into a shallow container and freeze for about 1 hour. After 1 hour, stir vigorously with a fork to break up any ice crystals. Repeat this stirring process every 30 minutes for 2 to 3 hours until the sorbet is firm but scoopable.
- Once ready, scoop the sorbet into bowls or glasses. Garnish with a fresh basil leaf or a small lemon wedge if desired, and serve immediately.
18. Frozen Watermelon Mint Slushies
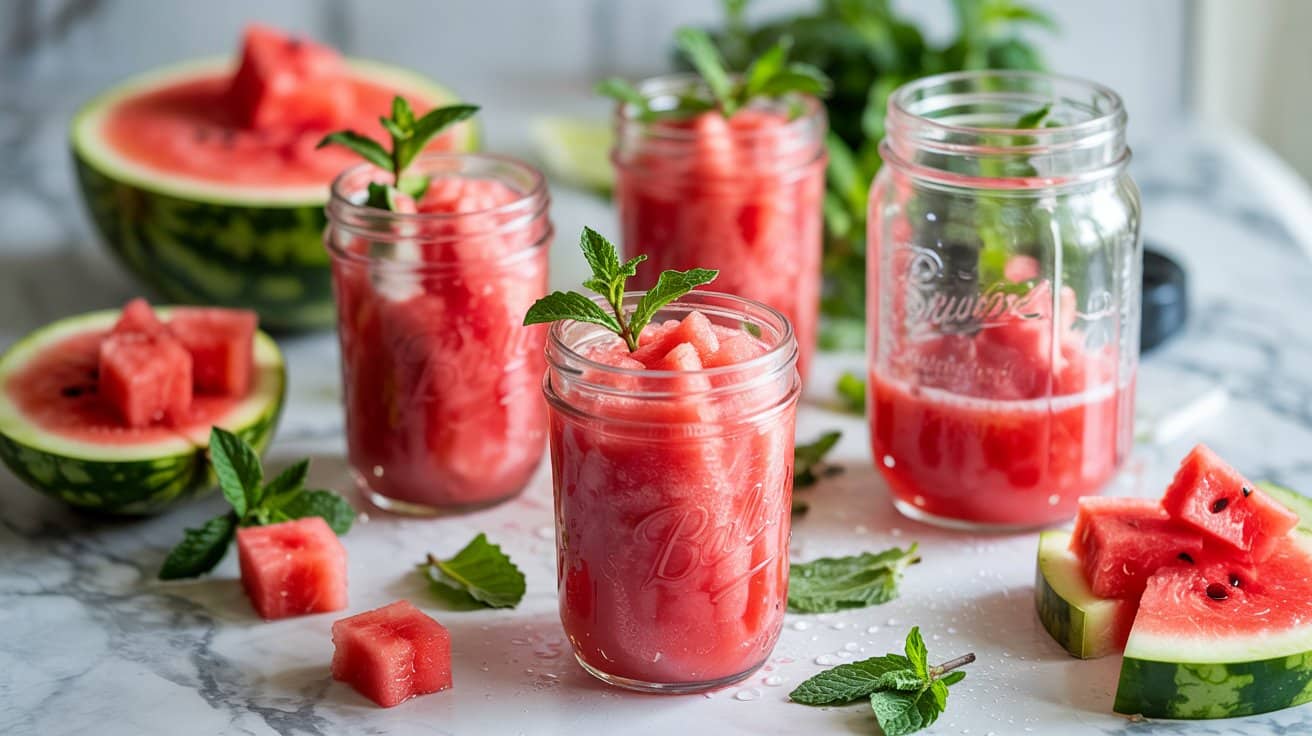
Frozen Watermelon Mint Slushies offer a refreshing way to cool down on a hot day. The combination of juicy watermelon and fresh mint creates a light, icy treat that's both flavorful and hydrating.
This recipe is easy to prepare, requiring just a few simple ingredients and no complicated steps, making it an ideal choice for a quick summer beverage you can enjoy anytime.
Why This Recipe Works
This slushie balances fresh fruitiness with a hint of mint, delivering a refreshing drink without added sugars or artificial flavors. It's a simple recipe that comes together quickly and is suitable for all ages.
- Convenience - Minimal ingredients and no blender needed if using a freezer-safe bag for crushing ice.
- Flavor balance - Sweet watermelon paired with cool mint creates a natural, refreshing taste.
- Texture - Soft icy crystals that are easy to sip or snack on, providing a fun summer treat.
- Appeal - Family-friendly and visually appealing with bright colors.
Ingredient Swap Ideas
Modifying the ingredients can help tailor these slushies to different preferences or dietary choices without losing their essence.
- Watermelon - Replace with cantaloupe or honeydew melon for a different melon flavor.
- Mint leaves - Use basil or cilantro for an alternative herbaceous note.
- Sweetener - Add a touch of honey or agave if you prefer a sweeter drink.
- Lime juice - Substitute with lemon juice for a slightly different citrus zip.
Ingredients
- 4 cups seedless watermelon - cubed and chilled for freshness.
- ¼ cup fresh mint leaves - washed and roughly chopped.
- 1 tablespoon fresh lime juice - adds a bright touch of acidity.
- 2 cups ice cubes - to create the slushie texture.
- Optional: 1 teaspoon honey or agave syrup - if you want extra sweetness.
Instructions
- Place the watermelon cubes, mint leaves, and lime juice in a blender. Blend until smooth and well combined.
- Add the ice cubes to the blender and pulse several times until the mixture reaches a slushie consistency. Avoid over-blending to keep the texture icy.
- Taste the slushie and add honey or agave syrup if you want it sweeter. Blend briefly to mix.
- Pour the slushie into glasses and garnish with a sprig of mint if desired. Serve immediately to enjoy the icy texture.
19. Salted Caramel Cashew Cream Pops
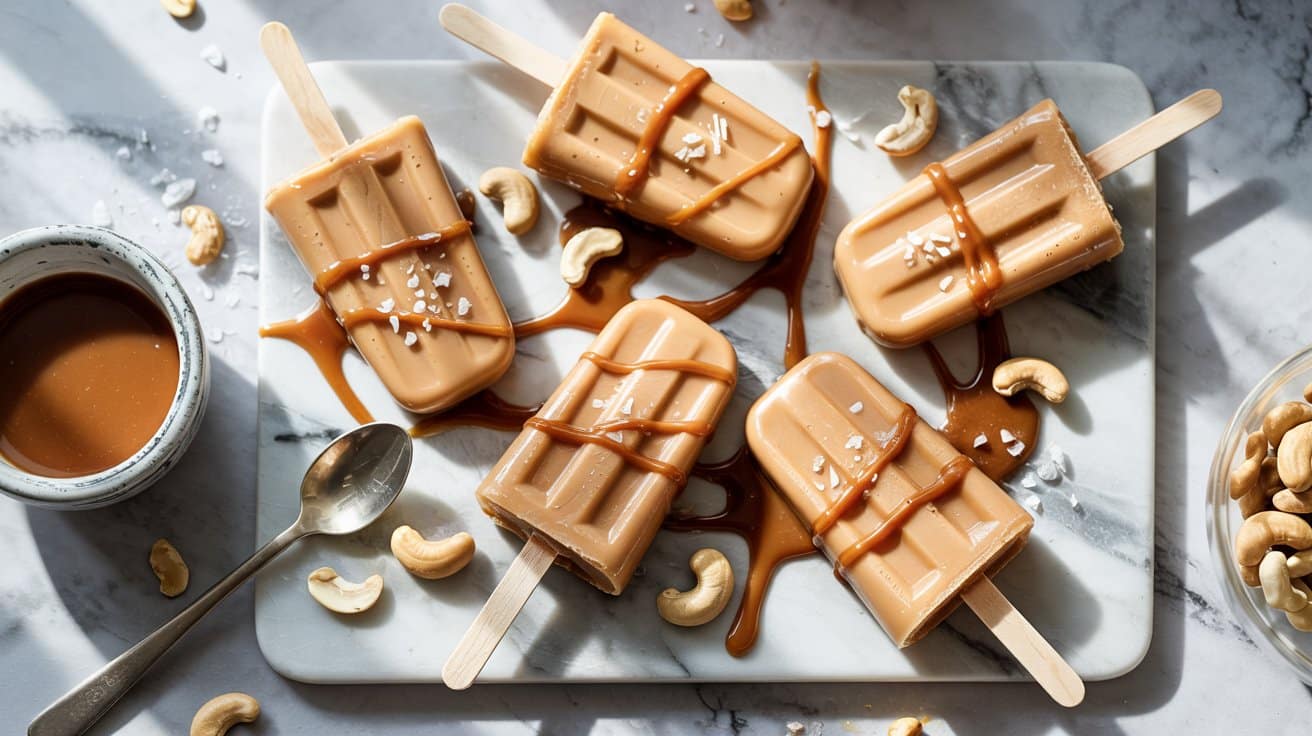
These popsicles offer a creamy, smooth treat balanced by the rich, buttery flavor of homemade salted caramel sauce. The cashew cream provides a velvety base that blends beautifully with the sweet and salty caramel, making every bite satisfyingly indulgent yet light.
They come together easily, requiring just a few ingredients and simple steps that are perfect for a refreshing snack or dessert on warm days.
If you're looking for a dairy-free frozen treat that feels a little special but stays approachable, this recipe fits the bill. The natural creaminess of cashews combined with the deep caramel notes creates a comforting flavor that's surprisingly easy to make ahead and store.
Why This Recipe Works
This recipe brings a great mix of flavors and textures in a simple format that's easy to prepare and enjoy.
- Balanced flavor - Combines creamy cashew base with homemade salted caramel for a sweet and salty harmony.
- Dairy-free option - Uses cashew cream as a smooth alternative to dairy cream, making it suitable for plant-based diets.
- Make-ahead convenience - Pops can be prepared in advance and stored for quick access anytime a cool treat is wanted.
- Rich texture - The cashew cream ensures each pop has a luscious mouthfeel that melts pleasantly.
Ingredient Swap Ideas
Adjustments can help tailor the recipe to your pantry or dietary needs while keeping the core idea intact.
- Use almond cream instead of cashew cream for a slightly different nutty flavor without losing the creamy texture.
- Replace maple syrup with agave nectar or honey as a natural sweetener alternative in the caramel sauce.
- Swap sea salt for smoked salt to add a subtle smoky twist to the salted caramel flavor.
- Use canned coconut milk in place of cashew cream to make the pops extra tropical and dairy-free.
Ingredients
- 1 cup raw cashews - Soaked for at least 4 hours, then drained for smooth cream.
- ¾ cup water - To blend with cashews for cream consistency.
- ½ cup coconut cream - Adds richness to the cashew base.
- ½ cup maple syrup - Sweetener for both the cream and caramel sauce.
- ¼ teaspoon sea salt - Enhances the salted caramel flavor.
- ½ cup granulated sugar - For making the salted caramel sauce.
- 2 tablespoons water - Used in caramel sauce preparation.
- 1 teaspoon vanilla extract - Adds warmth and depth to the cream.
Instructions
- Prepare the cashew cream by blending soaked cashews with ¾ cup water, coconut cream, ¼ cup maple syrup, and vanilla extract until smooth and creamy. Set aside.
- To make the salted caramel, combine granulated sugar and 2 tablespoons water in a saucepan over medium heat. Cook without stirring until the sugar melts and turns a deep amber color, about 6 to 8 minutes.
- Remove the caramel from heat and slowly whisk in the remaining ¼ cup maple syrup and sea salt. Allow the caramel to cool slightly but remain pourable.
- Spoon a layer of cashew cream into popsicle molds, then add a drizzle of salted caramel. Swirl lightly with a skewer or knife to create a marbled effect. Fill the molds with remaining cashew cream and top each with a little more caramel.
- Insert sticks and freeze the molds for at least 6 hours or until fully solid. To serve, run warm water briefly over the mold exterior to release the pops.
These salted caramel cashew cream pops provide a refreshing, creamy dessert leading with natural sweetness and a hint of salt that lingers pleasantly.
20. Dairy-Free Mocha Ripple Ice Cream
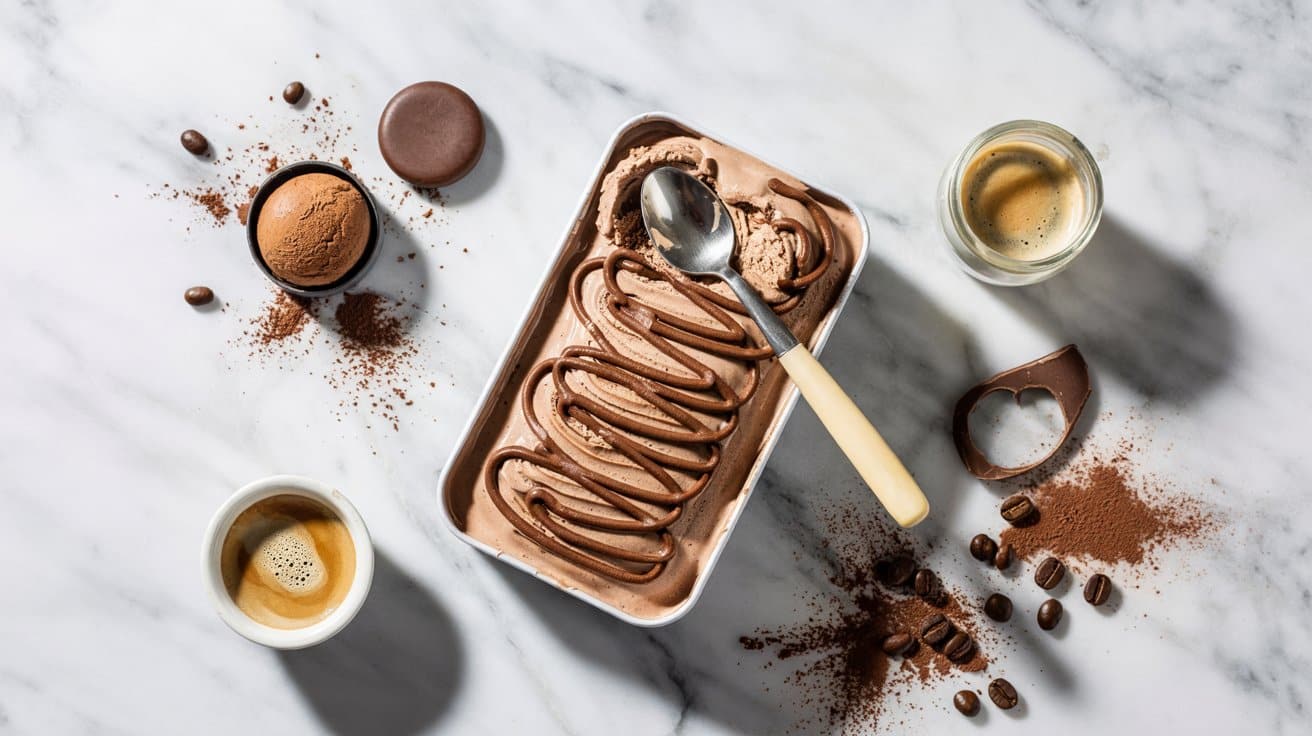
This Dairy-Free Mocha Ripple Ice Cream blends rich coffee and chocolate flavors with creamy coconut for a refreshing frozen treat. It's an excellent choice for anyone looking to enjoy classic mocha ice cream without dairy.
The texture combines the smoothness of coconut cream with swirls of deeply flavored espresso and chocolate, making every spoonful feel indulgent and energizing. Plus, it's surprisingly easy to prepare at home, requiring just a few ingredients and minimal hands-on time.
Why This Recipe Works
This recipe balances convenience with great flavor, offering a dairy-free dessert that feels special but doesn't demand much from your schedule.
- Convenience - Uses simple ingredients you can keep on hand and requires no ice cream maker.
- Flavor balance - Combines bold coffee with bittersweet chocolate and creamy coconut in harmony.
- Texture - Smooth and creamy base with chocolate ripples adding a pleasant contrast.
- Appeal - Suitable for those avoiding dairy without missing out on mocha ice cream enjoyment.
Ingredient Swap Ideas
Swapping ingredients in this recipe can help cater to different tastes or dietary needs while keeping it delicious and true to its mocha ripple character.
- Coconut cream - Replace with cashew cream for a slightly different nutty creaminess.
- Espresso - Use strong brewed coffee if you don't have an espresso machine available.
- Dark chocolate - Substitute with dairy-free chocolate chips or vegan chocolate bars for consistent melting.
- Sweetener - Maple syrup or agave can replace sugar for a natural alternative.
Ingredients
- 1 can (13.5 oz) full-fat coconut cream - Chilled well for a rich and creamy base.
- ¾ cup brewed espresso or strong coffee - Cooled.
- ½ cup sugar - Adjust to taste for sweetness.
- 1 teaspoon pure vanilla extract - improves the flavor.
- ¼ teaspoon salt - Balances the sweetness and enhances flavor.
- ½ cup dairy-free dark chocolate chips - Melted for the ripple effect.
Instructions
- Chill the coconut cream in the refrigerator overnight for best results. Scoop the solid cream into a mixing bowl, leaving the liquid behind.
- Whip the coconut cream using a hand mixer until it's light and fluffy, about 3 to 5 minutes.
- Mix the cooled espresso, sugar, vanilla extract, and salt in a separate bowl until the sugar dissolves completely. Gently fold this mixture into the whipped coconut cream until combined.
- Pour half of the ice cream mixture into a loaf pan. Warm the chocolate chips gently until melted and drizzle over the ice cream layer. Pour the remaining mixture on top and swirl lightly with a knife to create a ripple effect.
- Cover and freeze the pan for at least 6 hours or overnight until firm. Let sit at room temperature for about 5 minutes before scooping.
Serve chilled and enjoy a coffee and chocolate treat without the dairy.
Find more warm-weather desserts that skip dairy in this collection of dairy-free summer recipes for warm weather. If you need allergy-friendly sweets with robust flavor, explore gluten-free cookie recipes that satisfy.

Andrew Gray is a seasoned food writer and blogger with a wealth of experience in the restaurant and catering industries. With a passion for all things delicious, Andrew has honed his culinary expertise through his work as a personal chef and caterer.
His love for food led him to venture into food writing, where he has contributed to various online publications, sharing his knowledge and insights on the culinary world. As the proud owner of CooksCrafter.com, Andrew covers a wide range of topics, including recipes, restaurant reviews, product recommendations, and culinary tips.
Through his website, he aims to inspire and educate fellow food enthusiasts, offering a comprehensive resource for all things food-related.