Finding simple vegetable side dishes-small vegetable-based plates served alongside a main-that complement any main course can be a real timesaver in the kitchen. This collection of 20 easy vegetable sides offers a range of flavors and preparations to suit weeknight dinners, casual get-togethers, or any meal that needs a fresh, bright addition.
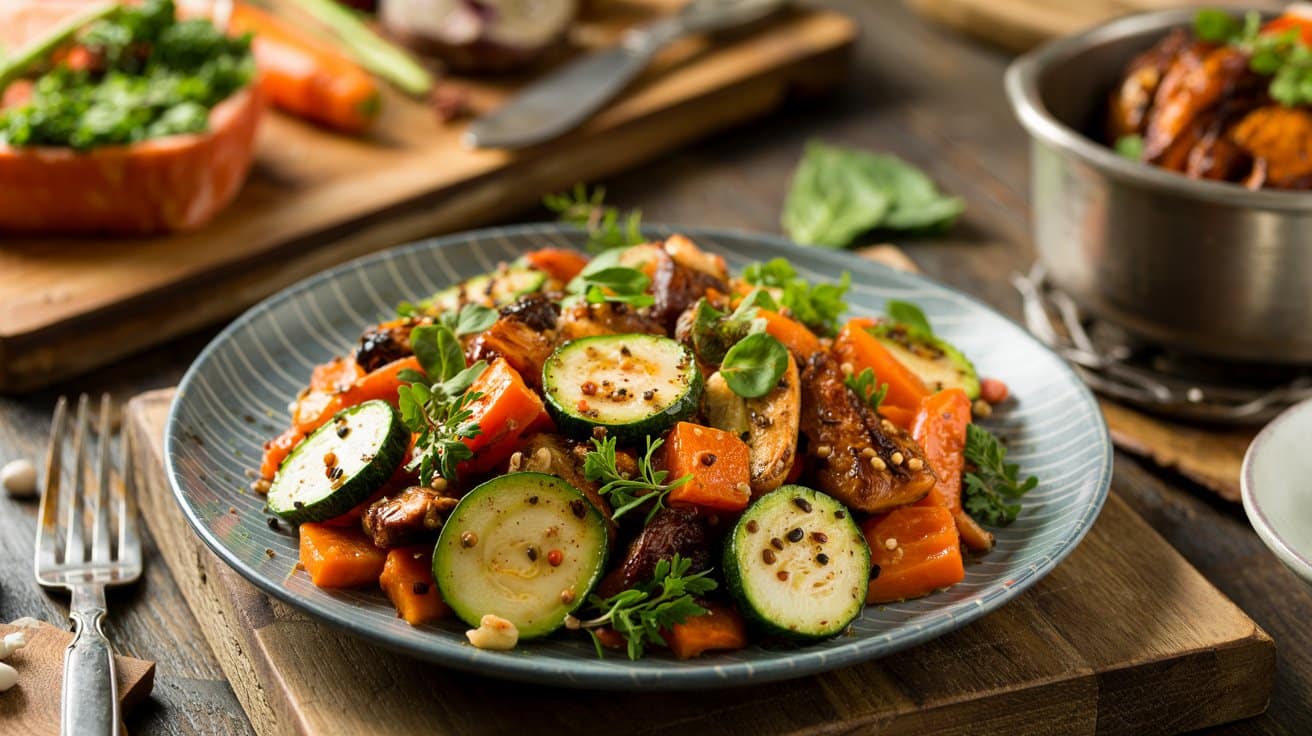
These recipes cover a variety of styles-from roasted and sautéed to fresh salads and quick pickles-giving you options that are both approachable and full of flavor. You'll find dishes that come together quickly, use everyday ingredients, and show seasonal vegetables in ways that brighten up any plate.
Whether you prefer warm, cozy sides or crisp, refreshing salads, this list has something to fit every mood and menu.
What makes these vegetable sides especially useful is how effortless they are to prepare, often requiring minimal hands-on time and easy cleanup. Each recipe focuses on boosting natural flavors with simple seasonings and techniques, making sure you get delicious results without extra fuss.
1. Garlic Roasted Broccoli
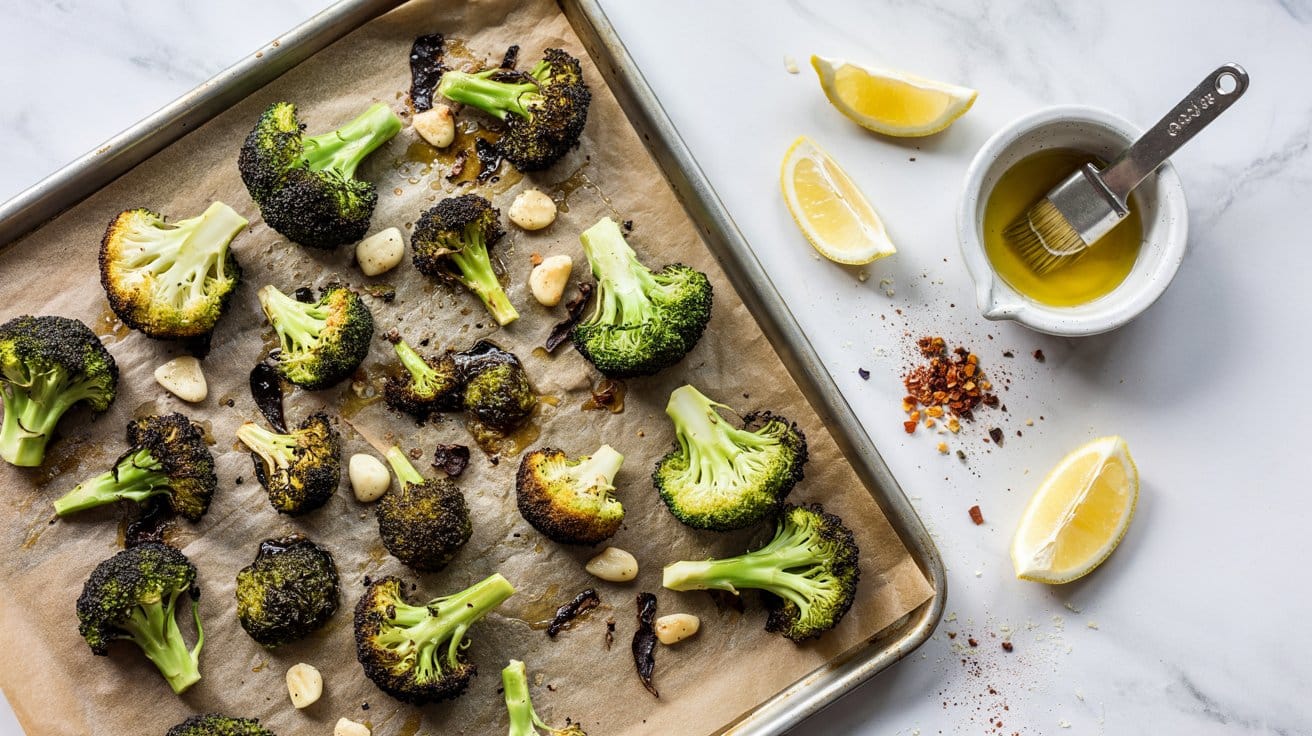
Garlic roasted broccoli is a simple side dish that brings out the best in this nutritious vegetable, which is high in vitamin C and fiber. Roasting the broccoli (about 425°F for 12-15 minutes) crisps the edges and deepens its natural flavor, while the garlic adds a fragrant, savory note that complements every bite.
This recipe is quick to prepare and requires minimal ingredients, making it an ideal choice for busy weeknights. The result is broccoli that is tender on the inside with satisfying crispy tips, offering a wonderful balance of texture and flavor.
For a savory roasted vegetable variation, consider miso cauliflower for bold umami.
For a simple pairing with seafood, consider vegetable side dishes that pair with garlic butter shrimp: side dishes that pair with garlic butter shrimp.
Why This Recipe Works
Garlic roasted broccoli combines ease and deliciousness in a way that fits seamlessly into any meal.
- Convenience - Prepping and roasting takes just minutes with little cleanup.
- Flavor balance - Roasting at about 425°F brings out a slight sweetness that goes well with the sharpness of garlic.
- Texture - Broccoli develops tender stalks and crispy, caramelized edges.
- Appeal - A wholesome side dish that works well for families and dinner guests alike.
Ingredient Swap Ideas
Swapping ingredients can help you tailor this dish to different diets or preferences without sacrificing its core charm; for quick crowd-pleasing bites, see three-ingredient appetizers for easy entertaining.
- Garlic - Use garlic powder if fresh cloves aren't available for a milder, easy alternative.
- Broccoli - Try cauliflower florets instead for a similar texture and roasting behavior.
- Olive oil - Substitute with avocado oil or any mild-flavored oil to suit your pantry (avocado oil has a higher smoke point).
- Seasoning - Add a squeeze of lemon juice or sprinkle of red pepper flakes for an extra layer of flavor.
Ingredients
- 1 large head of broccoli - cut into bite-sized florets.
- 3 tablespoons extra-virgin olive oil - for coating and roasting.
- 4 cloves garlic - minced finely to infuse flavor.
- ½ teaspoon salt - to season evenly.
- ¼ teaspoon freshly ground black pepper - to taste.
Instructions
- Preheat your oven to 425°F (220°C) and line a baking sheet with parchment paper or lightly grease it.
- In a large bowl, toss the broccoli florets with olive oil, minced garlic, salt, and black pepper until they are evenly coated.
- Spread the broccoli out in a single layer on the prepared baking sheet, making sure the pieces aren't overcrowded to encourage crisping.
- Roast for 18 to 22 minutes, stirring halfway through, until the broccoli is tender and the edges are golden and crisp.
- Remove from the oven and transfer to a serving dish. Serve warm as a flavorful, healthful side to your main course.
2. Lemon Parmesan Green Beans
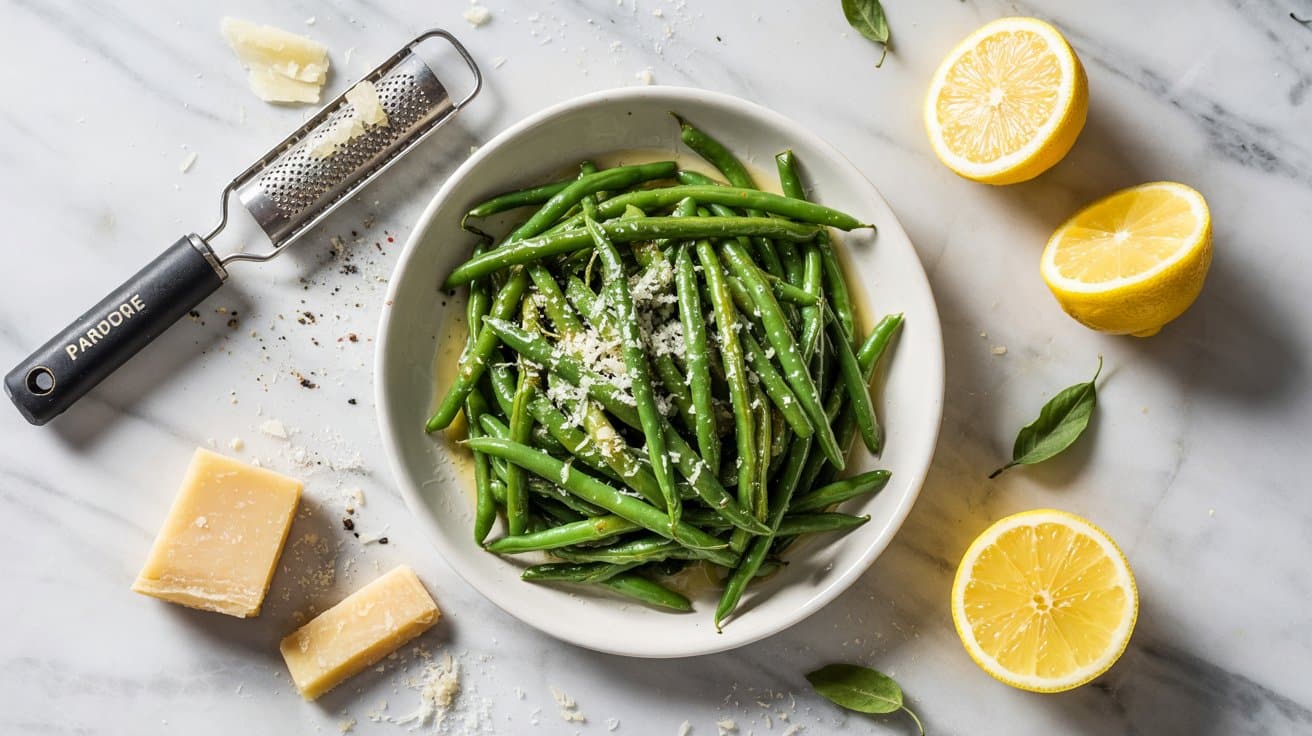
This dish offers fresh green beans quickly sautéed over medium-high heat with lemon zest for a bright, refreshing flavor that wakes up the palate. Topped with a sprinkle of Parmesan cheese, it creates a simple but satisfying combination of tangy citrus and savory cheese.
The preparation is straightforward and fits well into a weeknight dinner or as a side dish to any meal, cooking in about 6-8 minutes on the stovetop. The crispness of the green beans with the zesty lemon and sharp Parmesan makes it both flavorful and approachable for everyday cooking.
If you're planning a lemon-forward menu, find complementary options among side dishes to serve with lemon pound cake.
Why This Recipe Works
This recipe delivers a fresh, tangy side that complements many main dishes with ease.
- Convenience - Quick to prepare and cook, needing only a few ingredients you likely have on hand.
- Flavor balance - The lemon zest adds brightness while Parmesan brings a savory depth.
- Texture - Green beans stay tender-crisp, offering a satisfying bite.
- Appeal - Works well for family meals or casual gatherings without requiring complex steps.
Ingredient Swap Ideas
Adjusting a few ingredients here can tailor this recipe for different dietary needs or preferences without losing its essence.
- Parmesan cheese - Swap with Pecorino Romano or nutritional yeast for a slightly different umami note or a vegan-friendly option.
- Green beans - Substitute with asparagus or snap peas for a similar fresh crunch and flavor.
- Lemon zest - Use lime zest to introduce a different citrus twist.
- Olive oil - Replace with avocado or grapeseed oil for a different nuance in richness.
Ingredients
- 1 pound fresh green beans - trimmed and washed.
- 2 tablespoons extra-virgin olive oil - for sautéing.
- 1 teaspoon lemon zest - finely grated from a fresh lemon.
- 1 garlic clove - minced.
- ¼ teaspoon salt - or to taste.
- ¼ teaspoon freshly ground black pepper - or to taste.
- ¼ cup grated Parmesan cheese - for topping.
Instructions
- Heat the olive oil in a large skillet over medium-high heat until shimmering. Add the green beans and sauté, stirring frequently, for about 5 to 7 minutes until they become tender-crisp.
- Add the minced garlic and lemon zest to the skillet and cook for an additional 1 to 2 minutes, stirring to coat the beans evenly and releasing the garlic's aroma without browning it.
- Season with salt and black pepper, adjusting to your preference. Stir well to combine all flavors.
- Transfer the green beans to a serving dish and immediately sprinkle with the grated Parmesan cheese so it has a chance to melt slightly over the warm beans.
- Serve warm as a bright, cheesy side that pairs well with roasted meats, grilled fish, or simple grain bowls.
3. Honey-Glazed Carrots
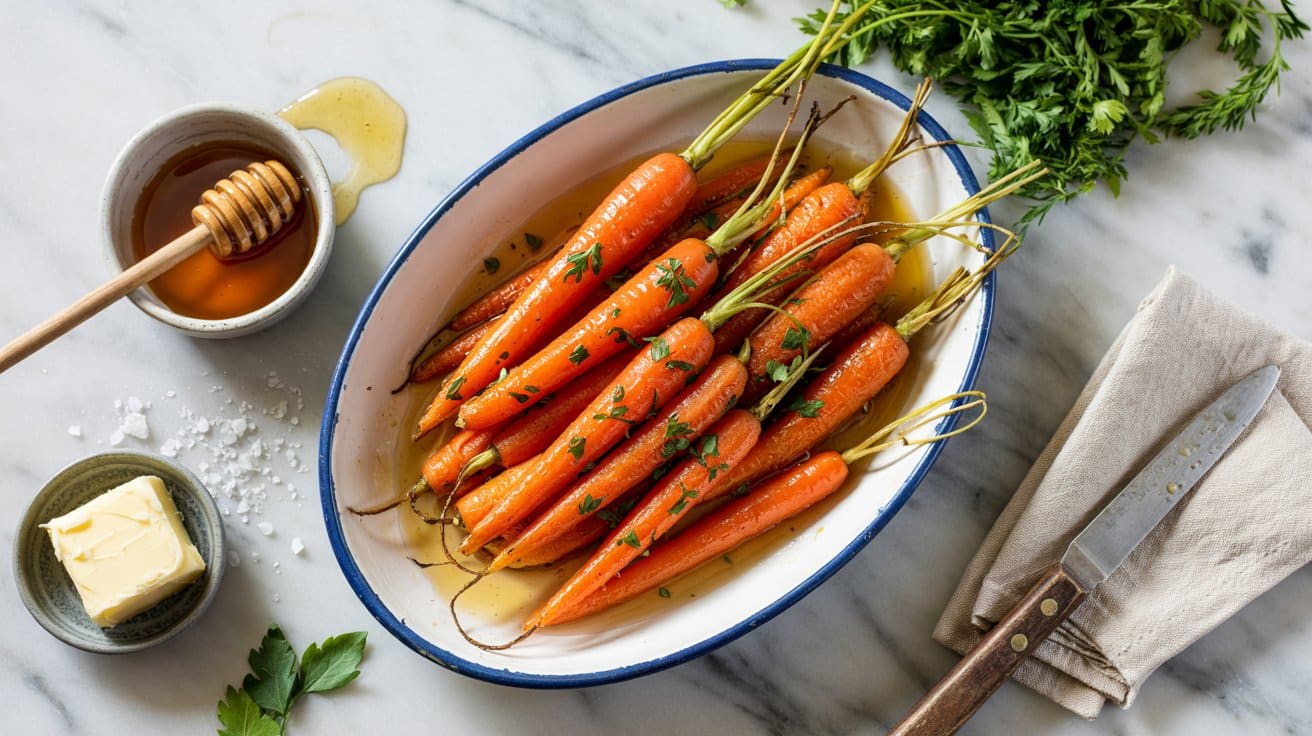
Roasted carrots get a lovely touch of sweetness and warmth from a simple honey glaze, bringing out their natural flavors beautifully. This recipe is easy to put together and results in tender, caramelized carrots with just the right balance of sweet and savory when roasted at 400°F for 20-25 minutes.
It's a versatile side dish that fits well with many main courses, adding bright color and a comforting flavor that appeals to both kids and adults. Preparing it doesn't take long, so it's a great choice for weeknight dinners or holiday gatherings.
Why This Recipe Works
This recipe makes the most of roasted carrots by improving their sweetness without overpowering their natural flavor.
- Convenience - Minimal prep and a short roasting time mean you can make this quickly alongside other dishes.
- Flavor balance - The honey glaze adds a gentle sweetness complemented by fresh thyme, creating a warm and inviting taste.
- Texture - Roasting softens the carrots while giving the edges a slight caramelized crispness, adding pleasant contrast.
- Appeal - Colorful and attractive on the plate, this side suits both everyday meals and special occasions.
Ingredient Swap Ideas
Adjusting ingredients can tailor this dish to support different diets or flavor preferences without losing the core taste.
- Honey - Use maple syrup or agave nectar as a plant-based alternative for a vegan-friendly glaze.
- Fresh thyme - Substitute with rosemary or a sprinkle of dried herbs if fresh is unavailable or for a different herbal note.
- Carrots - Try parsnips or sweet potatoes for a variation with similar sweetness and texture after roasting.
- Olive oil - Swap with avocado oil or melted coconut oil to change up the flavor slightly.
Ingredients
- 1 pound carrots - peeled and cut into uniform sticks or rounds.
- 2 tablespoons honey - for the sweet glaze.
- 1 tablespoon olive oil - to help roast and caramelize the carrots.
- 1 teaspoon fresh thyme leaves - adds warm herbal notes.
- ½ teaspoon salt - enhances natural flavors.
- ¼ teaspoon black pepper - for subtle heat.
Instructions
- Preheat your oven to 400°F (200°C). Line a baking sheet with parchment paper for easy cleanup.
- In a large bowl, toss the peeled carrots with olive oil, honey, salt, and black pepper until evenly coated. Add the fresh thyme leaves and gently mix again.
- Spread the carrots in a single layer on the prepared baking sheet, making sure they aren't crowded to promote caramelization.
- Roast for 20 to 25 minutes, stirring once halfway through, until the carrots are tender and slightly browned around the edges.
- Remove from the oven and transfer to a serving dish. Drizzle any glaze left in the bowl over the carrots before serving warm.
4. Creamy Garlic Mashed Cauliflower
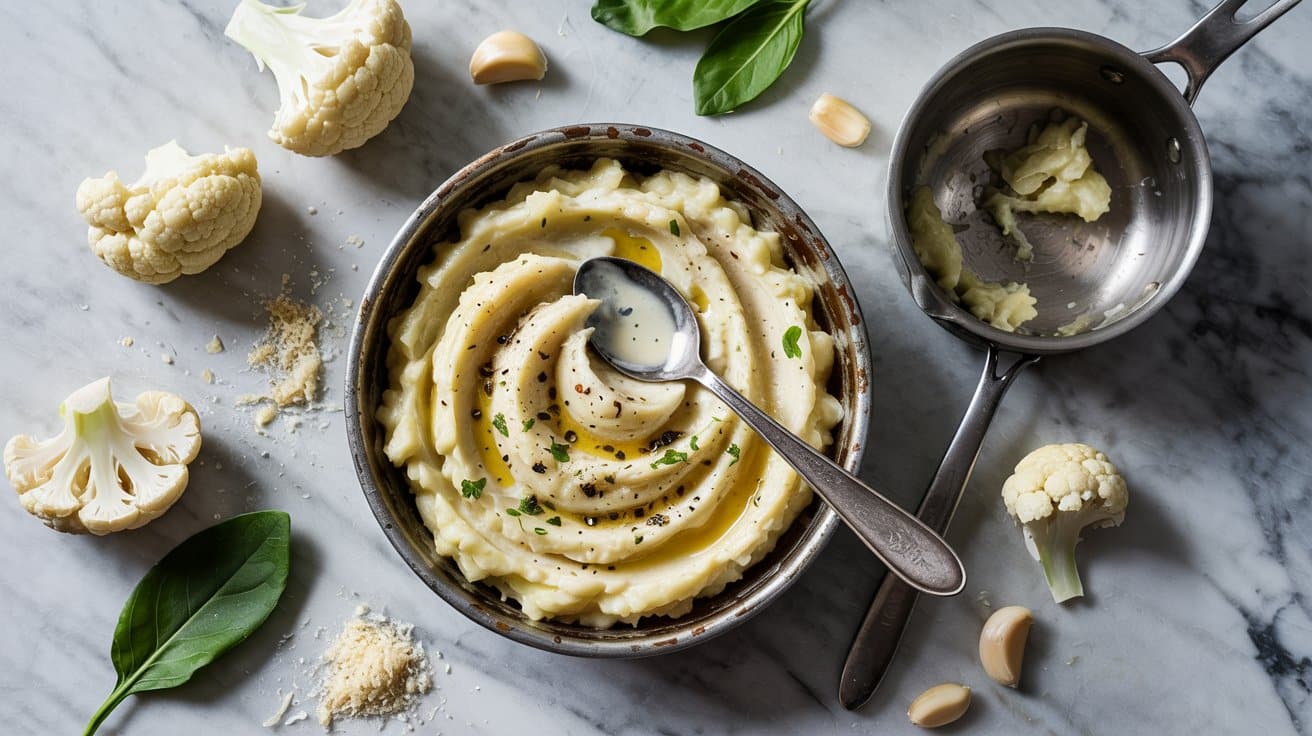
This creamy garlic mashed cauliflower is a smooth, comforting side that offers a satisfying alternative to traditional mashed potatoes. It brings together subtle garlic flavor and a rich, velvety texture that goes well with a variety of main dishes.
Preparing it is straightforward and quick, making it a practical choice for busy weeknights or when you want something wholesome without much fuss. The light creaminess adds just enough richness while keeping this dish light and healthy.
Why This Recipe Works
This recipe combines convenience and flavor with a nutritious twist, resulting in a creamy dish that feels indulgent without overloading on carbs.
- Convenience - It cooks quickly and blends easily, so you spend less time preparing and more time enjoying.
- Flavor balance - Mild garlic infusion enhances the natural sweetness of cauliflower without overpowering it.
- Texture - Smooth and creamy with a hint of silkiness from the added cream or milk.
- Appeal - Suitable for low-carb and keto diets, making it a family-friendly alternative with broad appeal.
Ingredient Swap Ideas
Swapping a few key ingredients helps customize the recipe to different dietary preferences or flavors without losing its essence.
- Cream or milk - Use unsweetened almond milk or coconut milk for a dairy-free version that remains creamy.
- Garlic - Roast the garlic before adding for a sweeter and milder garlic flavor.
- Butter - Substitute with olive oil or a plant-based margarine to keep the recipe vegan-friendly.
- Cheese addition - Mix in grated Parmesan for a richer, savory twist or nutritional yeast for a dairy-free cheese flavor.
Ingredients
- 1 large head cauliflower - chopped into florets for steaming.
- 3 tablespoons unsalted butter - adds richness and creaminess.
- 3 cloves garlic - minced to infuse flavor without harshness.
- ¼ cup heavy cream or milk - provides a smooth, creamy texture.
- ½ teaspoon salt - enhances the natural flavors.
- ¼ teaspoon black pepper - adds a gentle touch of heat.
- Fresh chives or parsley - finely chopped for garnish (optional).
Instructions
- Steam the cauliflower florets until they are very tender, about 10 to 12 minutes, then drain well to remove excess water.
- While the cauliflower steams, melt the butter in a small pan over medium heat and gently sauté the minced garlic until fragrant but not browned, about 1 to 2 minutes.
- Transfer the steamed cauliflower to a large bowl or food processor. Add the sautéed garlic with butter, heavy cream or milk, salt, and pepper.
- Mash or puree the mixture until smooth and creamy, adjusting the amount of cream or milk to get your preferred consistency.
- Serve warm, garnished with fresh chives or parsley for a touch of color and freshness.
5. Sautéed Spinach with Garlic and Lemon
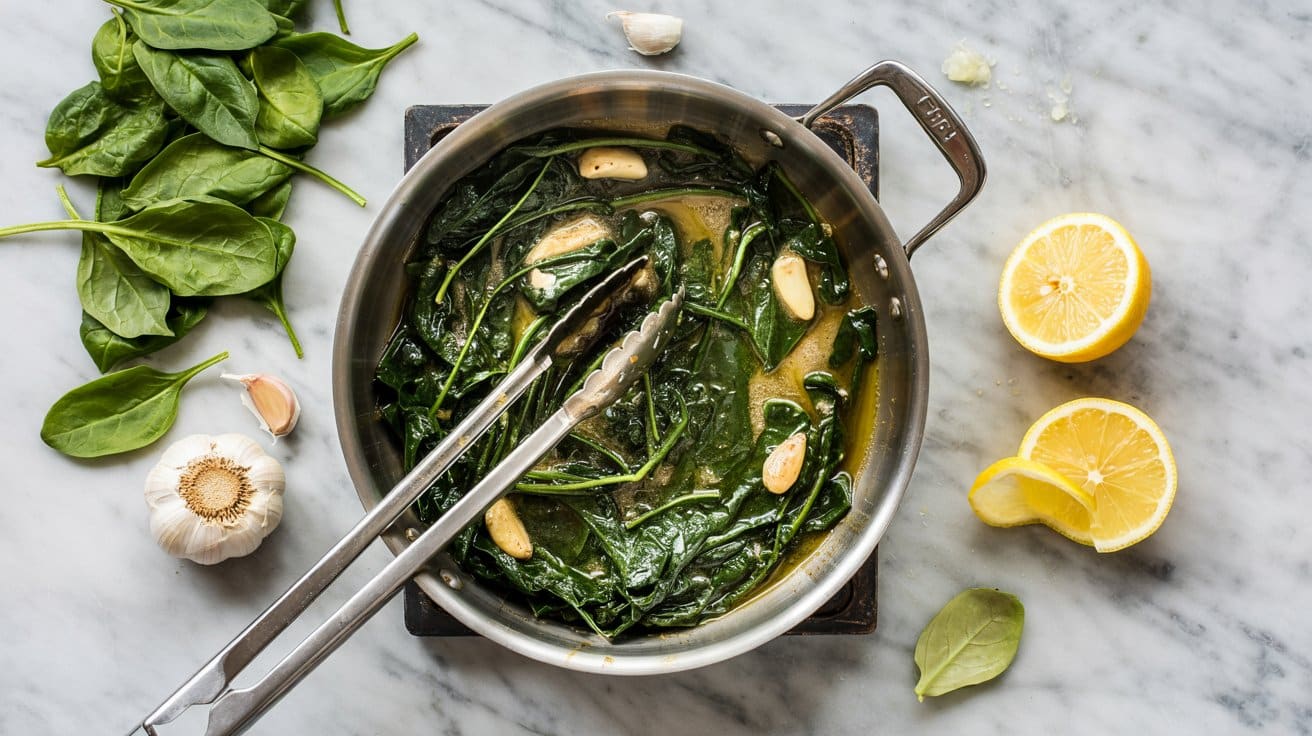
Sautéed spinach with garlic and lemon is a simple, fresh side dish that brings a bright, flavorful punch to any meal. The tender spinach cooks quickly, and the garlic infuses it with a warm aroma, while the squeeze of lemon adds a lively zing that lifts the whole dish.
This recipe is easy to prepare and comes together in minutes, making it a great choice for busy weeknights or whenever you want a healthy, bright vegetable on your plate. The combination of garlicky richness and citrus freshness makes every bite enjoyable.
Why This Recipe Works
This sautéed spinach dish balances convenience with bold, clean flavors and nutritional benefits, making it a practical and tasty choice for everyday meals.
- Convenience - Quickly cooks in just a few minutes with minimal prep.
- Flavor balance - Combines the earthiness of spinach with savory garlic and bright lemon notes.
- Texture - Leaves spinach tender yet not mushy, maintaining a pleasant mouthfeel.
- Appeal - Works well as a side for a variety of main dishes and appeals to all ages.
Ingredient Swap Ideas
Swapping ingredients can help you adjust this dish based on what you have on hand or dietary preferences without losing the essence of the recipe. Here are some simple swaps to consider:
- Spinach Alternatives - Use baby kale or Swiss chard for a heartier green with a slightly different texture.
- Garlic Substitute - Replace fresh garlic with garlic powder in smaller amounts if fresh is not available.
- Citrus Variation - Swap lemon juice with lime or a splash of white wine vinegar for a different acidic note.
- Oil Choices - Olive oil can be substituted with avocado oil or grapeseed oil if preferred.
Ingredients
- 1 pound fresh spinach - washed and drained well.
- 2 tablespoons olive oil - for sautéing and flavor.
- 3 garlic cloves - minced finely.
- 1 tablespoon fresh lemon juice - adds brightness and acidity.
- ¼ teaspoon salt - to improve the flavors.
- ⅛ teaspoon black pepper - for a mild kick.
Instructions
- Heat olive oil in a large skillet over medium heat until shimmering. Add the minced garlic and sauté for 30 seconds to 1 minute until fragrant, being careful not to burn it.
- Add the spinach to the skillet in batches, stirring frequently so it wilts evenly and cooks down, about 2 to 3 minutes total.
- Once the spinach is tender and mostly wilted, remove the skillet from heat. Season with salt and black pepper.
- Drizzle the fresh lemon juice over the spinach and toss to combine thoroughly.
- Transfer to a serving dish and serve immediately as a bright, healthy side.
6. Roasted Brussels Sprouts with Balsamic Glaze
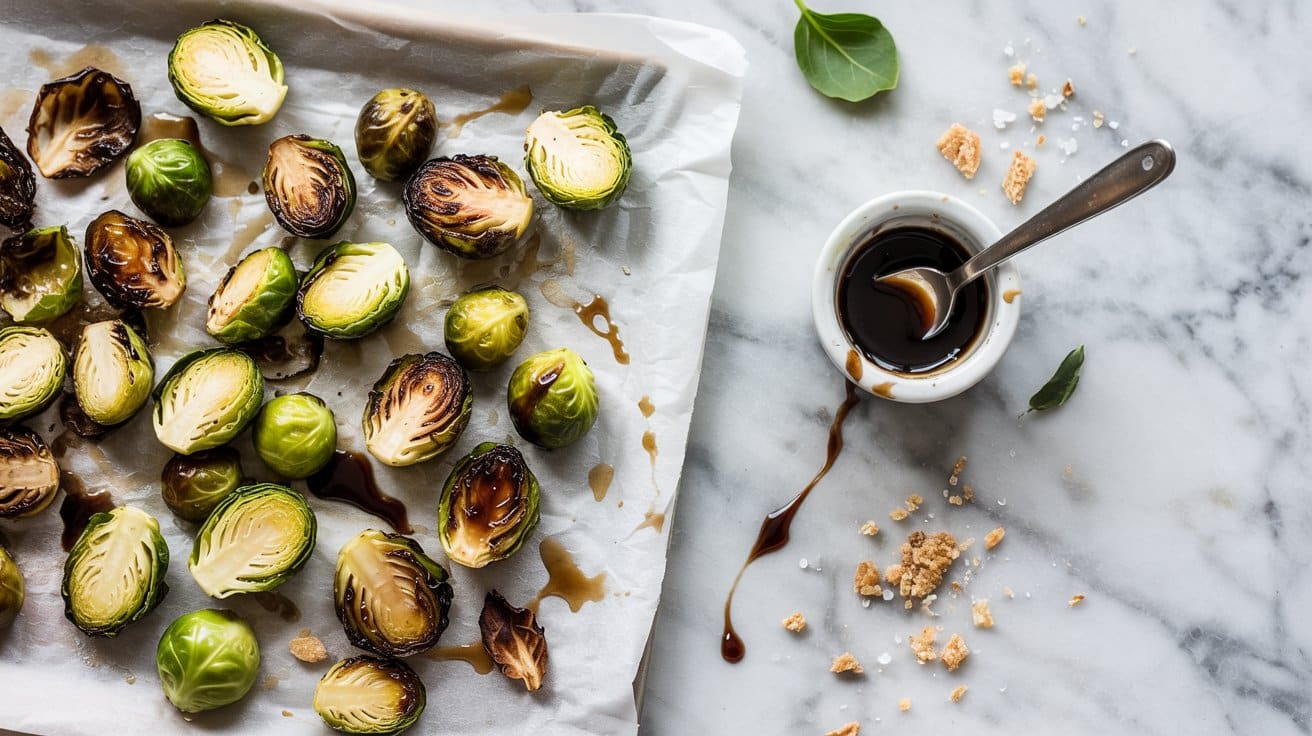
Roasted Brussels sprouts bring out a wonderful natural sweetness and a pleasantly crisp texture. Tossing them in a balsamic glaze adds a bright, tangy contrast that turns simple sprouts into a standout side dish.
This recipe is straightforward enough for weeknight dinners but special enough for holiday gatherings.
The combination of caramelized edges from roasting and the glossy, slightly sticky balsamic reduction gives these Brussels sprouts a balanced mix of flavors and textures. It's a great way to make this often-overlooked vegetable appealing to the whole family.
Why This Recipe Works
This recipe combines convenience and rich flavor, making it a reliable side for any meal.
- Convenience - Requires minimal prep and cooks quickly in the oven.
- Flavor balance - The sweetness of balsamic glaze goes with the slight bitterness of Brussels sprouts.
- Texture - Roasting creates crispy edges and tender centers for an enjoyable bite.
- Appeal - Works well as a healthy side that pairs with many main dishes effortlessly.
Ingredient Swap Ideas
Swapping ingredients can help modify the recipe for dietary preferences or to add variety while keeping the essence intact.
- Brussels sprouts - Substitute with broccolini or asparagus for a similar roasting effect.
- Balsamic vinegar - Use apple cider vinegar mixed with a touch of honey if balsamic is unavailable.
- Olive oil - Replace with avocado oil for a higher smoke point and mild flavor.
- Optional sweetness - Swap honey in the glaze for maple syrup to keep it vegan-friendly.
Ingredients
- 1 pound Brussels sprouts - trimmed and halved if large, washed.
- 2 tablespoons extra-virgin olive oil - for tossing the sprouts before roasting.
- Salt - to taste, enhances natural flavors.
- Freshly ground black pepper - to taste, for seasoning.
- ¼ cup balsamic vinegar - used to make the glaze.
- 1 tablespoon honey or maple syrup - adds sweetness to balance acidity.
Instructions
- Preheat your oven to 400°F (200°C). Line a baking sheet with parchment paper or lightly grease it.
- Toss the Brussels sprouts with olive oil, salt, and pepper until evenly coated. Spread them out in a single layer on the baking sheet.
- Roast the sprouts for about 20 to 25 minutes, turning halfway through, until they are browned and crispy on the edges.
- While the sprouts roast, combine balsamic vinegar and honey (or maple syrup) in a small saucepan. Simmer over medium heat, stirring occasionally, until it thickens to a syrupy glaze, about 5 to 7 minutes.
- Drizzle the warm balsamic glaze over the roasted Brussels sprouts and toss gently to coat. Serve immediately, enjoying the combination of crisp texture and tangy sweetness.
7. Zucchini Noodles with Cherry Tomatoes and Basil
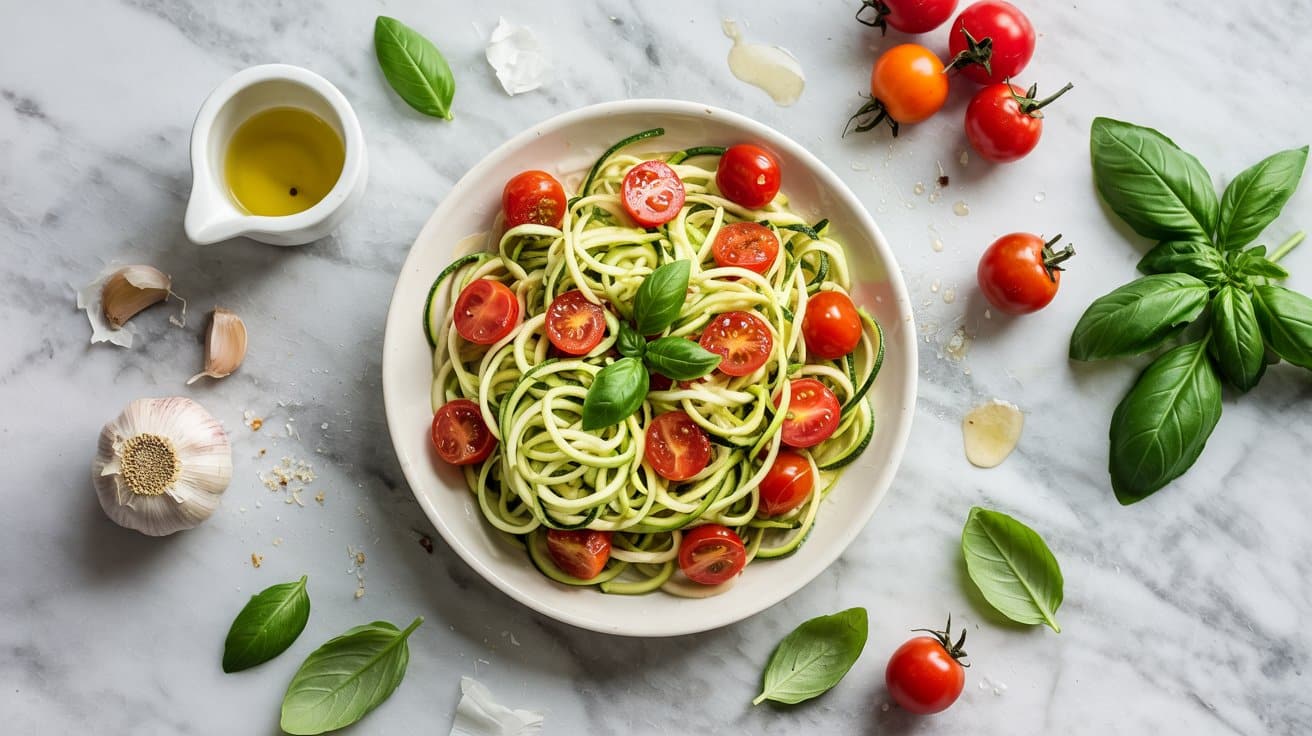
This zucchini noodles recipe is a fresh and light way to enjoy vegetables, especially in warmer months when you want something simple yet satisfying. The combination of crisp zucchini strands, sweet cherry tomatoes, and fragrant basil creates a refreshing dish that's both colorful and full of natural flavor.
Preparing this dish is straightforward and quick. Whether you serve it raw or give it a gentle sauté, the textures stay lively, and the bright herbs finish it with a bright touch.
It's a great option for a healthy side or a light main.
Why This Recipe Works
This recipe delivers a fast, nutritious dish with bright, summery flavors and a pleasing texture contrast.
- Convenience - Easy to prepare in under 15 minutes, with minimal ingredients.
- Flavor balance - Combines the mild, slightly sweet zucchini with juicy tomatoes and aromatic basil.
- Texture - Crisp zucchini noodles paired with tender tomatoes create a refreshing bite.
- Appeal - Light and colorful, it's suitable for healthy lunches or as a bright side dish.
Ingredient Swap Ideas
Swapping a few ingredients can make this recipe work for your dietary needs or to add slight variations while keeping its fresh character intact.
- Zucchini noodles - Substitute with spiralized yellow squash or cucumber for a different flavor and texture.
- Cherry tomatoes - Use grape tomatoes or halved roasted tomatoes for a richer taste.
- Basil - Swap basil for fresh mint or parsley to change the herb profile.
- Olive oil - Replace with avocado oil or a mild walnut oil for a different richness.
Ingredients
- 3 medium zucchini - spiralized into noodles or sliced thinly.
- 1 cup cherry tomatoes - halved.
- ¼ cup fresh basil leaves - roughly chopped.
- 2 tablespoons extra-virgin olive oil - for tossing the noodles.
- 1 teaspoon lemon juice - to brighten the flavors.
- ¼ teaspoon salt - to season.
- ¼ teaspoon black pepper - freshly ground.
Instructions
- Prepare the zucchini noodles using a spiralizer or vegetable peeler. Place them in a large bowl.
- Add the halved cherry tomatoes and chopped basil to the bowl with the zucchini noodles.
- Drizzle the olive oil and lemon juice over the mixture. Toss gently to combine everything evenly.
- Season with salt and black pepper. Give it a final toss and adjust seasoning as needed.
- Serve immediately as a fresh salad or let it sit for 10 minutes to allow the flavors to meld. Optionally, lightly sauté the zucchini noodles for 1-2 minutes in a pan before adding tomatoes and basil for a warm version.
8. Simple Steamed Asparagus with Lemon Butter
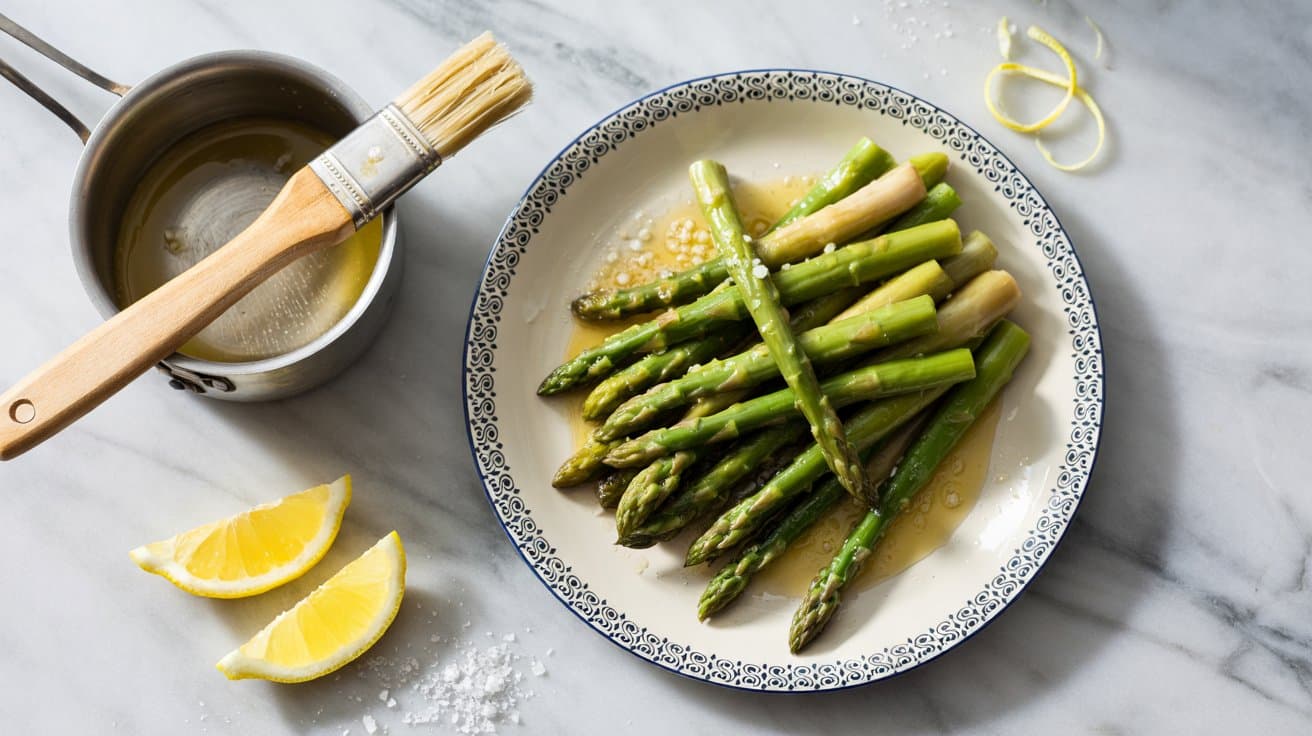
Steamed asparagus is a quick and straightforward way to enjoy this fresh, green vegetable. The mild tenderness of steamed asparagus goes well with a drizzle of lemon butter, adding a bright, slightly tangy note that goes with the natural earthiness.
This recipe focuses on simple ingredients that highlight the fresh flavor of asparagus while being easy to prepare, making it a great choice for a healthy side dish any day of the week.
Why This Recipe Works
This dish combines ease and fresh taste for a versatile vegetable side. Simple Steamed Asparagus with Lemon Butter offers a quick fix that feels light yet flavorful.
- Convenience - Steams quickly with very little prep work.
- Flavor balance - Bright lemon juice cuts through the richness of the butter.
- Texture - Tender asparagus with a slight snap for a pleasant bite.
- Appeal - Works well for family meals or gatherings with an elegant touch.
Ingredient Swap Ideas
Adapting this dish to fit your preferences or dietary needs is easy with a few simple swaps. You can keep the bright, buttery flavor while accommodating different tastes.
- Butter replacement - Use olive oil or a plant-based margarine for a dairy-free version.
- Citrus twist - Swap lemon juice for fresh lime juice to change the citrus note.
- Herb addition - Add chopped fresh herbs like parsley or dill instead of or alongside lemon for extra freshness.
- Seasoning variation - Sprinkle with a pinch of red pepper flakes or freshly ground black pepper to introduce a little heat.
Ingredients
- 1 pound fresh asparagus - trimmed and rinsed.
- 3 tablespoons unsalted butter - melted.
- 1 tablespoon fresh lemon juice - freshly squeezed for best flavor.
- Salt - to taste.
- Black pepper - freshly ground, to taste.
Instructions
- Prepare the asparagus by trimming the tough ends, then rinse well under cold water.
- Fill a large pot with about an inch of water and bring it to a boil. Place a steamer basket inside the pot, making sure the water does not touch the asparagus.
- Add the asparagus spears to the steamer basket, cover, and steam for 3 to 5 minutes until the asparagus turns bright green and becomes tender yet firm to the bite.
- Remove the asparagus and transfer it to a serving dish. Drizzle with melted butter and fresh lemon juice, then season with salt and pepper.
- Toss gently to coat evenly and serve immediately while warm.
9. Italian-Style Caprese Salad with Heirloom Tomatoes
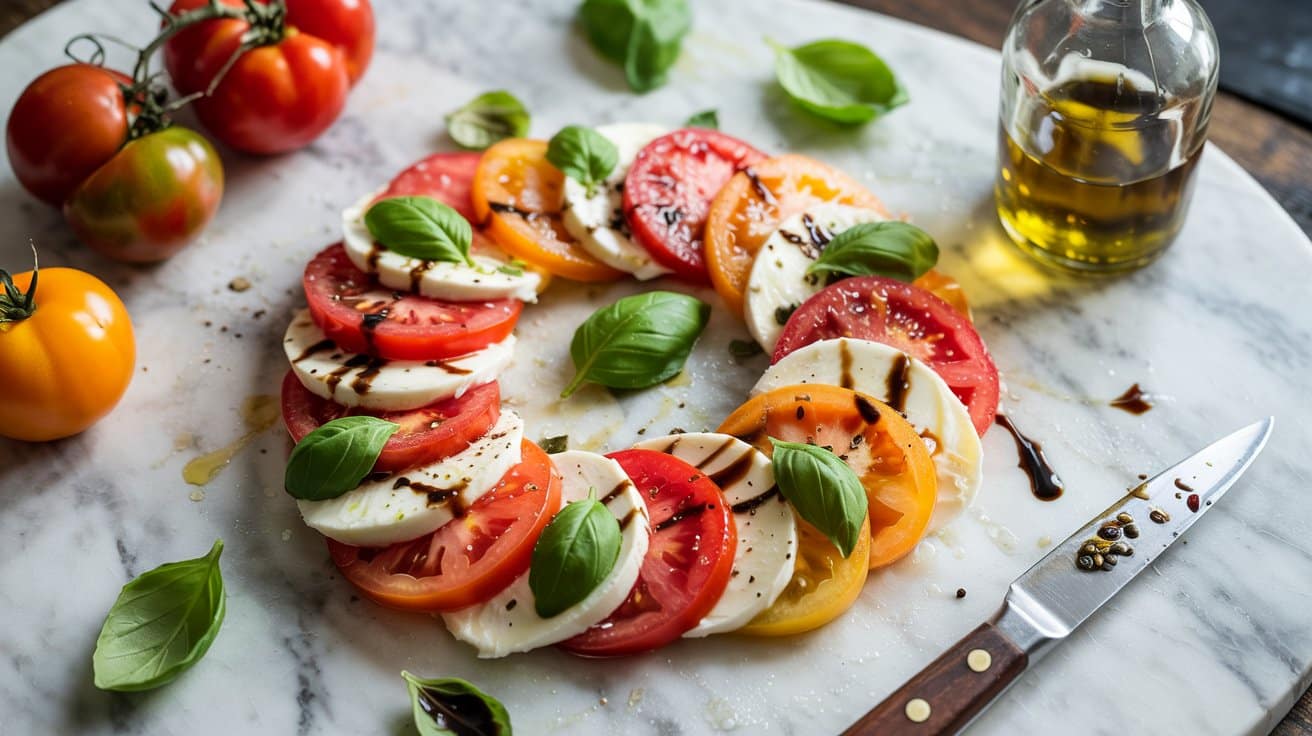
This Italian-style Caprese salad is a fresh and colorful way to enjoy summer's bounty of heirloom tomatoes. The combination of ripe tomatoes, creamy mozzarella, and fragrant basil creates a simple dish that's full of bright, balanced flavors.
No cooking is required, making this salad an easy option for busy days or when you want something light and satisfying. A drizzle of balsamic vinegar adds a subtle tang that goes with the sweetness of the tomatoes.
Why This Recipe Works
This Caprese salad delivers an uncomplicated yet flavorful dish that highlights quality ingredients. Its fresh components come together easily for a pleasing balance of tastes and textures that never fails to impress.
- Convenience - Requires no cooking and comes together quickly with minimal prep.
- Flavor balance - Combines creamy mozzarella, sweet tomatoes, and aromatic basil with tangy balsamic.
- Texture - Features juicy tomato slices paired with soft, tender cheese.
- Appeal - Its bright colors and classic ingredients make it well-suited for gatherings or everyday meals.
Ingredient Swap Ideas
Swapping ingredients helps customize the salad to your preferences or dietary needs while keeping the essence intact. Here are some practical adjustments you can make.
- Mozzarella - Swap fresh mozzarella for burrata for an extra creamy texture.
- Tomatoes - Use vine-ripened tomatoes if heirlooms are not available; cherry tomatoes halved also work well.
- Basil - Substitute with fresh arugula or mint to add a different herbal note.
- Balsamic vinegar - Replace with red wine vinegar or lemon juice for a lighter acidity.
Ingredients
- Heirloom tomatoes - 3 to 4 medium, sliced about ¼ inch thick.
- Fresh mozzarella - 8 ounces, sliced to similar thickness as tomatoes.
- Fresh basil leaves - ½ cup, gently torn or left whole.
- Extra-virgin olive oil - 3 tablespoons for drizzling.
- Balsamic vinegar - 1 to 2 tablespoons for drizzling.
- Salt - ½ teaspoon, or to taste.
- Freshly ground black pepper - ¼ teaspoon, or to taste.
Instructions
- Arrange the heirloom tomato slices on a large serving plate, slightly overlapping them in a single layer.
- Place slices of fresh mozzarella evenly over the tomatoes, distributing them to match the tomato layout.
- Scatter fresh basil leaves across the top to add aroma and color.
- Drizzle extra-virgin olive oil and balsamic vinegar evenly over the salad.
- Season with salt and freshly ground black pepper to enhance all the flavors. Serve immediately or chill briefly before serving for a cooler option.
10. Roasted Sweet Potato Wedges
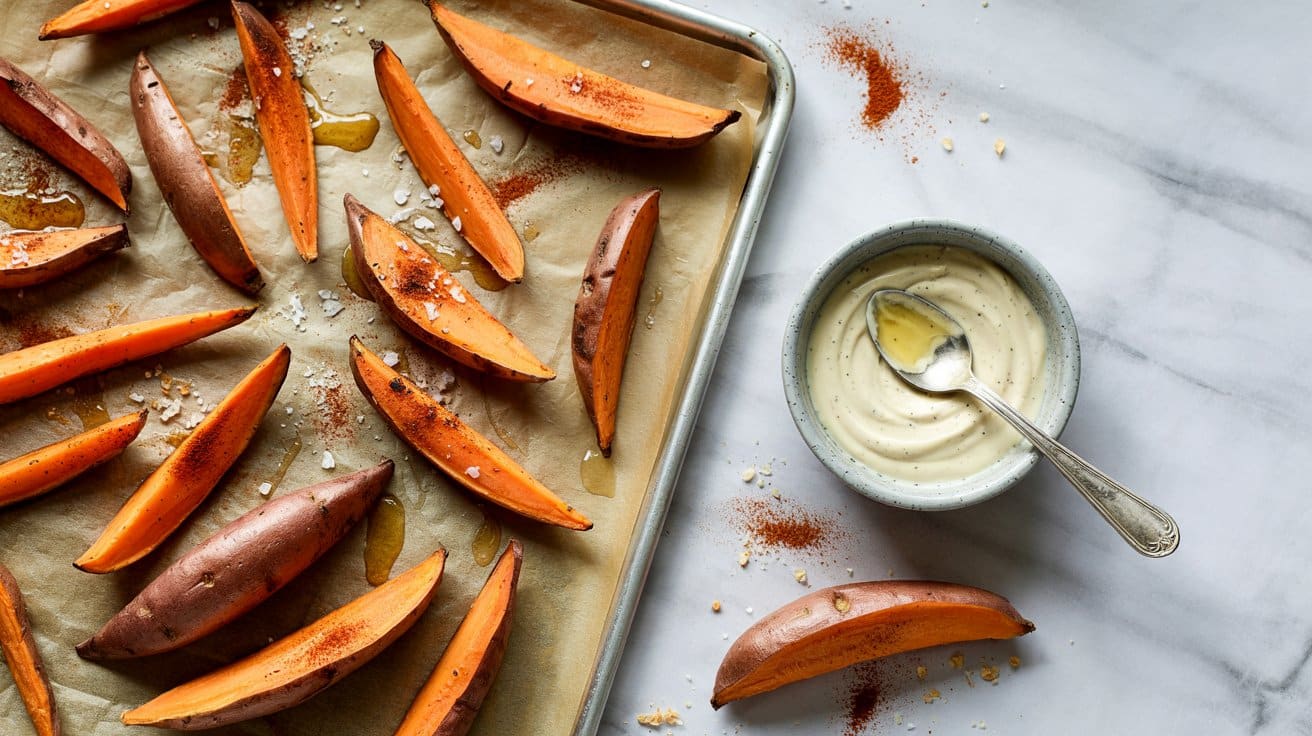
Roasted sweet potato wedges make for a satisfying and simple side dish that pairs well with a variety of meals. The sweet potatoes develop crispy edges under the heat, while maintaining a soft and tender middle.
A light sprinkle of smoked paprika or cumin adds a warm, smoky note that goes with the natural sweetness.
This recipe is straightforward and quick enough for any weeknight but flavorful enough to serve at gatherings or family dinners. It shows the natural appeal of sweet potatoes while offering a versatile option for those interested in wholesome, tasty sides.
Why This Recipe Works
Roasting sweet potato wedges creates a perfect balance of crispiness and softness, while the seasoning gives them a subtle smoky flavor. This recipe is a great option for anyone looking for a nutritious, crowd-pleasing side dish.
- Convenience - Minimal preparation and a simple roasting method make it easy to fit into busy schedules.
- Flavor balance - The natural sweetness of sweet potatoes is enhanced by smoky, earthy spices.
- Texture - Golden, crisp edges contrast with tender, creamy interiors for a pleasant bite.
- Appeal - Sweet potatoes appeal to a wide audience and complement many main dishes.
Ingredient Swap Ideas
Swapping ingredients here can adapt the recipe to different dietary preferences or simply vary the flavor. These options keep the spirit of the dish while accommodating what you have on hand or prefer.
- Spices - Use ground cinnamon and a pinch of chili powder instead of smoked paprika for a sweet-spicy twist.
- Oil - Substitute olive oil with avocado or coconut oil for a different flavor and nutritional profile.
- Vegetable choice - Try butternut squash or carrots cut into similar-sized wedges for a comparable roasting experience.
- Seasoning - Replace cumin with curry powder for an exotic flavor variation.
Ingredients
- 2 large sweet potatoes - peeled and cut into wedges about ½ inch thick.
- 2 tablespoons olive oil - enough to coat the wedges evenly.
- 1 teaspoon smoked paprika - adds warm, smoky flavor.
- ½ teaspoon ground cumin - optional, enhances earthiness.
- ½ teaspoon salt - balances sweetness.
- ¼ teaspoon black pepper - adds mild heat.
- Fresh parsley - chopped, for garnish (optional).
Instructions
- Preheat your oven to 425°F (220°C). Line a baking sheet with parchment paper or lightly grease it.
- In a large bowl, toss the sweet potato wedges with olive oil, smoked paprika, cumin (if using), salt, and pepper until they are evenly coated.
- Arrange the wedges in a single layer on the baking sheet, making sure they have a little space between them. This helps achieve crispy edges.
- Roast for 25 to 30 minutes, turning the wedges halfway through to ensure even browning. The sweet potatoes should be tender inside and crisp on the outside.
- Remove from the oven and transfer to a serving dish. Sprinkle chopped fresh parsley over the top for a pop of color and freshness, if desired. Serve warm.
11. Spiced Roasted Cauliflower Florets
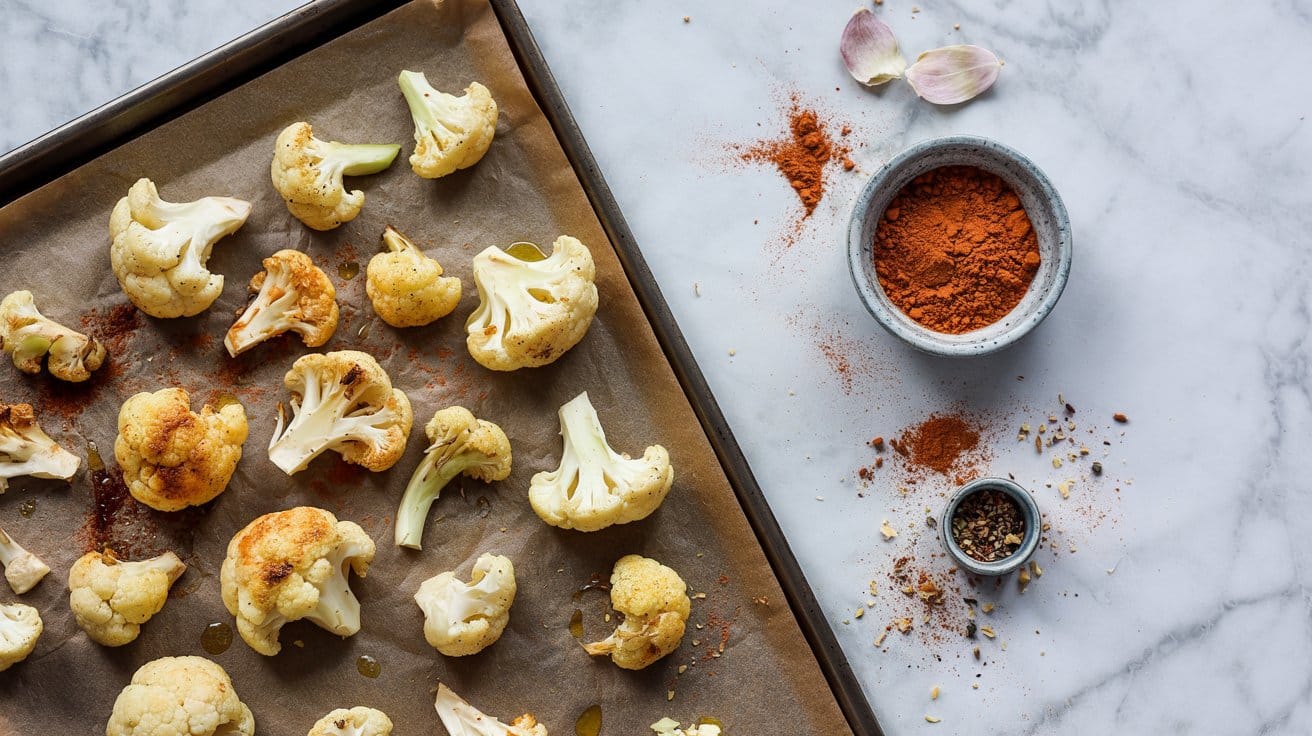
Spiced roasted cauliflower florets make a flavorful and bright side dish that's simple to prepare. The cauliflower turns tender and slightly crisp at the edges, while the curry powder or turmeric adds a warm, aromatic touch with a beautiful golden color.
This recipe fits well for busy evenings or when you want to add some spice to your meals without a lot of fuss. It pairs nicely with grains, proteins, or salads to round out a wholesome plate.
Why This Recipe Works
This recipe delivers a balanced, aromatic side dish with minimal effort and great taste. It's a straightforward way to bring bright, bold flavors to a classic vegetable.
- Convenience - Quick to prep and roast, ideal for weekday meals or meal prep.
- Flavor balance - Earthy turmeric or curry powder provides warmth without overpowering the natural cauliflower taste.
- Texture - Roasting creates tender florets with lightly crisped edges for a satisfying bite.
- Appeal - A colorful, nutrient-rich vegetable dish that complements many main courses.
Ingredient Swap Ideas
Swapping certain ingredients helps tailor this dish to your preferences or dietary restrictions while keeping the core flavors intact.
- Curry powder or turmeric - Use smoked paprika or garam masala for a different spice profile.
- Olive oil - Substitute with avocado oil or melted coconut oil for variation in flavor.
- Cauliflower - Try broccoli florets or Brussels sprouts as alternatives for roasting.
- Lemon juice - Use apple cider vinegar or fresh lime juice to add acidity if preferred.
Ingredients
- 1 large head cauliflower - cut into bite-sized florets.
- 2 tablespoons olive oil - for roasting and flavor.
- 1 teaspoon curry powder - or turmeric, based on preferred spice.
- ½ teaspoon ground cumin - adds mild earthiness.
- ½ teaspoon salt - to season evenly.
- ¼ teaspoon black pepper - freshly ground for a subtle kick.
- 1 tablespoon fresh lemon juice - to brighten the dish.
- Fresh cilantro or parsley - chopped for garnish (optional).
Instructions
- Preheat your oven to 425°F (220°C). Line a baking sheet with parchment paper or a silicone mat for easy cleanup.
- In a large bowl, toss the cauliflower florets with olive oil, curry powder (or turmeric), ground cumin, salt, and black pepper until well coated.
- Spread the seasoned cauliflower in a single layer on the prepared baking sheet, making sure the florets aren't overcrowded.
- Roast for 25-30 minutes, stirring halfway through, until the cauliflower is golden and tender with crispy edges.
- Remove the baking sheet from the oven and drizzle the lemon juice over the roasted cauliflower. Toss gently to combine.
- Garnish with fresh cilantro or parsley if using. Serve warm alongside your favorite mains.
12. Green Pea and Mint Salad
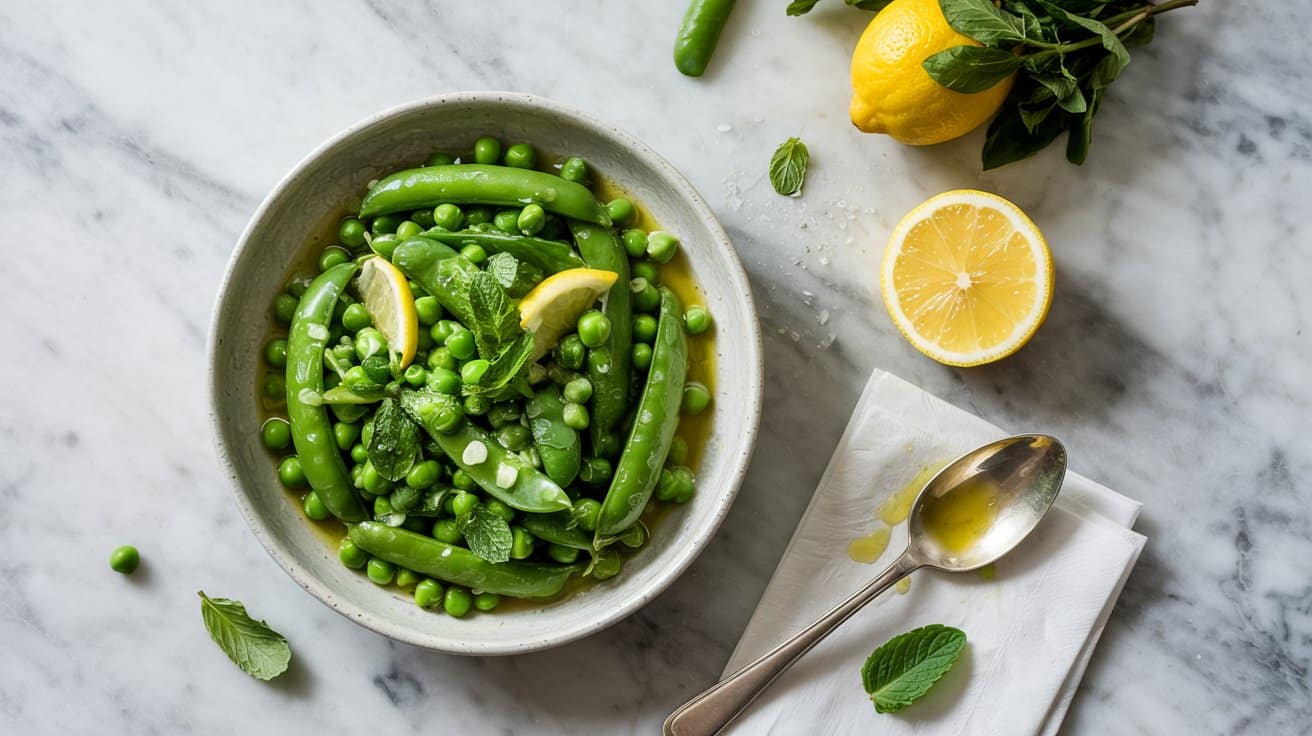
This green pea and mint salad offers a bright, fresh side that's quick to put together. The tender peas bring a natural sweetness, while the mint adds a cooling herbal note that lifts the whole dish.
A simple dressing of olive oil and lemon juice ties everything together with a light tang.
It works well as a refreshing accompaniment to grilled meats or fish, and you can serve it chilled or at room temperature. This salad is an easy way to add color and flavor to your plate without much fuss.
Why This Recipe Works
This salad is a straightforward, healthy side with fresh flavors and a lively combination of textures. It's a smart choice when you want something light and bright that can complement a variety of meals.
- Ease of preparation - Uses simple ingredients and comes together in minutes.
- Refreshing flavor - Sweet peas balanced by zesty lemon and cool mint.
- Versatility - Suitable as a side dish or tossed into other salads or bowls.
- Healthy ingredients - Packed with vitamins, fiber, and heart-healthy olive oil.
Ingredient Swap Ideas
Swapping some ingredients here can help tailor the salad to your preferences or dietary requirements without compromising the fresh and bright character.
- Green peas - Use snow peas or sugar snap peas if you prefer a crunchier texture.
- Mint - Substitute with fresh basil or parsley for a different herbal note.
- Lemon juice - Try lime juice for a slightly different citrus flavor.
- Olive oil - Swap with avocado oil or a mild nut oil for variation in richness.
Ingredients
- 2 cups fresh or frozen green peas - Thawed if frozen, lightly cooked if preferred tender.
- 2 tablespoons fresh mint leaves - Chopped finely for best flavor distribution.
- 2 tablespoons extra-virgin olive oil - Adds smoothness and enhances freshness.
- 1 tablespoon fresh lemon juice - For a bright, acidic touch.
- ¼ teaspoon salt - Balances the flavors.
- ⅛ teaspoon black pepper - Adds mild heat and depth.
Instructions
- If using frozen peas, cook them in boiling water for 1 to 2 minutes until tender but still bright green. Drain and rinse under cold water to stop cooking. If using fresh peas, simply rinse and drain well.
- In a medium bowl, combine the peas with the chopped mint leaves.
- Whisk together the olive oil, lemon juice, salt, and pepper in a small bowl until well blended.
- Pour the dressing over the peas and mint mixture, tossing gently to coat everything evenly.
- Let the salad sit for 5 to 10 minutes before serving to allow the flavors to meld. Serve chilled or at room temperature.
13. Glazed Baby Carrots with Dill
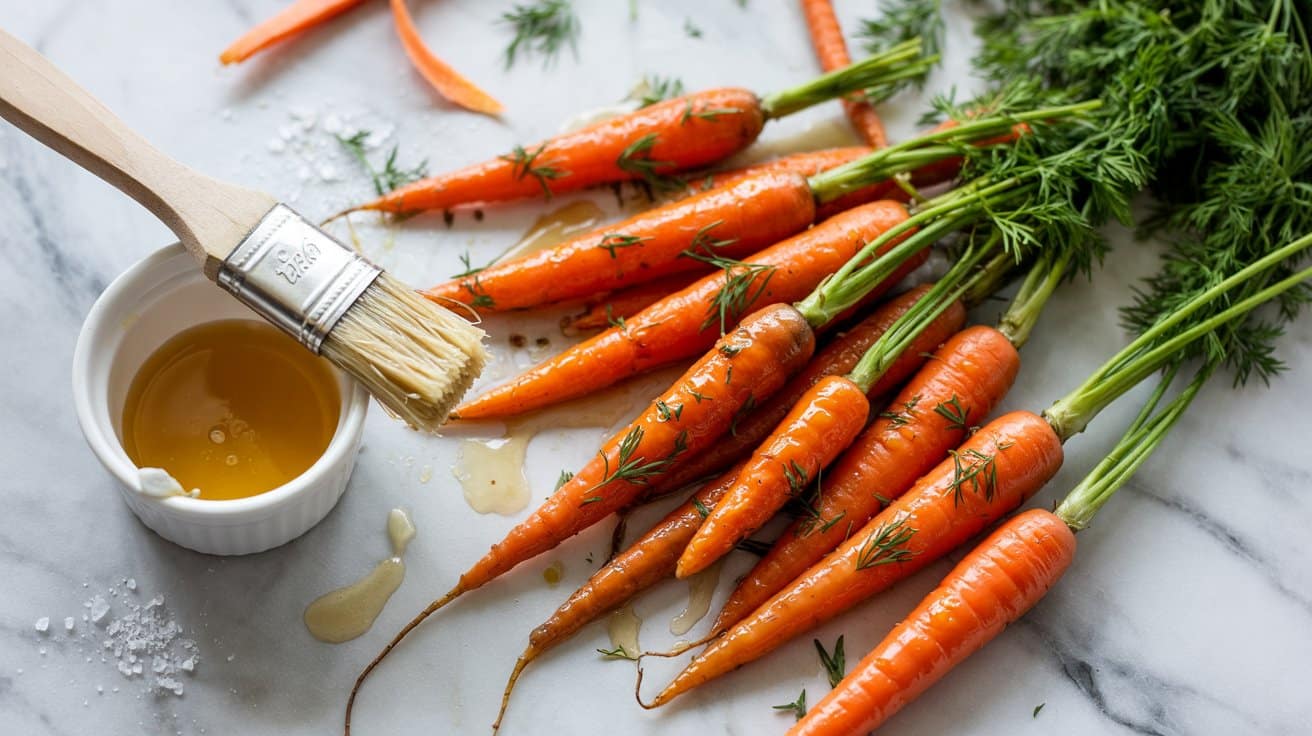
Glazed baby carrots with dill offer a simple yet flavorful way to enjoy these tender vegetables. The natural sweetness of the carrots comes forward when they are gently simmered in a light glaze, while fresh dill adds a bright, herbaceous note that goes with the overall dish beautifully.
This recipe is straightforward and quick, making it a great side for weeknight dinners or special occasions. The balance of sweet and savory flavors ensures it pairs well with a variety of main dishes.
Why This Recipe Works
This dish brings together ease and flavor in a way that works for busy cooks and vegetable lovers alike. The simple glaze enhances the carrots without overpowering their natural taste.
- Convenience - Quick to prepare and requires minimal ingredients.
- Flavor balance - Combines natural sweetness with fresh, herbal brightness.
- Texture - Tender yet slightly firm baby carrots that hold their shape.
- Appeal - Attractive, bright presentation that suits everyday meals and gatherings.
Ingredient Swap Ideas
Adapting this recipe is easy to match your preferences or dietary needs. Swapping a few ingredients won't change the core of the dish but can add variety or accommodate restrictions.
- Baby carrots - Substitute with regular carrots cut into uniform sticks if baby carrots aren't available.
- Fresh dill - Use fresh parsley or tarragon for a different herbal flavor.
- Honey - Replace with pure maple syrup for a vegan-friendly option.
- Butter - Use olive oil or a plant-based spread to make the glaze dairy-free.
Ingredients
- 1 pound baby carrots - washed and peeled if necessary.
- 2 tablespoons unsalted butter - or olive oil for a dairy-free option.
- 2 tablespoons honey - adds natural sweetness and helps with glazing.
- ¼ cup water - to create a gentle simmer for glazing.
- ½ teaspoon salt - to enhance flavor.
- ¼ teaspoon freshly ground black pepper - for subtle seasoning.
- 2 tablespoons fresh dill - finely chopped.
Instructions
- In a large skillet, melt the butter over medium heat. Add the baby carrots and stir to coat them evenly with the butter.
- Drizzle in the honey, then pour the water into the skillet. Sprinkle with salt and pepper, and stir gently to combine.
- Cover the pan and reduce the heat to low. Let the carrots simmer for about 10 to 12 minutes, stirring occasionally, until they are tender and most of the liquid has evaporated, leaving a glossy glaze.
- Remove the lid and increase the heat to medium-high for 1 to 2 minutes if needed, to thicken the glaze slightly, stirring often to prevent sticking.
- Remove the skillet from heat and stir in the fresh dill. Serve warm, garnished with extra dill if desired.
14. Crispy Sautéed Cabbage with Apples
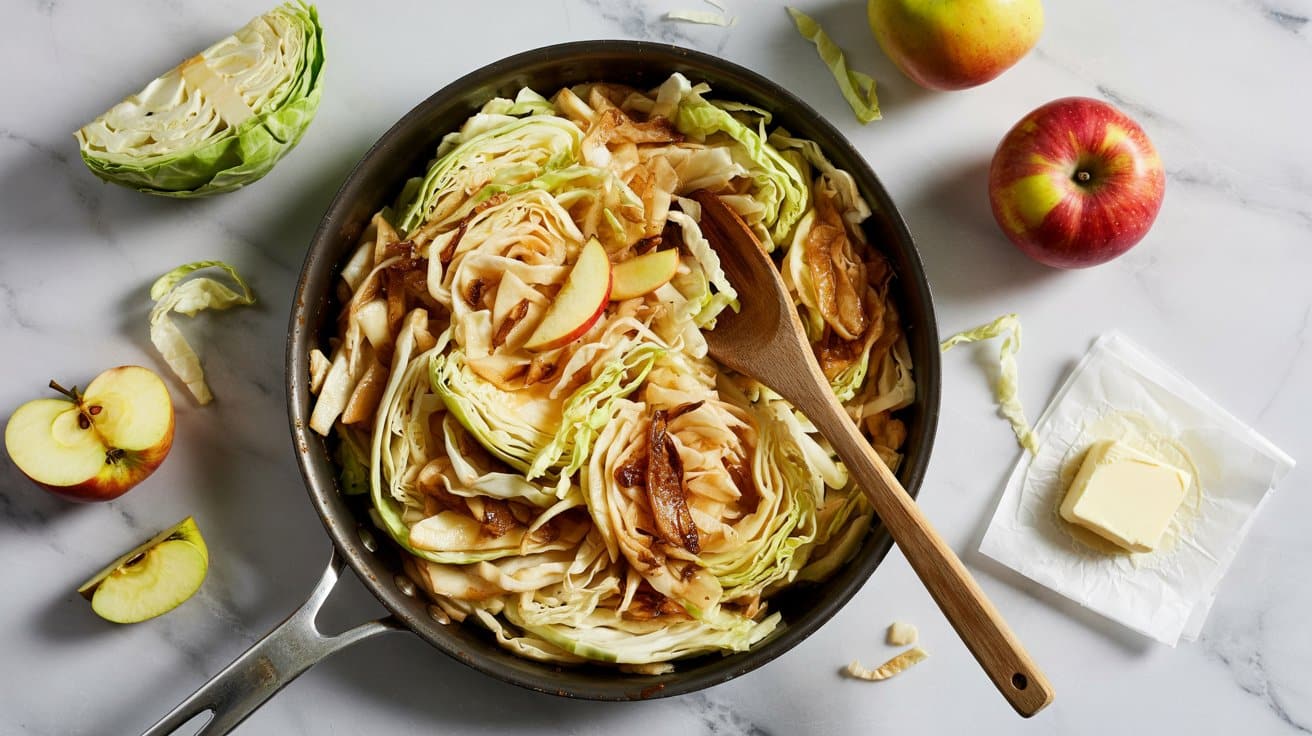
This dish brings together the mild, slightly sweet flavor of sautéed cabbage with the bright, fruity notes of fresh apples. It's a simple side that adds both texture and color to your meal, combining crisp-tender vegetables with a gentle sweetness and a touch of caramelization.
The preparation is straightforward and fits well into weeknight cooking routines. You'll find the blend of flavors refreshing without being overpowering, especially alongside roasted meats or hearty grains.
Why This Recipe Works
This recipe stands out because it offers a quick way to enjoy seasonal produce with minimal fuss and balanced flavors. It creates a satisfying contrast between crispy cabbage edges and tender apple slices.
- Convenience - Quick to prep and cook, ideal for busy evenings.
- Flavor balance - Combines savory cabbage with sweet apples and a hint of tang.
- Texture - Crispy edges on cabbage with tender but firm apple pieces.
- Appeal - Works as a bright, healthy side that pairs well with many main dishes.
Ingredient Swap Ideas
Swapping a few ingredients can adapt this dish for different tastes or dietary needs without losing its charm. Feel free to adjust based on what you have or prefer.
- Apples - Use pears for a softer, subtly different sweetness.
- Cabbage - Try green or napa cabbage for a variation in texture and flavor.
- Fat - Substitute butter with olive oil or avocado oil for a lighter or dairy-free option.
- Seasoning - Add a sprinkle of smoked paprika or a dash of apple cider vinegar for extra depth.
Ingredients
- 1 medium head green cabbage - thinly sliced for quick cooking.
- 2 medium apples - cored and thinly sliced, choose a firm variety like Granny Smith or Honeycrisp.
- 2 tablespoons unsalted butter - for sautéing and flavor.
- 1 tablespoon olive oil - helps achieve crispier edges on the cabbage.
- 1 small onion - thinly sliced to add sweetness and aroma.
- ½ teaspoon salt - to season and enhance flavors.
- ¼ teaspoon ground black pepper - for a mild kick.
- 1 teaspoon apple cider vinegar - adds brightness to balance the sweetness.
Instructions
- Heat the butter and olive oil together in a large skillet over medium-high heat until melted and hot.
- Add the sliced onion and cook for about 3 minutes until it begins to soften.
- Stir in the cabbage, spreading it evenly in the pan. Let it cook without stirring for about 5 minutes, allowing the edges to brown and crisp. Then toss and continue cooking for another 5 minutes until the cabbage softens but still has some crunch.
- Add the sliced apples, salt, and pepper. Cook for an additional 3 to 4 minutes, stirring occasionally, until the apples are tender but hold their shape.
- Remove from heat and drizzle the apple cider vinegar over the mixture. Toss gently to combine and serve warm as a flavorful, textured side dish.
15. Grilled Vegetable Antipasto
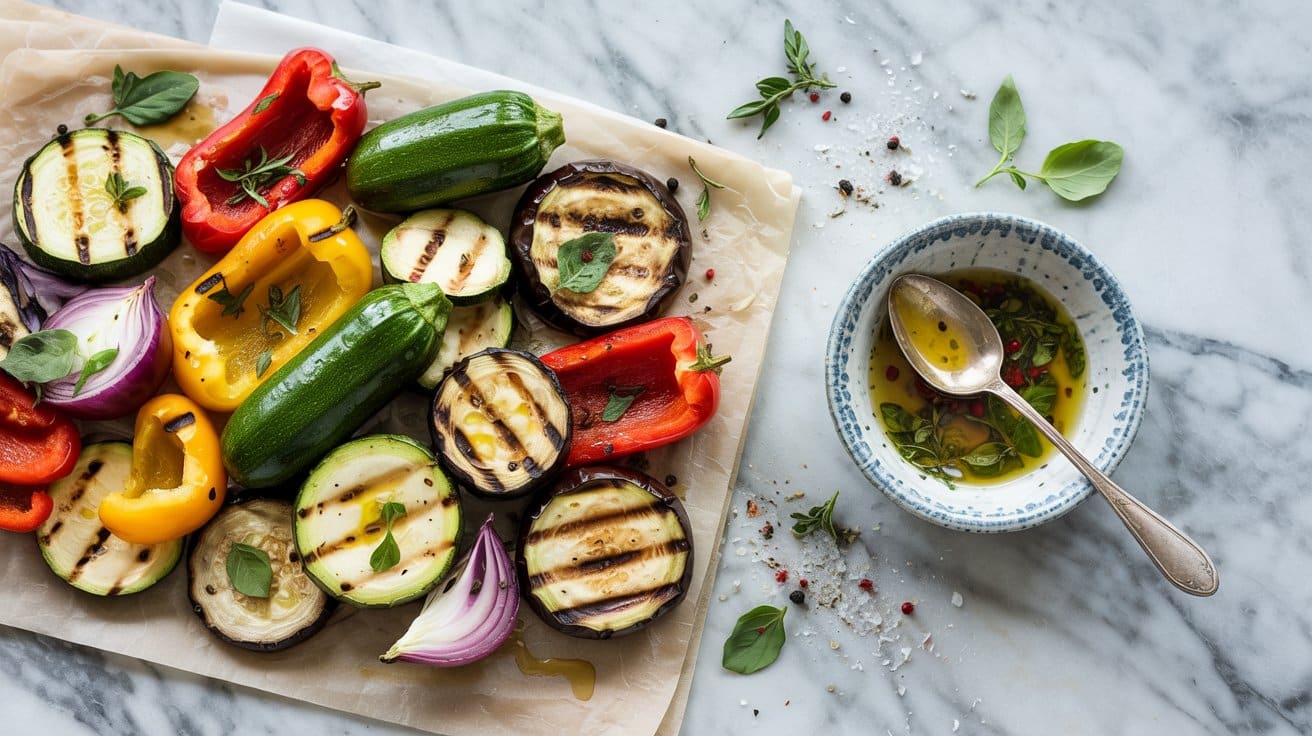
Making grilled vegetable antipasto is a straightforward way to add bold, fresh flavors to your meal without spending much time. This dish combines the smokiness of grilled vegetables with the bright taste of herbs and olive oil, offering a wonderful mix of textures and colors.
It's served at room temperature, which makes it a great choice for gatherings or quick weekday meals. The vegetables stay tender yet firm, and the marinade brings everything together with a hint of tang that brightens the dish.
Why This Recipe Works
This grilled vegetable antipasto stands out for its ease and bright flavor, making it an excellent choice to enjoy fresh vegetables in a simple yet delicious way.
- Convenience - Grilling brings out flavor quickly, and the dish can be made ahead and served cold.
- Flavor balance - The smoky vegetables and zesty marinade deliver a harmony of savoriness and brightness.
- Texture - Tender grilled veggies with a slightly crisp bite keep every mouthful interesting.
- Appeal - It works well as an appetizer or side dish, making it versatile for family meals or entertaining.
Ingredient Swap Ideas
Adapting this recipe to your pantry or preferences is easy with a few simple swaps. Choose alternatives that still provide a good balance of textures and flavor.
- Vegetables - Use zucchini or yellow squash instead of eggplant or bell peppers for a different but complementary taste.
- Oil - Swap olive oil with avocado oil for a milder flavor or if you need a higher smoke point when grilling.
- Herbs - Substitute fresh rosemary with thyme or oregano depending on what you have available.
- Acid - Use lemon juice instead of vinegar to add a citrusy brightness to the marinade.
Ingredients
- 1 medium eggplant - sliced into ½-inch thick rounds
- 2 medium zucchini - sliced lengthwise into ¼-inch thick strips
- 1 red bell pepper - cut into large pieces
- 1 yellow bell pepper - cut into large pieces
- 1 small red onion - cut into wedges
- ¼ cup extra-virgin olive oil - for grilling and marinade
- 3 tablespoons balsamic vinegar - adds tang and sweetness to the marinade
- 2 cloves garlic - minced for a touch of pungency
- 1 teaspoon fresh rosemary - chopped finely
- 1 teaspoon dried oregano - for an herbal note
- ½ teaspoon salt - enhances all the flavors
- ¼ teaspoon black pepper - for a gentle spicy kick
- 2 tablespoons fresh parsley - chopped for garnish
Instructions
- Preheat your grill or grill pan over medium-high heat. Brush the eggplant, zucchini, bell peppers, and onion with some olive oil and season lightly with salt and pepper.
- Grill the vegetables for about 4 to 5 minutes per side, turning carefully until they are tender and have nice grill marks. Remove from heat and let cool slightly.
- In a mixing bowl, whisk together the remaining olive oil, balsamic vinegar, garlic, rosemary, oregano, salt, and pepper to make the marinade.
- Layer the grilled vegetables in a shallow dish and pour the marinade evenly over them. Let the vegetables marinate at room temperature for at least 30 minutes to absorb the flavors.
- Garnish with chopped fresh parsley just before serving. Serve the antipasto at room temperature, either on its own or alongside crusty bread and cheese.
16. Roasted Butternut Squash with Sage
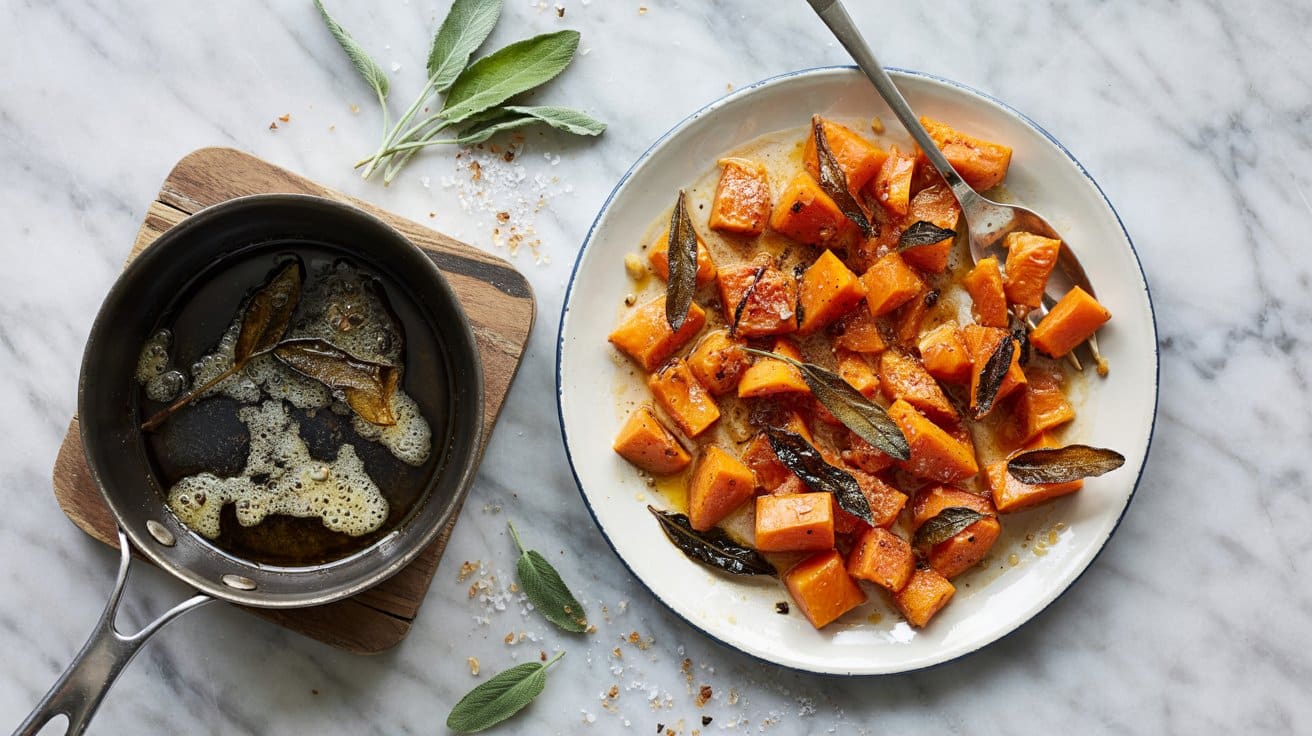
Roasted butternut squash with sage is a simple dish that brings out the natural sweetness and earthiness of autumn produce. The squash becomes tender and caramelized during roasting, while the sage adds a warm, herbal note that complements each bite beautifully.
This dish works well as a side for any fall meal, offering both comforting textures and a rich flavor. It's straightforward to prepare and can be adapted easily to suit different menus or tastes.
Why This Recipe Works
This roasted butternut squash is a great way to enjoy a seasonal vegetable with minimal fuss and maximum flavor. The combination of caramelized edges and tender squash makes each mouthful satisfying and hearty.
- Convenience - Requires simple prep and a hands-off roasting process.
- Flavor balance - Combines the natural sweetness of squash with the earthy tones of fresh sage.
- Texture - The squash roasts tender with slightly crisp edges for a pleasant contrast.
- Appeal - Suitable for family dinners and holiday spreads alike with a classic autumn feel.
Ingredient Swap Ideas
Swapping a few ingredients can help adjust this recipe to different preferences or dietary needs. These substitutions keep the core roasted squash flavor intact while providing variety.
- Sage - Replace with rosemary or thyme for a different herbal note.
- Butternut squash - Use sweet potatoes or acorn squash for an alternative roasted vegetable.
- Olive oil - Swap with avocado oil or melted coconut oil for a different fat source.
- Salt - Use smoked sea salt to add a subtle smoky flavor to the dish.
Ingredients
- 1 medium butternut squash - peeled, seeded, and cut into 1-inch cubes.
- 2 tablespoons extra-virgin olive oil - for roasting and flavor.
- 1 tablespoon fresh sage leaves - roughly chopped or whole, depending on preference.
- ½ teaspoon salt - to season evenly.
- ¼ teaspoon black pepper - freshly ground for mild heat.
Instructions
- Preheat your oven to 400°F (200°C). Line a baking sheet with parchment paper or lightly grease it.
- In a large bowl, toss the cubed butternut squash with olive oil, salt, and black pepper until all pieces are evenly coated.
- Spread the squash in a single layer on the baking sheet, making sure the cubes are not crowded. Scatter the fresh sage leaves over the top.
- Roast in the oven for 25 to 30 minutes, stirring halfway through, until the squash is tender and caramelized at the edges.
- Remove from the oven and serve warm as a side dish. The roasted squash pairs well with roasted meats or mixed into grain bowls.
17. Cucumber and Radish Salad with Yogurt Dressing
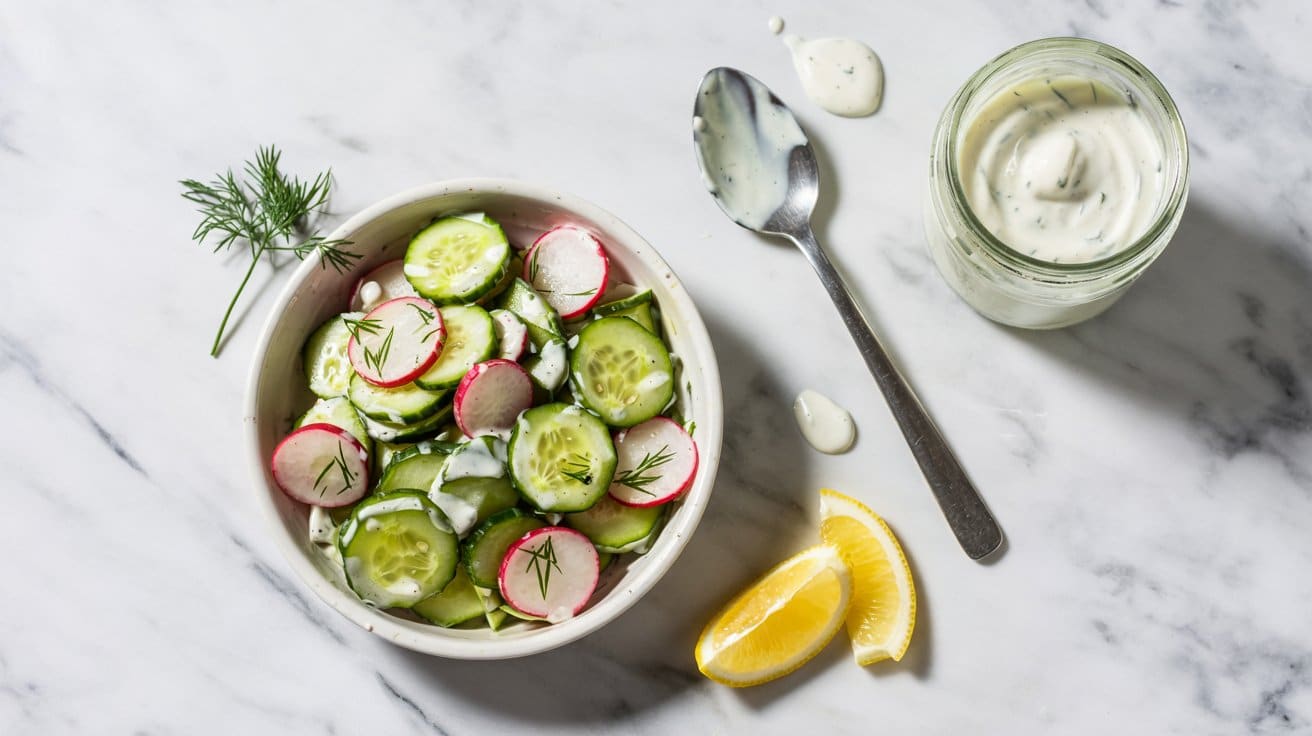
This cucumber and radish salad offers a refreshing mix of crisp, cool vegetables paired with a creamy yogurt dressing. It comes together quickly, making it an ideal side dish for busy weeknights or casual gatherings.
The crunch from fresh radishes goes with the mild, watery cucumbers perfectly, while the tangy yogurt dressing adds a smooth richness without overwhelming the natural flavors.
You'll appreciate how this simple salad balances textures and flavors, providing a light but satisfying option that can brighten up any meal. It's especially nice in warmer months but can be enjoyed year-round.
Why This Recipe Works
This salad is a straightforward way to bring freshness to your table with minimal preparation. The creamy, tangy dressing helps tie the crisp vegetables together while keeping it light and nutritious.
- Convenience - Ready in under 15 minutes, requiring no cooking.
- Flavor balance - Combines mild, crunchy vegetables with tangy, creamy dressing.
- Texture - Offers a satisfying crisp bite complemented by smooth yogurt.
- Appeal - A fresh, bright salad that works as a side or a light snack.
Ingredient Swap Ideas
Swapping some ingredients can help tailor this salad to meet personal preferences or dietary needs without losing its essence. Here are simple alternatives you can try:
- Yogurt - Use Greek yogurt for a thicker, creamier dressing or opt for dairy-free yogurt to make it vegan.
- Radishes - Substitute with thinly sliced fennel or jicama for a different crunchy element.
- Cucumber - Try English cucumber or kirby cucumbers for less watery texture.
- Herbs - Replace dill with fresh mint or parsley to vary the herbal notes in the dressing.
Ingredients
- 1 large cucumber - peeled if desired and thinly sliced.
- 6-8 radishes - thinly sliced for a crisp texture.
- 1 cup plain yogurt - use full-fat or low-fat based on preference.
- 1 tablespoon fresh dill - finely chopped.
- 1 tablespoon lemon juice - freshly squeezed for brightness.
- 1 garlic clove - minced finely or grated.
- Salt - to taste.
- Black pepper - freshly ground, to taste.
- 1 tablespoon olive oil - optional, for extra richness.
Instructions
- In a large bowl, combine the thinly sliced cucumbers and radishes. Toss them gently to mix.
- In a separate small bowl, whisk together the yogurt, lemon juice, minced garlic, chopped dill, salt, and pepper until smooth. Add olive oil if using, and whisk again.
- Pour the yogurt dressing over the cucumber and radish mixture. Stir gently until all the vegetables are evenly coated.
- Taste and adjust seasoning with additional salt, pepper, or lemon juice if desired.
- Cover the salad and chill in the refrigerator for at least 10 minutes before serving to allow the flavors to meld.
Serve chilled as a crisp and creamy side dish that pairs well with grilled meats, roasted vegetables, or as part of a light lunch spread.
18. Warm Lentil and Roasted Beet Salad
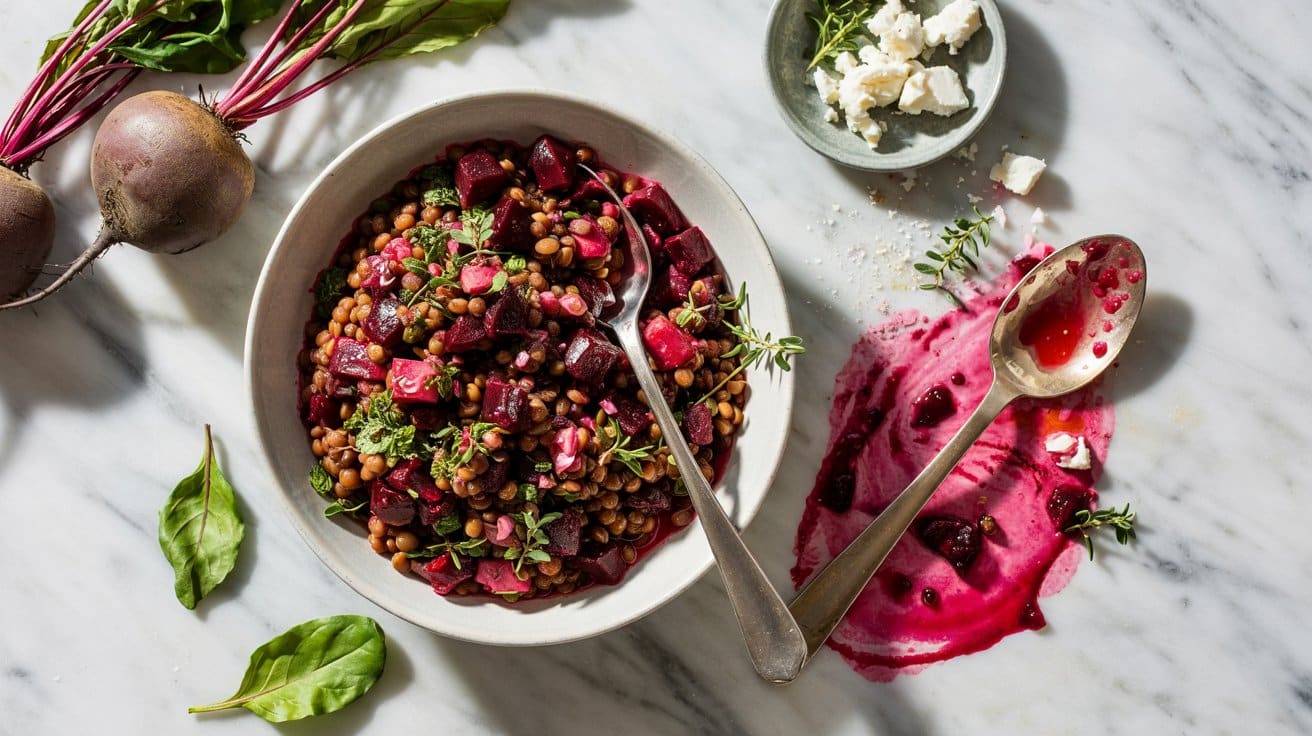
This warm lentil and roasted beet salad combines hearty lentils with the earthy sweetness of roasted beets, creating a nourishing meal that's both satisfying and full of texture. It's a great dish if you want something plant-based but still filling, and it works well as a lunch or a light dinner.
The salad is bright and colorful, with the deep reds of the beets contrasting the rustic tones of the lentils. Tossed in a simple mustard vinaigrette and finished with fresh herbs, it's easy to prepare and brings balanced flavors that come together beautifully.
Why This Recipe Works
This salad delivers both nutrition and taste without any fuss. It offers a simple way to include plant-based protein and vegetables in one dish while remaining visually appealing and satisfying.
- Convenience - Lentils cook quickly, and beets can be roasted in advance to save time.
- Flavor balance - The earthiness of beets goes well with tangy mustard vinaigrette and the subtle nuttiness of lentils.
- Texture - Roasted beets are tender yet firm, and lentils provide a pleasant bite.
- Appeal - Bright colors and hearty ingredients make it attractive for family meals or casual gatherings.
Ingredient Swap Ideas
Ingredient swaps help tailor this salad according to your preferences, dietary needs, or what you have on hand. These options let you keep the same wholesome feel while changing flavor or nutritional profiles.
- Use quinoa or farro instead of lentils for a different grain texture and a gluten-containing option.
- Swap roasted beets with roasted carrots or sweet potatoes if you prefer a sweeter flavor or don't have beets handy.
- Try a lemon vinaigrette instead of mustard for a lighter, fresher dressing variation.
- Add crumbled feta or goat cheese for some tangy creaminess, if you're not avoiding dairy.
Ingredients
- 3 medium beets - washed, peeled, and cut into 1-inch cubes
- 1 cup green or brown lentils - rinsed and drained
- 3 cups water or vegetable broth - for cooking lentils
- 3 tablespoons extra-virgin olive oil - divided
- 1 tablespoon Dijon mustard - for the vinaigrette
- 2 tablespoons apple cider vinegar - for a bright acidity
- 1 small shallot - minced finely
- ½ teaspoon salt - or to taste
- ¼ teaspoon black pepper - freshly ground
- 1 tablespoon fresh parsley - chopped, for garnish
- 1 teaspoon fresh thyme leaves - optional, for extra herbiness
Instructions
- Preheat your oven to 400°F (200°C). Toss the beet cubes with 1 tablespoon of olive oil and a pinch of salt and pepper. Spread them out on a baking sheet in a single layer and roast for about 30-35 minutes, turning halfway through, until tender and slightly caramelized.
- While the beets roast, place lentils and water or vegetable broth in a medium saucepan. Bring to a boil, then reduce heat to a simmer. Cook uncovered for about 20-25 minutes until lentils are tender but not mushy. Drain any excess liquid and set aside.
- In a small bowl, whisk together the remaining 2 tablespoons olive oil, Dijon mustard, apple cider vinegar, minced shallot, salt, and pepper until the dressing is smooth and emulsified.
- Combine the warm lentils and roasted beets in a large bowl. Pour the dressing over them and gently toss to coat everything evenly. Adjust seasoning with more salt or vinegar if needed.
- Sprinkle the salad with fresh parsley and thyme, then serve warm or at room temperature. This salad pairs well with crusty bread or can be served alongside grilled protein as part of a balanced meal.
19. Sautéed Mushrooms with Thyme and Garlic
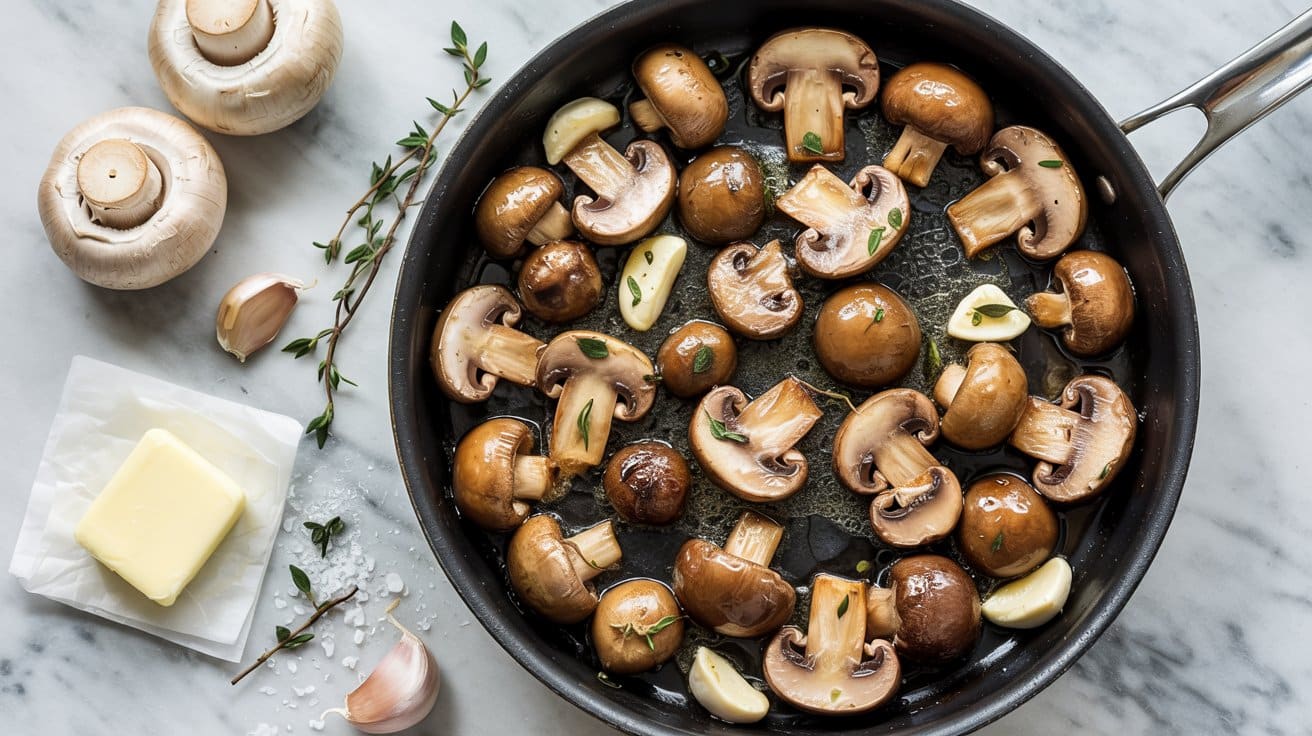
Sautéed mushrooms are a simple yet flavorful side that brings out the earthiness of the fungi while adding a savory note to any meal. This recipe combines garlic and fresh thyme, giving the mushrooms an aromatic boost that makes them incredibly fragrant and tender.
It's a straightforward dish that cooks quickly, making it a great option when you want something tasty without spending too much time at the stove. The gentle caramelization of the mushrooms pairs well with a variety of main courses or can be enjoyed on its own.
Why This Recipe Works
This recipe stands out by transforming plain mushrooms into a dish full of depth and warmth using just a few ingredients. It's an approachable way to add more vegetables to your meals with bold flavors and satisfying texture.
- Convenience - Cooks in under 15 minutes with minimal prep.
- Flavor balance - Earthy mushrooms mingle with fragrant thyme and pungent garlic.
- Texture - Mushrooms become tender with a lightly caramelized surface.
- Versatility - Works well as a side dish or a topping for grains, proteins, and salads.
Ingredient Swap Ideas
Adjusting ingredients here lets you tailor this dish to your dietary preferences or what you have on hand without losing its essence. Small changes keep the flavor close while offering flexibility.
- Fresh thyme - Substitute with rosemary or oregano for different herbal notes.
- Garlic - Use garlic powder if fresh isn't available; add a pinch during cooking.
- Mushrooms - Try cremini, shiitake, or oyster mushrooms instead of button for varied texture.
- Butter - Replace with olive oil or a plant-based butter alternative if dairy-free.
Ingredients
- 1 pound mushrooms sliced (button, cremini, or your choice)
- 2 tablespoons unsalted butter or olive oil
- 3 cloves garlic minced
- 1 teaspoon fresh thyme leaves plus more for garnish
- ½ teaspoon salt
- ¼ teaspoon black pepper
- 1 tablespoon fresh parsley chopped (optional, for garnish)
Instructions
- Heat the butter or olive oil in a large skillet over medium-high heat until melted and hot. Add the sliced mushrooms in a single layer and let them cook without stirring for about 3 minutes to develop a golden color.
- Stir the mushrooms to turn them and continue cooking for another 4 to 5 minutes until they release their moisture and start to brown evenly.
- Add the minced garlic and fresh thyme leaves. Cook, stirring frequently, for 1 to 2 minutes until the garlic is fragrant but not browned.
- Season the mushrooms with salt and black pepper, stirring well to combine. Cook for an additional minute to blend the flavors.
- Remove from heat and garnish with fresh parsley and additional thyme if desired. Serve warm alongside your favorite main dishes.
20. Grilled Corn on the Cob with Chili Lime Butter
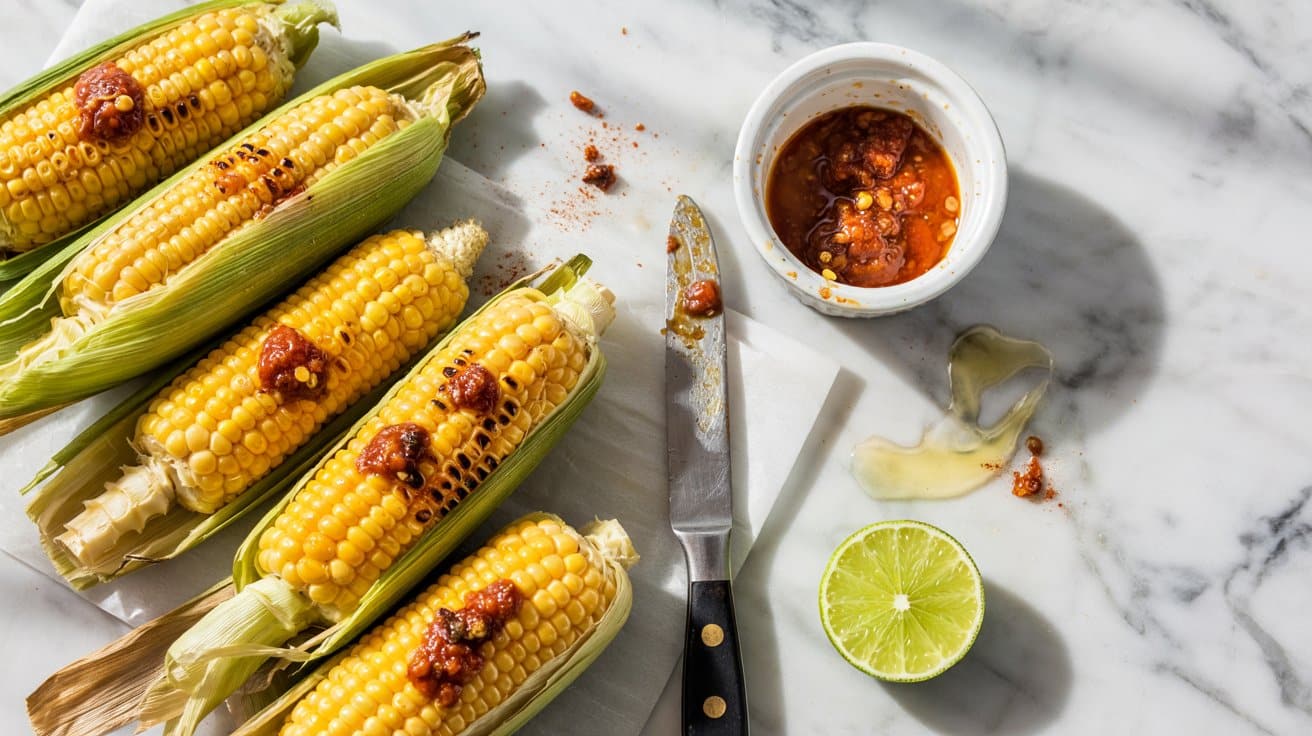
Grilled corn on the cob is a classic summer treat that's easy to prepare and full of fresh, smoky flavor. This version adds a lively twist with chili lime butter, bringing just the right balance of heat, tang, and richness that brightens each bite.
The charred kernels offer a satisfying pop, while the chili lime butter melts into every crevice, making this dish a fantastic side for BBQs, weeknight dinners, or casual gatherings. It's simple to make but packed with flavor, appealing to both kids and adults alike.
Why This Recipe Works
This grilled corn recipe pairs smoky sweetness with a bold, zesty butter, creating an irresistible combo that brings out the best in fresh corn.
- Convenience - Quick to grill and can be prepared ahead by making the chili lime butter in advance.
- Flavor balance - The heat from chili goes with the bright citrus and the creamy butter perfectly.
- Texture - Tender, juicy kernels with subtle char add a pleasing contrast to the smooth butter.
- Appeal - a flexible dish that fits casual meals or can be dressed up for celebrations.
Ingredient Swap Ideas
Adjusting the flavor or catering to dietary needs is easy with a few simple swaps. These options keep the spirit of the recipe intact without losing the core taste.
- Butter substitution - Use a plant-based butter to keep it dairy-free while maintaining richness.
- Chili options - Swap chili powder with smoked paprika or cayenne pepper for a different heat profile.
- Lime alternatives - Lemon juice can replace lime juice if limes aren't available, providing a similar tang.
- Extra herbs - Add chopped cilantro or parsley for a fresh herbal note that goes with the lime.
Ingredients
- 4 ears fresh corn on the cob - husked and cleaned
- ¼ cup unsalted butter - softened
- 1 tablespoon chili powder - use mild or hot depending on your preference
- 1 tablespoon fresh lime juice - about one lime
- ½ teaspoon salt - to enhance flavor
- ¼ teaspoon black pepper - fresh ground for subtle heat
- Optional: 1 teaspoon honey - balances heat with a touch of sweetness
Instructions
- Preheat your grill to medium-high heat. Place the corn directly on the grill grates and cook for about 10-12 minutes, turning occasionally, until kernels are tender and lightly charred.
- While the corn grills, combine softened butter, chili powder, lime juice, salt, pepper, and honey in a small bowl. Mix thoroughly until smooth and well blended.
- Remove the corn from the grill and immediately brush each ear generously with the chili lime butter. The warmth of the corn will melt the butter, spreading the flavors evenly.
- Serve hot with extra lime wedges on the side for squeezing, making it easy to add a fresh burst of citrus to every bite.
- Optionally, sprinkle a little extra chili powder or chopped fresh herbs on top for added color and flavor.
Enjoy this simple yet bright dish that brings a fresh twist to grilled corn.
Need a swap for vegetable oil in baking? Consider healthier substitutes for vegetable oil such as applesauce or melted butter depending on desired texture. If a recipe calls for vegetable broth, common alternatives like mushroom stock or concentrated bouillon work well; see simple vegetable broth substitutes for options and infusion tips.

Andrew Gray is a seasoned food writer and blogger with a wealth of experience in the restaurant and catering industries. With a passion for all things delicious, Andrew has honed his culinary expertise through his work as a personal chef and caterer.
His love for food led him to venture into food writing, where he has contributed to various online publications, sharing his knowledge and insights on the culinary world. As the proud owner of CooksCrafter.com, Andrew covers a wide range of topics, including recipes, restaurant reviews, product recommendations, and culinary tips.
Through his website, he aims to inspire and educate fellow food enthusiasts, offering a comprehensive resource for all things food-related.