Summer calls for cool, refreshing desserts that come together quickly without heating up the kitchen - especially no-bake pies, chilled desserts that set in the refrigerator using fillings like cream cheese, whipped cream, gelatin, or sweetened condensed milk. This collection of 13 summer pies that don't require baking offers a range of delicious options ideal for warm days and relaxed gatherings, featuring chilled, set fillings and crumb or no-bake crusts that firm in the refrigerator rather than in the oven.

These recipes show a variety of flavors and textures, from creamy cheesecakes to fruity tarts and tropical treats. Many feature fresh summer fruits like berries, peaches, and mangoes, combined with simple, no-bake crusts and light, airy fillings.
They're designed to be easy to prepare and visually inviting, making them great choices for casual get-togethers or special occasions.
What makes this selection especially appealing is how effortless they are to assemble, often requiring just chilling to set. Along with minimal cleanup and straightforward ingredients, these pies deliver big on taste without the need for an oven or complicated steps.
1. No-Bake Strawberry Cheesecake Pie

This no-bake strawberry cheesecake pie brings together a smooth, creamy cheesecake filling, made with cream cheese and whipped cream, with the fresh sweetness of ripe strawberries; for another quick strawberry dessert, try the air-fryer strawberry shortcake for quick desserts.
The graham cracker crust adds a subtle crunch and a hint of buttery flavor that goes well with the rich filling, typically made from about 1 ½ cups crushed graham crackers mixed with 6 tablespoons melted butter for a firm, sliceable base. Since it requires no baking, this pie comes together quickly and can chill while you focus on other things.
It's delightfully easy to make ahead and serves well at family dinners, gatherings, or casual snacks; see cheesecake side dish ideas for pairing suggestions.
Why This Recipe Works
This recipe combines convenience and delicious flavor in a straightforward, no-bake format that anyone can prepare - the filling firms up in the refrigerator rather than from oven heat. The balance of creamy cheesecake and fresh strawberries creates a dessert that's both appealing and light.
- Convenience - Requires no baking, saving time and effort in the kitchen.
- Flavor balance - Creamy and rich filling contrasts nicely with sweet, juicy strawberries.
- Texture - Crunchy graham cracker crust paired with smooth cheesecake and fresh fruit.
- Appeal - Family-friendly and looks inviting, perfect for casual or special occasions; pair with honey-based dessert ideas for summer.
- Make-ahead friendly - Can be prepared in advance and chilled, making serving easy.
Ingredient Swap Ideas
Sometimes adapting a recipe to fit personal preference or dietary needs makes it easier to enjoy, such as replacing the crust with a nut-based gluten-free crust or choosing plant-based cream cheese alternatives. Here are a few swaps that keep the essence of this pie intact while offering different options.
- Graham cracker crust - Substitute with gluten-free graham crackers or crushed digestive biscuits for dietary requirements.
- Cream cheese - Use a dairy-free cream cheese alternative to make the pie vegan or lactose-free.
- Strawberries - Replace fresh strawberries with raspberries, blueberries, or a mixed berry blend for variety.
- Sweetener - Swap granulated sugar with honey or maple syrup to introduce a different natural sweetness.
- Whipped topping - Use coconut whipped cream as a dairy-free topping option to maintain lightness, or explore small-batch cupcake ideas for intimate servings for single-serve treats.
Ingredients
- 1 ½ cups graham cracker crumbs - For the crunchy pie crust base.
- 6 tablespoons unsalted butter, melted - Binds the crust and adds richness.
- 2 tablespoons granulated sugar - Sweetens the crust slightly.
- 16 ounces (2 packages) cream cheese, softened - Main component of the creamy filling.
- ½ cup granulated sugar - Sweetens the cheesecake filling.
- 1 teaspoon vanilla extract - Enhances flavor depth in the filling.
- 1 cup heavy whipping cream - Whipped to create lightness in the filling.
- 2 cups fresh strawberries, sliced - Provides freshness and natural sweetness for topping.
Instructions
- Combine graham cracker crumbs, melted butter, and 2 tablespoons sugar in a bowl. Mix until crumbs are evenly coated and press the mixture firmly into the bottom and up the sides of a 9-inch pie plate. Chill the crust in the refrigerator while preparing the filling.
- Beat the softened cream cheese with ½ cup sugar and vanilla extract in a large bowl until smooth and creamy.
- In a separate bowl, whip the heavy cream until stiff peaks form. Gently fold the whipped cream into the cream cheese mixture until fully combined and light.
- Spread the cheesecake filling evenly over the chilled crust. Smooth the top with a spatula.
- Arrange the sliced strawberries evenly on top of the filling, pressing gently to set them into the surface.
- Refrigerate the pie for at least 4 hours or overnight to allow it to set properly before serving. Enjoy chilled.
2. No-Bake Key Lime Pie
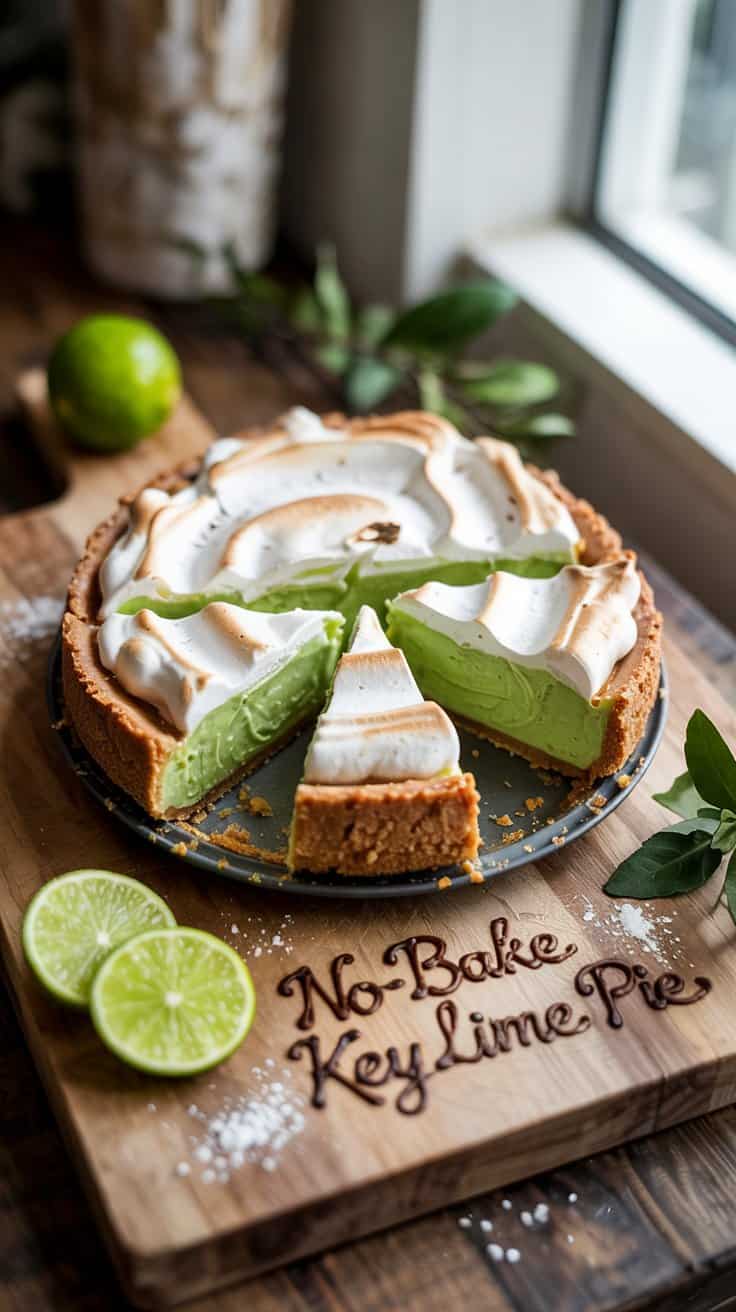
This no-bake Key lime pie is a refreshing treat with a bright, tangy flavor that's perfect for warm days or any time you want a light, citrusy dessert, traditionally made with Key limes (small, aromatic limes from the Florida Keys) for a distinctive tartness. The creamy filling combines lime juice and sweetened condensed milk (often made with one 14-ounce can of sweetened condensed milk to about ½ cup fresh lime juice), creating a smooth texture that holds its shape without baking.
The graham cracker crust adds a sweet crunch, balancing the tartness of the lime with a buttery foundation; for another quick fruit dessert, try the air-fryer apple pie for easy fruit desserts.
If you want a floral, aromatic lime note in citrus recipes, consider fragrant kaffir lime leaf substitutes that work well in citrus-forward desserts.
Why This Recipe Works
This pie stands out for its simplicity and bright, balanced flavors. It's a fast, no-bake dessert that offers a creamy, tangy filling with a crisp crust, making it ideal for easy entertaining.
- Convenience - Requires no baking and sets in the fridge, saving time and heat.
- Flavor balance - Combines tangy lime juice with sweet condensed milk for a creamy yet zesty taste.
- Texture - Smooth, firm filling paired with a crunchy graham cracker crust.
- Appeal - Light and refreshing, suitable for a family-friendly dessert or casual get-together.
- Preparation ease - Minimal ingredients and simple steps reduce mess and cleanup.
Ingredient Swap Ideas
Adjusting a few ingredients can tailor this recipe to your preferences or dietary needs without losing the pie's essential character.
- Use fresh lemon juice - Substitute lime juice with lemon juice for a slightly different citrus twist.
- Try a gluten-free crust - Replace the graham cracker crust with gluten-free crackers or nuts for a gluten-free option.
- Dairy-free alternative - Use a dairy-free condensed milk alternative and a dairy-free crust to make it suitable for lactose intolerance.
- Gelatin substitute - Skip gelatin or use agar-agar for a vegan-friendly set.
- Add zest for intensity - Incorporate lime zest into the filling for an extra burst of citrus flavor.
Ingredients
- 1 ½ cups graham cracker crumbs - For the pie crust base, finely crushed.
- 6 tablespoons unsalted butter - Melted, to bind the crust.
- 14 ounces sweetened condensed milk - The base of the creamy filling.
- ½ cup fresh Key lime juice - Provides tartness and flavor.
- 1 teaspoon unflavored gelatin powder - Optional, helps the filling set firmly.
- 2 tablespoons cold water - To bloom the gelatin.
- Whipped cream, for topping - Optional garnish for serving.
- Lime slices or zest, for garnish - Optional for extra decoration and flavor.
Instructions
- Combine graham cracker crumbs and melted butter in a medium bowl. Mix until the crumbs are evenly coated and press the mixture firmly into the bottom of a 9-inch pie plate to form the crust. Refrigerate to set while preparing the filling.
- In a small bowl, sprinkle gelatin over cold water and let it bloom for 5 minutes. Heat gently in the microwave or on the stove until the gelatin dissolves completely. Set aside to cool slightly.
- In a separate bowl, whisk together sweetened condensed milk and fresh Key lime juice until smooth. Stir in the dissolved gelatin until fully incorporated.
- Pour the filling over the chilled crust and spread evenly. Cover the pie with plastic wrap and refrigerate for at least 4 hours, or until the filling has set.
- Before serving, top with whipped cream and garnish with lime slices or zest, if desired. Slice and enjoy a bright, creamy dessert that requires no baking.
3. Blueberry Lemon Icebox Pie
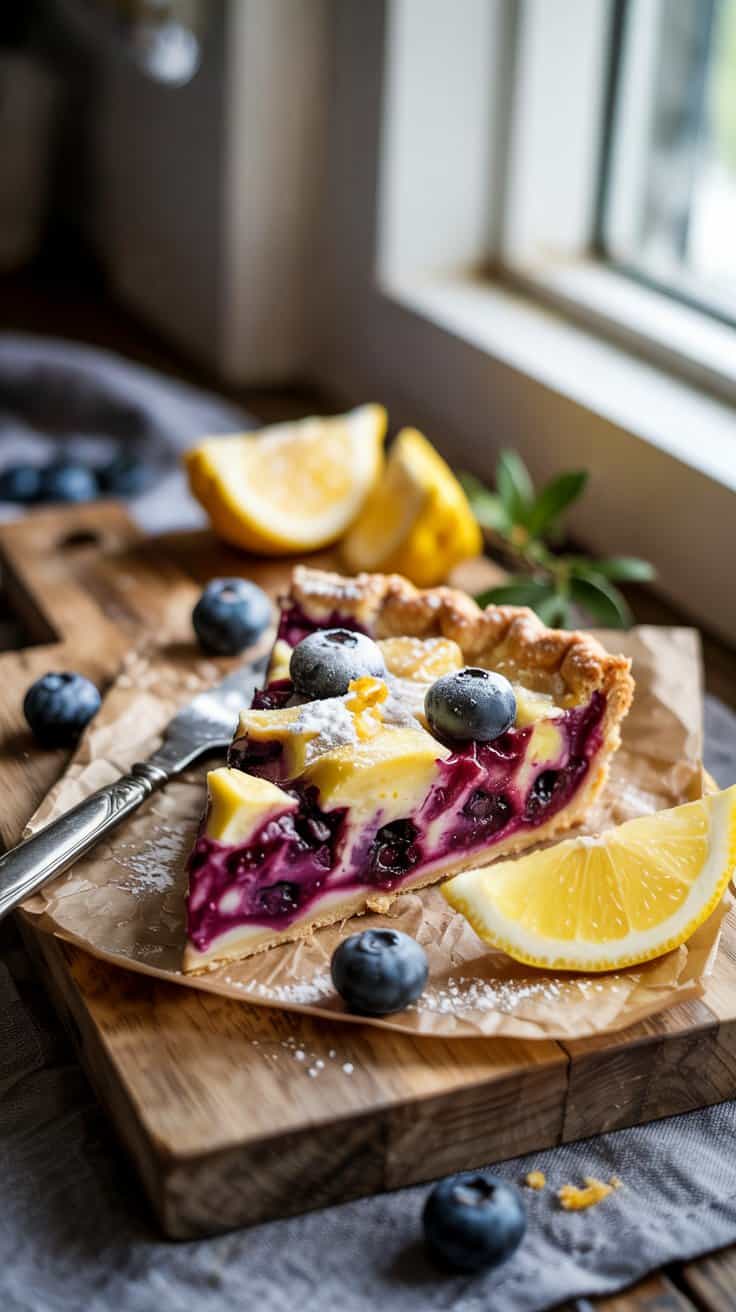
The blueberries add a sweet burst in every bite, while the lemon zest and juice brighten the filling, making it an ideal treat for warmer days or casual gatherings; if you need alternatives, see lemon juice substitutes for recipes.
The cookie crust, often made from crushed shortbread or graham cookies, provides a simple and slightly crunchy base, balancing the smooth filling perfectly. Plus, it's a no-bake pie, so you can have it ready with minimal hands-on time and chill it until it's firm and cool.
Why This Recipe Works
Blueberry Lemon Icebox Pie is a great choice for any occasion because it's easy to prepare, has a balanced flavor, and appeals to a wide audience. The mix of creamy filling and fresh fruit works well together, and it holds up nicely after chilling, making it a practical dessert to make ahead.
- Convenience - Requires no baking and comes together quickly with basic steps.
- Flavor balance - Combines tangy lemon with sweet blueberries and creamy filling.
- Texture - Smooth, creamy filling contrasts with the crisp cookie crust.
- Appeal - Light and fresh, ideal for family or guest gatherings.
- Serving ease - Pies can be portioned easily and kept chilled until ready to serve.
Ingredient Swap Ideas
Adjusting this recipe to suit different tastes or dietary needs is straightforward with a few swaps. This flexibility lets you enjoy the pie while keeping it suitable for various preferences.
- Cookie crust - Use gluten-free cookies instead of regular ones to make it gluten-friendly.
- Cream filling - Substitute cream cheese with a dairy-free cream cheese for lactose intolerance.
- Sweetener - Replace granulated sugar with maple syrup or honey for a natural sweetener.
- Blueberries - Try fresh raspberries or blackberries for a different berry flavor.
- Lemon - Use lime juice and zest for a slightly different citrus twist.
Ingredients
- 1 ½ cups crushed vanilla wafer cookies - Finely crushed for the pie crust.
- 6 tablespoons unsalted butter - Melted, to bind the cookie crust.
- 8 ounces cream cheese - Softened for the creamy filling.
- 1 cup powdered sugar - Added to the cream cheese for sweetness.
- 1 cup heavy cream - Whipped to fold into the filling.
- ¼ cup fresh lemon juice - For the bright citrus flavor.
- 1 teaspoon lemon zest - Adds extra lemon aroma and flavor.
- 1 cup fresh blueberries - Mixed into the filling.
- Extra blueberries for garnish - Optional, to decorate the top.
Instructions
- Combine the crushed vanilla wafers and melted butter in a bowl until the mixture resembles wet sand. Press this evenly into the bottom and slightly up the sides of a 9-inch pie plate. Place it in the refrigerator to chill while you prepare the filling.
- In a mixing bowl, beat the softened cream cheese and powdered sugar until smooth and creamy. Add the lemon juice and zest, and mix until fully incorporated.
- In a separate bowl, whip the heavy cream until stiff peaks form. Gently fold the whipped cream into the cream cheese mixture to keep it light and airy.
- Carefully fold in the fresh blueberries, reserving a few for garnish. Pour the filling into the chilled cookie crust and spread it evenly.
- Cover the pie loosely with plastic wrap and refrigerate for at least 4 hours, or until the filling is firm and set.
- Before serving, garnish the top of the pie with the reserved blueberries. Slice and enjoy this refreshing, creamy dessert.
4. Peach and Raspberry No-Bake Pie

This no-bake pie brings together the gentle sweetness of ripe peaches with the bright tartness of fresh raspberries. The combination creates a lively flavor contrast that feels fresh and light, perfect for warm days or when you want something easy but special.
The creamy filling adds a smooth, rich texture that balances the juicy fruit beautifully. It's a great choice when you want a homemade dessert without turning on the oven or spending too much time in preparation.
Why This Recipe Works
This pie combines simplicity and fresh flavors with a quick setup that doesn't sacrifice taste or texture. It's satisfying without being heavy, offering a bright and cool finish to any meal.
- Convenience - Requires no baking, so it's fast to assemble and chill.
- Flavor balance - Combines sweet peaches with the natural tartness of raspberries.
- Texture - Creamy filling paired with soft fruit and a crunchy crust.
- Appeal - Bright, colorful, and inviting for any casual or festive occasion.
- Serving ease - Easy to slice and serve straight from the fridge.
Ingredient Swap Ideas
Swapping ingredients can help you fit this recipe to your personal preferences or dietary needs while keeping the core flavors intact. Try these substitutions if needed:
- Peaches - Use nectarines or apricots for a slightly different but still sweet and juicy fruit base.
- Raspberries - Substitute with strawberries or blackberries for another tangy berry option.
- Creamy filling - Swap full-fat cream cheese for Greek yogurt or mascarpone for a lighter or richer texture.
- Pie crust - Use a gluten-free graham cracker or nut-based crust to suit dietary restrictions.
- Sweetener - Replace granulated sugar with honey or maple syrup for a more natural sweetness.
Ingredients
- 1 ½ cups graham cracker crumbs - for the pie crust base.
- 6 tablespoons unsalted butter, melted - binds the crust and adds richness.
- 1 cup cream cheese, softened - creates a smooth and creamy filling.
- 1 cup heavy cream - whips into soft peaks for a light texture.
- ½ cup granulated sugar - sweetens the filling just enough.
- 1 teaspoon vanilla extract - enhances the overall flavor.
- 2 ripe peaches, peeled and sliced - adds natural sweetness and juiciness.
- 1 cup fresh raspberries - provides a tart and colorful contrast.
- Additional raspberries and peach slices for garnish - makes the pie look fresh and inviting.
Instructions
- In a medium bowl, combine the graham cracker crumbs and melted butter. Mix well until the crumbs are evenly coated. Press the mixture firmly into the bottom and up the sides of a 9-inch pie dish to form the crust. Place it in the refrigerator to chill while preparing the filling.
- In a separate bowl, beat the cream cheese with the sugar and vanilla extract until smooth and creamy.
- In another bowl, whip the heavy cream until soft peaks form. Gently fold the whipped cream into the cream cheese mixture until fully combined.
- Carefully fold the sliced peaches and raspberries into the creamy filling, distributing the fruit evenly.
- Pour the filling into the chilled crust, smoothing the top with a spatula. Cover and refrigerate for at least 4 hours or until set.
- Before serving, garnish the pie with additional peach slices and raspberries for a fresh look. Slice and enjoy chilled.
5. Chocolate Peanut Butter Pie

This pie brings together rich peanut butter cream and smooth chocolate ganache in a chilled dessert that feels indulgent without needing to bake. The cookie crust adds just the right amount of crunch to balance the creamy fillings.
You can prepare this pie ahead of time, making it ideal for busy days or special occasions. Its layered textures and comforting flavors make each bite hard to resist, especially if you enjoy classic combinations that bring a hint of nostalgia.
The flavors blend seamlessly-the peanut butter is nutty and creamy, while the chocolate ganache adds a glossy, slightly bittersweet finish. Chilling the pie helps everything set beautifully, so you get a cool, satisfying treat every time.
Why This Recipe Works
This pie offers a satisfying mix of textures and flavors, paired with straightforward preparation that fits into a busy schedule.
- Convenience - No baking required, and it can be made in advance.
- Flavor balance - The richness of peanut butter goes with the bittersweet chocolate layer perfectly.
- Texture - Crunchy cookie crust contrasts with smooth, creamy fillings.
- Appeal - A crowd-pleasing dessert that works well for family dinners or gatherings.
- Serving ease - Slices cleanly and can be stored effortlessly in the fridge.
Ingredient Swap Ideas
Adjusting ingredients can help the pie suit different tastes or dietary needs without losing its essence.
- Cookie crust substitution - Use gluten-free cookies for a gluten-free dessert option.
- Peanut butter alternative - Swap peanut butter with almond or cashew butter to vary the nut flavor.
- Chocolate option - Use dairy-free chocolate chips for a vegan-friendly ganache.
- Cream choice - Replace heavy cream with coconut cream to keep it dairy-free and still creamy.
- Sweetener swap - Substitute granulated sugar with coconut sugar or maple syrup for a different sweetness profile.
Ingredients
- 1 ½ cups cookie crumbs - crushed, such as chocolate wafer or graham cracker crumbs.
- 6 tablespoons unsalted butter - melted, to bind the crust.
- 1 cup creamy peanut butter - smooth and unsalted preferred.
- 8 ounces cream cheese - softened.
- 1 cup powdered sugar - sifted for smooth texture.
- 1 teaspoon vanilla extract - for added flavor depth.
- 1 ½ cups heavy cream - chilled, for whipping.
- 8 ounces semisweet chocolate - chopped or chips, for ganache.
- ½ cup heavy cream - for the chocolate ganache.
Instructions
- Combine cookie crumbs and melted butter in a bowl. Press the mixture firmly into the bottom and up the sides of a 9-inch pie dish. Chill in the refrigerator while preparing the filling.
- In a mixing bowl, beat the peanut butter, softened cream cheese, powdered sugar, and vanilla extract until smooth and creamy.
- In a separate bowl, whip 1 ½ cups of chilled heavy cream into stiff peaks. Gently fold the whipped cream into the peanut butter mixture until fully incorporated.
- Spoon the peanut butter cream filling into the chilled crust and smooth the top. Place the pie back in the refrigerator to set while making the ganache.
- Heat ½ cup heavy cream in a small saucepan over medium heat until it just begins to simmer. Remove from heat and pour over the chopped chocolate. Let sit for a minute, then stir until smooth and glossy.
- Pour the chocolate ganache evenly over the peanut butter layer and spread carefully to cover. Refrigerate the pie for at least 4 hours or overnight before serving to allow it to firm up.
Serve chilled, slicing with a sharp knife for clean pieces. This pie stores well covered in the refrigerator for up to 3 days.
6. No-Bake Mango Coconut Cream Pie

This no-bake mango coconut cream pie brings a tropical twist to your dessert table with fresh mango chunks located in a smooth, creamy coconut filling. It's light, refreshing, and perfect for warmer days or when you want something sweet without turning on the oven.
The combination of tropical fruit with a nutty, crunchy crust creates a satisfying contrast in both flavor and texture. Its ease of preparation makes it a wonderful choice for busy weeknights or casual gatherings.
You can prepare this pie in advance and let it chill while you focus on other tasks. The bright flavors and creamy texture offer a nice balance that feels indulgent without being overly heavy.
Why This Recipe Works
This recipe offers a straightforward way to enjoy tropical flavors in a creamy, comforting dessert-no baking required. It delivers a wonderful mix of textures and tastes that appeal to all ages.
- Convenience - Requires no oven time, making it fast and simple to prepare.
- Flavor balance - Sweet mango and creamy coconut complement each other beautifully.
- Texture - A crunchy nutty crust contrasts with the smooth filling and soft mango pieces.
- Appeal - Bright colors and fresh fruits make it visually inviting and family-friendly.
- Make-ahead friendly - Can be prepared ahead and refrigerated, perfect for planning events or busy days.
Ingredient Swap Ideas
Swapping ingredients can accommodate dietary preferences or help you use what you already have on hand without losing the pie's essential tropical feel.
- Crust base - Use gluten-free graham crackers or crushed nuts for a gluten-free crust version.
- Filling cream - Replace cream cheese with dairy-free cream cheese or silken tofu for a vegan option.
- Sweetener - Substitute honey with maple syrup or agave nectar to keep the pie vegan-friendly.
- Fruit choice - Try pineapple chunks or peach slices in place of mango for a different tropical note.
- Coconut flavor - Use coconut yogurt instead of coconut cream for a lighter filling alternative.
Ingredients
- 1 ½ cups graham cracker crumbs or crushed digestive biscuits
- ½ cup toasted shredded coconut
- ½ cup finely chopped walnuts or pecans
- ⅓ cup melted coconut oil or unsalted butter
- 8 ounces cream cheese, softened
- 1 cup coconut cream (the thick part from canned coconut milk)
- ½ cup powdered sugar
- 1 teaspoon vanilla extract
- 1 ½ cups fresh mango chunks, peeled and chopped
- Toasted coconut flakes for garnish (optional)
Instructions
- In a medium bowl, combine the graham cracker crumbs, toasted shredded coconut, chopped nuts, and melted coconut oil. Stir until the mixture holds together when pressed.
- Press the crust mixture firmly into the bottom and slightly up the sides of a 9-inch pie dish. Place it in the refrigerator to chill for at least 30 minutes.
- In a large bowl, beat the softened cream cheese until smooth. Add the coconut cream, powdered sugar, and vanilla extract, then continue to beat until fully combined and creamy.
- Gently fold in the fresh mango chunks, taking care not to break them up too much.
- Pour the coconut mango filling into the chilled crust and spread evenly. Cover the pie with plastic wrap and refrigerate for at least 4 hours, preferably overnight, to allow it to set.
- Before serving, garnish with toasted coconut flakes if desired. Slice and enjoy this fresh, creamy dessert chilled.
7. Watermelon Pudding Pie

Watermelon pudding pie is a refreshing treat that's ideal for warm days when you want something cool and light. This dessert combines the natural sweetness and juiciness of watermelon with a smooth, delicate pudding texture.
It sets up nicely thanks to gelatin or agar, giving the pie a lovely firmness that's easy to slice and serve.
The flavor is subtly sweet and very fresh, making it a wholesome option for both family desserts and casual gatherings. The preparation is straightforward, requiring just a few main ingredients and some time to chill.
This pie delivers summer vibes in every bite without being heavy or overly sweet.
Why This Recipe Works
This watermelon pudding pie is as practical as it is delicious, bringing a fresh, summery twist to your dessert lineup. It balances bright fruit flavor with a creamy yet light texture, making it enjoyable for a wide range of tastes.
- Convenience - Uses simple ingredients with minimal prep and requires chilling time rather than complex cooking.
- Flavor balance - Offers natural sweetness from watermelon with a smooth, mildly creamy pudding.
- Texture - Features a firm but tender pudding set with gelatin or agar for easy slicing.
- Appeal - Perfect for hot days and events when you want a refreshing, crowd-pleasing dessert.
- Serving ease - Can be portioned ahead and served chilled, reducing last-minute hassle.
Ingredient Swap Ideas
Swapping some ingredients here can help you tailor the pie to suit dietary restrictions or personal preferences without losing the essence of the dessert.
- Gelatin or agar - Use agar for a vegetarian or vegan-friendly alternative to gelatin.
- Watermelon puree - Combine watermelon with other mild fruits like cantaloupe or honeydew for a slightly different flavor.
- Sweetener - Replace granulated sugar with honey or maple syrup to add a natural sweetness if you prefer.
- Pie crust - Use a gluten-free or nut-based crust to accommodate dietary needs or texture preferences.
- Cream or milk - Substitute with coconut cream or almond milk for a dairy-free version with added richness.
Ingredients
- 4 cups watermelon puree - Fresh watermelon blended until smooth.
- ½ cup granulated sugar - Adjust based on the watermelon's sweetness.
- 2 teaspoons unflavored gelatin powder - Or agar powder for a vegan option.
- ¼ cup cold water - To bloom the gelatin or agar.
- 1 cup heavy cream - Whipped lightly for a creamy texture.
- 1 teaspoon fresh lemon juice - To brighten the flavor.
- 1 pre-baked pie crust - Your choice of graham cracker, pastry, or nut-based crust.
Instructions
- In a small bowl, sprinkle the gelatin or agar over the cold water and let it sit for 5 minutes to bloom.
- Meanwhile, combine the watermelon puree, sugar, and lemon juice in a saucepan. Gently heat the mixture over low heat until the sugar dissolves, but do not let it boil.
- Remove the watermelon mixture from heat and stir in the bloomed gelatin or agar until fully dissolved. Let this mixture cool to room temperature.
- Once cooled, fold in the lightly whipped cream to create a smooth, airy pudding.
- Pour the pudding mixture into the pre-baked pie crust and smooth the top with a spatula.
- Refrigerate the pie for at least 4 hours or until fully set before slicing and serving chilled.
8. No-Bake Mixed Berry Tart
This no-bake mixed berry tart is an easy way to enjoy fresh fruit and creamy filling without turning on the oven. The combination of strawberries, blueberries, and blackberries offers a lovely balance of sweetness and tartness, making each bite refreshing.
The light cream filling goes with the berries beautifully, creating a smooth texture that contrasts with the crisp crust. This tart comes together quickly, making it well suited for busy days or last-minute gatherings.
Its bright colors also make it a visually appealing dessert to serve. Whether you're treating yourself or sharing with family, this tart feels both special and simple.
Why This Recipe Works
This no-bake mixed berry tart offers a straightforward preparation and a fresh, balanced flavor that many will appreciate.
- Convenience - Requires no baking, saving time and energy.
- Flavor balance - Combines creamy filling with naturally sweet and tangy berries.
- Texture - Crisp crust paired with smooth cream and juicy berries.
- Appeal - Bright, colorful presentation suitable for any occasion.
- Easy serving - Slices cleanly and can be made ahead, making serving hassle-free.
Ingredient Swap Ideas
Switching ingredients in this tart can tailor it to your preferences or dietary needs without losing its essence. Here are some alternatives to consider.
- Crust - Use gluten-free cookies or nut-based crust for a gluten-free option.
- Cream filling - Substitute regular cream cheese with vegan cream cheese or coconut cream for dairy-free diets.
- Sweetener - Replace granulated sugar with honey, maple syrup, or a sugar substitute of choice.
- Berries - Try raspberries or even sliced kiwi for a different fruit combination.
- Flavoring - Add lemon zest or a splash of vanilla extract to improve the cream filling's taste.
Ingredients
- 1 ½ cups graham cracker crumbs - For the tart crust base.
- ⅓ cup unsalted butter melted - To bind the crust ingredients.
- 8 ounces cream cheese softened - Provides the creamy filling texture.
- ½ cup powdered sugar - Sweetens the cream filling evenly.
- 1 teaspoon vanilla extract - Adds subtle warmth to the filling.
- 1 cup heavy cream cold - Whipped to light peaks for a fluffy filling.
- ½ cup strawberries hulled and sliced - Contributes sweetness and color.
- ½ cup blueberries fresh - Offers mild tartness and nice texture.
- ½ cup blackberries fresh - Adds deep color and tangy notes.
Instructions
- Combine graham cracker crumbs and melted butter in a bowl until the mixture holds together when pressed. Press this firmly into the bottom and up the sides of a tart pan. Chill in the refrigerator for at least 20 minutes to set the crust.
- Beat softened cream cheese, powdered sugar, and vanilla extract in a mixing bowl until smooth and creamy.
- In a separate bowl, whip the cold heavy cream until stiff peaks form. Gently fold the whipped cream into the cream cheese mixture until fully combined without deflating the cream.
- Spoon the cream filling evenly over the chilled crust and smooth the surface with a spatula.
- Arrange the strawberries, blueberries, and blackberries on top of the filling in an even layer for beautiful presentation.
- Refrigerate the assembled tart for at least 2 hours before serving to allow flavors to meld and filling to firm up.
Enjoy a slice chilled, appreciating the fresh berries paired with the light and creamy filling.
9. No-Bake Lemon Raspberry Swirl Pie

This no-bake lemon raspberry swirl pie is a refreshing treat that comes together quickly and easily. The lemon cream filling is smooth and tangy, bringing a bright citrus flavor that feels light and satisfying.
Swirled through the lemon cream are bright raspberry purees, creating a beautiful marbled effect that adds a fruity burst and a pop of color. The crust holds everything together with a crisp texture, offering a nice contrast to the creamy filling.
This pie suits busy days or casual gatherings when you want something fresh and impressive without heating up the oven. It's a great choice for spring or summer, bringing a balance of tartness and sweetness that appeals to all ages.
Why This Recipe Works
This pie combines easy preparation with a fresh, lively flavor that makes it a standout dessert for any occasion.
- Convenience - Requires no baking and sets quickly in the fridge, saving time and energy.
- Flavor balance - Combines zesty lemon cream with sweet, fruity raspberry swirls for a bright contrast.
- Texture - Crisp crust goes well with the smooth, creamy filling.
- Visual appeal - The raspberry marbling adds an eye-catching pattern that looks elegant yet simple.
- Serving ease - Chilled slices are neat and hold together well, making it easy to portion and serve.
Ingredient Swap Ideas
Swapping ingredients can help tailor this pie to your tastes or dietary needs without sacrificing its refreshing character.
- Graham cracker crust - Use crushed digestive biscuits or gluten-free cookies to create a similar crunchy base if preferred.
- Cream cheese - Replace with mascarpone or a dairy-free cream cheese alternative for a slightly different texture or to accommodate dairy restrictions.
- Lemon juice and zest - Lime juice and zest can be used for a different citrus twist, adding a slightly warmer tang.
- Raspberry puree - Use other berry purees such as strawberry or blueberry for varied fruit flavors.
- Sweetener - Swap granulated sugar with honey or maple syrup for a more natural sweetness.
Ingredients
- Graham cracker crumbs - 1 ½ cups, finely crushed
- Unsalted butter - 6 tablespoons, melted
- Cream cheese - 8 ounces, softened
- Sweetened condensed milk - 1 can (14 ounces)
- Fresh lemon juice - ½ cup, freshly squeezed
- Lemon zest - 1 tablespoon, finely grated
- Heavy cream - 1 cup, chilled
- Granulated sugar - ¼ cup
- Fresh raspberries - 1 cup, pureed and strained to remove seeds
- Vanilla extract - 1 teaspoon
Instructions
- Prepare the crust by combining graham cracker crumbs and melted butter in a bowl. Press the mixture firmly into the bottom and up the sides of a 9-inch pie pan. Place it in the refrigerator to chill while preparing the filling.
- Beat the softened cream cheese with sweetened condensed milk until smooth and creamy. Stir in lemon juice, lemon zest, and vanilla extract until fully combined.
- In a separate bowl, whip the heavy cream and granulated sugar until stiff peaks form. Gently fold the whipped cream into the lemon mixture, keeping it light and airy.
- Spoon half of the lemon cream filling into the crust. Drizzle half of the raspberry puree over it, then add the remaining lemon filling on top. Add the last of the raspberry puree in small spoonfuls. Use a knife to gently swirl the raspberry into the lemon cream, creating a marbled pattern.
- Cover the pie with plastic wrap and refrigerate for at least 4 hours or overnight until the filling is firm.
- Slice and serve chilled, garnished with fresh raspberries or a lemon twist if desired.
10. No-Bake Chocolate Banana Cream Pie
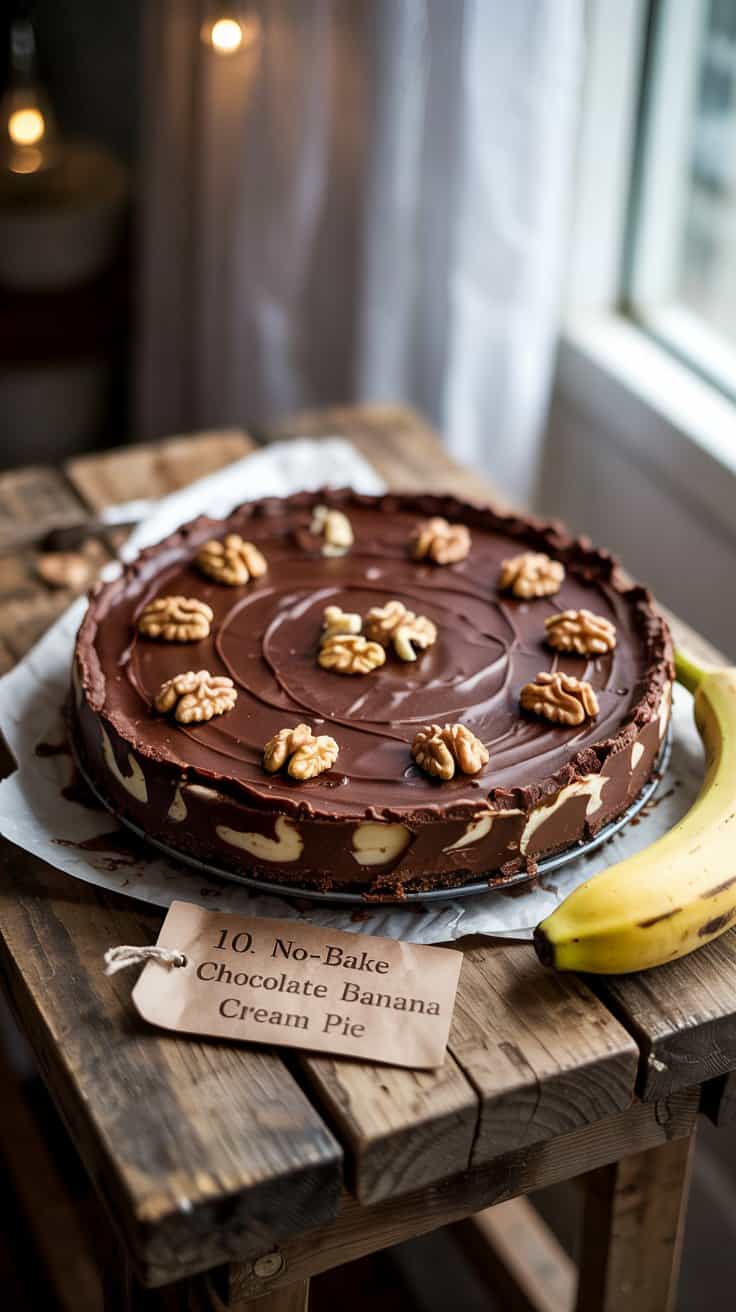
This no-bake chocolate banana cream pie offers a smooth, creamy experience layered with fresh banana slices and rich chocolate pudding. It combines the natural sweetness of bananas with the indulgence of chocolate, creating a dessert that feels both comforting and special.
The texture is wonderfully soft and velvety from the pudding, with gentle bite from the bananas and a light, fluffy whipped cream topping. Best of all, the pie comes together without turning on the oven, saving you time and keeping the kitchen cool.
Whether you want a quick dessert for a family gathering or an easy treat after dinner, this pie delivers satisfying flavors and a gorgeous presentation with minimal fuss.
Why This Recipe Works
This pie stands out for its simplicity and rich flavor, making it a reliable choice when you want something creamy and chocolatey, layered with fresh fruit. Here are the reasons this recipe is a smart pick:
- Convenience - No baking required, making assembly quick and hassle-free.
- Flavor balance - Combines the natural sweetness of bananas with chocolate's rich depth.
- Texture - Smooth pudding meets tender banana slices and airy whipped cream.
- Family-friendly appeal - Kids and adults enjoy its classic flavor pairing.
- Serve-and-store ease - Keeps well in the fridge and is easy to slice into portions.
Ingredient Swap Ideas
Swapping ingredients can adapt this recipe to different tastes or dietary needs without losing its charm. Feel free to try these straightforward changes to match what's on hand or suit health preferences.
- Chocolate pudding - Substitute with a dairy-free or sugar-free pudding mix to fit dietary needs.
- Bananas - Use sliced strawberries or peeled kiwi for a different fresh fruit layer.
- Whipped cream - Swap for coconut whipped cream to make it vegan and dairy-free.
- Pie crust - Use a gluten-free cookie crust or graham cracker crust if you prefer.
- Sweetener - Add a drizzle of honey or maple syrup if you like your pudding sweeter.
Ingredients
- 1 prepared pie crust - store-bought or homemade, chilled and ready to fill.
- 2 cups chocolate pudding - use your favorite instant or homemade pudding.
- 3 large bananas - peeled and sliced into thin rounds.
- 1 ½ cups whipped cream - homemade or store-bought, for topping.
- Chocolate shavings or cocoa powder - optional garnish for extra chocolate flavor.
Instructions
- Spread half of the chocolate pudding evenly over the bottom of the chilled pie crust.
- Arrange a layer of banana slices over the pudding, covering the surface completely.
- Spoon the remaining chocolate pudding on top of the banana layer and smooth it out.
- Cover the pie with plastic wrap and refrigerate for at least 2 hours to allow it to set.
- Before serving, spread the whipped cream evenly over the top layer of pudding.
- Garnish with chocolate shavings or a light dusting of cocoa powder if desired, then slice and serve chilled.
11. No-Bake Key Lime Pie with Coconut Crust
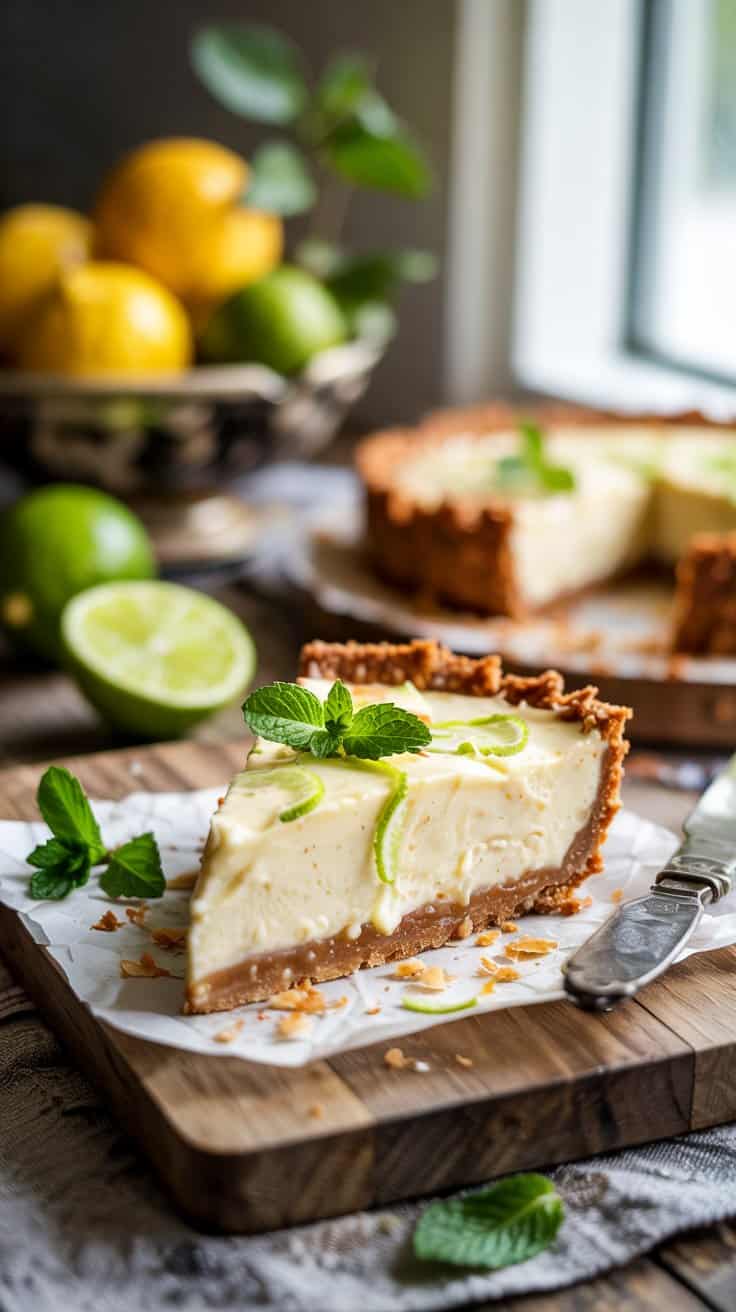
This no-bake key lime pie offers a refreshing twist on a classic dessert by swapping the usual graham cracker crust for a toasted coconut base. The crust adds a subtle sweetness and a nice crunch that goes well with the tart, creamy lime filling.
You'll find this pie is both easy and quick to prepare, making it a great choice for busy days or last-minute gatherings. The bright citrus flavor brightens every bite, while the smooth filling melts in your mouth.
It's a light but satisfying dessert that's perfect for warm-weather menus or any time you want a cool, zesty treat.
Why This Recipe Works
This recipe combines ease and flavor in a balanced way, delivering a dessert that doesn't require baking but still feels special and bright.
- Convenience - No-bake method saves time and keeps your oven free.
- Flavor balance - The tart key lime contrasts nicely with the sweet coconut crust.
- Texture - Crunchy toasted coconut crust goes with the creamy filling.
- Appeal - Bright and fresh, appealing to a wide range of tastes.
- Preparation - Simple steps require minimal equipment and clean-up.
Ingredient Swap Ideas
Swapping ingredients allows you to tailor this pie to your preferences or dietary needs without losing the core flavor and texture.
- Coconut crust - Use gluten-free graham crackers or crushed nuts for a different base.
- Dairy options - Substitute sweetened condensed milk with coconut condensed milk for a dairy-free version.
- Lime - Try using regular lime or Meyer lemon juice if key limes aren't available.
- Topping - Replace whipped cream with coconut whipped cream for a dairy-free topping.
- Sweetener - Adjust the level of sugar or try honey or agave syrup to vary sweetness naturally.
Ingredients
- 1 ½ cups shredded unsweetened coconut - toasted until golden and aromatic.
- 3 tablespoons unsalted butter - melted to help bind the crust.
- 2 tablespoons light brown sugar - adds sweetness and depth to the crust.
- 1 can (14 ounces) sweetened condensed milk - creates the rich, creamy filling.
- ½ cup fresh key lime juice - for tartness and bright citrus flavor.
- 1 tablespoon lime zest - intensifies the lime aroma and taste.
- 1 cup heavy whipping cream - chilled, for whipping into a light topping.
- 2 tablespoons powdered sugar - to sweeten the whipped cream.
- Extra toasted coconut or lime slices - for garnish, optional.
Instructions
- Toast the shredded coconut in a dry skillet over medium heat, stirring frequently until it turns golden and fragrant. Remove from heat and let cool slightly.
- In a bowl, combine the toasted coconut, melted butter, and brown sugar. Press this mixture firmly into the bottom and slightly up the sides of a 9-inch pie pan to form an even crust. Chill in the refrigerator while preparing the filling.
- In a separate bowl, whisk together the sweetened condensed milk, key lime juice, and lime zest until smooth and well combined. Pour the mixture over the chilled crust and spread evenly.
- Refrigerate the pie for at least 4 hours, or until the filling has fully set and thickened.
- Whip the heavy cream with powdered sugar until soft peaks form. Spread or pipe the whipped cream over the set filling just before serving.
- Garnish with extra toasted coconut or lime slices for a fresh, decorative touch. Keep the pie refrigerated until ready to serve.
12. No-Bake Salted Caramel Pecan Pie

This no-bake salted caramel pecan pie offers a wonderful blend of rich, buttery flavors with the satisfying crunch of pecans. The sweet and salty caramel filling sits atop a simple cookie crust that adds structure without baking, making it an easy yet impressive dessert.
The texture contrasts are pleasant-creamy caramel with toasted pecans and a crisp crust create a treat that's both indulgent and approachable. It's a great option for times when you want a special dessert without spending hours in the kitchen or heating the oven.
Why This Recipe Works
This recipe combines simplicity with delicious flavors and textures, making it a dessert that feels elevated but stays practical to prepare.
- Convenience - No baking required, saving time and effort.
- Flavor balance - The salted caramel and pecans offer a sweet and salty harmony.
- Texture - Crunchy pecans with a creamy filling and crisp cookie crust.
- Appeal - This pie looks impressive yet is easy enough to make any day.
- Serving ease - Ready to serve right after chilling, with minimal cleanup.
Ingredient Swap Ideas
Swapping ingredients can help customize this pie to fit various preferences or dietary considerations without losing its character. Here are a few suggestions to try.
- Cookie crust - Use gluten-free cookies for a gluten-free crust option.
- Caramel - Replace traditional caramel with a dairy-free caramel if you want a vegan version.
- Nuts - Substitute pecans with walnuts or almonds for a different nutty flavor.
- Salt - Use smoked sea salt instead of regular salt for a subtle smoky note.
- Butter - Choose plant-based butter to make the crust vegan-friendly.
Ingredients
- 1 ½ cups crushed chocolate wafer cookies - For the pie crust base.
- 6 tablespoons unsalted butter, melted - Binds the crust ingredients.
- 1 cup packed light brown sugar - Sweetens the caramel filling.
- ½ cup heavy cream - Adds richness and creaminess to the caramel.
- 4 tablespoons unsalted butter - Used in the caramel for smooth texture.
- 1 teaspoon vanilla extract - Enhances the caramel's flavor.
- ½ teaspoon sea salt, plus more for sprinkling - Balances sweetness with saltiness.
- 2 cups pecan halves, toasted - Provides crunch and flavor throughout the pie.
Instructions
- Combine the crushed chocolate wafer cookies and melted butter in a bowl. Press the mixture firmly into the bottom and up the sides of a 9-inch pie pan. Chill in the refrigerator while preparing the filling.
- In a medium saucepan over medium heat, mix the brown sugar, heavy cream, butter, and salt. Stir constantly and bring to a boil, then reduce heat to maintain a gentle boil for 3-4 minutes until thickened.
- Remove the saucepan from heat and stir in vanilla extract. Let the caramel cool for about 5 minutes.
- Stir half of the toasted pecans into the caramel mixture, then pour it evenly over the chilled crust. Smooth the surface with a spatula.
- Arrange the remaining pecans on top of the caramel layer and sprinkle lightly with sea salt. Refrigerate the pie for at least 4 hours or until fully set.
- Slice and serve chilled, enjoying the combination of creamy caramel and crunchy pecans in every bite.
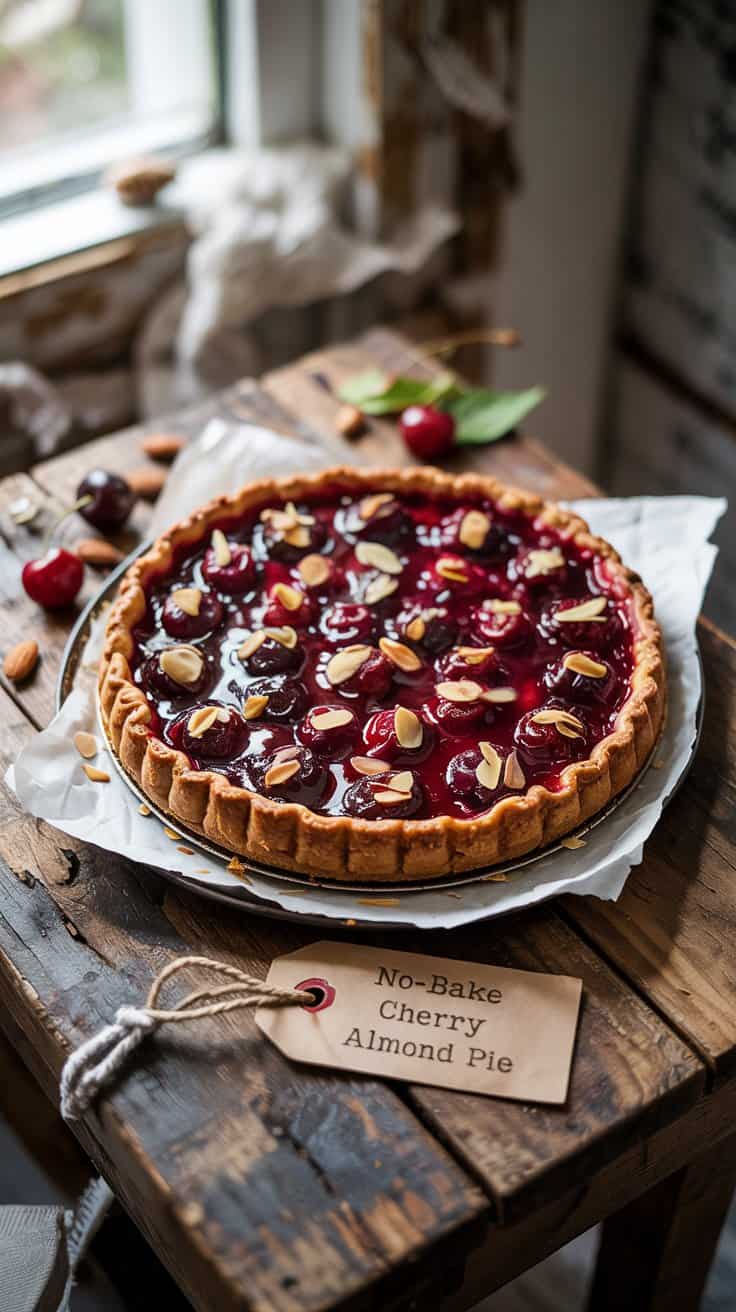
13. No-Bake Cherry Almond Pie
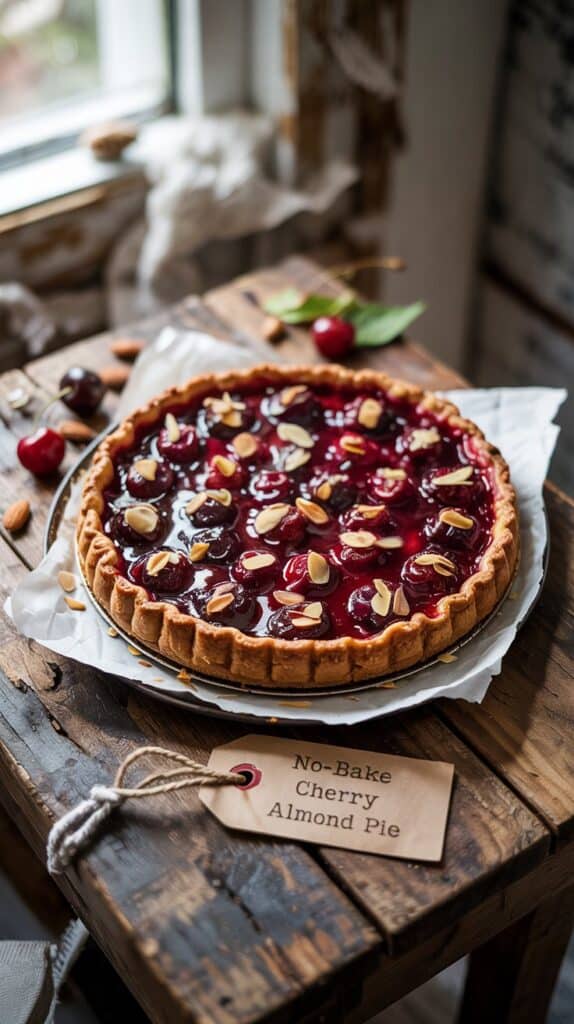
This no-bake cherry almond pie brings together a charming blend of creamy almond-flavored filling and sweet cherry topping. It's an inviting dessert that doesn't require turning on the oven, making it a convenient choice for warmer days or when time is limited.
The crispness of the crust combined with the smooth texture of the almond cream creates a pleasant contrast to the fruity burst of the cherry filling. Its balanced flavors make it a great finish to any meal without feeling too heavy.
You can prepare it in advance, giving the flavors time to meld while saving some room in your schedule. It's a straightforward recipe that delivers a wow factor with every slice.
Why This Recipe Works
This pie is an excellent option for anyone looking to combine ease and flavor with minimal preparation time. Its unique mix of almond cream and cherry filling offers a fresh take on traditional fruit pies.
- Convenience - Requires no baking, so it's quick to assemble and simple to prepare ahead of time.
- Flavor balance - Nutty almond cream goes well with the tangy and sweet cherry topping.
- Texture - Crunchy crust, silky filling, and juicy fruit create an enjoyable mouthfeel.
- Appeal - Elegant enough for special occasions, yet approachable for everyday desserts.
- Serving ease - Pre-portioned slices and minimal cleanup thanks to no oven use.
Ingredient Swap Ideas
Adjusting ingredients allows you to tailor the pie to different tastes or dietary preferences while keeping the core flavors intact. Here are some easy swaps you can consider.
- Almond extract - Replace with vanilla extract if almond flavor is not preferred.
- Cherry pie filling - Use fresh or frozen cherries lightly cooked with sugar for a less processed option.
- Crust - Substitute graham cracker crust with crushed digestive biscuits or gluten-free cookies.
- Cream base - Use coconut cream for a dairy-free version that still maintains richness.
- Sweetener - Swap granulated sugar with maple syrup or agave nectar for natural sweetness.
Ingredients
- 1 ½ cups graham cracker crumbs - For the crisp pie crust base.
- 6 tablespoons unsalted butter, melted - Binds the crust crumbs together.
- 1 cup heavy cream - Whipped to create the almond-flavored cream.
- ½ cup powdered sugar - Sweetens the almond cream smoothly.
- 1 teaspoon almond extract - Provides signature nutty flavor to the cream.
- 1 (21-ounce) can cherry pie filling - Offers sweet and tart cherries for the topping.
- Whole almonds, roughly chopped (optional) - For garnish and added texture.
Instructions
- In a medium bowl, combine the graham cracker crumbs and melted butter. Mix well until crumbs are evenly coated and hold together when pressed.
- Press the crumb mixture firmly into the bottom and up the sides of a 9-inch pie dish to form the crust. Place it in the refrigerator to chill while preparing the filling.
- In a large bowl, whip the heavy cream with powdered sugar and almond extract until stiff peaks form, creating a smooth and fluffy almond cream.
- Spread the almond cream evenly over the chilled crust, smoothing the top gently with a spatula.
- Spoon the cherry pie filling evenly on top of the almond cream layer, distributing cherries and syrup carefully.
- Refrigerate the assembled pie for at least 2 hours to set before serving. Garnish with chopped almonds if desired.
This pie keeps well covered in the refrigerator for up to 3 days and is best served chilled for a refreshing dessert experience.
For more chilled pie ideas that set in the refrigerator without baking, browse no-bake summer pies for gatherings. For additional cold desserts such as frozen pies and fridge-set tarts, see no-bake summer desserts for warm days.

Andrew Gray is a seasoned food writer and blogger with a wealth of experience in the restaurant and catering industries. With a passion for all things delicious, Andrew has honed his culinary expertise through his work as a personal chef and caterer.
His love for food led him to venture into food writing, where he has contributed to various online publications, sharing his knowledge and insights on the culinary world. As the proud owner of CooksCrafter.com, Andrew covers a wide range of topics, including recipes, restaurant reviews, product recommendations, and culinary tips.
Through his website, he aims to inspire and educate fellow food enthusiasts, offering a comprehensive resource for all things food-related.