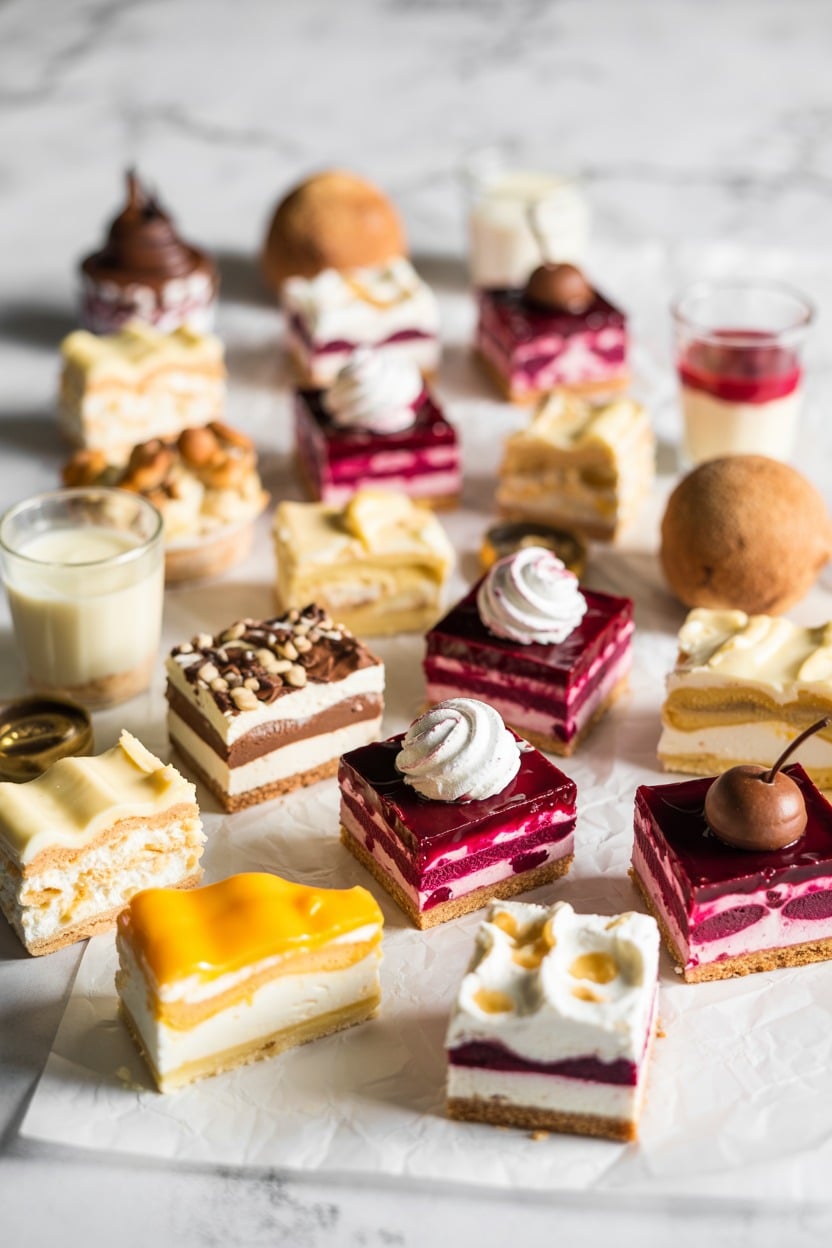
Planning desserts in advance can save time and reduce stress on busy days, making it easier to enjoy sweet treats without last-minute prep. This collection of 20 make-ahead freezer desserts offers a range of options that you can prepare ahead of time and have ready whenever you need them (desserts that are prepared ahead, frozen, and briefly thawed before serving).
The selection includes a variety of flavors and textures, from creamy cheesecakes and rich chocolate bars to fruity parfaits and refreshing popsicles. These recipes are designed to please different tastes and occasions, whether you want something indulgent or a lighter, fruit-based option.
Many are no-bake, which keeps things simple and quick to assemble, often requiring only refrigeration and freezing rather than oven time.
These make-ahead desserts work well together because they can be frozen and stored easily, allowing you to portion them out for individual servings or family gatherings. With minimal cleanup and straightforward instructions, they fit smoothly into any meal planning routine while still delivering delicious results.
1. No-Bake Chocolate Peanut Butter Bars
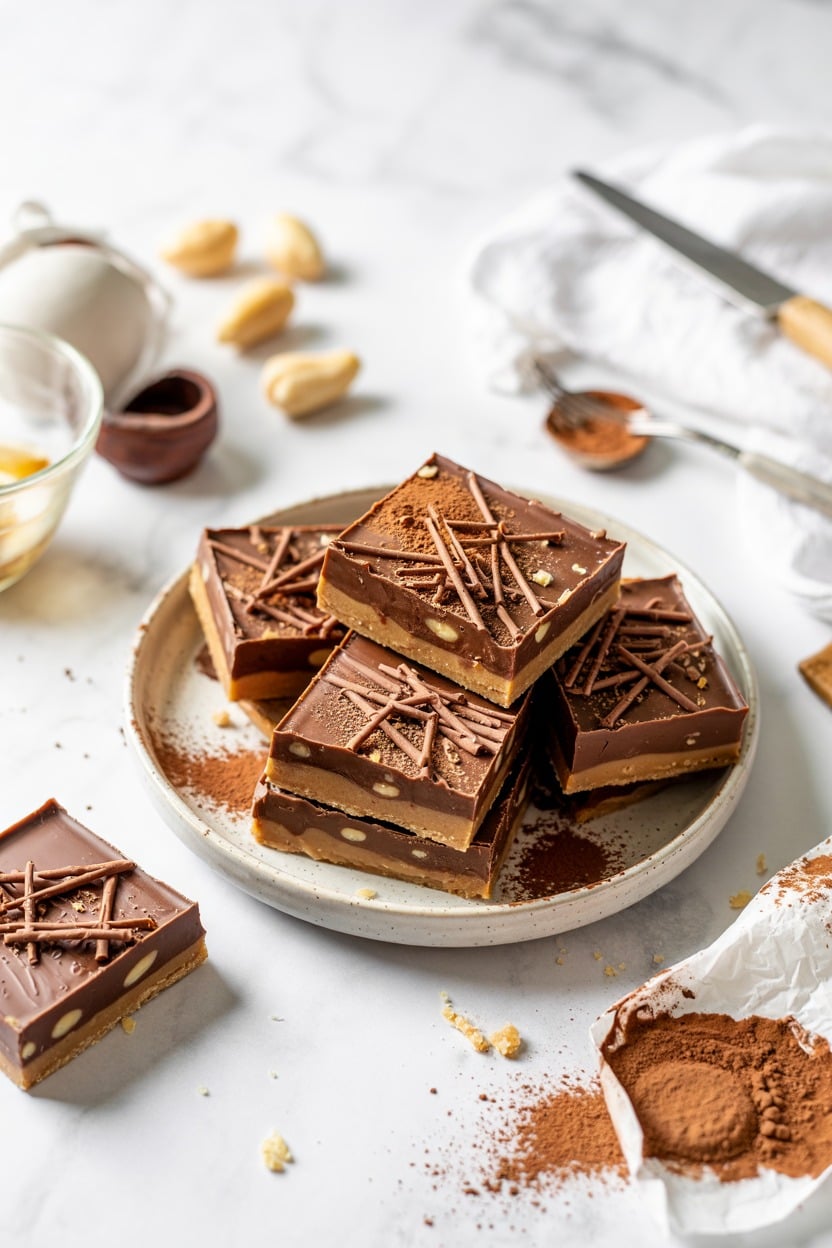
No-bake chocolate peanut butter bars combine creamy peanut butter with rich chocolate in a way that feels indulgent yet simple to make, with a layered filling and a firm, sliceable finish after freezing, chilling for at least 2 hours to fully set. These bars offer a smooth, layered texture that's both satisfying and easy to slice after freezing.
The balance of salty peanut butter and sweet chocolate ganache creates a flavor that appeals to everyone and pairs nicely with air fryer chocolate bark and peanut butter and chocolate recipe ideas for quick treats.
Why This Recipe Works
This recipe stands out for its ease and reliable flavor combination, making it a smart choice for homemade snacks or dessert.- Convenience - Requires no baking and minimal ingredients, saving time and cleanup.
- Flavor balance - Combines sweet chocolate with salty peanut butter for a classic pairing and pairs well with honey-based desserts for natural sweetness.
- Texture - Features a creamy peanut butter base topped with a smooth chocolate layer that firms up in the freezer for clean slices.
- Make-ahead friendly - Freezes well and can be cut into perfect bars once set.
Ingredient Swap Ideas
Adjusting ingredients can help tailor the bars to your preferences or dietary needs without losing their essence.- Peanut butter swap - Use almond butter or sunflower seed butter for a different nutty flavor or to avoid peanuts, which can slightly alter texture and sweetness.
- Chocolate option - Replace semi-sweet chocolate chips with dark or milk chocolate based on your sweetness preference.
- Sweetener variation - Swap honey for maple syrup to keep it vegan-friendly and maintain sweetness, and it pairs well with small-batch cupcake ideas for intimate gatherings.
- Dairy substitution - Use coconut oil instead of butter to make these bars dairy-free while preserving texture.
Ingredients
- 1 cup creamy peanut butter
- ½ cup unsalted butter
- 2 cups powdered sugar
- 1 ½ cups semi-sweet chocolate chips
- ¼ cup heavy cream
Instructions
- Line an 8x8-inch square pan with parchment paper, leaving some overhang for easy removal.
- In a medium saucepan, melt the peanut butter and butter together over low heat, stirring until smooth and combined.
- Remove the pan from heat and stir in the powdered sugar until fully mixed, forming a thick, even dough. Press this mixture evenly into the prepared pan.
- In a microwave-safe bowl, combine chocolate chips and heavy cream. Heat in 20-second intervals, stirring well between each until the chocolate is melted and smooth.
- Pour the chocolate ganache over the peanut butter layer, spreading it evenly with a spatula. Refrigerate or freeze for at least 2 hours until fully set and firm enough to cut into bars.
- Use the parchment paper overhang to lift the bars from the pan, then slice into squares and serve. Keep them stored in the refrigerator or freezer for best texture.
2. Classic Frozen Cheesecake Bars
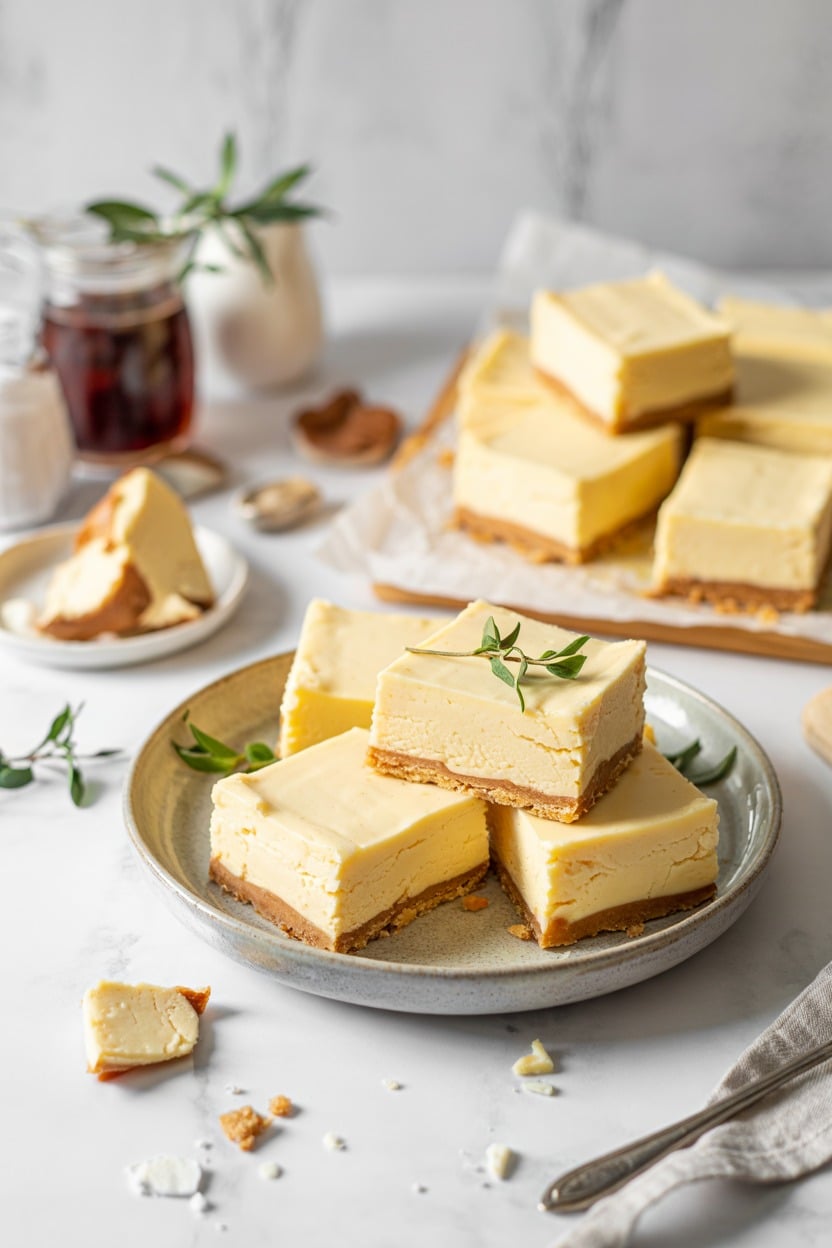
Freezing them in slices makes for a quick and convenient dessert you can enjoy anytime without needing to bake or prepare last minute, and they pair well with refreshing frozen treats for summer cooling, including frozen cheesecake ideas for reliable, sliceable bars.
The rich cream cheese filling pairs beautifully with the buttery crust, creating a satisfying sweet treat that's easy to portion and serve for gatherings or a simple family dessert, and is best when chilled at least 4 hours or overnight to fully firm.
Why This Recipe Works
This recipe provides a reliable way to have cheesecake ready at your fingertips with minimal fuss and delicious results.- Convenience - Make the bars ahead and keep them frozen for whenever you want a quick dessert.
- Flavor balance - Creamy, smooth filling with a lightly sweet, crunchy crust.
- Texture - The contrast between the firm crust and luscious cheesecake is enjoyable.
- Appeal - Easy to slice and serve, great for sharing at parties or family meals.
Ingredient Swap Ideas
Adjusting ingredients can help fit dietary restrictions or simply refresh the recipe to suit different preferences.- Use gluten-free graham crackers to make the crust suitable for gluten sensitivities.
- Swap cream cheese with a plant-based cream cheese for a dairy-free version.
- Replace granulated sugar with maple syrup or honey to add natural sweetness with a different flavor note.
- Add lemon zest or vanilla extract to the filling for a subtle twist of flavor.
Ingredients
- 1 ½ cups graham cracker crumbs
- ¼ cup granulated sugar
- 6 tablespoons unsalted butter, melted
- 16 ounces cream cheese, softened
- ⅔ cup granulated sugar
- 1 teaspoon vanilla extract
- 1 cup heavy cream
Instructions
- Preheat your oven to 325°F (163°C). In a medium bowl, combine graham cracker crumbs, ¼ cup sugar, and melted butter. Press this mixture evenly into the bottom of a 9x9-inch baking pan to form the crust. Bake for 10 minutes, then remove and let cool completely.
- In a large bowl, beat the softened cream cheese until smooth using an electric mixer. Add ⅔ cup sugar and vanilla extract, continuing to beat until the mixture is creamy and well combined.
- In a separate bowl, whip the heavy cream until stiff peaks form. Gently fold the whipped cream into the cream cheese mixture, making sure to keep it light and airy.
- Pour the cheesecake filling over the cooled crust and spread evenly with a spatula. Cover with plastic wrap, then freeze for at least 4 hours or until firm.
- Once firm, remove from the freezer and cut into bars. Let the bars sit at room temperature for about 5 minutes before serving to soften slightly. Store any leftovers in the freezer wrapped tightly to maintain texture.
3. Mixed Berry Frozen Yogurt Bark
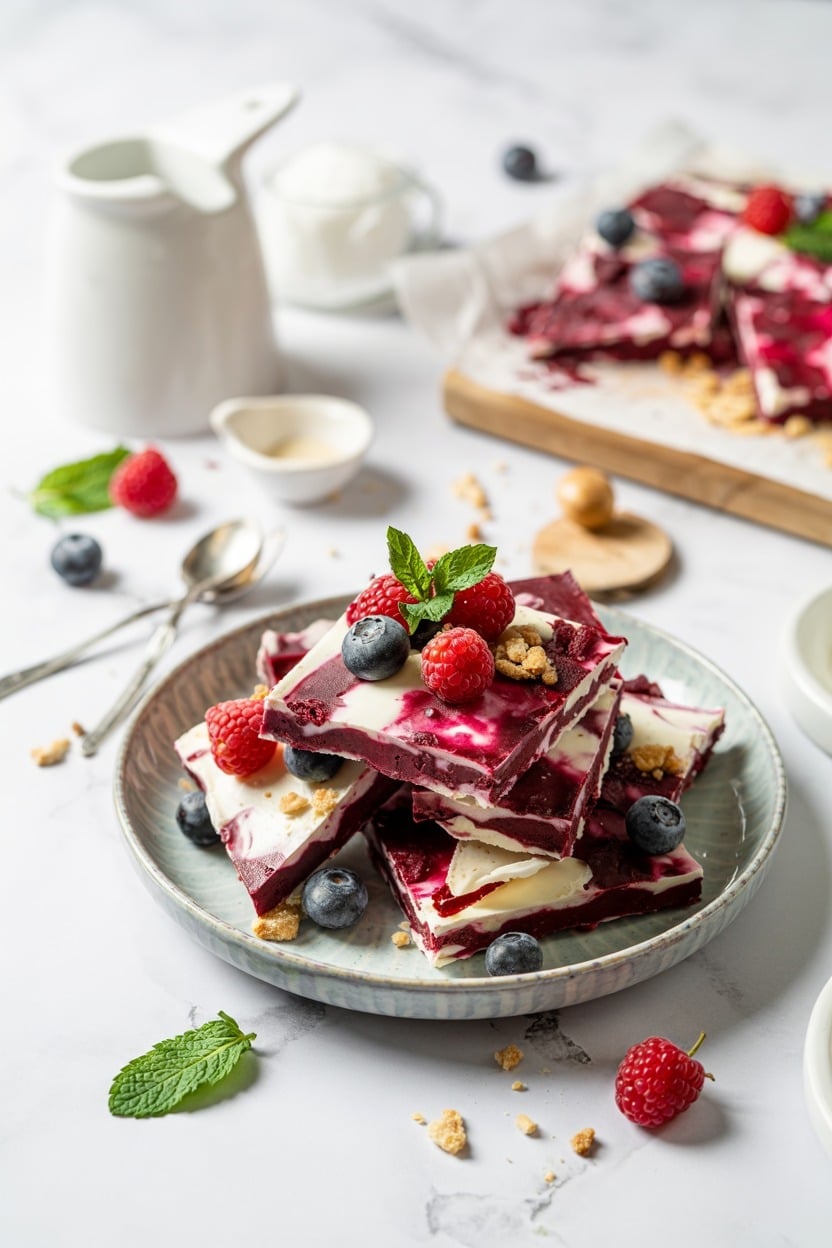
This Mixed Berry Frozen Yogurt Bark offers a refreshing and wholesome snack that combines creamy Greek yogurt with vibrant berries and a touch of honey, and is one of several creamy frozen yogurt recipe ideas for light desserts.
The combination of tangy yogurt and sweet berries creates a balanced flavor, while the frozen texture adds a satisfying crunch. This recipe works well for busy schedules yet still delivers on nutrition and taste without much fuss.
Why This Recipe Works
This recipe stands out because it’s simple to make, quick to freeze, and provides a healthy way to enjoy a cool dessert or snack.- Convenience - Requires minimal prep and can be made ahead, perfect for busy days.
- Flavor balance - Combines tangy Greek yogurt and natural sweetness from fresh berries and honey.
- Texture - Offers a crisp frozen bark that contrasts with the creamy yogurt base.
- Appeal - Colorful and vibrant, it's attractive for both kids and adults alike.
Ingredient Swap Ideas
You can easily customize this recipe to suit dietary needs or preferences without losing the essence of this refreshing snack.- Greek yogurt swap - Use non-dairy coconut or almond yogurt for a dairy-free version.
- Berry mix - Substitute mixed berries with your favorite frozen fruit like mango or peaches.
- Sweetener choice - Swap honey for maple syrup or agave nectar to make it vegan-friendly.
- Add-ins - Sprinkle chopped nuts or seeds on top for added crunch and nutrition.
Ingredients
- 2 cups Greek yogurt
- 1 cup mixed berries
- 2 tablespoons honey
- 1 teaspoon vanilla extract
- 1 tablespoon chia seeds
Instructions
- Line a baking sheet with parchment paper to prevent sticking and make removal easier.
- In a medium bowl, stir together Greek yogurt, honey, and vanilla extract until well combined.
- Pour the yogurt mixture onto the parchment and spread it evenly to about a ¼-inch thickness.
- Scatter the mixed berries and chia seeds evenly over the yogurt, gently pressing them in.
- Place the baking sheet in the freezer and freeze for at least 4 hours, or until completely firm.
- Once frozen, break or cut the bark into pieces and store in an airtight container in the freezer.
- Serve chilled for a refreshing snack that's easy to grab whenever you want something cool and healthy.
4. Salted Caramel Brownie Bites
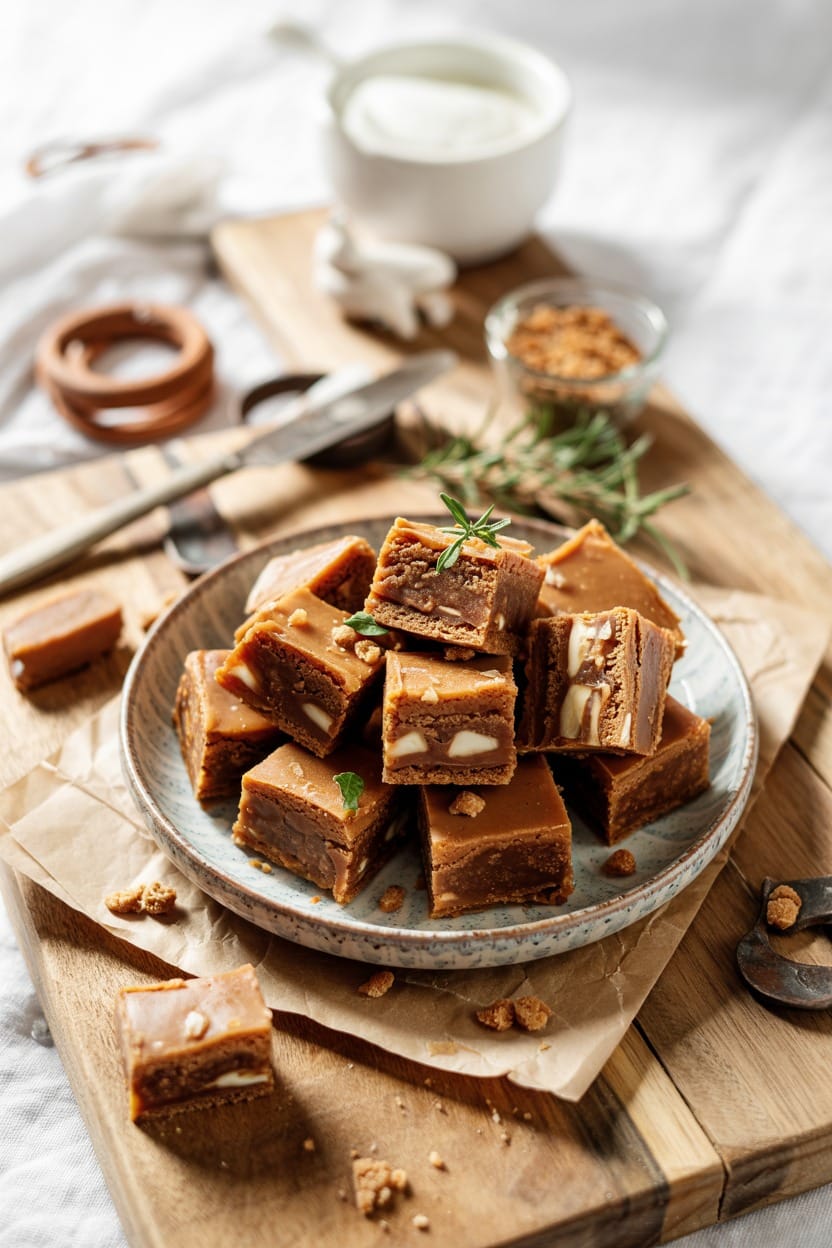
This recipe brings together two classic favorites: rich, fudgy brownies and luscious salted caramel. These bite-sized treats are great for serving at gatherings or simply enjoying as a sweet snack that's easy to share.
The brownies offer a deep chocolate flavor with a tender crumb, while the salted caramel topping adds an indulgent contrast that's both sweet and slightly salty.
They freeze well, so you can make a batch ahead of time and have a ready-to-eat dessert option anytime you want a little something special. The combination of textures-the chewy brownie base and smooth caramel layer-makes these bites both satisfying and easy to handle.
Why This Recipe Works
This recipe is a handy way to enjoy a rich dessert that feels elegant yet is simple to make. It balances the flavors and textures beautifully, giving you convenience, taste, and visual appeal in one.- Convenience - Easy to prepare with make-ahead and freezer-friendly options.
- Flavor balance - Combines intense chocolate with sweet and salty caramel notes.
- Texture - Soft, fudgy brownie bites topped with creamy, slightly firm caramel.
- Serving ease - Bite-sized portions make them simple to serve and enjoy without mess.
Ingredient Swap Ideas
Adjusting ingredients can customize these bites for dietary preferences or availability without losing the core flavors.- Brownie base - Use a gluten-free brownie mix or recipe if avoiding gluten.
- Caramel sauce - Try a dairy-free caramel made from coconut milk for a vegan-friendly topping.
- Salt - Use fleur de sel or kosher salt for a more pronounced salty crunch.
- Chocolate - Replace semi-sweet chocolate with dark chocolate for a richer, less sweet option.
Ingredients
- 1 cup unsalted butter, melted
- 2 cups granulated sugar
- 4 large eggs
- 1 teaspoon vanilla extract
- 1 cup all-purpose flour
- ¾ cup unsweetened cocoa powder
- ½ teaspoon salt
- ½ teaspoon baking powder
- 1 cup semi-sweet chocolate chips
- 1 cup salted caramel sauce
- Flaky sea salt
Instructions
- Preheat the oven to 350°F (175°C). Line a 9x13-inch baking pan with parchment paper, leaving an overhang on the sides to lift the brownies out easily.
- In a large bowl, combine the melted butter and granulated sugar. Stir in the eggs one at a time, followed by the vanilla extract. Mix well until smooth.
- Sift in the flour, cocoa powder, salt, and baking powder. Fold everything together until just combined. Stir in the chocolate chips.
- Pour the batter into the prepared pan and spread it evenly. Bake for 25-30 minutes, or until a toothpick inserted in the center comes out with a few moist crumbs. Remove from oven and let cool completely.
- Once cooled, spread the salted caramel sauce evenly over the brownie layer. Sprinkle a pinch of flaky sea salt on top. Cut into small bite-sized squares. Freeze the bites for 1-2 hours before serving.
5. Lemon Blueberry Frozen Cheesecake Parfaits
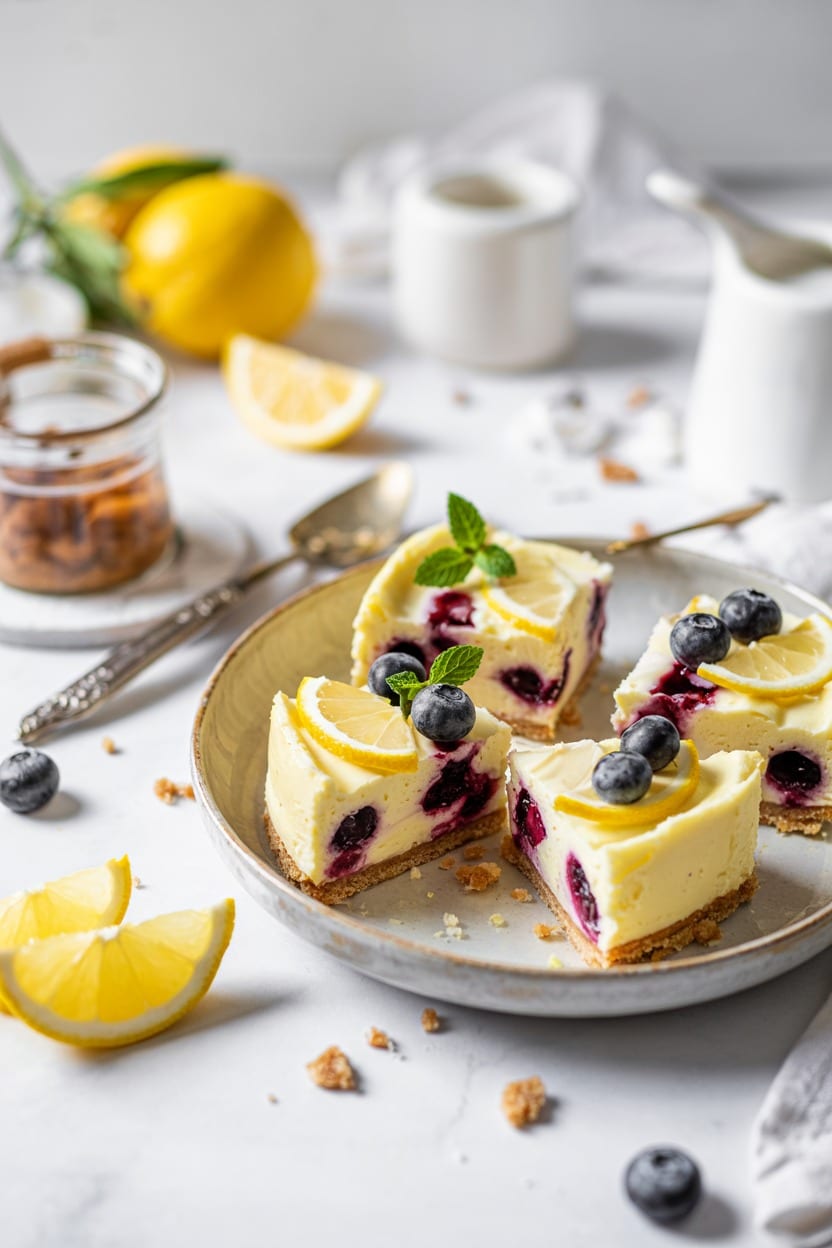
This dessert combines bright lemon curd, juicy blueberries, and creamy cheesecake filling into a refreshing treat you can prepare ahead and keep frozen. The layers offer a nice contrast in texture and flavor, with the tartness of lemon and blueberries balancing the rich creaminess perfectly.
These parfaits are easy to portion and serve individually, making them great for gatherings or a quick sweet snack any time. They look appealing and taste fresh without requiring complicated baking.
Why This Recipe Works
This recipe stands out for offering a simple preparation that delivers a refreshing, flavorful dessert with minimal fuss.- Convenience - Make ahead and freeze in individual cups for easy portion control.
- Flavor balance - Combines tangy lemon curd with sweet blueberries and smooth cheesecake cream.
- Texture - Creamy cheesecake contrasts nicely with the juicy fruit layers.
- Appeal - Bright colors and individual servings make it inviting and practical.
Ingredient Swap Ideas
Adjusting ingredients can help fit dietary needs or simply change up the flavor while keeping the basic parfait structure intact.- Swap the cream cheese with a dairy-free alternative to make it vegan-friendly.
- Use a natural sweetener like honey or maple syrup instead of granulated sugar for a different kind of sweetness.
- Substitute fresh blueberries with raspberries or blackberries depending on what's in season or preferred.
- Replace lemon curd with a prepared fruit jam for less tartness and varied flavor.
Ingredients
- 1 cup lemon curd
- 1 cup fresh blueberries
- 8 ounces cream cheese
- ½ cup powdered sugar
- 1 teaspoon vanilla extract
- 1 cup heavy whipping cream
- 1 tablespoon fresh lemon juice
Instructions
- In a mixing bowl, beat the softened cream cheese with powdered sugar, vanilla extract, and lemon juice until smooth and creamy.
- In a separate bowl, whip the chilled heavy cream until soft peaks form, then gently fold it into the cream cheese mixture to keep it airy.
- In serving cups or small jars, layer a spoonful of lemon curd, followed by a layer of blueberries, then a layer of the cheesecake cream. Repeat layers if desired, ending with cheesecake cream on top.
- Cover each parfait and freeze for at least 4 hours or until firm.
- Remove from the freezer about 10 minutes before serving to soften slightly for easier eating. Garnish with extra blueberries or a lemon zest twist if desired.
6. Tropical Mango Coconut Bars
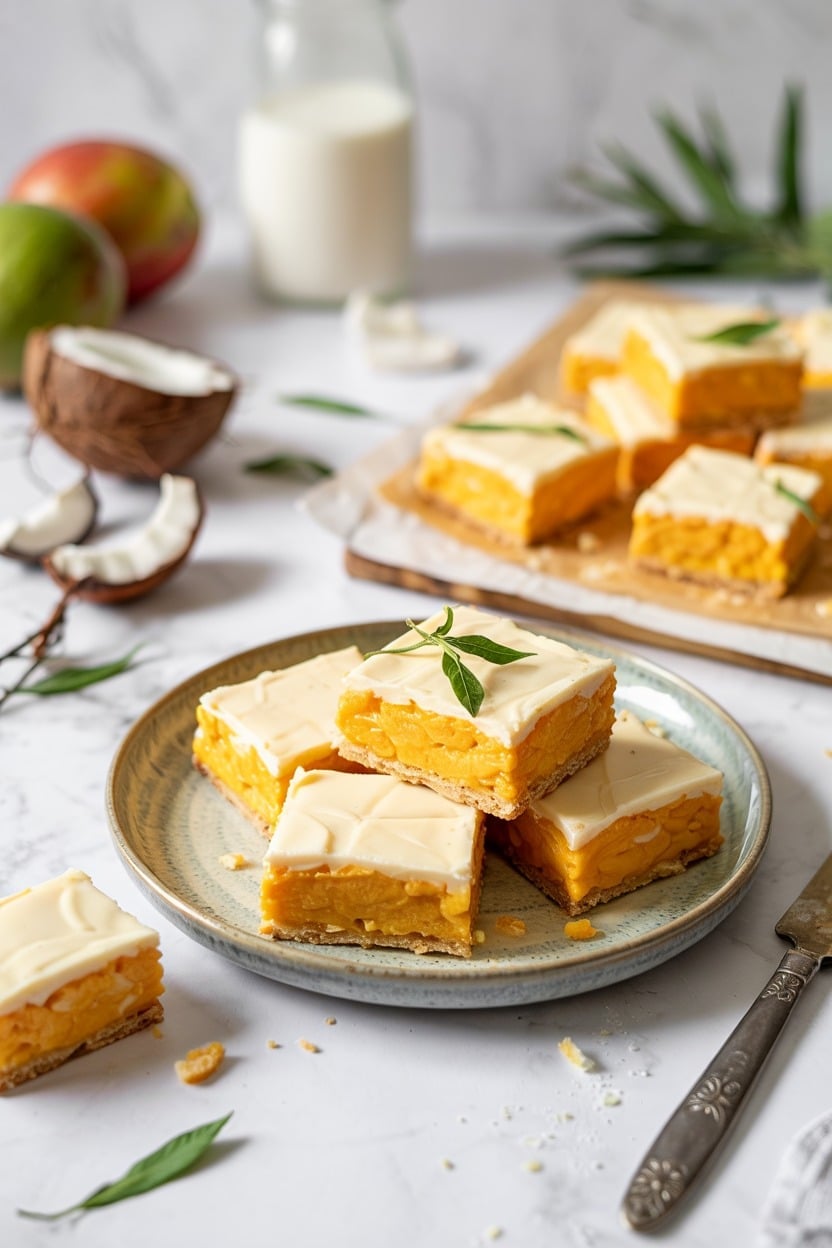
These Tropical Mango Coconut Bars bring a refreshing twist with vibrant mango puree and shredded coconut. They come together without baking, making them a perfect treat for warm days or anytime you want a cool, fruity snack that's light yet satisfying.
The texture is a nice balance-soft and chewy with bursts of tropical flavor. You can prepare these bars ahead of time and keep them in the freezer, which is handy when you want something quick and wholesome to grab.
Why This Recipe Works
This recipe combines ease and flavor to create a snack you’ll keep coming back to. It offers a natural sweetness with a tropical flair while keeping the preparation straightforward.- Convenience - No-bake preparation means minimal hands-on time and no oven needed.
- Flavor balance - Sweet mango paired with creamy coconut creates a fresh, tropical taste.
- Texture - Chewy bars with a slight crunch from shredded coconut make for an enjoyable bite.
- Freezer-friendly - Bars hold well in the freezer, ideal for quick snacks or desserts.
Ingredient Swap Ideas
Adjusting ingredients can help accommodate dietary preferences or simply mix up the flavors while keeping the core of the recipe intact.- Mango puree - Substitute with pineapple puree for a different tropical profile.
- Shredded coconut - Use dried, unsweetened coconut flakes if fresh is unavailable.
- Sweetener - Replace honey or maple syrup with agave nectar for a different natural option.
- Binding base - Instead of condensed milk, use coconut cream for a dairy-free alternative with a creamy texture.
Ingredients
- 1 cup mango puree
- 1 ½ cups shredded coconut
- ¾ cup sweetened condensed milk
- 1 teaspoon lime juice
- ½ teaspoon vanilla extract
- Pinch of salt
Instructions
- In a medium mixing bowl, combine the mango puree, sweetened condensed milk, lime juice, vanilla extract, and salt. Stir well until the mixture is smooth and uniform.
- Add the shredded coconut to the mango mixture and fold gently until the coconut is evenly distributed throughout the mixture.
- Line a square baking pan (8x8 inches) with parchment paper, allowing some overhang for easy removal later.
- Transfer the mixture into the pan, spreading it evenly and pressing down lightly to compact.
- Cover the pan with plastic wrap and place it in the freezer for at least 3 hours, or until firm enough to cut into bars.
- Once set, use the parchment overhang to lift the entire block out of the pan and cut into bars or squares. Keep stored in an airtight container in the freezer until ready to serve.
7. Frozen Chocolate Banana Pops
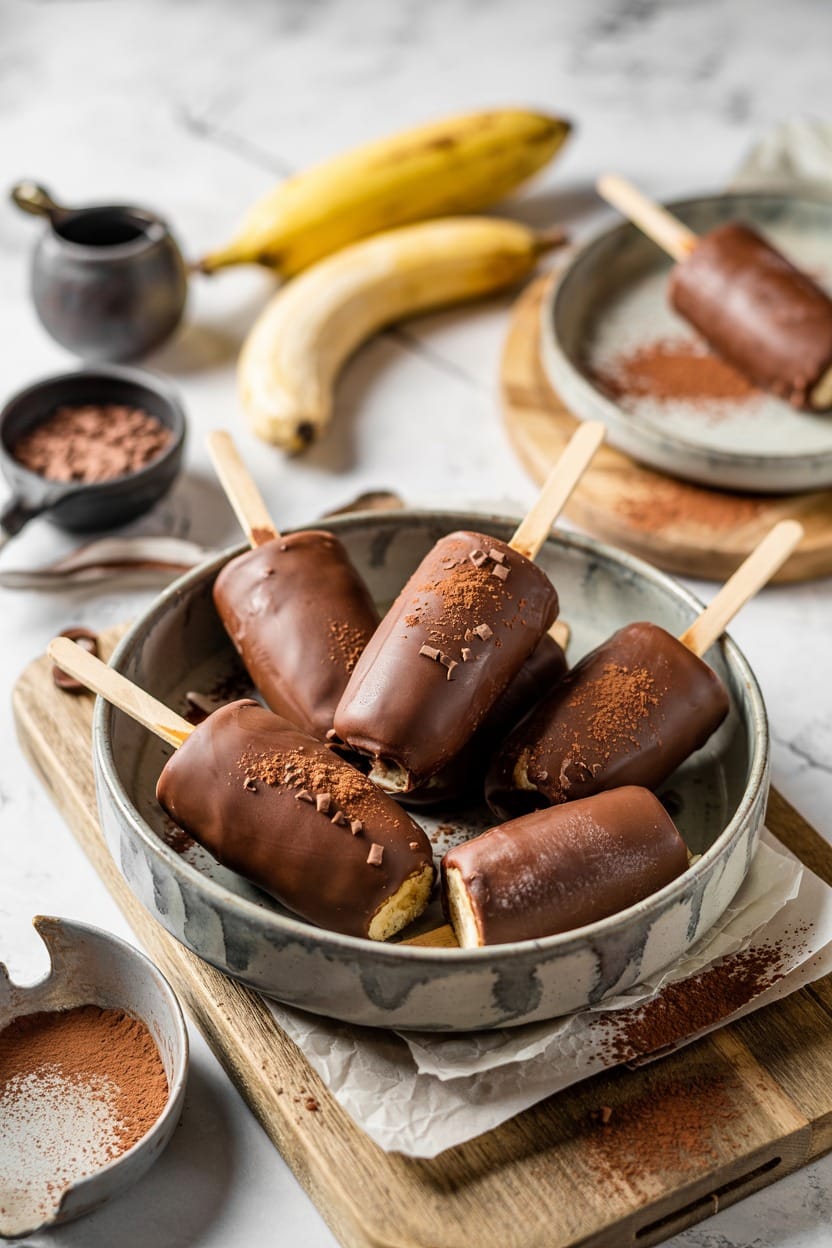
Frozen chocolate banana pops make for a simple treat that's both refreshing and satisfying. The blend of creamy banana, rich chocolate, and crunchy nuts creates a delightful mix of textures and flavors that appeal to kids and adults alike.
These pops are easy to prepare with minimal ingredients and just a bit of freezing time. They offer a fun way to enjoy fruit with a touch of sweetness and a pleasing crunch.
Why This Recipe Works
This recipe combines a few basic ingredients to create a tasty, chilled snack that’s perfect for warmer days or after-dinner treats.- Convenience - Requires minimal prep and can be made ahead for ready access.
- Flavor balance - Sweet banana pairs perfectly with bittersweet chocolate and crunchy nuts.
- Texture - Creamy banana meets crisp nuts for an enjoyable mouthfeel.
- Appeal - Kid-friendly and visually inviting on a stick, making them great for parties or snacks.
Ingredient Swap Ideas
Swapping ingredients in this recipe can help accommodate dietary preferences or what you have on hand, maintaining its core flavors and textures.- Chocolate - Use dark, milk, or white chocolate depending on your preference and sweetness level.
- Nuts - Substitute peanuts with almonds, walnuts, or pecans for a different crunch and flavor.
- Sweeteners - Add a drizzle of honey or maple syrup over the bananas before dipping if you want extra sweetness.
- Coatings - Replace nuts with shredded coconut or sprinkles to vary the texture and appearance.
Ingredients
- 3 ripe bananas
- 6 wooden popsicle sticks
- 1 cup semi-sweet or dark chocolate chips
- ½ cup chopped nuts
- Optional: 1 tablespoon coconut oil
Instructions
- Insert a wooden popsicle stick into the cut end of each banana half, pushing it about halfway through to hold firmly.
- Place the bananas on a parchment-lined tray and freeze for at least 1 hour until firm.
- Melt the chocolate chips in a microwave-safe bowl in 30-second intervals, stirring after each, until fully smooth. If desired, stir in coconut oil to make the chocolate coating silkier.
- Roll each frozen banana pop in the melted chocolate, then immediately sprinkle or press the chopped nuts onto the chocolate before it sets.
- Place the chocolate-coated pops back on the parchment and freeze until the chocolate is completely firm, about 30 minutes. Enjoy straight from the freezer.
8. Peach Cobbler Ice Cream Sandwiches
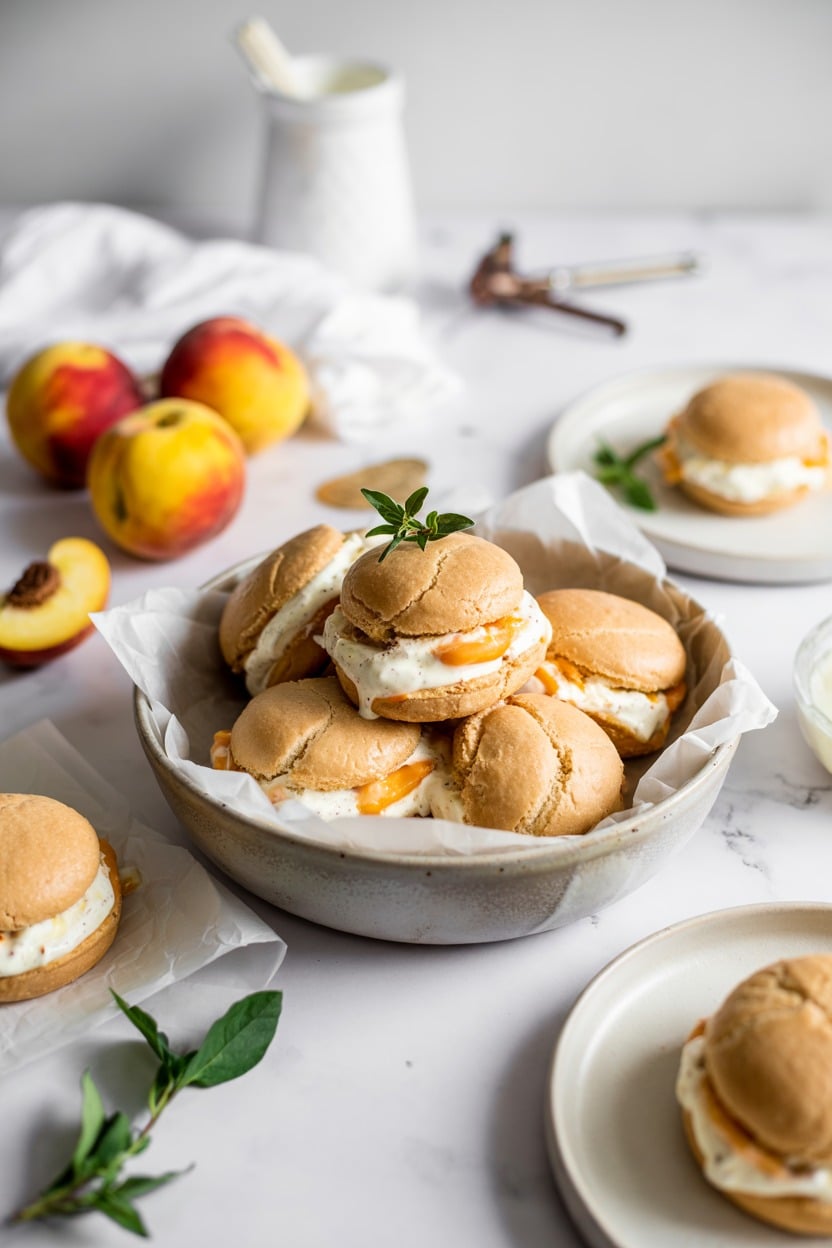
Peach Cobbler Ice Cream Sandwiches combine the warmth and sweetness of peach cobbler with the cool creaminess of vanilla ice cream, creating a refreshing dessert perfect for warm days. The soft, spiced cookies hold a generous scoop of peach filling and ice cream, making these sandwiches a handheld treat that's easy to assemble and fun to enjoy.
With balanced flavors from juicy peaches, cinnamon-spiced cookies, and smooth vanilla ice cream, these sandwiches offer a satisfying contrast in textures. They're an excellent option for summer gatherings or a cozy dessert at home.
Why This Recipe Works
This recipe blends vibrant fruit with comforting spice, creating a dessert that’s both refreshing and indulgent. Each element complements the others, providing a balanced flavor and texture experience.- Convenient make-ahead - Cookies and filling can be prepared in advance, then assembled with ice cream before serving.
- Balanced flavors - Sweet peaches, warm spices, and creamy vanilla ice cream come together harmoniously.
- Textural contrast - Soft cookies, juicy filling, and smooth ice cream provide satisfying mouthfeel variety.
- Easy portion control - Individual sandwiches make serving straightforward and reduce mess.
Ingredient Swap Ideas
Swapping ingredients allows you to customize this dessert for different tastes or special diets without losing its essence. You can adjust components to accommodate allergies or preferences while keeping the core flavor intact.- Use gluten-free flour blend instead of all-purpose flour for a gluten-free cookie base.
- Replace vanilla ice cream with dairy-free coconut milk ice cream to make it vegan-friendly.
- Swap canned peach filling for fresh peaches lightly cooked with sugar and cinnamon for a fresher, less processed option.
- Add a pinch of nutmeg or ginger to the cookie dough to introduce a slightly different spice profile.
Ingredients
- 1 cup all-purpose flour
- ½ teaspoon ground cinnamon
- ¼ teaspoon salt
- ½ cup unsalted butter, softened
- ½ cup granulated sugar
- 1 large egg
- 1 teaspoon vanilla extract
- 1 cup peach cobbler filling
- 1 pint vanilla ice cream
Instructions
- Preheat your oven to 350°F (175°C). Line a baking sheet with parchment paper.
- In a medium bowl, whisk together flour, cinnamon, and salt. In a separate large bowl, cream the softened butter and sugar until light and fluffy.
- Beat in the egg and vanilla extract until combined. Gradually add the dry ingredients to the butter mixture, mixing until just incorporated.
- Drop rounded tablespoons of dough onto the prepared baking sheet, spacing them about 2 inches apart. Bake for 10 to 12 minutes until cookies are lightly golden around the edges. Let cool completely.
- To assemble, spread about 2 tablespoons of peach cobbler filling onto the bottom of one cookie, top with a scoop of vanilla ice cream, and sandwich with another cookie. Gently press to secure. Place sandwiches on a tray and freeze for at least 1 hour before serving.
9. Strawberry Shortcake Trifle Cups
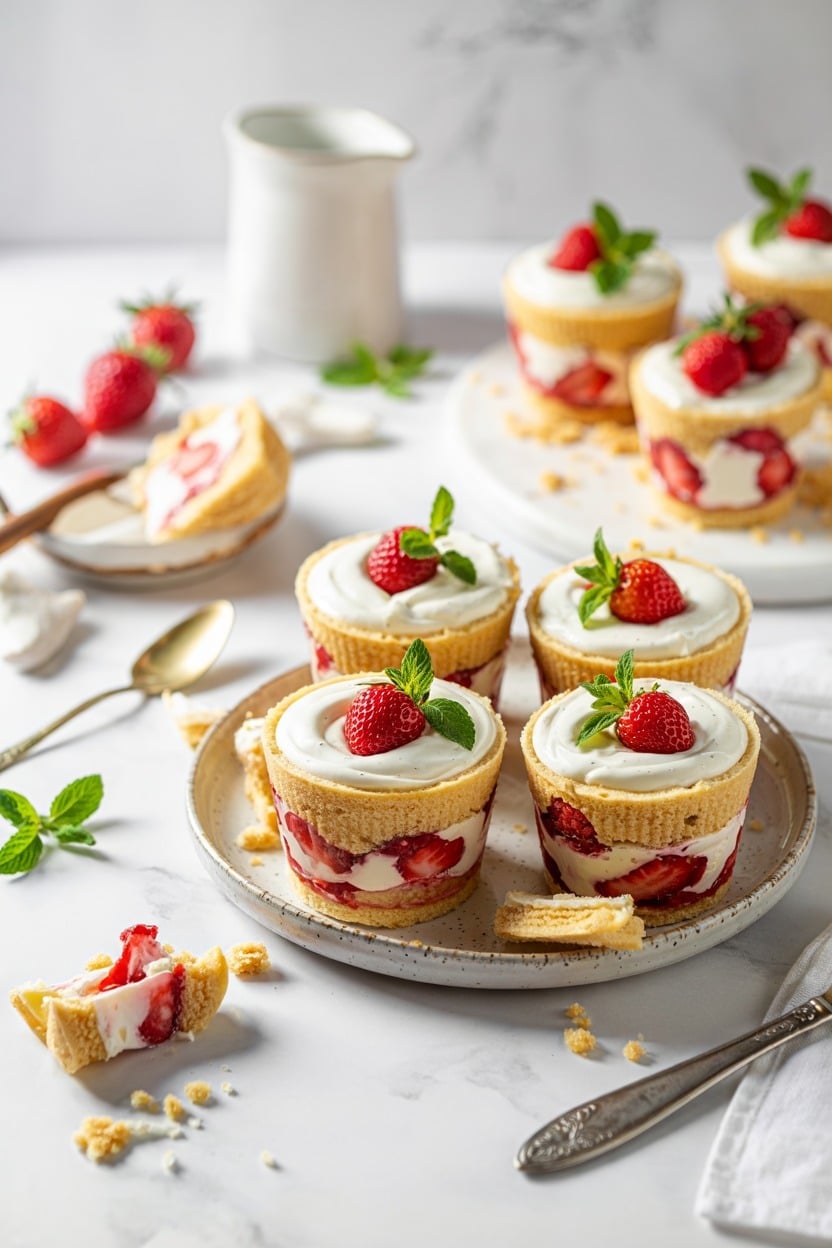
Strawberry shortcake trifle cups bring together the bright freshness of strawberries, the lightness of angel food cake, and the creaminess of whipped cream in an easy-to-assemble dessert. These individual portions make serving simple, and they're perfect for sharing at gatherings or enjoying a sweet treat any time.
The layers not only look inviting but also freeze well, so you can prepare them ahead and enjoy them later without losing flavor or texture. This dessert is refreshing, light, and just the right balance of fruity and creamy.
Why This Recipe Works
This recipe combines ease and flavor in a way that fits busy schedules and everyday cravings. Strawberry Shortcake Trifle Cups deliver a familiar classic with a fresh twist.- Convenience - No baking required beyond preparing or buying angel food cake, and individual cups make portioning simple.
- Flavor balance - Sweet strawberries and airy whipped cream complement the subtle vanilla of angel food cake.
- Texture - Soft, spongy cake layers alternate with silky cream and juicy berries for a satisfying mouthfeel.
- Make-ahead friendly - You can assemble these cups in advance and freeze them for later enjoyment.
Ingredient Swap Ideas
Adjusting this recipe works well for dietary preferences or ingredient availability without losing its essence.- Angel food cake - Use sponge cake or pound cake as a denser option for more richness.
- Whipped cream - Replace with coconut whipped cream for a dairy-free version or use Greek yogurt for a tangier twist.
- Strawberries - Substitute with other fresh berries like raspberries or blueberries depending on the season.
- Sweetener - If preferred, toss the strawberries with a little honey or maple syrup instead of granulated sugar.
Ingredients
- 2 cups fresh strawberries
- 1 tablespoon granulated sugar
- 3 cups angel food cake
- 2 cups whipped cream
Instructions
- Toss the sliced strawberries with granulated sugar in a bowl. Let them sit for about 10 minutes to release their natural juices.
- Place a layer of angel food cake cubes at the bottom of each serving cup or small glass.
- Add a generous spoonful of the macerated strawberries over the cake layer, followed by a layer of whipped cream.
- Repeat the layering process until the cups are filled, finishing with a dollop of whipped cream and a few strawberry slices on top for garnish.
- Chill the trifle cups in the refrigerator for at least 30 minutes before serving. For longer storage, freeze the cups individually and thaw them for 10-15 minutes prior to eating.
10. Mocha Fudge Frozen Pie
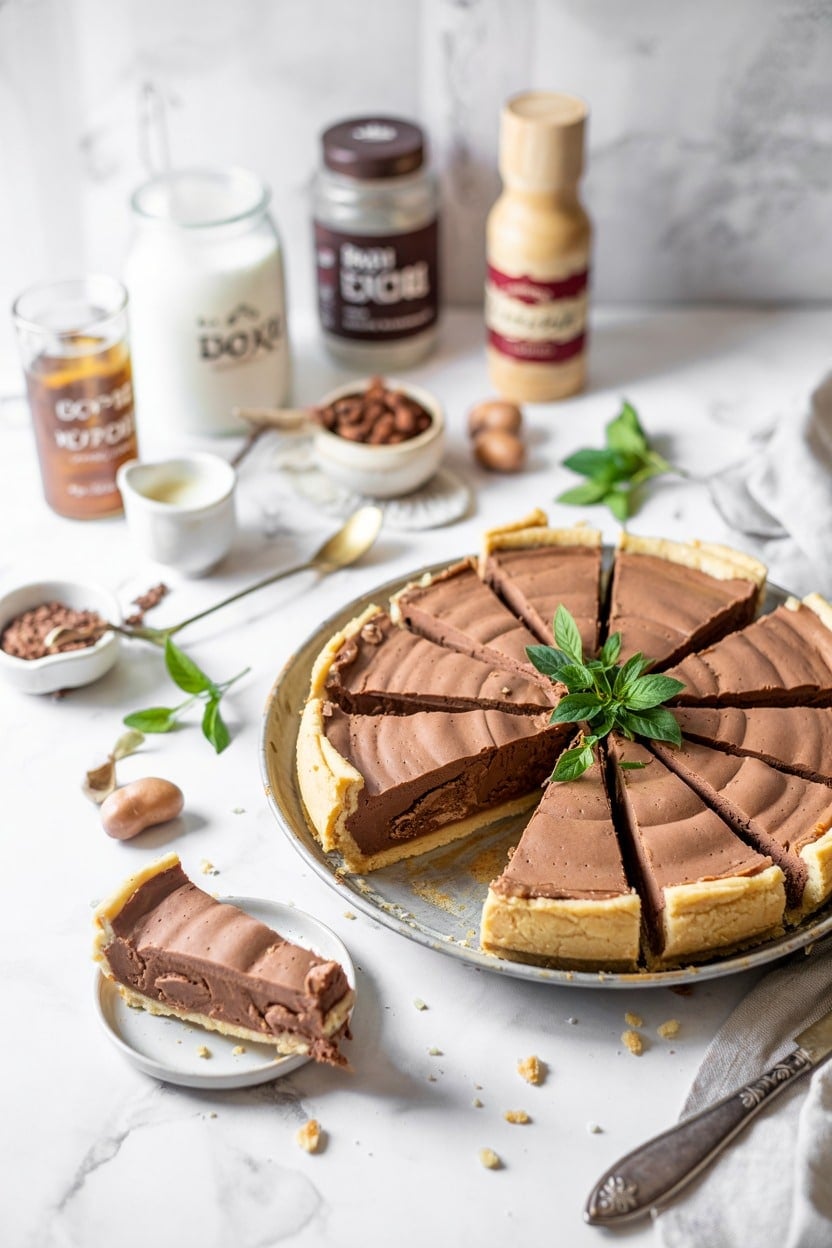
This Mocha Fudge Frozen Pie combines rich chocolate and bold coffee flavors into a dessert that's both indulgent and refreshing. The creamy texture holds up well in the freezer, making it a great choice for easy prep in advance.
With a no-bake base and a luscious mocha fudge filling, this pie offers a sophisticated taste without requiring much hands-on time. It's a cool, delicious finish to any meal or a special treat waiting in your freezer.
Why This Recipe Works
This pie balances deep cocoa and coffee notes with a smooth creaminess that satisfies chocolate lovers and coffee fans alike. It’s also practical and appealing in several ways:- Convenience - Requires no baking and can be prepared ahead, then stored in the freezer.
- Flavor balance - Combines rich chocolate fudge sweetness with a subtle coffee kick for a complex profile.
- Texture - Silky, creamy filling that freezes firmly yet scoops easily.
- Presentation - Elegant enough for guests but simple enough for family desserts.
Ingredient Swap Ideas
Swapping a few ingredients allows you to customize flavors or adapt for dietary needs without losing the pie’s essence. Here are some ideas to try:- Dairy-free cream - Use canned coconut cream rather than heavy cream for a vegan-friendly version with a slight coconut note.
- Coffee substitute - Replace brewed espresso with instant coffee dissolved in hot water if you don't have a machine.
- Chocolate choice - Try semi-sweet or dark chocolate chips depending on how intense or sweet you prefer the fudge layer.
- Crust option - Use gluten-free chocolate cookie crumbs instead of traditional chocolate wafer crumbs to make the crust gluten-free.
Ingredients
- 1 ½ cups chocolate wafer crumbs
- 6 tablespoons unsalted butter
- ½ cup espresso or strong brewed coffee
- 8 ounces semisweet chocolate chips
- 1 cup heavy cream
- ¼ cup powdered sugar
- 1 teaspoon instant coffee granules
- 1 teaspoon vanilla extract
- ¼ teaspoon salt
Instructions
- Combine chocolate wafer crumbs and melted butter. Press mixture into the bottom and sides of a 9-inch pie pan. Chill.
- Dissolve instant coffee granules in cooled espresso or brewed coffee.
- Melt chocolate chips, cool slightly.
- Fold whipped heavy cream with powdered sugar, vanilla, salt, coffee mixture, and melted chocolate until smooth.
- Pour filling into crust, freeze for at least 4 hours. Let soften 10 minutes before serving.
11. Cinnamon Roll Ice Cream Cake
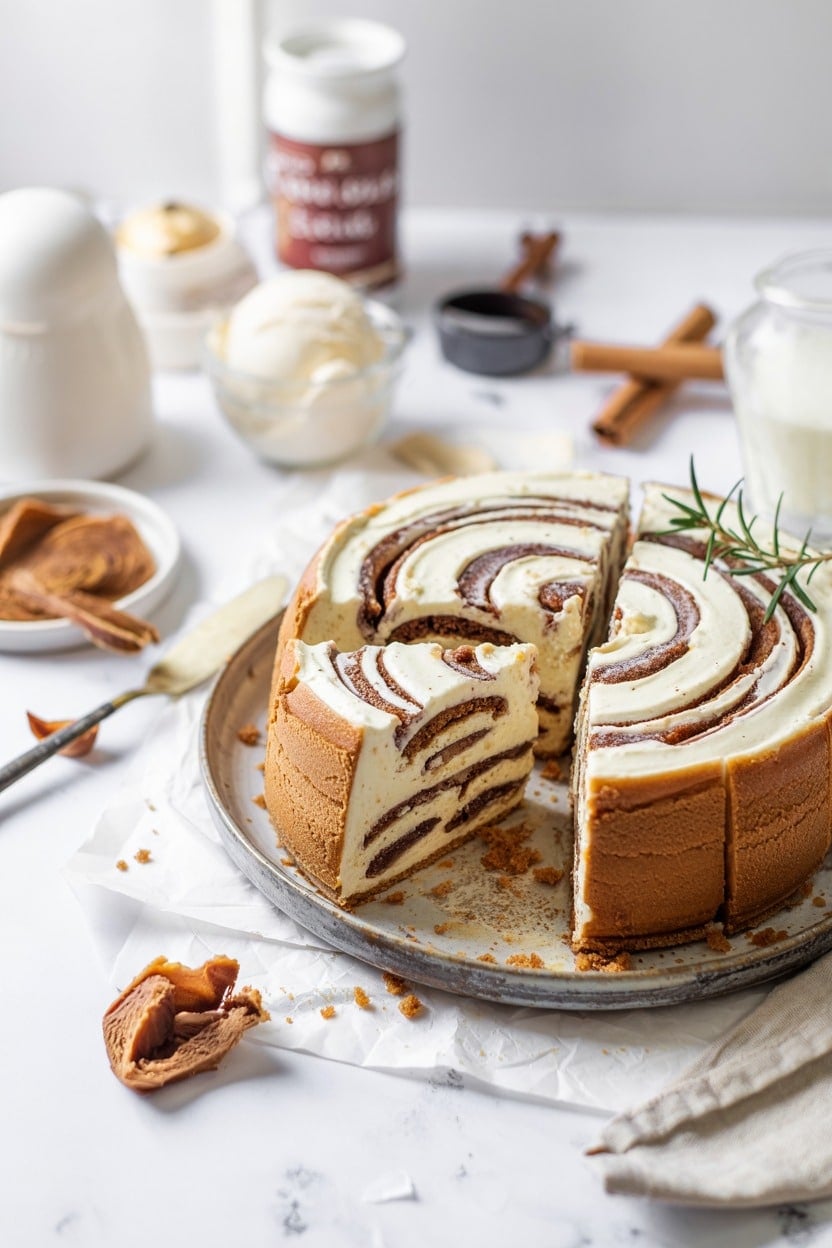
This Cinnamon Roll Ice Cream Cake brings together two favorite treats into one cool, sweet dessert. Layers of soft cinnamon roll pieces alternate with creamy vanilla ice cream, creating a rich yet refreshing texture combination that's sure to satisfy any sweet tooth.
The recipe is straightforward and can be prepped in advance, making it ideal for gatherings or a simple indulgence after a long day. It's a great way to enjoy classic cinnamon roll flavors in a light, frozen format that's easy to slice and serve.
Why This Recipe Works
This recipe combines the familiar warmth of cinnamon rolls with the cool creaminess of ice cream for a balanced and satisfying dessert.- Convenience - Easy to assemble and can be made ahead, saving time on serving day.
- Flavor balance - The cinnamon-sugar spice pairs beautifully with smooth vanilla ice cream.
- Texture - Soft cake-like cinnamon roll layers with cold, creamy ice cream create a pleasing contrast.
- Appeal - This dessert is a fun, family-friendly treat that stands out for special occasions or weekend indulgences.
Ingredient Swap Ideas
Switching up ingredients lets you tailor this cake to your dietary needs or flavor preferences without losing its essence.- Ice cream - Use a dairy-free vanilla ice cream to keep this treat vegan-friendly.
- Cinnamon rolls - Choose gluten-free cinnamon rolls if needed to accommodate gluten sensitivities.
- Flavor twists - Swap classic vanilla ice cream for caramel or maple for added depth.
- Additional nuts - Add chopped pecans or walnuts between layers to introduce a nutty crunch if desired.
Ingredients
- 6 cinnamon rolls
- 1.5 quarts vanilla ice cream
- 1 tablespoon ground cinnamon
- 2 tablespoons brown sugar
- Nonstick cooking spray
- Optional: caramel sauce or chopped nuts
Instructions
- Spray a 9-inch springform pan with nonstick cooking spray.
- Toss cinnamon roll pieces lightly with cinnamon and brown sugar. Layer in pan.
- Spread a third of softened vanilla ice cream over the cinnamon roll layer. Repeat twice.
- Cover and freeze at least 4 hours.
- Remove pan sides. Optionally top with caramel and nuts. Slice with warm knife and serve.
12. Mint Chocolate Chip Frozen Cheesecake Bites
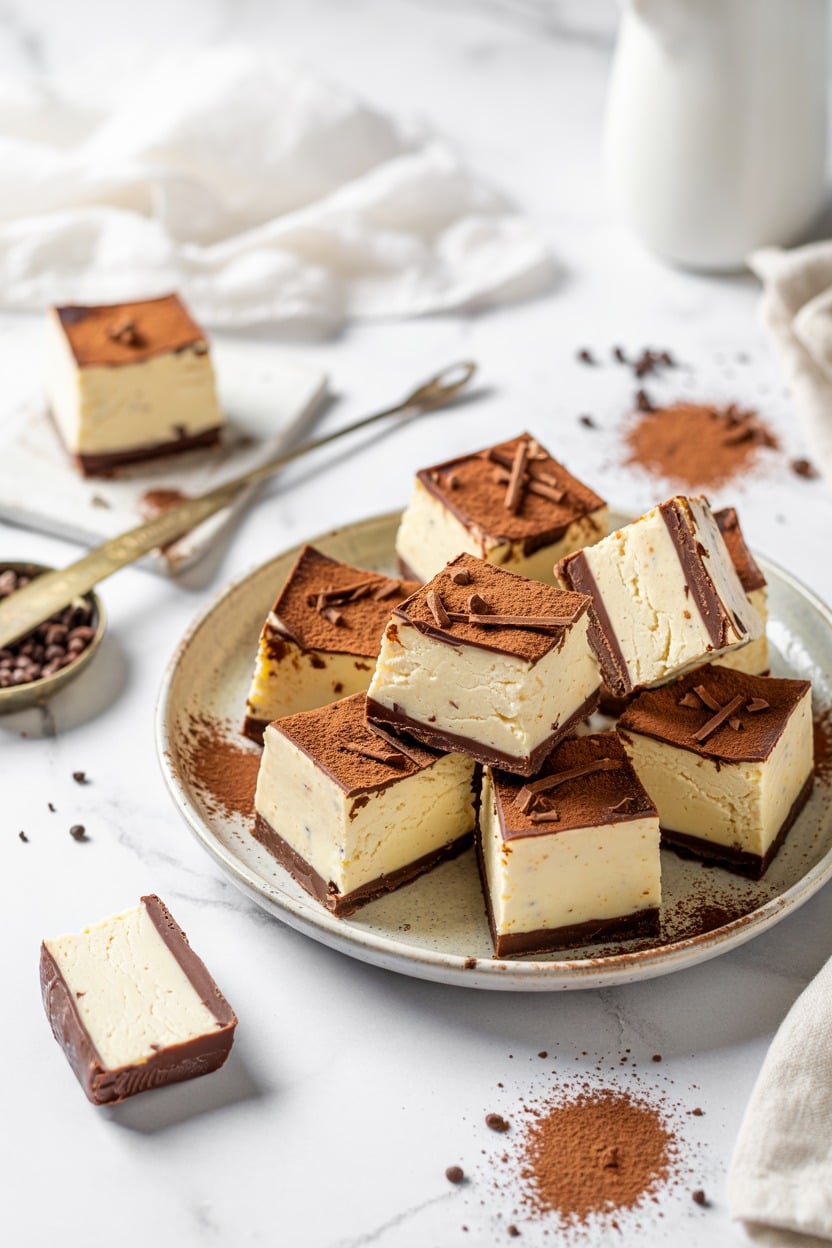
These Mint Chocolate Chip Frozen Cheesecake Bites are a refreshing and sweet treat that's easy to make ahead and enjoy anytime. The combination of creamy cheesecake, fresh mint, and small bursts of chocolate chips creates a lively flavor you can enjoy straight from the freezer.
They're perfect for portion control, as each bite is individually sized and simple to freeze. These mini cheesecakes offer the right balance of minty freshness and sweet richness without being overwhelming.
Why This Recipe Works
This recipe works well because it’s simple to prepare and allows you to enjoy a cool dessert whenever you want. The fresh mint and chocolate chips introduce vibrant flavor, while the cheesecake base keeps things creamy and smooth.- Convenience - Mini portions that freeze well for make-ahead dessert options.
- Flavor balance - Combination of fresh mint and chocolate chips enhances the rich, creamy cheesecake.
- Texture - Soft and creamy with little bursts of chocolate for a pleasant bite.
- Appeal - Attractive, bite-sized treats perfect for sharing or snacking.
Ingredient Swap Ideas
Swapping a few ingredients can help accommodate allergies or personal preferences without losing the core flavor of this recipe. Small changes make it flexible for different tastes or dietary needs.- Cream cheese - Use a dairy-free cream cheese alternative if avoiding dairy.
- Chocolate chips - Swap for mini dark chocolate chips to reduce sweetness or use sugar-free chips for a lower-sugar option.
- Mint - Replace fresh mint with peppermint extract if fresh herbs aren't available; adjust quantity to taste.
- Sweetener - Use honey or maple syrup instead of granulated sugar for a natural sweetness variation.
Ingredients
- 8 ounces cream cheese
- ½ cup granulated sugar
- 1 teaspoon vanilla extract
- 2 tablespoons fresh mint leaves
- ½ cup mini chocolate chips
- ½ cup heavy cream
- Mini muffin liners
Instructions
- Beat cream cheese and sugar until smooth.
- Stir in vanilla and chopped mint.
- Fold in chocolate chips.
- Whip heavy cream and fold in gently.
- Spoon into mini muffin liners.
- Freeze at least 4 hours, store frozen.
13. Raspberry Almond Frozen Bars
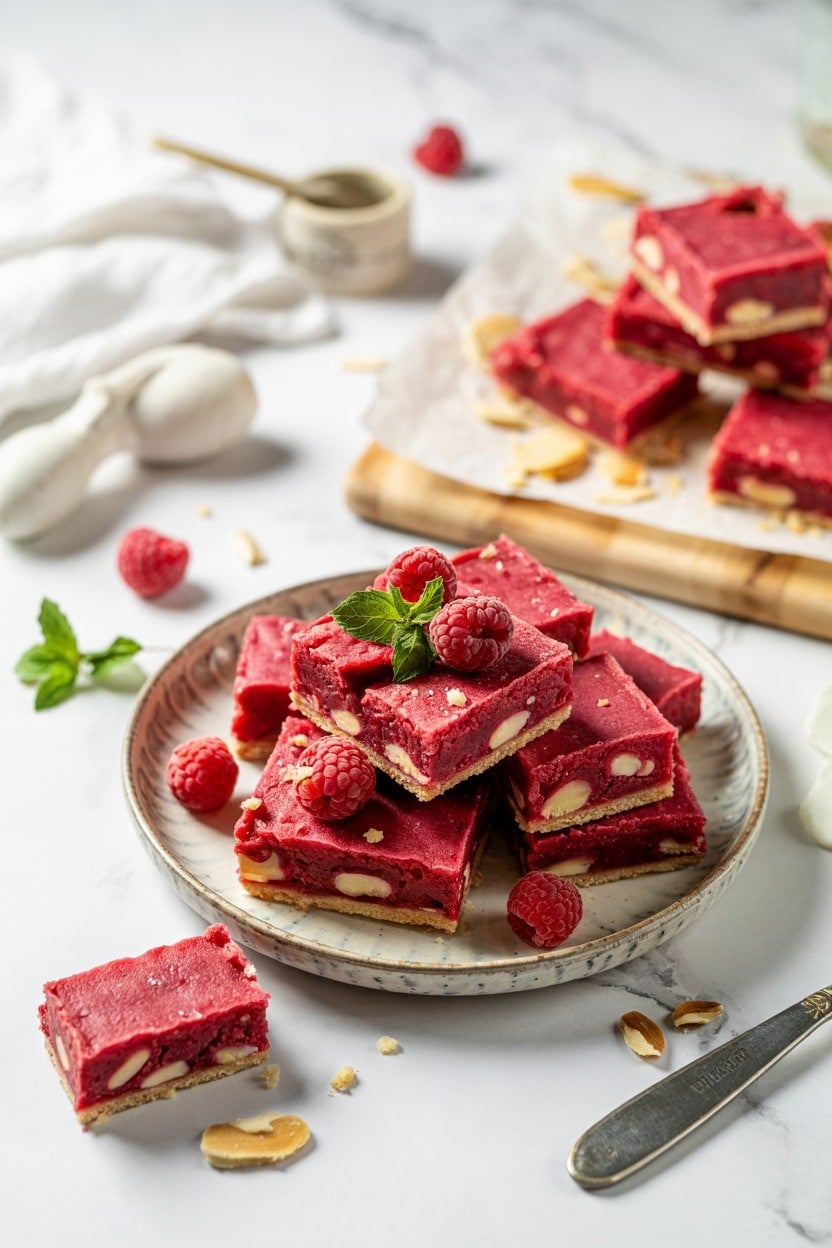
These Raspberry Almond Frozen Bars combine a nutty almond crust with a tart raspberry filling and a crunchy topping. The balance between the sweet almond notes and the bright raspberry flavor makes every bite refreshing yet satisfying.
They're easy to prepare and perfect for a cool treat on a warm day or to have ready for any gathering.
The bars freeze well and hold their shape nicely, making them an excellent option to prep ahead and enjoy whenever you want a wholesome, fruity snack.
Why This Recipe Works
This recipe brings together simple ingredients and straightforward steps to offer a tasty dessert that fits a variety of occasions. The raspberry and almond pairing provides a fresh and nutty flavor contrast that feels both light and indulgent.- Convenience - Prepares quickly with no baking required, then freezes for easy serving.
- Flavor balance - Combines tart raspberry with sweet, nutty almond to please your palate.
- Texture - Crunchy almond crust and topping complement the smooth, frozen raspberry layer.
- Appeal - Family-friendly treat that works well for snacks, parties, or dessert.
Ingredient Swap Ideas
Adjusting some ingredients can tailor this recipe to different diets or flavor preferences without losing the core taste and texture. Consider these swaps to make the bars work best for you.- Almond crust - Substitute almond flour with gluten-free oat flour if avoiding nuts.
- Sweetener - Use maple syrup or agave instead of honey for a vegan alternative.
- Raspberry filling - Swap raspberries for blueberries or strawberries to vary the fruit flavor.
- Almond topping - Replace sliced almonds with chopped walnuts or pecans for a different nuttiness.
Ingredients
- 1 ½ cups almond flour
- ¼ cup sliced almonds
- 3 tablespoons honey
- 3 tablespoons coconut oil
- 2 cups raspberries
- 2 tablespoons maple syrup
- 1 teaspoon lemon juice
- 1 teaspoon vanilla extract
Instructions
- Mix almond flour, honey, and melted coconut oil. Press ⅔ mixture into a lined 8x8-inch pan. Reserve rest for topping.
- Blend raspberries, maple syrup, lemon juice, vanilla until smooth. Pour over crust.
- Sprinkle reserved almond mixture and sliced almonds on top.
- Cover and freeze at least 4 hours until firm.
- Cut into bars after softening 10 minutes. Store frozen.
14. No-Bake Pumpkin Pie Bars
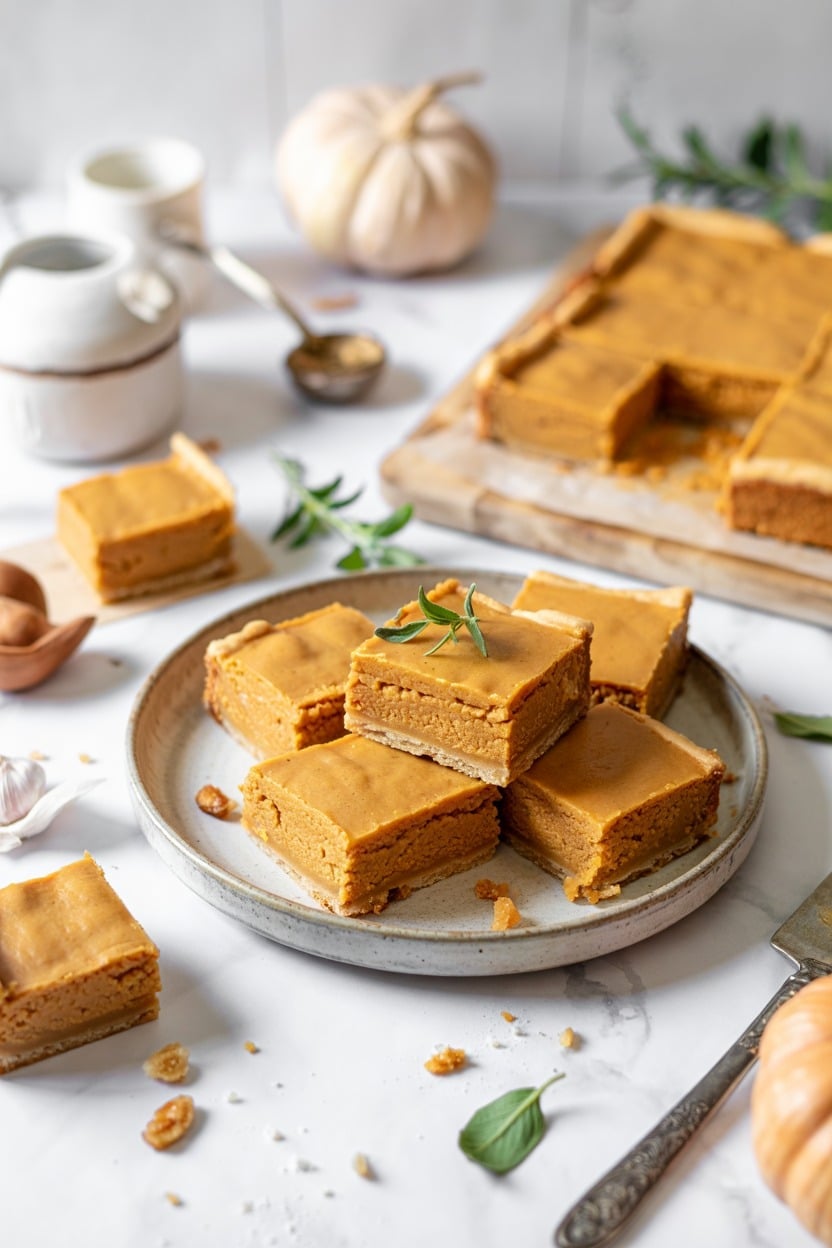
These no-bake pumpkin pie bars bring together the cozy flavors of pumpkin pie in a refreshingly simple dessert. The creamy pumpkin filling is spiced just right and sits atop a crunchy graham cracker crust, creating a great textural contrast.
Since these bars require no baking, they come together quickly and are an excellent choice for busy days or holiday gatherings.
You can prepare them ahead and store them in the freezer, making them a convenient treat that's ready whenever you want a seasonal snack. The balance of spices with smooth pumpkin filling makes each bite indulgent without being overly rich.
Why This Recipe Works
This recipe offers a straightforward way to enjoy pumpkin pie flavors without turning on the oven, making it especially convenient in warmer months or busy schedules.- Convenience - No baking needed; simple assembly with minimal hands-on time.
- Flavor balance - Warm pumpkin spices complement the sweetness, enhancing the classic taste.
- Texture contrast - Crisp graham cracker base paired with a creamy pumpkin layer.
- Make-ahead friendly - Holds well in the freezer for an easy grab-and-go dessert.
Ingredient Swap Ideas
Swapping ingredients can help adapt these bars for different diets or taste preferences without losing their essence.- Graham cracker crust - Use gluten-free graham crackers or digestive biscuits to suit gluten sensitivities.
- Cream cheese - Substitute with dairy-free cream cheese alternatives to make it vegan-friendly.
- Sweetener - Replace granulated sugar with maple syrup or agave nectar for a more natural sweetness.
- Spices - Adjust the pumpkin pie spice blend by adding more cinnamon or nutmeg based on personal preference.
Ingredients
- 1 ½ cups graham cracker crumbs
- 6 tablespoons unsalted butter
- 8 ounces cream cheese
- 1 cup canned pumpkin puree
- ¾ cup powdered sugar
- 1 teaspoon vanilla extract
- 1 teaspoon pumpkin pie spice
- 1 cup heavy cream
Instructions
- Press graham cracker crumbs mixed with butter into an 8x8-inch pan, chill.
- Beat cream cheese, pumpkin, sugar, vanilla, and pumpkin spice until smooth.
- Whip heavy cream and fold into pumpkin mixture.
- Spread over crust and refrigerate at least 4 hours.
- Slice and serve chilled; freeze for longer storage.
15. Frozen Vanilla Bean Pudding Cups
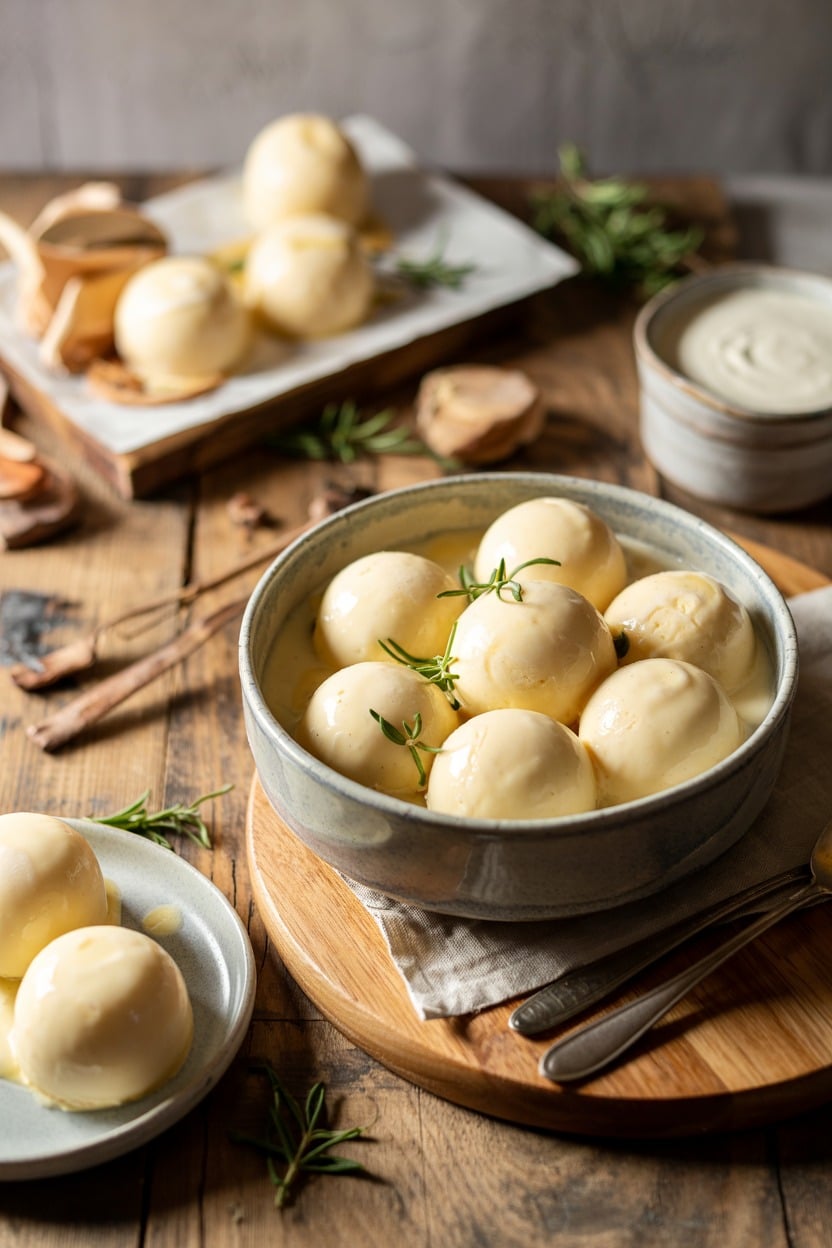
Frozen Vanilla Bean Pudding Cups are a refreshing treat that combines creamy vanilla pudding with a cool, icy texture. They are easy to prepare and ideal for warm days or when you want something sweet but light.
You can customize these individual pudding cups with fresh fruits, chocolate, or nuts to suit your taste and make them more festive.
The smooth, rich vanilla flavor pairs beautifully with a chilled texture that feels indulgent without being heavy. This recipe is practical for busy home cooks looking for a make-ahead dessert that the whole family can enjoy.
Why This Recipe Works
This recipe offers a simple way to enjoy creamy vanilla pudding in a frozen form, making it a satisfying yet light dessert option. It balances flavor and texture while being quick to assemble and store.- Convenience - Make-ahead dessert cups are easy to prepare and keep on hand for any occasion.
- Flavor balance - The subtle sweetness and aromatic vanilla bean flavor provide a gentle, comforting taste.
- Texture - Creamy pudding transforms into a smooth, frozen treat with a pleasant mouthfeel.
- Appeal - Served in individual portions, these cups are great for family snacks or gatherings with minimal mess.
Ingredient Swap Ideas
Swapping ingredients can help tailor this dessert to different dietary needs or flavor profiles without losing its charm.- Dairy-free option - Use almond milk or coconut milk pudding as a substitute for dairy-based pudding.
- Sweetener alternatives - Replace sugar with honey, maple syrup, or agave nectar for a different kind of sweetness.
- Flavor variation - Add a bit of cinnamon or cardamom to the pudding for warm, complementary spices.
- Toppings swap - Use fresh berries, crushed nuts, or dark chocolate shavings to customize the toppings to your preference.
Ingredients
- 2 cups milk
- ½ cup granulated sugar
- ¼ cup cornstarch
- 2 teaspoons pure vanilla bean paste
- ¼ teaspoon salt
- 1 cup heavy cream
- Fresh fruit or chocolate shavings
Instructions
- Whisk sugar, cornstarch, salt, and milk in a saucepan. Cook over medium heat, stirring until thick.
- Remove from heat; stir in vanilla bean paste. Cool, cover to prevent skin.
- Whip cream and fold into pudding.
- Spoon into cups; freeze 4+ hours.
- Garnish before serving.
16. Chocolate Hazelnut Freezer Fudge
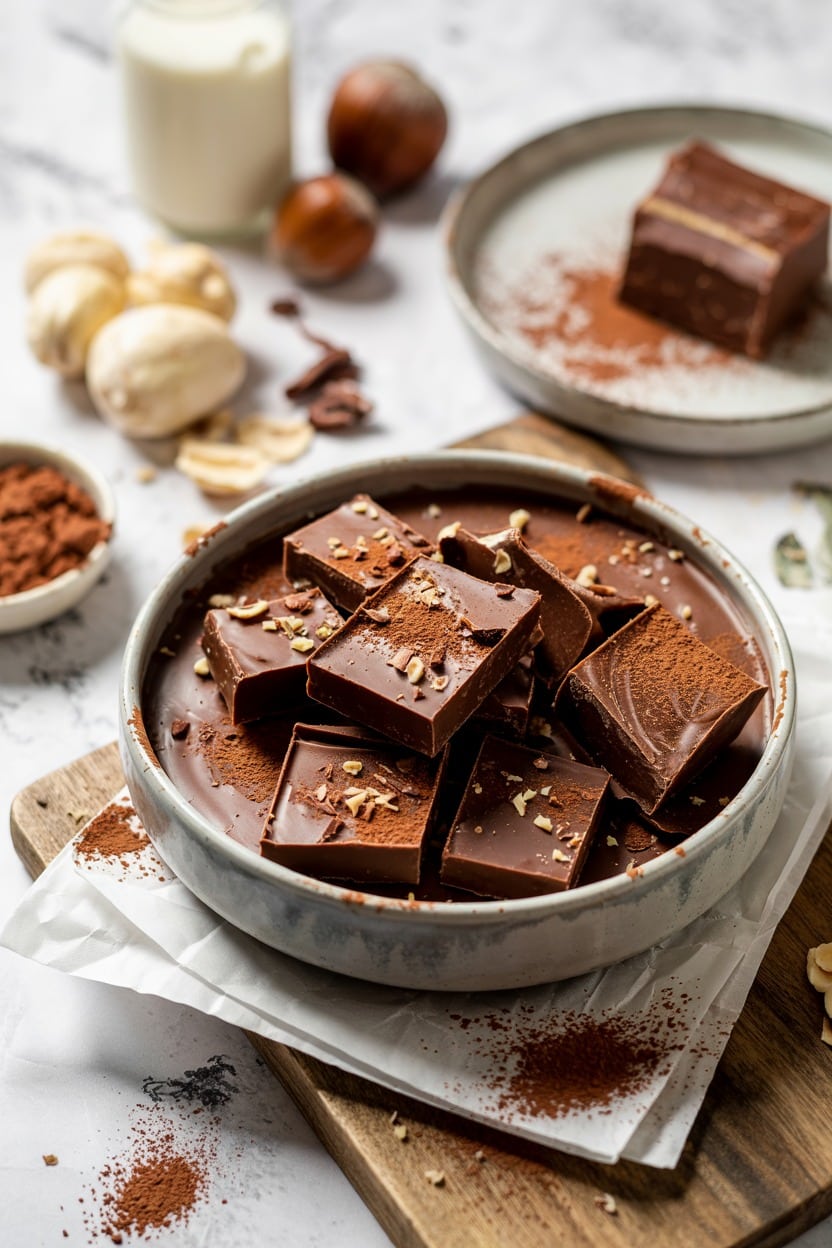
This Chocolate Hazelnut Freezer Fudge is a quick way to enjoy a rich, creamy treat without baking. The smooth chocolate base combined with the satisfying crunch of hazelnuts gives you a delightful contrast in every bite.
It's an easy no-bake dessert that sets up in the freezer, making it ideal for busy days or last-minute gatherings.
The fudge delivers classic flavors in a simple recipe that requires just a few ingredients. You can have it ready in minutes and stored in the freezer until you want to serve, making it a convenient, crowd-pleasing option.
Why This Recipe Works
This fudge recipe balances ease and flavor with an enjoyable texture, making it a reliable dessert choice for various occasions.- Convenience - No baking required and quick preparation lets you get it ready in a snap.
- Flavor balance - Combines rich chocolate with toasted hazelnuts, creating a harmonious blend.
- Texture - Smooth fudge with a satisfying nutty crunch adds interest.
- Make-ahead friendly - Stays fresh in the freezer and portions easily for serving.
Ingredient Swap Ideas
Swapping ingredients can help tailor this fudge to your preferences or dietary needs without losing its essence.- Hazelnuts - Try almonds or pecans for a different but still crunchy texture.
- Chocolate - Use dark, milk, or semi-sweet chocolate chips depending on your preferred sweetness level.
- Sweetener - Replace granulated sugar with coconut sugar or maple syrup for a natural twist.
- Butter - Use coconut oil for a dairy-free alternative while maintaining a creamy texture.
Ingredients
- 2 cups semi-sweet chocolate chips
- 1 cup sweetened condensed milk
- ½ cup unsalted butter
- 1 teaspoon vanilla extract
- 1 cup toasted hazelnuts
- Pinch of salt
Instructions
- Line an 8x8-inch pan with parchment paper.
- Heat chocolate chips, condensed milk, and butter over low heat until smooth.
- Stir in vanilla, salt, and half the hazelnuts.
- Pour into pan, sprinkle remaining nuts on top.
- Freeze at least 2 hours, cut into squares.
17. Banana Nutella Ice Cream Sandwiches
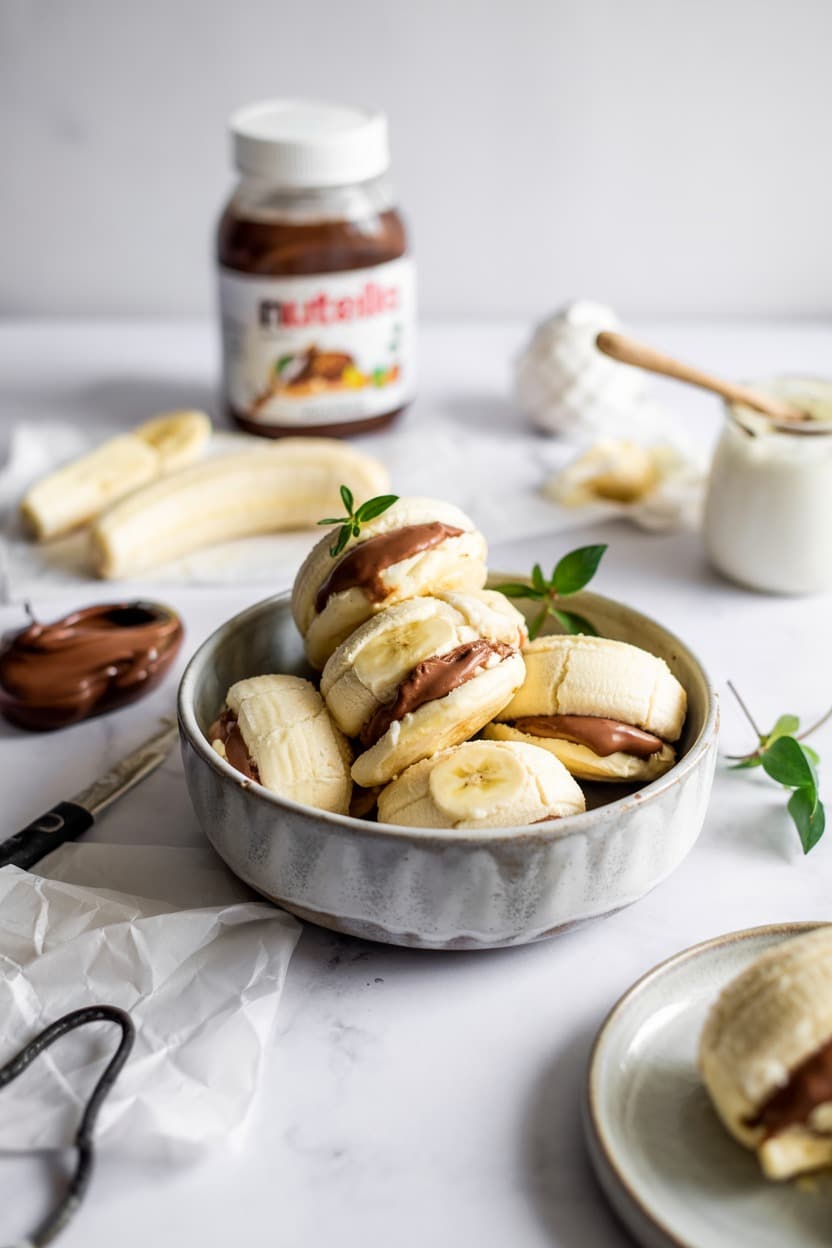
This recipe brings together two beloved flavors-ripe bananas and creamy Nutella-in a fun and refreshing treat. Sandwiched between soft cookies and gently frozen, these ice cream sandwiches are perfect for quick snacks or a casual dessert that feels indulgent without complicated prep.
The combination of the sweet Nutella spread and sliced bananas offers a satisfying balance of richness and natural fruitiness. Plus, the chilled texture adds a cooling element that's especially welcome on warmer days.
Why This Recipe Works
This recipe combines simplicity and flavor in a way that makes it easy to prepare and enjoyable to eat.- Convenience - Uses readily available ingredients and requires minimal assembly with no baking needed.
- Flavor balance - Sweet, creamy Nutella pairs beautifully with the fresh banana slices for a harmonious taste.
- Texture - Soft cookies and smooth Nutella contrast pleasantly with the cool, slightly firm frozen banana slices.
- Appeal - Ideal for family-friendly snacks, providing a healthier, home-made alternative to store-bought ice cream sandwiches.
Ingredient Swap Ideas
Adapting this recipe can help support dietary preferences or add new taste dimensions without losing the essence of the treat.- Cookie choices - Use gluten-free or oatmeal cookies if you prefer a different texture or dietary option.
- Spread alternatives - Substitute Nutella with almond butter or peanut butter to change the flavor profile or reduce sugar.
- Fruit variations - Swap bananas for sliced strawberries or kiwi for a different fruity twist.
- Frozen options - Add a scoop of vanilla ice cream or frozen yogurt instead of the fruit for a creamier sandwich.
Ingredients
- 12 soft chocolate chip or sandwich cookies
- ½ cup Nutella spread
- 2 medium ripe bananas
Instructions
- Lay out half of the cookies flat side up.
- Spread Nutella on the cookies.
- Arrange banana slices on top.
- Top with remaining cookies, press gently.
- Freeze 1 hour before serving.
18. Key Lime Pie Popsicles
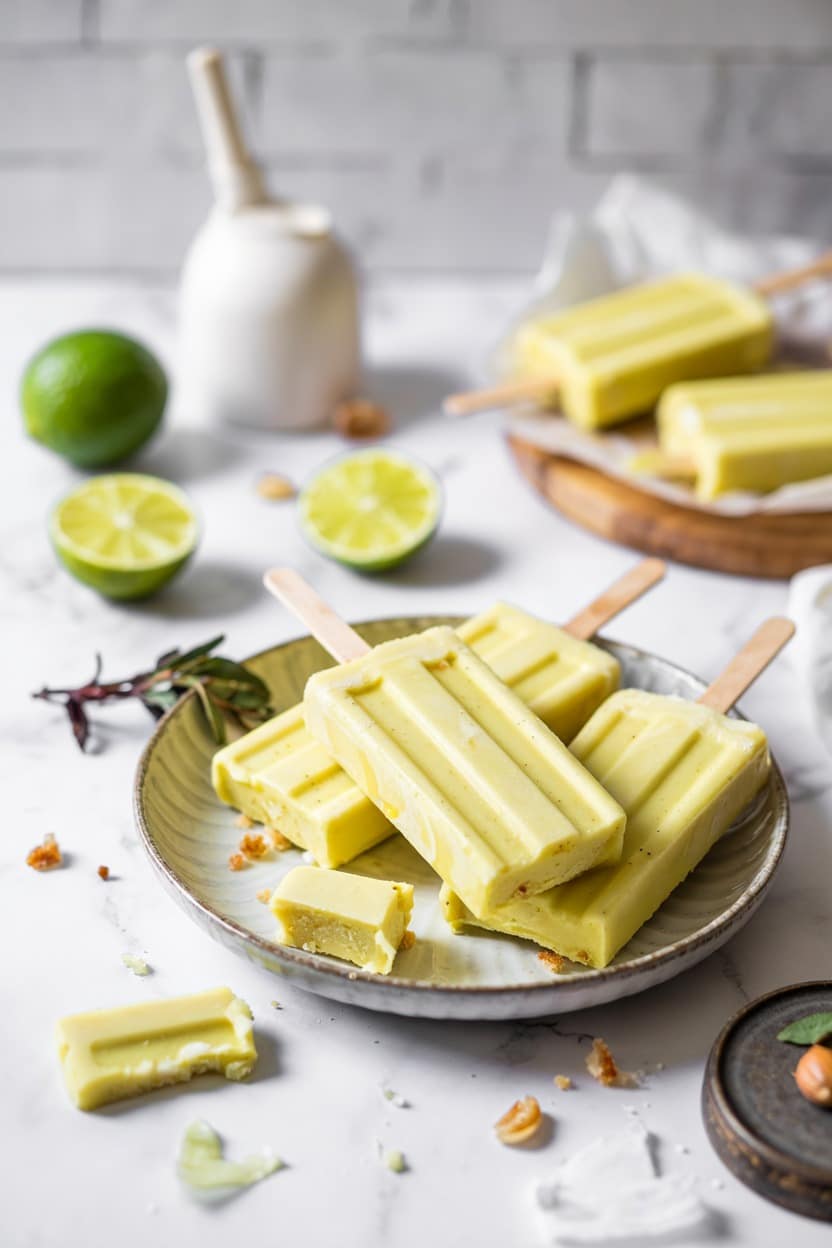
Key lime pie popsicles bring the bright, tangy flavor of classic key lime pie to a refreshing frozen treat. These popsicles have a creamy texture combined with the sharpness of lime juice and a hint of sweetness, making them an excellent choice for warm days or after-dinner desserts.
They are surprisingly simple to make at home, requiring just a few ingredients blended together and frozen on sticks. The balance of tart lime and sweetened condensed milk replicates that beloved key lime pie taste in a fun, handheld form.
Why This Recipe Works
This recipe offers a quick way to enjoy the familiar flavors of key lime pie with minimal prep and clean-up.- Convenience - Simple to prepare with a blender and freezer, no baking needed.
- Flavor balance - Tart lime juice combines with creamy condensed milk for a smooth, tangy treat.
- Texture - Silky and smooth popsicles that melt pleasantly on the tongue.
- Appeal - Kid-friendly and great for summer parties or casual snacking.
Ingredient Swap Ideas
Adjusting ingredients can make this recipe fit different tastes or dietary needs without losing its bright flavor.- Dairy-free substitute - Use full-fat coconut milk instead of sweetened condensed milk for a dairy-free version.
- Lime variety - Swap key lime juice for regular lime juice if key limes are unavailable.
- Sweetener alternative - Replace sweetened condensed milk with a mix of coconut cream and honey or maple syrup for less processed sweetness.
- Crust option - Add crushed graham crackers or cookie crumbs on top after freezing to mimic a pie crust texture.
Ingredients
- 1 can sweetened condensed milk
- ½ cup key lime juice
- 1 cup whole milk
- 1 cup heavy cream
- Zest of 1 key lime
- Optional graham cracker crumbs
Instructions
- Blend condensed milk, lime juice, milk, cream, and zest.
- Pour into molds, add graham crumbs if using.
- Insert sticks and freeze at least 6 hours.
- Run warm water over molds to release popsicles.
19. Peanut Butter Chocolate Chip Cookie Dough Bites
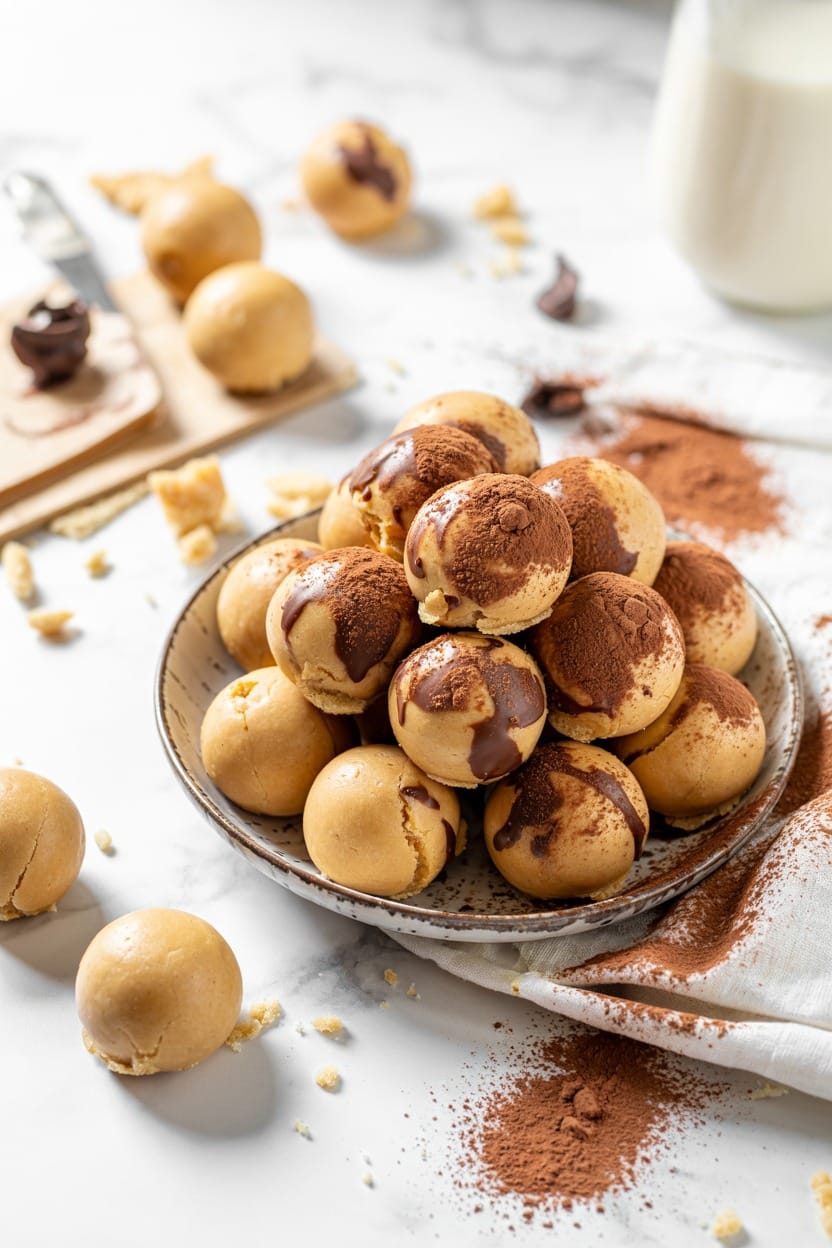
These Peanut Butter Chocolate Chip Cookie Dough Bites are an easy and fun way to enjoy the irresistible flavor of cookie dough without baking. They have a creamy, nutty richness from the peanut butter, balanced by sweet chocolate chips, making them a satisfying snack or treat.
Because they are small, frozen bites, they work well for portion control and are great to keep ready for whenever a quick sweet bite is needed. The texture is soft yet firm, giving you that familiar cookie dough feel without the raw flour or eggs.
Why This Recipe Works
This recipe comes together quickly and offers a rich combination of classic flavors in a simple, no-bake form.- Convenience - No baking required, freezer-ready for grab-and-go snacks.
- Flavor balance - Nutty peanut butter pairs perfectly with sweet chocolate chips.
- Texture - Soft and chewy, just like real cookie dough bites.
- Appeal - Family-friendly and kid-approved as a treat or dessert topping.
Ingredient Swap Ideas
Changing up some ingredients can help you tailor these bites to your dietary needs or personal preferences without losing the core flavor experience.- Nut butter - Use almond or cashew butter instead of peanut butter for a different nutty flavor.
- Sweetener - Replace brown sugar with coconut sugar or maple syrup for a more natural sweetness.
- Chocolate chips - Swap regular chips with dark or white chocolate chips depending on your taste.
- Flour - Use oat flour or a gluten-free flour blend if you need gluten-free options.
Ingredients
- 1 cup creamy peanut butter
- ½ cup brown sugar
- 1 teaspoon vanilla extract
- ¼ teaspoon salt
- 1 ½ cups all-purpose flour
- ¼ cup milk
- ½ cup mini chocolate chips
Instructions
- Mix peanut butter, brown sugar, vanilla, and salt until smooth.
- Add flour and milk gradually, forming thick dough.
- Fold in chocolate chips.
- Scoop dough into bite-sized balls.
- Freeze at least 1 hour before serving.
20. Cherry Almond Frozen Crumble Bars
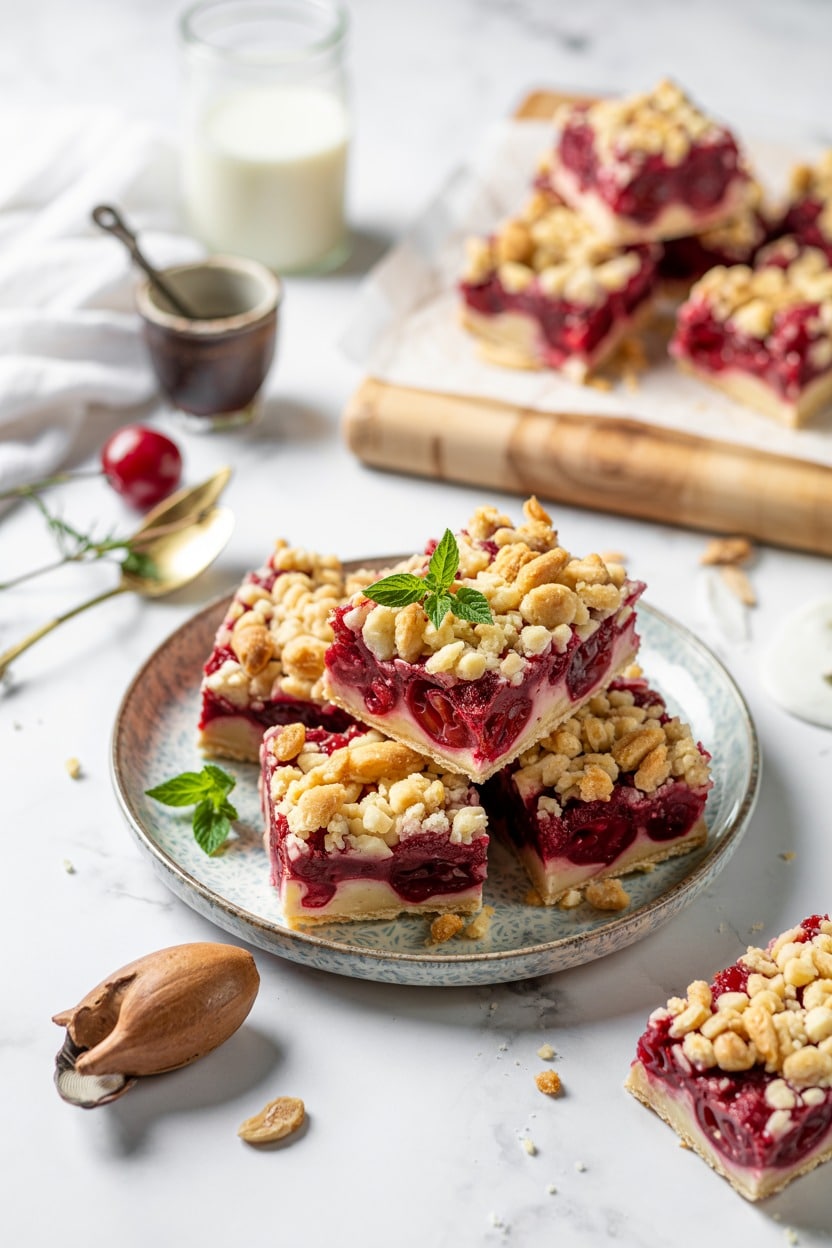
These Cherry Almond Frozen Crumble Bars combine sweet cherry filling with a crunchy almond oat crumble topping. They are easy to prepare and freeze well, making them a great option for busy days when you want a homemade treat ready to enjoy without extra hassle.
The balance between the tart cherries and nutty almond topping creates a satisfying flavor and texture that feels special but stays simple. It's a recipe that helps you have a homemade dessert on hand with minimal day-of effort.
Why This Recipe Works
This recipe delivers a fresh fruit dessert with a handy make-ahead feature and appealing texture contrast. It’s a wholesome option that blends natural sweetness with crisp, nutty elements.- Convenience - Prepare in advance and freeze for later, saving time on busy days.
- Flavor balance - Tart cherry filling pairs naturally with subtly sweet almond oat topping.
- Texture - Soft, juicy fruit layer contrasts with a crisp, crumbly almond oat crust.
- Appeal - Good for sharing, easily portioned, and ideal for casual occasions or snacks.
Ingredient Swap Ideas
These bars can be adapted for different preferences or dietary needs with a few simple swaps while maintaining their core qualities.- Almonds - Substitute with chopped pecans or walnuts for a varied nutty flavor.
- Cherries - Use frozen blueberries or mixed berries instead of cherries for a new fruit twist.
- Oats - Swap rolled oats for gluten-free oats to make the bars gluten-free-friendly.
- Sweetener - Replace brown sugar with coconut sugar or maple syrup to adjust sweetness and flavor.
Ingredients
- 1 ½ cups rolled oats
- 1 cup all-purpose flour
- ½ cup sliced almonds
- ½ cup brown sugar
- ½ teaspoon baking powder
- ¼ teaspoon salt
- ¾ cup unsalted butter
- 2 cups pitted cherries
- ½ cup granulated sugar
- 2 teaspoons cornstarch
- ½ teaspoon almond extract
Instructions
- Preheat oven to 350°F (175°C). Line 9x9-inch pan.
- Mix oats, flour, almonds, sugar, baking powder, salt, and butter until crumbly.
- Reserve 1 cup crumble. Press rest into pan.
- Toss cherries with sugar, cornstarch, almond extract; spread over crust.
- Sprinkle reserved crumble over filling.
- Bake 40-45 minutes until golden and bubbly. Cool completely.
- Freeze or refrigerate; cut before serving.
For additional make-ahead options suited to entertaining or weeknight prep, see make-ahead dessert ideas for busy weekends. To expand your freezer dessert repertoire with simple, do-ahead sweets, explore easy freezer desserts you can prep ahead.

Andrew Gray is a seasoned food writer and blogger with a wealth of experience in the restaurant and catering industries. With a passion for all things delicious, Andrew has honed his culinary expertise through his work as a personal chef and caterer.
His love for food led him to venture into food writing, where he has contributed to various online publications, sharing his knowledge and insights on the culinary world. As the proud owner of CooksCrafter.com, Andrew covers a wide range of topics, including recipes, restaurant reviews, product recommendations, and culinary tips.
Through his website, he aims to inspire and educate fellow food enthusiasts, offering a comprehensive resource for all things food-related.