If you're looking for a straightforward way to bake a batch of delicious cookie bars, this collection of 10 recipes made in just one pan is a smart choice, with cookie bars being a slab-style baked dessert similar to cookies but baked in a single pan and cut into squares. These recipes simplify dessert-making without skimping on flavor or texture, often relying on one-bowl mixing or simple creaming methods for consistently chewy results.
You'll find a variety of cookie bar styles here, from classic chocolate chip and chewy blondies to fruity and seasonal options like pumpkin spice or triple berry. Each recipe is designed to be easy to prepare, with clear steps and minimal ingredients, making them ideal for any occasion-whether a quick snack, a family treat, or a crowd-pleasing dessert to share.
What brings these recipes together is their emphasis on convenience and taste. Using a single pan means less cleanup and less fuss while still delivering rich, satisfying cookie bars with just the right balance of chewiness and softness.
1. Classic Chocolate Chip Cookie Bars
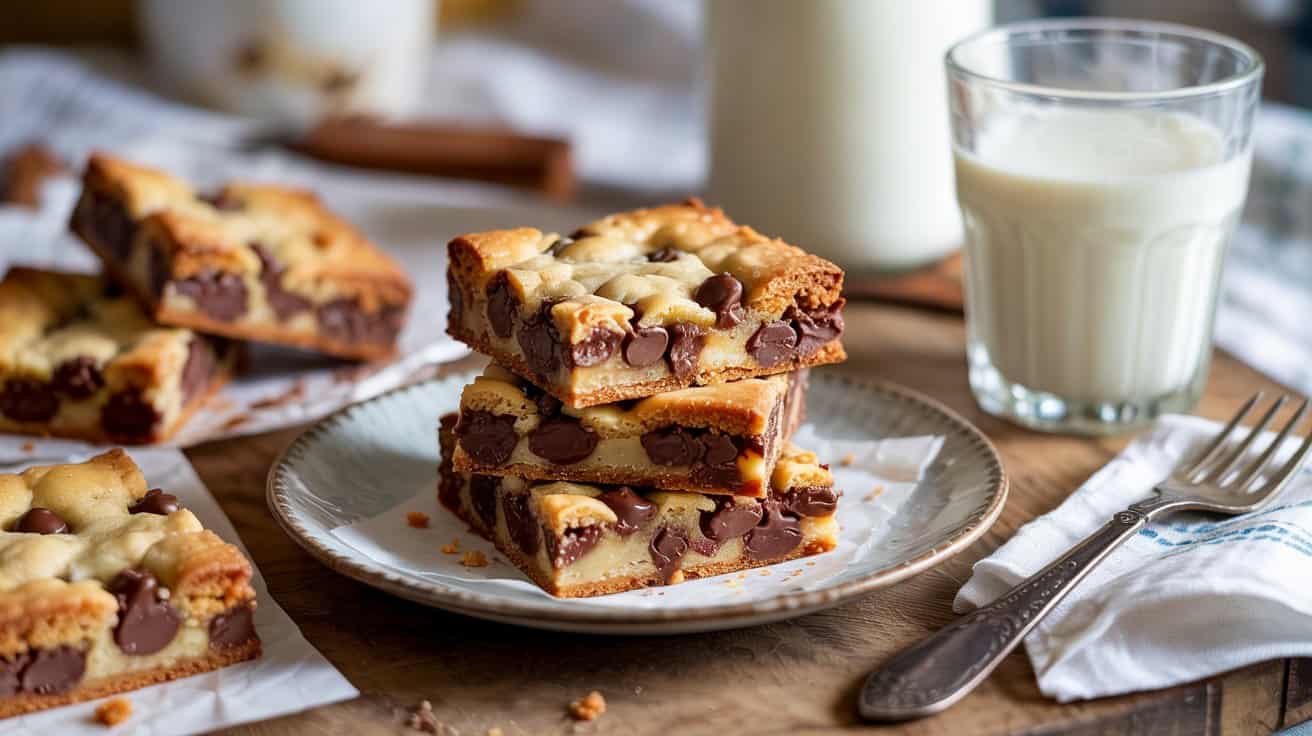
Classic chocolate chip cookie bars give you all the flavor of your favorite cookie but in an easy slice-and-serve form, typically baked in a 9x13-inch pan at 350°F for about 20-25 minutes. The bars have chewy edges that contrast nicely with a soft, slightly gooey center.
You can whip these up quickly for a dessert that's ready to share without the fuss of shaping individual cookies, often taking under 10 minutes of hands-on prep.
The balance of buttery dough and melty chocolate chips is familiar and comforting, perfect for any time you want a sweet bite and easily paired with chocolate chip alternatives for baking and easy chocolate garnish ideas for desserts.
Why This Recipe Works
This recipe is a straightforward way to get classic chocolate chip cookie flavor with minimal effort and maximum taste. It combines convenience and crowd appeal in one simple dish.
- Convenience - Easy to prepare in one pan and slice for portions.
- Flavor balance - Sweet and buttery with just the right amount of chocolate.
- Texture - Chewy on the edges and soft in the center for that cookie bar ideal.
- Appeal - Great for all ages and occasions, from snacks to parties.
- Serving ease - Bars hold their shape well, making cleanup quick and serving mess-free.
Ingredient Swap Ideas
Adjusting the ingredients lets you tailor these bars to different dietary preferences or ingredient availability without losing what makes them so popular.
- Butter substitute - Use margarine or coconut oil instead of butter for a dairy-free option.
- Flour alternative - Replace all-purpose flour with gluten-free flour blend to make it gluten-free.
- Sweetener swap - Use brown sugar completely or mix with coconut sugar for deeper caramel notes.
- Chocolate chips variety - Try white chocolate or dark chocolate chips if you want a different flavor.
- Add-ins - Stir in chopped nuts or dried fruit for extra texture and flavor contrast.
Ingredients
- 1 cup (2 sticks) unsalted butter - softened to room temperature
- 1 cup packed brown sugar - adds moisture and a rich flavor
- ½ cup granulated sugar - balances sweetness and texture
- 2 large eggs - bind the ingredients and add moisture
- 2 teaspoons vanilla extract - enhances the overall flavor
- 2 ¼ cups all-purpose flour - forms the base of the dough
- 1 teaspoon baking soda - helps the bars rise slightly
- ½ teaspoon salt - balances the sweetness
- 2 cups semisweet chocolate chips - provide melty chocolate throughout
Instructions
- Preheat your oven to 350°F (175°C). Grease a 9x13-inch baking pan or line it with parchment paper for easy removal.
- In a large bowl, cream together the softened butter, brown sugar, and granulated sugar until light and fluffy using a hand or stand mixer.
- Beat in the eggs one at a time, then mix in the vanilla extract until smooth and combined.
- In a separate bowl, whisk together the flour, baking soda, and salt. Gradually add the dry ingredients to the wet mixture, stirring just until combined.
- Fold in the chocolate chips evenly throughout the dough. Spread the batter into the prepared pan, smoothing the top with a spatula.
- Bake for 25 to 30 minutes until the edges are golden and a toothpick inserted in the center comes out with a few moist crumbs. Allow the bars to cool completely in the pan before cutting into squares.
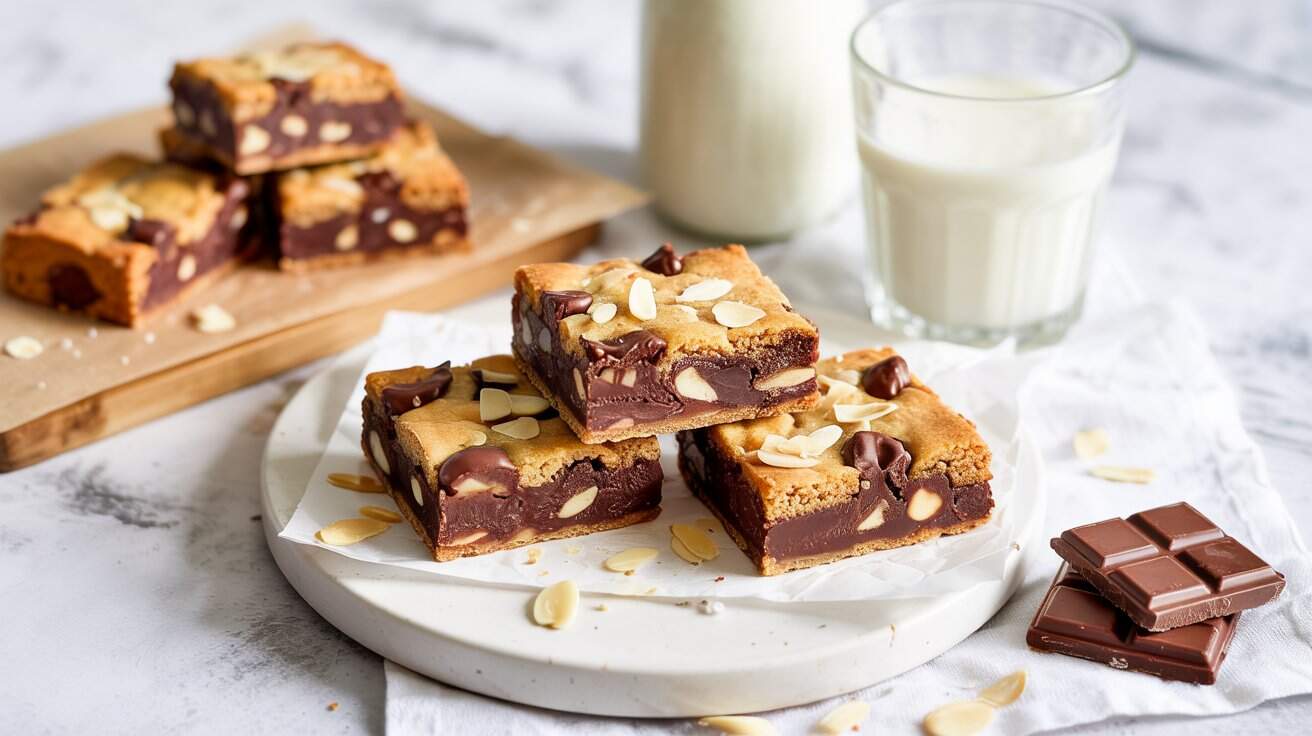
2. Blondie Bars with Walnuts and White Chocolate
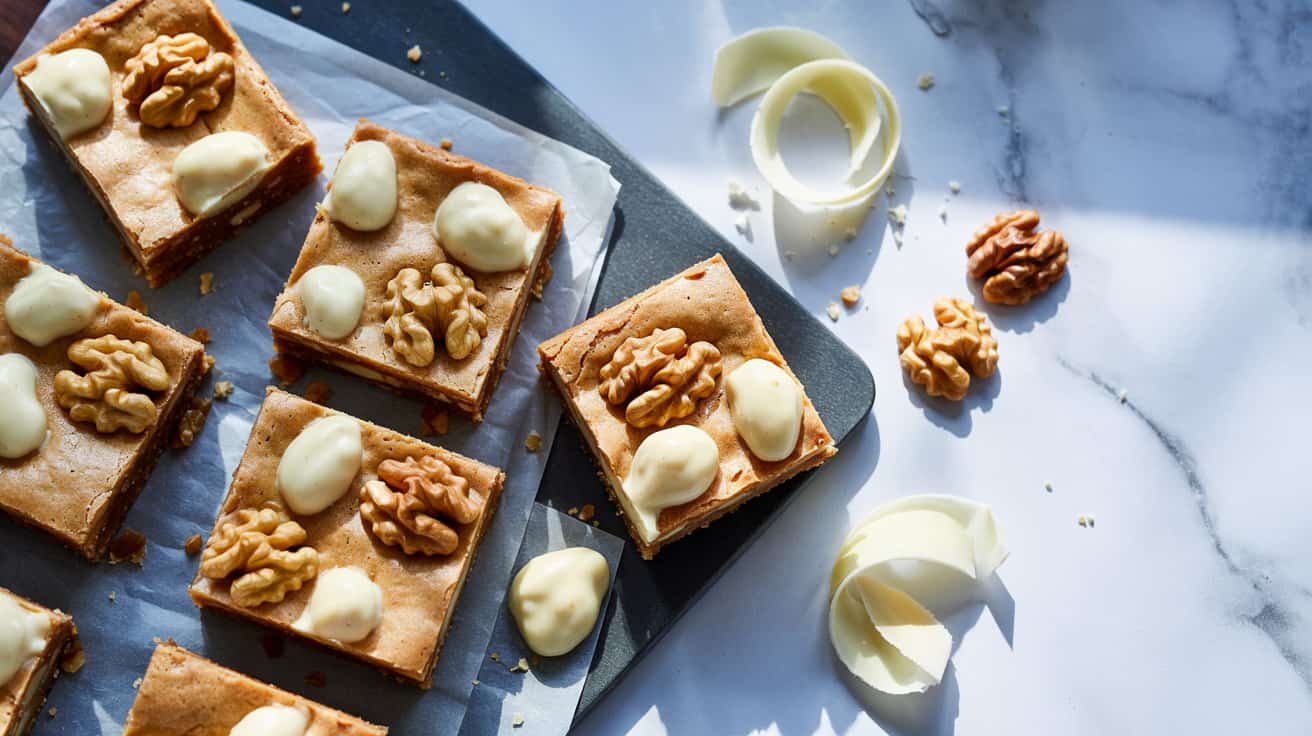
Blondie bars offer a wonderful twist on traditional brownies, focusing on rich, buttery flavors with a subtle caramel note from brown sugar, typically baked in a 9x9-inch pan at 350°F for about 20-25 minutes. These bars are soft and chewy, providing a comforting texture that's perfect for a snack or dessert.
Adding crunchy walnuts gives these blondies a satisfying bite, balancing the sweetness of the white chocolate alternatives for desserts scattered throughout.
These bars also hold up well, making them a convenient option to bake ahead for gatherings or just to enjoy over several days, staying fresh in an airtight container for up to 4 days, and pair well with easy blondie recipe variations for every occasion.
Why This Recipe Works
These blondie bars are a great choice because they blend simple ingredients for a rich flavor and satisfying texture that appeals to many. They are easy to make, versatile, and inviting enough for family and guests alike.
- Convenience - Uses common pantry staples and requires minimal prep time.
- Flavor balance - Combines the deep caramel notes of brown sugar with creamy white chocolate.
- Texture - Soft and chewy with crunchy walnut pieces for contrast.
- Appeal - A family-friendly treat that works for casual snacking or special occasions.
- Storage - Holds moisture well, so bars stay fresh for days when stored properly.
Ingredient Swap Ideas
Swapping ingredients in this recipe can help accommodate dietary preferences or introduce new flavors while keeping the core texture and feel intact. Here are some substitutions that work well:
- Walnuts - Use pecans or almonds if you prefer a different nut flavor or texture.
- White chocolate chips - Replace with dark or milk chocolate chips for a richer or less sweet taste.
- All-purpose flour - Substitute with gluten-free flour blend to make the bars gluten-free.
- Butter - Use coconut oil or a dairy-free margarine for a vegan-friendly version.
- Brown sugar - Light or dark brown sugar can be swapped depending on the desired caramel intensity.
Ingredients
- 1 cup unsalted butter - Melted and slightly cooled for richness.
- 1 ½ cups packed brown sugar - Adds moisture and a deep caramel flavor.
- 2 large eggs - Bind the ingredients and add structure.
- 2 teaspoons vanilla extract - Enhances sweetness and aroma.
- 2 cups all-purpose flour - Provides the base for the bars.
- 1 teaspoon baking powder - Helps with a light rise.
- ½ teaspoon salt - Balances sweetness and strengthens flavor.
- 1 cup white chocolate chips - Sweet and creamy bite-sized pieces.
- 1 cup chopped walnuts - Adds crunch and toasty flavor.
Instructions
- Preheat your oven to 350°F (175°C) and grease a 9x13-inch baking pan or line it with parchment paper.
- In a large bowl, whisk the melted butter and brown sugar together until smooth and well combined.
- Add the eggs one at a time, beating well after each addition, then stir in the vanilla extract.
- In a separate bowl, sift together the flour, baking powder, and salt.
- Gradually fold the dry ingredients into the wet mixture until just combined. Avoid overmixing to keep the bars tender.
- Gently fold in the white chocolate chips and chopped walnuts, distributing them evenly.
- Pour the batter into the prepared pan and spread it out evenly.
- Bake for 25 to 30 minutes, or until the top is lightly golden and a toothpick inserted into the center comes out with a few moist crumbs.
- Allow the blondies to cool completely in the pan before cutting into squares for clean edges and easier handling.
Enjoy these bars with a cup of tea or coffee, or pack them as a convenient treat for on-the-go snacking.
3. Peanut Butter Chocolate Chip Cookie Bars
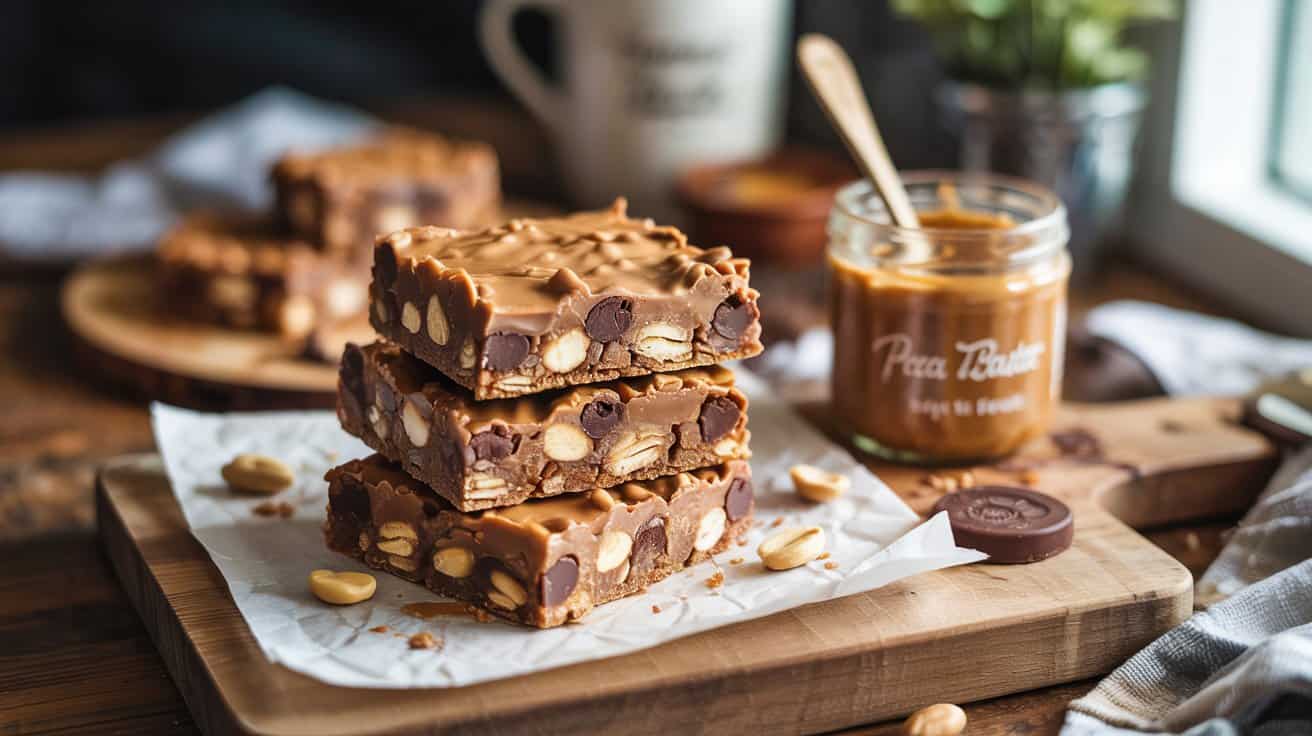
Peanut butter alternatives for baking can also add a creamy texture and slightly nutty flavor, while the semi-sweet chocolate chips bring a classic sweetness that balances the bars perfectly.
This recipe is straightforward and comes together quickly, making it an excellent option for busy days or when you want something homemade without a fuss. The bars stay moist thanks to the peanut butter, and their dense texture makes them easy to portion and share with family or friends.
You don't need any special equipment or hard-to-find ingredients, just a handful of basics you probably already have in your pantry, like all-purpose flour, eggs, and granulated sugar.
Why This Recipe Works
This recipe strikes a great balance between ease of preparation and a delicious, crowd-pleasing flavor. It delivers a comforting combination of peanut butter and chocolate that's familiar and satisfying.
- Convenience - Quick to mix and bake, making it ideal for last-minute desserts or snacks.
- Flavor balance - Creamy peanut butter blends smoothly with melty semi-sweet chocolate chips.
- Texture - Moist and chewy bars with a tender crumb, not dry or crumbly.
- Appeal - Appeals to both kids and adults with its classic flavor pairing.
- Portion control - Bars are easy to cut and serve, perfect for packed lunches or gatherings.
Ingredient Swap Ideas
Swapping ingredients can help you tailor these bars for dietary preferences or adjust flavors while keeping their essence intact.
- Peanut butter - Use almond butter or sunflower seed butter for a different nutty taste or a nut-free version.
- Chocolate chips - Swap semi-sweet for dark chocolate chips if you prefer a richer, less sweet profile.
- Sugar - Replace granulated sugar with coconut sugar or maple syrup to add a subtle caramel note and natural sweetness.
- Flour - Use gluten-free all-purpose flour in place of regular flour to make these bars gluten-free.
- Add-ins - Mix in chopped nuts or dried fruit for extra texture and flavor variety.
Ingredients
- 1 cup creamy peanut butter - Provides richness and moisture to the bars.
- ¾ cup granulated sugar - Offers sweetness and helps with texture.
- ½ cup brown sugar, packed - Adds deeper flavor and chewiness.
- ½ cup unsalted butter, softened - Contributes to the tender crumb.
- 2 large eggs - Bind the ingredients together.
- 1 teaspoon vanilla extract - Enhances the overall flavor.
- 1 ¼ cups all-purpose flour - The base structure for the bars.
- ½ teaspoon baking soda - Helps the bars rise slightly and become light.
- ¼ teaspoon salt - Balances sweetness and enhances flavors.
- 1 cup semi-sweet chocolate chips - Add classic chocolate sweetness throughout.
Instructions
- Preheat your oven to 350°F (175°C). Grease or line a 9x9-inch baking pan with parchment paper for easy removal.
- In a large mixing bowl, cream the softened butter, peanut butter, granulated sugar, and brown sugar together until smooth and well combined.
- Beat in the eggs one at a time, then mix in the vanilla extract until the batter is smooth and creamy.
- In a separate bowl, whisk together the flour, baking soda, and salt. Gradually add the dry ingredients to the wet mixture, stirring just until combined, avoiding overmixing.
- Fold in the chocolate chips evenly throughout the batter.
- Spread the batter evenly into the prepared pan and bake for 25 to 30 minutes, or until the edges are golden and a toothpick inserted into the center comes out mostly clean with a few moist crumbs.
- Allow the bars to cool completely in the pan before cutting into squares to serve.
This recipe makes a batch of satisfying peanut butter chocolate chip bars that keep well for several days stored in an airtight container. They also freeze nicely for longer storage.
4. Oatmeal Raisin Cookie Bars
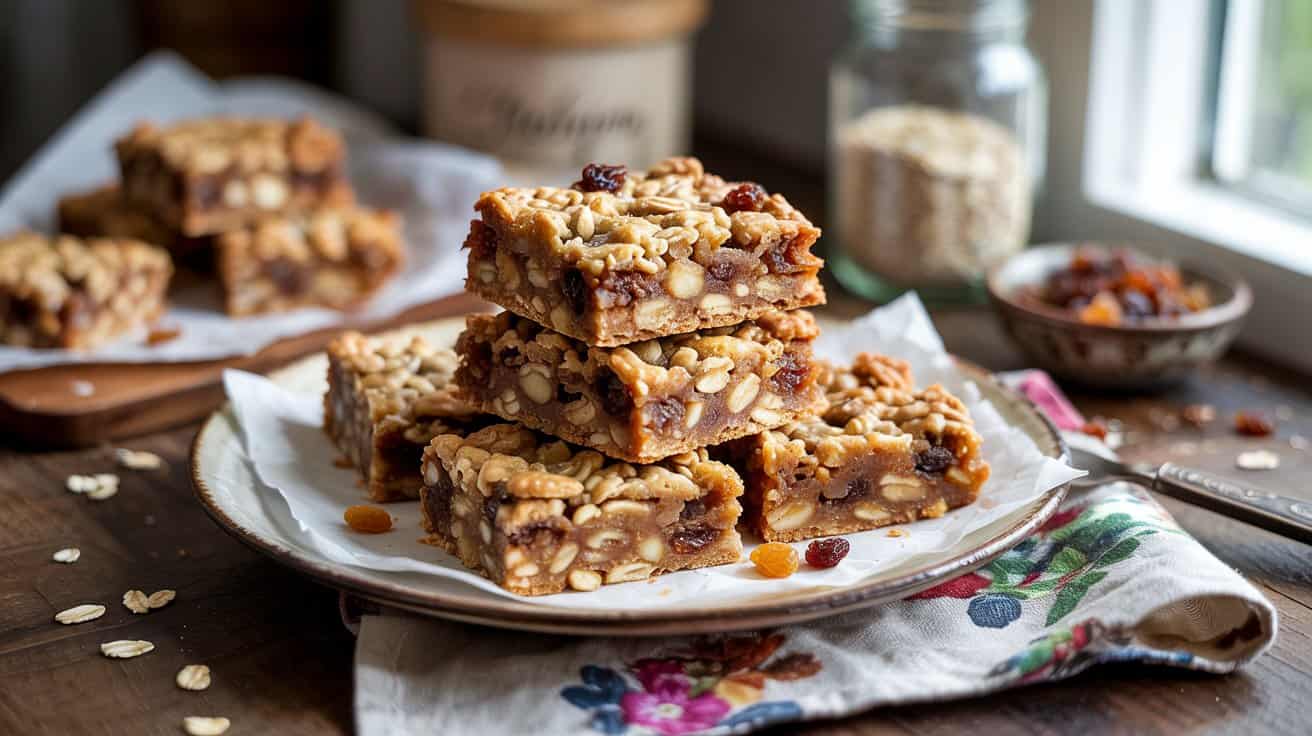
These oatmeal raisin cookie bars bring a comforting and wholesome twist to the classic oatmeal cookie you know and enjoy. They combine the hearty texture of oats with the natural sweetness of raisins, creating a bar that's chewy, tender, and satisfying.
You'll find these bars easy to prepare, making them a great option for a quick snack or a lunchbox treat. The recipe comes together simply, with common pantry ingredients and minimal fuss.
The result is a batch of bars that hold together nicely and offer a lovely balance of sweetness and chew.
Why This Recipe Works
This recipe offers a practical, tasty way to enjoy oatmeal raisin cookies in an easy-to-serve bar format. It delivers all the familiar flavors with an uncomplicated method that suits busy days or casual gatherings.
- Convenience - Simple ingredients and straightforward steps make it quick to prepare.
- Flavor balance - The sweetness of raisins pairs naturally with the earthy oats and warm spices.
- Texture - Bars have a chewy, moist interior with a slightly crisp top for contrast.
- Family-friendly - Appealing to kids and adults alike, these bars are great for sharing.
- Portion control - Cut into bars for easy serving, reducing mess and waste.
Ingredient Swap Ideas
Swapping a few ingredients can help tailor these bars to different preferences or dietary requirements while keeping the comforting taste intact.
- Raisins - Substitute with dried cranberries, chopped dates, or currants for varied sweetness and texture.
- Butter - Use coconut oil or a plant-based margarine to make a dairy-free version.
- All-purpose flour - Replace with a gluten-free flour blend to accommodate gluten sensitivities.
- Brown sugar - Swap with coconut sugar or maple syrup for a different kind of natural sweetness.
- Egg - Use a flax or chia egg substitute to make the recipe vegan-friendly.
Ingredients
- 1 cup (2 sticks) unsalted butter, softened - Provides richness and moisture.
- 1 cup packed brown sugar - Adds sweetness and a touch of molasses flavor.
- 2 large eggs - Binds the ingredients and gives structure.
- 1 teaspoon vanilla extract - Enhances overall flavor and aroma.
- 1 ½ cups all-purpose flour - Forms the base of the bars.
- 1 teaspoon baking soda - Helps the bars rise slightly.
- 1 teaspoon ground cinnamon - Adds warmth and spice.
- ½ teaspoon salt - Balances sweetness and boosts flavor.
- 3 cups old-fashioned rolled oats - Provides hearty texture and chewiness.
- 1 cup raisins - Offer bursts of natural sweetness throughout.
Instructions
- Preheat your oven to 350°F (175°C). Lightly grease a 9x13-inch baking pan or line it with parchment paper for easy removal.
- In a large mixing bowl, cream together the softened butter and brown sugar until the mixture is light and fluffy. Beat in the eggs one at a time, then stir in the vanilla extract.
- In a separate bowl, whisk together the flour, baking soda, cinnamon, and salt. Gradually add the dry ingredients to the butter mixture, mixing just until combined. Stir in the rolled oats and raisins until evenly distributed.
- Press the dough evenly into the prepared baking pan, smoothing the top with a spatula. Bake for 25 to 30 minutes, or until the top is golden and a toothpick inserted near the center comes out with a few moist crumbs.
- Allow the bars to cool completely in the pan on a wire rack before cutting into squares or rectangles. This cooling step helps them set properly and hold together.
- Store the bars in an airtight container at room temperature for up to a week, or freeze for longer storage.
These oatmeal raisin cookie bars make a convenient, wholesome snack with comforting flavors and textures that suit everyday moments or casual entertaining.
5. S’mores Cookie Bars in One Pan
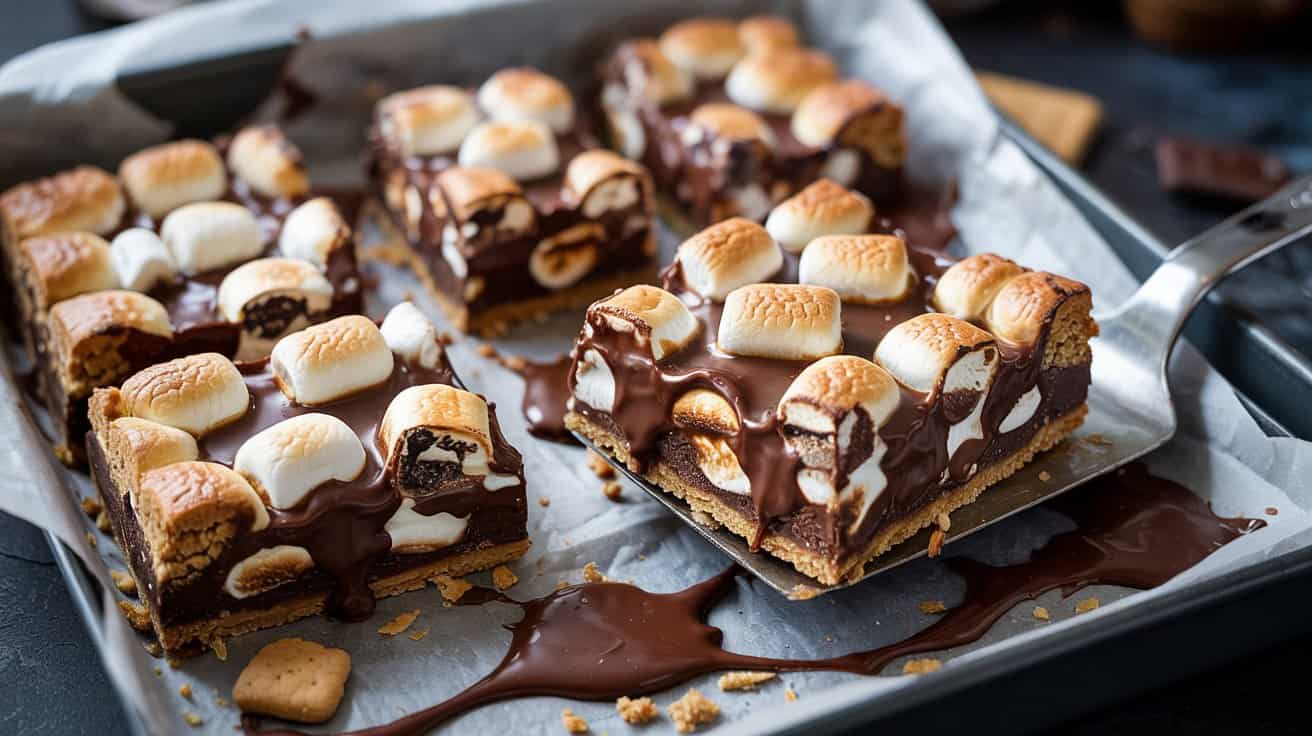
These S'mores Cookie Bars bring the classic campfire treat indoors with a simple twist. Combining a crisp graham cracker base with melted chocolate chunks and soft marshmallows on top, they give you all the flavors of roasted s'mores in a convenient pan.
The bars bake quickly in one dish and require minimal cleanup, making them a great choice for a sweet snack or an easy dessert for gatherings. The marshmallows toast lightly in the oven, which adds a subtle smokiness and a beautiful golden color.
Texture plays a big role here, with the crunchy base balancing the gooey, melty topping for a satisfying bite every time. These bars are especially popular with kids but enjoyable for anyone who appreciates that nostalgic s'mores flavor.
Why This Recipe Works
This recipe combines convenience and flavor in a way that makes it a reliable option even on busy days. The texture variety and familiar ingredients appeal widely, while the single-pan method simplifies prep and cleanup.
- Convenience - One-pan preparation means quick assembly and easy cleanup.
- Flavor balance - Sweet and toasty marshmallows go with the rich chocolate and buttery graham crust.
- Texture - Crunchy crust contrasts with soft, melted marshmallows and chocolate chunks.
- Appeal - Familiar flavors that kids and adults enjoy alike.
- Serving ease - Bars are pre-portioned and easy to grab for a treat or dessert.
Ingredient Swap Ideas
Adjusting this recipe for dietary preferences or what's on hand is straightforward. Simple swaps can keep the essence of the bars intact while catering to different needs or tastes.
- Graham cracker base - Use gluten-free graham crackers for a gluten-free version without changing texture.
- Chocolate chunks - Swap semi-sweet chocolate chips with dairy-free or vegan chocolate alternatives.
- Marshmallows - Choose vegan marshmallows to accommodate plant-based diets.
- Butter - Replace butter with coconut oil for a dairy-free option that still provides richness.
Ingredients
- 1 ½ cups graham cracker crumbs - Finely crushed to form the base layer.
- 6 tablespoons unsalted butter - Melted, to bind the crust.
- ¼ cup granulated sugar - Adds sweetness and helps the crust set.
- 1 cup semi-sweet chocolate chunks - To spread over the crust evenly.
- 2 cups mini marshmallows - Topping that toasts nicely in the oven.
Instructions
- Preheat the oven to 350°F (175°C). Line an 8x8-inch baking pan with parchment paper, leaving some overhang on the sides for easy removal.
- In a medium bowl, mix graham cracker crumbs, melted butter, and sugar until the crumbs are evenly coated and resemble wet sand. Press the mixture firmly into the prepared pan to form an even crust.
- Bake the crust for 8-10 minutes until lightly golden and set. Remove the pan from the oven and immediately sprinkle the chocolate chunks evenly over the warm crust.
- Scatter the mini marshmallows evenly over the chocolate layer. Return the pan to the oven and bake for another 5-7 minutes, watching closely until the marshmallows puff up and turn golden brown.
- Remove the pan from the oven and let it cool completely on a wire rack before slicing into bars using the parchment paper overhang.
- Serve at room temperature and store any leftovers covered at room temperature for up to 3 days.
6. Double Chocolate Fudge Cookie Bars
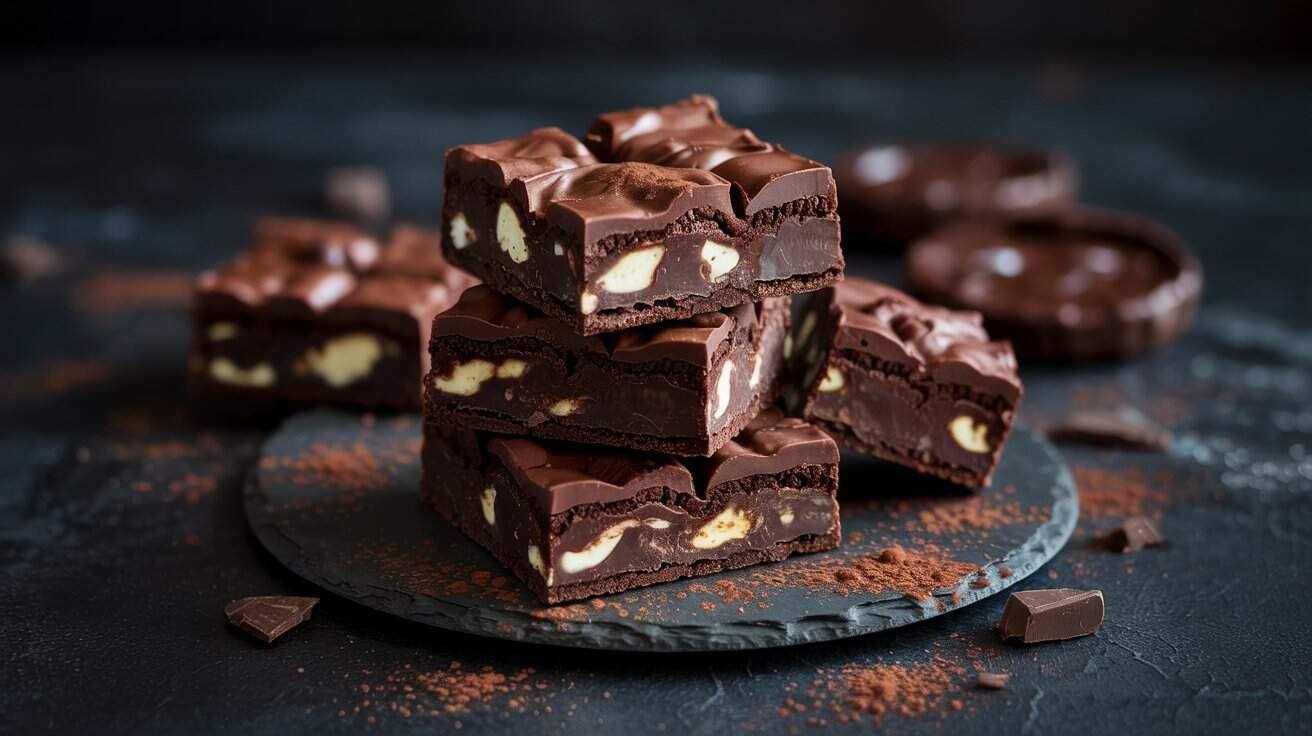
Double Chocolate Fudge Cookie Bars are a great option when you want a chocolate treat that's rich and satisfying, yet easy to share. These bars combine a deeply chocolatey cookie base with gooey chocolate chips throughout, resulting in a fudgy texture that stays soft and chewy.
They come together quickly and bake evenly in a single pan, making them a simple choice for busy days or casual gatherings. The balance of bittersweet cocoa and melty chocolate chips appeals to anyone who enjoys an intense chocolate experience without excessive sweetness.
Why This Recipe Works
This recipe delivers rich, fudgy chocolate bars that are simple to prepare and reliably delicious. They hold together well while offering a tender bite that chocolate lovers appreciate.
- Ease of preparation - Mix and bake in a single pan, minimal steps and equipment required.
- Rich chocolate flavor - Combines cocoa powder and chocolate chips to boost indulgence.
- Fudgy texture - Soft and dense crumb keeps these bars pleasurable without being dry or crumbly.
- Family-friendly treat - Appeals to kids and adults alike, suitable for lunchboxes or dessert plates.
- Makes good leftovers - Bars stay moist for several days stored properly, convenient for snacks later.
Ingredient Swap Ideas
Swapping out ingredients can help suit dietary preferences or ingredient availability without losing the essence of these bars. These adjustments still maintain the dense chocolate character and fudgy feel.
- Use dairy-free butter or margarine - Replace regular butter to make these bars dairy-free.
- Choose vegan chocolate chips - Opt for dairy-free or allergy-friendly chips if needed.
- Swap all-purpose flour with gluten-free flour blend - Use a one-to-one gluten-free baking mix for those avoiding gluten.
- Try coconut sugar instead of brown sugar - For a slightly different sweetness and a touch of caramel notes.
- Add chopped nuts (optional) - Walnuts or pecans add crunch and contrast to the soft texture.
Ingredients
- 1 cup unsalted butter - softened to room temperature.
- 1 cup packed light brown sugar - adds moisture and subtle caramel flavor.
- ½ cup granulated sugar - balances sweetness and structure.
- 2 large eggs - at room temperature to help bind ingredients.
- 1 teaspoon pure vanilla extract - enhances the chocolate depth.
- 1 cup all-purpose flour - provides structure to the dough.
- ¾ cup unsweetened cocoa powder - delivers rich chocolate flavor.
- ½ teaspoon baking powder - helps with slight rise without making bars cakey.
- ¼ teaspoon salt - balances flavors and amplifies sweetness.
- 1 ½ cups semisweet or bittersweet chocolate chips - for pockets of melted chocolate throughout.
Instructions
- Preheat your oven to 350°F (175°C). Lightly grease or line a 9x13-inch baking pan with parchment paper for easy removal.
- In a large bowl, cream the softened butter with both sugars until the mixture is smooth and creamy. Beat in the eggs one at a time, then stir in the vanilla extract.
- In a separate bowl, whisk together the flour, cocoa powder, baking powder, and salt. Gradually add this dry mix to the wet ingredients, stirring until combined and no streaks of flour remain.
- Fold the chocolate chips into the batter evenly, making sure they are distributed throughout.
- Spread the dough evenly into the prepared pan, smoothing the top with a spatula. Bake for 25 to 30 minutes, until the edges are set but the center still looks slightly soft-this preserves the fudgy texture.
- Remove from oven and allow the bars to cool completely in the pan before cutting into squares. This step helps the bars hold their shape and gives the best texture. Serve at room temperature.
These chocolate fudge bars offer a straightforward way to enjoy a rich dessert with familiar ingredients and simple steps. They make a dependable choice for an indulgent everyday treat or easy sharing snack.
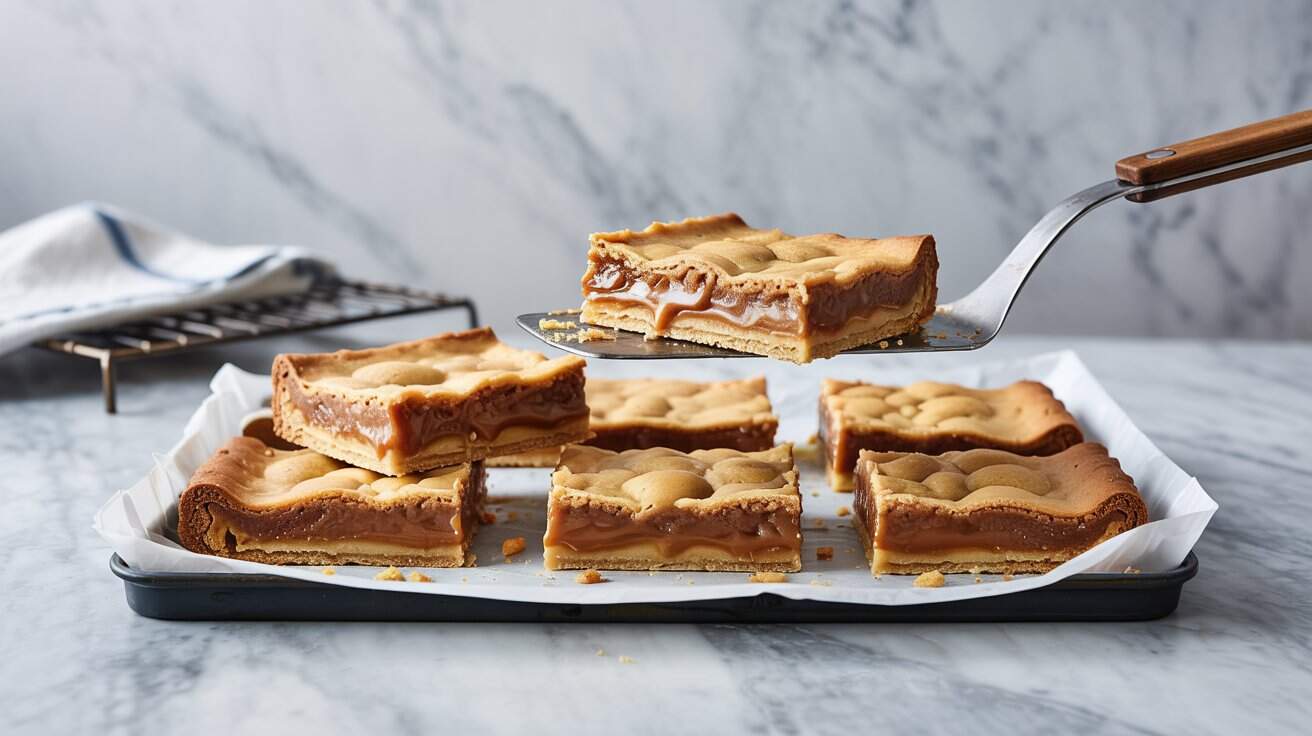
7. Salted Caramel Cookie Bars
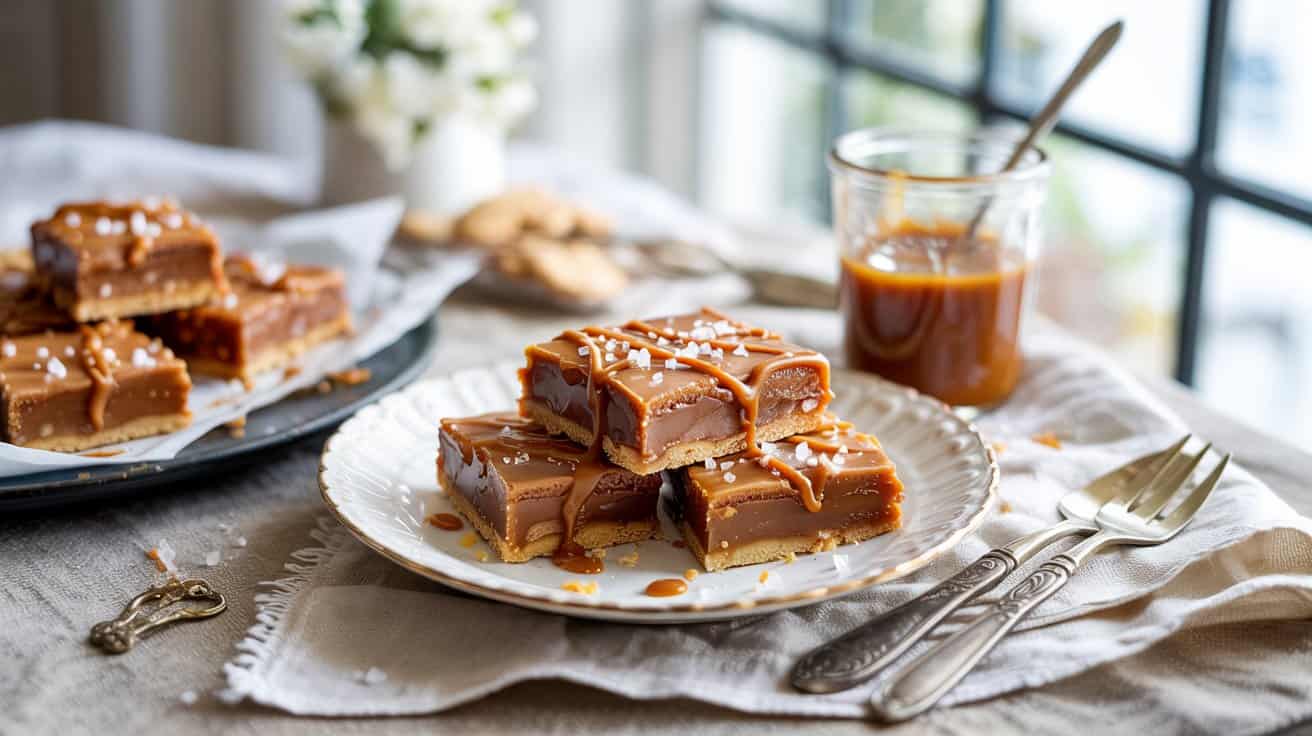
Salted caramel cookie bars bring a delicious twist to classic cookie bars by layering a rich, buttery cookie base with smooth caramel and a sprinkle of sea salt. This combination delivers a wonderful balance of sweet and salty flavors in every bite.
These bars are straightforward to make and perfect for sharing at family gatherings or enjoying as a treat after a busy day. The chewy, golden cookie crust goes well with the gooey caramel, while the sea salt adds a subtle contrast that keeps the flavors exciting.
Why This Recipe Works
This recipe combines ease and rich flavor in a way that fits well into any home cook's routine. It offers a satisfying treat without requiring complicated steps or hard-to-find ingredients.
- Convenience - Simple to prepare with no special equipment needed.
- Flavor balance - Combines sweet caramel with a touch of sea salt for contrast.
- Texture - Soft, chewy cookie base topped with smooth, sticky caramel.
- Appeal - A crowd-pleaser that works for casual snacks or special occasions.
- Serving ease - Cut into bars for easy portioning and sharing.
Ingredient Swap Ideas
Swapping ingredients can help you tailor the bars to different tastes or dietary preferences without losing the heart of the recipe. Here are some ideas to consider.
- Caramel sauce - Use a dairy-free or vegan caramel if you prefer a plant-based option.
- Butter - Substitute with coconut oil to make it dairy-free while keeping richness.
- Flour - Swap all-purpose flour with a gluten-free blend to accommodate gluten sensitivity.
- Salt - Try flavored finishing salts like smoked sea salt for a different twist.
- Sweetener - Replace white sugar with coconut sugar for a deeper caramel note and reduced glycemic impact.
Ingredients
- 1 cup unsalted butter - softened to room temperature for easy mixing.
- 1 cup granulated sugar - provides sweetness and structure to the cookie base.
- 1 cup packed brown sugar - adds moisture and a hint of molasses flavor.
- 2 large eggs - help bind the dough and add richness.
- 2 teaspoons vanilla extract - enhances the overall flavor.
- 2 ½ cups all-purpose flour - forms the base of the cookie dough.
- 1 teaspoon baking soda - aids in leavening for a tender texture.
- ½ teaspoon salt - balances sweetness and boosts flavor.
- 1 (14-ounce) jar caramel sauce - for the gooey layer on top.
- 1 teaspoon flaky sea salt - sprinkled on top to finish the bars.
Instructions
- Preheat your oven to 350°F (175°C). Line a 9x13-inch baking pan with parchment paper, leaving some overhang for easy removal.
- In a large bowl, cream the softened butter with both sugars until light and fluffy using a hand mixer or stand mixer. Add the eggs one at a time, beating well after each addition. Stir in the vanilla extract.
- In a separate bowl, whisk together the flour, baking soda, and salt. Gradually add this to the butter mixture, mixing until just combined.
- Press about two-thirds of the cookie dough evenly into the prepared baking pan to form a solid base. Spread the caramel sauce evenly over the cookie layer. Crumble the remaining cookie dough over the caramel, distributing it as evenly as possible.
- Bake for 30 to 35 minutes, or until the cookie topping is golden and set. Remove from the oven and immediately sprinkle the flaky sea salt over the top.
- Let the bars cool completely in the pan before using the parchment overhang to lift them out. Cut into bars and serve.
This recipe makes a batch of scrumptious bars that balance the richness of caramel with the bright touch of salt, perfect for sharing or enjoying on your own schedule.
8. Pumpkin Spice Cookie Bars
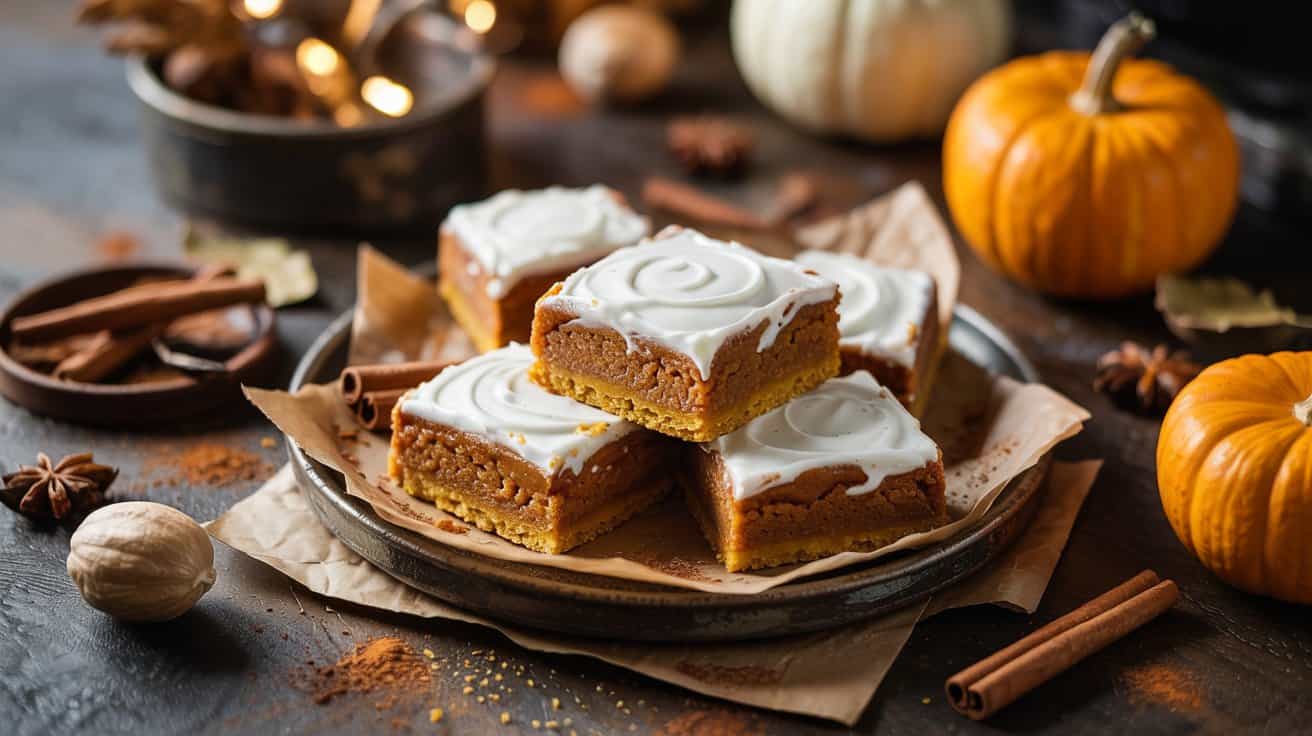
Pumpkin Spice Cookie Bars capture the essence of the fall season with warm spices and rich pumpkin flavor, all baked in one simple pan. These bars have a soft, cake-like texture with a tender crumb that makes them easy to slice and share.
Using pumpkin puree adds natural moisture and a subtle sweetness that goes well with cinnamon, nutmeg, and cloves, creating a cozy and inviting aroma as they bake. They are a great treat for busy days when you want something homemade without a complicated process.
Whether you're packing snacks for the kids or serving guests at a casual gathering, these bars hold up well and stay moist, making them a reliable choice for seasonal baking.
Why This Recipe Works
This recipe delivers satisfying flavors with practical ease and a comforting texture. It makes a wonderful snack or dessert option that appeals to both pumpkin enthusiasts and those new to autumn flavors.
- Convenience - Baked in a single pan, the preparation is straightforward and quick.
- Flavor balance - Combines natural sweetness from pumpkin with balanced warm spices.
- Texture - Soft, tender bars that are easy to cut and hold together nicely.
- Appeal - Family-friendly and suitable for sharing at casual events or as an everyday treat.
- Storage - Bars keep well in an airtight container for several days without losing moisture.
Ingredient Swap Ideas
Swapping ingredients can help you customize the bars to suit dietary needs or personal preferences without losing the essence of the recipe.
- Pumpkin puree - Can be replaced with canned sweet potato puree for a similar texture and flavor.
- All-purpose flour - Use gluten-free flour blends to make the bars suitable for gluten-sensitive diets.
- Butter - Substitute with coconut oil for a dairy-free version while keeping moisture intact.
- Brown sugar - Try coconut sugar or maple syrup for a natural sweetener alternative.
- Spices - Adjust the mix to include ginger or allspice if you want a slightly different warm spice touch.
Ingredients
- 1 cup pumpkin puree - Use canned or homemade for smooth texture and natural moisture.
- ½ cup unsalted butter, softened - Adds rich flavor and tenderness.
- ¾ cup brown sugar - Provides sweetness with a hint of molasses.
- 1 large egg - Binds the ingredients and adds structure.
- 1 teaspoon vanilla extract - Enhances the overall flavor.
- 1 ½ cups all-purpose flour - Forms the base of the bars.
- 1 teaspoon baking powder - Helps the bars rise and stay light.
- ½ teaspoon baking soda - Adds leavening for softness.
- ½ teaspoon salt - Balances the sweetness.
- 2 teaspoons ground cinnamon - The primary warming spice.
- ½ teaspoon ground nutmeg - Adds depth and aroma.
- ¼ teaspoon ground cloves - Provides a subtle spicy note.
Instructions
- Preheat your oven to 350°F (175°C). Grease or line an 8x8-inch baking pan with parchment paper.
- In a large bowl, cream the softened butter and brown sugar together until light and fluffy. Add the egg and vanilla extract, mixing well.
- In a separate bowl, whisk together the flour, baking powder, baking soda, salt, cinnamon, nutmeg, and cloves.
- Gradually add the dry ingredients to the wet mixture, stirring just until combined. Fold in the pumpkin puree until evenly distributed.
- Spread the batter evenly into the prepared pan, smoothing the top with a spatula.
- Bake for 30 to 35 minutes, or until a toothpick inserted into the center comes out clean. Allow the bars to cool completely in the pan before cutting into squares and serving.
9. Vegan Chocolate Chip Cookie Bars
These vegan chocolate chip cookie bars bring all the familiar flavors and textures you expect from a classic treat, without any animal products. Using flax eggs and plant-based butter ensures a tender, chewy texture that holds together well when sliced.
The rich chocolate chips melt slightly into each bite, balancing sweetness with that nostalgic cookie feel. This recipe is straightforward, using pantry staples with just a few simple steps, making it easy to whip up for a snack or to share at gatherings.
Why This Recipe Works
This recipe combines practical ingredients and simple techniques to create a crowd-pleasing vegan dessert. It offers a satisfying texture and rich chocolate flavor that makes these bars hard to resist.
- Convenience - Polished but straightforward preparation suited for busy schedules.
- Flavor balance - Sweet cookie dough base with pockets of melty, bittersweet chocolate.
- Texture - Soft and chewy, with just enough structure to cut neat bars.
- Appeal - Everyone can enjoy this vegan-friendly twist on a classic favorite.
- Cleanup or serving ease - Baked in one pan, ready to slice and serve with minimal mess.
Ingredient Swap Ideas
Feel free to customize these bars to suit your pantry or dietary preferences without losing their essence. Swapping out a few ingredients can keep things fresh or accommodate allergies easily.
- Flax eggs - Use chia eggs in the same amount if you prefer.
- Plant-based butter - Substitute with coconut oil, which may give a slightly different texture and flavor.
- Brown sugar - Swap for coconut sugar for a less processed sweetener.
- Chocolate chips - Use dairy-free white or dark chocolate chips for variety.
- All-purpose flour - Replace with gluten-free flour blend for a gluten-free option.
Ingredients
- Ground flaxseed - 2 tablespoons, mixed with 6 tablespoons water to create 2 flax eggs.
- Plant-based butter - ½ cup (1 stick), softened.
- Brown sugar - ¾ cup, packed.
- Granulated sugar - ¼ cup.
- Vanilla extract - 1 teaspoon.
- All-purpose flour - 1 ¾ cups.
- Baking soda - ½ teaspoon.
- Salt - ¼ teaspoon.
- Dairy-free chocolate chips - 1 cup.
Instructions
- Preheat your oven to 350°F (175°C). Line an 8x8-inch baking pan with parchment paper, leaving some overhang for easy removal.
- In a small bowl, combine ground flaxseed and water. Stir and let sit for 5 minutes until it thickens into flax eggs.
- In a large mixing bowl, cream together the softened plant-based butter, brown sugar, and granulated sugar until smooth and well combined.
- Mix in the flax eggs and vanilla extract until fully incorporated.
- In another bowl, whisk together the flour, baking soda, and salt. Gradually add the dry ingredients to the wet, stirring just until combined. Avoid overmixing.
- Fold in the dairy-free chocolate chips evenly throughout the dough. Press the dough evenly into the prepared baking pan.
- Bake for 20 to 25 minutes or until the edges are slightly golden and a toothpick inserted near the center comes out with moist crumbs.
- Remove from oven and let cool completely in the pan before slicing into bars.
These bars keep well stored in an airtight container at room temperature for up to 4 days or can be frozen for longer storage.
10. Triple Berry Cookie Bars

Triple Berry Cookie Bars bring together the fresh, bright flavors of berries in a soft, buttery cookie base. They provide a sweet yet slightly tangy bite that refreshes the palate with every mouthful.
This recipe uses either fresh or frozen berries folded into a classic cookie dough, giving a beautiful pop of color and juicy bursts throughout.
You can mix and match blueberries, raspberries, and blackberries for a lively combination. These bars are straightforward to prepare and bake, making them a convenient treat for a snack, dessert, or even a grab-and-go breakfast.
The balance of tender crumb and juicy berries feels satisfying without being too heavy.
Why This Recipe Works
This recipe strikes a great balance between convenience and flavor, offering a quick way to enjoy seasonal fruits baked into a soft cookie bar.
- Convenience - Simple one-bowl preparation and quick baking time.
- Flavor balance - Sweet cookie base complemented by the natural tartness of berries.
- Texture - Soft and chewy with juicy bursts of berry goodness in every bite.
- Appeal - Bright, colorful appearance makes these bars inviting for family and guests.
- Serving ease - Bars are pre-portioned and easy to pack or serve at gatherings.
Ingredient Swap Ideas
You can adjust this recipe based on your pantry staples or dietary preferences while keeping its essence intact.
- Swap all-purpose flour with a gluten-free blend to make these bars gluten-free.
- Use coconut oil or vegan butter instead of butter for a dairy-free version.
- Substitute the granulated sugar with maple syrup or honey for a natural sweetener alternative.
- Replace mixed berries with just strawberries or cherries if that's what you have on hand.
- Add chopped nuts, like almonds or walnuts, to the batter for a crunchy texture.
Ingredients
- 1 cup unsalted butter - softened to room temperature for easy mixing.
- 1 cup granulated sugar - adds sweetness to the cookie base.
- 2 large eggs - bind the ingredients and add richness.
- 1 teaspoon vanilla extract - enhances the overall flavor.
- 2 ½ cups all-purpose flour - the base structure for the cookie bars.
- ½ teaspoon baking powder - helps the bars rise slightly.
- ¼ teaspoon salt - balances the sweetness.
- 1 ½ to 2 cups fresh or frozen mixed berries - blueberries, raspberries, and blackberries for juicy bursts.
- Optional: ½ cup chopped nuts - for added texture (almonds or walnuts work well).
Instructions
- Preheat your oven to 350°F (175°C). Grease and line a 9x13-inch baking dish with parchment paper, leaving some overhang for easy removal.
- In a large bowl, cream together the softened butter and granulated sugar until light and fluffy. Add eggs one at a time and beat well after each addition. Stir in vanilla extract.
- In a separate bowl, whisk together the flour, baking powder, and salt. Gradually add the dry ingredients to the wet mixture and mix until just combined.
- Gently fold in the mixed berries and nuts (if using), being careful not to crush the berries and turn the dough purple.
- Spread the batter evenly into the prepared baking dish. Smooth the top with a spatula to create an even layer.
- Bake for 35 to 40 minutes until the edges are golden brown and a toothpick inserted near the center comes out with a few moist crumbs. Allow the bars to cool completely in the pan before lifting them out and cutting into squares.
If your recipe calls for a loaf pan, consider small loaf pan alternatives for baking that keep crusts even and slices uniform. For bundt-pan recipes, try bundt pan replacements for decorative cakes that produce similar ring-shaped results.

Andrew Gray is a seasoned food writer and blogger with a wealth of experience in the restaurant and catering industries. With a passion for all things delicious, Andrew has honed his culinary expertise through his work as a personal chef and caterer.
His love for food led him to venture into food writing, where he has contributed to various online publications, sharing his knowledge and insights on the culinary world. As the proud owner of CooksCrafter.com, Andrew covers a wide range of topics, including recipes, restaurant reviews, product recommendations, and culinary tips.
Through his website, he aims to inspire and educate fellow food enthusiasts, offering a comprehensive resource for all things food-related.