If you're looking to brighten your dessert lineup, this collection of 11 Easy Lemon Desserts That Are Bright and Zingy offers a refreshing selection to enjoy, featuring desserts that highlight fresh lemon juice or zest from Citrus limon for clear citrus flavor. These recipes bring out the fresh, tangy flavor of lemon in simple treats that don't require complicated techniques.
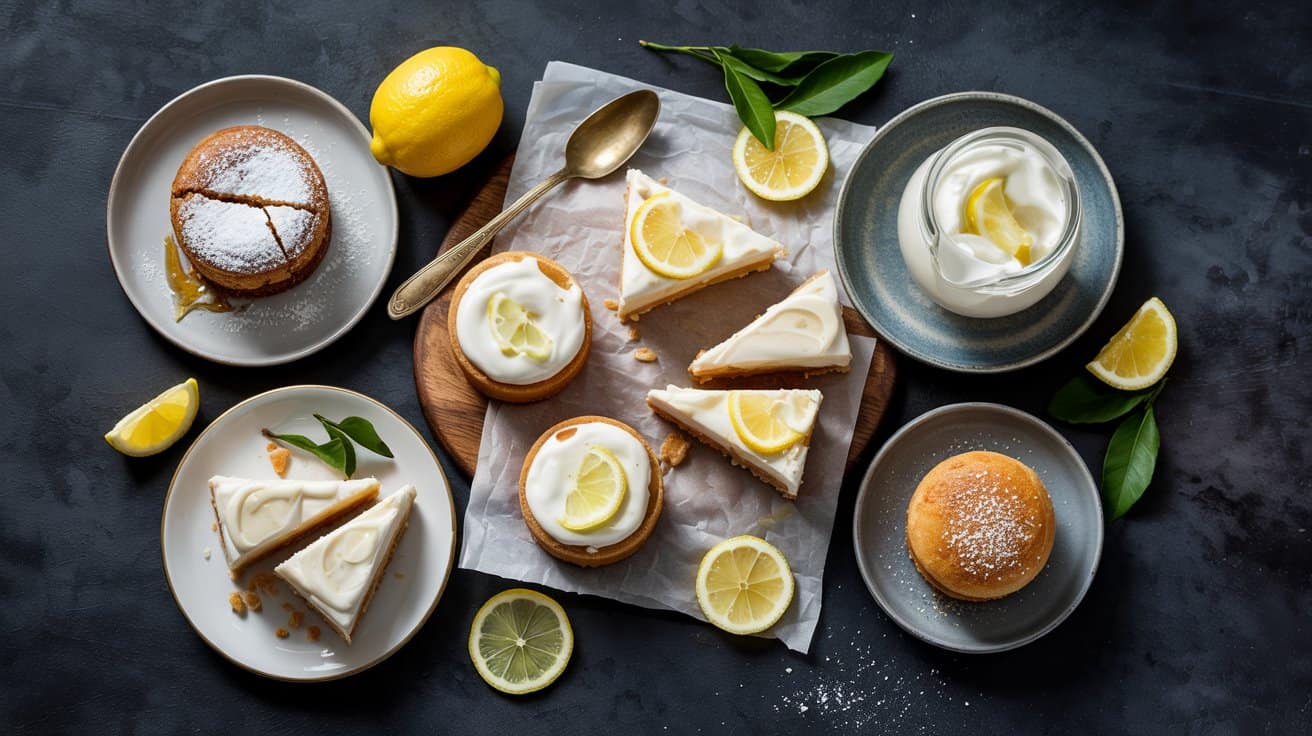
From no-bake cheesecake cups and light lemon mousse to tender lemon poppy seed cake and crisp lemon sugar cookies, this variety covers both baked and chilled options. Whether you want a quick, individual dessert or something to share with family and friends, these recipes deliver bright citrus flavor in a range of textures from creamy to crumbly.
What makes this lineup especially appealing is how approachable each recipe is, using common ingredients and straightforward steps. They come together with minimal fuss, which means you'll spend less time cleaning up and more time enjoying these bright, zingy desserts.
1. Classic Lemon Bars with Shortbread Crust

This lemon bar recipe brings together a bright lemon custard topping with a crumbly, buttery shortbread crust, baked at 350°F until the filling is just set - see lemon juice substitutes for baking.
These bars hold their shape well, making them easy to slice for sharing or packing up as a snack, especially after cooling and chilling for at least 30 minutes.
The preparation is straightforward, making it a great choice even on busy days when you want a citrusy treat without fuss - or try an air-fryer lemon pound cake for quick treats.
Why This Recipe Works
This recipe offers a reliable way to make lemon bars that taste fresh and feel balanced, and pairing lemon with honey can add floral sweetness - see honey-based dessert ideas for summer.
- Convenience - Simple ingredients and straightforward steps make this recipe easy to prepare.
- Flavor balance - Tangy lemon filling mellowed by a butter-rich shortbread crust.
- Texture - Crisp and crumbly base supporting a smooth, silky lemon custard.
- Appeal - Versatile enough for casual get-togethers or more formal occasions.
- Serving ease - Slices cleanly, making portioning and sharing hassle-free.
Ingredient Swap Ideas
These swap options keep the essence of the lemon bars intact while offering some variation, and for other small-batch desserts see small-batch cupcake ideas for two.
- Butter substitute - Use coconut oil or a plant-based margarine for a dairy-free shortbread crust.
- Flour options - Try gluten-free all-purpose flour to make this recipe gluten-free without affecting texture.
- Sweeteners - Replace granulated sugar with honey or maple syrup, adjusting the liquid content slightly.
- Lemon juice - Fresh lemon juice is best, but bottled lemon juice can be used in a pinch, though fresh will yield a brighter flavor.
- Topping twist - Add a dusting of powdered sugar mixed with a little lemon zest for extra citrus aroma.
Ingredients
- 1 cup unsalted butter - softened, for a rich shortbread crust.
- ½ cup granulated sugar - to sweeten the crust.
- 2 cups all-purpose flour - provides structure for the base.
- ¼ teaspoon salt - enhances overall flavor.
- 4 large eggs - beaten, for the lemon custard filling.
- 1 ½ cups granulated sugar - to sweeten the filling.
- ¼ cup all-purpose flour - thickens the lemon custard.
- ½ cup freshly squeezed lemon juice - for bright, natural tartness.
- 2 teaspoons lemon zest - adds extra zing and fragrance.
Instructions
- Preheat your oven to 350°F (175°C). Line a 9x13-inch baking pan with parchment paper, leaving some overhang on the sides to lift the bars out easily.
- To make the crust, beat the softened butter and ½ cup sugar together until light and creamy. Mix in the 2 cups flour and salt until just combined. Press this mixture evenly into the bottom of the prepared pan.
- Bake the crust for 15 to 20 minutes or until it's lightly golden around the edges. Remove it from the oven but keep the oven on.
- While the crust bakes, whisk together the eggs, 1 ½ cups sugar, ¼ cup flour, lemon juice, and zest until smooth and well blended.
- Pour the lemon filling over the warm crust and return the pan to the oven. Bake for another 20 to 25 minutes or until the filling is set and does not jiggle when you gently shake the pan.
- Let the lemon bars cool completely in the pan on a wire rack. Once cooled, lift the bars out using the parchment overhang and cut into squares. For clean cuts, refrigerate the bars for about an hour before slicing.
2. No-Bake Lemon Cheesecake Cups

These no-bake lemon cheesecake cups offer a fresh way to enjoy a creamy dessert without turning on the oven - explore no-bake cheesecake recipes for summer.
Because each portion is served in its own cup, it makes for an elegant presentation - perfect for casual family meals or small gatherings. Plus, the quick prep means you can whip these up any time you want a satisfying sweet treat without a lot of fuss.
The combination of the zesty lemon filling and a simple crust creates a nice contrast in texture, with a smooth top layer and a slight crunch underneath. These cups come together easily and chill quickly, making them a convenient dessert choice that still impresses; chill for at least 2 hours to ensure the filling is set.
For recipes that call for preserved lemons, consider preserved lemon substitutes for desserts to keep bright savory-citrus notes.
Why This Recipe Works
This recipe brings together ease and flavor, delivering a bright, creamy dessert that respects your time and palate. It stands out because it keeps preparation simple while offering a beautifully portioned dessert.
- Convenience - No baking required; quick to prepare and chill.
- Flavor balance - Combines tangy lemon with creamy sweetness in every bite.
- Texture - Smooth cheesecake filling contrasts with a crunchy crust layer.
- Appeal - Individual servings create an elegant look suitable for any occasion.
- Serving ease - Ready to eat straight from the cups, reducing cleanup.
Ingredient Swap Ideas
Swapping ingredients can tailor this dessert to your dietary needs or flavor preferences without losing its character. These alternatives help keep the same refreshing feel while accommodating different tastes.
- Cream cheese - Use a dairy-free cream cheese substitute for a vegan or lactose-free version.
- Lemon juice - Replace fresh lemon juice with lime juice for a different citrus twist.
- Graham cracker crust - Try crushed digestive biscuits or gluten-free cookies for a gluten-free option.
- Sweetener - Swap granulated sugar with honey or maple syrup to add natural sweetness and depth.
- Whipped topping - Opt for coconut whipped cream instead of traditional whipped cream for a dairy-free alternative.
Ingredients
- 1 ½ cups graham cracker crumbs - finely crushed to form the base crust.
- 5 tablespoons unsalted butter - melted, to bind the crust together.
- 8 ounces cream cheese - softened, for a smooth and creamy filling.
- ½ cup powdered sugar - to sweeten the cheesecake layer gently.
- 1 teaspoon vanilla extract - adds subtle flavor to the filling.
- ¼ cup fresh lemon juice - brings bright acidity to the cheesecake.
- 1 cup heavy cream - cold, for whipping into soft peaks to lighten the filling.
- Zest of 1 lemon - finely grated, to enhance lemon flavor in the filling.
Instructions
- In a medium bowl, combine the graham cracker crumbs and melted butter. Mix until the crumbs are evenly coated and hold together when pressed. Divide the mixture evenly among individual dessert cups, pressing firmly into the bottom to form a compact crust.
- In a separate bowl, beat the softened cream cheese with powdered sugar and vanilla extract until smooth and creamy. Stir in fresh lemon juice and lemon zest, mixing until fully incorporated.
- In a chilled bowl, whip the heavy cream until soft peaks form. Gently fold the whipped cream into the lemon cheesecake mixture to keep the filling light and airy.
- Spoon or pipe the cheesecake filling over the crust layer in each cup, smoothing the top with a spatula. Cover the cups with plastic wrap and refrigerate for at least 2 hours, allowing the filling to set.
- Before serving, garnish each cup with additional lemon zest or thin lemon slices for a fresh look. Serve chilled straight from the cups.
3. Lemon Mousse with Whipped Cream

This lemon mousse offers a light and airy texture that works wonderfully as a refreshing dessert after any meal when chilled at least 1 hour. It's bright and zesty, thanks to the fresh lemon juice and zest, which create a crisp acidity that balances the silky creaminess.
The whipped cream adds softness and richness, improving the overall smooth mouthfeel without weighing it down - for dairy-free options see easy whipped cream substitutes for desserts.
Why This Recipe Works
This lemon mousse recipe stands out for its simple preparation and bright combination of flavors that brighten the palate.
- Convenience - Quick to prepare with minimal ingredients and no complex techniques.
- Flavor balance - Combines tart lemon notes with sweet, creamy elements for a balanced taste.
- Texture - Smooth, airy mousse complemented by fluffy whipped cream.
- Appeal - Fits casual and special occasions with its fresh and light profile.
- Serving ease - Individual portions or large bowls make it easy to serve and enjoy.
Ingredient Swap Ideas
Adapting this recipe can help you cater to different dietary preferences or what's available in your pantry, without losing its essence.
- Dairy-free option - Use coconut cream in place of heavy cream for a similar texture with a subtle coconut flavor.
- Sweetener swap - Replace granulated sugar with honey or maple syrup for alternative natural sweetness.
- Zest alternatives - Substitute lemon zest with lime or orange zest for a different citrus twist.
- Egg-free version - Use a commercial egg replacer or gelatin-free whipped topping if avoiding eggs.
- Lower fat - Use reduced-fat yogurt instead of cream to lighten the mousse while keeping some creaminess.
Ingredients
- 2 teaspoons lemon zest - Freshly grated for intense citrus flavor.
- ½ cup fresh lemon juice - Provides the mousse's bright acidity.
- ¾ cup granulated sugar - Balances tartness with sweetness.
- 3 large eggs, separated - Yolks give richness, whites add lightness when whipped.
- 1 cup heavy cream - For whipping into soft peaks to fold in.
- ½ teaspoon vanilla extract - Adds subtle warmth and depth to the flavor.
- Pinch of salt - Enhances overall taste by balancing sweetness and tartness.
Instructions
- In a heatproof bowl, whisk together the lemon juice, lemon zest, and sugar. Add the egg yolks and mix well until combined.
- Set the bowl over a pot of simmering water (double boiler) and cook, stirring constantly, until the mixture thickens enough to coat the back of a spoon. Remove from heat and let it cool slightly.
- In a separate clean bowl, beat the egg whites with a pinch of salt until stiff peaks form.
- In another bowl, whip the heavy cream with the vanilla extract until soft peaks appear.
- Gently fold the whipped cream into the cooled lemon mixture, then carefully fold in the beaten egg whites, preserving as much air as possible.
- Spoon the mousse into serving dishes and chill for at least 2 hours before serving to allow it to set and flavors to meld.
This lemon mousse is an ideal treat for warm days or anytime you want a dessert that feels light yet satisfying.
4. Lemon Poppy Seed Cake

This lemon poppy seed cake offers a tender, moist crumb that's lively with fresh lemon juice and bright zest throughout. Every bite brings a gentle tang paired with the slight crunch of poppy seeds, adding a pleasant texture and a subtle nutty note.
It's a straightforward cake to prepare, making it accessible for busy home cooks who want a refreshing dessert or an uplifting snack alongside a cup of tea. The balance of citrus and seeds gives this cake a lightness that's satisfying without feeling heavy.
Whether for an afternoon gathering or a simple family treat, this cake fits nicely into a wholesome approach to baking. It's easy to slice and share, with flavors that work well any time of day.
Why This Recipe Works
This lemon poppy seed cake blends bright citrus flavors with a soft, tender crumb and subtle crunch, making it a versatile and appealing choice. It's a practical recipe you can count on for reliable results and enjoyable taste.
- Convenience - Simple ingredients and straightforward steps make this cake quick to prepare from start to finish.
- Flavor balance - The lemon's tang mixes smoothly with the nutty poppy seeds and mild sweetness.
- Texture - A moist tender crumb contrasts with the poppy seeds' gentle crunch for interest in every bite.
- Appeal - Its fresh citrus notes keep the cake feeling light, fitting for casual or slightly dressed-up occasions.
- Serving ease - Clean slices hold together well, making this cake easy to portion and share.
Ingredient Swap Ideas
Swapping ingredients can help adjust this cake to fit dietary needs or shift the flavor slightly, all while keeping its core character intact.
- Butter - Use a plant-based margarine or coconut oil to make the cake dairy-free without losing richness.
- Flour - Substitute all-purpose flour with a gluten-free blend to accommodate gluten sensitivities.
- Sugar - Replace granulated sugar with maple syrup or honey, reducing processed sugar while maintaining sweetness.
- Yogurt - Use dairy-free yogurt like almond or coconut yogurt to keep the cake tangy and moist if avoiding dairy.
- Lemon zest and juice - Orange zest and juice can be swapped in for a sweeter, milder citrus version.
Ingredients
- 1 ½ cups all-purpose flour - Provides the structure for a tender crumb.
- 1 teaspoon baking powder - Helps the cake rise and stay light.
- ½ teaspoon baking soda - Works with lemon juice to give lift.
- ¼ teaspoon salt - Balances the sweetness and enhances flavors.
- 1 cup granulated sugar - Sweetens the cake evenly.
- ½ cup unsalted butter softened - Adds richness and moistness.
- 2 large eggs - Bind ingredients and contribute to texture.
- ½ cup plain yogurt - Keeps the cake moist and adds subtle tang.
- Zest of 2 lemons - Infuses bright citrus aroma and flavor throughout.
- ¼ cup fresh lemon juice - Brings fresh acidity for a lively taste.
- 2 tablespoons poppy seeds - Adds crunch and a mild nutty element.
- 1 teaspoon vanilla extract - Enhances overall flavor depth.
Instructions
- Preheat the oven to 350°F (175°C). Grease and flour an 8-inch round cake pan or line it with parchment paper.
- In a medium bowl, whisk together the flour, baking powder, baking soda, and salt. Set aside.
- In a large bowl, cream the butter and sugar with a mixer until light and fluffy. Beat in the eggs one at a time, then stir in the vanilla extract, lemon zest, and lemon juice.
- Alternately add the flour mixture and yogurt to the wet ingredients, beginning and ending with the flour mixture. Mix gently just until combined. Fold in the poppy seeds.
- Pour the batter into the prepared pan and smooth the top evenly. Bake for 35 to 40 minutes or until a toothpick inserted into the center comes out clean.
- Let the cake cool in the pan for 15 minutes before transferring to a wire rack to cool completely. Slice and serve.
5. Lemon Curd Tartlets

Lemon curd tartlets offer a bright burst of citrus flavor wrapped in a buttery, crisp shell. These mini desserts are great for any occasion when you want a handheld treat that feels both fresh and indulgent.
The smooth, tangy lemon curd goes well with the flaky tart shells, creating a balance that's both refreshing and rich. Plus, these tartlets come together in just a few steps, making them a convenient option when you want something impressive but quick to prepare.
Why This Recipe Works
This recipe delivers a simple yet flavorful dessert that's easy to make and visually appealing.
- Convenience - Uses ready-made tart shells for a faster assembly.
- Flavor balance - Bright, zesty lemon curd with a sweet, buttery crust.
- Texture - Crisp tart shells contrast with smooth, creamy filling.
- Appeal - Small size is perfect for parties, snacks, or a sweet finish.
- Serving ease - Individual portions mean less mess and easy sharing.
Ingredient Swap Ideas
Swapping a few ingredients can help adjust this recipe to suit dietary needs or different flavors without losing the essence of the tartlets.
- Use gluten-free tart shells - Choose a gluten-free variety to make this dessert suitable for gluten sensitivities.
- Substitute lemon curd with lime curd - For a different citrus twist, try lime curd instead of lemon.
- Make a dairy-free lemon curd - Use coconut milk or dairy-free butter alternatives to create a vegan-friendly filling.
- Replace granulated sugar with honey or maple syrup - Adjust sweetness naturally while adding a subtle flavor note.
- Try almond flour tart shells - For a nuttier crust, use tart shells made with almond flour.
Ingredients
- 12 mini tart shells - Pre-baked and ready to fill.
- 1 cup lemon curd - Smooth and bright, homemade or store-bought.
- 1 tablespoon powdered sugar - For dusting on top.
- Fresh mint leaves - For garnish (optional).
- Thin lemon slices or zest - To decorate each tartlet.
Instructions
- Spoon about 1 to 2 tablespoons of lemon curd into each mini tart shell, filling them just enough to create a smooth surface.
- Place the filled tartlets on a serving plate or tray, making sure they hold steady for decoration.
- Lightly dust the tops with powdered sugar to add a soft sweetness and a delicate finish.
- Garnish each tartlet with a small mint leaf and a thin slice or twist of lemon zest for a pop of color and extra aroma.
- Chill the tartlets in the refrigerator for at least 30 minutes before serving to allow the curd to set and flavors to meld.
- Serve these lemon curd tartlets chilled or at room temperature as a refreshing, handheld dessert ideal for gatherings or a simple treat any time.
6. Greek Yogurt Lemon Parfaits with Honey and Granola

This recipe brings together the bright, zesty flavor of lemon with the creamy richness of Greek yogurt, creating a dessert that feels both fresh and indulgent. The natural tang of the yogurt is balanced by the gentle sweetness of honey, while a layer of crunchy granola adds texture and a satisfying bite.
The parfaits are simple to assemble, making them an ideal choice for busy days or casual gatherings. Using fresh ingredients means this dessert is not only delicious but also a wholesome option to satisfy a sweet craving without weighing you down.
Whether you're preparing a quick snack for yourself or a healthful treat to share, these lemon parfaits combine bright flavors and textures in a way that's both refreshing and nourishing.
Why This Recipe Works
This recipe stands out for its easy preparation and lively flavor, making it a practical option for various occasions. It offers a great balance between creamy, tangy, and crunchy elements, all while using nutritious ingredients.
- Convenience - Requires minimal prep and no baking, perfect for quick assembly.
- Flavor balance - Blends tangy lemon yogurt with sweet honey for a refreshing taste.
- Texture - Combines smooth yogurt with crunchy granola for satisfying contrast.
- Healthful Ingredients - Uses Greek yogurt and natural sweeteners to keep it nutritious.
- Versatile Serving - Suitable for breakfast, dessert, or a snack, appealing to all ages.
Ingredient Swap Ideas
Adjusting some ingredients can help cater to dietary needs or personal preferences without losing the essence of this light dessert. Simple swaps ensure you can enjoy the parfait in whatever way suits you best.
- Greek yogurt - Substitute with plant-based yogurt like almond or coconut yogurt for a dairy-free option.
- Honey - Use maple syrup or agave nectar if you prefer a vegan sweetener.
- Granola - Swap for nuts and seeds if you want less sugar or a low-carb version.
- Lemon - Replace fresh lemon juice and zest with lime for a slightly different citrus twist.
- Add-ins - Mix in fresh berries or chopped fruit layers to boost flavor and freshness.
Ingredients
- 2 cups Greek yogurt - Thick and creamy, acts as the base of the parfait.
- ¼ cup honey - Provides natural sweetness to balance the tang of the yogurt.
- 2 tablespoons fresh lemon juice - Adds bright, zesty flavor.
- 1 teaspoon lemon zest - Enhances the lemon flavor with aromatic oils from the peel.
- 1 ½ cups granola - Adds crunch and texture to the layered dessert.
- Optional fresh berries - For garnish or additional flavor (such as blueberries or raspberries).
Instructions
- In a medium bowl, combine the Greek yogurt, honey, fresh lemon juice, and lemon zest. Stir well until all ingredients are evenly mixed and the yogurt is slightly fluffy.
- Prepare serving glasses or jars by adding a spoonful of the lemon yogurt mixture to the bottom of each container.
- Sprinkle a layer of granola over the yogurt, creating a crunchy contrast.
- Repeat the layers, alternating between the lemon yogurt and granola until the glasses are filled, finishing with a yogurt layer on top.
- If using, add fresh berries on the final layer as a colorful, fresh garnish.
- Chill the parfaits in the refrigerator for at least 30 minutes before serving to allow the flavors to meld and the granola to soften slightly without losing crunch.
This straightforward assembly creates a layered treat that's both visually appealing and satisfying in flavor and texture. Enjoy these parfaits as a light dessert or a refreshing snack any time of day.
7. Lemon Sugar Cookies with Zesty Glaze

These lemon sugar cookies offer a bright, citrus twist on a classic treat. They are soft and buttery, enhanced by the subtle zing of fresh lemon zest folded throughout the dough.
Topping them with a tangy lemon glaze adds sweet and tart contrast that's refreshing and satisfying.
Making these cookies is straightforward, with simple ingredients you probably already have on hand. The texture is tender and melt-in-your-mouth, making them a great option for casual snacking or sharing at gatherings.
The lemon flavor keeps them light and inviting, perfect for any season.
Why This Recipe Works
This recipe balances ease and flavor in a way that makes it a welcome addition to your baking repertoire. Lemon Sugar Cookies with Zesty Glaze blend classic, familiar textures with a bright, fresh burst of citrus.
- Convenience - Simple ingredients and quick mixing make it ideal for busy days.
- Flavor balance - The butteriness of the cookies goes well with the zesty, tangy glaze.
- Texture - Soft, tender cookies that feel light but still satisfy a sweet craving.
- Appeal - Suitable for everyday snacking or special occasions, pleasing both kids and adults.
- Serving ease - Individually portioned cookies with a neat glaze for easy handling and sharing.
Ingredient Swap Ideas
Adapting this recipe is possible without losing its essential citrus character. Here are some swaps to fit dietary needs or change it up.
- Butter - Replace with coconut oil for a dairy-free and slightly tropical flavor.
- All-purpose flour - Use a gluten-free flour blend to make the cookies suitable for gluten sensitivities.
- Powdered sugar in glaze - Substitute with a sugar-free powdered sweetener for a lower-sugar option.
- Lemon zest and juice - Use lime zest and juice as an alternative for a different citrus note.
- Egg - Swap for a flax egg (1 tablespoon flaxseed meal plus 3 tablespoons water) to make it egg-free.
Ingredients
- 1 cup unsalted butter - softened to room temperature for easy mixing.
- 1 ¼ cups granulated sugar - for sweetness and texture.
- 1 large egg - to bind the dough and add richness.
- 2 tablespoons fresh lemon zest - finely grated for bright citrus flavor.
- 2 tablespoons fresh lemon juice - adds tang and moisture.
- 2 teaspoons vanilla extract - to enhance overall flavor.
- 2 ¾ cups all-purpose flour - provides structure for the cookies.
- ½ teaspoon baking soda - helps the cookies rise slightly.
- ¼ teaspoon salt - balances the sweetness and enhances flavor.
For the glaze:
- 1 cup powdered sugar - smooth and sweet for glazing.
- 2 tablespoons fresh lemon juice - adds fresh tartness to the glaze.
- 1 teaspoon lemon zest - for extra zing in the glaze.
Instructions
- Preheat the oven to 350°F (175°C). Line baking sheets with parchment paper.
- In a large bowl, cream the butter and granulated sugar together until light and fluffy. Beat in the egg, lemon zest, lemon juice, and vanilla extract until combined.
- In a separate bowl, whisk together the flour, baking soda, and salt. Gradually add the dry ingredients to the wet mixture, stirring until a soft dough forms.
- Roll the dough into 1-inch balls and place them about 2 inches apart on the prepared baking sheets. Gently flatten each ball with the bottom of a glass or your palm.
- Bake for 10 to 12 minutes until the edges are just set but cookies remain soft in the center. Let cool on the baking sheet for 5 minutes, then transfer to a wire rack.
- For the glaze, whisk together the powdered sugar, lemon juice, and lemon zest until smooth. Drizzle or spread the glaze over the cooled cookies. Allow the glaze to set before serving.
8. Baked Lemon Pudding Cake

This baked lemon pudding cake offers a refreshing twist on traditional desserts by combining the lightness of a cake with the creamy texture of a pudding. It shines with bright lemon flavor that feels fresh and zesty, making each bite light yet satisfying.
The cake forms a delicate crust on top while the bottom remains soft and custardy, giving a pleasing contrast in texture. It's a straightforward recipe that comes together with simple ingredients and a single bowl, making it approachable for busy days when you want something special without complexity.
This dessert works well served warm straight from the oven, but it also chills nicely for a firmer, cool treat. Whether you're looking to finish a weeknight dinner or bring something to a gathering, this lemon pudding cake is a versatile choice that brings a fresh pop of flavor.
Why This Recipe Works
This baked lemon pudding cake combines easy preparation with a wonderfully balanced flavor and texture that feels both light and indulgent.
- Convenience - Requires only basic ingredients and can be baked in one dish with minimal steps.
- Flavor balance - The tangy lemon flavor is bright without being overpowering, complemented by subtle sweetness.
- Texture - Features a crisp top layer and a smooth, custard-like base for a satisfying contrast.
- Appeal - Suitable for family meals or casual entertaining thanks to its elegant yet simple presentation.
- Serving ease - Can be enjoyed warm or chilled, fitting different preferences and occasions.
Ingredient Swap Ideas
Swapping certain ingredients allows you to adapt this recipe for different tastes or dietary needs while keeping the core lemon pudding cake experience intact.
- Butter swap - Use a plant-based margarine or coconut oil to make a dairy-free version.
- Flour alternative - Replace all-purpose flour with a gluten-free blend for those with gluten sensitivities.
- Sweetener options - Substitute granulated sugar with coconut sugar or a natural sweetener for a different flavor.
- Milk choice - Use almond milk or oat milk instead of regular milk to keep it dairy-free.
- Egg substitute - For an egg-free version, try a commercial egg replacer or use flax eggs to maintain texture.
Ingredients
- 3 large eggs separated
- 1 cup granulated sugar
- ¼ cup all-purpose flour
- ½ teaspoon baking powder
- ½ cup whole milk
- ¼ cup fresh lemon juice (about 2 lemons)
- 1 tablespoon finely grated lemon zest
- ¼ teaspoon salt
- 2 tablespoons unsalted butter melted and slightly cooled
Instructions
- Preheat the oven to 350°F (175°C). Grease a 9-inch round baking dish or similar ovenproof dish.
- In a large bowl, whisk together the egg yolks and sugar until pale and slightly thickened. Stir in the flour, baking powder, milk, lemon juice, lemon zest, and salt until just combined. Mix in the melted butter.
- In a separate clean bowl, beat the egg whites until they hold stiff peaks. Gently fold the beaten whites into the lemon batter in two additions, being careful not to deflate the mixture.
- Pour the batter into the prepared baking dish and bake for about 35 to 40 minutes. The top should be lightly golden and a toothpick inserted near the center will come out mostly clean with a few moist crumbs.
- Allow the pudding cake to cool for 10 minutes before serving warm or chill for a couple of hours for a firmer texture. Enjoy plain or with a dusting of powdered sugar or fresh berries.
9. Lemon Ricotta Pancakes (Dessert Style)

Lemon ricotta pancakes bring a fresh twist to a classic breakfast dish, making them just as welcome as a dessert. These pancakes are wonderfully fluffy and light, thanks to the ricotta cheese, which adds a subtle richness and delicate texture.
The bright lemon zest cuts through the creaminess, giving each bite a refreshing citrus lift.
Making these pancakes is straightforward, with ingredients you likely already have on hand. They come together quickly, and you can finish them off with a drizzle of lemon syrup or a dusting of powdered sugar for an indulgent finish.
These pancakes work well for a weekend treat or any time you want a citrusy, sweet bite that feels a little special.
Why This Recipe Works
This pancake recipe combines easy preparation with a unique flavor that improves a familiar favorite. Bold flavors and soft textures come together to make a dish that's both comforting and bright.
- Convenience - The batter mixes quickly using common ingredients found in most kitchens.
- Flavor balance - The zesty lemon goes well with the milky ricotta for a fresh, tangy taste.
- Texture - Ricotta provides a creamy interior while the pancakes remain fluffy and light.
- Appeal - The dessert-style finish works well for brunch, afternoon treats, or a cozy breakfast.
- Serving ease - These pancakes cook evenly on a griddle, making portioning simple and cleanup minimal.
Ingredient Swap Ideas
Adjusting the recipe to suit different preferences or dietary needs is simple with a few ingredient swaps. These changes keep the essential character while offering flexibility.
- Ricotta cheese - Substitute with cottage cheese for a lighter texture or use a plant-based ricotta alternative for dairy-free options.
- All-purpose flour - Replace with a gluten-free blend to accommodate gluten sensitivities.
- Lemon zest - Use orange or lime zest instead for a different citrus flavor.
- Powdered sugar - Swap for a drizzle of honey or maple syrup for natural sweetness without refined sugar.
- Lemon syrup - Make a quick berry compote as a topping for a fruity variation.
Ingredients
- 1 cup ricotta cheese - Whole-milk ricotta adds richness and moisture to the pancakes.
- 1 cup all-purpose flour - Provides structure and a tender crumb.
- 2 tablespoons sugar - Adds sweetness without overpowering the lemon flavor.
- 1 teaspoon baking powder - Helps the pancakes rise and become fluffy.
- ¼ teaspoon baking soda - Works with the acid in ricotta to create lift.
- ¼ teaspoon salt - Balances sweetness and enhances flavor.
- 1 cup buttermilk - Adds acidity and contributes to the light texture.
- 2 large eggs - Bind the ingredients and add richness.
- 2 teaspoons lemon zest - Freshly grated lemon zest gives the pancakes a bright citrus note.
- 1 teaspoon vanilla extract - Adds subtle depth to the flavor.
- Butter or oil - For cooking the pancakes on the griddle.
- Powdered sugar or lemon syrup - For serving and finishing the pancakes.
Instructions
- In a large bowl, whisk together the flour, sugar, baking powder, baking soda, and salt until evenly combined.
- In a separate bowl, blend the ricotta cheese, buttermilk, eggs, lemon zest, and vanilla extract until smooth and creamy.
- Gradually add the wet ingredients to the dry ingredients, stirring gently just until the batter comes together. Avoid overmixing to keep the pancakes tender.
- Heat a non-stick pan or griddle over medium heat and add a small amount of butter or oil to coat.
- Pour about ¼ cup of batter per pancake onto the pan. Cook until bubbles form on the surface and the edges look set, approximately 2 to 3 minutes.
- Flip the pancakes carefully and cook for another 1 to 2 minutes until golden brown and cooked through. Remove from heat.
Serve the lemon ricotta pancakes warm with a drizzle of lemon syrup or a dusting of powdered sugar for added sweetness. They pair nicely with fresh berries or a dollop of whipped cream if you like.
10. Lemon Coconut Bars

Lemon Coconut Bars bring together the bright, zesty flavor of lemon with the sweet, chewy texture of coconut in a simple, satisfying treat. These bars offer a refreshing twist on classic coconut desserts with a pop of citrus that feels light and tropical.
The combination of fresh lemon juice and zest adds a clean, tangy note that balances the richness of the coconut perfectly. They come together easily, making them a great option for a quick dessert or an anytime snack that feels a bit special.
You'll find the bars have a tender crumb and chewy texture that melts in your mouth, while the lemon flavor keeps things lively and fresh. Whether you're baking for a gathering or just craving something sweet and bright, these bars hit the spot without fuss.
Why This Recipe Works
This recipe combines simple ingredients and straightforward steps to deliver a bright, flavorful dessert that's easy to share and enjoy. The balance of sweet coconut and tangy lemon makes these bars truly enjoyable.
- Convenience - Quick prep and baking time make these bars a practical choice for busy schedules.
- Flavor balance - The tanginess of lemon zest and juice goes with the natural sweetness of coconut beautifully.
- Texture - Chewy coconut pieces add satisfying bite alongside a tender, moist crumb.
- Appeal - Bright, tropical flavors suit a variety of tastes and occasions, from casual snacks to special events.
- Serving ease - Bars are already portioned, making serving and sharing simple and mess-free.
Ingredient Swap Ideas
Adjusting ingredients can help tailor these bars to your preferences or dietary needs while maintaining their core flavor and texture. Here are a few ways to customize the recipe:
- Use almond flour instead of all-purpose flour for a nuttier taste and gluten-free option.
- Replace shredded coconut with unsweetened dried coconut flakes to reduce sweetness and add crunch.
- Swap fresh lemon juice with lime juice for a slightly different citrus twist.
- Use coconut oil in place of butter to emphasize coconut flavor and keep it dairy-free.
- Substitute granulated sugar with coconut sugar or maple syrup for a more natural sweetener.
Ingredients
- 1 cup all-purpose flour - Provides the base structure for the bars.
- ½ cup shredded coconut - Adds chewiness and tropical flavor.
- ½ cup granulated sugar - Sweetens the bars consistently.
- ¼ teaspoon salt - Balances the sweetness and enhances flavors.
- ½ cup unsalted butter, melted - Adds richness and helps bind ingredients.
- 2 large eggs - Contribute moisture and structure.
- ½ cup fresh lemon juice - Offers bright citrus acidity.
- 1 tablespoon lemon zest - Intensifies the lemon flavor.
- 1 teaspoon vanilla extract - Adds warm undertones to the flavor.
Instructions
- Preheat your oven to 350°F (175°C) and lightly grease an 8-inch square baking pan or line it with parchment paper.
- In a large bowl, combine the flour, shredded coconut, sugar, and salt. Stir these dry ingredients together until evenly mixed.
- In a separate bowl, whisk the melted butter, eggs, lemon juice, lemon zest, and vanilla extract until smooth and well combined.
- Pour the wet ingredients into the dry mixture and stir gently until just combined, making sure not to overmix.
- Spread the batter evenly into the prepared pan with a spatula, smoothing the top.
- Bake in the preheated oven for 25 to 30 minutes, or until the edges turn golden and a toothpick inserted in the center comes out clean.
- Allow the bars to cool completely in the pan before cutting into squares. This helps them firm up and makes slicing easier.
- Serve and enjoy these bright, chewy bars as a refreshing treat any time of day.
11. Lemon Posset

Lemon Posset is a simple yet elegant British dessert that combines creamy richness with a fresh, zesty bite. It's made by gently cooking cream and sugar, then curdling it with lemon juice to create a smooth, silky pudding that sets naturally without needing eggs or gelatin.
This dessert requires very few ingredients, all pantry staples, making it easy to whip up on short notice. Its bright, tangy flavor balances beautifully with the sweet cream, offering a refreshing finish after any meal.
Its texture is delightfully soft and luscious, almost like a custard but lighter, and it looks charming served in small glasses or ramekins for sharing. Lemon Posset is perfect for those who want a fuss-free but impressive dessert.
Why This Recipe Works
Lemon Posset is a straightforward and quick pudding that delivers bright lemon flavor combined with creamy texture, using a minimal number of ingredients. It's versatile and great for entertaining or a quiet treat at home.
- Convenience - Only three main ingredients and minimal cooking time make it very accessible.
- Flavor balance - The tartness of lemon cuts through the rich cream for a refreshing dessert.
- Texture - Smooth and silky, it sets firmly but remains soft on the palate.
- Appeal - Elegant presentation in individual servings fits casual or formal occasions.
- Minimal cleanup - Prepares in one pot, with simple tools needed.
Ingredient Swap Ideas
Adjusting ingredients can help cater to dietary preferences or add interesting variations while keeping the core of Lemon Posset intact.
- Cream - Substitute with full-fat coconut milk for a dairy-free version with a subtle coconut flavor.
- Sugar - Use honey or maple syrup for natural sweetness and a different dimension of taste.
- Lemon juice - Replace lemon with lime or orange juice for a different citrus twist.
- Toppings - Add fresh berries, crushed pistachios, or a drizzle of fruit coulis to diversify the presentation and flavor.
Ingredients
- Heavy cream - 2 cups (480 ml), for richness and body.
- Granulated sugar - ⅔ cup (135 g), to sweeten the cream.
- Fresh lemon juice - 3 tablespoons, to curdle cream and provide tang.
- Lemon zest - 1 teaspoon (optional), to enhance citrus aroma.
Instructions
- Pour the heavy cream and granulated sugar into a saucepan and heat over medium-low. Stir gently until the sugar fully dissolves and the cream reaches a gentle simmer. Avoid boiling.
- Remove the pan from heat and stir in the fresh lemon juice along with lemon zest if using. You will notice the mixture thickening almost immediately as the acid curdles the cream.
- Pour the mixture into individual serving glasses or ramekins. Allow it to cool for a few minutes, then cover and refrigerate for at least 4 hours or until set firmly.
- Before serving, you can garnish with a thin slice of lemon, fresh berries, or a sprinkling of finely chopped herbs like mint for a bright finish.
- Serve chilled for a light, tangy dessert that feels indulgent without heaviness.
Explore bright seasoning swaps like lemon pepper substitutes for bold citrus spice to pair with lemon desserts or savory dishes. For a sweeter, less acidic option in lemon-forward recipes, try meyer lemon substitutes for sweeter citrus.

Andrew Gray is a seasoned food writer and blogger with a wealth of experience in the restaurant and catering industries. With a passion for all things delicious, Andrew has honed his culinary expertise through his work as a personal chef and caterer.
His love for food led him to venture into food writing, where he has contributed to various online publications, sharing his knowledge and insights on the culinary world. As the proud owner of CooksCrafter.com, Andrew covers a wide range of topics, including recipes, restaurant reviews, product recommendations, and culinary tips.
Through his website, he aims to inspire and educate fellow food enthusiasts, offering a comprehensive resource for all things food-related.