Chocolate and fruit make a classic combination that brings both freshness and indulgence to the table, a pairing common in European patisserie and American dessert traditions. This curated collection of 12 chocolate and fruit desserts offers reliable recipes that blend these flavors beautifully for any occasion.
Inside, you'll find a range of desserts from simple no-bake treats and quick dips to baked goods like tarts, brownies, and cobblers. These recipes balance bold chocolate with bright fruit, providing something for every taste and skill level.
Whether you're looking for an easy crowd-pleaser or a visually beautiful dessert, this selection covers both.
Each recipe focuses on straightforward preparation without sacrificing flavor or presentation, making them great choices for busy cooks. With manageable ingredients and minimal cleanup, these desserts come together smoothly and deliver satisfying results every time.
1. Chocolate-Covered Strawberries

Chocolate-covered strawberries combine the natural sweetness and juiciness of fresh strawberries with the rich, smooth flavor of chocolate. This simple treat brings together two classic favorites in a way that's both elegant and approachable.
Making chocolate-covered strawberries is a straightforward process, ideal for a quick dessert or a special occasion, typically involving melting chocolate (in a double boiler or microwave), dipping the berries, and letting them set at room temperature or chilling for 10-15 minutes. They look impressive but require few ingredients and minimal time, making them accessible for cooks at any level.
The contrast between the firm chocolate shell and the crisp, juicy strawberry creates a satisfying texture. These treats offer just the right amount of indulgence without feeling heavy, making them a popular choice for sharing with family or guests.
Why This Recipe Works
This recipe offers an easy way to enjoy a fresh fruit dessert with a sweet twist. Chocolate-covered strawberries are visually appealing, quick to prepare, and satisfying without being overly rich.
- Convenience - Requires minimal preparation and ingredients, ready in under 30 minutes.
- Flavor balance - Combines the natural tartness of strawberries with sweet, creamy chocolate.
- Texture - Crisp chocolate coating contrasts with juicy, tender fruit.
- Appeal - Versatile for parties, gifts, or everyday treats that look special.
- Serving ease - Bite-sized portions that need no utensils or plating fuss.
Ingredient Swap Ideas
You can modify this recipe to suit different tastes, dietary restrictions, or ingredient availability without losing its charm. These swaps keep the focus on fresh fruit dipped in a sweet coating.
- Chocolate type swap - Use white or ruby chocolate instead of dark or milk chocolate for flavor variety.
- Fruit swap - Substitute strawberries with blueberries, raspberries, or sliced bananas.
- Allergy-friendly options - Opt for dairy-free chocolate to accommodate lactose sensitivity.
- Topping variation - Roll dipped strawberries in crushed nuts, shredded coconut, or sprinkles for added texture.
- Sweetener swap - Choose sugar-free or stevia-sweetened chocolate to reduce sugar content.
Ingredients
- 1 pound fresh strawberries - Ripe and firm, washed and thoroughly dried with stems intact.
- 8 ounces quality dark or milk chocolate - Chopped or in chips for smooth melting.
- Optional toppings - Crushed nuts, shredded coconut, or sprinkles for coating (about ½ cup).
Instructions
- Prepare strawberries by washing them carefully and drying completely with paper towels. Moisture will prevent chocolate from sticking properly.
- Place chopped chocolate or chocolate chips in a heat-safe bowl. Melt gently using a double boiler or microwave in 20-second bursts, stirring between each until smooth.
- Hold each strawberry by the stem and dip it into the melted chocolate, covering about two-thirds of the fruit. Allow excess chocolate to drip back into the bowl.
- If using toppings, immediately roll or sprinkle the dipped strawberry before the chocolate sets. Place each dipped strawberry on a parchment-lined baking sheet.
- Let the strawberries rest at room temperature or refrigerate for about 15-20 minutes until the chocolate hardens and sets.
- Serve chilled or at room temperature within 24 hours for the freshest taste and texture.
2. Chocolate Raspberry Mousse Parfaits

These chocolate raspberry mousse parfaits bring together the richness of chocolate and the bright freshness of raspberries in a light, airy dessert, with the mousse usually made by folding whipped cream into melted chocolate for an airy texture. It feels elegant enough for special occasions but is simple enough to prepare any day you want something sweet without too much fuss.
The layers create a pleasing contrast between the creamy mousse and juicy raspberries, giving every spoonful a balanced flavor and texture.
Making these parfaits doesn't take long, and they can be prepared ahead, which makes them perfect for busy schedules or when you want to be ready to serve with minimal last-minute work, and they can be paired with chocolate mousse side dishes for a fuller dessert spread.
Why This Recipe Works
This recipe combines simplicity and elegance with refreshing flavors that anyone can enjoy. It delivers a fine balance of chocolate and fruit, wrapped in a light mousse suitable for a variety of occasions.
- Convenience - Quick to mix up and can be made in advance to chill.
- Flavor balance - The tart raspberries cut through the creamy, rich chocolate mousse.
- Texture - Airy mousse layered with soft, juicy berries for contrast.
- Appeal - Looks attractive in individual servings, great for guests.
- Portion control - Individual parfaits make serving and storing easy.
Ingredient Swap Ideas
Adjusting ingredients can help fit different dietary needs or personal preferences while keeping the dessert's core flavors intact.
- Dairy-free option - Replace heavy cream with canned full-fat coconut milk chilled overnight.
- Sweetener choice - Use maple syrup or agave nectar instead of granulated sugar for a natural sweetness.
- Berry alternative - Swap fresh raspberries with blueberries or strawberries depending on availability.
- Chocolate variation - Use dark chocolate or dairy-free chocolate to suit your taste.
- Add crunch - Incorporate crushed nuts or gluten-free granola between layers for extra texture.
Ingredients
- 6 ounces bittersweet chocolate - chopped into small pieces.
- 1 cup heavy cream - chilled, for whipping.
- ¼ cup granulated sugar - to sweeten the mousse.
- 1 teaspoon vanilla extract - for subtle flavor.
- 1 cup fresh raspberries - rinsed and patted dry.
- Optional garnish: fresh mint leaves or shaved chocolate - to decorate.
Instructions
- Melt the chopped chocolate in a heatproof bowl set over a pot of simmering water, stirring occasionally until smooth. Remove from heat and let it cool slightly.
- In a large bowl, whip the chilled heavy cream with sugar and vanilla extract until soft peaks form. Be careful not to overwhip.
- Gently fold the melted chocolate into the whipped cream, mixing until fully combined and smooth.
- Layer the parfaits by spooning a few tablespoons of chocolate mousse into the bottom of serving glasses. Add a layer of fresh raspberries, then repeat layers until glasses are full, finishing with raspberries on top.
- Cover the parfaits and refrigerate for at least 2 hours to set and chill.
- Before serving, garnish with fresh mint or a few chocolate shavings if desired. Serve cold and enjoy.
3. Banana Chocolate Chip Bread
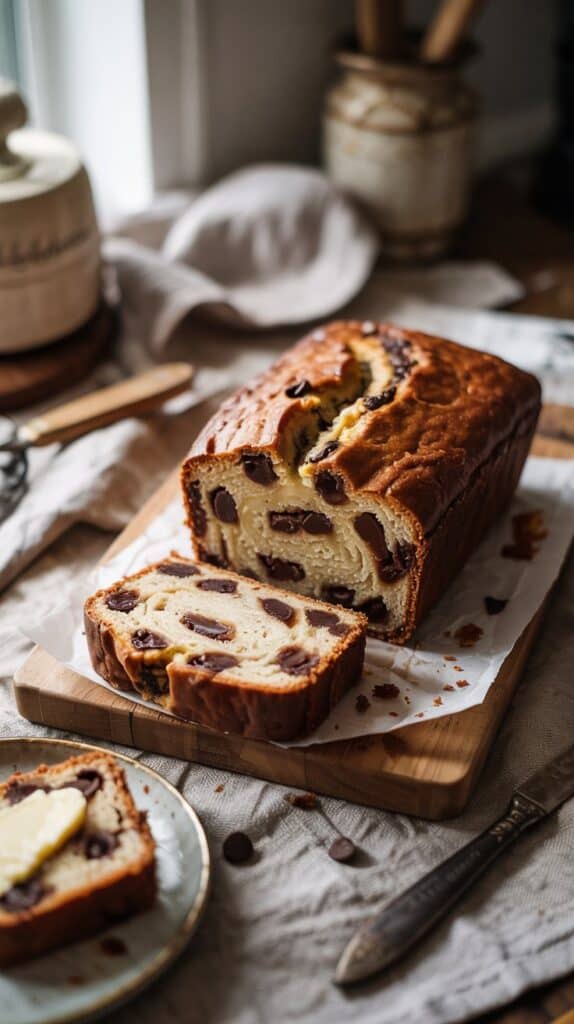
This banana chocolate chip bread is a comforting treat that combines the natural sweetness of ripe bananas with bursts of rich chocolate chips; see chocolate chip substitutes for baking if you need alternatives.
You'll find the texture perfectly soft, with just enough crumb to hold the chocolate chips without them sinking to the bottom. The recipe is straightforward and uses simple ingredients, so it comes together quickly without needing any special techniques, and is typically baked at 350°F until a toothpick inserted in the center comes out clean (about 50-60 minutes).
Why This Recipe Works
This banana chocolate chip bread is a crowd-pleaser thanks to its easy preparation and balanced flavors that appeal to both kids and adults. It holds moisture well and stays fresh for days, making it a go-to option for meal prep or packed lunches.
- Convenience - Quick to mix and bake with common pantry ingredients.
- Flavor balance - Sweet bananas go with the chocolate chips without overpowering.
- Texture - Moist crumb with slightly crisp edges for variety in each bite.
- Family-friendly - Appeals broadly to a range of tastes, perfect for sharing.
- Storage - Keeps well at room temperature or refrigerated for several days.
Ingredient Swap Ideas
Swapping a few ingredients can tailor this bread to different preferences or dietary needs without losing its character. Pick alternatives that keep the bread moist and flavorful.
- Replace all-purpose flour with gluten-free flour - Use a gluten-free blend for a wheat-free version.
- Swap chocolate chips with chopped nuts or dried fruit - Walnuts, pecans, or raisins add texture and sweetness.
- Use coconut oil instead of vegetable oil - Adds a subtle, tropical flavor and works well for dairy-free diets.
- Substitute eggs with flax eggs - Mix 1 tablespoon ground flaxseed with 3 tablespoons water per egg to keep it vegan-friendly.
- Try brown sugar instead of white sugar - For a deeper, caramel-like sweetness and slightly chewier crumb.
Ingredients
- 1 ¾ cups all-purpose flour - Provides the structure for the bread.
- 1 teaspoon baking soda - Helps the bread rise and become light.
- ½ teaspoon salt - Balances sweetness and enhances flavor.
- ½ cup vegetable oil - Keeps the bread moist and tender.
- ¾ cup granulated sugar - Adds sweetness evenly throughout.
- 2 large eggs - Bind the ingredients and contribute to the bread's texture.
- 3 ripe bananas, mashed - Gives natural sweetness and moisture.
- 1 teaspoon vanilla extract - Adds warmth and depth to flavor.
- 1 cup semi-sweet chocolate chips - Provide rich bursts of chocolate throughout.
Instructions
- Preheat your oven to 350°F (175°C). Grease a 9x5-inch loaf pan or line it with parchment paper.
- In a medium bowl, whisk together the flour, baking soda, and salt. Set aside.
- In a larger bowl, beat the oil and sugar until well combined. Add the eggs one at a time, mixing well after each addition. Stir in the mashed bananas and vanilla extract.
- Gradually add the dry ingredients to the wet mixture, folding gently until just combined. Avoid overmixing to keep the bread tender.
- Fold in the chocolate chips evenly. Pour the batter into the prepared loaf pan and spread it out.
- Bake for 60 to 70 minutes, or until a toothpick inserted in the center comes out clean (a few moist crumbs are fine). Allow the bread to cool in the pan for 10 minutes before transferring it to a wire rack to cool completely.
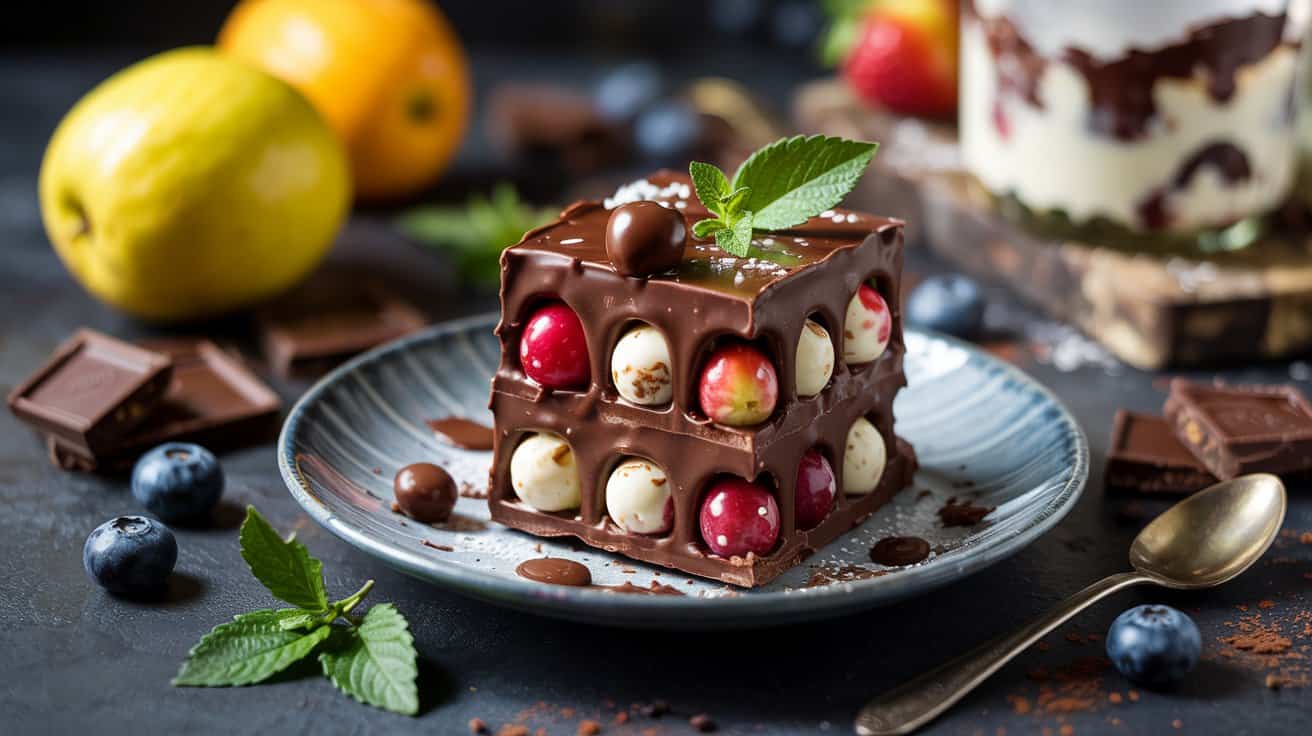
4. Mixed Berry Chocolate Tart

A mixed berry chocolate tart is a dessert that combines the richness of chocolate with the fresh brightness of berries. The chocolate crust provides a firm yet tender base, while the chocolate ganache filling adds a smooth, creamy element.
Topped with an assortment of fresh berries, this tart is both visually appealing and packed with balanced flavors.
This tart works well for a variety of occasions, from casual family dinners to more formal gatherings. It's impressive without requiring complicated steps, making it accessible for busy cooks who want a special dessert.
You'll find the contrast between the bittersweet chocolate and the sweet, tangy berries particularly satisfying.
Why This Recipe Works
This tart delivers rich and bright flavors with straightforward preparation and an elegant result.
- Convenience - The tart can be made ahead and chilled, which fits well with busy schedules.
- Flavor balance - Combines the deep, bittersweet notes of chocolate with the light, fresh taste of berries.
- Texture - A crisp chocolate crust paired with a silky ganache and juicy berries creates a pleasing mouthfeel.
- Appeal - It presents beautifully, perfect for impressing guests or enjoying a treat at home.
- Serving ease - Individual slices hold their shape well, making this tart easy to portion and serve.
Ingredient Swap Ideas
Swapping ingredients can help tailor this tart to different preferences or dietary needs while keeping its essential character.
- Gluten-free option - Use a gluten-free flour blend for the crust instead of all-purpose flour.
- Dairy-free version - Replace heavy cream in the ganache with canned coconut milk for a creamy alternative.
- Berry variations - Use any combination of berries like raspberries, blackberries, or sliced strawberries based on availability or taste.
- Chocolate type - Swap bittersweet chocolate for semi-sweet or dark chocolate depending on your preferred sweetness level.
- Sweetener adjustment - Use honey or maple syrup in the crust instead of granulated sugar for a different flavor nuance.
Ingredients
- 1 ¼ cups all-purpose flour - Provides structure for the chocolate crust.
- ¼ cup unsweetened cocoa powder - Adds rich chocolate flavor to the crust.
- ½ cup powdered sugar - Sweetens the crust gently.
- ¼ teaspoon salt - Balances sweetness and enhances flavor.
- ½ cup cold unsalted butter, cubed - Creates a flaky, tender texture in the crust.
- 1 large egg yolk - Binds the crust ingredients together.
- 8 ounces bittersweet chocolate, chopped - Forms the base of the ganache filling.
- ¾ cup heavy cream - Makes the ganache smooth and creamy.
- 1 teaspoon pure vanilla extract - improves the ganache flavor.
- 2 cups mixed fresh berries - Such as blueberries, raspberries, and blackberries, for topping.
- 2 tablespoons granulated sugar - Optional, to sprinkle over berries for extra sweetness.
Instructions
- Preheat your oven to 350°F (175°C). In a large bowl, whisk together flour, cocoa powder, powdered sugar, and salt. Add the cold butter cubes and use a pastry cutter or your fingers to work the butter into the dry ingredients until the mixture looks like coarse crumbs.
- Add the egg yolk and mix just until the dough comes together. Press the dough evenly into a 9-inch tart pan with a removable bottom, making sure to cover the sides. Chill the crust for 15 minutes to firm up.
- Bake the crust for 15 to 18 minutes until set. Let it cool completely on a wire rack before adding the filling.
- For the ganache, heat the heavy cream in a small saucepan just until it starts to simmer. Remove from heat and pour over the chopped bittersweet chocolate in a heatproof bowl. Let sit for a minute, then stir gently until smooth. Stir in vanilla extract.
- Pour the ganache into the cooled crust and smooth the top evenly. Chill the tart in the fridge for at least 2 hours or until the ganache is firm.
- Before serving, arrange the fresh mixed berries on top of the tart. If desired, sprinkle with granulated sugar to add a touch of sparkle and sweetness. Slice and serve chilled for a refreshing and elegant dessert.
5. Chocolate-Dipped Orange Slices

Chocolate-dipped orange slices offer a fresh take on a classic treat. The juicy, bright citrus contrasts beautifully with the deep, smooth richness of chocolate.
This combination creates a flavor that feels both refreshing and indulgent at the same time.
Making these slices is straightforward and quick, requiring just a few ingredients and minimal preparation. They make an excellent snack or a striking dessert garnish that's colorful and fun to share.
Plus, they're a wholesome way to add a bit of elegance to any occasion.
Why This Recipe Works
This recipe combines simple ingredients to create a fresh, flavorful treat that's easy to prepare and enjoy. Chocolate-dipped orange slices balance sweet and tangy notes with approachable textures.
- Convenience - Quick preparation with minimal steps, perfect for busy days.
- Flavor balance - Bright and juicy citrus pairs seamlessly with rich, smooth chocolate.
- Texture - Tender orange slices covered with a crisp chocolate coating add a pleasant contrast.
- Appeal - Visually attractive treat ideal for snacks, gifts, or event presentations.
- Flexibility - Easy to customize with different types of chocolate or citrus varieties.
Ingredient Swap Ideas
You can swap ingredients here to adjust for dietary preferences or to experiment with flavor. These alternatives keep the core idea intact while giving you room to adapt the recipe.
- Dark chocolate - Choose dairy-free or vegan dark chocolate options to make this treat vegan-friendly.
- Blood oranges or grapefruit - Use other citrus fruits for a unique twist in both color and taste.
- Chipotle or cinnamon - Sprinkle a pinch of these spices on the chocolate before it sets for added warmth and complexity.
- Coconut oil - Mix a small amount into melted chocolate to make dipping smoother and to add a subtle coconut flavor.
- Orange zest - Mix some finely grated zest into the melted chocolate for enhanced citrus aroma.
Ingredients
- 2 large oranges - Firm but ripe, washed and dried.
- 6 ounces dark or semi-sweet chocolate - Use quality bars or chips for melting.
- Optional garnish - Sea salt flakes, chopped nuts, or orange zest to sprinkle on chocolate.
Instructions
- Slice the oranges into thin rounds, about ¼ inch thick. Remove any seeds gently with a small knife or toothpick.
- Lay the orange slices on a parchment-lined baking sheet. Pat them dry with paper towels to remove excess moisture.
- Melt the chocolate in a heatproof bowl over simmering water or in short bursts in the microwave, stirring frequently until smooth.
- Dip each orange slice halfway or one-third into the melted chocolate, allowing the excess chocolate to drip back into the bowl. Place the dipped slices back on the parchment paper.
- If desired, sprinkle with sea salt, chopped nuts, or orange zest before the chocolate sets.
- Let the chocolate harden at room temperature or refrigerate for about 20 minutes until firm. Store the slices in an airtight container in the fridge.
These chocolate-dipped orange slices make a refreshing treat that brightens your snack routine and adds some elegance with minimal fuss.
6. Peach and Chocolate Cobbler

This Peach and Chocolate Cobbler brings together the juicy sweetness of ripe peaches with the rich warmth of a chocolate biscuit topping. It's a cozy dessert that offers the fresh, tangy flavor of fruit alongside the indulgence of chocolate in each bite.
The dish is easy to prepare and perfect for weeknight desserts or casual gatherings. Baking the cobbler allows the peaches to soften and release their natural juices, which blend beautifully with the cocoa in the topping.
It's a simple way to enjoy a comforting treat that doesn't feel heavy or overly rich.
Why This Recipe Works
This cobbler combines fresh fruit and chocolate in a way that's approachable and satisfying. It works well for anyone looking for a dessert that's easy to make but feels special.
- Convenience - Requires minimal prep and cooks in a single dish.
- Flavor balance - Juicy peaches pair nicely with deep, bittersweet chocolate notes.
- Texture - Soft, tender fruit under a crumbly, slightly crisp biscuit crust.
- Family-friendly - A dessert both kids and adults can enjoy.
- Serving ease - Ready to serve straight from the oven with no extra steps.
Ingredient Swap Ideas
Adjusting ingredients lets you suit different dietary needs or flavor preferences without losing the heart of this dessert.
- Use dairy-free butter for a vegan or lactose-free version that still delivers a tender crust.
- Try stone fruits like nectarines or plums instead of peaches to vary the sweet-tart fruit base.
- Replace all-purpose flour with gluten-free flour to make the cobbler gluten-free.
- Substitute brown sugar with coconut sugar for a deeper, caramel-like sweetness with less refined sugar.
- Use dark cocoa powder for a richer chocolate flavor or Dutch-processed cocoa for a milder taste.
Ingredients
- 4 cups fresh peaches peeled and sliced
- 1 cup granulated sugar divided
- 2 teaspoons fresh lemon juice
- 1 cup all-purpose flour
- ½ cup unsweetened cocoa powder
- 1 teaspoon baking powder
- ½ teaspoon salt
- ½ cup unsalted butter melted, plus extra for greasing
- ½ cup milk at room temperature
- 1 teaspoon vanilla extract
Instructions
- Preheat your oven to 350°F (175°C). Grease a 9-inch square baking dish with butter.
- In a bowl, toss the sliced peaches with ½ cup of the sugar and the lemon juice. Spread the peaches evenly in the prepared dish.
- In another bowl, whisk together the flour, cocoa powder, baking powder, salt, and remaining ½ cup sugar.
- Add the melted butter, milk, and vanilla extract to the dry ingredients. Stir just until combined; the batter will be thick.
- Spoon dollops of the biscuit topping over the peaches, covering as much surface as possible but not smoothing it out completely.
- Bake for 35 to 40 minutes until the topping is set and slightly crisp on top, and the peach juices are bubbling around the edges. Let cool for 10 minutes before serving.
This cobbler tastes great on its own or served warm with a scoop of vanilla ice cream or a dollop of whipped cream.
7. Cherry Almond Chocolate Brownies

Cherry Almond Chocolate Brownies bring together rich, fudgy chocolate with a bright burst of tart cherries and the crunch of toasted almonds. This combination makes every bite interesting and satisfying without being complicated to prepare.
The texture contrast between the dense brownie, juicy cherries, and crisp almonds creates a nice treat that feels a little special but is still straightforward enough for a weekday dessert. You'll appreciate how the natural sweetness of the cherries balances the deep cocoa flavor.
These brownies hold up well for sharing or packing in a lunchbox, making them a versatile choice whenever you want something chocolaty with a fresh twist.
Why This Recipe Works
This recipe combines rich chocolate with fruity notes and crunchy nuts for a multi-dimensional treat you can make easily.
- Convenience - One-bowl mixing and relatively simple steps keep preparation quick.
- Flavor balance - Tart cherries cut through the sweetness and richness of chocolate.
- Texture - Soft, fudgy brownie base contrasted by crunchy toasted almonds.
- Appeal - Suitable for casual family dessert or a small gathering treat.
- Serving ease - Brownies slice neatly for portion control and sharing.
Ingredient Swap Ideas
Adjusting a few ingredients lets you tailor these brownies for different dietary needs or flavor preferences without losing their charm.
- Cherries - Use dried cherries soaked briefly or fresh/frozen pitted cherries as alternatives.
- Almonds - Swap toasted walnuts or pecans if preferred or for variety in flavor and texture.
- Chocolate - Use dark chocolate chips or baking chunks for a deeper cocoa taste, or semi-sweet chocolate for a lighter sweetness.
- Flour - Substitute with gluten-free all-purpose flour blend to make it gluten-free.
- Butter - Replace with coconut oil in equal measure for a dairy-free version, noting a subtle coconut flavor.
Ingredients
- 1 cup (2 sticks) unsalted butter - melted and slightly cooled.
- 2 ¼ cups granulated sugar - for balanced sweetness.
- 4 large eggs - room temperature for even mixing.
- 1 teaspoon pure vanilla extract - improves the chocolate flavor.
- 1 ¼ cups unsweetened cocoa powder - provides rich chocolate base.
- 1 teaspoon salt - enhances overall flavor.
- 1 teaspoon baking powder - helps with slight rise and texture.
- 1 ½ cups all-purpose flour - for structure and body.
- 1 cup tart cherries - pitted and roughly chopped if fresh or thawed from frozen.
- ½ cup sliced almonds - toasted for crunch and nuttiness.
- ½ cup semi-sweet chocolate chips - optional for extra chocolate bursts.
Instructions
- Preheat your oven to 350°F (175°C). Grease a 9x13-inch baking pan or line it with parchment paper for easier removal.
- In a large bowl, whisk together the melted butter and sugar until smooth. Add the eggs one at a time, beating well after each addition, then stir in the vanilla extract.
- Sift the cocoa powder, salt, baking powder, and flour over the wet ingredients. Fold gently until just combined; avoid overmixing to keep brownies tender.
- Fold in the cherries, toasted almonds, and chocolate chips (if using) until evenly distributed throughout the batter.
- Pour the batter into the prepared pan and spread it evenly. Bake for 35-40 minutes or until a toothpick inserted into the center comes out with a few moist crumbs attached.
- Let the brownies cool completely in the pan before cutting into squares. This helps them set and makes slicing cleaner.
These Cherry Almond Chocolate Brownies keep well in an airtight container at room temperature for up to 4 days and freeze nicely for longer storage.
8. Blackberry Chocolate Pavlova

This Blackberry Chocolate Pavlova is a beautiful dessert that brings together crisp meringue, fresh blackberries, and smooth whipped cream. The combination offers a lovely contrast of textures, with the crunchy shell giving way to a soft, marshmallow-like center.
The addition of shaved chocolate adds a rich, slightly bitter note that goes well with the sweet berries. It's a light dessert that looks impressive on any table yet stays simple enough to prepare without stress.
Preparing this pavlova allows you to create something fancy and fresh that your guests will enjoy without spending hours in the kitchen. It's a wonderful choice for summer gatherings or special dinners with family.
Why This Recipe Works
This pavlova offers a nice mix of flavors and textures while remaining straightforward to make. It's a beautiful, fresh dessert that balances sweetness with tart fruit and deep chocolate notes.
- Convenience - The meringue base can be made ahead of time and stored, making assembly quick.
- Flavor balance - Sweet and crisp meringue contrasts naturally with tangy blackberries and bittersweet chocolate.
- Texture - Crisp outside with a soft center gives a satisfying bite every time.
- Appeal - Elegant presentation impresses without complicated steps.
- Serving ease - Individual pavlova nests mean less cutting and easy portion control.
Ingredient Swap Ideas
Adjusting ingredients lets you tailor the pavlova for dietary needs or personal preferences without losing its charm.
- Use frozen blackberries if fresh ones aren't in season; thaw and drain well before assembling to avoid sogginess.
- Replace dark chocolate with white or milk chocolate for a sweeter finish.
- Swap heavy cream with coconut cream to keep this dessert dairy-free and maintain that rich whipped topping.
- Add a splash of citrus zest (like lemon or orange) to the whipped cream for extra brightness.
Ingredients
- 4 large egg whites - At room temperature for better volume when whipped.
- 1 cup granulated sugar - Helps create a stable, crisp meringue.
- 1 teaspoon white vinegar - Stabilizes and adds slight acidity.
- 1 teaspoon cornstarch - Helps give the meringue a crisp shell with a soft inside.
- 1 cup heavy cream - Chilled, for whipping into soft peaks.
- 2 cups fresh blackberries - Washed and patted dry.
- 2 ounces dark chocolate - Shaved or grated for topping.
- 1 teaspoon vanilla extract - Added to whipped cream for flavor.
Instructions
- Preheat the oven to 300°F (150°C). Line a baking sheet with parchment paper and draw four 4-inch circles as a guide.
- Beat egg whites with an electric mixer until soft peaks form. Gradually add sugar, one tablespoon at a time, beating continuously until stiff and glossy peaks develop.
- Gently fold in vinegar and cornstarch. Spoon the meringue onto the parchment within the circles, shaping it into nests with a slight well in the center for the toppings.
- Bake for about 50 minutes until the meringue is dry to the touch and lightly golden. Turn off the oven and leave the pavlovas inside to cool completely.
- Whip the chilled cream with vanilla extract until soft peaks form. Spoon or pipe the whipped cream onto each cooled meringue nest.
- Top with fresh blackberries and sprinkle with shaved dark chocolate. Serve immediately for the best texture contrast.
9. Chocolate Avocado Pudding with Raspberry Sauce

This chocolate avocado pudding offers a creamy, rich dessert that feels indulgent without the heaviness of traditional puddings. Using ripe avocados as a base creates a smooth texture that blends wonderfully with the deep chocolate flavor.
The raspberry sauce adds a bright, tangy contrast that cuts through the richness and adds a fresh fruit element. It's an easy recipe you can pull together quickly, which makes it great for busy evenings or unexpected guests.
Because it's dairy-free and naturally sweetened, this pudding lines up well with a variety of diets while still tasting satisfying and decadent.
Why This Recipe Works
This pudding brings together rich, creamy chocolate with the natural creaminess of avocado, creating a dessert that's both healthy and indulgent. The tangy raspberry sauce brightens each spoonful and balances the flavors beautifully.
- Convenience - Requires minimal ingredients and can be prepared in under 15 minutes.
- Flavor balance - Combines deep chocolate with fresh raspberry for a perfect sweet-tart contrast.
- Texture - Smooth and creamy pudding paired with a slightly chunky, bright sauce.
- Appeal - Suitable for vegan, dairy-free, and gluten-free diets without sacrificing taste.
- Serving ease - No baking involved and easy to portion into individual cups or bowls.
Ingredient Swap Ideas
Adjusting this recipe is simple if you want to tailor it for different tastes or dietary needs. Substitutions allow you to keep the dessert accessible and enjoyable for everyone.
- Cocoa powder - Swap for carob powder if you want a caffeine-free chocolate flavor.
- Agave syrup - Use maple syrup or honey if not strictly vegan and to alter sweetness notes.
- Avocado - Replace with silken tofu for a similar creamy texture and protein boost.
- Raspberries - Use strawberries or mixed berries depending on what you have on hand or prefer.
- Coconut milk - Add a splash for a slightly lighter pudding and a subtle coconut undertone.
Ingredients
- 2 ripe avocados peeled, pitted, and flesh scooped out
- ¼ cup unsweetened cocoa powder natural or Dutch-processed
- ¼ cup agave syrup or maple syrup for natural sweetness
- ½ teaspoon vanilla extract to enhance flavor depth
- ¼ teaspoon salt to balance sweetness
- 1 cup fresh raspberries plus extra for garnish
- 2 tablespoons water to thin raspberry sauce as needed
- 1 tablespoon lemon juice to brighten raspberry sauce flavor
- Optional - fresh mint leaves for garnish
Instructions
- In a food processor or blender, combine the avocado flesh, cocoa powder, agave syrup, vanilla extract, and salt. Blend until completely smooth and creamy, scraping down the sides as needed.
- Transfer the chocolate avocado pudding to serving bowls or cups, then place in the refrigerator while preparing the raspberry sauce. Chill for at least 30 minutes to allow the flavors to meld.
- For the raspberry sauce, combine the fresh raspberries, lemon juice, and water in a small saucepan over medium heat. Cook for 5 minutes, stirring occasionally, until the berries break down and the sauce thickens slightly.
- Remove the raspberry sauce from heat and strain it through a fine-mesh sieve to remove seeds, pressing with a spoon to extract as much liquid as possible. Let the sauce cool to room temperature.
- Spoon the cooled raspberry sauce over the chilled chocolate avocado pudding just before serving. Garnish with additional fresh raspberries and mint leaves if desired.
- Serve immediately or keep refrigerated up to 2 days for best freshness.
This pudding makes a wonderful simple dessert that still feels like a treat. Its rich chocolate flavor balanced with fresh fruit makes it a winner for everyday or special occasions.
10. Chocolate Banana Cream Pie
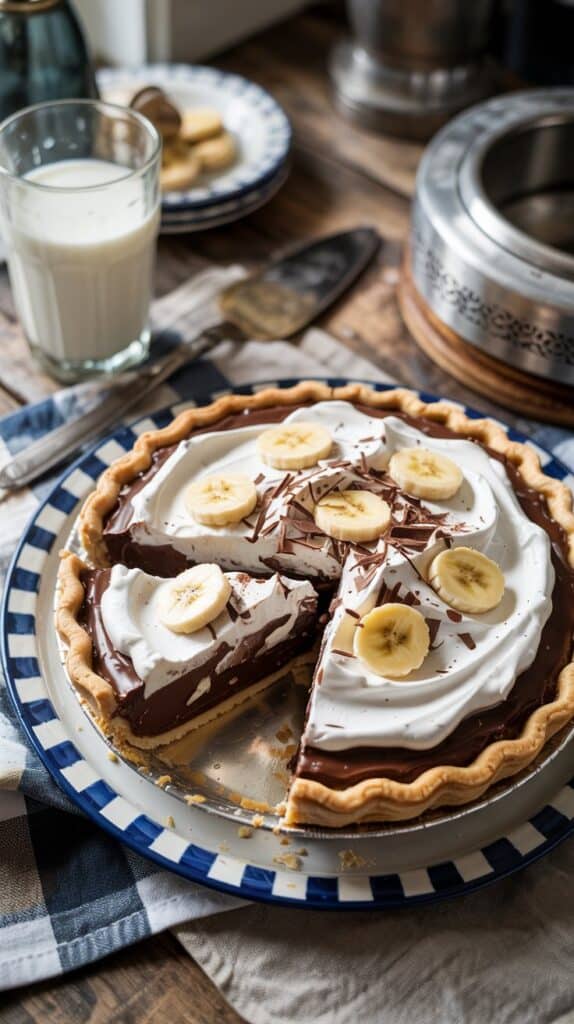
This chocolate banana cream pie brings together two classic flavors in a single, comforting dessert. The rich, smooth chocolate custard goes well with fresh banana slices, creating a balance of creamy and fruity textures.
The flaky pie crust adds a satisfying crunch that contrasts nicely with the soft filling and whipped cream topping. It's a straightforward pie to assemble, making it a wonderful choice for sharing with family or at gatherings.
If you're looking for a dessert that feels special without requiring complicated steps, this recipe fits the bill. It brings a nostalgic touch with a creamy, chocolaty finish everyone can enjoy.
Why This Recipe Works
This pie combines familiar flavors with a simple process that yields a dessert everyone will appreciate. It delivers on texture, taste, and presentation with minimal fuss.
- Convenience - Custard base is easy to prepare and can be made ahead.
- Flavor balance - Smooth chocolate custard complements fresh banana slices seamlessly.
- Texture - Crispy crust contrasts the creamy filling and fluffy whipped topping.
- Appeal - Family-friendly dessert that suits casual meals or celebrations.
- Serving ease - Portioning is simple, and the pie stays stable when sliced.
Ingredient Swap Ideas
Adjusting certain ingredients can help fit dietary preferences or pantry availability without sacrificing flavor or texture.
- Pie crust - Use a gluten-free crust for a gluten intolerance option.
- Milk - Substitute whole milk with almond or oat milk to reduce dairy.
- Chocolate - Choose a dark or semi-sweet chocolate depending on sweetness preference.
- Whipped cream - Use coconut whipped cream for a dairy-free topping.
- Bananas - Try using ripe plantains lightly caramelized for a twist on flavor and texture.
Ingredients
- 1 9-inch pie crust, pre-baked and cooled
- 2 cups whole milk or milk alternative
- ½ cup granulated sugar
- ¼ cup unsweetened cocoa powder
- ¼ cup cornstarch
- ⅛ teaspoon salt
- 3 large egg yolks
- 4 ounces bittersweet or semi-sweet chocolate, chopped
- 2 tablespoons unsalted butter, softened
- 2 ripe bananas, sliced
- 1 cup heavy cream or dairy-free whipping cream
- 2 tablespoons powdered sugar
Instructions
- In a medium saucepan, whisk together sugar, cocoa powder, cornstarch, and salt. Gradually add milk, stirring until smooth.
- Place the pan over medium heat. Cook, stirring constantly, until the mixture thickens and comes to a gentle boil. Let it boil for 1 minute while stirring.
- In a small bowl, whisk the egg yolks. Slowly add about 1 cup of the hot milk mixture into the yolks while whisking constantly to temper them. Then pour this back into the saucepan.
- Cook for another 2 minutes, stirring constantly, until the custard is thickened further. Remove from heat and stir in the chopped chocolate and butter until fully melted and smooth.
- Pour half of the warm chocolate custard into the pre-baked crust. Layer the banana slices evenly on top. Pour the remaining custard over the bananas, smoothing the surface. Cover with plastic wrap pressed directly on the custard to prevent a skin from forming. Chill in the fridge for at least 4 hours.
- Before serving, whip the cream with powdered sugar until soft peaks form. Spread or pipe the whipped cream over the chilled pie. Slice and serve cold.
11. Chocolate Fig Bites

Chocolate Fig Bites bring together fresh figs, rich dark chocolate, and crunchy toasted nuts for a simple yet impressive treat. These bite-sized snacks combine sweet, earthy fruit with smooth, slightly bitter chocolate, creating a flavor harmony that feels indulgent without being heavy.
This recipe is straightforward to prepare and requires minimal ingredients, making it a great option for a quick dessert or elegant appetizer. You can assemble these in minutes and serve them immediately or chill for a firmer texture.
Why This Recipe Works
This recipe offers a delicious mix of natural sweetness and a satisfying crunch in manageable portions, perfect for sharing or enjoying solo. The combination of flavors and textures makes it a standout yet easy option for entertaining or daily snacking.
- Convenience - Requires only a few ingredients and quick assembly.
- Flavor balance - Sweet figs and bittersweet chocolate complement each other beautifully.
- Texture - Soft figs contrast with smooth chocolate and crunchy nuts.
- Appeal - Elegant appearance fits well for gatherings or casual moments.
- Make-ahead friendly - Can be stored refrigerated for several days.
Ingredient Swap Ideas
Swapping ingredients can tailor this recipe to your preferences or dietary needs without losing its core appeal. Adjusting nuts or chocolate types lets you control flavor, texture, or allergens while keeping the treat delicious.
- Nuts - Use almonds, pecans, or hazelnuts instead of walnuts for different crunch and flavor.
- Chocolate - Substitute dark chocolate with milk or white chocolate depending on sweetness preference.
- Figs - Dried figs can replace fresh ones if fresh figs are unavailable, though the texture will be chewier.
- Add a pinch of sea salt - Sprinkle on top for a salty-sweet contrast.
- Optional spices - Add a sprinkle of cinnamon or chili powder for a warming twist.
Ingredients
- 12 fresh figs - Ripe but firm, washed and dried.
- 4 ounces dark chocolate - Chopped or in chips, preferably 70% cocoa or higher.
- ½ cup toasted walnuts - Roughly chopped for crunch and flavor.
- Optional pinch of sea salt - To sprinkle on top for added contrast.
Instructions
- Cut the fresh figs in half lengthwise, creating flat surfaces for stuffing.
- Place a small piece of dark chocolate on the cut side of each fig half.
- Sprinkle a few chopped toasted walnuts over the chocolate on each fig half.
- Arrange the figs on a parchment-lined tray and refrigerate for at least 15 minutes until the chocolate firms up slightly.
- Before serving, add a light pinch of sea salt on top if desired to improve the flavor.
- Serve chilled or at room temperature for a nice bite-sized snack.
12. Strawberry and White Chocolate Cheesecake Bars

These strawberry and white chocolate cheesecake bars combine creamy richness with a bright, fruity twist. You get the smooth texture of cheesecake infused with swirls of fresh strawberry puree and pockets of melted white chocolate.
It's a dessert that feels both indulgent and refreshing at the same time.
Making these bars is straightforward and rewarding. The crust adds a buttery base, while the cheesecake layer remains soft and luscious.
Once chilled, slicing these bars reveals the pretty pink swirls and creamy filling, perfect for sharing or saving for later.
Why This Recipe Works
This recipe offers a crowd-pleasing balance of sweet and tangy flavors with a creamy texture that holds up well for serving. It's ideal for a weekend treat or a dessert to bring to family gatherings.
- Convenience - Easy to prepare with a simple crust and no complicated techniques.
- Flavor balance - Combining white chocolate creaminess with the tartness of fresh strawberries.
- Texture - A firm crust supports a dense yet smooth cheesecake layer with melty chocolate pockets.
- Appeal - Bright, inviting color and classic flavor pairings that appeal to many tastes.
- Serving ease - Bars are portioned and easy to slice after chilling, perfect for gatherings.
Ingredient Swap Ideas
Swapping ingredients here can help adjust the recipe to suit different dietary preferences or to match what you have on hand, without losing the essence of the dessert.
- Use gluten-free graham crackers instead of regular for a gluten-free crust option.
- Substitute coconut white chocolate chips for dairy-free and vegan adaptation.
- Replace cream cheese with a plant-based cream cheese for a vegan version.
- Try raspberry puree instead of strawberry for a similar but slightly tangier fruit note.
- Use crushed almonds or pecans in the crust instead of graham crackers for a nutty base.
Ingredients
- 1 ½ cups graham cracker crumbs - For a buttery, crisp crust.
- ¼ cup granulated sugar - Adds sweetness to the crust.
- 6 tablespoons unsalted butter, melted - Binds the crust ingredients together.
- 3 (8-ounce) packages cream cheese, softened - Main component for the cheesecake layer.
- 1 cup granulated sugar - Sweetens the cheesecake filling.
- 3 large eggs - Provides structure and richness to the cheesecake.
- 1 teaspoon vanilla extract - Enhances overall flavor.
- ½ cup white chocolate chips - Adds pockets of melted sweetness throughout the cheesecake.
- ½ cup fresh strawberry puree - Made from blended fresh strawberries for natural fruit flavor.
- 2 teaspoons lemon juice - Balances the sweetness with slight acidity.
Instructions
- Preheat the oven to 325°F (163°C). Line a 9x13-inch baking pan with parchment paper, leaving an overhang for easy removal.
- In a medium bowl, mix graham cracker crumbs, ¼ cup sugar, and melted butter until combined. Press this mixture evenly into the bottom of the prepared pan to form the crust. Bake for 10 minutes, then remove and let cool slightly.
- In a large bowl, beat the softened cream cheese with 1 cup sugar until smooth and creamy. Add eggs one at a time, mixing well after each addition. Stir in vanilla extract and lemon juice.
- Pour half of the cream cheese mixture over the baked crust. Sprinkle half of the white chocolate chips evenly on top of this layer. Dollop half of the strawberry puree and gently swirl it into the cream cheese with a knife or skewer.
- Repeat by layering the remaining cream cheese mixture, white chocolate chips, and strawberry puree with gentle swirling.
- Bake for 45 to 50 minutes or until the edges are set but the center still feels slightly jiggly. Avoid overbaking to maintain creamy texture. Cool completely in the pan, then refrigerate for at least 4 hours or overnight before slicing into bars.
For richer, less-sweet finales, consider these dark chocolate desserts for grown-up taste buds. For fruit-forward warm bakes with crunchy toppings, try these crumble and crisp fruit desserts for seasonal fruit.

Andrew Gray is a seasoned food writer and blogger with a wealth of experience in the restaurant and catering industries. With a passion for all things delicious, Andrew has honed his culinary expertise through his work as a personal chef and caterer.
His love for food led him to venture into food writing, where he has contributed to various online publications, sharing his knowledge and insights on the culinary world. As the proud owner of CooksCrafter.com, Andrew covers a wide range of topics, including recipes, restaurant reviews, product recommendations, and culinary tips.
Through his website, he aims to inspire and educate fellow food enthusiasts, offering a comprehensive resource for all things food-related.