
Warm weather calls for treats that keep things cool and simple, and this collection of 12 no-bake cookie ideas fits the bill perfectly. These recipes bring together a variety of flavors and textures that come together quickly without needing an oven, typically set by chilling or stovetop melting, often using melted chocolate or syrup-based binders rather than baking.

From classic chocolate peanut butter to refreshing lemon coconut and rich mocha espresso, these cookies offer options for every taste and preference. They include everything from energizing seed bites to naturally sweetened vegan varieties, making them ideal for quick snacks, family gatherings, or outdoor events.
What ties these recipes together is their simplicity and convenience. With minimal preparation and no baking required, they save time, reduce heat in the kitchen, and keep cleanup light-making them a great solution for warm days.
1. Classic Chocolate Peanut Butter No-Bake Cookies

These classic chocolate peanut butter no-bake cookies are a quick and satisfying treat that combines rich cocoa, creamy peanut butter, and hearty oats, and if you like chocolate, try easy air-fryer chocolate treats or explore peanut butter and chocolate recipe ideas for more options.
The texture is chewy with a slightly fudgy bite, and the flavors blend perfectly to hit that nostalgic sweet spot.
The recipe is straightforward enough to make with ingredients that you probably already have on hand, like rolled oats, peanut butter, cocoa powder, and butter. It's a crowd-pleaser that also works well for sharing or packing in lunchboxes.
If you need a simple dessert that comes together fast, this is a solid choice.
Why This Recipe Works
This recipe stands out for its convenience and flavorful results all in one simple preparation.
- Convenience - No baking required, just mix and chill for quick, fuss-free cookies, chilling about 20-30 minutes until set.
- Flavor balance - The combination of chocolate and peanut butter creates a rich, creamy taste.
- Texture - Oats add a chewy bite that contrasts nicely with the smooth, fudgy mixture.
- Appeal - Loved by all ages, making it perfect for family snacks or casual gatherings.
Ingredient Swap Ideas
Swapping ingredients can help you tailor these no-bake cookies to your specific dietary needs or flavor preferences without losing their essence.
- Peanut butter - Use almond butter or sunflower seed butter for a different nutty flavor or to avoid peanuts.
- Oats - Gluten-free oats work well if you need to keep the recipe gluten-free.
- Sweetener - Substitute granulated sugar with coconut sugar or a sugar substitute for a lower glycemic option, using a 1:1 swap for similar sweetness.
- Chocolate - Use dark cocoa powder for a more intense chocolate flavor or natural cocoa powder for a milder taste.
Ingredients
- ½ cup unsalted butter - Provides richness and helps bind the cookies.
- 2 cups granulated sugar - Sweetens the cookies and balances the chocolate.
- ½ cup milk - Adds moisture to create a smooth mixture.
- ¼ cup unsweetened cocoa powder - Gives the cookies their deep chocolate flavor.
- 1 cup creamy peanut butter - Adds creaminess and nutty flavor.
- 2 teaspoons vanilla extract - Enhances the overall taste with a subtle aromatic note.
- 3 cups old-fashioned rolled oats - Adds structure and chewiness to the cookies.
Instructions
- In a medium saucepan, melt the butter over medium heat. Stir in sugar, milk, and cocoa powder. Bring the mixture to a rolling boil, stirring constantly.
- Let the mixture boil for 1 minute without stirring to ensure it reaches the right consistency.
- Remove the pan from heat and quickly stir in the peanut butter and vanilla extract until smooth and fully combined.
- Fold in the rolled oats using a wooden spoon, making sure they are evenly coated with the chocolate mixture.
- Drop spoonfuls of the mixture onto wax paper or a silicone baking mat. Let the cookies cool at room temperature or refrigerate until set, about 30 minutes.
Enjoy these no-bake cookies as a quick treat that's ready with minimal effort and maximum flavor.
2. No-Bake Oatmeal Coconut Cookies

These no-bake oatmeal coconut cookies are a straightforward way to get a sweet treat without turning on the oven, and for more oat-based ideas see oatmeal swaps for breakfast options.
You can mix these cookies in just minutes, then let them set while you take care of other things, then chill about 20-30 minutes until firm. Since there's no baking involved, they come together easily and fit well into a busy day or a simple gathering.
Why This Recipe Works
This recipe stands out for its simplicity, flavor, and texture, bringing together wholesome ingredients in a way that's both tasty and convenient.
- Convenience - Comes together quickly without needing an oven, ideal for easy snacking.
- Flavor balance - Combines mellow oats with the rich, nutty taste of coconut and a touch of honey.
- Texture - Chewy and satisfying, with a nice bite from the oats and the crisp coconut flakes.
- Appeal - Family-friendly and suitable for those who want a naturally sweetened treat.
Ingredient Swap Ideas
Swapping ingredients can help match different dietary needs or preferences without losing the core qualities of these cookies.
- Honey - Use maple syrup or agave nectar to keep the sweetness vegan-friendly.
- Rolled oats - Substitute with gluten-free oats if avoiding gluten.
- Coconut flakes - Toasted coconut or chopped nuts add a different crunch and flavor.
- Butter - Replace with coconut oil or a dairy-free margarine for a dairy-free version.
Ingredients
- 1 cup rolled oats - Provides the chewy base for the cookies.
- ½ cup shredded coconut flakes - Adds tropical flavor and texture.
- ¼ cup honey - Sweetens the cookies naturally and binds the ingredients.
- ¼ cup unsalted butter - Helps hold the cookie mixture together.
- ½ teaspoon vanilla extract - Enhances the overall flavor with warmth.
- Pinch of salt - Balances the sweetness and deepens the flavor.
Instructions
- In a medium saucepan, melt the butter over low heat. Stir in the honey and vanilla extract until the mixture is smooth and combined.
- Remove the pan from the heat and add the rolled oats, shredded coconut flakes, and a pinch of salt. Stir thoroughly to coat all dry ingredients with the butter and honey mixture.
- Using a tablespoon or small cookie scoop, drop spoonfuls of the mixture onto a parchment-lined baking sheet, shaping each into a cookie.
- Refrigerate the cookies for at least 30 minutes to set firmly before serving.
- Store any leftovers in an airtight container in the refrigerator to keep them chewy and fresh.
3. Vegan Almond Butter and Date No-Bake Cookies

These vegan almond butter and date no-bake cookies are a straightforward treat that comes together quickly without needing an oven. They combine natural sweetness from dates with creamy almond butter to create a satisfying snack that's both nourishing and flavorful, often bound with a touch of vanilla and a pinch of salt.
The texture is nicely chewy with just enough firmness to hold its shape, making these cookies a convenient option to prepare ahead and keep on hand. You'll find they strike a good balance between wholesome ingredients and simple preparation.
For vegan recipes that call for eggs, consult vegan egg substitutes for baking to find suitable swaps.
Why This Recipe Works
This recipe offers a wholesome option that's easy to prepare with minimal ingredients and no baking required. It's a reliable choice for anyone looking to add nutrient-dense snacks to their routine.
- Convenience - No baking needed, ready in minutes, and perfect for busy schedules.
- Flavor balance - Naturally sweet dates complement rich almond butter for a mellow, satisfying taste.
- Texture - Chewy and slightly firm, offering a pleasant mouthfeel without being dry or crumbly.
- Appeal - Suitable for vegan diets and makes a convenient grab-and-go snack.
Ingredient Swap Ideas
Swapping ingredients can help tailor this recipe to different preferences or dietary needs without losing its core appeal.
- Almond butter - Substitute with peanut butter or cashew butter for a different nutty flavor.
- Dates - Use medjool dates for extra softness or swap with dried figs for a slightly different sweetness and texture.
- Add-ins - Mix in shredded coconut, chopped nuts, or cocoa nibs to vary the texture and flavor.
- Sweetener - If dates aren't preferred, replace with maple syrup for a looser but still sweet base.
Ingredients
- 1 cup pitted dates - Soaked briefly if dry to soften for easy blending.
- ½ cup almond butter - Smooth or crunchy, based on your preference.
- 1 cup rolled oats - Use gluten-free oats if needed.
- 1 teaspoon vanilla extract - improves the flavor.
- ¼ teaspoon salt - Balances sweetness and enhances flavor.
- Optional mix-ins - ¼ cup chopped nuts, shredded coconut, or dark chocolate chips.
Instructions
- Place the pitted dates in a food processor and pulse until they form a sticky paste. If the dates are dry, soak them in warm water for 10 minutes beforehand and drain well.
- Add the almond butter, rolled oats, vanilla extract, and salt to the food processor. Pulse again until the mixture combines into a thick, sticky dough.
- Transfer the mixture to a bowl and stir in any optional mix-ins like chopped nuts or shredded coconut.
- Use your hands or a spoon to shape the dough into small, evenly sized cookies. Place them on a parchment-lined tray or plate.
- Refrigerate the cookies for at least 30 minutes to firm up before serving. Store leftovers in an airtight container in the fridge for up to a week.
4. No-Bake Mocha Espresso Oatmeal Cookies

These no-bake mocha espresso oatmeal cookies bring together the rich flavors of coffee and chocolate with the wholesome texture of oats. They're chewy, slightly chocolatey, and have a subtle espresso kick that makes each bite interesting without being overpowering.
The best part? They don't require baking, so you can mix them up quickly and have a tasty snack ready after chilling.
They make a great treat for coffee lovers or anyone who enjoys a simple yet satisfying cookie.
Why This Recipe Works
This recipe combines convenience and bold flavors into a quick, rewarding snack. The no-bake method keeps preparation simple and cleanup minimal while delivering a satisfying texture and taste.
- Convenience - Ready in under 30 minutes with no oven needed.
- Flavor balance - The espresso adds a subtle depth alongside cocoa's rich chocolate notes.
- Texture - Chewy oats provide hearty bite and substance without being dry.
- Appeal - A great option for coffee drinkers and a nice change from traditional cookies.
Ingredient Swap Ideas
Swapping ingredients here can help adjust the recipe for specific dietary preferences or to suit what you have on hand, without losing the essential mocha-espresso character.
- Oats - Use gluten-free rolled oats to make the cookies gluten-free while keeping the chewy texture.
- Sweetener - Replace granulated sugar with coconut sugar or maple syrup for a natural alternative.
- Butter - Use coconut oil in place of butter to make the recipe dairy-free.
- Espresso powder - Substitute with instant coffee granules if espresso powder isn't available; just use slightly less to avoid bitterness.
Ingredients
- ½ cup butter - Softened to room temperature for easy mixing.
- 2 cups granulated sugar - Adds sweetness and structure.
- ½ cup milk - Whole or any plant-based milk works fine.
- ¼ cup unsweetened cocoa powder - For the chocolate flavor.
- 1 tablespoon espresso powder - Provides the subtle coffee kick.
- 3 cups old-fashioned rolled oats - Gives chewy texture and heartiness.
- 1 teaspoon vanilla extract - Adds warmth and depth to the flavor.
- ¼ teaspoon salt - Balances sweetness and enhances flavors.
Instructions
- In a medium saucepan over medium heat, combine the butter, granulated sugar, milk, cocoa powder, and espresso powder. Stir constantly until the mixture starts to boil. Allow it to boil for 1 minute while stirring continuously.
- Remove the pan from heat and stir in the vanilla extract and salt immediately.
- Add the rolled oats to the warm mixture and mix thoroughly until the oats are fully coated with the chocolate and espresso sauce.
- Drop spoonfuls of the mixture onto parchment paper or a silicone mat, shaping them into cookies.
- Refrigerate the cookies for at least 30 minutes to set and firm up before serving. Store leftovers in an airtight container in the fridge.
5. Gluten-Free Chocolate Chia Seed Energy Bites
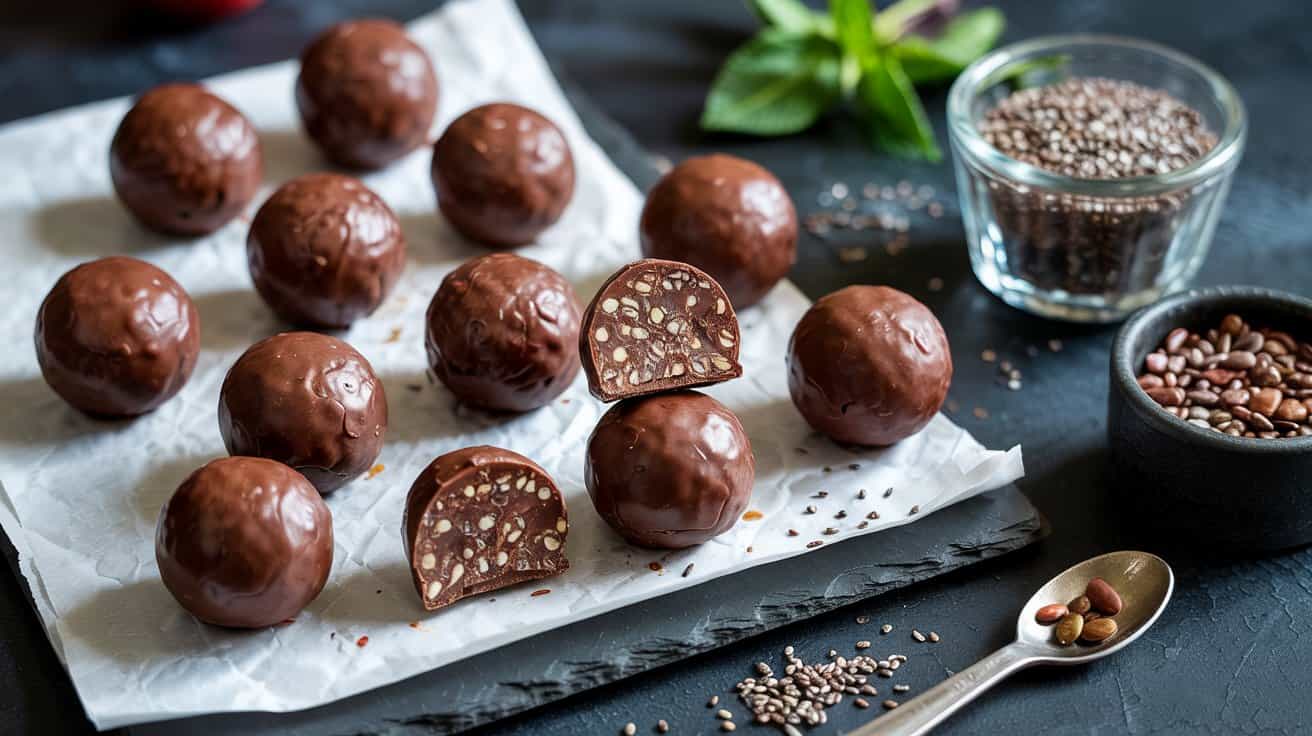
These Gluten-Free Chocolate Chia Seed Energy Bites combine wholesome ingredients for a small treat that packs a nutritional punch. The soft, chewy texture of oats and chia seeds meets a rich chocolate coating, making them a satisfying snack you can grab anytime.
They're quick to prepare and don't require baking, so you can mix up a batch in minutes. These bites offer just the right balance of natural sweetness and chocolate flavor, ideal for busy days or a mid-afternoon boost.
Why This Recipe Works
This recipe strikes a balance between nutrition and flavor with minimal prep needed. Gluten-Free Chocolate Chia Seed Energy Bites offer energy in a convenient, tasty package.
- Convenience - No-bake and ready to snack in under 30 minutes.
- Nutrition - Packed with fiber and omega-3s from chia seeds and gluten-free oats.
- Texture - Chewy interior with a smooth, chocolate coating for contrast.
- Snack Appeal - A wholesome option suitable for gluten-free diets and all ages.
Ingredient Swap Ideas
Adjusting ingredients can help accommodate different preferences or dietary needs while keeping the core flavor.
- Chia seeds - Substitute with flaxseeds or hemp seeds for a similar texture and nutritional benefit.
- Gluten-free oats - Replace with quinoa flakes or puffed amaranth to keep it gluten-free with varied texture.
- Dark chocolate - Use milk chocolate or white chocolate for a milder, sweeter coating.
- Sweetener - Swap honey with maple syrup or agave nectar for a vegan-friendly option.
Ingredients
- 1 cup gluten-free rolled oats - Provides a filling, chewy base with fiber.
- ¼ cup chia seeds - Adds texture and omega-3 fatty acids.
- ⅓ cup natural peanut butter - Binds ingredients and adds creaminess.
- ¼ cup honey - Sweetens naturally while helping hold the mixture together.
- ½ teaspoon vanilla extract - Enhances overall flavor.
- ¼ teaspoon salt - Balances sweetness.
- ½ cup dark chocolate chips - Creates the rich, chocolate coating.
Instructions
- In a medium bowl, combine gluten-free oats and chia seeds. Stir to evenly distribute.
- Add peanut butter, honey, vanilla extract, and salt to the dry ingredients. Mix thoroughly until all components are well incorporated and hold together when pressed.
- Roll the mixture into small, bite-sized balls and place them on a parchment-lined tray. Refrigerate for 15 minutes to firm up.
- Melt the dark chocolate chips using a microwave or double boiler until smooth.
- Dip each chilled bite into the melted chocolate to coat evenly. Return them to the tray and refrigerate for another 20 minutes until the chocolate hardens.
Store these bites in an airtight container in the refrigerator for up to one week, making a handy snack wherever you need a quick energy boost.
6. Tahini and Honey No-Bake Seed Cookies
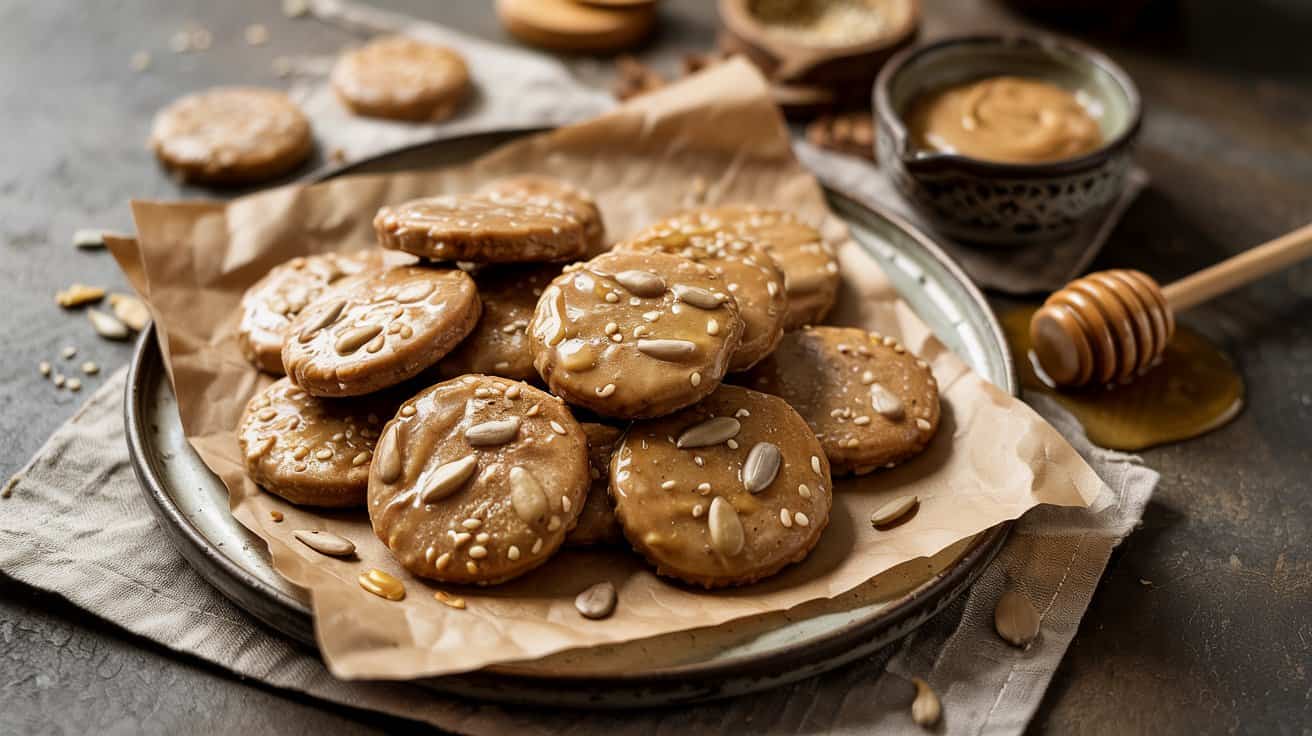
These no-bake seed cookies bring together the rich, nutty flavor of tahini with the natural sweetness of honey for a wholesome treat. They offer a satisfying crunch thanks to a mix of various seeds, making them both nutritious and enjoyable.
The best part is how simple they are to make-no need for an oven, just a few minutes of mixing and chilling. They're great for a quick snack or an on-the-go energy boost.
Why This Recipe Works
This recipe combines practicality and flavor in a way that fits easily into busy routines while providing a tasty, wholesome snack.
- Convenience - No baking required and quick to prepare with minimal hands-on time.
- Flavor balance - The creamy tahini pairs smoothly with honey's sweetness and the toasty seeds.
- Texture - Crunchy seeds contrast nicely with the chewy, sticky cookie base.
- Appeal - Nut-free and packed with wholesome ingredients, suitable for various dietary needs.
Ingredient Swap Ideas
Swapping ingredients in this recipe can help tailor it to different preferences or dietary restrictions without losing its charm. These options allow you to customize flavor, texture, or accommodate allergies easily.
- Tahini substitute - Use sunflower seed butter for an alternative nut- and sesame-free spread.
- Sweetener swap - Replace honey with maple syrup if you want a vegan-friendly version.
- Seed mix variations - Use pumpkin seeds, flaxseeds, or hemp seeds in place of sunflower and sesame for different flavors.
- Binding alternative - If you want a different binder, a bit of mashed banana or applesauce can work, but may alter texture.
Ingredients
- ½ cup tahini - Smooth and creamy for a nutty, rich base.
- ⅓ cup honey - Adds natural sweetness and helps bind the cookies.
- 1 cup mixed seeds - A combination such as sunflower seeds, sesame seeds, and pumpkin seeds, for crunch and nutrition.
- ½ cup rolled oats - Adds chewiness and helps hold everything together.
- ¼ teaspoon salt - Balances sweetness and enhances flavor.
Instructions
- In a medium bowl, combine the tahini and honey. Stir well until you get a smooth, uniform mixture.
- Add the mixed seeds, rolled oats, and salt to the tahini-honey blend. Mix thoroughly to evenly distribute all ingredients.
- Scoop tablespoon-sized portions of the mixture and shape into small, compact cookies with your hands. Place them on a lined tray or plate.
- Refrigerate the formed cookies for at least 30 minutes so they firm up and hold their shape.
- Once chilled, serve immediately or store in an airtight container in the refrigerator for up to one week.
7. No-Bake Lemon Coconut Protein Cookies

These no-bake lemon coconut protein cookies bring together bright citrus flavor and the satisfying texture of shredded coconut. They offer a refreshing twist on the typical protein snack with a zesty lemon punch that feels light but filling.
These cookies come together quickly without any baking, making them a great option for busy days or when you need a quick post-workout boost. The combination of protein powder and coconut adds both nutrition and subtle chewiness that keeps you going.
Why This Recipe Works
These cookies combine easy preparation with fresh, bright flavors to deliver a nutritious and approachable snack.
- Convenience - Ready in minutes with no oven required.
- Flavor balance - Bright lemon zest goes well with sweet coconut.
- Texture - A chewy, moist bite thanks to shredded coconut and nut butter.
- Appeal - Ideal for a light snack or a protein boost between meals.
Ingredient Swap Ideas
Swapping ingredients can help you tailor this recipe for different taste preferences or dietary needs without losing its core qualities.
- Protein powder - Use your preferred variety, such as whey, pea, or rice protein.
- Nut butter - Swap almond butter for peanut butter or sunflower seed butter if you have allergies.
- Sweetener - Replace honey with maple syrup or agave for a vegan option.
- Coconut - Use unsweetened shredded coconut for less sweetness or toasted coconut for extra flavor.
Ingredients
- 1 cup rolled oats - Provides a filling base and fiber.
- ½ cup vanilla protein powder - Adds protein and a light sweetness.
- ½ cup shredded coconut - Offers chewy texture and tropical flavor.
- ⅓ cup almond butter - Binds ingredients and adds healthy fats.
- ¼ cup honey - Natural sweetener that holds the cookies together.
- Zest of 1 lemon - Gives bright citrus flavor.
- 2 tablespoons fresh lemon juice - Enhances the lemony taste.
- ½ teaspoon vanilla extract - Rounds the flavors.
- Pinch of salt - Balances the sweetness and boosts flavor.
Instructions
- In a large mixing bowl, combine rolled oats, protein powder, shredded coconut, lemon zest, and salt. Stir until evenly mixed.
- In a small bowl, whisk together almond butter, honey, lemon juice, and vanilla extract until smooth and well combined.
- Pour the wet ingredients into the dry ingredients and stir thoroughly until a sticky dough forms.
- Using your hands or a spoon, shape the mixture into small cookies or balls and place them on a tray lined with parchment paper.
- Refrigerate for at least 30 minutes to firm up before serving. Store any leftovers in an airtight container in the fridge.
8. No-Bake Pumpkin Spice Oatmeal Cookies

These no-bake pumpkin spice oatmeal cookies are a seasonal treat that combines the warm flavors of pumpkin and spice with hearty oats. They have a soft, chewy texture and set up nicely in the fridge, making them a straightforward snack or dessert to prepare ahead of time.
This recipe offers a nice alternative to traditional baked cookies, especially when you want something quick without turning on the oven.
The blend of cinnamon, nutmeg, and cloves adds cozy autumn notes, while the oats provide substance and nutrition. These cookies are mildly sweet with a subtle pumpkin taste, perfect for sharing as an easy fall favorite.
Why This Recipe Works
This recipe brings together convenience, comforting flavors, and wholesome ingredients in a way that fits a busy lifestyle. No baking means less time and heat in your kitchen, with reliable results every time.
- Convenience - Prepared quickly with no oven needed and sets firmly in the fridge.
- Flavor balance - Warm spices paired with real pumpkin create a classic fall profile.
- Texture - Chewy oats contrast softly with the creamy pumpkin and maple syrup mix.
- Appeal - Great for family-friendly snacking or casual get-togethers during the season.
Ingredient Swap Ideas
Swapping ingredients can help tailor these cookies to different tastes or dietary restrictions without losing their signature flavor and texture.
- Pumpkin puree - Use sweet potato puree for a different but still earthy sweetness.
- Rolled oats - Substitute gluten-free oats if you need a gluten-free option.
- Maple syrup - Try honey or agave syrup for an alternative sweetener.
- Spices - Adjust the pumpkin pie spice to suit your preferences, or use individual cinnamon, nutmeg, and ginger.
Ingredients
- 1 cup pumpkin puree - Smooth canned or homemade pumpkin puree works well.
- 2 cups old-fashioned rolled oats - Use gluten-free oats if preferred.
- ½ cup maple syrup - Natural sweetener that balances the spices and pumpkin.
- ½ teaspoon pumpkin pie spice - A mix of cinnamon, nutmeg, ginger, and cloves.
- ½ teaspoon vanilla extract - Enhances the overall flavor.
- ¼ teaspoon salt - Balances sweetness and intensifies flavors.
- ¼ cup chopped pecans or walnuts (optional) - Adds crunch and nuttiness.
Instructions
- In a large bowl, combine the pumpkin puree, maple syrup, vanilla extract, pumpkin pie spice, and salt. Stir well until the mixture is smooth and uniform.
- Add the rolled oats and nuts (if using) into the pumpkin mixture. Mix thoroughly until all the oats are coated and the mixture is sticky enough to hold together.
- Using a tablespoon or cookie scoop, portion out the mixture onto a parchment-lined baking sheet or tray. Press each cookie lightly to flatten slightly, as they won't spread.
- Place the tray in the refrigerator and chill the cookies for at least 2 hours, or until they are firm enough to handle.
- Once set, store the cookies in an airtight container in the refrigerator for up to a week. Serve chilled or at room temperature.
These no-bake pumpkin spice oatmeal cookies are a simple yet satisfying treat you can enjoy whenever the craving strikes during the cooler months.
9. No-Bake White Chocolate Cranberry Oat Cookies

These no-bake cookies bring together the creamy sweetness of white chocolate and the tart punch of dried cranberries for a simple treat that's loaded with flavor. With hearty oats adding a satisfying chew, they are easy to prepare and don't require heating up the oven, which saves time and effort.
They're a great choice if you want a quick snack or a thoughtful addition to a coffee break or lunchbox. The combination of textures and flavors works well for those who prefer something mildly sweet but still interesting.
Why This Recipe Works
This recipe stands out for combining ease with enjoyable taste and a balanced texture, making it suitable for busy days and casual sharing.
- Convenience - No baking or special equipment needed, just mix and chill.
- Flavor balance - Sweet white chocolate blends with tart cranberries for a refreshing contrast.
- Texture - Chewy oats give a filling bite that goes with the smooth chocolate pieces.
- Family-friendly appeal - A gentle sweetness that kids and adults alike can enjoy.
Ingredient Swap Ideas
Adjusting a few ingredients can tailor this recipe to different diets or preferences while keeping its core charm intact.
- Swap white chocolate chips for dark chocolate chips to reduce sweetness and add depth.
- Use unsweetened dried cherries or blueberries instead of cranberries for a different tart note.
- Replace rolled oats with gluten-free oats to accommodate gluten sensitivities.
- Substitute honey or light corn syrup for granulated sugar syrup to vary the sweetness profile.
Ingredients
- 1 cup rolled oats - Use old-fashioned oats for the best texture and chewiness.
- ½ cup dried cranberries - Tart and chewy, providing a bright contrast.
- ½ cup white chocolate chips - Adds creamy sweetness and soft texture.
- ¼ cup unsalted butter - Helps bind the ingredients and adds richness.
- ¼ cup granulated sugar - Sweetens and contributes to the cookie's structure.
- 2 tablespoons milk - Adds moisture to bring the mixture together smoothly.
- ½ teaspoon vanilla extract - Enhances the overall sweetness with subtle flavor.
- Pinch of salt - Balances sweetness and enhances other flavors.
Instructions
- In a medium saucepan, melt the butter over low heat. Stir in the granulated sugar, milk, and salt, mixing until the sugar dissolves and the mixture is smooth.
- Remove the pan from the heat and add the vanilla extract, stirring to combine.
- Quickly stir in the rolled oats, dried cranberries, and white chocolate chips until all the ingredients are evenly coated.
- Drop spoonfuls of the mixture onto a parchment-lined baking sheet or plate, shaping them slightly if needed.
- Refrigerate the cookies for at least 30 minutes until they are firm and set. Store any leftovers in an airtight container in the fridge for freshness.
10. Salted Caramel Pretzel No-Bake Cookies

These Salted Caramel Pretzel No-Bake Cookies bring together a simple way to make a sweet and salty treat that's ready without turning on the oven. The combination of soft caramel-flavored sauce, crunchy crushed pretzels, and hearty oats delivers satisfying texture and rich flavor in every bite.
They're a quick snack or dessert to whip up when you want something indulgent yet easy, and they hold their shape well without baking. Making these no-bake cookies is a straightforward process that fits smoothly into busy days.
Why This Recipe Works
This recipe blends sweet caramel tones with the salty crunch of pretzels, all bound together by oats for added substance. Its ease and reliable results make it a dependable choice for any occasion.
- Convenience - Ready in under 30 minutes with no oven needed.
- Flavor balance - Combines smooth caramel creaminess with a salty, crunchy bite.
- Texture - Offers chewy oats and crunchy pretzel pieces in each cookie.
- Appeal - Works great as a homemade snack or a crowd-pleasing dessert.
Ingredient Swap Ideas
Adjusting ingredients can tailor this recipe for your preferences or dietary needs without losing its essence. Here are a few options to keep it tasty and applicable.
- Pretzels - Use gluten-free pretzels to make the recipe gluten-free while keeping the crunch.
- Caramel sauce - Substitute with a dairy-free caramel or date caramel for a vegan version.
- Oats - Rolled oats can be swapped with quick oats if you prefer a softer texture.
- Butter - Replace butter with coconut oil to accommodate dairy-free diets.
Ingredients
- ½ cup unsalted butter - Adds richness and helps bind the cookies.
- 1 cup packed brown sugar - Provides caramel-like sweetness and moisture.
- ¼ cup milk - Creates a smooth caramel sauce texture.
- ½ teaspoon salt - Enhances flavor and balances sweetness.
- 3 cups quick oats - Gives body and chewiness to the cookies.
- 1 cup crushed pretzels - Adds a salty crunch and texture contrast.
- 1 teaspoon vanilla extract - Brings depth to the caramel flavor.
- Flaky sea salt for sprinkling (optional) - Adds extra saltiness and texture on top.
Instructions
- In a medium saucepan over medium heat, melt the butter. Stir in the brown sugar, milk, and salt, mixing until smooth.
- Bring the mixture to a gentle boil and let it cook for 1 to 2 minutes, stirring constantly to prevent burning. Remove from heat and stir in vanilla extract.
- Immediately add the quick oats and crushed pretzels to the caramel mixture. Stir well until every piece is coated evenly.
- Drop spoonfuls of the mixture onto parchment-lined baking sheets. Press down lightly to shape cookies. Optionally, sprinkle with flaky sea salt.
- Let the cookies cool at room temperature for about 30 minutes or until firm. Store in an airtight container for up to one week.
These no-bake cookies offer a nice balance of salty and sweet and come together with very little cleanup, making them a practical choice to enjoy any day.
11. No-Bake Matcha Green Tea Oat Balls
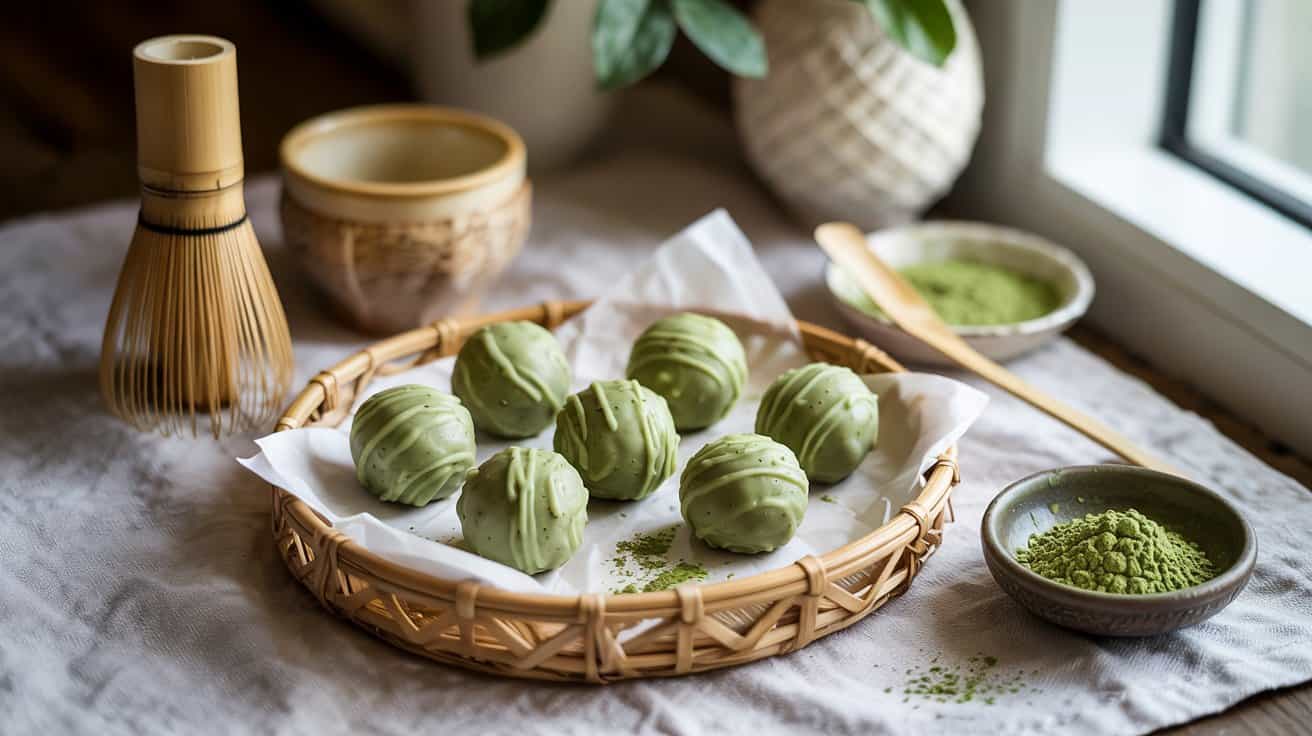
These no-bake matcha green tea oat balls are a simple and wholesome snack you can quickly put together. They combine the earthy, slightly bitter taste of matcha with creamy nut butter and the subtle natural sweetness of honey or maple syrup.
The texture is chewy and satisfying, thanks to the oats, making them a great option to have on hand when you need a quick energy boost without turning on the stove.
Making these oat balls requires just a handful of ingredients and no baking, which means minimal clean-up and a straightforward process. They're a tasty way to enjoy the benefits of matcha alongside nutrient-dense oats and a hint of sweetness, fitting easily into a busy day.
Why This Recipe Works
This recipe brings together simple ingredients for a healthy and flavorful snack that's ready in minutes. It offers a nice balance of taste, texture, and convenience.
- Convenience - Requires no baking and minimal preparation time, ideal for busy schedules.
- Flavor balance - Earthy matcha pairs well with creamy nut butter and natural sweetness.
- Texture - Chewy oats provide a satisfying bite, making the snack filling and enjoyable.
- Appeal - Portable and portioned for snacking at home, work, or on the go.
Ingredient Swap Ideas
Swapping ingredients can tailor this recipe to different dietary needs or flavor preferences without losing the core qualities of these oat balls.
- Nut butter swap - Use sunflower seed butter or tahini for a nut-free alternative.
- Sweetener options - Replace honey with maple syrup for a vegan version or agave syrup for a milder flavor.
- Oat varieties - Use gluten-free oats if necessary to keep it safe for gluten-sensitive diets.
- Flavor add-ins - Stir in shredded coconut or chopped nuts for extra texture and nutty flavor.
Ingredients
- 1 cup rolled oats - Provides chewy texture and wholesome bulk.
- 2 tablespoons matcha green tea powder - Adds distinctive earthy flavor and color.
- ½ cup creamy nut butter - Binds the mixture and offers creaminess (peanut, almond, or other favorite).
- ¼ cup honey or maple syrup - Sweetens naturally and helps hold the balls together.
- 1 teaspoon vanilla extract - Enhances overall flavor.
- Pinch of salt - Balances sweetness and brings out other flavors.
Instructions
- In a large mixing bowl, combine the rolled oats and matcha powder. Stir well to distribute the matcha evenly through the oats.
- Add the creamy nut butter, honey or maple syrup, vanilla extract, and a pinch of salt to the dry ingredients. Mix everything thoroughly using a spoon or your hands until a sticky, even dough forms.
- Scoop out small portions of the mixture-about 1 tablespoon each-and roll them into tight balls between your palms.
- Arrange the matcha oat balls on a parchment-lined tray or plate and refrigerate for at least 30 minutes. This helps them firm up and hold together better.
- Once chilled, enjoy immediately or store the oat balls in an airtight container in the refrigerator for up to one week. They make a handy grab-and-go snack anytime.
12. No-Bake Chocolate Banana Oat Cookies
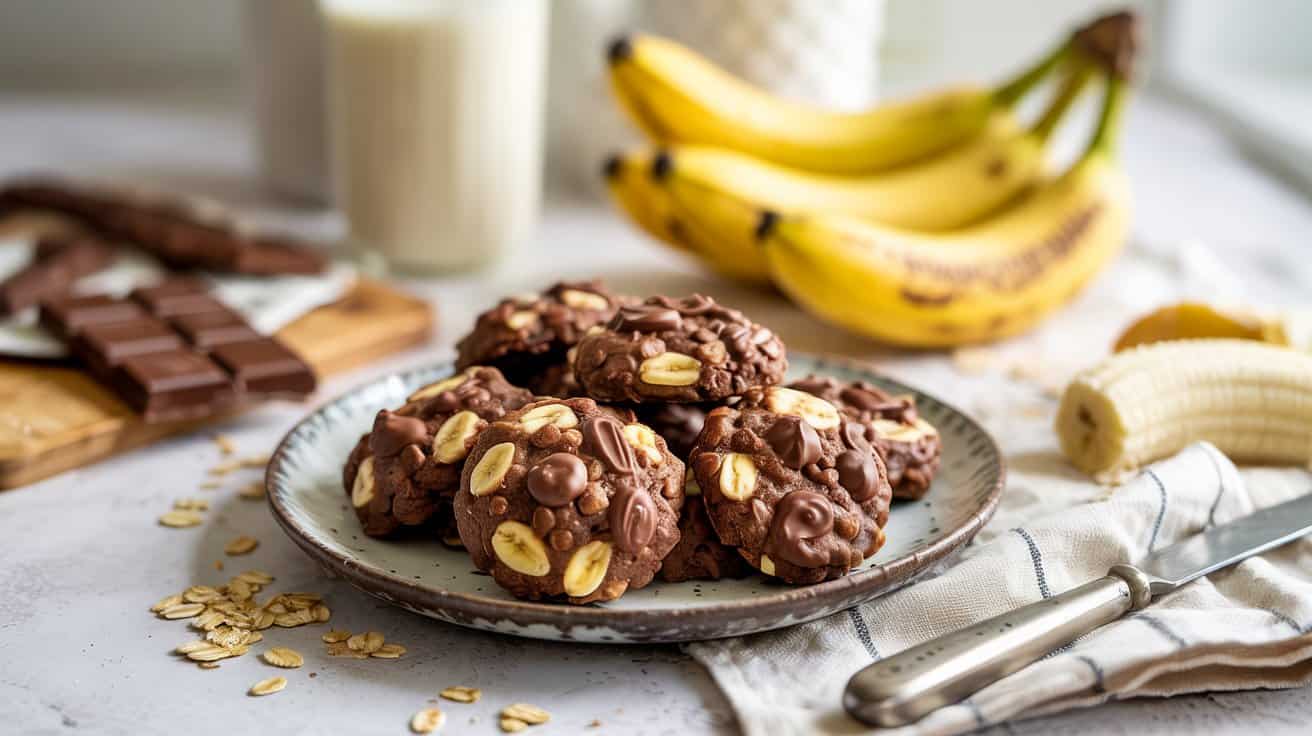
These no-bake chocolate banana oat cookies are a simple and wholesome treat you'll want to keep in your back pocket. Combining ripe mashed bananas with rich cocoa powder and hearty oats, they come together quickly without any oven time.
They offer just the right amount of natural sweetness and chocolate flavor, making them a satisfying snack or a quick breakfast option. The soft, chewy texture from the oats and gooey bananas adds a nice contrast to the chocolatey coating.
Why This Recipe Works
This recipe offers a tasty treat that comes together with minimal prep while delivering both nutrition and flavor. No baking means less time spent waiting, so you can enjoy these anytime.
- Convenience - Ready in about 15 minutes with no oven required.
- Natural sweetness - Uses ripe bananas instead of added sugars for a more wholesome taste.
- Texture - Chewy oats go well with the smooth, chocolate banana mixture.
- Family-friendly - A crowd-pleasing snack suitable for kids and adults alike.
Ingredient Swap Ideas
Adjusting ingredients can help accommodate different dietary preferences or change things up without losing the essence of the recipe.
- Bananas - Use mashed avocado for a lower-sugar alternative with a creamy texture.
- Oats - Swap rolled oats with quick oats or gluten-free oats to fit your needs.
- Cocoa powder - Replace with carob powder for a caffeine-free, milder chocolate flavor.
- Sweetener - Add a tablespoon of honey or maple syrup if your bananas aren't ripe enough for natural sweetness.
Ingredients
- 2 ripe bananas - Mashed until smooth to act as the natural sweetener and binder.
- ¼ cup cocoa powder - Unsweetened, for that rich chocolate taste.
- 1 ½ cups rolled oats - Provides chewy texture and wholesome body.
- 1 teaspoon vanilla extract - Adds depth and rounds out the flavors.
- Pinch of salt - Enhances the chocolate and balances the sweetness.
Instructions
- In a medium bowl, mash the ripe bananas thoroughly until smooth with no large lumps.
- Stir in the cocoa powder, vanilla extract, and salt until fully combined.
- Add the rolled oats and mix well to ensure all the oats are coated with the banana-chocolate mixture.
- Using a spoon, scoop out portions of the mixture and shape them into cookie-sized rounds on a parchment-lined tray or plate.
- Chill the cookies in the refrigerator for at least 30 minutes to help them firm up before serving.
Store any leftovers in an airtight container in the fridge for up to three days.
For more warm-weather, oven-free sweets, see a range of chilled treats and simple desserts in no-bake summer desserts to keep you cool. To expand your oven-free repertoire with handheld pies and portable sweets, try the collection of no-bake summer pies for warm days.

Andrew Gray is a seasoned food writer and blogger with a wealth of experience in the restaurant and catering industries. With a passion for all things delicious, Andrew has honed his culinary expertise through his work as a personal chef and caterer.
His love for food led him to venture into food writing, where he has contributed to various online publications, sharing his knowledge and insights on the culinary world. As the proud owner of CooksCrafter.com, Andrew covers a wide range of topics, including recipes, restaurant reviews, product recommendations, and culinary tips.
Through his website, he aims to inspire and educate fellow food enthusiasts, offering a comprehensive resource for all things food-related.