When you need a sweet treat in a hurry, having a collection of quick desserts made from pantry staples can be a real lifesaver, since pantry staples are shelf-stable items like flour, sugar, cocoa, canned fruit, and shelf-stable milk alternatives. These 13 recipes are designed to come together fast, using ingredients you likely already have on hand.
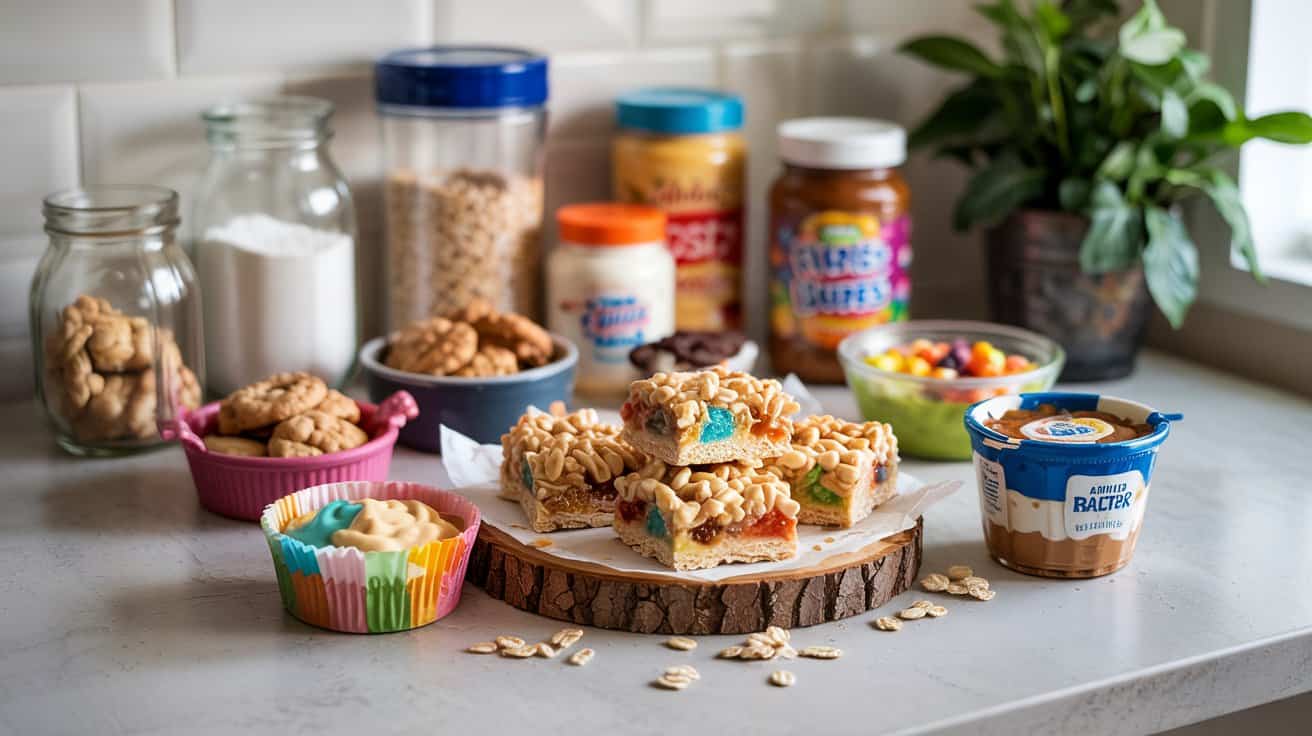
This selection includes a variety of options, from microwave mug cakes (including single-serve mug cakes) and no-bake cookies to simple baked goods and rich puddings. They cover a range of flavors and textures, offering something for every craving without requiring fresh or complicated ingredients.
Whether you want a single-serving dessert or something to share, these recipes provide delicious results with minimal fuss.
What makes this group of desserts especially appealing is how they combine simplicity with great taste, all while keeping cleanup to a minimum. These recipes fit seamlessly into busy schedules, allowing you to whip up satisfying desserts without needing extra trips to the store or special equipment.
1. Microwave Chocolate Mug Cake

This microwave chocolate mug cake (see mug cake recipes for moist, quick desserts) is a quick fix for when you want a warm, chocolatey treat, a single-serve dessert without fussing over a full baking session, or try air-fryer chocolate bark for quick treats for another simple chocolate option.
The cake's texture is moist and slightly gooey in the center, giving it that cozy feel you want from a chocolate dessert. Since it uses simple pantry ingredients, it's a great option to keep on hand for any solo dessert craving or unexpected guests.
You don't have to worry about complicated steps or long waiting times. Just mix, microwave, and enjoy a little chocolate indulgence right away, microwaving on high for about 60-90 seconds depending on your microwave's wattage.
It's a straightforward recipe that anyone can pull off with ease.
Why This Recipe Works
This microwave chocolate mug cake shines because it's fast, uses minimal ingredients, and offers comforting chocolate flavor in a small, easy portion.
- Convenience - Ready in under five minutes using common ingredients.
- Simple Ingredients - Uses pantry staples that most households already have; for recipes that spotlight pantry honey as a sweetener, see honey-based desserts to savor.
- Single Serving - Perfect for when you want a quick dessert without leftovers.
- Texture - Soft and moist with a slight fudge-like center, a result of slightly undercooking the center for a gooey finish.
- Minimal Cleanup - Made and served in one mug, reducing dishes.
Ingredient Swap Ideas
Ingredient swaps can help tailor this recipe to your preferences or address dietary needs without losing its essence.
- Flour - Replace all-purpose flour with gluten-free flour blend for gluten sensitivity; for small-batch sweet ideas that adapt well to alternate flours, see small-batch cupcake ideas for couples.
- Sugar - Use coconut sugar or maple syrup for a different sweetness profile.
- Oil - Swap neutral vegetable oil with melted coconut oil for a slight tropical note.
- Milk - Substitute dairy milk with almond or oat milk for a dairy-free option, using a 1:1 ratio for most milk substitutes.
- Cocoa Powder - Use dark cocoa powder for more intense chocolate flavor.
Ingredients
- 4 tablespoons all-purpose flour - Provides structure for the cake.
- 4 tablespoons granulated sugar - Adds sweetness to balance cocoa's bitterness.
- 2 tablespoons unsweetened cocoa powder - Brings rich chocolate flavor.
- ⅛ teaspoon baking powder - Helps the cake rise slightly.
- 3 tablespoons milk - Moistens the batter.
- 2 tablespoons vegetable oil - Keeps the cake tender and moist.
- ¼ teaspoon vanilla extract - Enhances the chocolate aroma.
- Pinch of salt - Balances sweetness and intensifies flavor.
Instructions
- In a microwave-safe mug, whisk together the flour, sugar, cocoa powder, baking powder, and salt until combined.
- Add the milk, vegetable oil, and vanilla extract to the dry ingredients. Stir well until you have a smooth batter with no lumps.
- Place the mug in the microwave and cook on high for 60 to 75 seconds. Start checking at 60 seconds to avoid overcooking; the cake should be set but slightly soft in the center.
- Carefully remove the mug from the microwave (it will be hot) and allow it to cool for a minute before eating. Optionally, top with a spoonful of yogurt, a drizzle of chocolate sauce, or fresh berries.
- Enjoy your quick, moist chocolate mug cake straight from the mug for a fast and satisfying treat.
2. Classic Peanut Butter Cookies
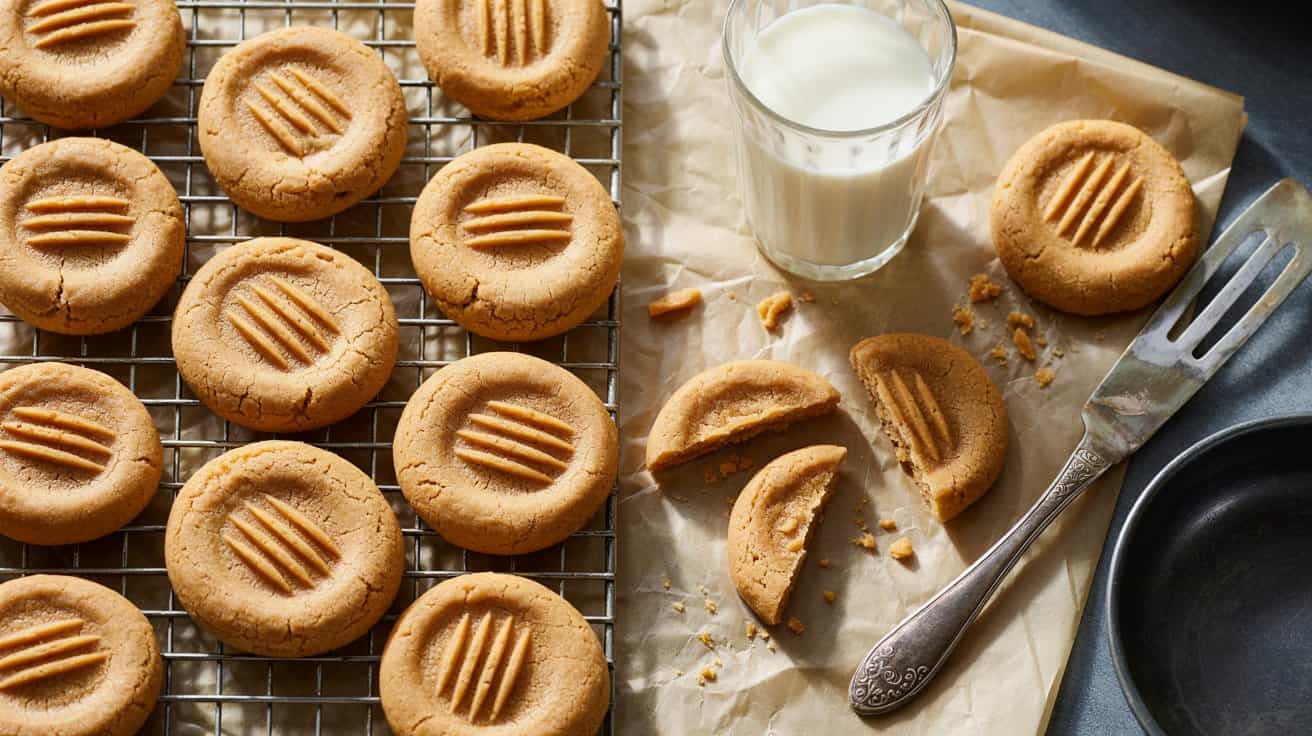
These classic peanut butter cookies bring simple ingredients together for a truly satisfying treat (or explore peanut butter substitutes for similar texture); for another quick method, see air-fryer peanut butter cookies for quick bakes.
You'll appreciate that this recipe uses pantry staples you probably already have, and it doesn't call for eggs or butter, making it ready in about 15-20 minutes. That makes it both convenient and approachable, especially for a quick bake.
The straightforward preparation means you can whip up a batch anytime you want a sweet snack that feels homemade without a fuss. The familiar taste of peanut butter shines through beautifully in every bite.
Why This Recipe Works
This peanut butter cookie recipe offers a straightforward way to enjoy a classic treat with minimal ingredients and fuss. The cookies deliver a satisfying texture and flavor that works well for any occasion.
- Convenience - Requires only pantry staples and no eggs or butter, making it simple to prepare anytime.
- Flavor balance - shows rich peanut butter flavor complemented by just the right amount of sweetness.
- Texture - Crisp edges with a soft and chewy center create a nice contrast.
- Appeal - Family-friendly and a proven classic that appeals widely across all ages.
- Cleanup ease - Minimal bowls and utensils needed, leading to quick and easy cleanup.
Ingredient Swap Ideas
Adjusting this recipe to fit different preferences or dietary needs is easy with a few smart swaps. These suggestions help keep the recipe's core while offering variety.
- Peanut butter - Swap with almond or cashew butter for a different nut flavor and similar texture.
- All-purpose flour - Use a gluten-free flour blend if avoiding gluten, keeping the same measurement for ease.
- Sugar - Substitute granulated sugar with coconut sugar or a natural sweetener to slightly change the taste while maintaining sweetness.
- Baking soda - Use baking powder if necessary, but reduce quantity slightly for proper rise.
- Salt - Omit for a lower sodium version or experiment with flavored salts for subtle twists.
Ingredients
- 1 cup peanut butter - Creamy or chunky works depending on your texture preference.
- 1 cup granulated sugar - Provides sweetness and slight crunch.
- 1 teaspoon baking soda - Helps the cookies rise and spread just right.
- ½ cup all-purpose flour - Adds structure and balances the dough texture.
Instructions
- Preheat your oven to 350°F (175°C) and line a baking sheet with parchment paper for easy cleanup.
- In a mixing bowl, combine the peanut butter, sugar, baking soda, and flour. Stir them together until the mixture forms a thick dough.
- Scoop tablespoon-sized portions of dough and roll them into balls. Place them on the prepared baking sheet, spacing them about 2 inches apart.
- Use a fork to gently press down on each dough ball, creating a crisscross pattern on top. This step also helps flatten the cookies slightly for even baking.
- Bake the cookies in the preheated oven for 8 to 10 minutes. They should have light golden edges while still soft in the middle when you remove them.
- Let the cookies cool on the sheet for a few minutes before transferring them to a wire rack to cool completely. This helps them set while keeping chewiness inside.
3. No-Bake Chocolate Oatmeal Cookies

No-bake chocolate oatmeal cookies are a quick and satisfying treat that doesn't require an oven or complicated steps. These cookies combine rich cocoa flavor with the hearty texture of oats, creating a chewy, chocolatey snack that comes together in minutes.
The sweetness of sugar goes with the cocoa perfectly, while the oats, especially when using old-fashioned rolled oats, lend a comforting chewiness that makes each bite feel substantial. This recipe is especially handy when you need a fast dessert or snack option without heating up the kitchen.
For ways to swap chocolate chips in other pantry desserts, see chocolate chip substitutes for baking.
Why This Recipe Works
This recipe delivers a flavorful, comforting cookie with minimal time or equipment needed. Its straightforward preparation and familiar ingredients make it a dependable choice for busy days.
- Convenience - No baking required, saving time and energy.
- Balanced Flavor - Sweet and chocolatey without being overpowering.
- Texture Contrast - Chewy oats meet smooth, fudgy chocolate.
- Family-Friendly - Appeals to both kids and adults alike.
- Minimal Cleanup - Few dishes needed, with no oven to preheat or monitor.
Ingredient Swap Ideas
Adjusting ingredients lets you customize these cookies to different tastes or dietary needs without sacrificing their character. Here are some easy swaps that keep things simple and delicious.
- Quick oats - Use rolled oats for a slightly denser texture.
- Cocoa powder - Substitute with carob powder for a caffeine-free option.
- Sugar - Swap white granulated sugar with coconut sugar or maple syrup for natural sweetness.
- Butter - Use coconut oil or a dairy-free margarine to make the cookies vegan.
- Milk - Replace with almond, soy, or oat milk for dairy-free versions.
Ingredients
- ½ cup butter - Provides richness and helps bind the ingredients.
- 2 cups sugar - Sweetens the cookies and balances the cocoa.
- ½ cup milk - Adds moisture and creaminess.
- ¼ cup unsweetened cocoa powder - Gives the deep chocolate flavor.
- 3 cups quick oats - Adds chewy texture and fiber.
- 1 teaspoon vanilla extract - Enhances overall flavor.
Instructions
- In a medium saucepan over medium heat, melt the butter. Stir in the sugar, milk, and cocoa powder. Bring the mixture to a gentle boil, stirring constantly.
- Allow it to boil for 1 minute, maintaining gentle stirring to prevent burning.
- Remove from heat and stir in the vanilla extract and quick oats until fully combined and the oats are coated with the chocolate mixture.
- Drop spoonfuls of the mixture onto wax paper or a greased baking sheet, shaping into cookie rounds as you go.
- Let the cookies cool and set at room temperature for about 30 minutes until firm.
- Store the cookies in an airtight container for up to one week.
4. 3-Ingredient Pancake Cupcakes
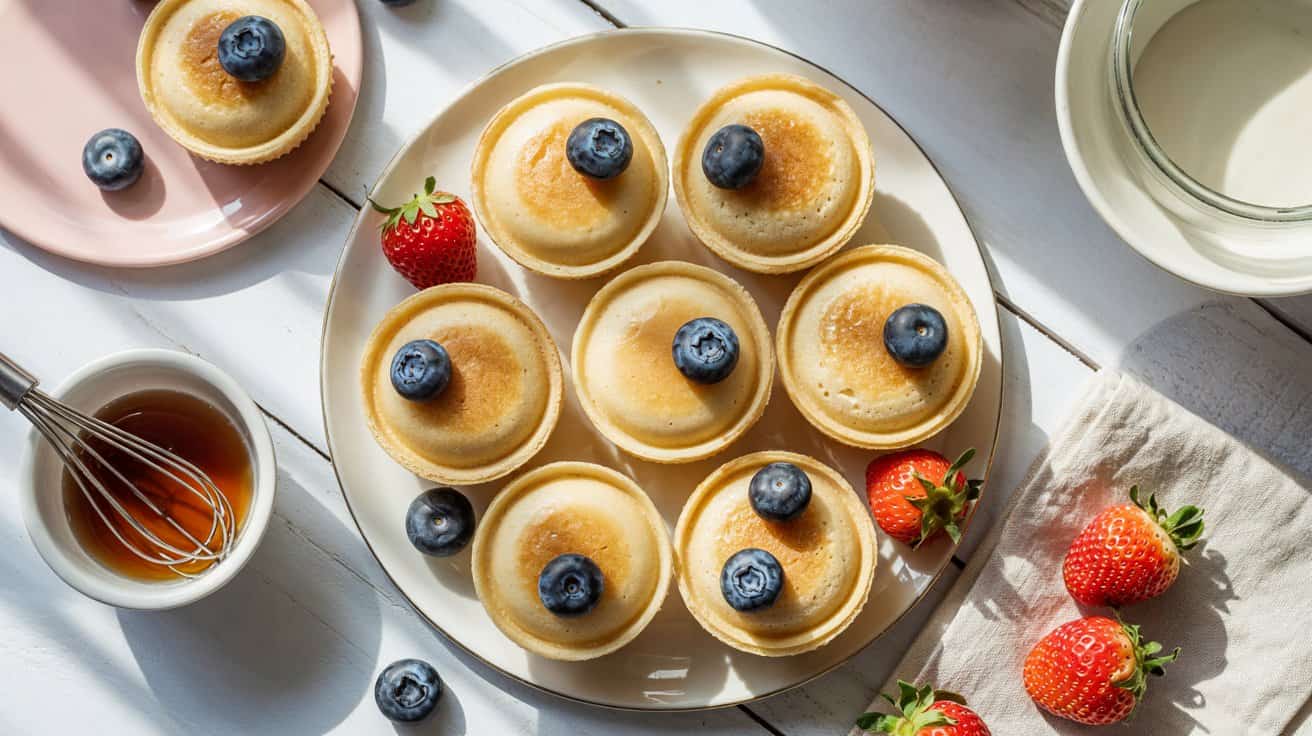
These 3-Ingredient Pancake Cupcakes are a quick and simple twist on classic pancakes, shaped into fun, mini cupcake-sized portions. The ease of preparation and blend of sweet syrup and a light glaze make them a snack or breakfast option that works well when you want something satisfying but straightforward.
The texture is tender and fluffy, with just enough syrup to add a touch of natural sweetness while the glaze brings a subtle finish without overpowering. They're easy to customize with toppings or mix-ins, making them great for a relaxed morning or an easy treat for kids and adults alike.
Why This Recipe Works
This recipe stands out for its quick preparation, balanced flavor, and approachable style. It offers a fresh way to enjoy pancakes that feels special without requiring extra ingredients or time.
- Convenience - Uses just three basic ingredients and comes together fast.
- Flavor balance - Combines the mild sweetness of syrup with a smooth glaze for a layered taste.
- Texture - Produces tender, fluffy cupcakes that hold together nicely.
- Appeal - Small portions make them easy to serve at gatherings or for lunchboxes.
- Cleanup ease - Minimal ingredients mean fewer dishes and less mess overall.
Ingredient Swap Ideas
Swapping ingredients can help tailor this recipe to fit different dietary needs or flavor preferences, keeping it fresh and flexible.
- Pancake mix - Use gluten-free pancake mix to make these cupcakes suitable for gluten sensitivities.
- Syrup - Substitute maple syrup with honey or agave syrup for a different natural sweetness.
- Glaze - Swap the quick glaze with a dairy-free icing made from powdered sugar and coconut milk for a vegan option.
- Add-ins - Blend in mashed banana or blueberries into the batter for added flavor and nutrition.
- Toppings - Finish with chopped nuts or a sprinkle of cinnamon instead of glaze for a less sweet version.
Ingredients
- 1 cup pancake mix - Use your favorite store-bought or homemade mix.
- ½ cup maple syrup - For a rich, natural sweetness that pairs well with pancakes.
- ¼ cup powdered sugar - Used to make the quick glaze topping.
- 2 tablespoons milk or water - To mix with powdered sugar for the glaze.
Instructions
- Preheat your oven to 350°F (175°C) and lightly grease a mini muffin tin or line it with paper cupcake liners.
- In a medium bowl, combine the pancake mix and maple syrup. Stir gently until the mixture is smooth but not overly runny.
- Spoon the batter evenly into the muffin cups, filling each about two-thirds full.
- Bake for 10-12 minutes, or until the tops are set and golden but still soft to the touch. Remove from the oven and let them cool slightly.
- Meanwhile, prepare the glaze by whisking the powdered sugar with milk or water until smooth and pourable. Adjust the liquid if needed to reach the right consistency.
- Drizzle the glaze over the warm pancake cupcakes. Let them sit a few minutes for the glaze to set before serving.
These pancake cupcakes come together quickly and provide a simple but satisfying treat any time of day.
5. Quick Cinnamon Sugar Pull-Apart Bread
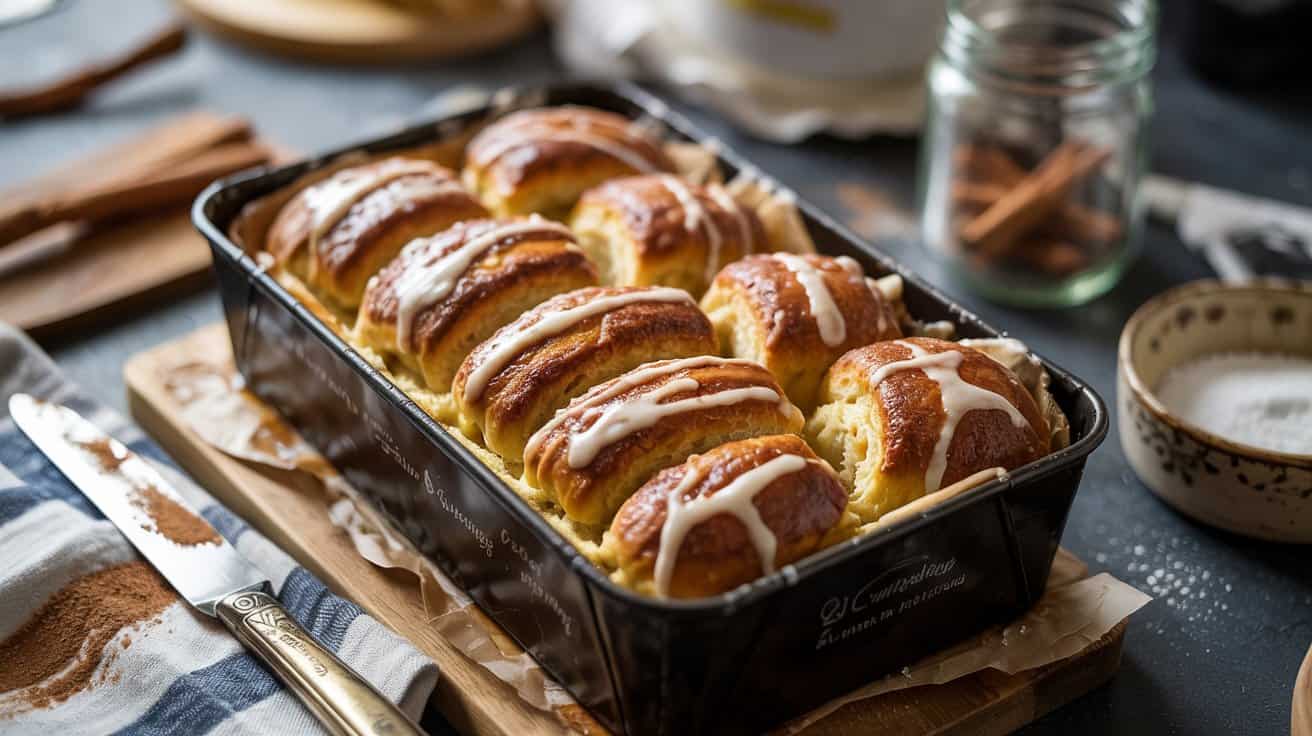
This cinnamon sugar pull-apart bread is a simple treat that you can prepare quickly with common pantry ingredients. It combines soft, tender bread layers with a sweet butter and cinnamon sugar filling that feels a bit like a warm hug in every bite.
Because the dough is straightforward and requires no complicated steps or rising time, you can have it ready in under 30 minutes. It's perfect for a cozy breakfast, snack, or an easy dessert that the whole family can enjoy.
The sweet cinnamon flavor pairs well with a cup of coffee or tea, making it a nice option for busy mornings or casual gatherings.
Why This Recipe Works
This recipe brings practical convenience and satisfying flavor in a simple, quick bread. It combines a soft texture with a crisp, cinnamon-sugary crust, and it's easy enough for weeknight baking.
- Convenience - Uses quick dough with no yeast or rising time necessary.
- Flavor balance - Combines buttery richness with warm cinnamon and sweet sugar.
- Texture - Soft bread layers with crisp, caramelized sugar edges.
- Appeal - Family-friendly and visually inviting pull-apart design.
- Serving ease - Portionable pieces make it easy to share and serve.
Ingredient Swap Ideas
You can adjust this recipe for different tastes or dietary needs without losing the main idea of this cinnamon bread. Swapping some ingredients also allows for new flavor variations.
- Butter swap - Use plant-based margarine or coconut oil for a dairy-free option.
- Sugar choice - Replace granulated sugar with coconut sugar or a natural sweetener.
- Flour alternative - Try whole wheat flour for a nuttier, heartier texture.
- Add-ins - Mix chopped nuts, raisins, or dried cranberries between layers for extra texture.
- Milk substitute - Use almond, soy, or oat milk instead of dairy milk to suit dietary preferences.
Ingredients
- 2 cups all-purpose flour, plus extra for dusting
- 1 tablespoon baking powder
- ½ teaspoon salt
- ¾ cup milk (dairy or plant-based), room temperature
- ¼ cup unsalted butter, melted, plus 2 tablespoons softened for layering
- ¼ cup granulated sugar
- 1 tablespoon ground cinnamon
Instructions
- Preheat your oven to 350°F (175°C). Grease a 9x5-inch loaf pan or line it with parchment paper.
- In a medium bowl, whisk together the flour, baking powder, and salt. In another bowl, combine the milk and melted butter.
- Pour the wet ingredients into the dry ingredients and stir with a spatula until a soft dough forms. Avoid overmixing to keep the bread tender.
- On a floured surface, roll out the dough into a rectangle about 12x8 inches. Spread the softened butter evenly over the dough. Mix the sugar and cinnamon together and sprinkle it evenly on top.
- Cut the dough into about 12 strips, then stack the strips on top of each other. Cut the stacked strips into 3 equal sections. Place these sections side by side in the prepared loaf pan, standing upright so the layers show.
- Bake for 25 to 30 minutes, until the top is golden and a toothpick inserted in the center comes out clean. Let cool slightly before pulling apart and serving warm.
6. Easy Rice Pudding
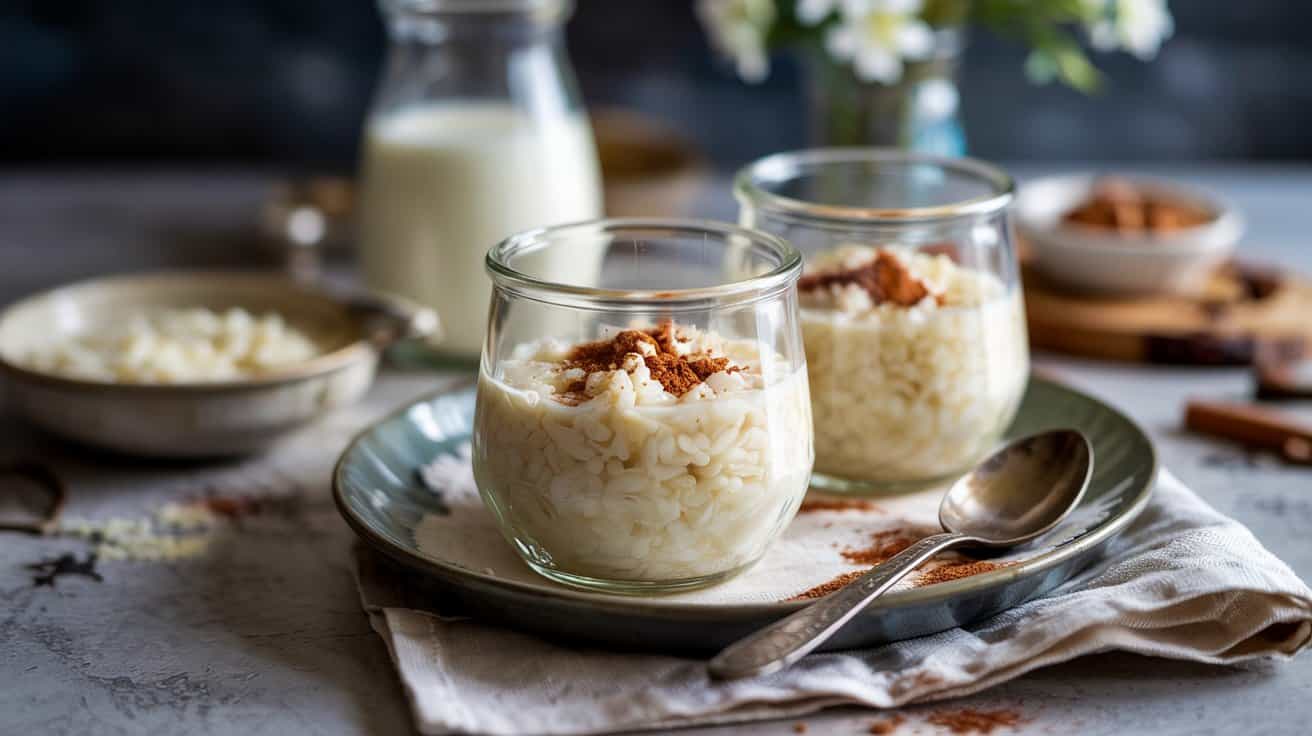
Rice pudding is a timeless dessert that offers simple comfort in every spoonful. It combines cooked rice with milk, sugar, and a touch of cinnamon to create a creamy, gently sweet treat that's both satisfying and easy to prepare.
This recipe takes just a few basic ingredients you likely already have, making it a convenient option for a quick dessert or even a cozy breakfast. The pudding has a smooth texture with soft rice grains throughout, complemented by warm cinnamon flavor that brings out its inviting aroma.
Whether you want to turn leftover rice into a delicious sweet dish or simply crave something soothing and homey, this easy rice pudding makes an excellent choice.
Why This Recipe Works
This rice pudding recipe brings together practical simplicity and comforting flavors in a dish anyone can whip up quickly. It's a reliable way to enjoy a creamy dessert with minimal fuss and familiar ingredients.
- Convenience - Uses leftover cooked rice, reducing waste and saving time in prep.
- Flavor balance - Combines mild sweetness with warming cinnamon for a cozy taste.
- Texture - Creamy base envelops tender rice grains, creating a pleasant mouthfeel.
- Family-friendly - Gentle flavors appeal to adults and children alike.
- Versatile serving - Enjoy it warm for comfort or chilled for a refreshing treat.
Ingredient Swap Ideas
Swapping a few ingredients can help tailor this recipe to different dietary needs or taste preferences without losing the comforting essence of rice pudding.
- Milk alternatives - Use almond, oat, or soy milk for a dairy-free version with subtle flavor differences.
- Sweetener options - Swap granulated sugar for honey, maple syrup, or coconut sugar to adjust sweetness and add depth.
- Spice variations - Substitute cinnamon with nutmeg or cardamom for a different aromatic twist.
- Rice choices - Try short-grain or Arborio rice for a creamier pudding, or brown rice for added fiber and a nuttier flavor.
- Add-ins - Stir in raisins, chopped nuts, or a splash of vanilla extract for extra texture and aroma.
Ingredients
- 2 cups cooked white rice - Leftover plain rice works best.
- 2 cups whole milk - Provides creaminess and richness.
- ⅓ cup granulated sugar - Adds sweetness to balance the milk.
- 1 teaspoon ground cinnamon - Infuses warm, comforting flavor.
- ¼ teaspoon salt - Enhances overall taste.
- 1 teaspoon vanilla extract - Optional, for extra aroma.
- 1 large egg - Lightly beaten, to thicken the pudding (optional).
Instructions
- In a medium saucepan, combine the cooked rice, milk, sugar, cinnamon, and salt. Stir the mixture over medium heat until heated through but not boiling.
- If using the egg, beat it lightly in a small bowl. Slowly add about ½ cup of the warm milk mixture to the egg while whisking constantly to temper it.
- Pour the tempered egg back into the saucepan. Continue cooking and stirring gently for about 5 to 7 minutes, until the mixture thickens and coats the back of a spoon.
- Remove the saucepan from heat and stir in the vanilla extract if desired. Let the pudding cool slightly.
- Serve the rice pudding warm or transfer it to bowls and chill in the refrigerator for at least 1 hour. Sprinkle additional cinnamon on top before serving if you like.
This easy rice pudding is a straightforward recipe that brings simple ingredients to life with creamy texture and cozy flavor. It's perfect for a quick dessert or a comforting snack that pleases everyone.
7. Peanut Butter Banana Mug Cake
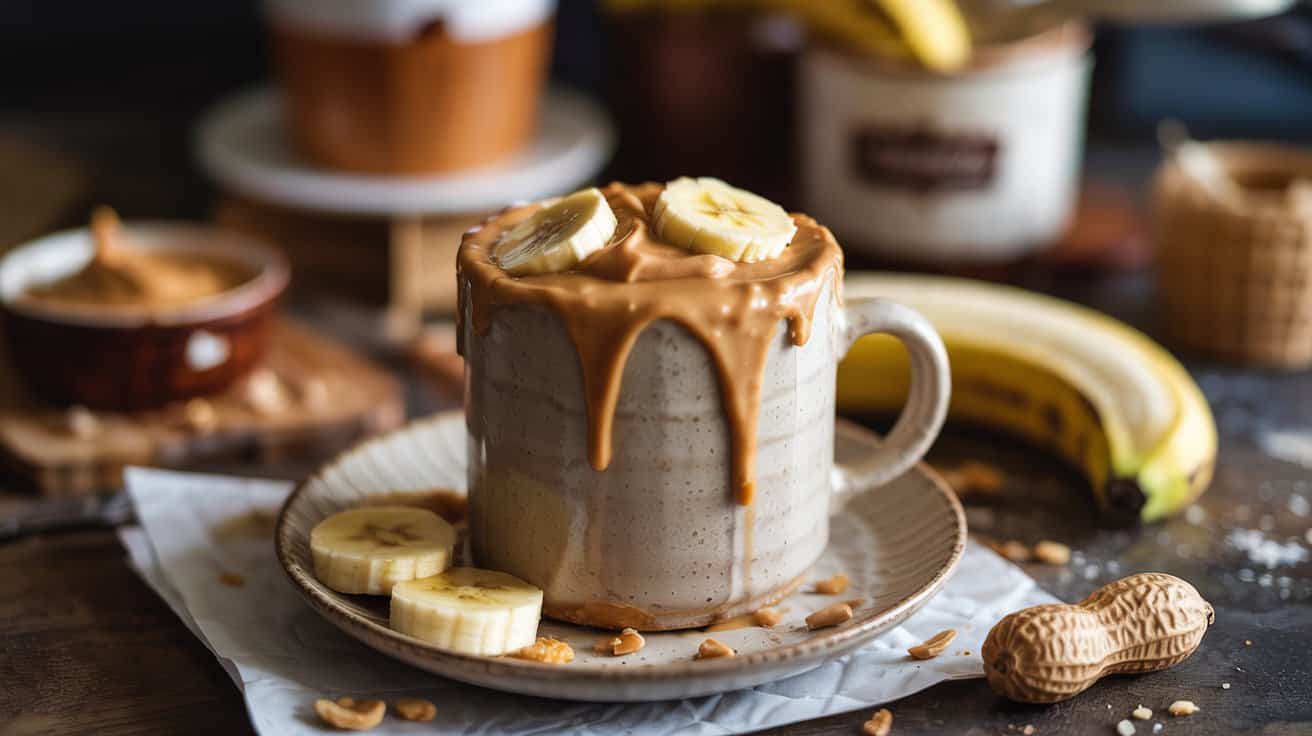
This Peanut Butter Banana Mug Cake is an easy and satisfying treat you can whip up quickly in your microwave. The mashed banana keeps the cake moist while adding natural sweetness, and peanut butter brings a rich, nutty flavor that goes well with the banana.
Made with simple pantry ingredients, this mug cake takes just a few minutes to make and is perfect for when you want a single-serve dessert without much fuss. The texture is tender and soft, with a slightly gooey center that makes it feel indulgent without needing fancy components.
Why This Recipe Works
This mug cake balances convenience and flavor in a way that makes it both a quick fix and a delicious choice for a solo dessert or snack.
- Convenience - You only need one mug and a few minutes to prepare and cook.
- Flavor balance - The natural sweetness from banana goes with the creamy, salty peanut butter nicely.
- Texture - Moist and tender with a soft crumb that feels fresh and homemade.
- Appeal - Single-serve size makes it practical and reduces leftovers.
- Cleanup ease - Minimal dishes since everything is mixed and cooked in one mug.
Ingredient Swap Ideas
Swapping ingredients can help you match preferences or dietary requirements while keeping the core taste and texture of the mug cake.
- Peanut butter - Use almond or cashew butter if you prefer a different nut flavor or need a peanut-free option.
- All-purpose flour - Substitute with whole wheat flour or gluten-free flour blends to accommodate dietary needs.
- Banana - Use applesauce or pumpkin puree for a different flavor and moisture alternative.
- Sweetener - Swap honey or maple syrup for granulated sugar or a sugar substitute to adjust sweetness or texture.
- Milk - Replace dairy milk with oat, almond, or any other plant-based milk to keep it dairy-free.
Ingredients
- 1 small ripe banana - mashed well to add moisture and natural sweetness.
- 2 tablespoons peanut butter - smooth or chunky based on preference.
- 4 tablespoons all-purpose flour - for structure and a tender crumb.
- 2 tablespoons sugar - to enhance sweetness.
- ¼ teaspoon baking powder - gives lift to the cake.
- ⅛ teaspoon salt - balances flavors.
- 3 tablespoons milk - any type, adds moisture to the batter.
- ¼ teaspoon vanilla extract - optional, for extra flavor depth.
Instructions
- In a microwave-safe mug, mash the banana thoroughly until smooth. Stir in the peanut butter until well combined.
- Add the flour, sugar, baking powder, and salt, mixing gently to combine without overmixing.
- Pour in the milk and vanilla extract, stirring until the batter is smooth and all ingredients are incorporated.
- Microwave the mug on high power for 1 to 1 ½ minutes. The cake should rise and be set but still moist in the center.
- Let the mug cake cool for a minute or two before eating. You can enjoy it straight from the mug or loosen the sides with a spoon to transfer it onto a plate.
- Optionally, top with a sprinkle of chopped nuts or a drizzle of extra peanut butter before serving.
8. Chocolate Chip Cookie Bars
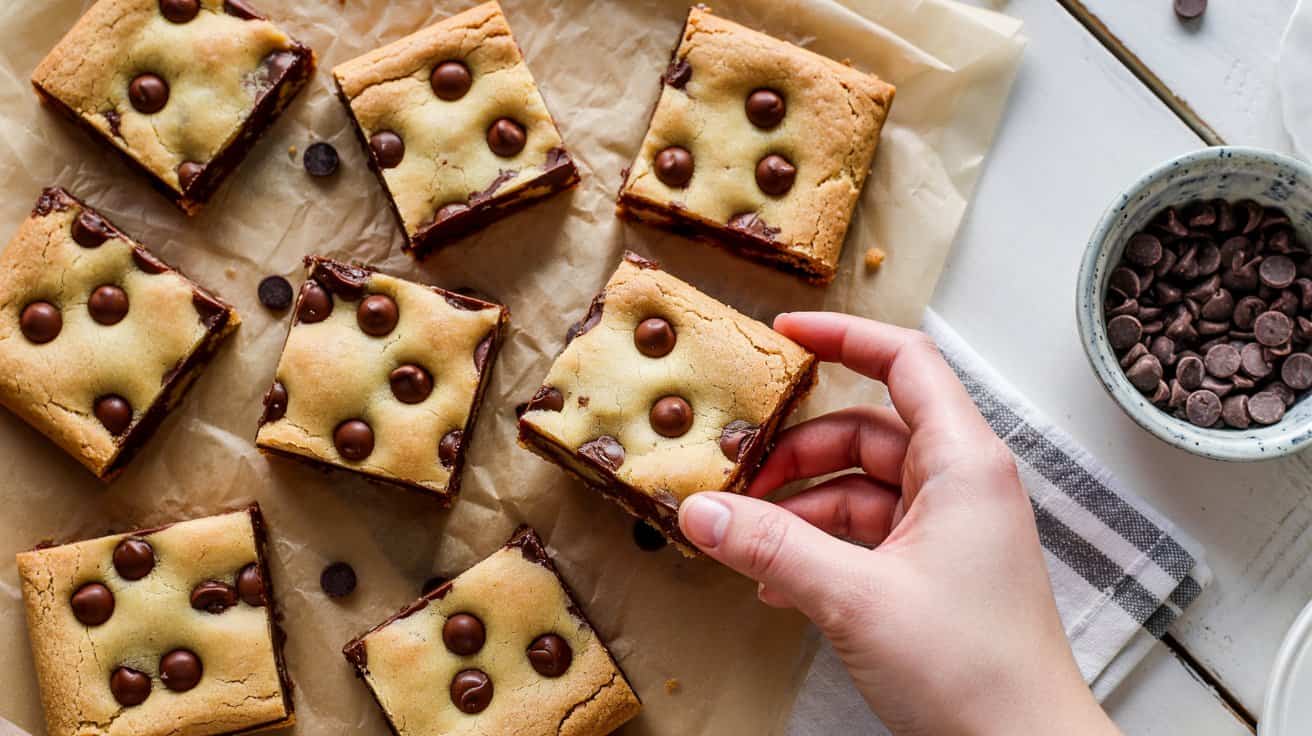
Chocolate chip cookie bars take everything that's great about classic cookies and shape it into a thick, sliceable treat. Instead of scooping out individual cookies, you spread the dough into a pan and bake it all at once.
The result is a soft, chewy bar with pockets of melted chocolate throughout. It's easy to cut into squares that hold together nicely, making it ideal for sharing or packing into lunchboxes.
Plus, this recipe keeps things straightforward by using everyday ingredients you likely have on hand.
These bars offer the familiar flavors you expect from a chocolate chip cookie, but with a bit more ease and convenience. Whether you want a simple dessert for a family gathering or a quick sweet to satisfy a craving, these cookie bars fit the bill without fuss.
Why This Recipe Works
This chocolate chip cookie bar recipe blends the best of taste and practicality, giving you a nice dessert that's simple to prepare and easy to portion.
- Convenience - Baked in one pan, so it saves time on shaping and baking multiple cookies.
- Texture - Soft and chewy with gooey chocolate chips throughout every bite.
- Flavor balance - Sweet cookie dough combined with rich, melty chocolate hits the right notes.
- Appeal - Family-friendly and great for occasions or everyday treats.
- Serving ease - Slices hold shape well, making serving and cleanup straightforward.
Ingredient Swap Ideas
Adjusting ingredients can help accommodate different preferences or dietary requirements without losing what makes these bars appealing.
- Flour - Use a gluten-free all-purpose blend to make these bars gluten-free.
- Butter - Swap for coconut oil of equal measure if you prefer a dairy-free option.
- Sugar - Replace granulated sugar with coconut sugar for a slight caramel flavor and lower glycemic index.
- Chocolate chips - Use dairy-free chocolate chips or chopped nuts for variation.
- Egg substitute - Use flax or chia seed egg (1 tablespoon ground seed + 3 tablespoon water) for a vegan version.
Ingredients
- 1 cup (2 sticks) unsalted butter - softened to room temperature.
- 1 cup granulated sugar - adds sweetness and structure.
- 1 cup packed light brown sugar - contributes moisture and caramel notes.
- 2 large eggs - bind the dough and add richness.
- 2 teaspoons pure vanilla extract - enhances flavor depth.
- 3 cups all-purpose flour - the base for these bars.
- 1 teaspoon baking soda - provides a bit of lift.
- ½ teaspoon salt - balances sweetness.
- 2 cups semi-sweet chocolate chips - the star of the bars, melty and sweet.
Instructions
- Preheat your oven to 350°F (175°C). Grease a 9x13-inch baking pan or line it with parchment paper for easy removal.
- In a large bowl, cream the softened butter with granulated sugar and brown sugar until light and fluffy using a mixer or sturdy spoon.
- Beat in the eggs one at a time, then add vanilla extract, mixing until everything is combined.
- In a separate bowl, whisk together the flour, baking soda, and salt. Gradually add the dry ingredients to the wet mixture, stirring just until the dough comes together.
- Fold in the chocolate chips evenly. Spread the dough evenly into the prepared pan, smoothing the top with a spatula.
- Bake for 25 to 30 minutes, until the edges are golden and a toothpick inserted in the center comes out mostly clean with a few moist crumbs. Allow the bars to cool completely before slicing into squares.
These cookie bars keep well stored in an airtight container at room temperature for several days. Reheat slightly for a fresh-baked feel anytime.
9. Pumpkin Spice Mug Cake
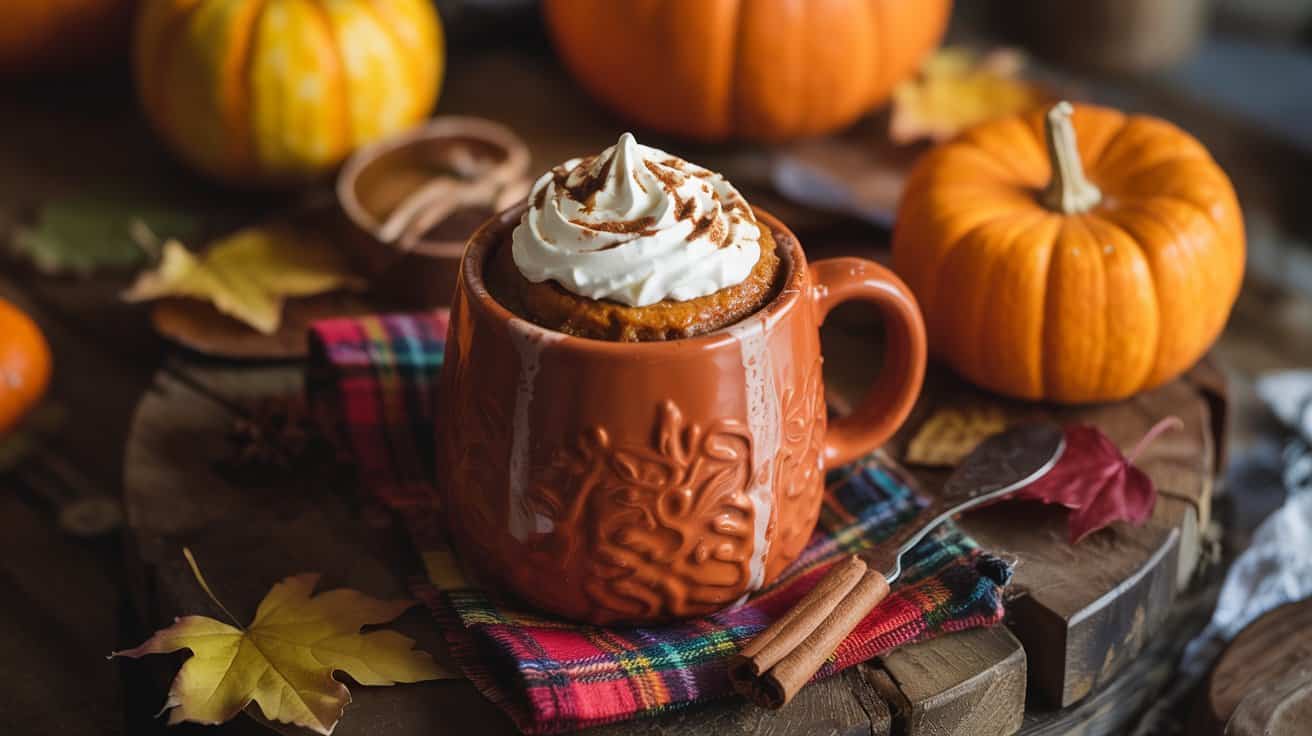
This pumpkin spice mug cake is a quick and satisfying treat that fits perfectly into a busy day. It brings together the warm flavors of fall with canned pumpkin and a blend of classic spices, making it an inviting snack or dessert.
The texture is moist and tender, similar to a traditional cake but ready in just minutes thanks to the microwave. You don't need many ingredients or complicated steps, which makes it easy to whip up whenever the craving strikes.
This recipe suits anyone looking for a cozy, seasonal bite without a lot of fuss or cleanup. It also offers enough sweetness balanced by pumpkin's natural earthiness and aromatic spices.
Why This Recipe Works
This mug cake combines speed, comforting flavors, and straightforward ingredients to create a tasty fall-inspired treat in moments.
- Convenience - Ready in about five minutes with minimal preparation and clean-up.
- Flavor balance - Blends pumpkin's mild sweetness with cinnamon, nutmeg, and ginger for warm spice notes.
- Texture - Soft, moist crumb that mimics a small homemade cake inside a mug.
- Appeal - Individual serving size makes it great for portion control and solo enjoyment.
- Versatility - Simple ingredients that are easy to find and swap based on what you have at home.
Ingredient Swap Ideas
You can adapt this recipe to fit different dietary preferences or ingredient availability by making some simple swaps without losing the essence of pumpkin spice flavor.
- Pumpkin puree - Use fresh cooked and mashed pumpkin instead of canned for a fruiter version.
- All-purpose flour - Substitute with gluten-free flour blends for a gluten-free mug cake.
- Sugar - Replace granulated sugar with maple syrup or honey for a natural sweetener alternative.
- Milk - Use almond, oat, or soy milk instead of dairy milk to make it dairy-free.
- Spices - Adjust the pumpkin pie spice blend or use individual ground cinnamon, nutmeg, and cloves as preferred.
Ingredients
- 4 tablespoons canned pumpkin - Provides moist texture and pumpkin flavor.
- 3 tablespoons all-purpose flour - Forms the cake base.
- 2 tablespoons granulated sugar - Sweetens the batter.
- ⅛ teaspoon baking powder - Helps the cake rise.
- ¼ teaspoon pumpkin pie spice - Adds cinnamon, nutmeg, ginger, and cloves for warmth.
- A pinch of salt - Enhances flavors.
- 3 tablespoons milk - Moistens the batter and blends the ingredients.
- 1 tablespoon vegetable oil - Keeps the cake tender.
- ¼ teaspoon vanilla extract - improves the flavor.
Instructions
- In a microwave-safe mug, whisk together the canned pumpkin, milk, vegetable oil, and vanilla extract until smooth.
- Add the flour, sugar, baking powder, pumpkin pie spice, and salt. Stir until the batter is well combined and free of lumps.
- Microwave on high for 1 minute and 30 seconds, then check the cake. If it's not set, continue microwaving in 15-second increments until cooked through but still moist.
- Let the mug cake cool slightly before eating, as it will be very hot just out of the microwave.
- Enjoy the mug cake on its own or topped with a little whipped cream or a sprinkle of cinnamon if you like.
10. Banana Bread Muffins
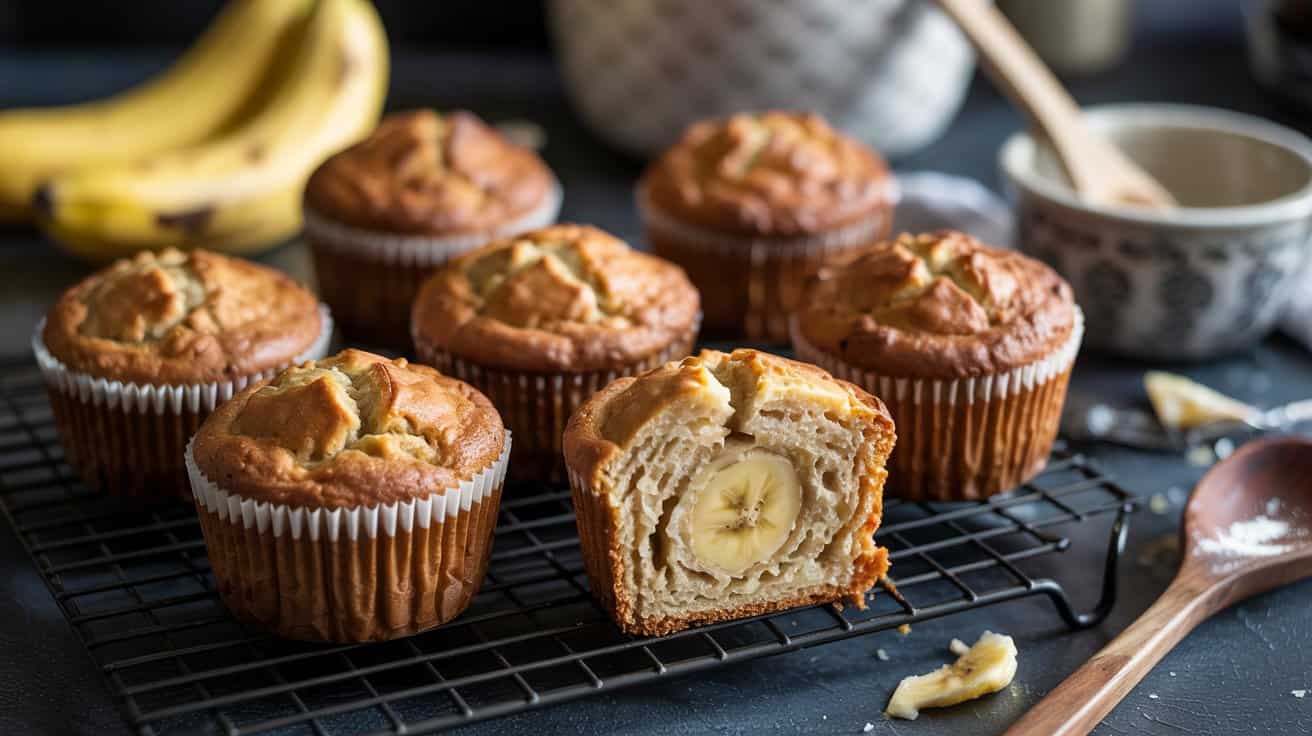
Banana bread muffins are a great way to enjoy the flavors of classic banana bread in a quicker, portioned form. These muffins come together easily, making them an ideal choice when you want a tasty snack or breakfast without a long wait.
The natural sweetness from overripe bananas gives these muffins a moist, tender crumb with just the right amount of flavor. Their golden tops get slightly crisp during baking while remaining soft inside, offering satisfying texture in every bite.
Since they use simple pantry ingredients, you can whip these up anytime you have a few ripe bananas sitting around. Plus, making muffins instead of a loaf means faster baking, perfect for busy mornings or last-minute gatherings.
Why This Recipe Works
This recipe balances convenience, flavor, and texture to bring you a delicious, easy banana treat in muffin form.
- Convenience - Uses basic pantry staples and overripe bananas for quick preparation.
- Flavor balance - Sweet bananas paired with warm spices create a rich, comforting taste.
- Texture - Moist, tender inside with lightly crisp tops for pleasant contrast.
- Appeal - Muffin size makes them perfect for breakfast, snacks, or lunchboxes.
- Serving ease - Portable portions cut down on mess and make sharing simple.
Ingredient Swap Ideas
Swapping ingredients can help customize these muffins to your preferences or dietary needs without losing their core flavor.
- Flour alternative - Use whole wheat or gluten-free flour blends instead of all-purpose for added nutrition or to accommodate gluten intolerance.
- Sweetener options - Replace granulated sugar with coconut sugar or maple syrup for different sweetness profiles.
- Fat substitutes - Use melted coconut oil or applesauce in place of butter to reduce saturated fat or add moisture while keeping the muffins tender.
- Add-ins - Mix in chopped nuts, chocolate chips, or dried fruit to vary flavor and texture without changing the base recipe too much.
- Egg replacement - Substitute eggs with flaxseed meal mixed with water for a vegan-friendly option.
Ingredients
- 3 ripe bananas - mashed with soft texture and brown spots for natural sweetness.
- ½ cup unsalted butter - melted to blend smoothly into the batter.
- 1 cup granulated sugar - provides balanced sweetness without overpowering the banana flavor.
- 2 large eggs - help bind the ingredients and provide structure.
- 1 teaspoon vanilla extract - adds warm, aromatic depth.
- 1 ½ cups all-purpose flour - the base for the muffins' structure.
- 1 teaspoon baking soda - gives the muffins lift and lightness.
- ½ teaspoon salt - enhances the overall flavor by balancing sweetness.
- 1 teaspoon ground cinnamon - brings subtle warmth and spice.
Instructions
- Preheat your oven to 350°F (175°C) and line a 12-cup muffin tin with paper liners or grease it well.
- In a large bowl, mash the ripe bananas with a fork until mostly smooth. Stir in the melted butter until fully incorporated.
- Add the sugar, eggs, and vanilla extract to the banana mixture and whisk together until combined.
- In a separate bowl, whisk together the flour, baking soda, salt, and cinnamon. Gradually add the dry ingredients into the wet mixture, stirring just until no dry streaks remain.
- Divide the batter evenly among the muffin cups, filling each about three-quarters full.
- Bake for 18-22 minutes or until a toothpick inserted into the center of a muffin comes out clean. Remove from the oven and let cool in the pan for 5 minutes before transferring to a wire rack to cool completely.
These banana bread muffins hold up well for several days stored in an airtight container, making them a handy option to prepare ahead. You can also warm them briefly before serving to bring out their fresh-baked aroma.
11. Sugar & Cinnamon Toast Crunch Cereal Treats
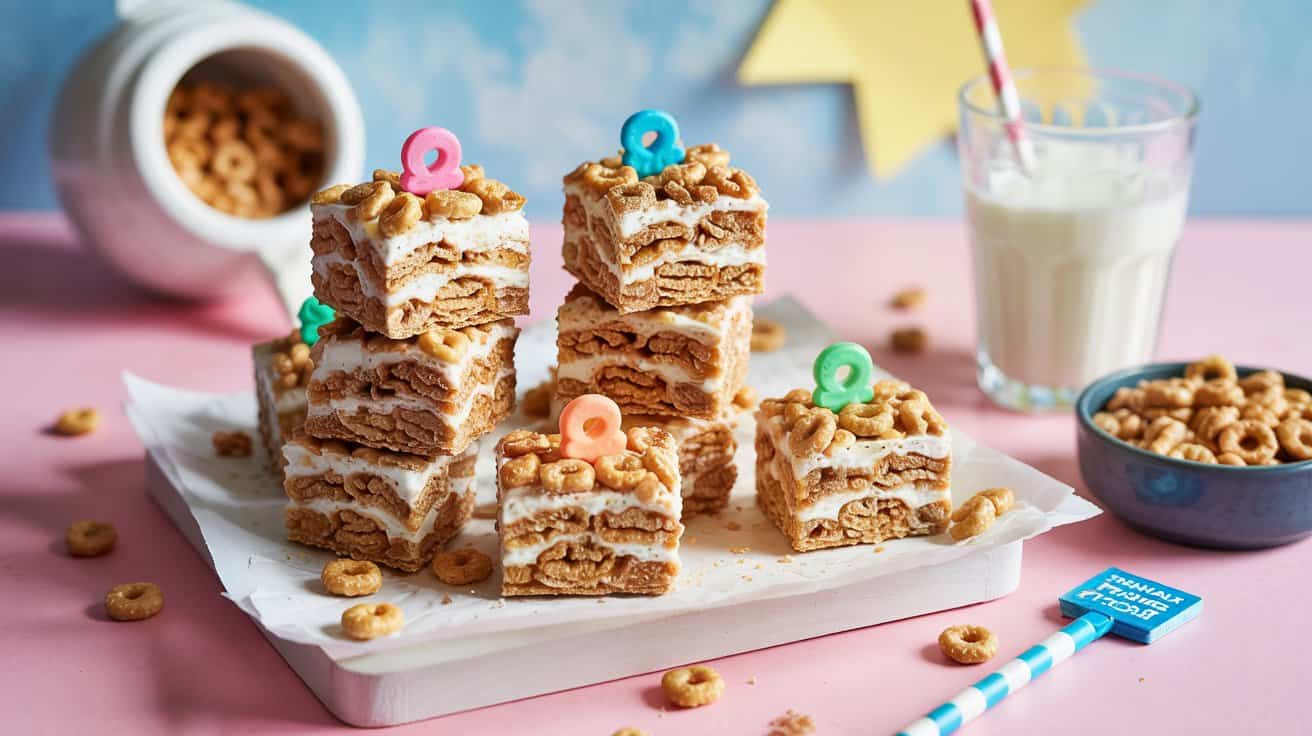
This recipe takes the classic cereal treat we all know and gives it a sweet, cinnamon-sugar twist using Cinnamon Toast Crunch cereal. The marshmallow and butter mixture binds the cereal into soft, chewy bars that are bursting with cinnamon flavor.
These treats are quick to make and bring a comforting, nostalgic feeling to snack time. They're great for a busy afternoon pick-me-up or a simple dessert after dinner.
You'll appreciate how easy the preparation is, especially when you want something sweet without turning on the oven.
Why This Recipe Works
This recipe combines convenience and delicious cinnamon flavor in a treat that your whole family can enjoy. It's quick to prepare, uses pantry staples, and offers a fresh take on traditional cereal treats.
- Convenience - Comes together in under 15 minutes with few ingredients and no baking.
- Flavor balance - Combines sweet marshmallows with warm cinnamon sugar for a cozy taste.
- Texture - Soft, chewy cereal clusters with a slight crunch for interest.
- Appeal - Kid-friendly and perfect for casual snacking or packed lunches.
- Cleanup ease - Uses a single pot and pan, minimizing mess after making.
Ingredient Swap Ideas
Swapping ingredients can help you adjust the recipe for different dietary preferences or to change the flavor slightly. Here are some options that keep the recipe's core intact.
- Cinnamon Toast Crunch cereal - Use a similar cinnamon-flavored cereal or plain crispy rice cereal with added cinnamon.
- Butter - Replace with coconut oil or a dairy-free spread for a vegan version.
- Marshmallows - Use vegan marshmallows if avoiding gelatin.
- Cinnamon sugar topping - Mix pure cinnamon with a sugar substitute like erythritol for a lower sugar variation.
- Add-ins - Stir in chopped nuts or dried fruit for extra texture and flavor.
Ingredients
- 6 cups Cinnamon Toast Crunch cereal - Provides the base with cinnamon and sugar flavor.
- 4 tablespoons unsalted butter - Melted to bind the treats and add richness.
- 1 package (10 ounces) marshmallows - Melts to create the sticky, chewy texture.
- 1 teaspoon ground cinnamon - Enhances the cinnamon flavor for extra warmth.
- 2 tablespoons granulated sugar - Mixed with cinnamon for sprinkling on top.
- Cooking spray or butter - For greasing the pan to prevent sticking.
Instructions
- Grease a 9x13-inch baking dish with cooking spray or butter and set aside.
- In a large pot, melt the butter over low heat. Add the marshmallows and stir continuously until completely melted and smooth. Remove from heat.
- Stir in the ground cinnamon until evenly combined with the melted marshmallow mixture.
- Add the Cinnamon Toast Crunch cereal to the pot and gently fold it into the marshmallow mixture, making sure all cereal pieces are well coated.
- Transfer the mixture into the prepared baking dish. Using a buttered spatula or wax paper, press the mixture firmly and evenly into the pan.
- Combine the sugar and additional ground cinnamon in a small bowl, then lightly sprinkle this mixture over the top of the pressed cereal treats for an extra cinnamon sugar crunch.
- Allow the treats to cool completely at room temperature for about 1 hour before cutting into squares. Store in an airtight container for up to 3 days.
12. No-Bake Cheesecake Cups

No-Bake Cheesecake Cups are a fantastic way to enjoy a classic dessert without any oven time. They combine a simple cookie crust with a creamy, tangy filling, offering a refreshing treat that comes together quickly.
These individual-sized portions are great for serving at gatherings or for a quick after-dinner snack. The smooth texture of the cream cheese mixture goes well with the crunch of the cookie base, making every bite satisfying.
Because they use common pantry ingredients, this recipe is incredibly accessible. You can customize toppings or crust flavors to suit your preferences, making it a versatile option for a variety of occasions.
Why This Recipe Works
This recipe delivers a creamy and tangy dessert that's quick to prepare and easy to serve. It works well for those moments when you want something sweet but straightforward.
- Convenience - Requires no baking, ready in under 30 minutes.
- Flavor balance - Combines the richness of cream cheese with a subtle sweetness and a hint of vanilla.
- Texture - Crisp cookie crust contrasts with smooth and creamy filling.
- Appeal - Individual portions make it perfect for sharing or portion control.
- Cleanup or serving ease - Made in cups or small jars for minimal mess and attractive presentation.
Ingredient Swap Ideas
Swapping ingredients can help tailor these cheesecake cups to your dietary needs or flavor preferences. A few simple adjustments keep the dessert just as enjoyable.
- Cookie crust - Use gluten-free cookies to accommodate gluten sensitivity.
- Sweetener - Substitute sugar with honey or maple syrup for a natural alternative.
- Cream cheese - Replace with a non-dairy cream cheese for a vegan-friendly version.
- Toppings - Fresh berries can be swapped for fruit compote or chocolate shavings.
- Crust texture - Use crushed granola or nuts instead of cookies for extra crunch.
Ingredients
- 1 ½ cups crushed cookies - Use graham crackers or digestive biscuits for the crust.
- 5 tablespoons unsalted butter melted - To bind the cookie crumbs.
- 8 ounces cream cheese softened - The base of the cheesecake filling.
- ½ cup powdered sugar - Adds sweetness without graininess.
- 1 teaspoon vanilla extract - Enhances the flavor.
- ½ cup heavy cream - Whipped to create a light, airy texture for the filling.
- Fresh fruit or fruit preserves - For topping the cheesecake cups.
Instructions
- Combine the crushed cookies and melted butter in a bowl. Stir well until the mixture holds together when pressed. Divide the crumb mixture evenly among serving cups and press firmly to form the base.
- In a separate bowl, beat the softened cream cheese until smooth. Add powdered sugar and vanilla extract, continuing to mix until fully incorporated.
- Whip the heavy cream in another bowl until stiff peaks form, then gently fold it into the cream cheese mixture, keeping the texture light and airy.
- Spoon the cream cheese filling over the cookie crust in each cup, smoothing the tops with a spoon or spatula.
- Chill the cheesecake cups in the refrigerator for at least 2 hours to set. Before serving, add fresh fruit or a spoonful of fruit preserves on top to finish.
- Serve chilled, enjoying the crisp crust and creamy filling in every bite.
13. Brown Sugar and Cinnamon Baked Apples (Microwave Version)
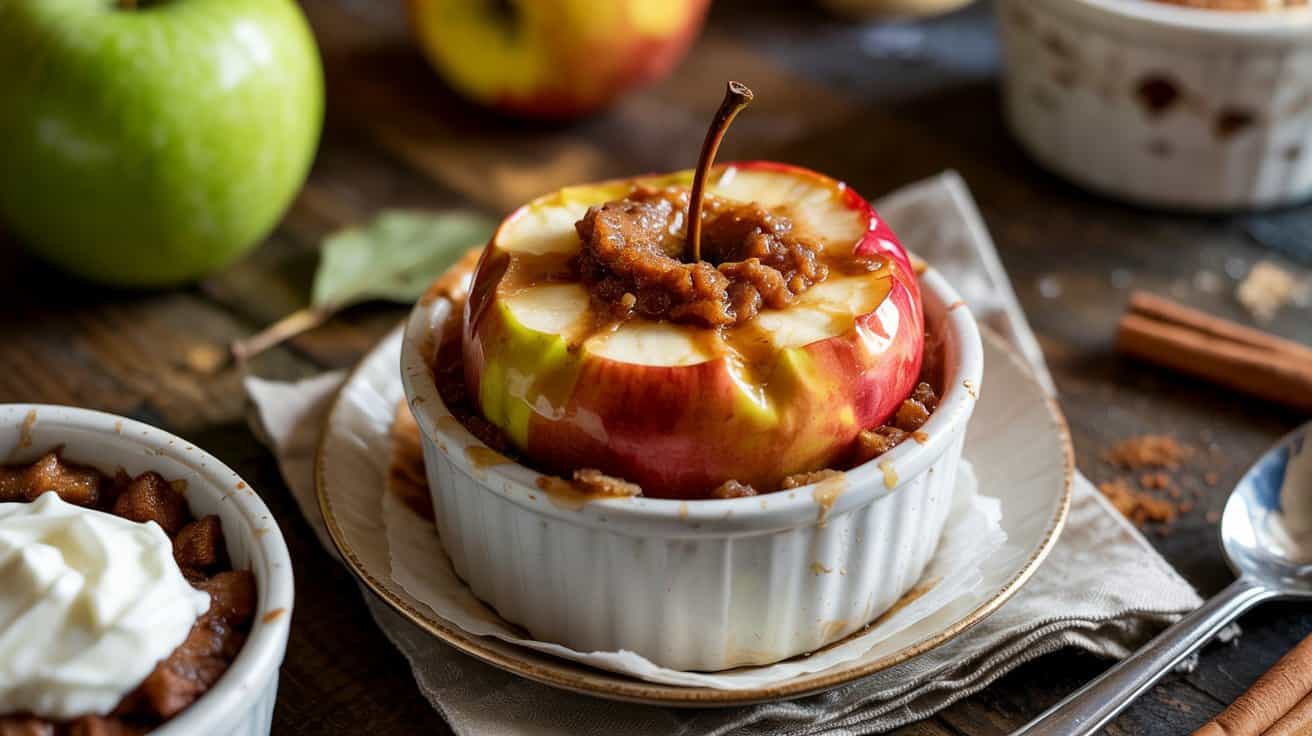
This Brown Sugar and Cinnamon Baked Apples recipe offers a warm, comforting dessert that comes together quickly in the microwave. It's an ideal choice when you want a sweet treat without waiting for the oven to heat or spending too much time in preparation.
The combination of tender apples, sweet brown sugar, and fragrant cinnamon makes every bite cozy and satisfying. This recipe works well with either fresh or canned apples, making it versatile and easy to whip up with what you have on hand.
You'll appreciate how simple it is to customize this dessert with your preferred toppings or additions. It's perfect for a quiet night in or a casual family gathering whenever you want a gently spiced sweet finish.
Why This Recipe Works
This microwave baked apples recipe balances convenience with comforting flavors, making it a go-to dessert that's ready quickly and tastes like classic baked apples.
- Convenience - Prepares in minutes using common ingredients and a microwave.
- Flavor balance - Combines the natural sweetness of apples with rich brown sugar and warm cinnamon notes.
- Texture - Produces tender, juicy apples softened perfectly without becoming mushy.
- Appeal - Suitable for all ages and works as a quick snack or dessert option.
- Minimal cleanup - Uses just one microwave-safe dish for easy cleaning.
Ingredient Swap Ideas
Swapping some ingredients here allows you to adjust this recipe for dietary preferences or to alter the flavor while keeping the core idea intact.
- Use maple syrup or honey instead of brown sugar to add a different natural sweetness and new flavor depth.
- Replace cinnamon with pumpkin pie spice or nutmeg for a warm spice variation that still goes with the apples.
- Try pear slices or peach slices instead of apples if you want to experiment with other fruits that work well in microwaving.
- Use unsweetened applesauce or diced canned apples in juice to reduce sugar or calories while maintaining moisture.
- Add chopped nuts such as walnuts or pecans for extra texture and a nutty taste.
Ingredients
- 2 large apples - peeled, cored, and sliced into thin wedges.
- 2 tablespoons brown sugar - packed, adds sweetness and caramel notes.
- 1 teaspoon ground cinnamon - for warm spice flavor.
- 1 tablespoon unsalted butter - melted, helps soften apples and adds richness.
- 1 teaspoon lemon juice - prevents browning and adds slight freshness.
- Optional toppings: chopped walnuts, vanilla ice cream, or whipped cream - for serving.
Instructions
- Place the sliced apples in a microwave-safe dish. Drizzle with lemon juice and toss gently to coat.
- Sprinkle the brown sugar and cinnamon evenly over the apple slices. Pour melted butter on top.
- Cover the dish loosely with microwave-safe plastic wrap or a microwave cover to trap steam.
- Microwave the apples on high for 3 to 4 minutes until they are tender but still hold their shape. Cooking time may vary based on microwave wattage.
- Carefully remove the cover to avoid steam burns and give the apples a gentle stir to distribute the melted sugar and spices.
- Serve warm, garnished with optional chopped nuts, a scoop of vanilla ice cream, or a spoonful of whipped cream, if desired.
Grill-side gatherings often benefit from portable, crowd-pleasing sweets like bars, cobblers, and skewered desserts; find seasonal ideas at desserts for summer BBQs. Fresh or canned summer fruit can be dressed into quick treats-crisp-style bakes, compotes, or chilled parfaits-so consider easy fruit desserts for summer gatherings when fruit is plentiful.

Andrew Gray is a seasoned food writer and blogger with a wealth of experience in the restaurant and catering industries. With a passion for all things delicious, Andrew has honed his culinary expertise through his work as a personal chef and caterer.
His love for food led him to venture into food writing, where he has contributed to various online publications, sharing his knowledge and insights on the culinary world. As the proud owner of CooksCrafter.com, Andrew covers a wide range of topics, including recipes, restaurant reviews, product recommendations, and culinary tips.
Through his website, he aims to inspire and educate fellow food enthusiasts, offering a comprehensive resource for all things food-related.