
Back-to-school season calls for snacks and desserts that fit seamlessly into busy routines, especially portable, make-ahead options like no-bake bars and freezer-ready bites. This curated collection features 10 treats that serve double duty-both satisfying sweet cravings and providing convenient, kid-friendly options (sized for lunchboxes and portable for on-the-go).
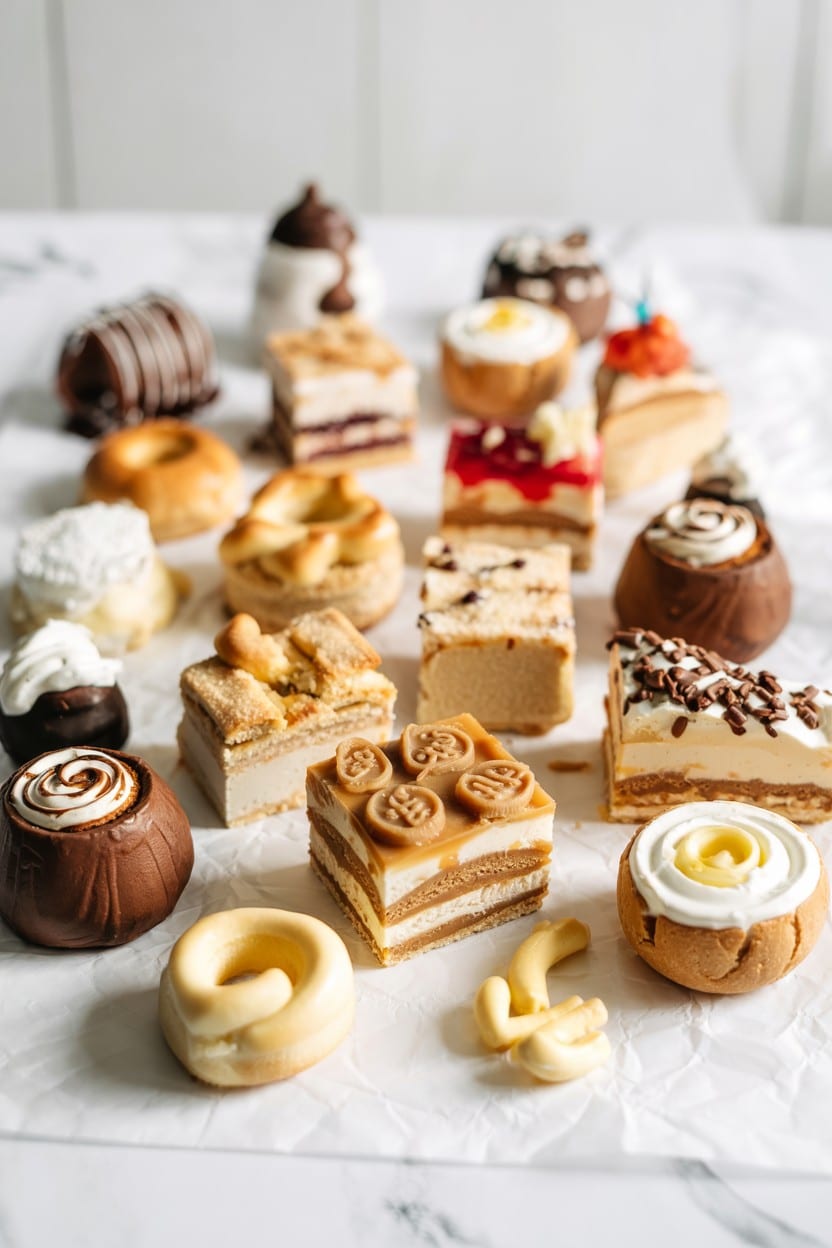
The recipes range from no-bake bars and fruity parfaits to baked muffins and simple frozen bites. Each one combines familiar flavors with wholesome ingredients, offering a variety of textures and tastes that appeal to children and adults alike.
Whether you're packing lunchboxes or preparing after-school snacks, these recipes are designed to be straightforward and enjoyable.
Together, these 10 back-to-school treats make it easy to keep both nutrition and flavor on the table without spending too much time or energy. They require minimal cleanup and use accessible ingredients, helping to simplify hectic days while keeping everyone happy.
1. Peanut Butter Banana Oat Bars
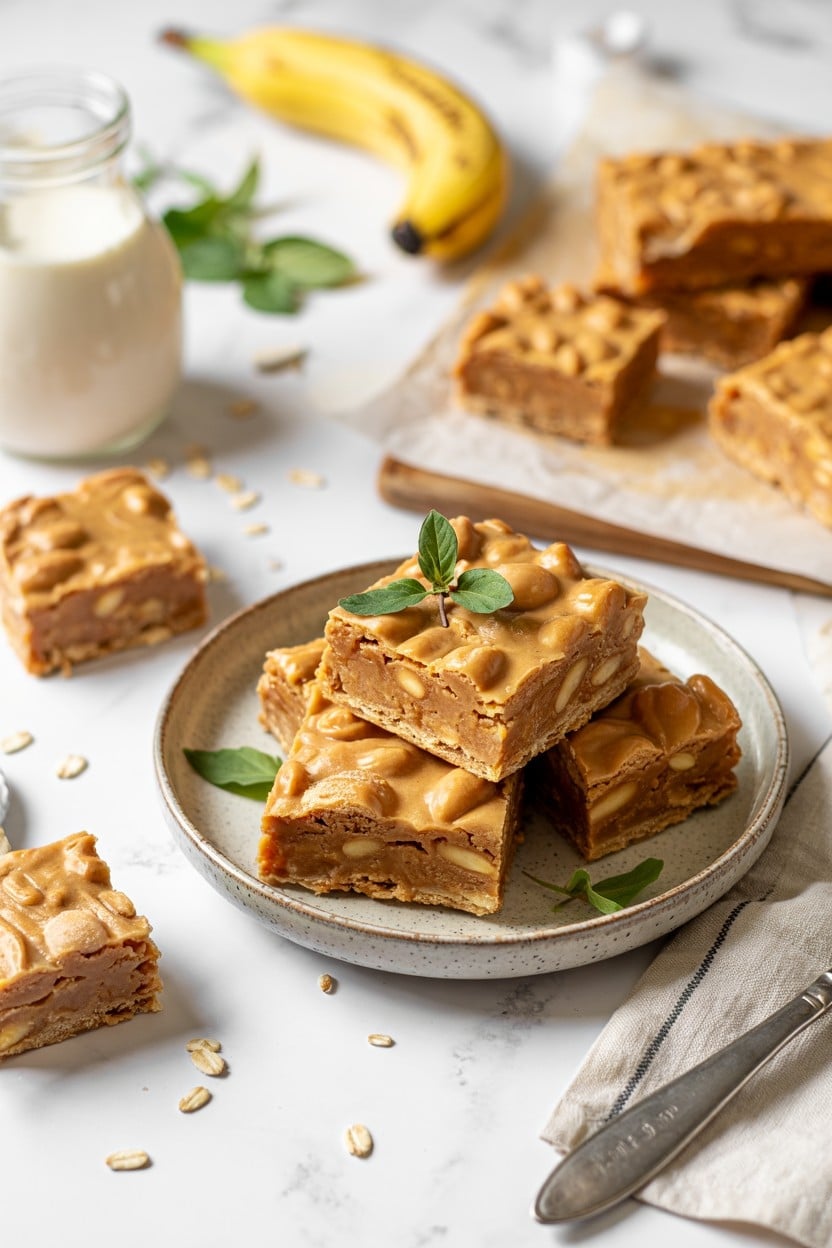
These Peanut Butter Banana Oat Bars are a simple, wholesome snack you can prepare quickly without turning on the oven, made with ripe bananas, creamy peanut butter, and rolled oats (use old-fashioned rolled oats for best chew) for a chewy texture. They combine the natural sweetness of ripe bananas with creamy peanut butter and hearty oats to create a satisfying chew in every bite.
With no baking involved, these bars are ideal for busy days when you want something nutritious and filling to grab on the go, and for a baked alternative try easy air-fryer peanut butter cookie ideas; if peanut butter isn't an option, consider peanut butter substitutes for simple swaps.
Why This Recipe Works
This recipe offers a smart solution for a wholesome snack that’s ready in minutes and carries satisfying flavors everyone enjoys. It pairs familiar ingredients in a way that feels both nourishing and approachable.- Convenience - No-bake preparation means you can have these bars ready quickly without using the oven.
- Flavor balance - The combination of creamy peanut butter and naturally sweet banana creates a pleasant, mellow taste.
- Texture - Chewy oats add substance, while smooth nut butter helps bind the mixture.
- Appeal - Family-friendly and portable, these bars work well for all ages and various occasions.
Ingredient Swap Ideas
Adjusting ingredients can customize these bars for dietary preferences or to keep your pantry stocked with what you have on hand. A few swaps easily maintain the recipe's character.- Peanut butter - Use almond or cashew butter instead for a different nutty flavor.
- Oats - Substitute rolled oats with gluten-free oats if needed.
- Sweetener - Add a tablespoon of honey or maple syrup if your bananas are not quite ripe enough.
- Add-ins - Mix in a handful of dark chocolate chips or chopped nuts for extra texture and richness.
Ingredients
- 2 large ripe bananas - Mashed until smooth for natural sweetness and moisture.
- 1 cup peanut butter - Creamy or crunchy based on your texture preference.
- 2 ½ cups rolled oats - Provides the chewy base and holds the bars together.
- 1 teaspoon vanilla extract - Enhances the overall flavor with a subtle warmth.
- ¼ teaspoon salt - Balances the sweetness and elevates the flavors.
Instructions
- Line an 8x8-inch baking dish with parchment paper, leaving some overhang for easy removal.
- In a large bowl, mash the ripe bananas thoroughly until smooth. Add the peanut butter and vanilla extract, stirring until fully combined.
- Sprinkle the oats and salt over the wet ingredients and mix well until the oats are evenly distributed throughout the mixture.
- Transfer the mixture to the prepared baking dish and press it firmly with a spatula or your hands to create an even layer.
- Refrigerate the bars for at least 2 hours or until firm enough to cut. Use the parchment paper to lift the bars from the dish and slice them into squares.
2. Chocolate Dipped Apple Slices
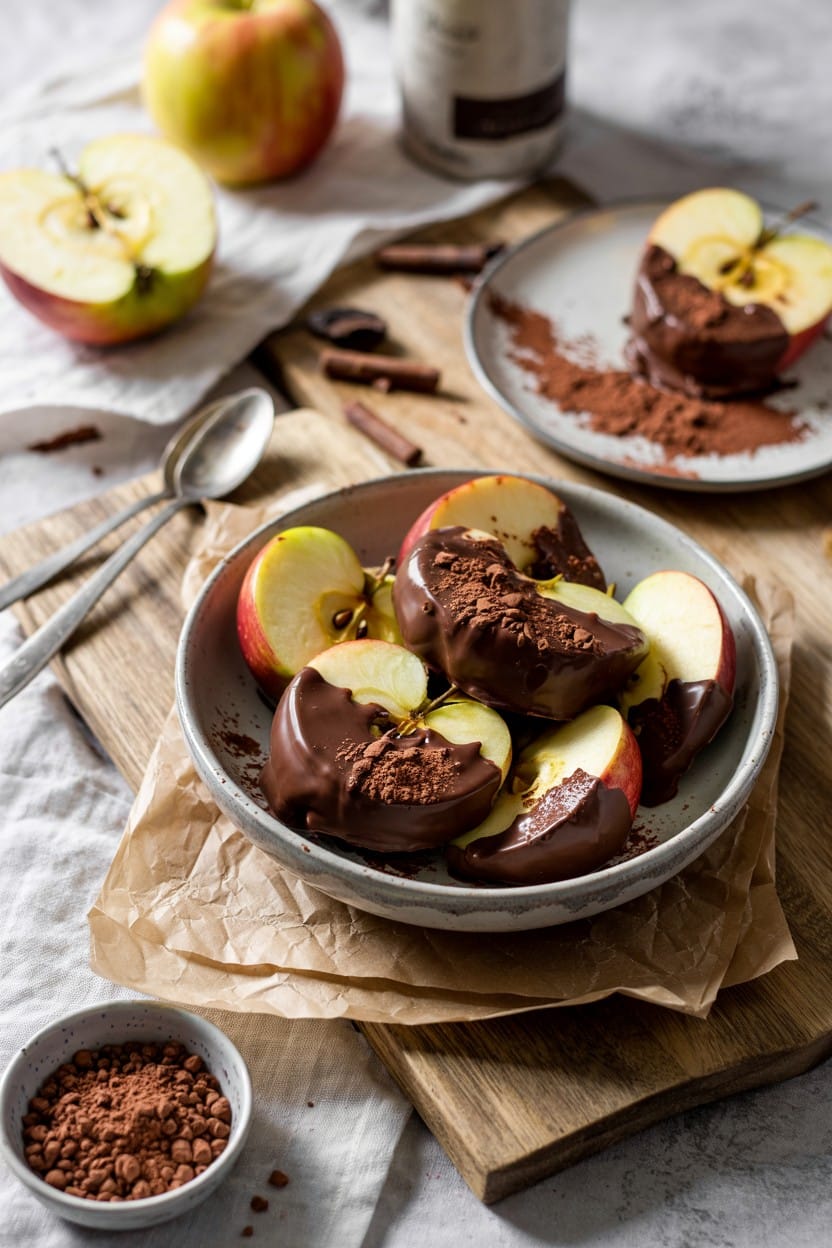
This simple treat combines crisp apple slices with rich dark chocolate for a snack that's both refreshing and indulgent, using crisp Granny Smith or Honeycrisp apples and melted bittersweet dark chocolate (60-70% cacao) for contrast. The natural sweetness of the apples pairs beautifully with the slightly bitter chocolate, while a sprinkle of nuts or coconut adds a satisfying crunch.
It's a quick recipe with minimal ingredients, making it a convenient option for a healthy dessert or an afternoon pick-me-up; for another quick chocolate treat try easy air-fryer chocolate bark recipes.
If you prefer different chocolate forms for coatings or mix-ins, try chocolate chip substitutes for bake-ins when a specific chocolate form is unavailable.
Why This Recipe Works
This recipe is a straightforward way to enjoy fruit with a chocolate twist, offering delightful textures and flavors in every bite.- Convenience - Quick to prepare with no cooking required aside from melting chocolate.
- Flavor balance - The tartness of the apple complements the bittersweet chocolate perfectly.
- Texture - Crisp apple slices meet smooth melted chocolate and crunchy toppings.
- Appeal - A visually appealing snack that's great for kids and adults alike.
Ingredient Swap Ideas
Swapping ingredients can help match dietary preferences or simply change the flavor profile to suit different tastes. These swaps keep the core idea intact while introducing variety.- Apple types - Try Granny Smith for tartness or Fuji for extra sweetness.
- Chocolate variety - Use milk or white chocolate if you prefer a creamier, sweeter coating.
- Toppings - Swap chopped nuts for shredded coconut, pumpkin seeds, or even crushed pretzels for different textures.
- Nut-free option - Use toasted coconut flakes instead of nuts to keep things crunchy without allergens.
Ingredients
- 2 large apples - Crisp varieties like Gala, Honeycrisp, or Granny Smith, washed and sliced about ¼ inch thick.
- 4 ounces dark chocolate - Choose 60-70% cocoa for a balanced bittersweet flavor.
- ¼ cup chopped nuts - Such as walnuts, pecans, or almonds, toasted if desired.
- 2 tablespoons shredded coconut - Optional, for an extra layer of texture and flavor.
Instructions
- Rinse and dry the apples thoroughly, then slice them evenly about ¼ inch thick. Remove any seeds from each slice.
- Melt the dark chocolate gently using a double boiler or microwave in short bursts, stirring frequently to avoid burning.
- Dip each apple slice halfway into the melted chocolate, allowing any excess to drip off before placing the slice on a parchment-lined tray.
- Immediately sprinkle the chocolate-coated portion with chopped nuts or coconut to ensure they stick well.
- Place the tray in the refrigerator and chill for at least 15 minutes until the chocolate sets firm.
3. Yogurt and Berry Parfaits with Granola
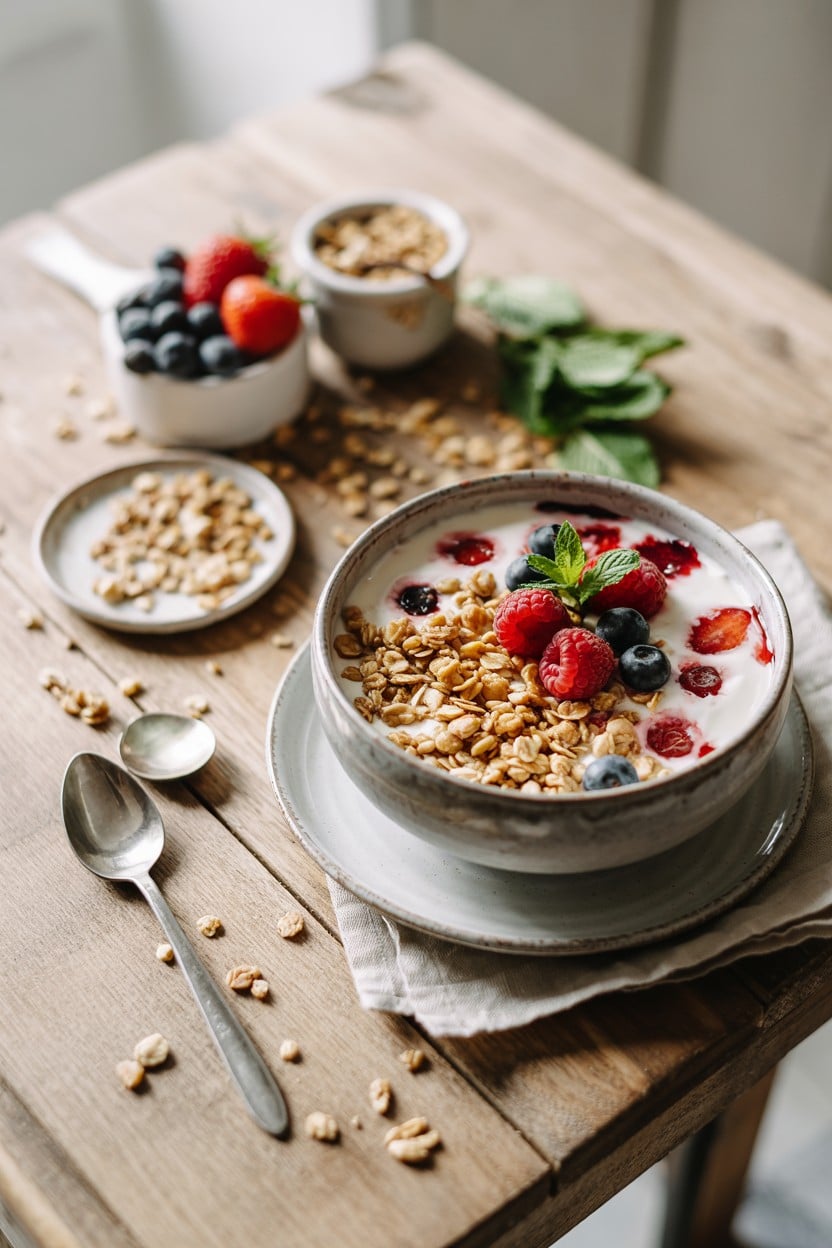
Yogurt and berry parfaits with granola make a refreshing and satisfying snack that feels both light and indulgent. The creamy Greek yogurt (plain Greek yogurt has more protein and less added sugar) pairs beautifully with the natural sweetness of fresh berries, while the crunchy granola adds a delightful texture contrast.
This recipe is straightforward and quick to put together, making it an ideal choice for busy mornings or a wholesome dessert after a meal; if you need dairy-free options, try Greek yogurt substitutes for quick swaps.
Why This Recipe Works
This parfait combines fresh, wholesome ingredients that deliver a balance of flavor, texture, and nutrition. It’s a simple way to enjoy a treat that feels special without taking much time to prepare.- Convenience - Quick to assemble with no cooking needed, great for busy schedules.
- Flavor balance - Creamy and tangy yogurt complements sweet and slightly tart berries.
- Texture - Crunchy granola adds contrast to smooth yogurt and juicy fruit.
- Appeal - Colorful, layered presentation makes it inviting and suitable for all ages.
Ingredient Swap Ideas
Adjusting ingredients can make this recipe fit various tastes or dietary needs without losing its essence. These swaps are easy to make and still provide that creamy, crunchy, fruity combination.- Greek yogurt - Substitute with dairy-free coconut or almond yogurt for a vegan option.
- Mixed berries - Use any fresh or frozen fruit like mango, peaches, or sliced banana.
- Granola - Replace with chopped nuts or toasted oats if you prefer less sweetness or need a grain-free alternative.
- Sweetener (optional) - Drizzle with honey or maple syrup if you like added sweetness.
Ingredients
- 2 cups Greek yogurt - Choose plain or vanilla for a naturally creamy base.
- 1 cup mixed fresh berries - Use strawberries, blueberries, raspberries, or blackberries.
- 1 cup granola - Select your favorite crunchy granola, plain or flavored.
- 1 tablespoon honey or maple syrup - Optional, for extra sweetness.
Instructions
- Start by rinsing the berries and patting them dry. If using larger berries like strawberries, slice them into bite-sized pieces.
- Spoon about two tablespoons of Greek yogurt into the bottom of each serving glass or bowl.
- Add a layer of mixed berries, followed by a layer of granola. Repeat these layers until the glass is nearly full, finishing with a handful of granola on top.
- Drizzle honey or maple syrup over the parfaits if you want a touch more sweetness.
- Serve immediately for the best texture, or cover and refrigerate for up to a few hours if preparing ahead.
4. Frozen Yogurt Covered Blueberries
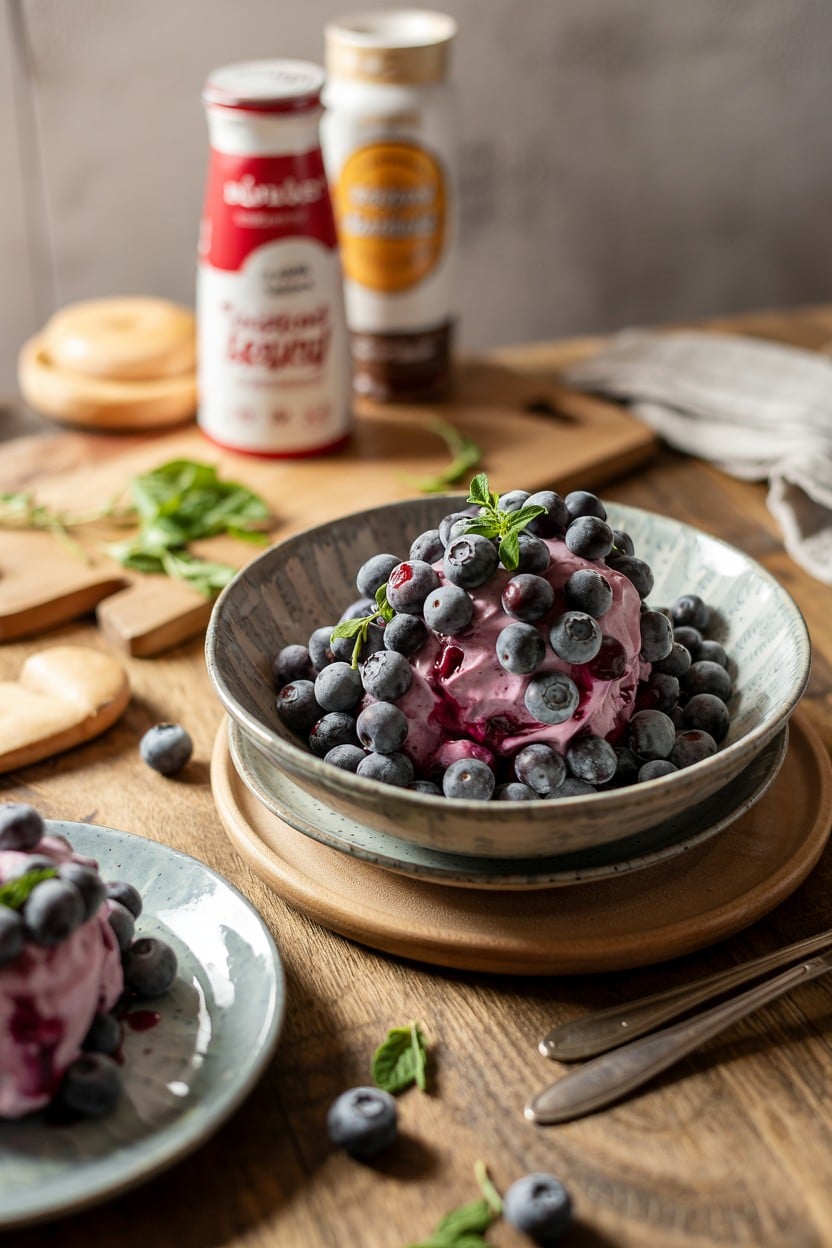
This simple snack combines the natural sweetness of blueberries with the creamy tang of yogurt, creating a refreshing treat that's both light and satisfying. It's incredibly easy to prepare and perfect for a quick snack, a healthy dessert, or a cool bite on a warm day.
The contrast between the frozen blueberries and the yogurt coating adds a pleasant texture, making each bite enjoyable and refreshing. These little bites are portable and keep well in the freezer, so you can have a wholesome snack ready whenever you need it.
Why This Recipe Works
This recipe offers a quick, healthy way to enjoy fruit with a creamy coating, making it a go-to for busy days or casual gatherings. The flavor and texture balance makes it appealing and easy to enjoy anytime.- Convenience - Requires minimal prep and freezes well for grab-and-go snacking.
- Flavor balance - Combines the sweetness of blueberries with the tanginess of yogurt.
- Texture - Delivers a cool, creamy exterior with a juicy frozen center.
- Appeal - Suitable for kids and adults, and works well for portion-controlled treats.
Ingredient Swap Ideas
Swapping ingredients can help tailor this snack to different taste preferences or dietary needs without losing the fresh, creamy essence.- Yogurt base - Use dairy-free or plant-based yogurt to keep this recipe vegan.
- Fruit choice - Substitute blueberries with raspberries, blackberries, or pomegranate seeds for variation.
- Sweetener - Mix a little honey or maple syrup into the yogurt if you prefer a sweeter coating.
- Coating thickness - Use Greek yogurt for a thicker coating, or blend plain yogurt with cream cheese for extra richness.
Ingredients
- 1 cup fresh blueberries - Rinsed and dried thoroughly.
- 1 cup plain yogurt - Use Greek yogurt or regular, depending on your preference.
- 1 to 2 teaspoons honey or maple syrup (optional) - For a touch of natural sweetness.
- 1 teaspoon vanilla extract (optional) - Adds a subtle flavor to the yogurt coating.
Instructions
- In a small bowl, whisk together the yogurt, honey or maple syrup, and vanilla extract until smooth and combined.
- Using a toothpick or fork, dip each blueberry into the yogurt mixture, coating it evenly. Gently shake off any excess yogurt.
- Place the coated blueberries on a baking sheet lined with parchment paper, spacing them apart so they don't stick together.
- Freeze the blueberries for at least 2 hours, or until the yogurt coating is firm.
- Transfer the frozen yogurt-covered blueberries to an airtight container or freezer bag for storage. Keep frozen and enjoy as a cool, refreshing snack.
5. No-Bake Energy Bites with Dates and Seeds
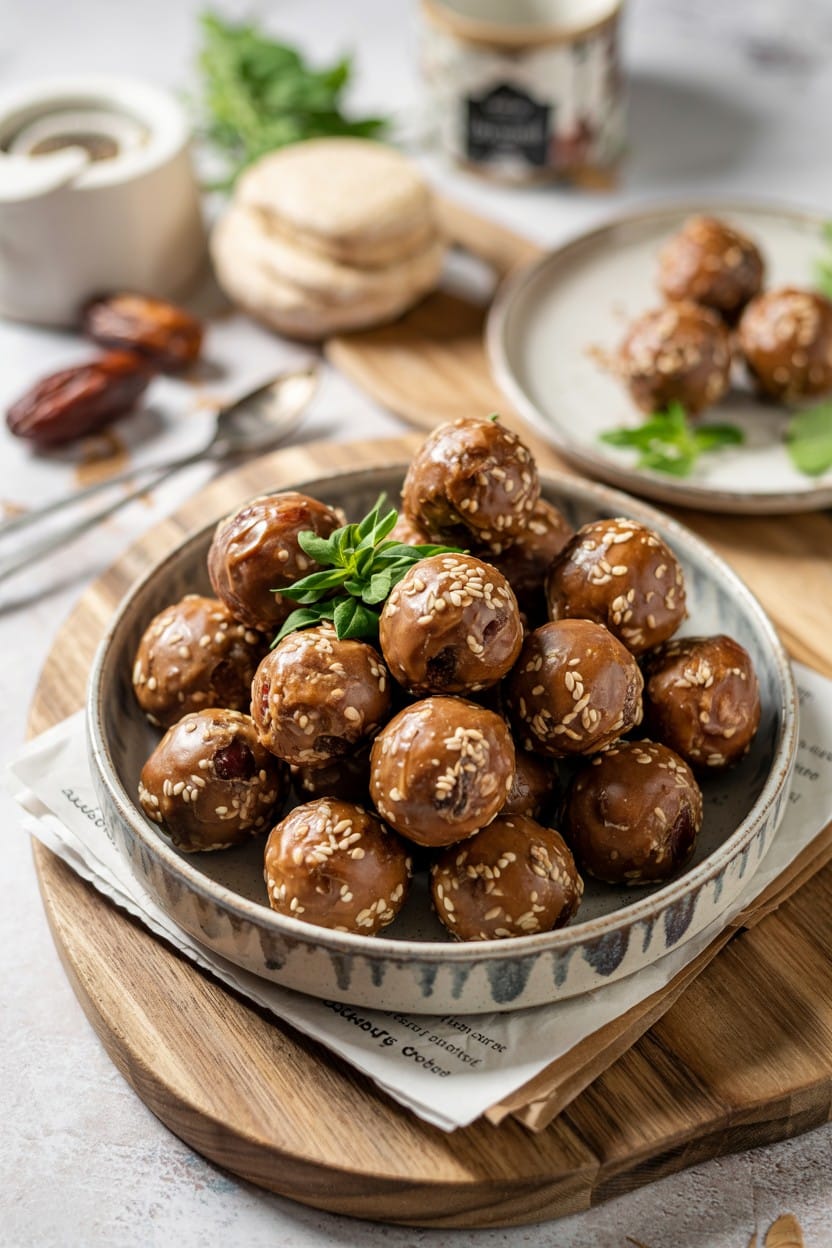
These energy bites are a quick snack you can prepare without turning on the oven. Combining natural sweetness from dates with the crunch of seeds and the heartiness of oats, they offer a balanced bite full of nutrients and flavor.
They come together in minutes and hold up well for several days, making them an ideal grab-and-go option for busy mornings or afternoon hunger.
Why This Recipe Works
This recipe blends practical nutrition with simple preparation for a snack that appeals to both kids and adults.- Convenience - No baking or cooking required, just mix and roll.
- Flavor balance - Sweet dates pair nicely with nutty seeds and creamy nut butter.
- Texture - Chewy, crunchy, and smooth all in one bite-sized ball.
- Appeal - Suitable for all ages and tastes, kid-friendly with whole ingredients.
Ingredient Swap Ideas
Adjusting ingredients can help you customize these energy bites to fit different preferences or pantry items.- Nut butter - Substitute almond butter with peanut butter or sunflower seed butter for a nut-free version.
- Seeds - Swap chia seeds for flaxseeds or hemp seeds to tweak texture and nutrition.
- Sweetener - If dates aren't available, replace them with dried figs or apricots, chopped finely.
- Oats - Use gluten-free oats if needed to keep this snack gluten-sensitive friendly.
Ingredients
- 1 cup rolled oats - Provides a chewy, hearty base with fiber.
- ½ cup pitted dates - Natural sweetness and sticky texture to bind ingredients.
- ⅓ cup nut butter - Adds creaminess and healthy fats; almond or peanut preferred.
- 2 tablespoons chia seeds - Boosts fiber, omega-3s, and nutrition.
- ¼ cup mixed seeds - Such as sunflower or pumpkin seeds for added crunch.
- 1 teaspoon vanilla extract - Enhances overall flavor subtly.
- ¼ teaspoon salt - Balances sweetness and deepens taste.
Instructions
- Put the rolled oats and mixed seeds into a food processor and pulse to lightly chop the seeds and break down the oats slightly.
- Add the pitted dates, nut butter, chia seeds, vanilla extract, and salt to the processor. Pulse until the mixture sticks together and forms a coarse dough.
- Scoop out spoonfuls of the mixture and roll them between your hands into bite-sized balls.
- Place the energy bites on a lined plate or tray and refrigerate for at least 30 minutes to firm up.
- Store the energy bites in an airtight container in the fridge for up to one week or freeze for longer storage.
6. Mini Fruit and Cream Cheese Crescents
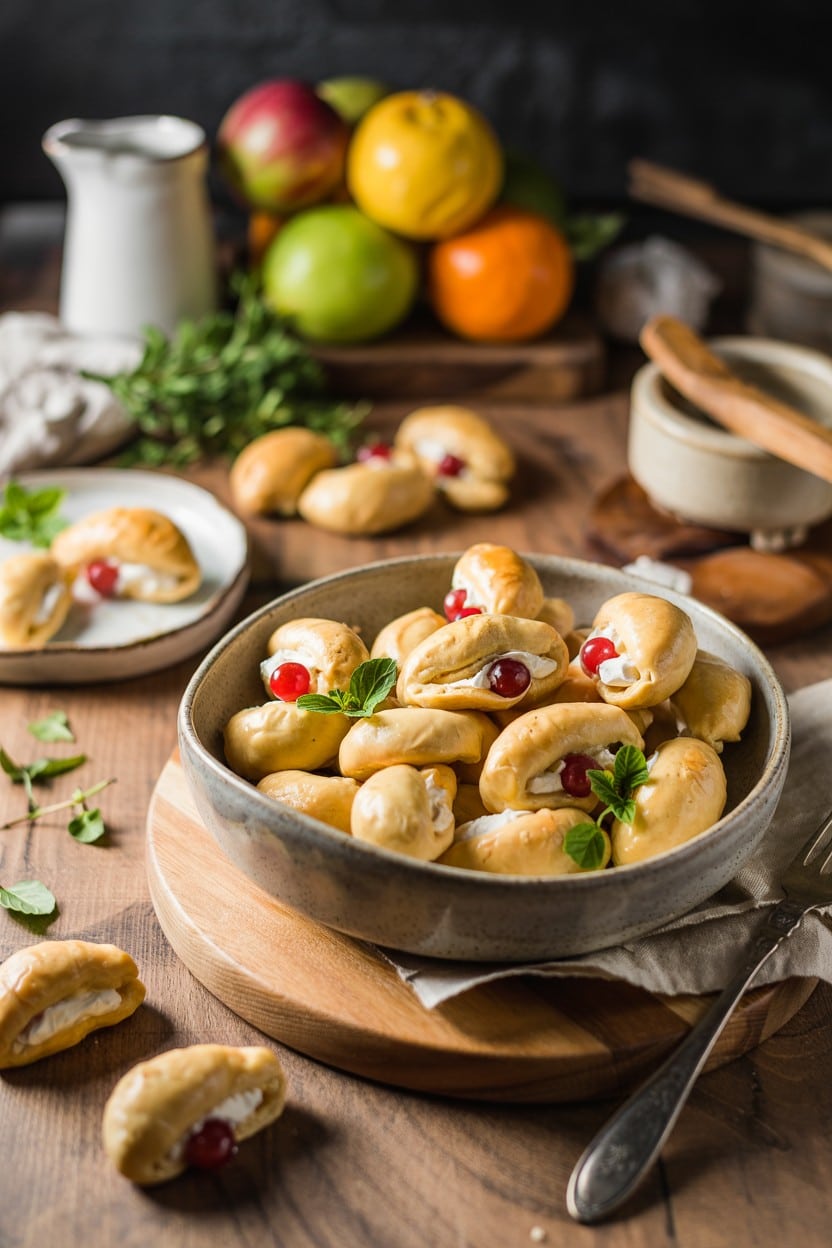
Mini fruit and cream cheese crescents are a wonderful addition to any lunchbox or snack tray. These little pockets bring together flaky, buttery pastry with a rich, creamy filling and a burst of fruity sweetness from mixed jams.
They're straightforward to prepare and bake quickly, making them a smart choice for busy days or casual get-togethers. Each bite offers a satisfying contrast between the tender pastry and the soft filling, with just the right touch of fruitiness.
Why This Recipe Works
This recipe delivers a tasty and convenient treat that suits a variety of occasions and appetites. It balances simple ingredients to create a satisfying sweet snack that appeals to all ages.- Convenience - Uses ready-made puff pastry for quick assembly and baking.
- Flavor balance - Combines creamy cheese with sweet and tangy fruit jam.
- Texture - Features a flaky, golden exterior with a soft, smooth filling inside.
- Serving ease - Perfectly portioned for snacks, lunches, or casual entertaining.
Ingredient Swap Ideas
Adjusting the filling ingredients lets you customize these crescents to your tastes or dietary needs without losing their essence. Here are some straightforward swaps to try.- Cream cheese - Replace with mascarpone or ricotta for a milder flavor and creamier texture.
- Mixed fruit jam - Use a single fruit preserve like apricot, raspberry, or strawberry depending on preference.
- Puff pastry - Choose a gluten-free version if avoiding gluten, ensuring similar flakiness.
- Sweetener in cream cheese - Add a touch of honey or maple syrup to the cream cheese for extra sweetness if desired.
Ingredients
- 1 sheet puff pastry - thawed, ready to use.
- 4 ounces cream cheese - softened to room temperature for easy spreading.
- ⅓ cup mixed fruit jam - choose your favorite combination or use any single fruit jam.
- 1 egg - beaten, for egg wash to give a golden finish.
- 1 tablespoon granulated sugar - optional, for sprinkling on top before baking.
Instructions
- Preheat your oven to 375°F (190°C) and line a baking sheet with parchment paper.
- Roll out the puff pastry sheet slightly on a floured surface and cut into 8 equal squares.
- In a small bowl, mix the softened cream cheese with the mixed fruit jam until combined but still slightly distinct for texture.
- Place a spoonful of the cream cheese mixture in the center of each pastry square. Fold the corners over to the center and pinch the edges firmly to seal.
- Brush each crescent with the beaten egg and sprinkle a little sugar on top if desired. Bake for 15 to 18 minutes until the pastry is puffed and golden.
- Let the crescents cool slightly before transferring to a wire rack. Serve warm or at room temperature.
7. Homemade Fruit Leather Strips
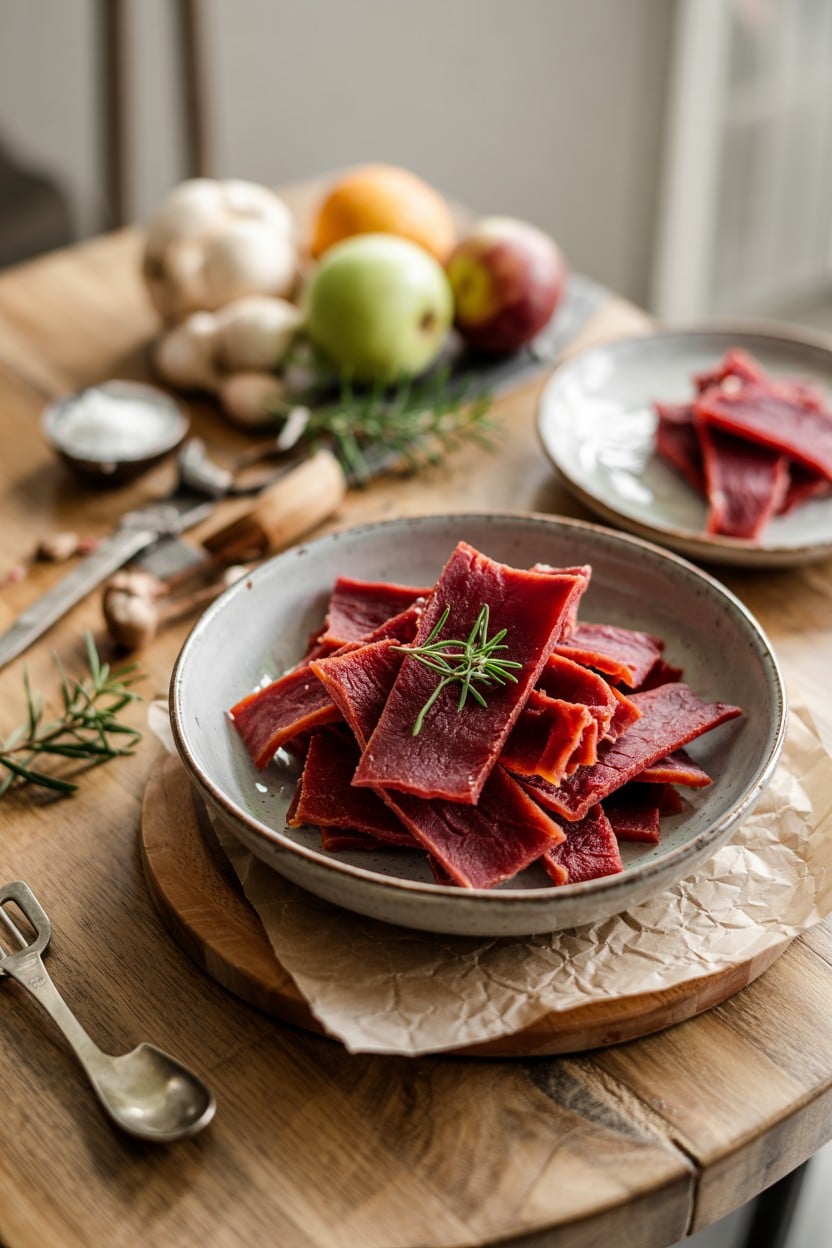
Making your own fruit leather strips at home is a fun way to enjoy a naturally sweet treat without any added preservatives or artificial flavors. These fruit rolls are chewy and flavorful, with a deep fruit taste that shines through every bite.
They're easy to customize based on whatever fruit you have on hand and make a great snack for busy days or packed lunches. Plus, you control the ingredients, keeping it wholesome and simple.
Why This Recipe Works
This recipe combines convenience and wholesome flavor to create a snack you can feel good about.- Simple Preparation - Uses fruit puree and minimal equipment to make an easy-to-follow process.
- Natural Sweetness - Relies on the natural sugars in fruit, avoiding refined sugars or additives.
- Customizable Flavors - Works well with different fruits or combinations to suit your taste.
- Kid-Friendly Snack - Chewy texture and fruity taste appeal to all ages, making it a reliable option for family snacks.
Ingredient Swap Ideas
Adjusting the recipe can help if you want to change flavors or accommodate dietary needs.- Fruit Choices - Use mango, berries, or peaches instead of apples or pears for different flavor profiles.
- Sweetener Options - Add a little honey or maple syrup if your fruit is less ripe or tart.
- Citrus Addition - Lemon or lime juice can be added to enhance brightness and preserve color.
- Spice Variations - Ground cinnamon, ginger, or nutmeg can add subtle warming notes.
Ingredients
- 4 cups fresh fruit, chopped and pureed (such as strawberries, apples, or mango)
- 1 to 2 tablespoons honey or maple syrup, optional for extra sweetness
- 1 tablespoon lemon juice, to prevent browning and add brightness
- ½ teaspoon ground cinnamon, optional for warmth and flavor
Instructions
- Preheat your oven to 170°F (75°C) or the lowest temperature setting it has. Line a baking sheet with a silicone baking mat or parchment paper.
- Blend the chopped fruit in a food processor until smooth. Stir in honey or maple syrup, lemon juice, and cinnamon if using.
- Pour the fruit puree evenly onto the prepared baking sheet, spreading it with a spatula to about ⅛-inch thickness.
- Bake in the oven for 4 to 6 hours, or until the fruit leather is no longer sticky and peels away from the mat or paper easily.
- Let cool, then cut into strips or roll up with parchment paper. Store in an airtight container for up to two weeks.
8. Whole Wheat Cinnamon Sugar Snickerdoodle Muffins
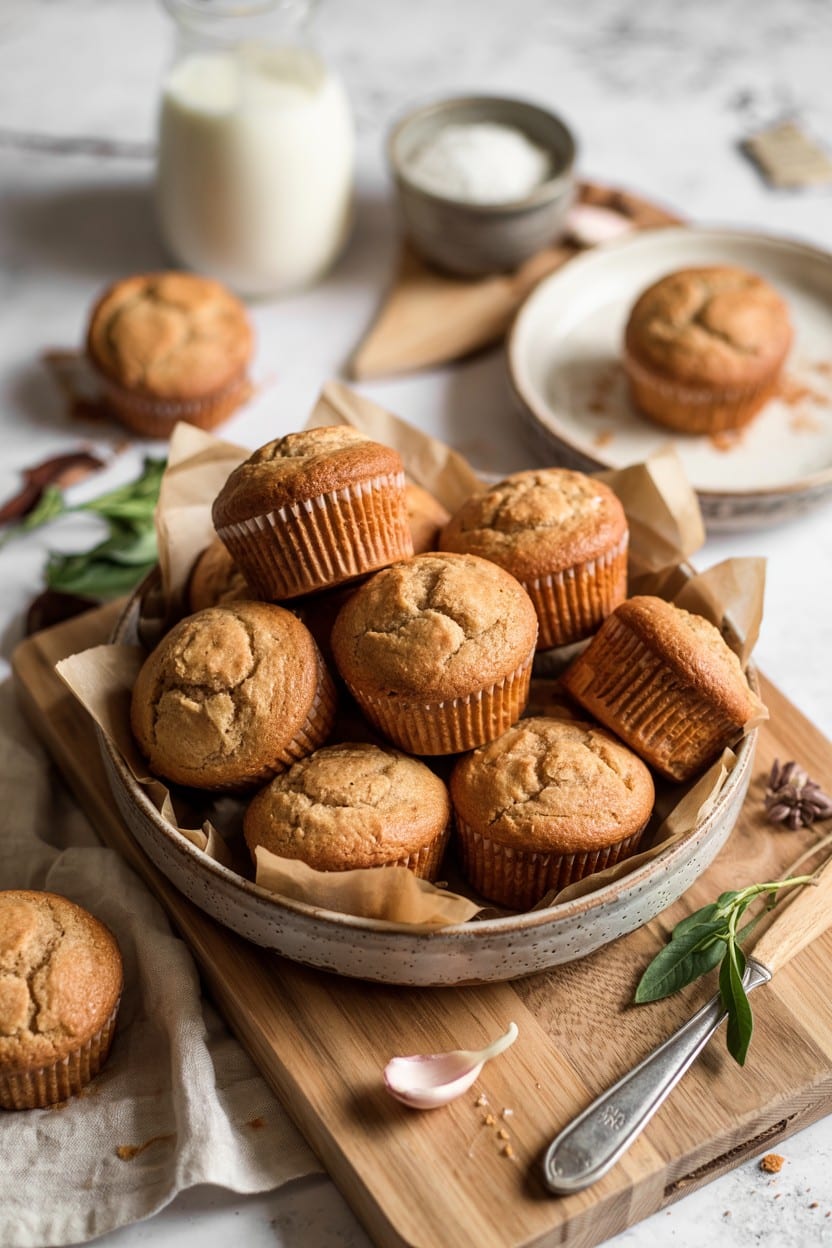
These Whole Wheat Cinnamon Sugar Snickerdoodle Muffins bring the warm, cozy flavors of snickerdoodle cookies into a soft, fluffy muffin form. They offer a lightly sweetened, cinnamon-spiced treat that works well as a morning snack or an afternoon pick-me-up.
Made with whole wheat flour, these muffins add a wholesome touch without sacrificing the familiar sweet and cinnamon flavor you expect. The cinnamon sugar topping gives a pleasant, slightly crunchy finish that contrasts nicely with the tender crumb inside.
Why This Recipe Works
This recipe combines practical benefits with comforting flavors, making it a versatile option for everyday baking.- Wholesome ingredients - Uses whole wheat flour for added fiber and nutrition without overwhelming the original cookie-inspired flavor.
- Balanced sweetness - Lightly sweetened to avoid being too rich, perfect for breakfast or casual snacking.
- Soft texture - Moist and tender interiors with a slight crumbly bite reminiscent of classic snickerdoodle cookies.
- Simple preparation - Straightforward steps and common ingredients keep it accessible for busy home cooks.
Ingredient Swap Ideas
Swapping ingredients in this recipe can help adapt it to dietary restrictions or taste preferences while keeping its core character intact.- Whole wheat flour - Replace with all-purpose flour if you prefer a lighter texture, though it will be less hearty.
- Butter - Use coconut oil or a plant-based margarine for a dairy-free version without losing moisture.
- Sugar - Substitute with coconut sugar or maple sugar for a deeper flavor and less processed option.
- Milk - Swap dairy milk with almond, oat, or soy milk to make it suitable for lactose intolerance.
Ingredients
- 1 ¾ cups whole wheat flour - Provides structure and a nutty flavor.
- 1 teaspoon baking powder - Helps muffins rise and become fluffy.
- ½ teaspoon baking soda - Adds lift and lightness.
- 1 teaspoon ground cinnamon - Gives the classic snickerdoodle spice.
- ½ teaspoon salt - Balances sweetness and enhances flavor.
- ⅓ cup granulated sugar - Sweetens the batter naturally.
- ¼ cup brown sugar - Adds moisture and a subtle molasses note.
- ½ cup unsalted butter, melted - Keeps muffins moist and tender.
- 1 large egg - Binds ingredients together.
- 1 cup milk - Moisturizes and softens the crumb.
- 2 teaspoons vanilla extract - Deepens overall flavor.
- 2 tablespoons granulated sugar - Sweet outer layer.
- 1 tablespoon ground cinnamon - Crisp cinnamon flavor on top.
Instructions
- Preheat your oven to 375°F (190°C). Line a 12-cup muffin tin with paper liners or grease it lightly.
- In a large bowl, whisk together whole wheat flour, baking powder, baking soda, cinnamon, and salt until well combined.
- In a separate bowl, mix melted butter, granulated sugar, brown sugar, egg, milk, and vanilla extract until the mixture is smooth and uniform.
- Pour the wet ingredients into the dry ingredients and stir gently until just combined. Avoid overmixing to keep muffins tender.
- Divide the batter evenly among the muffin cups, filling each about three-quarters full.
- Combine the sugar and cinnamon for the topping in a small bowl. Sprinkle this mixture generously over each muffin.
- Bake for 18 to 22 minutes, or until a toothpick inserted in the center comes out clean. Remove from oven and let muffins cool in the pan for 5 minutes before transferring to a wire rack.
9. Chia Seed Pudding with Mixed Fruit Topping
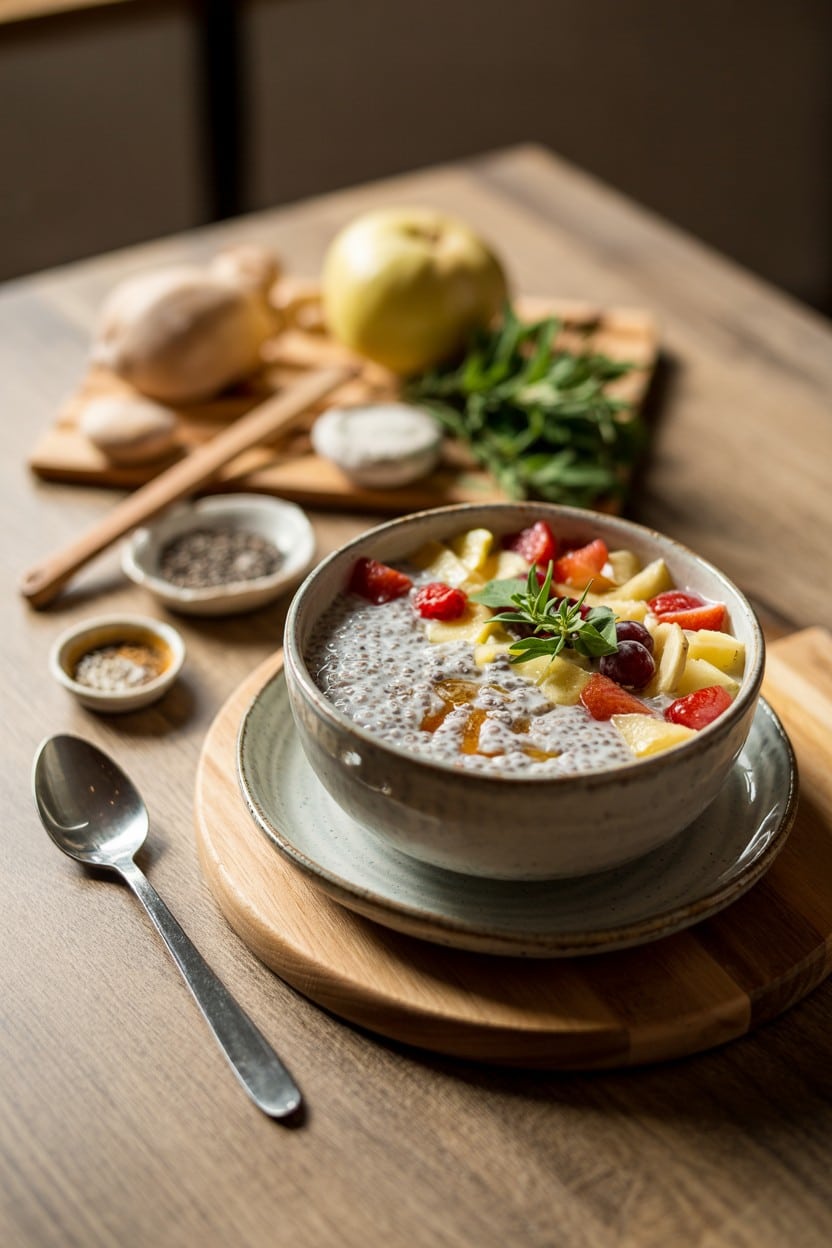
Chia seed pudding is a simple, wholesome treat you can prepare ahead and enjoy anytime. This version combines creamy almond milk with tiny chia seeds that swell into a smooth, custard-like texture by morning.
Topping it with a mix of fresh fruit adds a bright pop of natural sweetness and extra fiber, making this snack or dessert both refreshing and nourishing. The balance of creaminess and juicy fruit is satisfying without feeling heavy.
Why This Recipe Works
This chia seed pudding recipe blends ease and nutrition in a flavorfully fresh package. It works well for busy days, a light dessert, or a healthy snack that keeps you feeling good.- Convenience - Requires no cooking and can be made the night before for a grab-and-go option.
- Flavor balance - Combines mild almond milk creaminess with the natural sweetness and tang of fresh fruit.
- Texture - Smooth, gel-like pudding with a pleasant slight crunch from soaked chia seeds.
- Appeal - Versatile and visually colorful with the mixed fruit topping, making it enjoyable for all ages.
Ingredient Swap Ideas
Swapping out ingredients can tailor this chia pudding to your preferences or dietary needs without losing its core qualities. These simple changes keep the texture and freshness intact.- Almond milk - Use any plant-based milk like oat, coconut, or soy if you prefer a different flavor or need a nut-free option.
- Mixed fruit - Choose seasonal or frozen fruit such as berries, mango, or stone fruit to vary your topping.
- Sweetener - Substitute maple syrup with honey or agave syrup depending on your taste or dietary restrictions.
- Chia seeds - Try ground flaxseed or hemp hearts as an alternative source of fiber and omega-3 fats.
Ingredients
- 3 tablespoons chia seeds - Provides fiber and thickens the pudding as they soak.
- 1 cup unsweetened almond milk - Forms the creamy base with a mild flavor.
- 1 tablespoon maple syrup - Adds subtle sweetness to the pudding.
- ½ teaspoon vanilla extract - Enhances flavor depth with a warm note.
- 1 cup mixed fresh fruit - Such as berries, kiwi, mango, or banana, chopped or sliced for topping.
Instructions
- In a bowl or jar, combine chia seeds, almond milk, maple syrup, and vanilla extract. Stir well to evenly distribute the seeds and dissolve the sweetener.
- Cover the mixture and refrigerate it for at least 4 hours, preferably overnight. During the first 30 minutes, stir again to prevent clumps from forming.
- When ready to serve, give the pudding a good stir to smooth out any lumps.
- Spoon the chia pudding into serving bowls or glasses and top each with the mixed fresh fruit.
- Enjoy immediately, or keep refrigerated for up to 2 days for a quick, nutritious snack or dessert option.
10. Mini Chocolate Chip Zucchini Muffins
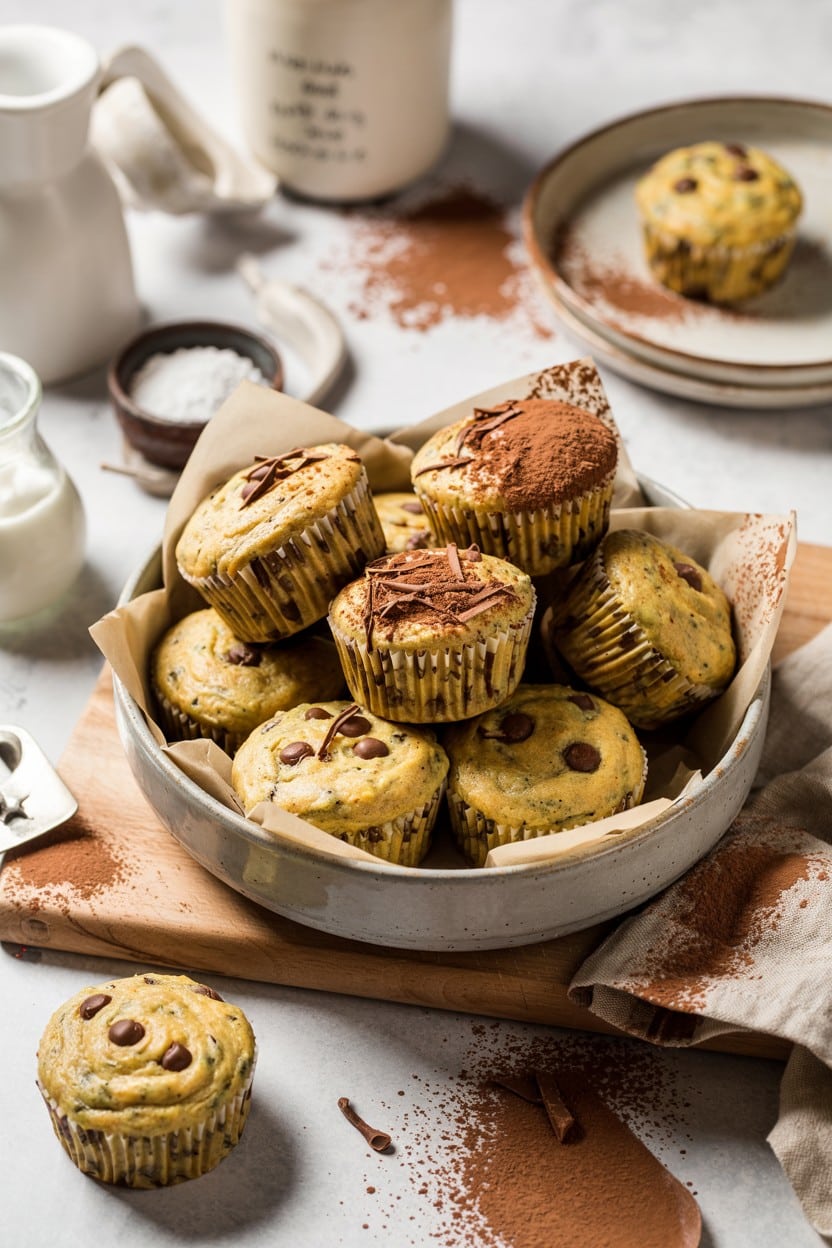
Mini Chocolate Chip Zucchini Muffins bring together the comforting sweetness of chocolate with the subtle moistness that grated zucchini adds. These bite-sized treats are easy to make and pleasantly soft, making them a great snack or quick breakfast option for busy days.
They combine a tender crumb with melty chocolate chips that complement the mild flavor of zucchini without overpowering it. Because they are small, these muffins are perfect for portion control and easy sharing with friends or family.
Why This Recipe Works
This recipe offers a simple way to include vegetables in a sweet snack without compromising flavor or texture. Mini Chocolate Chip Zucchini Muffins balance moisture and sweetness perfectly for a crowd-pleasing result.- Convenience - Easy to prepare and bake in a single batch of mini muffins for quick snacking.
- Flavor Balance - The mild zucchini flavor pairs smoothly with semi-sweet chocolate chips for just the right sweetness.
- Texture - Moist and tender crumb with pockets of gooey chocolate from the chips.
- Family-Friendly - Bite-sized and approachable, perfect for packing in lunchboxes or serving at gatherings.
Ingredient Swap Ideas
Adjusting ingredients can help tailor these muffins to your preferences or dietary needs without changing their character.- Flour Substitutes - Use whole wheat pastry flour or a gluten-free blend to add nutrition or accommodate dietary restrictions.
- Sweetener Options - Replace granulated sugar with coconut sugar or maple syrup for a different flavor profile and natural sweetness.
- Chocolate Chips - Swap semi-sweet chips with dark chocolate, white chocolate, or dairy-free versions depending on taste or dietary needs.
- Oil Alternatives - Use melted coconut oil or applesauce instead of vegetable oil for a different fat source or lighter muffin texture.
Ingredients
- 1 cup grated zucchini - About one medium zucchini, shredded finely and squeezed to remove excess moisture.
- 1 ½ cups all-purpose flour - Provides the structure for the muffins.
- ½ teaspoon baking powder - Helps the muffins rise slightly and stay tender.
- ½ teaspoon baking soda - Works with baking powder for lift and lightness.
- ¼ teaspoon salt - Enhances the other flavors.
- ½ cup granulated sugar - Adds sweetness without overpowering.
- ¼ cup vegetable oil - Keeps the muffins moist and soft.
- 1 large egg - Binds ingredients and adds richness.
- 1 teaspoon vanilla extract - Adds warm, sweet aroma and flavor.
- ½ cup mini chocolate chips - Small chips distribute chocolate evenly in each bite.
Instructions
- Preheat your oven to 350°F (175°C) and line a mini muffin tin with paper liners or grease it lightly.
- In a medium bowl, whisk together the flour, baking powder, baking soda, and salt to combine evenly.
- In a larger bowl, mix the sugar, vegetable oil, egg, and vanilla extract until smooth and well blended.
- Fold the dry ingredients into the wet ingredients just until combined; avoid overmixing to keep the muffins tender.
- Gently fold in the grated zucchini and mini chocolate chips, distributing them evenly throughout the batter.
- Spoon the batter into the prepared mini muffin cups, filling each about two-thirds full.
- Bake for 12 to 15 minutes, or until a toothpick inserted in the center of a muffin comes out clean with a few moist crumbs.
- Remove from the oven and let the muffins cool in the pan for 5 minutes before transferring to a wire rack to cool completely.
For more make-ahead ideas that freeze well, see freezer-friendly treats for make-ahead snacks. For extra fast sweet options, try the collection of two-minute desserts for instant sweet fixes.

Andrew Gray is a seasoned food writer and blogger with a wealth of experience in the restaurant and catering industries. With a passion for all things delicious, Andrew has honed his culinary expertise through his work as a personal chef and caterer.
His love for food led him to venture into food writing, where he has contributed to various online publications, sharing his knowledge and insights on the culinary world. As the proud owner of CooksCrafter.com, Andrew covers a wide range of topics, including recipes, restaurant reviews, product recommendations, and culinary tips.
Through his website, he aims to inspire and educate fellow food enthusiasts, offering a comprehensive resource for all things food-related.