Finding simple, delicious snacks that can be stored in the freezer for anytime indulgence makes busy days a little smoother. This collection of 12 freezer-friendly individual treats offers an easy way to have flavorful bites ready whenever you want, each one a single-serve, portion-controlled snack or dessert meant to be frozen for later, typically stored at 0°F and thawed or reheated before serving.
The recipes range from classic chocolate chip cookie dough bites to no-bake fudge brownie squares and mini cinnamon roll mug cakes. Each treat is designed to be portable, portion-controlled, and quick to enjoy, whether as a quick breakfast, an afternoon pick-me-up, or a sweet finish to a meal.
These treats share a focus on convenience and great taste while keeping preparation and cleanup straightforward. Freezing them in individual sizes means you can pull out exactly what you need without wasting food or time.
1. Classic Chocolate Chip Cookie Dough Bites
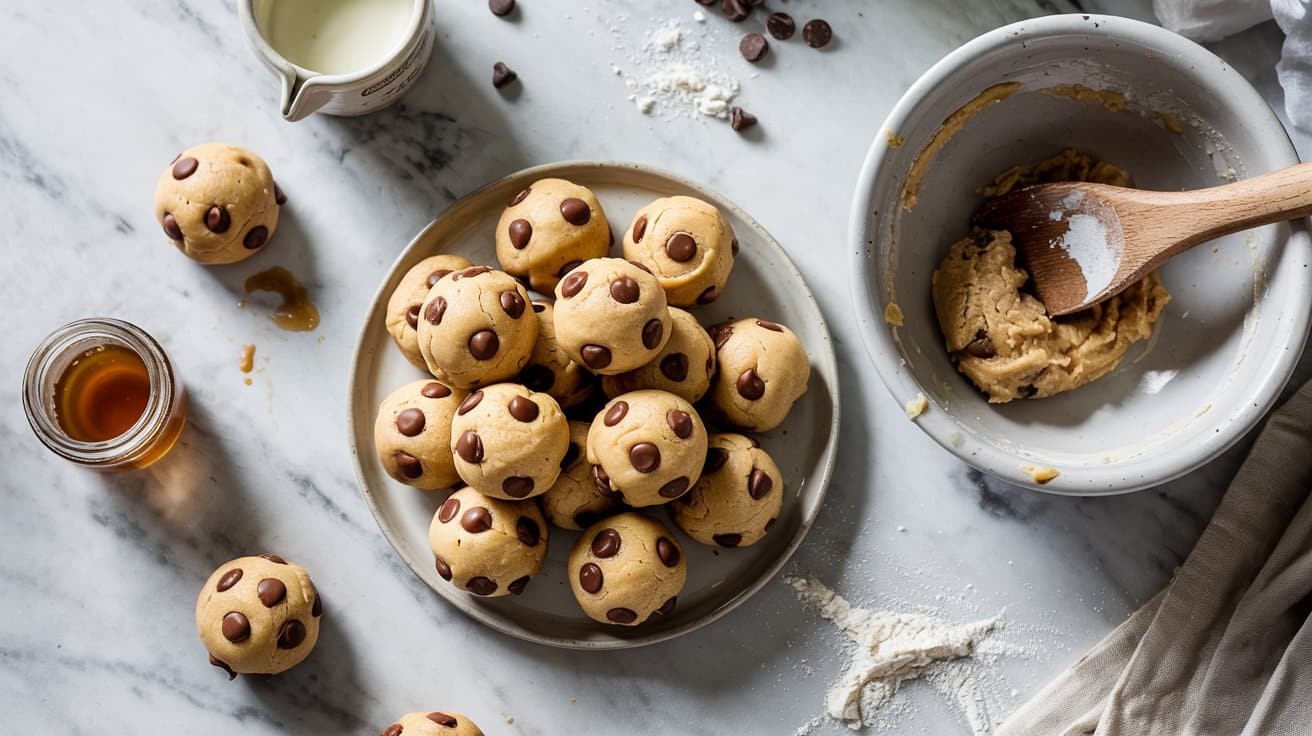
Classic Chocolate Chip Cookie Dough Bites bring a fun twist to a beloved treat, the classic American chocolate chip cookie. These bite-sized dough balls are easy to make ahead and freeze, letting you enjoy fresh cookies whenever you want without the fuss of mixing dough from scratch every time, and they keep well for up to 3 months at 0°F.
The combination of sweet dough and melty chocolate chips delivers familiar comfort in a convenient form; for another quick chocolate treat try easy chocolate bark for snacks, or explore chocolate chip substitutes for varied melt.
These cookie dough bites offer a soft, chewy texture with just the right amount of chocolate in each bite. They are perfect for sharing as snacks or serving at gatherings, giving everyone a chance to indulge in freshly baked cookies with minimal prep.
Why This Recipe Works
This recipe combines ease and flavor in a way that fits busy schedules and simple desires for homemade goodness, with 1-inch dough balls that bake at 350°F in about 8-10 minutes. It lets you bake fresh cookies in minutes while making sure consistent results and delicious taste every time.
- Convenience - Dough balls can be frozen individually, ready for baking whenever you want fresh cookies; thaw 10-15 minutes at room temperature before baking, and for lighter, floral-sweet options try refreshing honey desserts for summer.
- Flavor balance - Classic sweetness from the dough paired with rich semi-sweet chocolate chips keeps the taste well rounded.
- Texture - Soft, tender cookie bites with chewy centers and slightly crisp edges after baking.
- Appeal - Kid-friendly and ideal for casual events or after-school snacks that everyone enjoys.
Ingredient Swap Ideas
Adapting this recipe is straightforward if you want to adjust for allergies, dietary needs, or flavor preferences, and using one-inch scoops helps keep portions uniform. Simple swaps keep the core experience while making it work better for different tastes.
- Butter alternative - Use coconut oil or vegan butter for dairy-free options that still yield tender dough, with coconut oil giving a slightly crisper edge; for other small-batch ideas try small-batch cupcake ideas for two.
- Sweetener swap - Substitute light brown sugar with coconut sugar or maple syrup for a different kind of sweetness.
- Flour substitution - Gluten-free all-purpose flour blend works well if you need a gluten-free version.
- Chocolate chips - Choose mini semi-sweet, dark chocolate, or white chocolate chips depending on your preference.
Ingredients
- 1 cup unsalted butter - softened at room temperature for easy mixing.
- ¾ cup light brown sugar - packed, adds moisture and rich sweetness.
- ¼ cup granulated sugar - balances sweetness with a slight crunch.
- 2 large eggs - at room temperature to help bind the dough.
- 1 teaspoon vanilla extract - for warm, aromatic flavor.
- 2 ¼ cups all-purpose flour - provides structure for the dough.
- 1 teaspoon baking soda - leavens for a light, tender crumb.
- ½ teaspoon salt - enhances flavors and balances sweetness.
- 1 ½ cups semi-sweet chocolate chips - classic choice for chocolate bursts.
Instructions
- In a large mixing bowl, beat the softened butter with brown sugar and granulated sugar until creamy and smooth.
- Add eggs one at a time, mixing well after each addition, then stir in the vanilla extract.
- In a separate bowl, whisk together flour, baking soda, and salt. Gradually add dry ingredients to the wet mixture, stirring until just combined. Avoid overmixing.
- Fold in the chocolate chips evenly throughout the dough.
- Scoop the dough into small balls, about 1 tablespoon each, and place them on a parchment-lined baking sheet. Freeze the balls individually until firm, then transfer to a sealed bag or container for storage.
- When ready to bake, preheat oven to 350°F (175°C). Place frozen dough bites on a baking sheet, spacing them apart and bake for 12-14 minutes until edges start to turn golden but centers remain soft.
- Remove from oven and let cool a few minutes before enjoying warm.
These cookie dough bites make it simple to enjoy classic chocolate chip cookies anytime with fresh-from-the-oven taste and texture.
2. Mini Peanut Butter Chocolate Chip Blondies
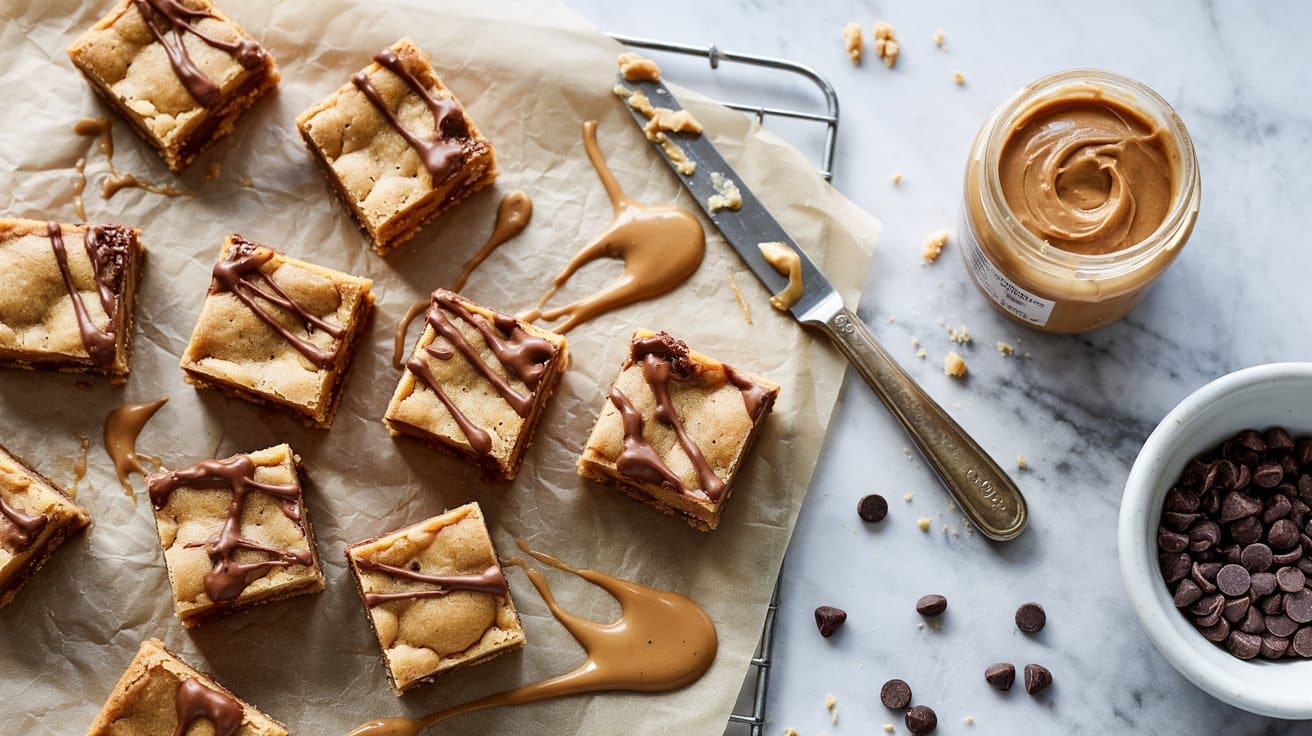
Mini peanut butter chocolate chip blondies make a sweet snack that's both chewy and flavorful, with a dense, fudgy crumb that holds together well when frozen. These bite-sized treats combine the rich, nutty taste of peanut butter with melty chocolate chips for a satisfying combo.
They're simple to prepare and bake quickly (about 12-15 minutes at 350°F), which makes them great for busy days or when you want to bake something to share with family and friends; try easy mini pie recipes for any occasion for similar handheld treats.
If you need non-peanut options with similar creaminess, check peanut butter substitutes for similar texture.
Why This Recipe Works
This recipe strikes a balance between being easy to make and delivering a delicious, crowd-pleasing dessert with lasting freshness.
- Convenience - Mini portions bake faster and are easy to serve or freeze for later.
- Flavor balance - Peanut butter's richness goes well with sweet chocolate chips.
- Texture - Chewy blondies with a slightly crisp top make for a satisfying bite.
- Appeal - Handheld size makes these blondies ideal for snacks, lunchboxes, or gatherings.
Ingredient Swap Ideas
Swapping ingredients can help tailor this recipe to your dietary preferences or what you have available in the pantry without losing the character of these blondies.
- Peanut butter - Use almond or cashew butter for a different nutty flavor.
- Chocolate chips - Substitute with dark, white, or dairy-free chocolate chips as preferred.
- Flour - Try whole wheat flour or gluten-free flour blends to adjust texture or suit diets.
- Sweetener - Replace the brown sugar with coconut sugar or maple syrup for a natural sweetness variation.
Ingredients
- ½ cup unsalted butter - softened to room temperature.
- 1 cup creamy peanut butter - natural or smooth, for rich flavor and moist texture.
- 1 cup packed light brown sugar - adds sweetness and moisture.
- 1 large egg - to bind the mixture.
- 1 teaspoon vanilla extract - enhances overall flavor.
- 1 cup all-purpose flour - provides structure.
- ½ teaspoon baking powder - helps the blondies rise slightly.
- ¼ teaspoon salt - balances the sweetness.
- ¾ cup chocolate chips - semi-sweet or milk chocolate, whichever you prefer.
Instructions
- Preheat your oven to 350°F (175°C). Line a mini muffin tin with paper liners or grease it lightly.
- In a large bowl, cream together the softened butter, peanut butter, and brown sugar until smooth and well combined.
- Beat in the egg and vanilla extract until the mixture is creamy and uniform.
- In a separate bowl, whisk together the flour, baking powder, and salt. Gradually add the dry ingredients to the wet mixture, stirring just until combined. Fold in the chocolate chips evenly.
- Spoon the batter into the prepared mini muffin cups, filling each about ¾ full. Bake for 12-14 minutes or until the edges are set and a toothpick inserted in the center comes out mostly clean with a few moist crumbs.
- Let the blondies cool in the pan for 5 minutes before transferring to a wire rack to cool completely. Store leftovers in an airtight container or freeze for longer storage.
3. Single-Serve Banana Oat Muffins
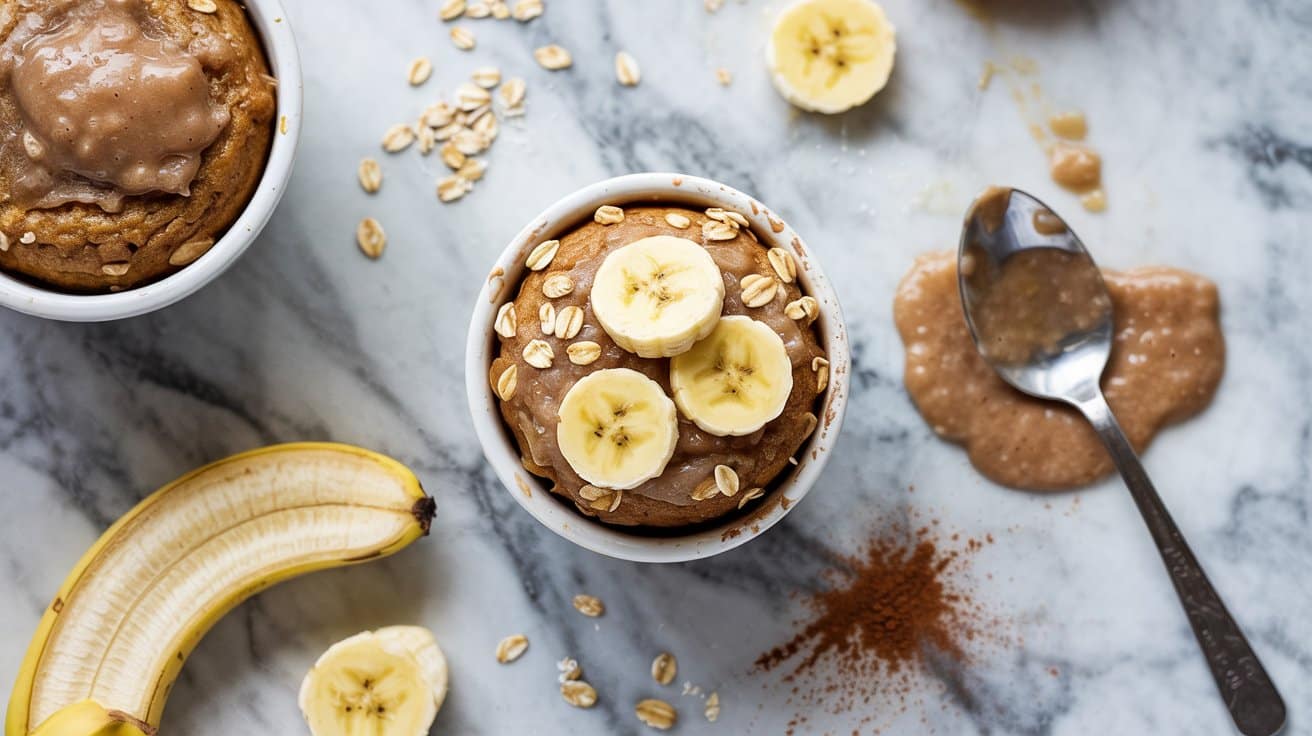
These single-serve banana oat muffins make a simple and nutritious option for an on-the-go breakfast or a quick snack. They combine natural sweetness from ripe bananas with the hearty texture of oats, creating a tender, mildly sweet treat that's both wholesome and satisfying.
Because they're made in a single-serving portion, these muffins are easy to prepare without the pressure of baking an entire batch, and reheat from frozen for about 30-45 seconds in the microwave. Plus, they freeze well, so you can make several ahead and enjoy a quick grab-and-go option throughout the week.
For contrasting savory or tangy swaps in other recipes, see banana pepper substitutes for tangy heat.
Why This Recipe Works
This recipe balances convenience, flavor, and health in a way that suits busy mornings or light snack moments perfectly.
- Convenience - Made in one small batch for quick preparation and minimal cleanup.
- Natural sweetness - Ripe bananas provide gentle sweetness without added sugar.
- Texture - Oats add a tender, slightly chewy crumb that goes with the softness of the banana.
- Versatility - Muffins freeze and reheat well, making them easy to store and enjoy later.
Ingredient Swap Ideas
Adapting this recipe to your preferences or dietary needs is straightforward with a few simple swaps. These options help keep the muffins tasty and wholesome while fitting different diets.
- Oats - Use certified gluten-free oats to make the muffins gluten-free.
- Banana - Swap ripe banana for applesauce to change the flavor and reduce sweetness.
- Milk - Replace dairy milk with almond, oat, or soy milk for a dairy-free version.
- Add-ins - Stir in chopped nuts, dark chocolate chips, or dried fruit for extra flavor and texture.
Ingredients
- 1 ripe banana - mashed, about ⅓ cup.
- ¼ cup rolled oats - provides texture and whole grain goodness.
- 1 tablespoon milk - any kind, dairy or plant-based.
- 1 tablespoon maple syrup - optional, adds some sweetness.
- ¼ teaspoon baking powder - helps the muffin rise.
- ¼ teaspoon ground cinnamon - adds warmth and flavor.
- Pinch of salt - balances sweetness.
Instructions
- Preheat your oven to 350°F (175°C) and lightly grease a small ramekin or muffin tin.
- In a bowl, mash the ripe banana until smooth. Add the milk and maple syrup, then stir to combine.
- Mix in the rolled oats, baking powder, cinnamon, and salt until everything is evenly incorporated.
- Pour the batter into the prepared ramekin or muffin tin and smooth the top.
- Bake for 15 to 18 minutes, or until the muffin has set and a toothpick inserted in the center comes out clean. Let it cool slightly before enjoying warm or at room temperature.
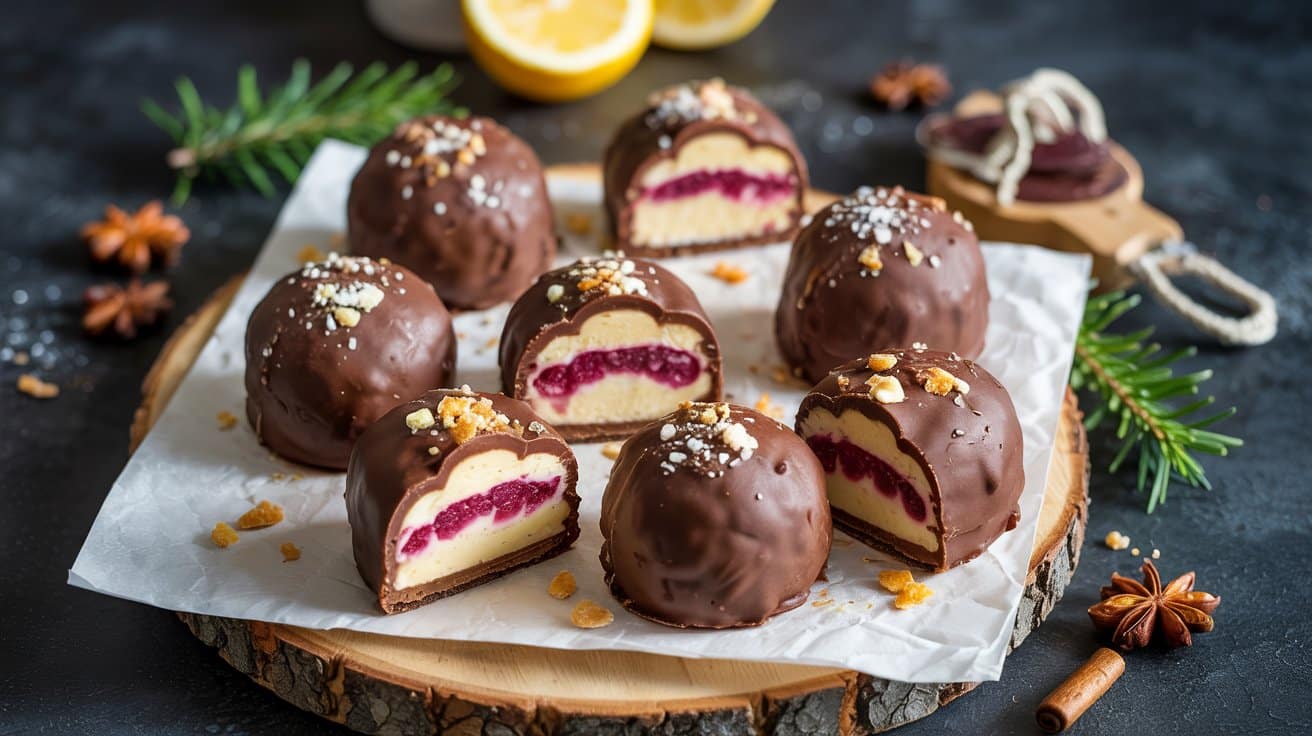
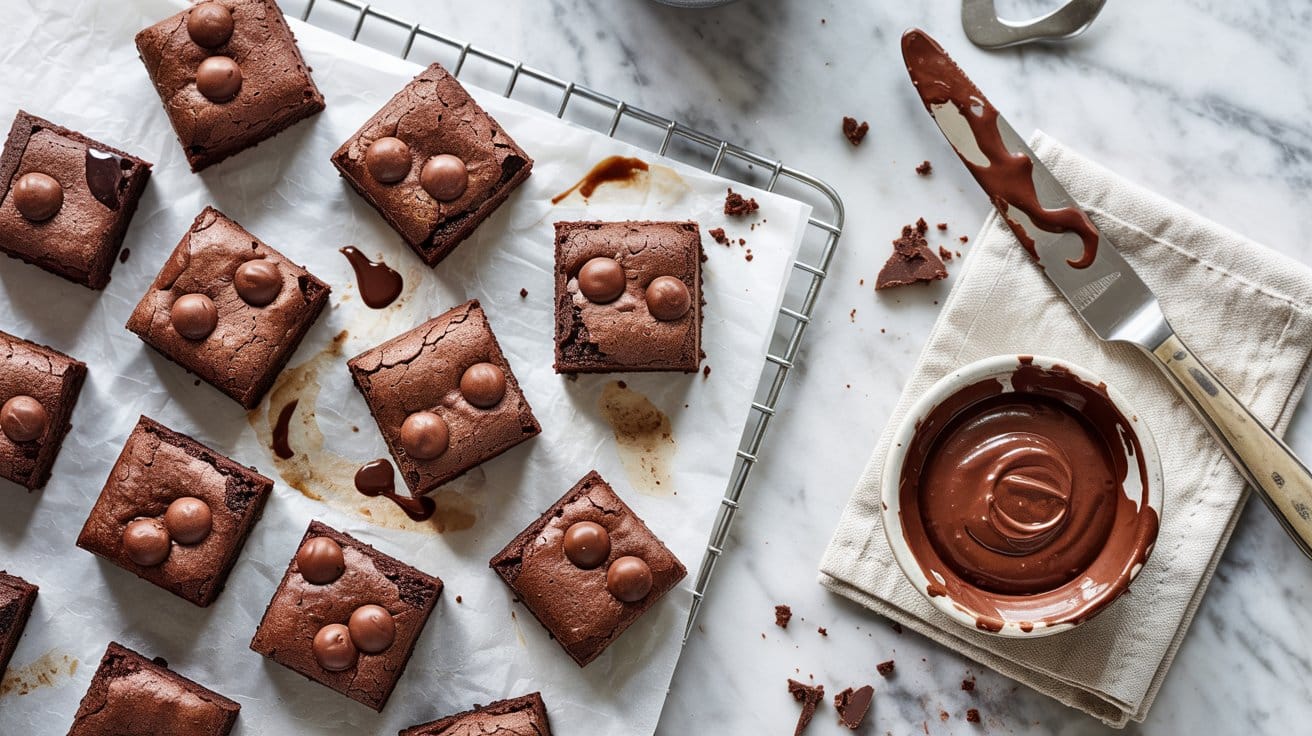
4. No-Bake Fudge Brownie Bites
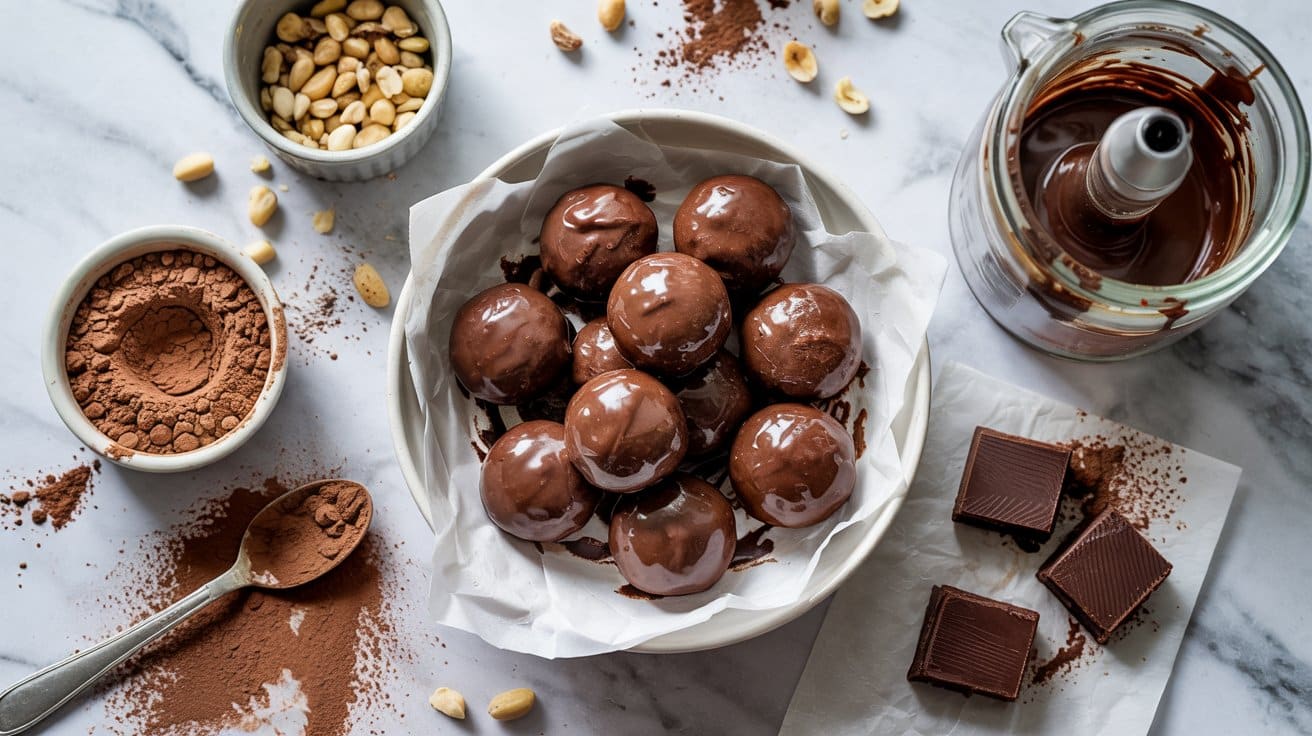
These no-bake fudge brownie bites give you all the rich, chocolatey satisfaction of brownies without needing to use an oven. They're dense and fudgy, with a concentrated cocoa flavor that makes each bite feel indulgent.
Since they freeze solid, they're easy to store and thaw quickly whenever a sweet craving hits or you need a quick treat.
Making these bites is straightforward and doesn't involve complex steps or equipment. They're great for busy days when you want something chocolaty and satisfying without much fuss.
Why This Recipe Works
This recipe combines convenience and rich flavor in a small, easy-to-eat form. You can prepare the bites ahead, chill them in the freezer, and have ready portions whenever you want something sweet and satisfying.
- Convenience - No baking required, with simple steps and quick freezing for ready-to-enjoy brownies.
- Flavor balance - Deep chocolate flavor balanced with subtle sweetness and a fudge-like texture.
- Texture - Firm enough to hold shape when frozen, soft enough to melt pleasantly in your mouth after thawing.
- Portion control - Bite-sized squares keep servings manageable and make sharing simple.
Ingredient Swap Ideas
Swapping ingredients can help adapt the recipe to meet dietary restrictions or flavor preferences while keeping the core fudge brownie taste intact.
- Use coconut oil instead of butter for a dairy-free option that still maintains richness.
- Replace traditional cocoa powder with raw cacao powder to add a slightly more intense chocolate flavor and antioxidants.
- Swap maple syrup or honey for granulated sugar to change the sweetness profile or suit what you have on hand.
- Add chopped nuts or seeds like walnuts or sunflower seeds to bring texture and a nutty twist.
Ingredients
- 1 cup semisweet chocolate chips - Provides rich chocolate flavor that melts easily.
- ½ cup unsalted butter - Adds creaminess and helps bind the mixture.
- ¾ cup sugar - Sweetens the bites just enough without overpowering.
- ⅓ cup unsweetened cocoa powder - Intensifies chocolate flavor and gives depth.
- ½ teaspoon vanilla extract - Enhances overall taste with warm vanilla notes.
- ¼ teaspoon salt - Balances sweetness and enhances chocolate flavor.
- 1 cup powdered sugar - Adds smooth sweetness and helps achieve fudgy texture.
- 1 cup finely crushed graham crackers - Provides slight crunch and structure to the bites.
Instructions
- In a medium saucepan over low heat, melt the butter and chocolate chips together, stirring constantly until smooth and combined.
- Remove the pan from heat and whisk in sugar, cocoa powder, vanilla extract, and salt until the mixture is well blended.
- Stir in powdered sugar and crushed graham crackers until everything is fully incorporated and forms a thick, dense batter.
- Line a small square baking pan (about 8x8 inches) with parchment paper, then spread the mixture evenly into the pan, pressing firmly to compact it.
- Freeze the pan for at least 2 hours until the fudge is firm. Remove from freezer and cut into bite-sized squares. Let them thaw for a few minutes before serving to soften slightly.
Store any leftover bites in an airtight container in the freezer. They keep well and are easy to portion out for quick indulgence any time.
5. Frozen Yogurt Berry Parfaits in Jars
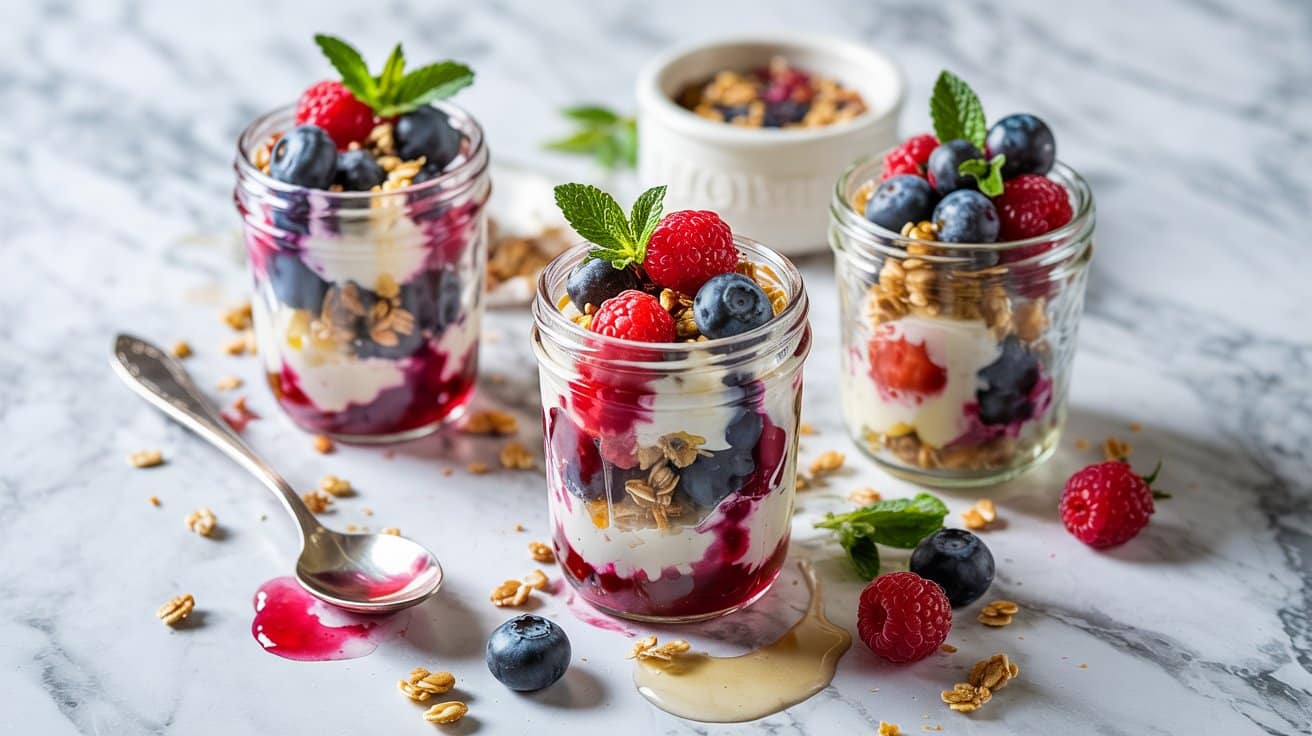
These frozen yogurt berry parfaits in jars make a refreshing, easy-to-prep treat you can enjoy anytime. They layer creamy frozen yogurt with fresh, juicy berries and a bit of crunch, creating a combination of flavors and textures that feels light and satisfying.
The best part is that you prepare them ahead and freeze for quick access whenever you want a cool snack or a simple dessert.
Using jars for layering makes portion control easy and creates a neat presentation that's great for family snacks or serving guests. You'll find the balance between tart and sweet, creaminess and fruitiness appealing without being overly rich.
Why This Recipe Works
This recipe offers a straightforward way to have a nutritious, customizable dessert ready in minutes with minimal fuss.
- Convenience - Make several parfaits in advance and freeze for grab-and-go treats.
- Flavor balance - Tangy frozen yogurt pairs well with the natural sweetness of fresh berries.
- Texture - Combines smooth, creamy yogurt with the burst of fresh fruit and crunchy toppings.
- Serving ease - Individual jars mean no extra dishes and simple portioning.
Ingredient Swap Ideas
Swapping ingredients can help fit dietary preferences or simply change up the flavor without complicating the recipe.
- Frozen yogurt - Use dairy-free or coconut-based yogurt to make this vegan-friendly.
- Berries - Replace with any seasonal or favorite fruits like mango, peaches, or pineapple chunks.
- Crunchy topping - Swap granola for chopped nuts, toasted coconut flakes, or seeds for different textures.
- Sweetener - Drizzle honey or maple syrup if you prefer extra sweetness in the layers.
Ingredients
- 2 cups plain or vanilla frozen yogurt - Use a brand with good texture for freezing.
- 1 cup mixed fresh berries - Choose strawberries, blueberries, raspberries, or blackberries, washed and drained.
- ½ cup granola - Use your favorite type with a mix of oats and nuts.
- 1 tablespoon honey or maple syrup (optional) - For drizzling in layers or on top.
- 4 small glass jars or containers with lids - For assembling and freezing parfaits.
Instructions
- Let the frozen yogurt soften slightly at room temperature for about 5 minutes to make spooning easier.
- In each jar, add a spoonful of frozen yogurt, followed by a layer of mixed berries. Drizzle a little honey or maple syrup if using.
- Add a sprinkle of granola on top of the berries to add crunch before repeating the layers until the jar is filled. End with a layer of berries and a final sprinkle of granola.
- Seal the jars with lids and place them in the freezer for at least 2 hours, or until the parfaits are fully frozen.
- To serve, remove a jar from the freezer and let it sit for 5 minutes before digging in to soften slightly. Enjoy your quick, refreshing treat straight from the jar or with a spoon on the side.
6. Mini Cinnamon Roll Mug Cakes
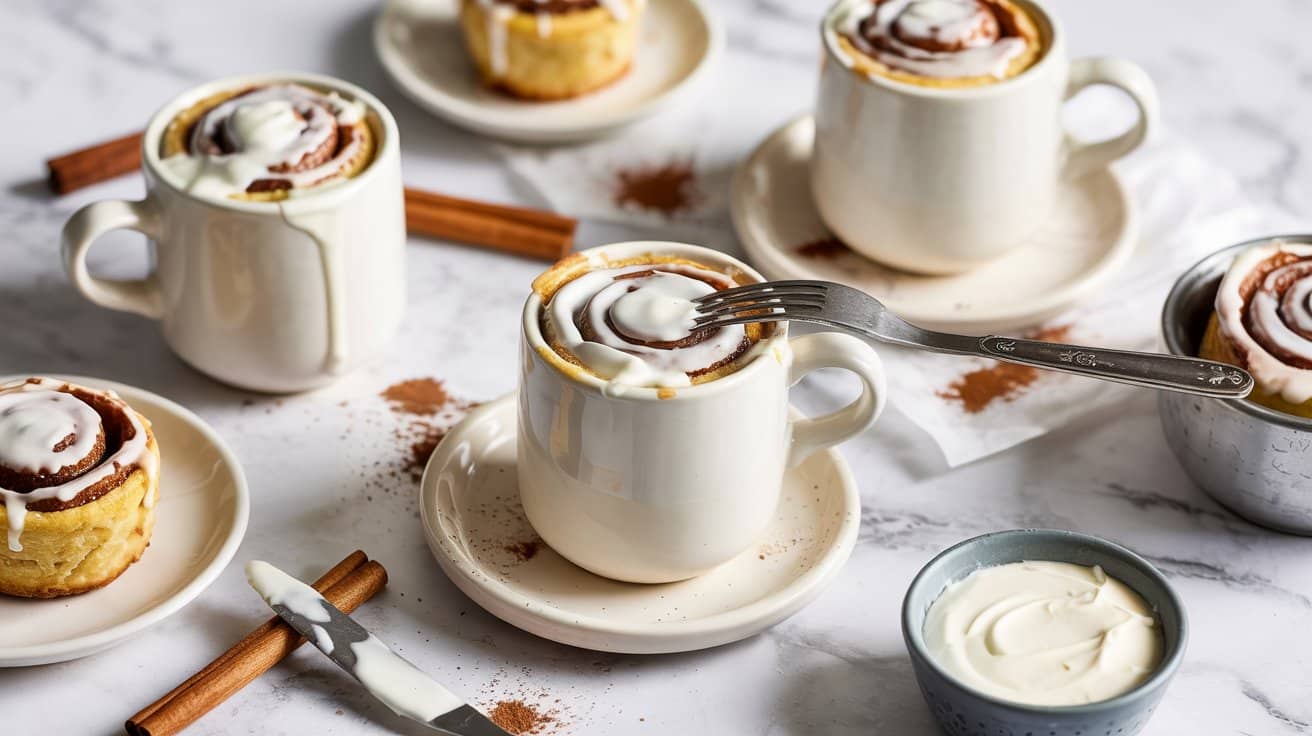
Mini Cinnamon Roll Mug Cakes offer a quick and satisfying way to enjoy the warm, comforting flavors of cinnamon rolls without the hassle of traditional baking. These individual-sized treats come together simply in a mug and bake in the microwave within minutes, making them ideal for busy mornings or a cozy snack any time of day.
Their soft, tender crumb paired with the sweet cinnamon swirl and glaze hits all the right notes.
The recipe uses common ingredients and requires minimal prep, yet the result is a nice, portion-controlled dessert or breakfast treat. You can also prepare several in advance, freeze them, and have a warm cinnamon roll ready whenever you want with a quick zap in the microwave.
Why This Recipe Works
This recipe combines ease, flavor, and convenience, making it a reliable go-to for cinnamon roll cravings. Mini Cinnamon Roll Mug Cakes deliver indulgent cinnamon and vanilla flavors in a fraction of the time.
- Convenience - Comes together quickly with simple pantry ingredients and cooks fast in the microwave.
- Flavor balance - Combines the sweetness of cinnamon and sugar with a soft, cake-like texture.
- Portion control - Individual mugs mean no leftover rolls to store or share.
- Make-ahead friendly - Can be made in batches, frozen, and reheated quickly for busy days.
Ingredient Swap Ideas
Swapping a few ingredients lets you adjust this recipe to suit dietary needs or flavor preferences without sacrificing the classic cinnamon roll experience.
- Use almond milk or oat milk instead of cow's milk for a dairy-free version.
- Replace all-purpose flour with a gluten-free flour blend to make it gluten-free.
- Swap granulated sugar for coconut sugar or maple syrup to add a different sweetness profile.
- Try adding ground nutmeg or cardamom along with the cinnamon for extra warm spice notes.
Ingredients
- 3 tablespoons all-purpose flour - Provides structure for the mug cake batter.
- 1 tablespoon granulated sugar - Adds sweetness for the cake base.
- ½ teaspoon baking powder - Helps the cake rise and become fluffy.
- ¼ teaspoon ground cinnamon - Brings the signature cinnamon flavor to the batter.
- 2 tablespoons milk - Keeps the cake moist and tender.
- 1 tablespoon unsalted butter, melted - Adds richness and moistness.
- ¼ teaspoon vanilla extract - Enhances the sweetness and aroma.
- 1 tablespoon brown sugar - Forms the cinnamon sugar swirl inside the mug cake.
- ¼ teaspoon ground cinnamon - For mixing with the brown sugar swirl.
- 1 tablespoon cream cheese, softened - Used in the glaze for a creamy finish.
- 1 teaspoon powdered sugar - Sweetens the glaze.
- ½ teaspoon milk - Thins the glaze for drizzling.
Instructions
- In a small bowl, mix all-purpose flour, granulated sugar, baking powder, and ground cinnamon. Stir in milk, melted butter, and vanilla extract until the batter is smooth and well combined.
- In a separate small bowl, combine brown sugar and ground cinnamon to make the cinnamon sugar swirl.
- Pour half of the batter into a microwave-safe mug or ramekin. Sprinkle the cinnamon sugar mixture evenly over the batter, then spoon the remaining batter on top to cover the swirl.
- Microwave on high power for about 60 to 75 seconds. Check doneness by inserting a toothpick in the center; it should come out clean or with a few moist crumbs. Microwave more in 10-second increments if needed, avoiding overcooking.
- While the cake cooks, mix softened cream cheese, powdered sugar, and milk until smooth to make a glaze. Drizzle the glaze over the warm mug cake and serve immediately.
These mug cakes are comforting and quick, delivering the heart of a cinnamon roll in a portion just for you.
7. Lemon Poppy Seed Mini Loaves
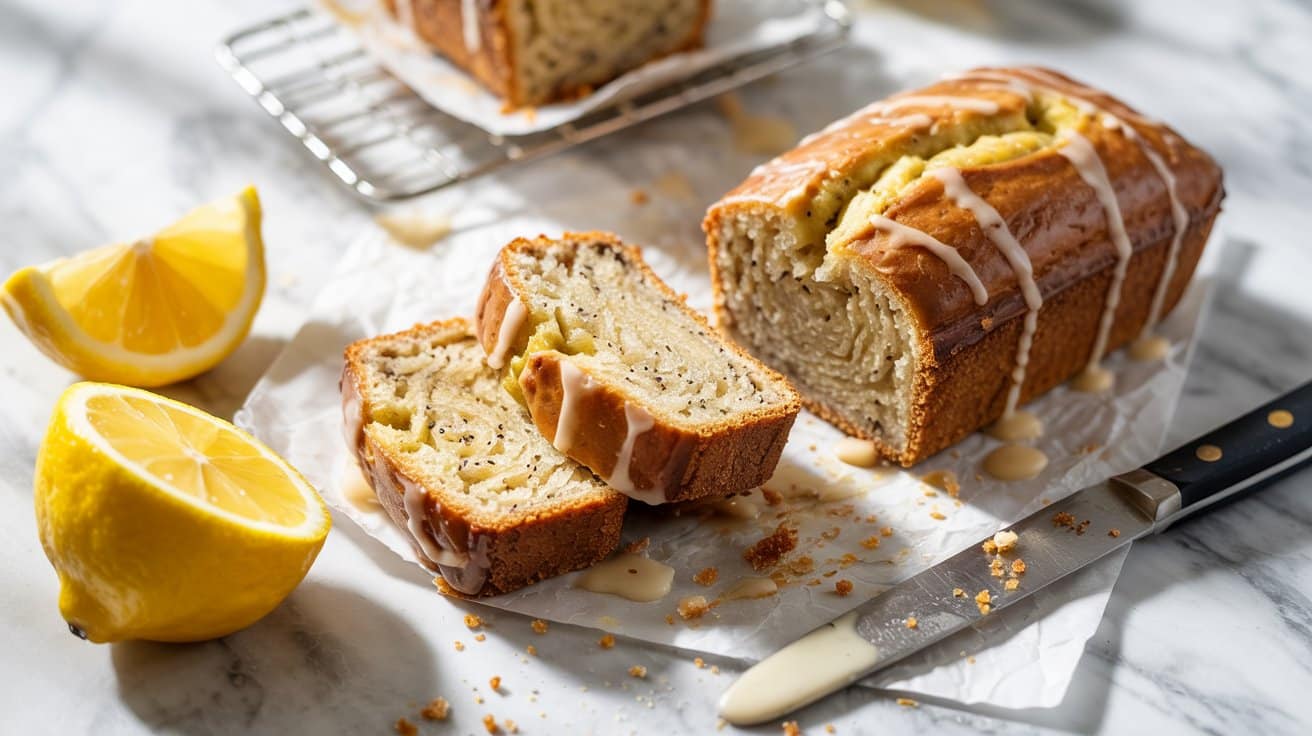
These lemon poppy seed mini loaves are a bright and tangy treat that balances sweetness with a subtle crunch from the poppy seeds. They bake quickly and deliver moist, tender slices, making them an excellent choice for a grab-and-go breakfast or a light snack throughout the day.
Because they're baked in mini loaf pans, these loaves are perfectly portioned for sharing or freezing, and their moist texture stays intact even after being frozen and thawed. Their fresh lemon flavor feels uplifting and natural, without feeling heavy or overly sweet.
Why This Recipe Works
This recipe combines practical advantages with refreshing flavors to create a baked good that suits a busy lifestyle and a balanced palate.
- Convenience - Mini loaves bake in under 40 minutes, and their individual size simplifies portioning and storage.
- Flavor balance - The zesty lemon pairs well with the nutty poppy seeds, creating an appealing contrast.
- Moist texture - These loaves stay soft and tender, including after freezing.
- Family-friendly - They're approachable for all ages and work well for breakfasts, snacks, or light desserts.
Ingredient Swap Ideas
Making simple swaps can help adjust the recipe for different dietary needs or ingredient availability, while keeping the lemon poppy seed combination intact.
- Use dairy-free yogurt or applesauce instead of sour cream to maintain moisture for a dairy-free version.
- Replace all-purpose flour with gluten-free flour in a 1-to-1 ratio made for baking to create a gluten-free option.
- Swap poppy seeds for chia seeds for a different textural crunch and similar nutritional benefits.
- Use coconut oil or melted plant-based butter instead of regular butter for a vegan-friendly variation.
Ingredients
- 1 ½ cups all-purpose flour - Provides structure for the loaves.
- 1 teaspoon baking powder - Helps the loaves rise.
- ½ teaspoon baking soda - Works with baking powder for leavening.
- ¼ teaspoon salt - Balances sweetness.
- 3 tablespoons poppy seeds - Adds texture and a subtle nutty flavor.
- 1 cup granulated sugar - Sweetens the batter.
- 2 large eggs - Bind ingredients and add richness.
- ½ cup sour cream - Keeps the texture moist and tender.
- ½ cup unsalted butter, melted - Adds flavor and richness.
- ¼ cup fresh lemon juice - Brightens the flavor.
- 1 tablespoon lemon zest - Intensifies the lemon flavor.
- 1 teaspoon vanilla extract - Enhances overall taste.
Instructions
- Preheat your oven to 350°F (175°C). Lightly grease 4 mini loaf pans or line them with parchment paper.
- In a large bowl, whisk together the flour, baking powder, baking soda, salt, and poppy seeds until combined. Set aside.
- In another bowl, beat the sugar and eggs until smooth. Add the sour cream, melted butter, lemon juice, lemon zest, and vanilla extract. Mix until fully combined.
- Gradually fold the dry ingredients into the wet ingredients, stirring gently until just combined. Avoid overmixing to keep the loaves tender.
- Divide the batter evenly among the prepared mini loaf pans. Bake for 30 to 35 minutes, or until a toothpick inserted into the center comes out clean. Remove from oven and let cool in the pans for 10 minutes before transferring to a wire rack to cool completely.
Enjoy these lemon poppy seed mini loaves warm or at room temperature. They freeze well, so keep some on hand for busy mornings or unexpected guests.
8. Chocolate Peanut Butter Energy Balls
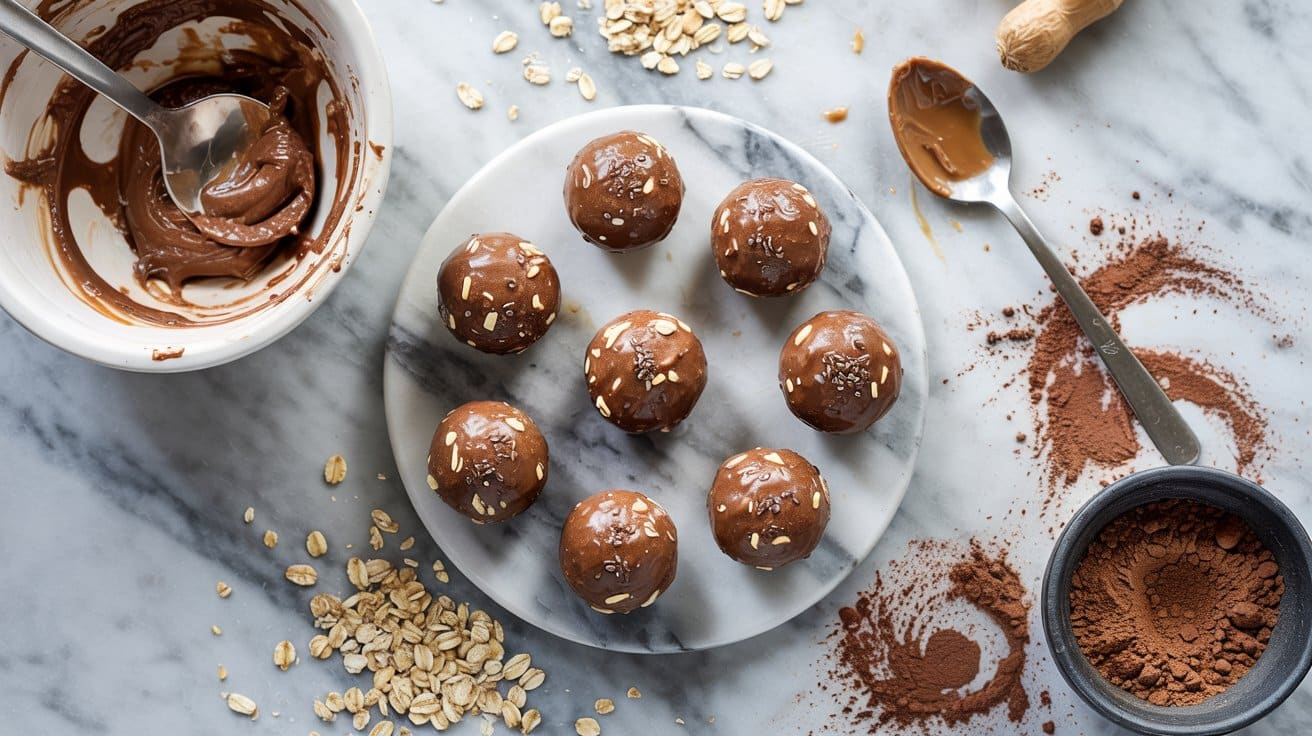
Chocolate Peanut Butter Energy Balls make for a great snack that combines rich, satisfying flavors with a boost of energy. These no-bake treats are easy to prepare, and their chewy texture goes well with the creamy peanut butter and a hint of chocolate.
They're ideal for busy days when you need a wholesome grab-and-go option.
You can keep a batch of these energy balls frozen and grab one whenever hunger strikes. The balance of natural sweetness and protein creates a satisfying bite that's both nutritious and delicious.
Why This Recipe Works
This recipe brings together taste and convenience, offering a simple way to energize your day with wholesome ingredients.
- Convenience - Requires no baking and minimal prep, making it quick to assemble.
- Flavor balance - Combines creamy peanut butter with rich chocolate, offering a smooth yet indulgent taste.
- Texture - Delivers a chewy, slightly crunchy texture that's satisfying to eat.
- Appeal - Suitable for a wide audience, including those seeking nutritious, portion-controlled snacks.
Ingredient Swap Ideas
Swapping ingredients here can tailor the energy balls to different dietary needs or flavor preferences without compromising their essence. This keeps the recipe flexible and accessible.
- Peanut butter - Use almond or cashew butter for a milder or slightly sweeter nut flavor.
- Oats - Replace old-fashioned oats with gluten-free oats to keep the recipe gluten-free.
- Sweetener - Swap honey with maple syrup or agave nectar for a vegan-friendly option.
- Chocolate chips - Use dark chocolate chips or cacao nibs for a less sweet, more intense chocolate taste.
Ingredients
- 1 cup rolled oats - Provides chewy texture and fiber.
- ½ cup natural peanut butter - Adds creaminess and protein.
- ¼ cup honey - is a natural sweetener and binder.
- ¼ cup mini chocolate chips - Adds bursts of chocolate flavor throughout.
- 1 tablespoon chia seeds - Boosts fiber and omega-3 content.
- 1 teaspoon vanilla extract - Enhances overall flavor.
- A pinch of salt - Balances the sweetness and intensifies flavors.
Instructions
- In a large bowl, combine the rolled oats, peanut butter, honey, chia seeds, vanilla extract, and a pinch of salt. Stir well until the ingredients are fully mixed.
- Fold in the mini chocolate chips evenly throughout the mixture.
- Scoop out tablespoon-sized portions of the mixture and roll each into a ball using your hands. Repeat until all the mixture is used.
- Place the energy balls on a baking sheet or plate lined with parchment paper. Refrigerate for at least 30 minutes to firm up.
- Store the energy balls in an airtight container in the refrigerator or freezer. Enjoy chilled whenever you need a quick, satisfying snack.
9. Pumpkin Spice Mini Muffins
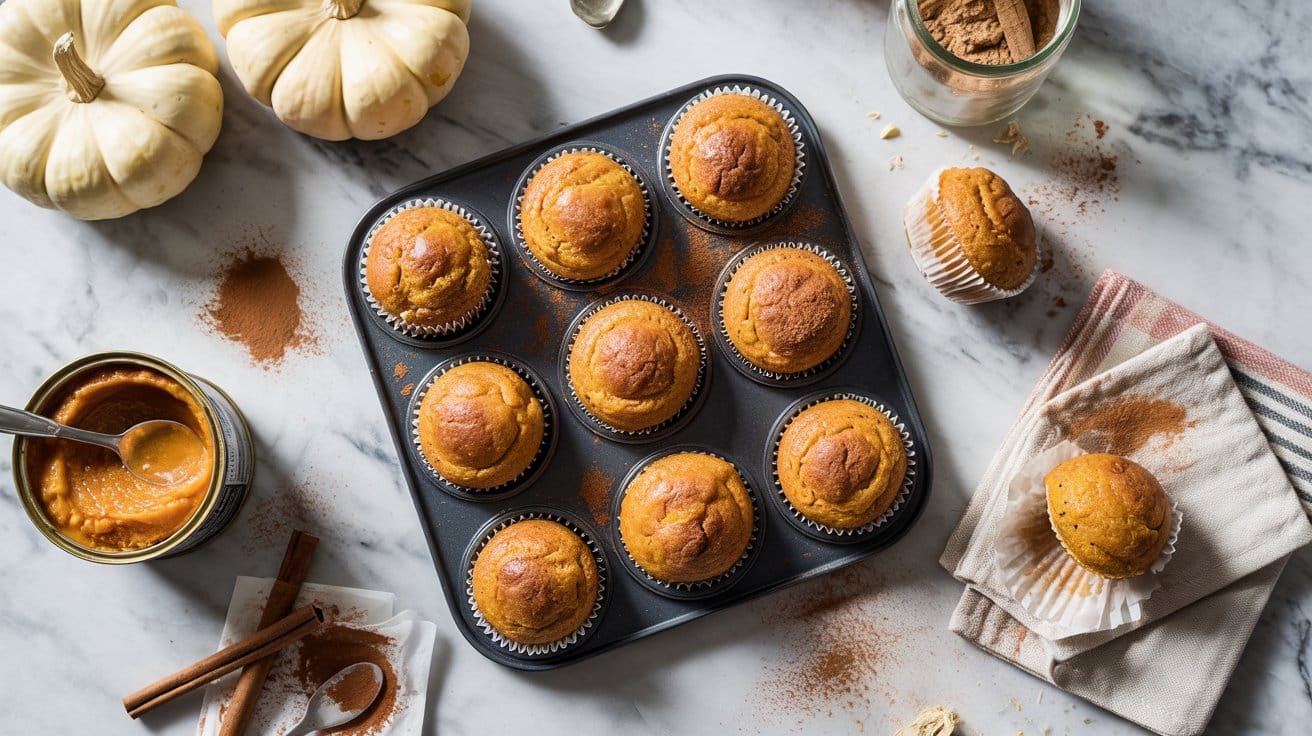
Pumpkin Spice Mini Muffins bring the warm, cozy flavors of autumn into a convenient, bite-sized treat. These muffins have a tender crumb with a subtle sweetness balanced by the nostalgic blend of cinnamon, nutmeg, and cloves.
They're quick to prepare and bake, making them a great option for a seasonal snack, breakfast on the go, or a thoughtful addition to your meal prep lineup. You can easily freeze and reheat them, so you always have a taste of fall ready whenever you want.
Why This Recipe Works
This recipe combines seasonal spices with pumpkin for a comforting flavor that's both familiar and satisfying. Pumpkin Spice Mini Muffins are practical and appealing for various occasions.
- Convenience - Small size makes portion control easy and suitable for freezing.
- Flavor balance - Warm spices go with the natural earthiness of pumpkin without overpowering.
- Texture - Moist and tender crumb that stays soft even after freezing.
- Appeal - Kid friendly and easy to pack for lunches or snacks.
Ingredient Swap Ideas
Adjusting ingredients can help fit dietary needs or personal preferences without losing the essence of these muffins.
- Pumpkin puree - Use sweet potato puree for a slightly different sweetness and texture.
- All-purpose flour - Swap with whole wheat flour to increase fiber and add a nuttier taste.
- Brown sugar - Replace with maple syrup or honey for a natural sweetener option.
- Vegetable oil - Coconut oil or melted butter can be used to add richness and flavor.
Ingredients
- ¾ cup pumpkin puree - Canned or homemade, unsweetened.
- ½ cup sugar - Granulated or a combination of granulated and brown sugar.
- ¼ cup vegetable oil - For moisture and tenderness.
- 2 large eggs - At room temperature to help with batter consistency.
- 1 teaspoon vanilla extract - improves the flavor.
- 1 ¾ cups all-purpose flour - Provides structure for the muffins.
- 1 teaspoon baking powder - Helps the muffins rise.
- ½ teaspoon baking soda - Works with the acidic pumpkin for lift.
- ½ teaspoon salt - Enhances all other flavors.
- 1 teaspoon ground cinnamon - Core spice for pumpkin flavor.
- ½ teaspoon ground nutmeg - Adds warmth and complexity.
- ¼ teaspoon ground cloves - Brings subtle spice notes.
Instructions
- Preheat your oven to 350°F (175°C). Lightly grease a mini muffin tin or line with mini paper liners.
- In a large bowl, whisk together pumpkin puree, sugar, vegetable oil, eggs, and vanilla until smooth and combined.
- In another bowl, sift or whisk together flour, baking powder, baking soda, salt, cinnamon, nutmeg, and cloves.
- Gradually add the dry ingredients to the wet ingredients, stirring gently until just combined. Avoid overmixing to keep the muffins tender.
- Spoon batter into the mini muffin tin, filling each cup about ¾ full. Bake for 12 to 15 minutes, or until a toothpick inserted in the center comes out clean.
- Allow muffins to cool in the pan for 5 minutes before transferring to a wire rack to cool completely. Store cooled muffins in an airtight container or freeze for later use.
10. Oatmeal Raisin Cookie Dough Balls
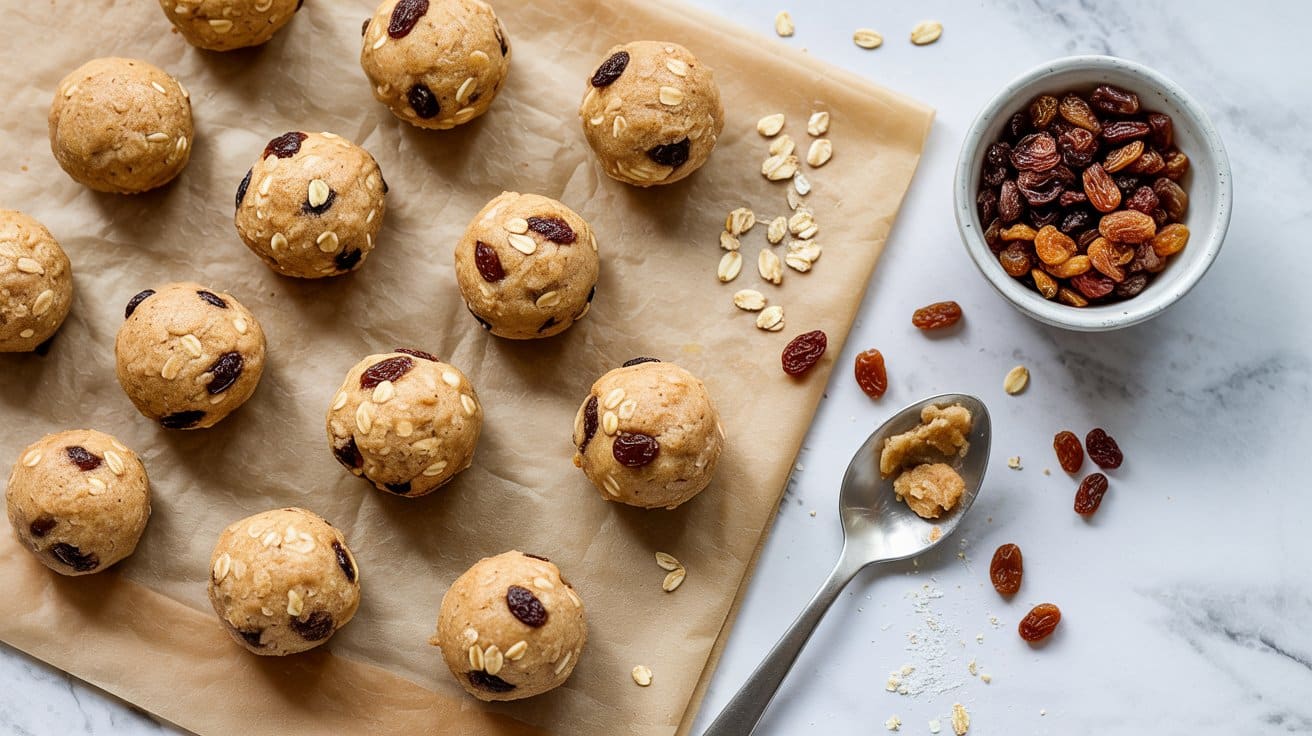
Oatmeal raisin cookie dough balls are a handy treat that captures all the comforting flavors of a classic cookie in a quick, ready-to-eat form. These little bites balance the chewiness of oats with the natural sweetness of raisins, making them an easy snack to prepare ahead and enjoy anytime.
They hold their texture well after freezing, so you can keep them on hand for a satisfying bite without having to bake a whole batch of cookies. The combination of warm spices and wholesome oats makes these cookie dough balls familiar and comforting, yet simple to make.
Why This Recipe Works
This recipe brings together convenience and timeless flavor in a snack-sized package. Its balanced sweetness and texture make it an appealing option for various occasions.
- Convenience - Form cookie dough into single-serving balls that freeze well for grab-and-go snacking.
- Flavor balance - Combines wholesome oats and plump raisins with warm cinnamon and nutmeg for classic taste.
- Texture - Soft and chewy with just enough firmness to hold shape after freezing.
- Appeal - Suitable for a quick treat or part of a lunchbox, pleasing for both adults and kids.
Ingredient Swap Ideas
Swapping ingredients can help tailor this recipe to fit dietary needs or personal taste without losing its essence.
- Raisins - Use dried cranberries, chopped dates, or cherries for a different fruity sweetness.
- Honey - Substitute maple syrup or agave nectar for a plant-based sweetener.
- Butter - Replace with coconut oil or vegan margarine to make it dairy-free.
- Flour - Use a gluten-free all-purpose flour blend to adapt the recipe for gluten sensitivity.
Ingredients
- ½ cup unsalted butter - softened to room temperature for easy mixing.
- ½ cup brown sugar - packed, adds moisture and rich sweetness.
- ¼ cup honey - for natural sweetness and chewiness.
- 1 teaspoon vanilla extract - enhances the overall flavor.
- 1 cup old-fashioned rolled oats - provides texture and wholesome body.
- ¾ cup all-purpose flour - binds the dough while keeping it soft.
- ½ teaspoon ground cinnamon - adds warmth and spice.
- ¼ teaspoon ground nutmeg - goes with the cinnamon with subtle depth.
- ¼ teaspoon salt - balances sweetness and enhances flavor.
- ½ cup raisins - plump and sweet, folded into the dough.
Instructions
- In a large bowl, beat the softened butter with brown sugar and honey until creamy and smooth. Stir in the vanilla extract.
- In a separate bowl, whisk together oats, flour, cinnamon, nutmeg, and salt. Gradually add the dry ingredients to the butter mixture, mixing until combined.
- Fold in the raisins evenly through the dough. It should be soft but hold together well.
- Using a spoon or cookie scoop, form the dough into 1½-inch balls and place them on a baking sheet lined with parchment paper.
- Freeze the balls on the tray for at least 1 hour, then transfer to a resealable container. Keep them frozen until ready to enjoy. No baking needed-eat straight from the freezer or thaw for a few minutes if preferred soft.
11. Mini Cheesecake Cups
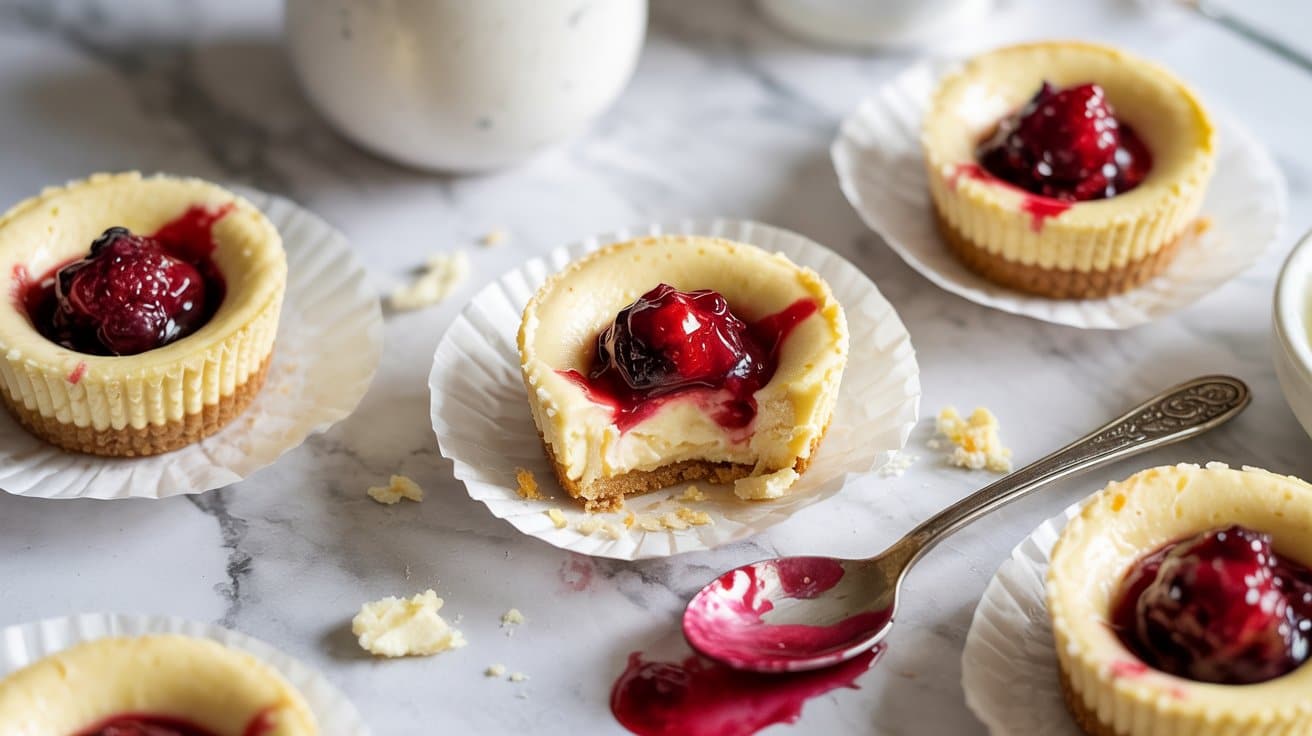
Mini cheesecake cups offer a simple yet satisfying way to enjoy creamy cheesecake in a perfectly portioned size. Baked right in muffin tins, these individual treats have a smooth, rich texture with a subtle tang from the cream cheese.
They're easy to customize with your favorite toppings or flavors, and their small size makes them ideal for gatherings or as a quick dessert ready from the freezer.
Why This Recipe Works
This recipe combines ease of preparation with fantastic creamy texture, making it a great choice for busy cooks who want a reliable dessert option.
- Convenience - Baked in muffin tins and easy to freeze for dessert on demand.
- Flavor balance - Creamy, tangy filling with a buttery crust that complements each bite.
- Texture - Smooth and dense cheesecake filling with a crumbly base.
- Appeal - Individual portions that look inviting and eliminate extra slicing or serving fuss.
Ingredient Swap Ideas
Adjusting ingredients can make these cheesecake cups fit various dietary preferences or flavors without losing their creamy appeal.
- Graham cracker crumbs - Use gluten-free cookies or crushed nuts for a gluten-free crust option.
- Cream cheese - Substitute with dairy-free cream cheese to make the recipe vegan-friendly.
- Sugar - Replace granulated sugar with coconut sugar or a sugar substitute for a lower-glycemic version.
- Toppings - Add fresh berries or fruit compote instead of a plain top for extra flavor and color.
Ingredients
- 1 ½ cups graham cracker crumbs - For a buttery, crunchy base.
- ¼ cup granulated sugar - Adds sweetness to the crust.
- ⅓ cup unsalted butter, melted - Binds the crumbs and adds richness.
- 16 ounces cream cheese, softened - Main ingredient for a smooth and tangy filling.
- ⅔ cup granulated sugar - Sweetens the cheesecake filling.
- 2 large eggs - Helps the filling set without being too dense.
- 1 teaspoon vanilla extract - Enhances overall flavor.
- ½ cup sour cream - Adds moisture and slight tang to balance the richness.
Instructions
- Preheat the oven to 325°F (160°C). Line a 12-cup muffin tin with paper liners or lightly grease each cup.
- Combine graham cracker crumbs, ¼ cup sugar, and melted butter in a bowl. Mix until the crumbs are evenly coated and press the mixture firmly into the bottom of each muffin cup to form a crust.
- In a large bowl, beat the softened cream cheese until smooth using a hand mixer or stand mixer. Gradually add ⅔ cup sugar and mix until creamy.
- Add eggs one at a time, blending well after each addition. Stir in vanilla extract and sour cream until the batter is smooth and well combined.
- Spoon the batter evenly over each graham cracker crust in the muffin cups. Bake for 18 to 20 minutes, or until the edges are set but the centers still slightly jiggle.
- Remove from the oven and allow cheesecakes to cool completely in the pan. Then refrigerate for at least 2 hours before serving, or freeze wrapped in plastic for longer storage.
Serve chilled, plain or topped with fresh fruit or a drizzle of chocolate for added flavor.
12. Double Chocolate Chip Brownie Bites
These Double Chocolate Chip Brownie Bites are small, rich treats that satisfy any chocolate craving. Their fudgy texture holds up well, making them ideal for freezing and enjoying later without losing their softness.
The intense chocolate flavor goes well with semi-sweet chocolate chips scattered throughout. You can whip these up quickly using simple ingredients and enjoy bite-sized brownies anytime.
Why This Recipe Works
This recipe balances convenience with indulgence, making it ideal for busy days or planned gatherings.
- Convenience - The batter comes together quickly, and the brownies freeze well for future snacking.
- Flavor balance - Deep chocolate notes are enhanced by the mix of cocoa and melty chocolate chips.
- Texture - Fudgy and dense with a tender crumb that stays moist even after freezing.
- Appeal - Bite-sized portions are easy to serve and perfect for sharing with family or guests.
Ingredient Swap Ideas
Simple swaps allow you to tailor this recipe to your tastes or dietary needs without sacrificing chocolate goodness.
- Use dairy-free butter or coconut oil to make the brownies suitable for vegan or dairy-free diets.
- Substitute all-purpose flour with gluten-free flour to accommodate gluten intolerance while maintaining texture.
- Try dark or white chocolate chips for a different flavor twist within the same fudgy base.
- Swap granulated sugar with coconut sugar or maple syrup for a less refined sweetness option.
Ingredients
- ½ cup unsalted butter - melted and cooled slightly.
- 1 cup granulated sugar - adds sweetness and structure.
- 2 large eggs - bind the batter and create richness.
- 1 teaspoon vanilla extract - enhances chocolate flavor.
- ⅓ cup unsweetened cocoa powder - provides deep chocolate taste.
- ½ cup all-purpose flour - gives structure to the brownie bites.
- ¼ teaspoon salt - balances sweetness.
- ¼ teaspoon baking powder - helps the brownie bites rise slightly.
- ½ cup semi-sweet chocolate chips - add melty pockets of chocolate throughout.
Instructions
- Preheat your oven to 350°F (175°C) and lightly grease a mini muffin pan or line it with paper liners.
- In a medium bowl, mix the melted butter and sugar until combined. Whisk in the eggs and vanilla extract until smooth.
- Sift together the cocoa powder, flour, salt, and baking powder in a separate bowl. Gradually fold the dry ingredients into the wet ingredients until just combined.
- Gently stir in the chocolate chips, distributing them evenly through the batter.
- Spoon the batter into the prepared muffin pan, filling each cup about ¾ full. Bake for 12 to 15 minutes until a toothpick inserted comes out with moist crumbs. Let the brownie bites cool completely before removing them from the pan.
Store any leftovers in an airtight container or freeze for longer storage. These bite-sized treats thaw quickly and maintain their fudgy texture even after being frozen.
Many of the treats here double as kid-friendly options suitable for packed lunches and quick mornings, and you can find more kid-friendly back-to-school snacks for busy mornings. If you want additional make-ahead sweets for the freezer, see easy freezer desserts to prep ahead for both full-size and individual-serve ideas.

Andrew Gray is a seasoned food writer and blogger with a wealth of experience in the restaurant and catering industries. With a passion for all things delicious, Andrew has honed his culinary expertise through his work as a personal chef and caterer.
His love for food led him to venture into food writing, where he has contributed to various online publications, sharing his knowledge and insights on the culinary world. As the proud owner of CooksCrafter.com, Andrew covers a wide range of topics, including recipes, restaurant reviews, product recommendations, and culinary tips.
Through his website, he aims to inspire and educate fellow food enthusiasts, offering a comprehensive resource for all things food-related.