Sheet pan desserts are a simple way to prepare treats that serve a crowd without much hassle, using a single rimmed baking sheet, typically a half-sheet pan (about 18x13 inches), for even baking and quick cleanup. This collection of 11 recipes offers a range of sweet options suited for gatherings, potlucks, or any time you need to feed several people with minimal fuss.
From fudgy brownies and chewy blondies to fruit-filled cobblers and spiced pumpkin cakes, the variety here covers classic favorites and seasonal delights. Each recipe is designed for ease, using a single sheet pan that simplifies preparation and baking while delivering big, satisfying flavors.
These desserts stand out because they combine convenience with crowd appeal. Baking everything on one pan means less cleanup, and the straightforward recipes make portioning and serving quick, so you can enjoy the moment with your guests rather than spending time in the kitchen.
1. Classic Sheet Pan Brownies
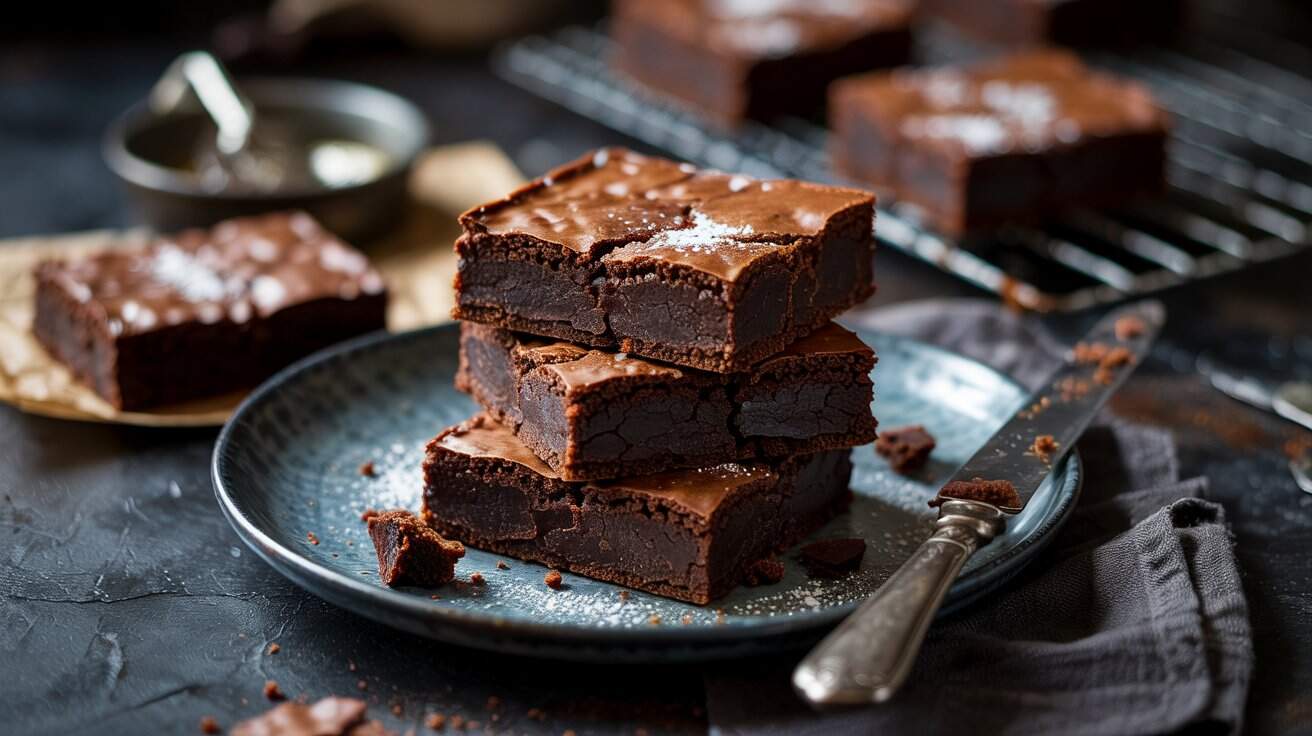
Baking brownies in a single sheet pan makes it easy to get a batch of rich, fudgy bars that everyone will enjoy, baked at 350°F for about 20-25 minutes. This recipe keeps things simple and straightforward, giving you that classic chocolate experience with a tender, chewy texture and a crackly top.
You can count on these brownies for a quick dessert fix or a treat to share with friends and family; for travel-friendly cake options for potlucks see sheet cakes that travel well for potlucks.
Plus, the ingredients are pantry staples, so you likely have everything on hand, like all-purpose flour, granulated sugar, cocoa powder, eggs, and butter.
If you don't have a broiler pan, consider these handy broiler pan substitutes for home kitchens.
Why This Recipe Works
This sheet pan brownie recipe brings together convenience and taste in a way that fits busy schedules without compromising flavor.
- Convenience - One pan prep means less cleanup and a quicker baking process.
- Rich flavor - Deep chocolate notes give a satisfying taste that's not overly sweet.
- Fudgy texture - Moist and dense inside with a slightly crisp top layer.
- Family-friendly - Appeals to all ages, perfect for gatherings or after-dinner dessert.
- Easy portioning - Cut into bars to serve the right size according to your needs.
Ingredient Swap Ideas
You can adjust some ingredients to suit dietary preferences or ingredient availability, while keeping the overall chocolate brownie experience.
- Butter substitute - Use coconut oil in the same amount to make it dairy-free.
- Flour swap - Try almond flour for a gluten-free option, but expect a slightly different texture.
- Sugar alternative - Replace granulated sugar with coconut sugar for a less processed sweetener.
- Add-ins - Stir in chopped nuts or dark chocolate chips for extra texture and flavor depending on your preference.
- Egg replacement - Use flaxseed egg (1 tablespoon flaxseed meal + 3 tablespoons water) to make it vegan-friendly.
Ingredients
- 1 cup (225g) unsalted butter - melted and slightly cooled for mixing.
- 2 cups (400g) granulated sugar - provides sweetness and structure.
- 4 large eggs - bind the ingredients and add moisture.
- 1 teaspoon vanilla extract - enhances the chocolate flavor.
- 1 cup (85g) unsweetened cocoa powder - delivers rich chocolate taste.
- 1 cup (125g) all-purpose flour - holds the batter together.
- ½ teaspoon salt - balances sweetness and intensifies flavors.
- ½ teaspoon baking powder - helps a slight lift without losing fudginess.
Instructions
- Preheat your oven to 350°F (175°C) and lightly grease a 9x13 inch sheet pan or line it with parchment paper.
- In a large bowl, whisk the melted butter and granulated sugar together until combined but not overly fluffy.
- Beat in the eggs one at a time, then stir in the vanilla extract. Mix until smooth.
- Sift the cocoa powder, flour, salt, and baking powder into the wet ingredients. Gently fold until just combined, avoiding overmixing.
- Pour the batter evenly into the prepared sheet pan, spreading to the edges for even thickness.
- Bake for 25 to 30 minutes. Check doneness by inserting a toothpick in the center; a few moist crumbs indicate fudgy brownies.
- Let cool completely in the pan before slicing into bars to prevent crumbling.
These sheet pan brownies offer straightforward baking with satisfying results. You can easily adjust add-ins or swaps to suit your mood or needs without losing that classic brownie appeal.
2. Peach Cobbler Sheet Pan Dessert
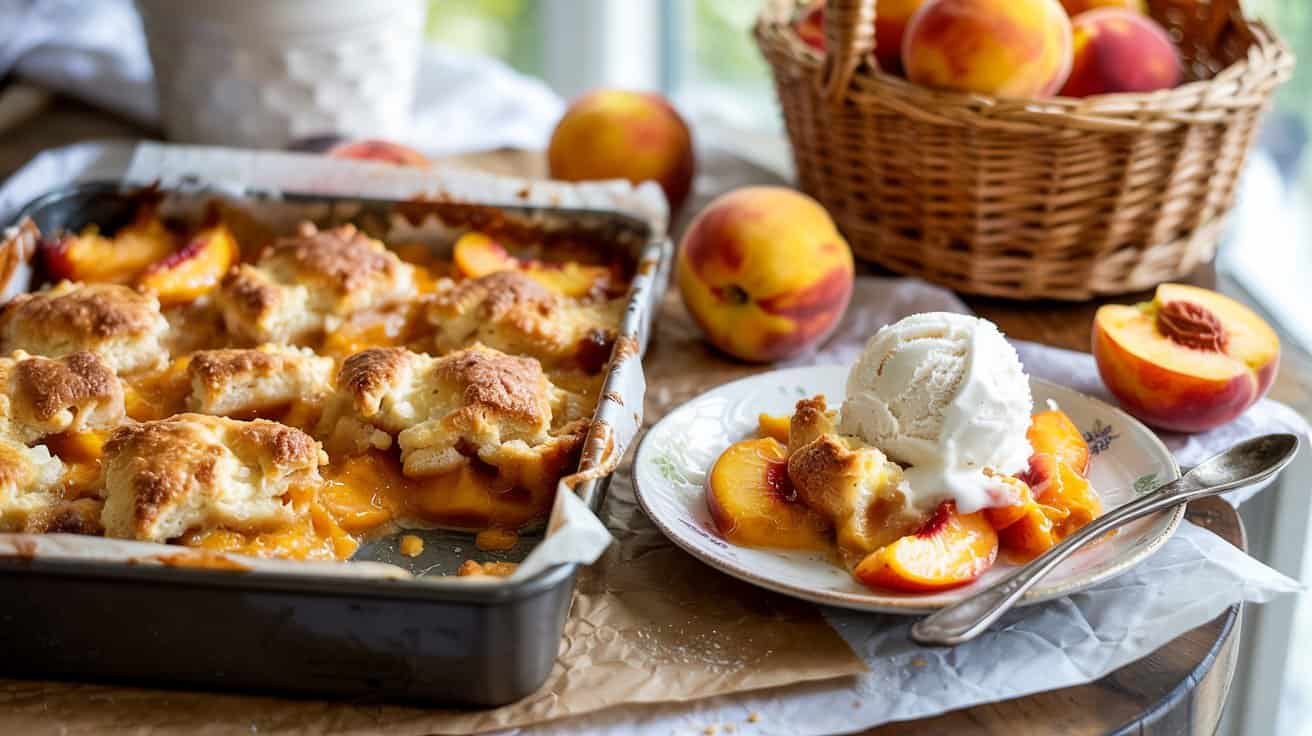
This sheet pan version spreads the filling and topping out evenly for easy serving, making it a great choice for gatherings or family treats; for other peach-based accompaniments that pair well at gatherings see tangy sides to serve with peach salsa.
You'll notice the peaches turn tender and bubbly as they bake, especially when using ripe, freestone peaches, blending beautifully with the buttery biscuit topping that browns perfectly across the pan. The combination of juicy fruit and biscuit crust creates a simple yet satisfying dessert that's easy to prepare and share.
Why This Recipe Works
This recipe combines fresh fruit and a biscuit topping in a one-pan bake that's straightforward and crowd-pleasing. It's a reliable way to enjoy peach cobbler without fuss and with plenty of flavor.
- Convenience - Everything bakes together on a single sheet pan for an easy cleanup and serving experience.
- Flavor balance - Natural sweetness from ripe peaches pairs with warm spices and a buttery biscuit topping.
- Texture - Juicy, tender fruit filling contrasts nicely with a soft but slightly crisp biscuit crust.
- Appeal - Ideal for sharing at family meals, potlucks, or casual get-togethers because it's simple and satisfying.
- Serving ease - The sheet pan format means you can cut cobbler into portions quickly without additional plates or bowls.
Ingredient Swap Ideas
Swapping ingredients lets you adjust this cobbler to suit what you have on hand or to meet different dietary preferences. Small changes can keep the essence intact while offering new tastes or textures.
- Peaches - Use nectarines or a mix of stone fruits like plums and apricots if peaches aren't in season.
- Biscuit topping - Replace all-purpose flour with a gluten-free blend to make it gluten-friendly.
- Butter - Swap unsalted butter for coconut oil if you want a dairy-free option with a subtle tropical note.
- Sweetener - Use maple syrup or honey instead of granulated sugar for a natural sweetness variation.
- Spices - Add a pinch of ground cardamom or ginger to the filling for a different warm spice profile.
Ingredients
- 6 cups fresh peaches - peeled, pitted, and sliced into medium wedges.
- ½ cup granulated sugar - for sweetening the peach filling.
- ¼ cup light brown sugar - adds depth and caramel notes to the fruit.
- 1 teaspoon ground cinnamon - warms up the filling's flavor.
- ¼ teaspoon ground nutmeg - provides a subtle spice accent.
- 1 tablespoon lemon juice - brightens the peach flavor and balances sweetness.
- 2 teaspoons cornstarch - thickens the peach filling slightly when baked.
- 2 cups all-purpose flour - for the biscuit topping.
- ½ cup granulated sugar - sweetens the topping dough.
- 1 tablespoon baking powder - helps biscuits rise and become fluffy.
- ½ teaspoon salt - balances sweetness in the topping.
- ¾ cup unsalted butter - cold and cut into pieces, for the biscuit topping.
- 1 cup whole milk - adds moisture to the biscuit dough.
- Optional: coarse sugar - for sprinkling on top before baking to add crunch.
Instructions
- Preheat your oven to 375°F (190°C). Lightly grease a sheet pan, approximately 9x13 inches, to prevent sticking.
- In a large bowl, combine sliced peaches, granulated sugar, brown sugar, cinnamon, nutmeg, lemon juice, and cornstarch. Toss gently until the peaches are evenly coated. Pour this mixture into the prepared sheet pan, spreading it out in an even layer.
- In a separate bowl, whisk together flour, sugar, baking powder, and salt for the biscuit topping. Add the cold butter pieces and use a pastry cutter or your fingers to mix until the mixture resembles coarse crumbs.
- Pour in the milk and stir just until a soft dough forms. Drop spoonfuls of the biscuit dough evenly over the peach filling. The topping will spread slightly as it bakes, so don't worry if some peaches remain visible.
- Sprinkle coarse sugar over the biscuit topping if using. Bake in the preheated oven for 40 to 45 minutes, or until the biscuit topping is golden brown and a toothpick inserted comes out clean. The peach filling should be bubbly and slightly thickened.
- Remove from the oven and let the cobbler cool for about 15 minutes before slicing into squares. Serve warm, optionally with vanilla ice cream or whipped cream.
3. Blondie Bars with Chocolate Chips and Walnuts
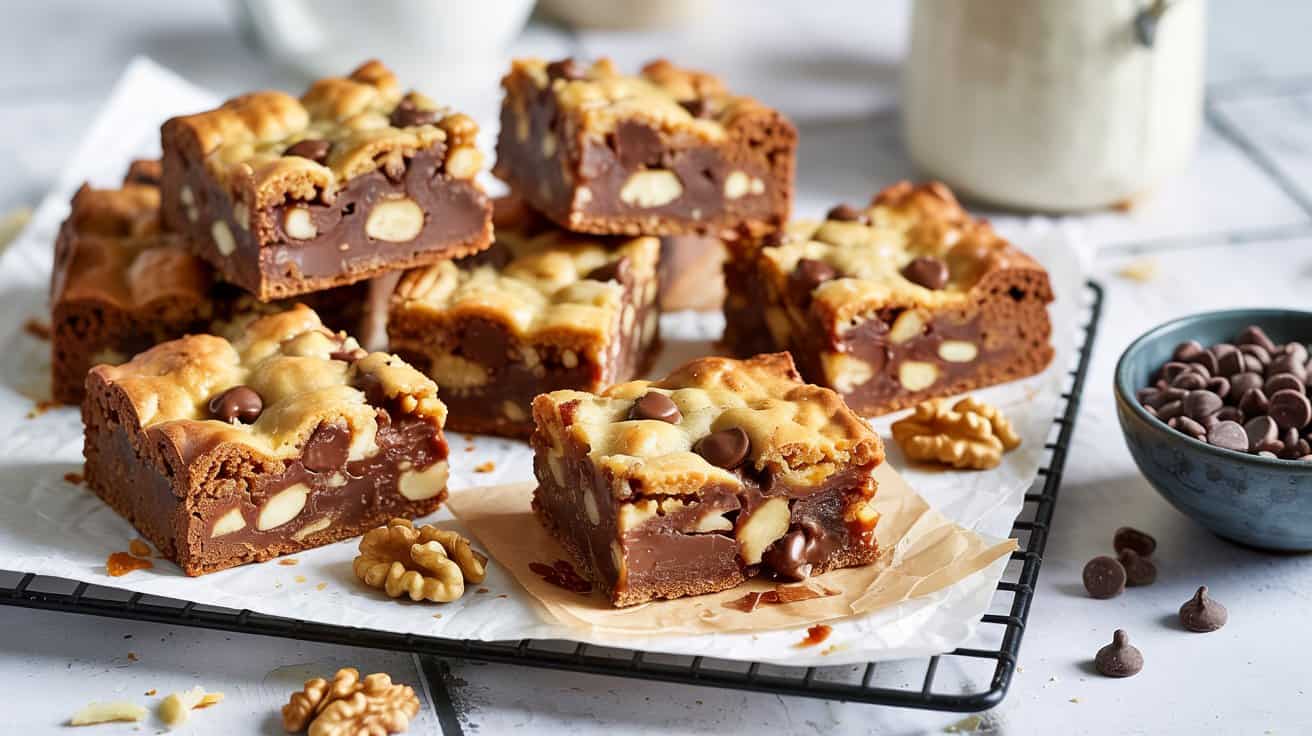
Blondie bars are a wonderful treat that combines a buttery, chewy texture with rich pockets of chocolate and crunchy walnuts. For alternatives to chocolate chips, try chocolate chip substitutes for baking.
This recipe is straightforward, baked all in one pan and sliced into bars, making it perfect for batch baking. Whether you want something sweet for an afternoon snack or need a simple dessert to share, these blondies fit the bill with their balanced crunch and gooey chocolate chips.
Why This Recipe Works
The recipe delivers a rich, buttery base layered with chocolate and nuts, creating an inviting texture and flavor in every bite. Plus, it's simple to make and easy to portion.
- Convenience - Prepare the batter quickly in one bowl, then bake and slice.
- Flavor balance - Combines sweet brown sugar, semi-sweet chocolate, and earthy walnuts.
- Texture - Chewy interior with a slightly crisp edge and crunchy nuts.
- Appeal - Loved by kids and adults alike, ideal for sharing or packing in lunches.
- Cleanup or serving ease - Uses just one pan and cuts easily into uniform bars.
Ingredient Swap Ideas
Swapping ingredients lets you adjust these blondie bars to suit different tastes or dietary needs without changing the core flavor and texture.
- Walnuts - Use pecans, almonds, or even sunflower seeds for a nut variation.
- Chocolate chips - Substitute with white chocolate, butterscotch chips, or chopped baking chocolate.
- Butter - Try coconut oil for a dairy-free alternative with a subtle coconut flavor.
- Flour - Use a gluten-free all-purpose flour blend to make it suitable for gluten sensitivities.
- Sugar - Replace brown sugar with coconut sugar or a mix of maple syrup and white sugar for a different sweetness profile.
Ingredients
- 1 cup unsalted butter - melted and slightly cooled.
- 2 cups packed light brown sugar - adds moisture and caramel flavor.
- 2 large eggs - at room temperature, to bind the mixture.
- 2 teaspoons pure vanilla extract - enhances sweetness and depth.
- 2 cups all-purpose flour - provides structure and tenderness.
- 1 teaspoon baking powder - helps the blondies rise slightly.
- ½ teaspoon salt - balances sweetness and enhances flavors.
- 1 cup semi-sweet chocolate chips - distributes gooey chocolate throughout.
- 1 cup chopped walnuts - adds crunch and a nutty note.
Instructions
- Preheat your oven to 350°F (175°C). Line a 9x13-inch baking pan with parchment paper or grease it lightly.
- In a large mixing bowl, combine the melted butter and brown sugar. Stir well until smooth and fully incorporated.
- Add the eggs one at a time, mixing thoroughly after each addition. Stir in the vanilla extract.
- In a separate bowl, whisk together the flour, baking powder, and salt. Gradually add the dry ingredients to the wet ingredients, stirring just until combined. Avoid overmixing.
- Fold in the chocolate chips and chopped walnuts evenly throughout the batter.
- Spread the batter evenly into the prepared pan, smoothing the top with a spatula. Bake for 25 to 30 minutes, or until the edges are set and lightly golden but the center still feels slightly soft.
- Remove from oven and let cool completely in the pan. Once cool, lift the blondies out using the parchment paper and cut into bars.
Enjoy your bars as a snack, dessert, or a sweet addition to any gathering. Store leftovers in an airtight container at room temperature for up to 4 days.
4. Mixed Berry Crumble Sheet Pan
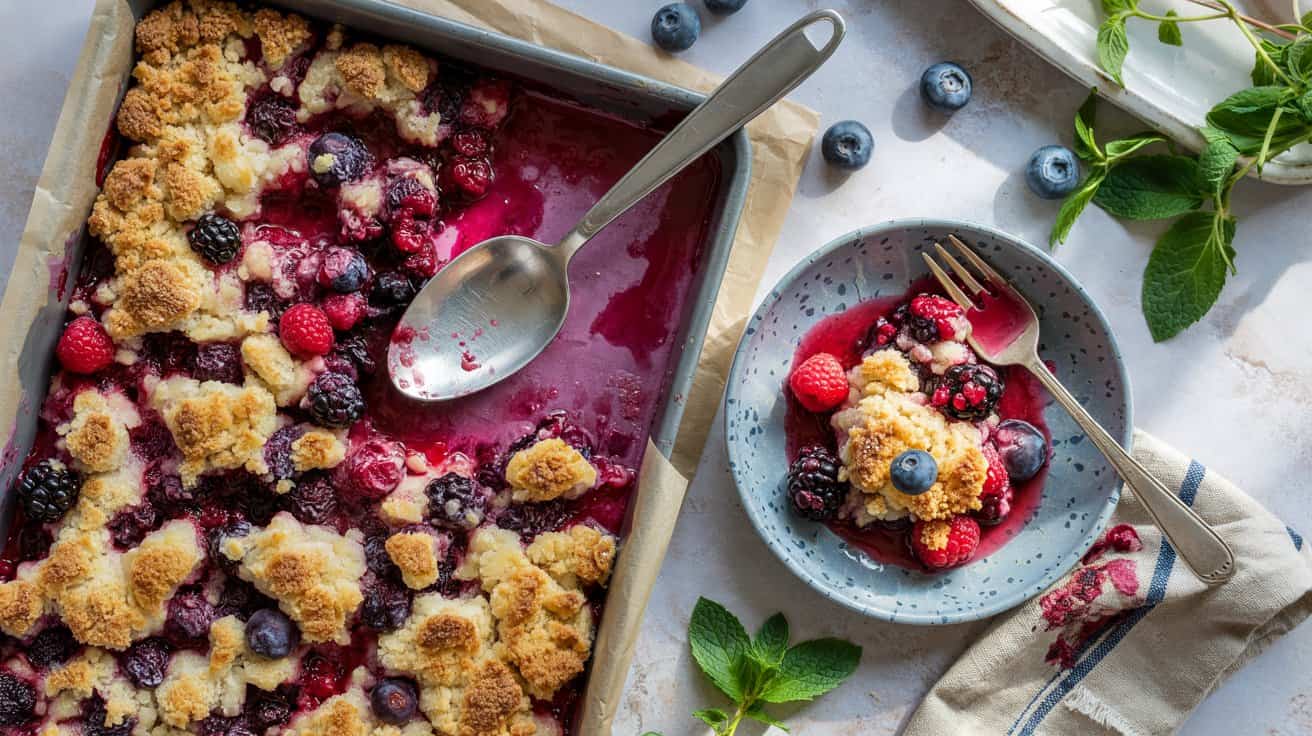
This Mixed Berry Crumble Sheet Pan brings together the sweet and tart flavors of fresh or frozen berries baked under a crunchy oat topping. It's a straightforward dessert that's easy to prepare and perfect for sharing, thanks to the convenient sheet pan format.
The combination of juicy, bubbling berries and a crispy, golden crumble creates a balance of textures that's satisfying with every bite. You can enjoy it warm with a scoop of ice cream or let it cool down for a simple treat any time.
Using a sheet pan means you can make a generous batch quickly without multiple bowls or tricky steps. It's a go-to recipe for family dinners, casual gatherings, or just when you want a wholesome, fruit-forward dessert.
Why This Recipe Works
This recipe offers a delicious, no-fuss way to enjoy a classic crumble with minimal prep and cleanup. The juicy berries combined with a crisp oat topping bring together bright flavors and inviting textures.
- Convenience - Made in one sheet pan with simple mixing and baking steps.
- Flavor balance - Sweet and tart berries go with the buttery, slightly spiced crumble perfectly.
- Texture - Juicy fruit filling with a crunchy, golden oat topping provides great contrast.
- Appeal - A family-friendly dessert that works well for casual meals or small gatherings.
- Cleanup ease - Baking on a sheet pan means fewer dishes and quick cleanup.
Ingredient Swap Ideas
Swapping a few ingredients here and there can customize this crumble to suit personal preferences or dietary needs. You can keep the essence of the recipe while making it your own with simple substitutions.
- Fresh or frozen berries - Use raspberries, blackberries, strawberries, or a mix depending on what's available.
- Butter - Substitute with coconut oil or a vegan butter alternative for a dairy-free version.
- Oats - Use gluten-free rolled oats to keep the crumble gluten-free.
- Sweetener - Replace brown sugar with maple syrup or coconut sugar for a different sweetness profile.
- Flour - Swap all-purpose flour for almond flour or oat flour to add subtle flavor and accommodate allergies.
Ingredients
- 5 cups mixed berries - Fresh or frozen blueberries, raspberries, strawberries, and blackberries.
- ½ cup granulated sugar - Provides sweetness for the berry filling.
- 1 tablespoon lemon juice - Enhances berry flavors and balances sweetness.
- 1 tablespoon cornstarch - Thickens the berry juices during baking.
- 1 cup old-fashioned rolled oats - Forms the base of the crispy crumble topping.
- ¾ cup all-purpose flour - Helps bind the crumble topping.
- ½ cup light brown sugar - Adds sweetness and moisture to the crumble topping.
- 1 teaspoon ground cinnamon - Adds warm spice to the topping.
- ¼ teaspoon salt - Enhances all flavors.
- ½ cup unsalted butter - Cold and cut into pieces, creates a buttery, crisp crumble.
Instructions
- Preheat your oven to 350°F (175°C). Lightly grease a rimmed sheet pan to prevent sticking.
- In a large bowl, combine the mixed berries, granulated sugar, lemon juice, and cornstarch. Toss gently until the berries are evenly coated. Spread the berry mixture evenly across the prepared sheet pan.
- In another bowl, mix the rolled oats, all-purpose flour, brown sugar, cinnamon, and salt. Add the cold butter pieces and use your fingers or a pastry cutter to work the butter into the dry ingredients until the mixture resembles coarse crumbs.
- Sprinkle the crumble topping evenly over the berries in the sheet pan. Make sure the topping covers the berries well but doesn't need to be packed down.
- Bake for 35 to 40 minutes, or until the topping is golden brown and the berry filling is bubbling around the edges.
- Let the crumble cool slightly before serving. It's excellent warm, with vanilla ice cream or plain Greek yogurt on the side.
5. Salted Caramel Apple Sheet Pan Bars
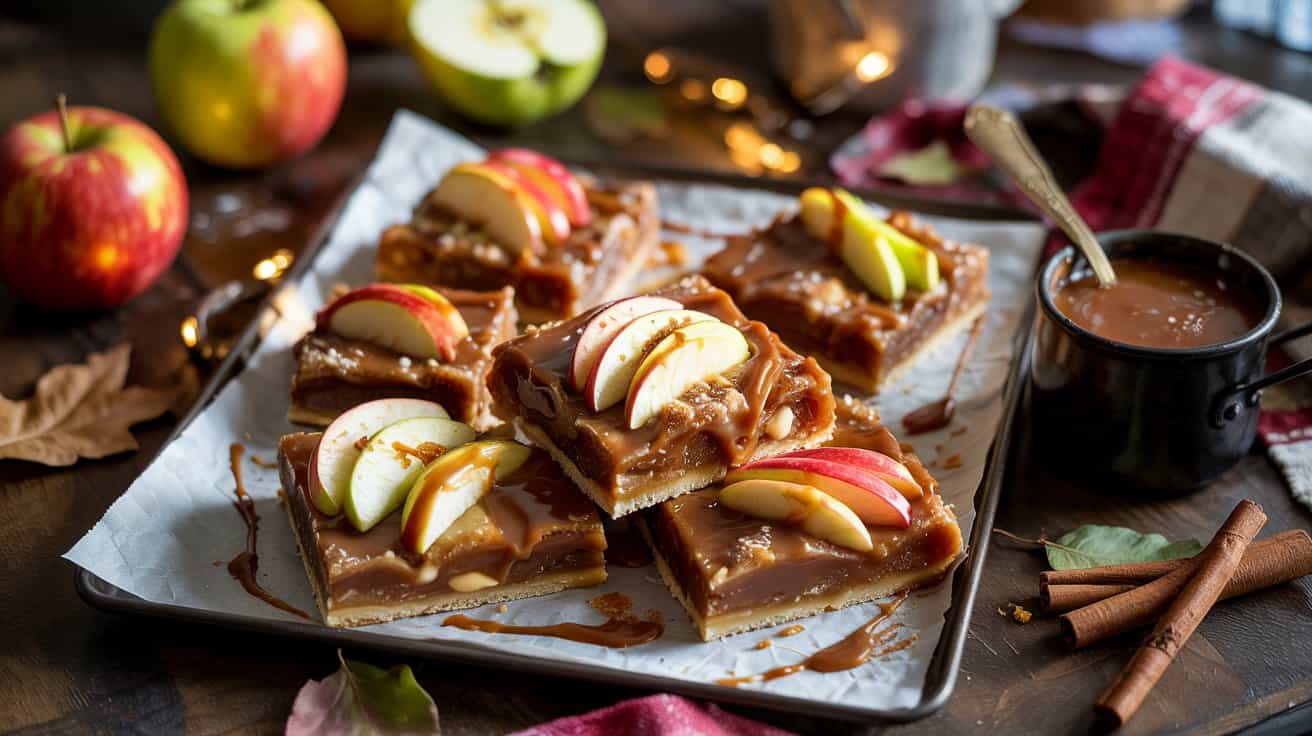
These salted caramel apple sheet pan bars combine juicy tart apples with rich, gooey caramel in a crisp, buttery crust. They're a straightforward dessert that's ideal for sharing at gatherings or enjoying as an afternoon treat.
The bars strike a nice balance between sweet and salty, with the caramel improving the natural brightness of the apples. Since everything is baked on one sheet pan, they come together without much fuss or extra cleanup.
You can customize the bars with your favorite apple varieties, or add a sprinkle of nuts for a bit of crunch if you want a different textural contrast. They keep well too, making them perfect for preparing ahead of time.
Why This Recipe Works
This recipe offers a wonderful mix of flavors and textures that's easy to nail every time. The combination of tart apples, salted caramel, and crisp crust makes it an appealing dessert for almost any occasion.
- Convenience - Baked entirely in one sheet pan, reducing prep and cleanup time.
- Flavor Balance - Tart apples paired with rich salted caramel create a satisfying sweet-and-savory combo.
- Texture - Crisp crust topped with tender, juicy apple slices and smooth caramel drizzle.
- Family-Friendly - A dessert that appeals to both adults and kids alike.
- Make-Ahead - Stores well for several days, perfect for planning ahead or leftovers.
Ingredient Swap Ideas
You can easily adjust this recipe to fit other preferences or dietary needs by swapping a few ingredients without losing the core flavor.
- Apples - Use Granny Smith for tartness or Fuji for extra sweetness depending on your taste.
- Caramel Sauce - Replace with homemade caramel or dulce de leche for a richer, more indulgent topping.
- Butter - Use plant-based margarine or coconut oil for a dairy-free variation.
- Flour - Swap all-purpose flour with gluten-free flour blends to make it gluten-free.
- Topping - Add chopped pecans or walnuts for added crunch and depth.
Ingredients
- 2 cups all-purpose flour - Provides structure to the crust and topping.
- ½ teaspoon baking powder - Helps the crust rise slightly and stay tender.
- ¼ teaspoon salt - Balances sweetness and enhances flavor.
- ¾ cup cold unsalted butter - Cut into pieces, adds richness and crispness to the crust.
- 1 cup granulated sugar - Sweetens the crust and topping.
- 2 large eggs - Bind the ingredients and add moisture.
- 1 teaspoon vanilla extract - Adds warmth and depth to the flavor.
- 3 medium tart apples - Peeled, cored, and thinly sliced. Tart apples hold their shape and balance the sweet caramel.
- ¾ cup caramel sauce - Salted caramel sauce for drizzling on top. Use store-bought or homemade.
- Sea salt flakes - A sprinkle on top to bring out the salted caramel flavor.
Instructions
- Preheat your oven to 350°F (175°C) and line a 9x13-inch sheet pan with parchment paper. This makes it easier to remove the bars later and reduces sticking.
- In a medium bowl, whisk together the flour, baking powder, and salt. Add the cold butter pieces and use a pastry cutter or your fingers to incorporate it until the mixture resembles coarse crumbs.
- In a separate bowl, whisk the sugar, eggs, and vanilla extract until smooth. Combine this with the flour mixture and mix just until combined to form the crust dough.
- Press about two-thirds of the dough evenly into the prepared pan to form the base layer. Arrange the apple slices in an even layer over the crust.
- Crumble the remaining dough on top of the apples, then bake the whole pan for 35 to 40 minutes until the crust is golden and the apples are tender.
- Remove the pan from the oven and immediately drizzle the salted caramel sauce over the warm bars. Sprinkle with a few sea salt flakes, then let cool completely before slicing into squares.
Enjoy these bars as a handheld dessert or served with a dollop of whipped cream or vanilla ice cream for an extra touch.
6. Pumpkin Cinnamon Sheet Pan Cake

This Pumpkin Cinnamon Sheet Pan Cake is a great choice for seasonal baking that's both simple and satisfying. The batter comes together quickly and bakes evenly in a sheet pan, making it ideal for serving a crowd or slicing into snack-sized pieces for later.
The texture is tender and moist, with just enough density to hold up well to cutting. The warm cinnamon goes with the natural sweetness of pumpkin, creating cozy flavors that remind us of crisp fall days.
Since it uses familiar pantry ingredients and minimal fuss, it fits effortlessly into busy schedules. You get a homemade dessert without complicated steps or long baking times, perfect for sharing with family and friends.
Why This Recipe Works
This recipe offers a straightforward way to enjoy pumpkin's rich fall flavor in a form that's easy to make and serve.
- Convenience - Uses one sheet pan for baking, allowing for quick preparation and easy cleanup.
- Flavor balance - Combines warm cinnamon with pumpkin's natural sweetness for a comforting yet refined taste.
- Texture - The cake bakes thin and tender with a lightly crisp top that cuts well into squares.
- Appeal - Crowd-pleasing and festive, great for gatherings or casual treats.
- Serving ease - Pre-portioned squares make it simple to serve and store leftovers.
Ingredient Swap Ideas
Simple ingredient swaps can adapt this cake to fit specific diets or flavor preferences without losing its essence. Adjusting as needed keeps this recipe flexible and accessible.
- Pumpkin puree swap - Use sweet potato puree if you want a slightly different sweetness and texture.
- Flour alternative - Replace all-purpose flour with a gluten-free blend for gluten sensitivities.
- Sweetener options - Substitute brown sugar with coconut sugar or maple syrup to vary the sweetness profile.
- Fat choices - Use melted coconut oil or a plant-based butter substitute for a dairy-free version.
- Spice variations - Add nutmeg or ginger alongside cinnamon for more complex warmth.
Ingredients
- 2 cups canned pumpkin puree - Smooth, unsweetened pumpkin for moist texture and fall flavor.
- 1 cup granulated sugar - Provides sweetness and helps balance pumpkin's earthiness.
- ½ cup brown sugar - Adds a deeper, molasses-like sweet note and moisture.
- 3 large eggs - Bind the ingredients and give structure to the cake.
- 1 cup vegetable oil - Keeps the cake tender and soft.
- 2 ½ cups all-purpose flour - Provides the bulk and structure for the cake.
- 2 teaspoons ground cinnamon - Brings warm spice that goes well with pumpkin.
- 1 teaspoon baking powder - Helps the cake rise slightly for a tender crumb.
- ½ teaspoon baking soda - Balances acidity and aids leavening.
- ½ teaspoon salt - Enhances all the flavors.
- 1 cup chopped walnuts or pecans (optional) - Adds crunch and texture.
Instructions
- Preheat your oven to 350°F (175°C). Lightly grease a 15x10-inch sheet pan or line it with parchment paper for easier cleanup.
- In a large mixing bowl, combine pumpkin puree, granulated sugar, brown sugar, eggs, and vegetable oil. Whisk until the mixture is smooth and well blended.
- In a separate bowl, sift together flour, cinnamon, baking powder, baking soda, and salt.
- Gradually add the dry ingredients to the wet pumpkin mixture. Stir gently until just combined-avoid overmixing, which can make the cake tough.
- Pour the batter evenly into the prepared sheet pan. If using nuts, sprinkle them over the top, pressing lightly so they stick.
- Bake for 25-30 minutes, or until a toothpick inserted into the center comes out clean. Remove from the oven and let cool completely in the pan before cutting into squares.
Serve as a cozy snack with coffee or a light dessert after meals. This cake keeps well, covered at room temperature for a couple of days or refrigerated for longer storage.
7. Lemon Bar Sheet Pan Dessert
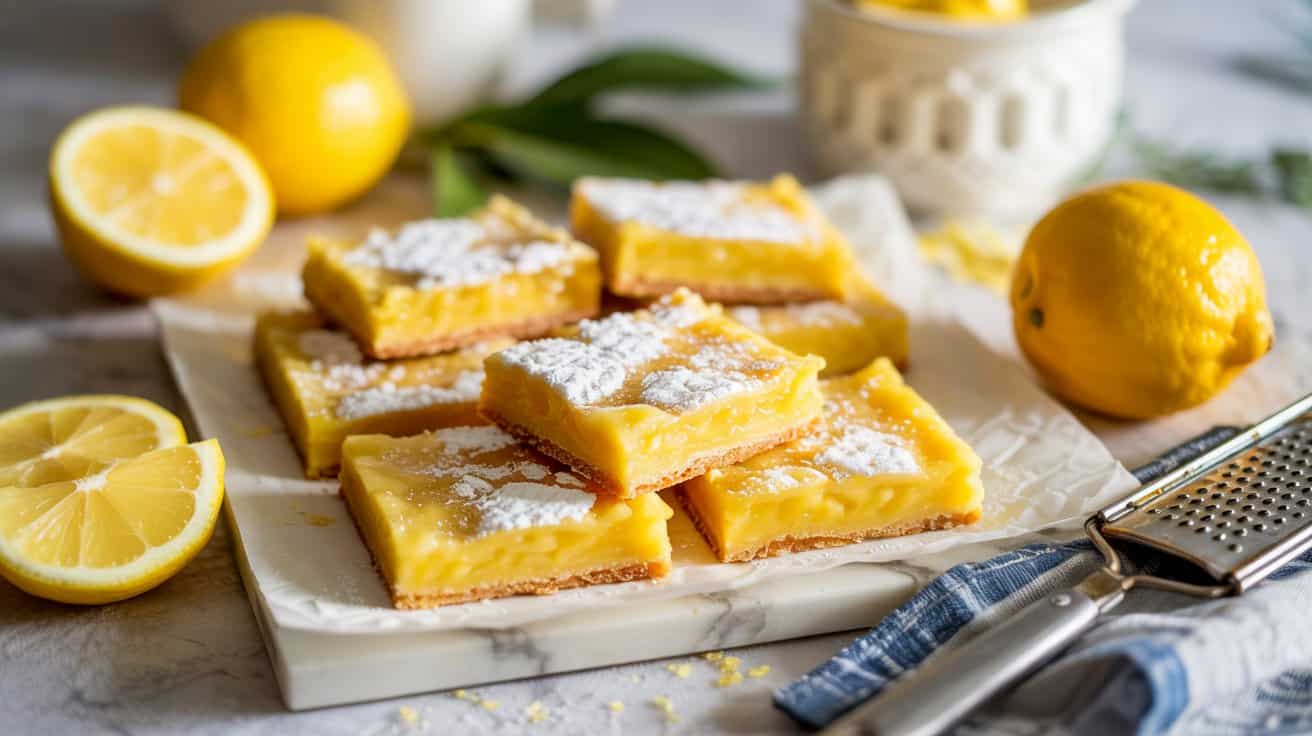
This lemon bar sheet pan dessert is a simple, refreshing treat that combines a bright, tangy lemon filling with a buttery, tender crust. It's baked in a large sheet pan, making it easy to slice into generous squares for sharing or storing.
The bright lemon flavor cuts through the richness of the crust, creating a balance that feels light and satisfying without being overly sweet. If you enjoy desserts that are both fresh and comforting, this one fits the bill nicely.
Because it's made in a sheet pan, this recipe simplifies the baking process. It's a straightforward way to make dessert for a crowd or keep some lovely squares ready for snack time or dessert during the week.
Why This Recipe Works
This lemon bar sheet pan dessert combines refreshingly bright citrus flavor with easy preparation and classic textures. It works well for everyday baking and special occasions alike.
- Convenience - Made in a single large sheet pan for quick prep and easy slicing.
- Flavor balance - Tangy lemon filling paired with a rich, buttery crust.
- Texture - A firm crust with a smooth, slightly creamy topping.
- Appeal - Versatile dessert that is widely liked and suitable for many occasions.
- Serving ease - Easy to cut into uniform bars that hold together well.
Ingredient Swap Ideas
Adjusting ingredients lets you tailor this lemon bar recipe to different tastes or dietary needs without losing the core flavors.
- Gluten-free option - Use a gluten-free all-purpose flour blend instead of regular flour for the crust.
- Sugar swap - Replace granulated sugar with coconut sugar or a natural sweetener like erythritol for a different sweetness profile.
- Dairy alternative - Swap butter for a plant-based margarine or coconut oil if avoiding dairy.
- Citrus variation - Try lime juice in place of lemon juice for a slightly different but still zesty flavor.
- Egg substitute - Use a flaxseed or chia egg to make the recipe vegan-friendly, though texture will vary slightly.
Ingredients
- 2 ½ cups all-purpose flour - For the buttery crust that forms the base.
- 1 cup unsalted butter, cold and cubed - Adds richness and structure to the crust.
- 1 cup granulated sugar - Sweetens the crust and filling evenly.
- 4 large eggs - Bind the lemon filling and add richness.
- 1 ½ cups fresh lemon juice - Provides the signature tangy flavor.
- Zest of 2 lemons - Adds a bright citrus aroma and depth.
- 1 teaspoon baking powder - Helps set the lemon filling with a slight lift.
- ½ teaspoon salt - Balances the sweetness and enhances flavor.
- Powdered sugar, for dusting - Optional, for a delicate finish on top.
Instructions
- Preheat your oven to 350°F (175°C). Line a 9x13 inch sheet pan with parchment paper, leaving some overhang for easy removal.
- Prepare the crust by combining the flour, ½ cup sugar, and salt in a medium bowl. Cut in the cold butter using a pastry cutter or your fingers until the mixture resembles coarse crumbs. Press this evenly into the bottom of the prepared pan. Bake for 15 to 20 minutes, or until lightly golden on the edges.
- While the crust is baking, whisk together the eggs, remaining ½ cup sugar, lemon juice, lemon zest, and baking powder in a large bowl until smooth and well combined.
- Pour the lemon mixture over the hot, partially baked crust immediately after removing it from the oven. Return the pan to the oven and bake for another 20 to 25 minutes, until the filling is just set and doesn't jiggle when gently shaken.
- Remove from the oven and let cool completely in the pan. Once cooled, refrigerate for at least an hour to firm up before slicing into bars.
- Dust the top with powdered sugar if desired before cutting into squares and serving. Store leftover bars covered in the refrigerator for up to 4 days.
8. Chocolate Chip Cookie Sheet Cake
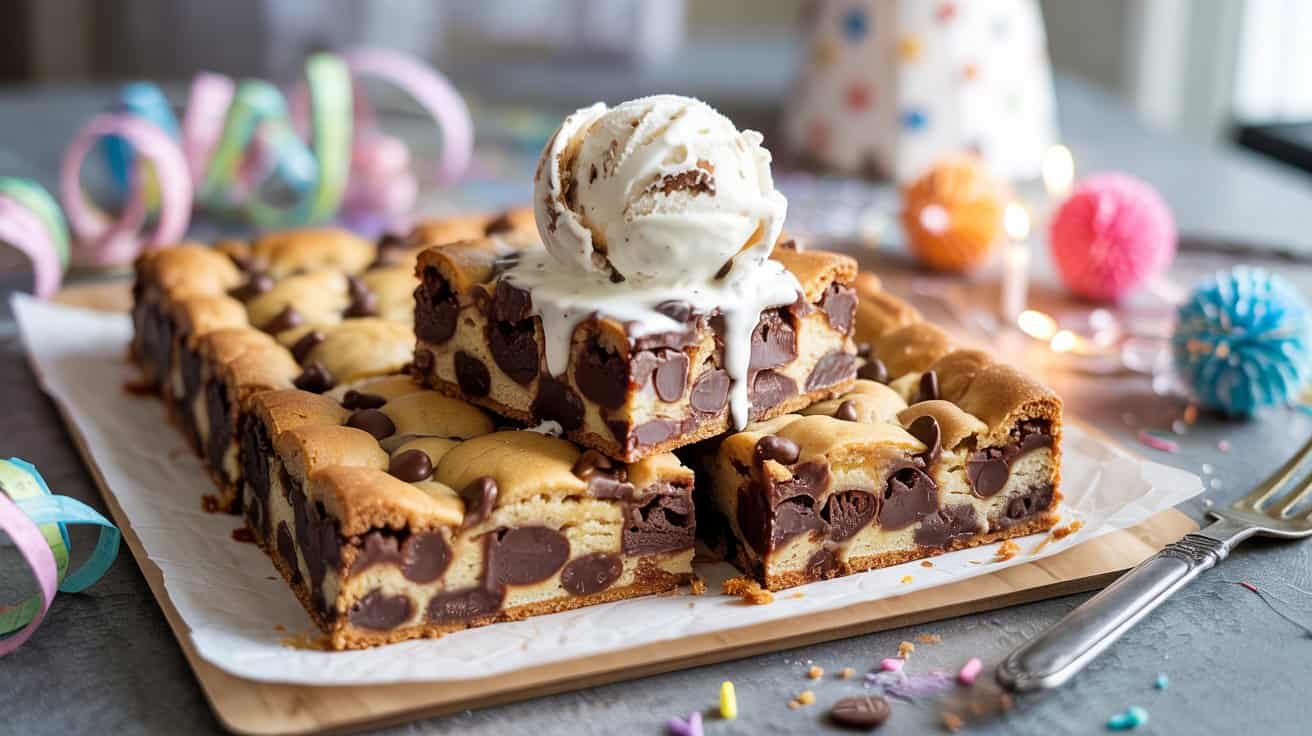
This Chocolate Chip Cookie Sheet Cake takes the classic, beloved cookie and transforms it into a thick, gooey cake that's perfect for sharing. It offers all the familiar flavors you expect from a chocolate chip cookie but with the ease and size of a sheet cake, making it great for family gatherings or casual get-togethers.
The texture is rich and chewy with a slightly crisp top, giving you the best of both worlds in every bite. Preparing it is straightforward, requiring simple ingredients and minimal tools, so you can have a crowd-pleasing dessert ready with little fuss.
Why This Recipe Works
This recipe brings together the comforting taste of chocolate chip cookies and the convenience of baking a large cake in one pan. It balances rich sweetness with chewy texture, making it a hit among all ages.
- Convenience - Made in a single pan with basic pantry ingredients, saving time and cleanup.
- Flavor balance - Sweet with bursts of melty chocolate chips throughout.
- Texture - Thick and chewy center with a lightly crisp top layer.
- Appeal - Appeals to cookie lovers and cake fans alike, ideal for sharing.
- Serving ease - Cut into squares for easy portioning and casual serving.
Ingredient Swap Ideas
Adjusting certain ingredients can help tailor this sheet cake for different preferences or dietary needs without losing what makes it special.
- Use dairy-free butter or margarine - To make the cake suitable for those avoiding dairy.
- Replace all-purpose flour with gluten-free flour blend - For a gluten-free version that still bakes well.
- Swap semi-sweet chocolate chips with dark or white chocolate chips - To suit personal flavor preferences.
- Add chopped nuts like walnuts or pecans - For extra texture and a nutty twist.
- Use coconut sugar or maple syrup instead of granulated sugar - To reduce refined sugar content.
Ingredients
- 1 cup unsalted butter - Softened to room temperature for easy mixing.
- 1 cup granulated sugar - Adds sweetness and structure to the cake.
- 1 cup packed brown sugar - Contributes moisture and caramel notes.
- 2 large eggs - Bind ingredients and add richness.
- 2 teaspoons vanilla extract - Enhances the overall flavor.
- 2 ½ cups all-purpose flour - Forms the base of the cake batter.
- 1 teaspoon baking soda - Provides leavening for lightness.
- ½ teaspoon salt - Balances the sweetness and deepens flavor.
- 2 cups semi-sweet chocolate chips - Melty bursts of chocolate throughout the cake.
Instructions
- Preheat your oven to 350°F (175°C). Grease and flour a 9x13-inch baking pan to prevent sticking.
- In a large bowl, beat the softened butter, granulated sugar, and brown sugar together until the mixture is light and fluffy.
- Add the eggs one at a time, mixing well after each addition. Stir in the vanilla extract.
- In a separate bowl, whisk together the flour, baking soda, and salt. Gradually add this dry mixture to the wet ingredients, stirring just until combined.
- Fold in the chocolate chips evenly throughout the batter. Spread the mixture evenly into the prepared baking pan, smoothing the top gently.
- Bake for 30 to 35 minutes, or until the top is golden and a toothpick inserted into the center comes out with a few moist crumbs attached. Allow the cake to cool completely in the pan before cutting into squares and serving.
9. Cinnamon Roll Sheet Pan Danish

This Cinnamon Roll Sheet Pan Danish is an easy twist on the classic cinnamon roll, baked in a single pan. It saves time shaping individual rolls, making it ideal for busy mornings or casual gatherings.
The layers of buttery dough, cinnamon sugar, and a glossy glaze create a comforting combination of sweet and tender textures. The sheet pan design ensures even baking and simple slicing for serving.
You'll enjoy the familiar flavor of cinnamon rolls, but with one less step to manage. It's a great way to bring warmth and sweetness to your breakfast or brunch table with minimal fuss.
Why This Recipe Works
This recipe combines convenience and flavor in a way that makes cinnamon rolls feel approachable and quick. It offers a soft, flavorful treat that's easy to share.
- Convenience - Baked in one pan without rolling individual buns, saving prep time.
- Flavor balance - Sweet cinnamon paired with rich buttery dough creates classic taste.
- Texture - Soft, tender layers inside with a slightly crisp top.
- Appeal - Great for family breakfasts or casual brunch gatherings.
- Serving ease - Sliced right from the pan for less mess and easy portions.
Ingredient Swap Ideas
Customizing this recipe can help match your dietary needs or what you have on hand without compromising the cinnamon roll flavor you expect.
- Use plant-based butter - Swap with vegan margarine for dairy-free baking.
- Try whole wheat flour - Replace half of the all-purpose flour to add fiber and nuttiness.
- Swap white sugar with coconut sugar - For a more natural sweetener option.
- Almond milk instead of regular milk - Works well for lactose-free versions.
- Add chopped nuts - Include walnuts or pecans inside for texture and flavor variety.
Ingredients
- 2 ¼ teaspoons active dry yeast - One packet.
- 1 cup warm whole milk - About 110°F, warmed to activate yeast.
- ½ cup granulated sugar - For sweetness in dough.
- ⅓ cup unsalted butter - Melted and slightly cooled.
- 1 teaspoon salt - Enhances flavor.
- 2 large eggs - Room temperature.
- 4 cups all-purpose flour - For dough structure.
- 1 cup brown sugar - Packed, for cinnamon filling.
- 3 tablespoons ground cinnamon - Classic spice flavor.
- ⅓ cup unsalted butter - Softened, for spreading.
- 1 cup powdered sugar - For glaze.
- 2 tablespoons milk - To thin glaze.
- ½ teaspoon vanilla extract - Adds flavor to glaze.
Instructions
- In a large bowl, dissolve yeast in warm milk and let it sit 5 minutes until foamy. Add granulated sugar, melted butter, salt, and eggs, and mix well.
- Gradually add the flour, stirring until the dough comes together. Knead on a floured surface about 5-7 minutes until smooth and elastic.
- Place dough in a greased bowl, cover with a towel, and let it rise in a warm spot about 1 hour, or until doubled in size.
- Preheat oven to 350°F (175°C). Roll dough into a 15x9-inch rectangle on a lightly floured surface.
- Spread softened butter evenly over the dough. Mix brown sugar and cinnamon, then sprinkle the mixture evenly on top.
- Starting with the long side, roll the dough tightly into a log. Pinch the edge to seal. Press the log into a greased 9x13-inch sheet pan, shaping it to fill the pan evenly.
- Bake for 25-30 minutes, until golden brown on top.
- While baking, whisk powdered sugar, milk, and vanilla to a smooth glaze.
- Remove cinnamon roll sheet pan from oven and drizzle glaze over warm Danish. Let cool slightly before slicing and serving.
10. S’mores Sheet Pan Bars
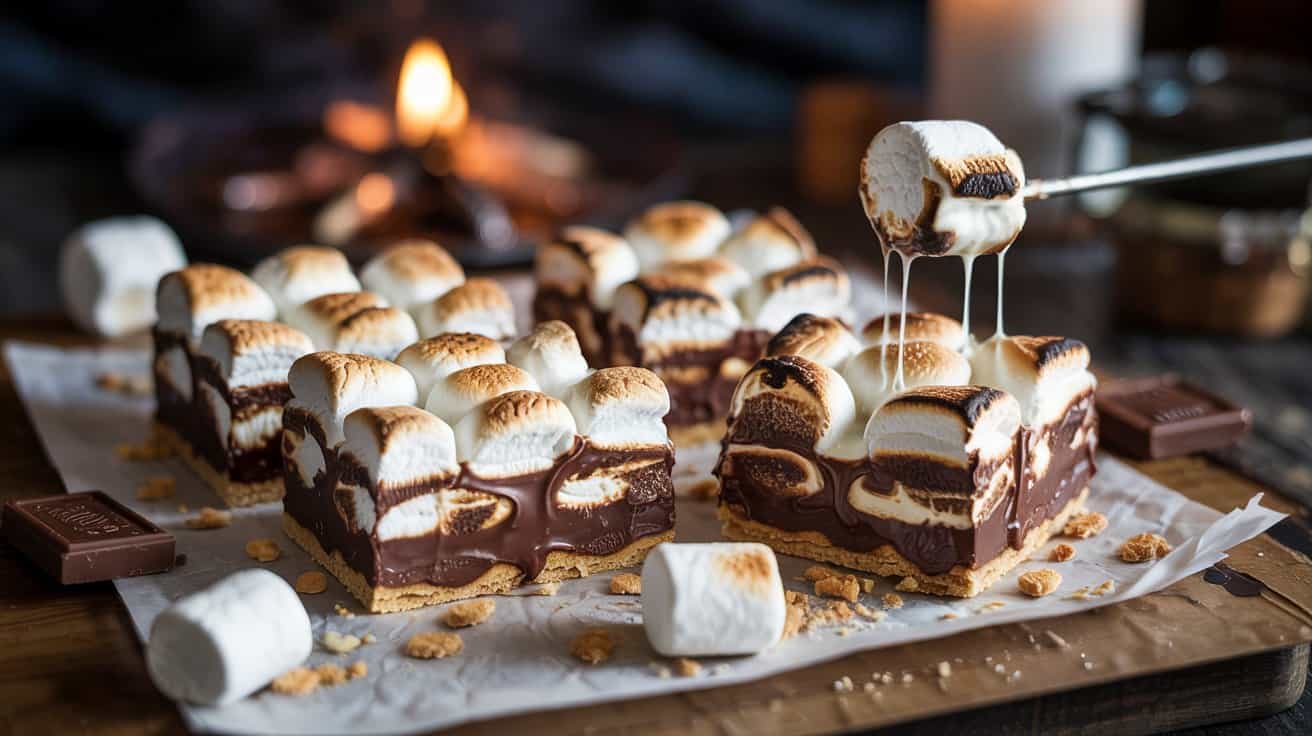
S'mores Sheet Pan Bars bring the classic campfire treat into a convenient dessert you can make anytime. With a crunchy graham cracker crust, a rich chocolate layer, and a gooey top of toasted marshmallows, these bars deliver all the nostalgic flavors without any fire required.
This recipe works well for busy days or casual gatherings because it's made on a single sheet pan, making preparation and cleanup simple. The combination of textures-from crisp crust to melty chocolate and sticky marshmallows-creates a treat everyone can enjoy.
Why This Recipe Works
This recipe combines the appeal of traditional s'mores with easy baking, creating a crowd-pleasing dessert that comes together quickly.
- Convenience - Uses one sheet pan for straightforward prep and cleanup.
- Flavor balance - Combines sweet and toasty marshmallows with rich chocolate and a slight crunch from the graham cracker crust.
- Texture - Delivers a crunchy base, melty chocolate middle, and pillowy toasted marshmallow top.
- Appeal - Familiar flavors that are popular with kids and adults alike.
- Serving ease - Bars are pre-portioned and easy to serve at parties or family meals.
Ingredient Swap Ideas
Swapping ingredients can make this recipe fit different tastes or dietary requirements while keeping the core flavor intact.
- Graham cracker crust - Use gluten-free graham crackers for a gluten-free version.
- Chocolate layer - Substitute milk chocolate chips with dark or white chocolate for varied sweetness.
- Marshmallows - Try vegan marshmallows, which are gelatin-free, for a plant-based option.
- Butter - Use coconut oil instead of butter to keep it dairy-free.
- Add nuts - Mix chopped toasted nuts into the crust for added crunch and flavor.
Ingredients
- 1 ½ cups graham cracker crumbs - Crushed finely to form the crust.
- 6 tablespoons unsalted butter, melted - Binds the graham cracker crumbs together.
- ¼ cup granulated sugar - Sweetens the crust slightly.
- 1 ½ cups semi-sweet chocolate chips - Provides the rich chocolate layer.
- 3 cups mini marshmallows - Topping that melts and toasts beautifully.
Instructions
- Preheat your oven to 350°F (175°C). Line a 9x13-inch sheet pan with parchment paper, leaving some overhang for easy removal.
- In a medium bowl, combine the graham cracker crumbs, melted butter, and sugar. Stir until the mixture looks like wet sand. Press this evenly into the prepared pan to form the crust.
- Bake the crust for about 8 minutes until it starts to set and slightly brown around the edges. Remove the pan from the oven.
- Sprinkle the chocolate chips evenly over the warm crust. Immediately top with mini marshmallows, spreading them out in an even layer.
- Return the pan to the oven and bake for another 5 to 7 minutes, watching closely so the marshmallows become golden and puffy but not burned.
- Remove from the oven and let cool completely in the pan. Once cooled, use the parchment overhang to lift the bars out, then cut them into squares. Serve and enjoy.
11. Banana Bread Sheet Pan Bars
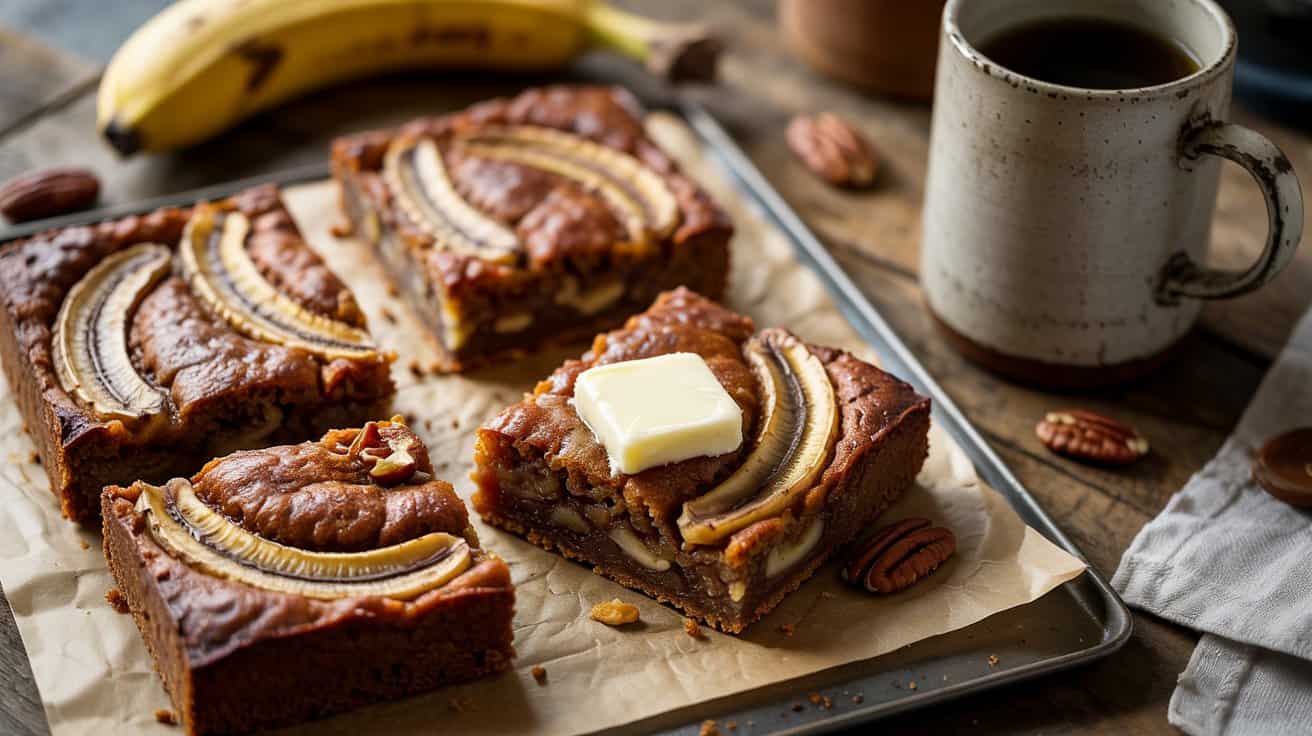
Banana bread is a comforting classic that many of us enjoy, but sometimes slicing and serving traditional loaf-shaped bread can be a little inconvenient. This recipe simplifies things by baking the banana bread in a sheet pan, creating bars that are easy to portion and share.
The thin, moist cake has all the familiar flavors you expect from banana bread but offers a lighter texture and a slightly crisp top from baking in a sheet pan.
These bars are great for quick breakfasts, snacks, or even packing into lunchboxes. You'll appreciate how quickly they bake compared to a loaf, making them a solid choice when you want banana bread without the longer baking time.
Plus, the thin bars store well and can be reheated gently to bring back that fresh-baked feel.
Why This Recipe Works
This sheet pan banana bread turns a classic treat into a convenient, sharable snack that's just as rich in flavor.
- Convenience - Bakes quickly in a sheet pan, saving time.
- Texture - Moist cake with a slightly crisp, golden edge.
- Portioning - Easy to cut into neat bars for sharing or packing.
- Flavor - Sweet banana flavor enhanced with warm spices.
- Storage - Bars stay fresh longer and reheat nicely for anytime enjoyment.
Ingredient Swap Ideas
Swapping ingredients can help this recipe fit various dietary preferences or adapt flavors while maintaining its core appeal.
- Flour substitutions - Use a gluten-free all-purpose blend instead of regular flour to make the bars gluten-free.
- Sweetener swaps - Replace white sugar with maple syrup or honey for a different sweetness profile.
- Oil alternatives - Try melted coconut oil instead of vegetable oil to add a subtle, tropical note.
- Add-ins - Mix in chopped nuts or dairy-free chocolate chips for extra texture and flavor.
- Banana variations - Overripe mashed plantains can be used in place of bananas for a unique twist.
Ingredients
- 3 large ripe bananas - mashed until smooth.
- ½ cup vegetable oil - for moistness and tenderness.
- 1 cup granulated sugar - adds sweetness.
- 2 large eggs - room temperature to help bind the batter.
- 1 teaspoon vanilla extract - for flavor depth.
- 1 ¾ cups all-purpose flour - provides structure.
- 1 teaspoon baking soda - leavens the batter.
- ½ teaspoon salt - balances sweetness.
- 1 teaspoon ground cinnamon - adds warmth and aroma.
Instructions
- Preheat your oven to 350°F (175°C). Line a 9x13-inch sheet pan with parchment paper, leaving a slight overhang for easy lifting.
- In a large bowl, combine the mashed bananas, vegetable oil, sugar, eggs, and vanilla extract. Whisk together until smooth and well blended.
- In a separate bowl, whisk the flour, baking soda, salt, and ground cinnamon. Gradually add the dry ingredients to the wet mixture, stirring until just combined.
- Pour the batter evenly into the prepared sheet pan, spreading it out with a spatula to smooth the surface.
- Bake for 25 to 30 minutes until the top is golden and a toothpick inserted into the center comes out clean.
- Allow the banana bread bars to cool completely in the pan before lifting with the parchment paper and cutting into bars. Store in an airtight container for up to 4 days or freeze for longer keeping.
If you need chilled, plant-based sweets for warm weather entertaining, see vegan summer desserts for cooling. For make-ahead treats that freeze well and save time, consult easy freezer desserts to prep ahead.

Andrew Gray is a seasoned food writer and blogger with a wealth of experience in the restaurant and catering industries. With a passion for all things delicious, Andrew has honed his culinary expertise through his work as a personal chef and caterer.
His love for food led him to venture into food writing, where he has contributed to various online publications, sharing his knowledge and insights on the culinary world. As the proud owner of CooksCrafter.com, Andrew covers a wide range of topics, including recipes, restaurant reviews, product recommendations, and culinary tips.
Through his website, he aims to inspire and educate fellow food enthusiasts, offering a comprehensive resource for all things food-related.