Cheese appetizers bring a comforting and flavorful touch to any gathering, featuring small bites that showcase one or more cheeses as the main flavor component, typically served warm or cold and rooted in many global appetizer traditions. This collection of 14 cheese appetizer recipes offers a range of options perfectly suited for serving all year round.

These recipes include everything from warm, baked treats to fresh, light bites. They range from simple skewers and dips to savory tarts and crispy crisps, delivering variety and crowd-pleasing appeal without complicated preparations or hard-to-find ingredients.
Each recipe is designed to be approachable and practical, making it easy to prepare and serve with little fuss. Combining balanced flavors and easy cleanup, these appetizers help create enjoyable moments with minimal stress.
1. Baked Brie with Honey and Pecans
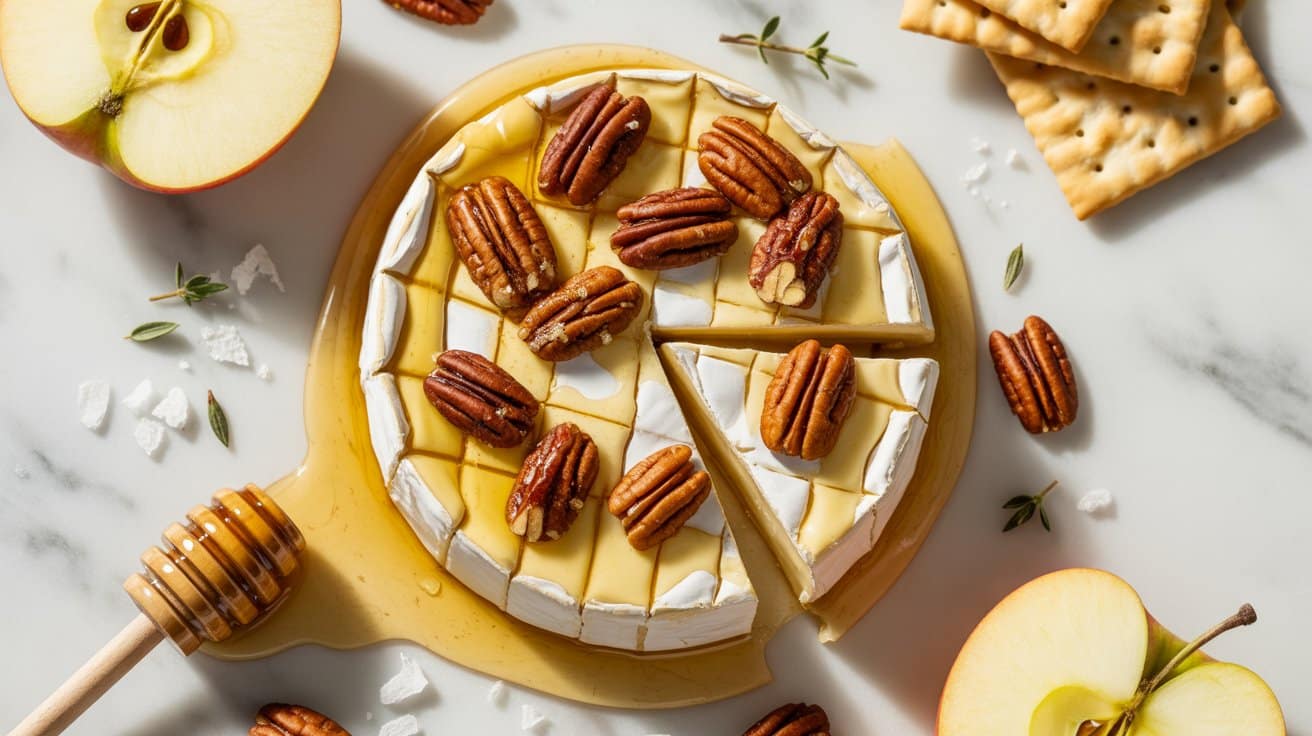
Baked Brie with honey and pecans is a simple yet beautiful appetizer that combines creamy, melty cheese with sweet and crunchy toppings. It takes only a few minutes to prepare but gives you a warm, inviting dish that's great for gatherings or a cozy night in (bake at 350°F for 12-15 minutes until the Brie is gooey).
It pairs well with cozy baked sides to serve, like baked bean side dish ideas.
Why This Recipe Works
This baked Brie recipe balances creamy and crunchy textures with sweet and savory flavors. It offers a quick way to create an attractive appetizer that impresses without demanding much time or skill.
- Convenience - Takes just minutes to assemble and bake, ideal for last-minute snacks or party starters.
- Flavor balance - The smooth Brie contrasts pleasantly with the crunch and natural sweetness of honey and toasted pecans.
- Texture - Soft, gooey cheese meets crisp pecans, creating a satisfying mouthfeel.
- Appeal - Elegant yet approachable, making it great for casual or formal occasions.
Ingredient Swap Ideas
Swapping ingredients can help adjust the recipe for different dietary needs or flavor preferences while keeping its core appeal. You can tailor it to what you have on hand or adapt it for guests.
- Pecans with walnuts or almonds - Use other toasted nuts you prefer or have available for a similar crunch and flavor.
- Honey with maple syrup - Replace honey for a vegan-friendly sweetener that adds a rich, earthy note.
- Brie with Camembert - Switch to Camembert or another soft, creamy cheese with a similar melting quality.
- Add dried fruit - Mix in dried cranberries or apricots with the pecans for an extra layer of sweetness and texture.
Ingredients
- 1 small wheel Brie cheese - about 8 ounces, whole and uncut.
- 2 tablespoons honey - for drizzling over the melted Brie.
- ⅓ cup pecans - toasted and roughly chopped.
- Optional - fresh thyme or rosemary for garnish.
Instructions
- Preheat your oven to 350°F (175°C). Place the whole wheel of Brie on a parchment-lined baking sheet or in a small oven-safe dish.
- Bake the Brie for 10 to 12 minutes, or until the cheese is soft and starting to ooze but not fully melted out.
- Meanwhile, toast the pecans in a dry skillet over medium heat for 3 to 5 minutes, stirring frequently. Remove from heat once fragrant and slightly browned.
- Remove the Brie from the oven and drizzle the honey evenly over the top. Sprinkle the toasted pecans on top of the honey.
- If you like, garnish with a few fresh thyme or rosemary leaves. Serve immediately with sliced baguette, crackers, or apple slices for dipping.
2. Goat Cheese and Herb Stuffed Peppadew Peppers

This recipe brings together the bright, tangy flavor of goat cheese with the sweet and slightly spicy peppadew peppers for a simple yet delicious appetizer or snack (peppadews are pickled piquanté peppers originally from South Africa), and for alternative fillings see goat cheese alternatives to try.
Stuffing these little peppers takes just a few minutes and requires no cooking, making it an ideal option for quick entertaining or a light, flavorful treat (ready in under 10 minutes), and peppadews are typically sold jarred, making them easy to find.
Why This Recipe Works
This recipe is a great choice for anyone wanting a flavorful, easy-to-prepare appetizer with a fresh, bright profile.
- Convenience - Requires no cooking and comes together quickly with minimal ingredients.
- Flavor balance - Combines the creamy tang of goat cheese with the sweet heat of peppadew peppers.
- Texture - The juicy, slightly crunchy peppers go well with the smooth cheese filling.
- Appeal - Elegant enough for guests yet simple enough for casual snacking.
Ingredient Swap Ideas
Swapping ingredients can help adapt this recipe to fit different dietary needs or flavor preferences without losing the basic concept.
- Cheese alternatives - Use cream cheese or ricotta for a milder, creamier filling.
- Spice level adjustments - Substitute with sweet mini bell peppers if you prefer less heat.
- Herb variations - Fresh dill or parsley can replace basil or chives for a different herbal note.
- Added crunch - Stir in chopped toasted nuts like walnuts or pine nuts for extra texture.
Ingredients
- Peppadew peppers - 24 whole, drained from jar or jarred variety.
- Goat cheese - 4 ounces, softened to room temperature for easy filling.
- Fresh basil - 1 tablespoon, finely chopped to add herbal brightness.
- Fresh chives - 1 tablespoon, thinly sliced for a mild onion flavor.
- Lemon zest - 1 teaspoon, grated to improve the tangy flavor.
- Black pepper - ¼ teaspoon, freshly ground for subtle spice.
Instructions
- Gently rinse the peppadew peppers under cold water and pat dry with paper towels. Set aside to drain well.
- In a medium bowl, combine the softened goat cheese, chopped basil, chives, lemon zest, and black pepper. Mix thoroughly until the herbs are evenly distributed.
- Using a small spoon or piping bag, fill each peppadew pepper with the goat cheese mixture, being careful not to overfill.
- Arrange the stuffed peppers on a serving plate or dish. Chill in the refrigerator for at least 15 minutes before serving to allow flavors to meld.
- Serve chilled or at room temperature as an appetizer, snack, or party bite.
3. Cheddar and Chive Cheese Ball
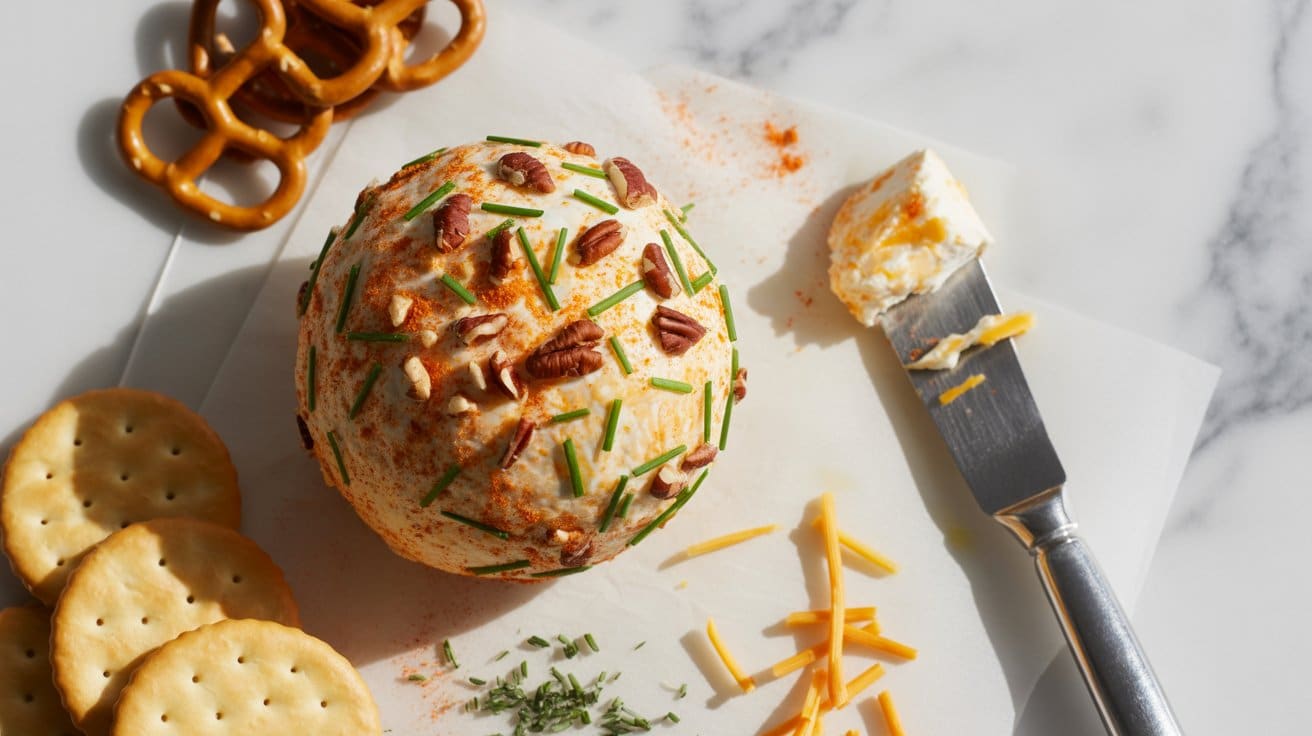
This cheddar and chive cheese ball brings together sharp, tangy cheddar cheese with the fresh, mild bite of chives, and for alternate options see cheddar cheese substitutes to consider.
It's a nostalgic favorite that fits perfectly on any party table or casual get-together, and it can be made a day ahead and kept refrigerated until serving. Preparing this cheese ball is straightforward and doesn't require much time, making it a go-to appetizer for busy cooks.
The flavor is balanced and approachable, with just enough herbaceous brightness to go with the cheddar's richness. It goes well with crackers, fresh vegetables, or sliced baguette, allowing everyone to enjoy a little something savory and satisfying.
Why This Recipe Works
This recipe stands out because it combines easily accessible ingredients with rich flavor and appealing texture. It's a reliable choice that offers both familiarity and a bit of flair for entertaining or snacking.
- Convenience - Quick to prepare and can be made in advance, saving you time.
- Flavor balance - Sharp cheddar cheese blends beautifully with fresh chives for a fresh but rich taste.
- Texture - Creamy inside with a crunchy coating adds contrast and interest.
- Appeal - Crowd-pleasing, suitable for casual gatherings or more formal occasions.
Ingredient Swap Ideas
Swapping ingredients can help adjust this cheese ball to suit dietary preferences or what you have available. These changes keep the essence of the dish while offering flexibility.
- Cheddar Cheese - Use a mild or extra sharp cheddar depending on your taste preference.
- Chives - Substitute with green onions or finely chopped fresh parsley for a different herbal note.
- Coating - Swap chopped walnuts or pecans with toasted sunflower seeds or crispy bacon bits for a different crunch.
- Cream Cheese - Use a dairy-free cream cheese alternative to make the recipe vegan-friendly.
Ingredients
- 8 ounces sharp cheddar cheese, shredded.
- 8 ounces cream cheese, softened to room temperature.
- 2 tablespoons fresh chives, finely chopped.
- ½ teaspoon garlic powder.
- ¼ teaspoon black pepper.
- ¼ teaspoon smoked paprika (optional for a smoky touch).
- ½ cup chopped pecans or walnuts, toasted.
- ¼ cup crispy bacon bits (optional, for rolling).
Instructions
- In a large mixing bowl, combine the shredded cheddar cheese, softened cream cheese, chopped chives, garlic powder, black pepper, and smoked paprika if using. Mix thoroughly until all ingredients are well incorporated.
- Shape the cheese mixture into a ball using your hands or a small bowl as a mold. Wrap it tightly in plastic wrap and refrigerate for at least 1 hour to firm up.
- On a plate, mix the toasted chopped nuts and crispy bacon bits if using. Remove the cheese ball from the fridge and roll it evenly in the nut and bacon mixture to coat the outside completely.
- Place the coated cheese ball on a serving plate. Let it sit at room temperature for about 15 minutes before serving to soften slightly.
- Serve with an assortment of crackers, sliced vegetables, or bread for spreading.
4. Mozzarella Caprese Skewers
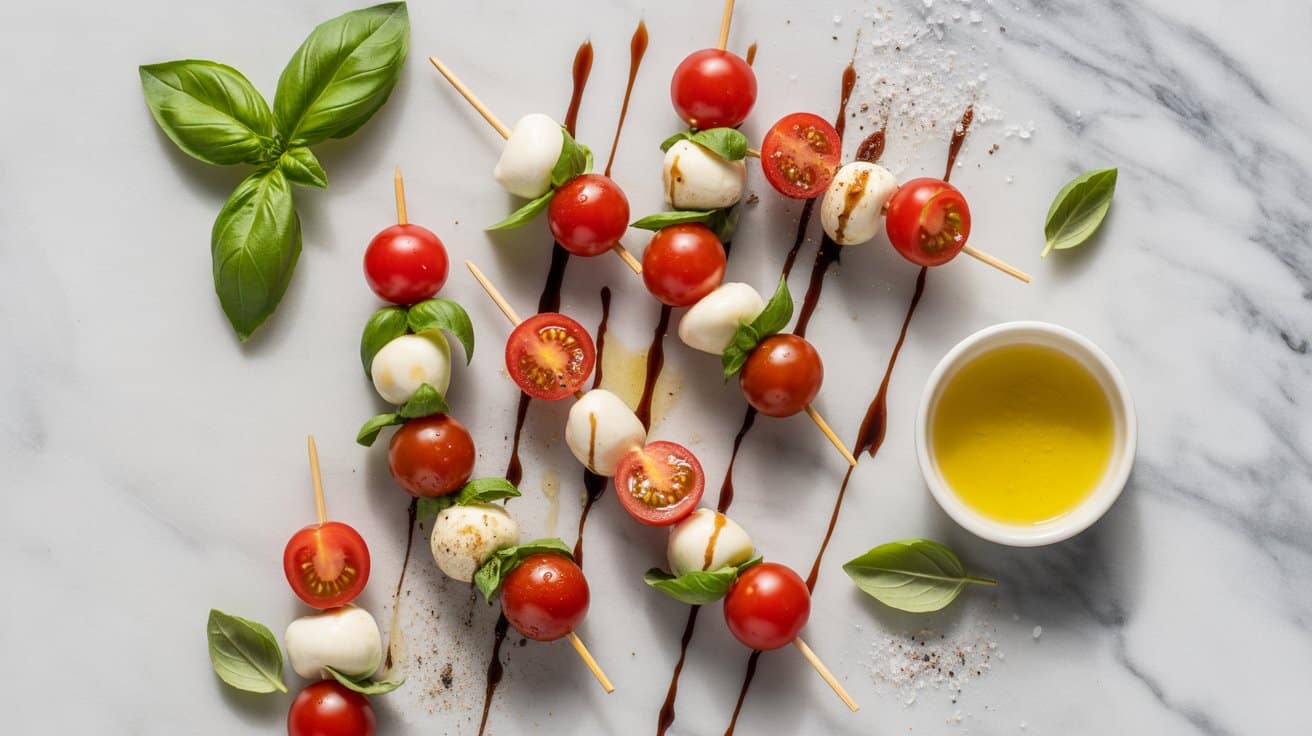
Mozzarella Caprese Skewers combine simple, fresh ingredients to create a light and appealing appetizer. The juicy cherry tomatoes, creamy mozzarella, and fragrant basil come together beautifully, offering a tasty bite that feels bright and satisfying.
This recipe is both straightforward and colorful, making it a great choice for gatherings or as a quick snack. Drizzling the skewers with balsamic glaze adds a subtle tang that goes with the other flavors perfectly.
Why This Recipe Works
This recipe shines with its ease, freshness, and visual appeal. It's quick to assemble and requires minimal ingredients, making it ideal for last-minute entertaining or simple meals.
- Convenience - Ready in minutes with no cooking needed.
- Flavor balance - Combines creamy cheese, sweet tomatoes, and herbal basil.
- Texture - Smooth mozzarella and firm tomatoes create a pleasant contrast.
- Presentation - Eye-catching with bright colors and neat portions.
Ingredient Swap Ideas
Swapping ingredients can help tailor the dish to different taste preferences or dietary needs without losing its essential character. These options keep the fresh, light feel intact.
- Cheese substitution - Use small bocconcini or marinated mozzarella balls to vary texture.
- Basil alternatives - Try fresh mint or oregano for a different herbal note.
- Tomato types - Grape tomatoes or sun-dried tomatoes work well for a twist.
- Balsamic glaze replacement - Drizzle with lemon vinaigrette or aged sherry vinegar for a different finish.
Ingredients
- Cherry tomatoes - 20, washed and halved if large.
- Fresh mozzarella balls (bocconcini) - 20 small pieces.
- Fresh basil leaves - 20, whole.
- Balsamic glaze - 2 tablespoons, for drizzling.
- Extra virgin olive oil - 1 tablespoon, optional for brushing.
- Salt - A pinch, to taste.
- Black pepper - A pinch, freshly ground.
Instructions
- Rinse the cherry tomatoes and basil leaves under cold water. Pat dry with a paper towel to remove extra moisture.
- Prepare the skewers by threading one cherry tomato, followed by a basil leaf folded if large, then a mozzarella ball. Repeat until all ingredients are used.
- Arrange the skewers on a serving platter. Lightly brush with olive oil if desired, then sprinkle with a pinch of salt and freshly ground black pepper.
- Drizzle the balsamic glaze evenly over the assembled skewers just before serving to avoid sogginess.
- Serve immediately and enjoy the fresh, balanced flavors.
5. Parmesan Crisps (Frico)
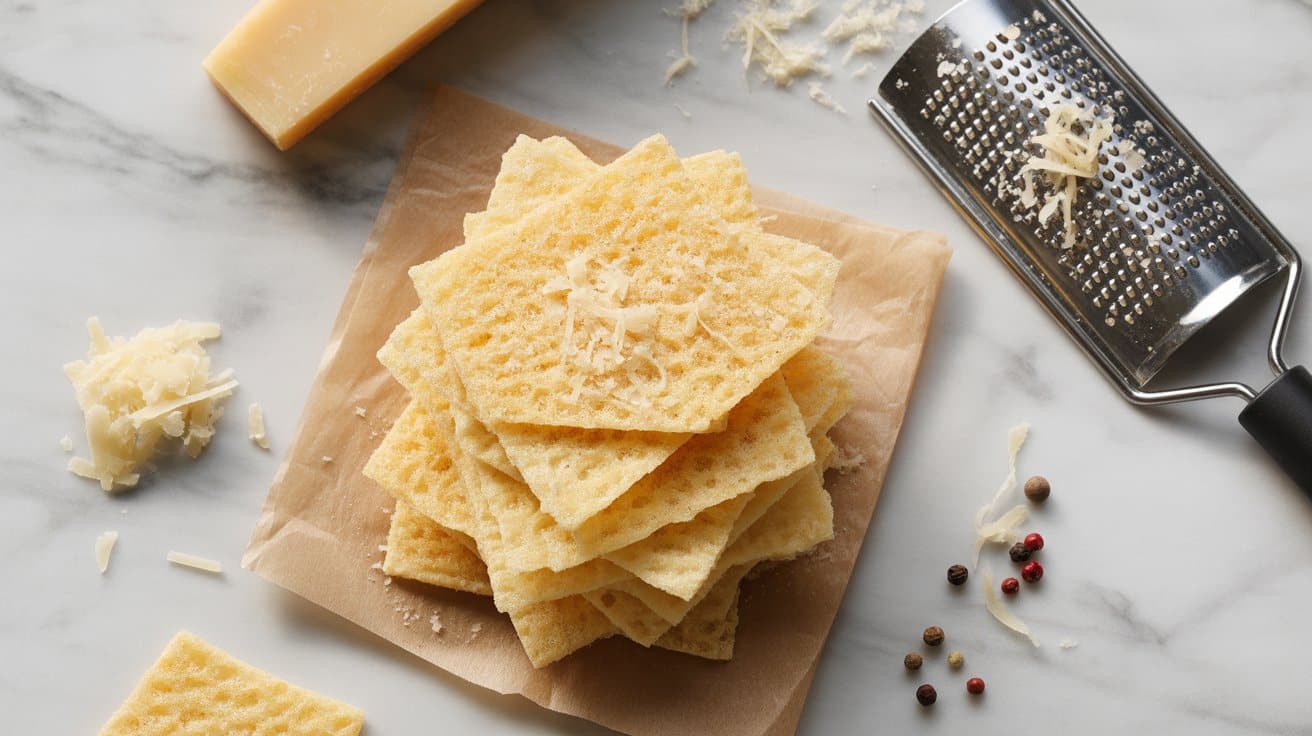
Parmesan crisps, also known as frico, are a simple and delicious way to enjoy parmesan cheese with a satisfying crunch. These baked rounds of cheese offer a rich, nutty flavor and a crispy texture that works perfectly as a low-carb snack or as a base for spreads and toppings.
Making parmesan crisps requires just minutes and minimal ingredients, making them an ideal choice for quick homemade appetizers or to add a touch of elegance to your snack platter.
Why This Recipe Works
This recipe is a straightforward way to turn parmesan cheese into a crunchy treat that pairs well with many dishes or stands on its own.
- Convenience - Takes only a few minutes to prepare and bake, perfect for last-minute snacks.
- Flavor balance - Rich, savory, and nutty parmesan flavor delivers deep taste without additional seasoning.
- Texture - Bakes into light, crispy rounds that add a satisfying crunch to snacks and meals.
- Versatility - Use as a garnish, snack, or crunchy base for spreads and toppings.
Ingredient Swap Ideas
Changing up ingredients can help tailor this recipe to your preferences or dietary needs without losing its essential crispiness and flavor.
- Cheese substitute - Use Pecorino Romano for a sharper, saltier option.
- Add herbs - Sprinkle finely chopped rosemary or thyme over the cheese for a herby twist.
- Spice it up - Add a dash of smoked paprika or chili flakes for a bit of heat and color.
- Vegan option - Try a firm, aged vegan cheese designed to melt well, though the texture may vary.
Ingredients
- 1 cup grated Parmesan cheese - finely grated for even melting and crisping.
Instructions
- Preheat your oven to 400°F (200°C) and line a baking sheet with parchment paper or a silicone baking mat.
- Spoon about 1 tablespoon of grated Parmesan onto the baking sheet, spreading it into a thin, even circle roughly 2 inches in diameter. Repeat, leaving space between each round.
- Bake for 5 to 7 minutes until the edges are golden and the cheese has melted into crisp rounds. Watch closely to prevent burning.
- Remove from the oven and let the crisps cool on the baking sheet for a few minutes; they will harden as they cool.
- Use immediately or store in an airtight container once completely cooled to keep them crisp.
These crisps make a simple and delicious snack on their own or a crunchy addition to salads and dips.
6. Blue Cheese Stuffed Dates Wrapped in Bacon

This recipe combines sweet, salty, and tangy flavors in a way that's both simple and satisfying. Stuffing dates with blue cheese adds a creamy richness, while wrapping them in bacon provides a crunchy, smoky contrast that makes every bite appealing.
These bites come together quickly and are ideal for entertaining or a special snack. They require just a few ingredients, and their mix of textures keeps things interesting from start to finish.
Why This Recipe Works
This appetizer offers an impressive combination of flavors and an easy preparation that suits busy schedules.
- Quick Prep - Takes only a few minutes to assemble and a short bake to finish.
- Flavor Contrast - Sweet dates balance the bold tang of blue cheese and savory bacon.
- Texture Variety - Creamy cheese and chewy dates paired with crispy bacon create a pleasing mouthfeel.
- Versatile Serving - Works for casual gatherings or more elegant events with little fuss.
Ingredient Swap Ideas
Adjusting ingredients makes this recipe adaptable for different tastes or diets without losing its character.
- Blue cheese - Replace with goat cheese or cream cheese for a milder, creamier filling.
- Dates - Use dried figs or apricots to change the fruit flavor while keeping sweetness.
- Bacon - Swap pork bacon for turkey bacon or plant-based alternatives for a leaner or vegetarian option.
- Add nuts - Insert a pecan or almond inside for extra crunch and flavor variation.
Ingredients
- 12 Medjool dates - Pitted for easy stuffing and natural sweetness.
- 4 ounces blue cheese - Crumbled to fill the dates with rich, tangy flavor.
- 12 slices bacon - Cut in half to wrap around each stuffed date.
- Toothpicks - For securing the wrapped dates during baking.
Instructions
- Preheat your oven to 375°F (190°C). Line a baking sheet with parchment paper or foil for easy cleanup.
- Slice each pitted date lengthwise, creating a pocket without cutting all the way through. Stuff each date with about a teaspoon of crumbled blue cheese.
- Wrap each stuffed date with half a slice of bacon, securing it with a toothpick to keep everything in place during cooking.
- Arrange the wrapped dates on the prepared baking sheet in a single layer. Bake for 20 to 25 minutes, turning halfway through, until the bacon is crisp and cooked through.
- Remove from the oven and let cool slightly before serving. These are best enjoyed warm for the full combination of textures and flavors.
7. Ricotta and Lemon Crostini
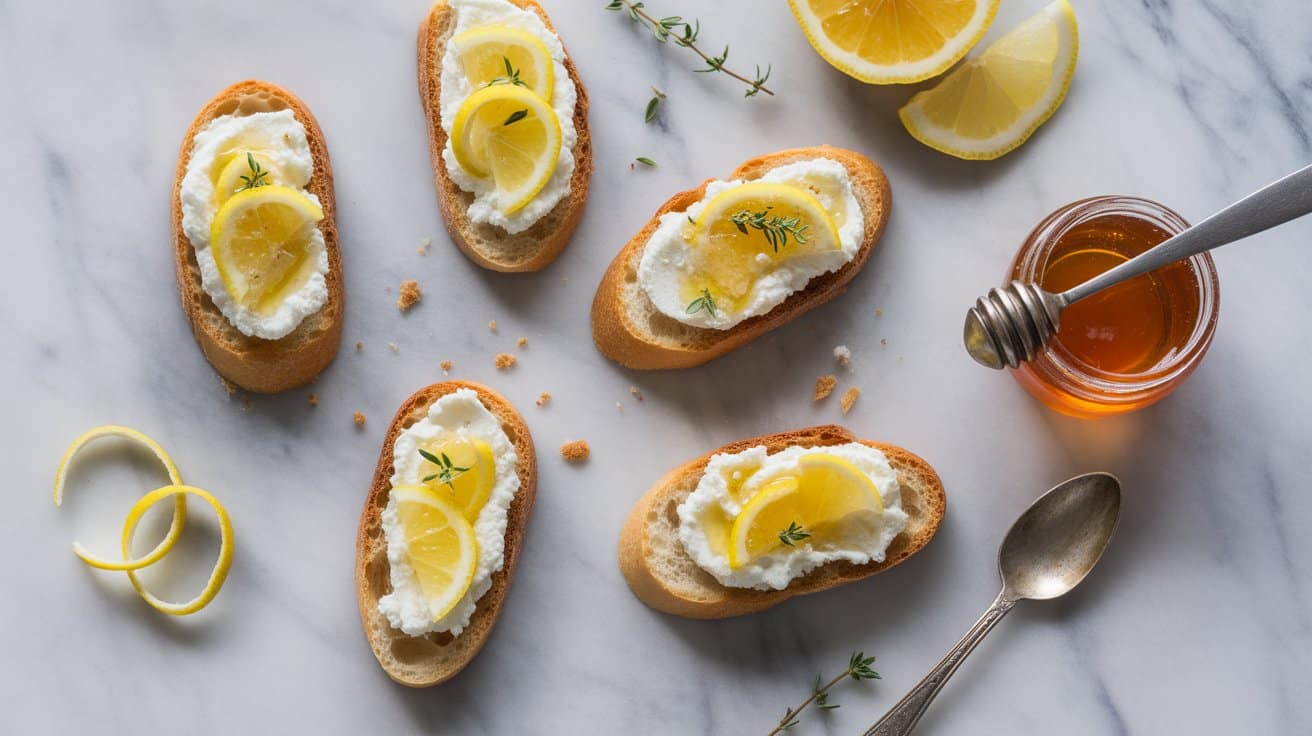
Ricotta and lemon crostini is a simple yet refreshing appetizer that brings bright flavors to your table. The creamy ricotta spread goes well with the zesty lemon, while a drizzle of olive oil adds richness and smoothness.
This recipe works great as a light snack or as part of a larger spread for gatherings. Plus, it's quick to put together - perfect for those moments when you want something tasty without spending a lot of time preparing it.
Why This Recipe Works
This crostini recipe combines ease and bright, balanced flavors with minimal ingredients. It's a quick way to add a fresh, elegant touch to any meal or social occasion.
- Convenience - Ready in minutes with simple preparation and minimal cooking.
- Flavor balance - Creamy ricotta contrasts with lively lemon zest for a bright, fresh taste.
- Texture - Crisp toasted baguette provides a satisfying crunch beneath the smooth ricotta.
- Appeal - Elegant yet approachable, suitable for family snacks or entertaining guests.
Ingredient Swap Ideas
Swapping ingredients can adapt the crostini to different preferences or dietary needs without losing the overall light character. These changes keep the core idea while offering some variety.
- Ricotta cheese - Substitute with mascarpone or cream cheese for a richer texture.
- Baguette - Use gluten-free bread or crisp crackers for a gluten-free option.
- Lemon zest - Replace with orange or lime zest for a different citrus note.
- Olive oil - Try flavored oils, like basil or chili oil, to add a unique twist.
Ingredients
- 1 French baguette - sliced into ½-inch thick pieces.
- 1 cup ricotta cheese - well-drained for creamy spreadability.
- 1 lemon - zested finely; juice reserved if desired for extra tang.
- 2 tablespoons extra-virgin olive oil - plus extra for drizzling.
- Salt - to taste.
- Freshly ground black pepper - to taste.
- Optional - fresh herbs such as basil or thyme for garnish.
Instructions
- Preheat your oven to 375°F (190°C). Arrange baguette slices on a baking sheet and lightly brush them with olive oil on both sides. Toast for about 8-10 minutes until golden and crisp.
- In a small bowl, combine the ricotta cheese with lemon zest, a pinch of salt, and freshly ground black pepper. Mix well to blend the flavors evenly.
- Spread a generous layer of the lemon ricotta mixture on each toasted baguette slice.
- Drizzle each crostini with a little extra olive oil for added richness and shine. Add an optional sprinkle of fresh herbs if you like.
- Serve immediately to enjoy the contrast of creamy ricotta and crisp bread, or store the toasted baguette and ricotta mixture separately until ready to assemble.
8. Feta and Watermelon Bites
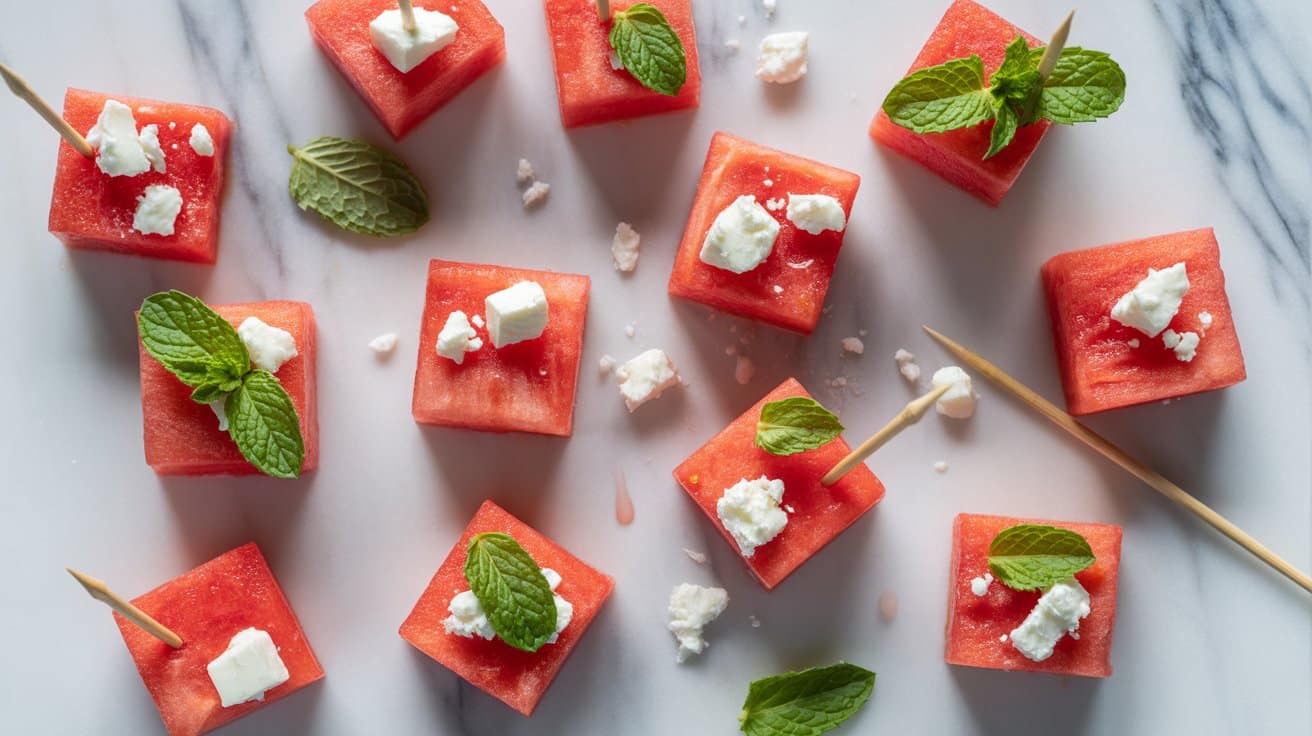
These feta and watermelon bites are a refreshing and simple way to enjoy a combination of sweet and savory flavors. The juicy, crisp watermelon cubes paired with salty feta cheese create a satisfying contrast, while fresh mint adds a bright, herbal note that enhances every bite.
This recipe comes together quickly, making it ideal for a light snack, party appetizer, or an easy addition to summer gatherings. You can assemble them in minutes and serve chilled for a truly refreshing treat.
Why This Recipe Works
This recipe brings together a balance of flavors and textures in an easy-to-prepare format that suits a variety of occasions. It's light, tasty, and visually appealing with minimal clean-up.
- Convenience - Requires no cooking and minimal prep time.
- Flavor balance - Combines sweet watermelon with salty, tangy feta and fresh mint.
- Texture - Offers a crisp bite from watermelon and crumbly creaminess from feta.
- Appeal - Works well for casual snacks, elegant appetizers, or healthy party platters.
Ingredient Swap Ideas
Swapping ingredients can help cater to dietary needs or adjust flavors based on what you have available without losing the recipe's refreshing character.
- Feta cheese - Substitute with halloumi cubes for a firmer texture or vegan feta for a dairy-free version.
- Watermelon - Use cantaloupe or honeydew for a milder, less watery option.
- Herbs - Swap fresh mint for basil or cilantro for a different herbal twist.
- Add nuts - Toasted pistachios or walnuts can be sprinkled on top for added crunch and richness.
Ingredients
- 2 cups watermelon - Cut into bite-sized cubes, seeds removed if necessary.
- 4 ounces feta cheese - Crumbled or cut into small cubes for topping.
- 10 fresh mint leaves - Washed and torn or left whole for garnish.
- 1 tablespoon extra-virgin olive oil - Optional, for drizzling.
- Freshly ground black pepper - To taste, for a subtle kick.
Instructions
- Place the watermelon cubes on a serving platter or arrange them on toothpicks if you prefer easy finger food.
- Top each watermelon piece with a small cube or crumble of feta cheese.
- Garnish with fresh mint leaves, tucking them on top of the feta or beside the bites.
- Drizzle lightly with olive oil if desired, then sprinkle a few cracks of black pepper over everything.
- Serve immediately or chill in the refrigerator for 15-20 minutes to improve the refreshing quality before serving.
9. Gruyère and Caramelized Onion Tartlets

These mini tartlets combine the nutty, slightly sweet flavor of Gruyère cheese with the rich, mellow taste of caramelized onions. They offer an elegant yet approachable appetizer or snack, perfect for busy home cooks who want something impressive without too much fuss.
The balance of buttery pastry, melted cheese, and soft onions creates a satisfying bite that's both savory and comforting. These tartlets can be made ahead and served warm or at room temperature, making them convenient for gatherings or simple meals.
Why This Recipe Works
This recipe brings together simple ingredients for a flavorful result that feels special. The combination of creamy cheese and sweet onions fits many occasions, from casual family snacks to party appetizers.
- Convenience - Uses ready-made puff pastry for quick assembly and easy baking.
- Flavor balance - Sweet caramelized onions go with the rich, nutty Gruyère cheese perfectly.
- Texture - Crispy, flaky tart shell contrasts with smooth, melty cheese and tender onions.
- Appeal - Attractive presentation and manageable portions suit gatherings or everyday treats.
Ingredient Swap Ideas
Adjusting the ingredients can cater to different tastes or dietary needs without losing the essence of the tartlets. Try these replacements to suit your preferences.
- Cheese substitution - Swap Gruyère for Emmental, Comté, or a mild sharp cheddar for a similar melt and flavor.
- Onion variation - Use shallots or red onions in place of yellow onions for a slightly different sweetness and color.
- Pastry choice - Substitute puff pastry with shortcrust pastry for a sturdier, buttery base.
- Add herbs - Mix fresh thyme or rosemary into the filling for an herby note that goes with the cheese.
Ingredients
- 1 sheet puff pastry - thawed, ready to roll out for the tart shells.
- 2 large yellow onions - thinly sliced for caramelizing.
- 2 tablespoons olive oil - to caramelize the onions gently.
- 1 teaspoon sugar - enhances the sweetness of the onions during caramelization.
- 4 ounces Gruyère cheese - grated, for melting inside the tartlets.
- 1 tablespoon butter - optional, adds richness to the onions.
- Salt and black pepper - to taste, seasoning the onions and filling.
- 1 egg - beaten, for brushing on the pastry edges for a golden finish.
Instructions
- Preheat your oven to 375°F (190°C). Roll out the puff pastry on a lightly floured surface to about ⅛ inch thick. Cut circles approximately 3 to 4 inches in diameter to fit into a mini muffin or tart pan.
- Heat olive oil and butter in a large skillet over medium heat. Add sliced onions and sprinkle with sugar and a pinch of salt. Cook slowly, stirring frequently, for 20 to 25 minutes until softened and caramelized to a deep golden brown. Season with black pepper. Remove from heat and let cool slightly.
- Place the pastry circles into the tart or mini muffin pans, pressing gently to form shells. Divide the caramelized onions evenly among the pastry shells. Sprinkle grated Gruyère cheese over the onions.
- Brush the exposed pastry edges with beaten egg to encourage browning. Bake in the preheated oven for about 15 to 20 minutes, until the pastry is crisp and golden and the cheese has melted beautifully.
- Remove from the oven and allow the tartlets to cool for a few minutes in the pan before transferring to a wire rack. Serve warm or at room temperature for a delicious appetizer or snack.
10. Cream Cheese and Smoked Salmon Pinwheels
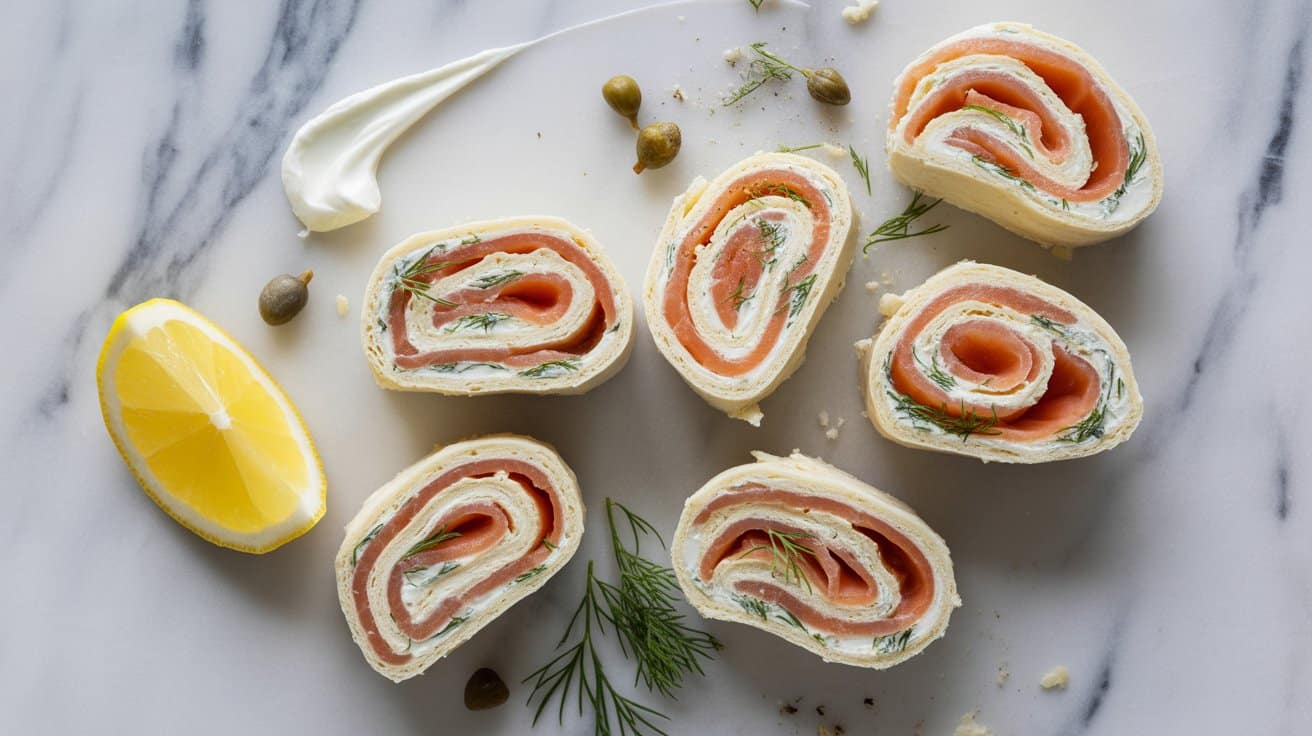
Cream Cheese and Smoked Salmon Pinwheels make a great option for a quick appetizer or party snack. The smooth, herbed cream cheese goes well with the rich, smoky flavor of the salmon.
Each bite offers a creamy, savory experience wrapped up in a soft tortilla that's easy to slice and serve.
This recipe comes together fast and looks elegant on any platter. It's a nice balance of fresh herbs, tangy cheese, and that distinctive smoked fish taste, all rolled into handy pinwheels that are easy to handle at gatherings or for a light lunch.
Why This Recipe Works
This recipe delivers a simple, no-fuss snack that tastes fresh and flavorful. Cream Cheese and Smoked Salmon Pinwheels provide a great balance of creaminess and smokiness, while being quick to prepare and attractive to serve.
- Convenience - Requires no cooking and is ready in minutes, making it ideal for busy days or last-minute guests.
- Flavor balance - Combines tangy cream cheese with smoky salmon and fresh herbs for a well-rounded bite.
- Texture - Soft tortillas wrapped around creamy filling create an appealing, tender mouthfeel.
- Appeal - Elegant enough for special occasions yet approachable for everyday snacking.
Ingredient Swap Ideas
Swapping out some ingredients can tailor this recipe to your preferences or dietary needs, keeping the core flavors intact.
- Use dairy-free cream cheese for a lactose-intolerant or vegan-friendly option.
- Replace smoked salmon with smoked trout or cooked shrimp if you want a milder or different seafood flavor.
- Try whole wheat or gluten-free tortillas to add fiber or accommodate gluten restrictions.
- Add fresh cucumber slices or avocado inside the roll for an extra crunch or creaminess.
Ingredients
- 4 large flour tortillas - Soft and flexible for easy rolling.
- 8 ounces cream cheese - Soften it for easy spreading.
- 2 tablespoons fresh dill - Finely chopped for herbal freshness.
- 1 tablespoon lemon juice - Adds brightness to the cream cheese.
- ¼ teaspoon black pepper - For subtle seasoning.
- 6 ounces smoked salmon - Thinly sliced.
- Optional: ¼ cup finely chopped red onion - Adds a mild sharpness.
Instructions
- In a small bowl, mix the cream cheese, fresh dill, lemon juice, and black pepper until smooth and well combined.
- Lay out one tortilla on a flat surface. Spread a thin, even layer of the cream cheese mixture over it, covering nearly the entire surface.
- Arrange a layer of smoked salmon evenly on top of the cream cheese. If using, sprinkle finely chopped red onion over the salmon for added flavor.
- Roll the tortilla tightly from one edge to the other, creating a compact log. Wrap it in plastic wrap and chill in the refrigerator for at least 30 minutes to firm up.
- Remove the wrap and slice the roll into 1-inch pinwheels. Arrange on a serving plate and enjoy immediately or keep chilled until serving.
11. Pimento Cheese Dip
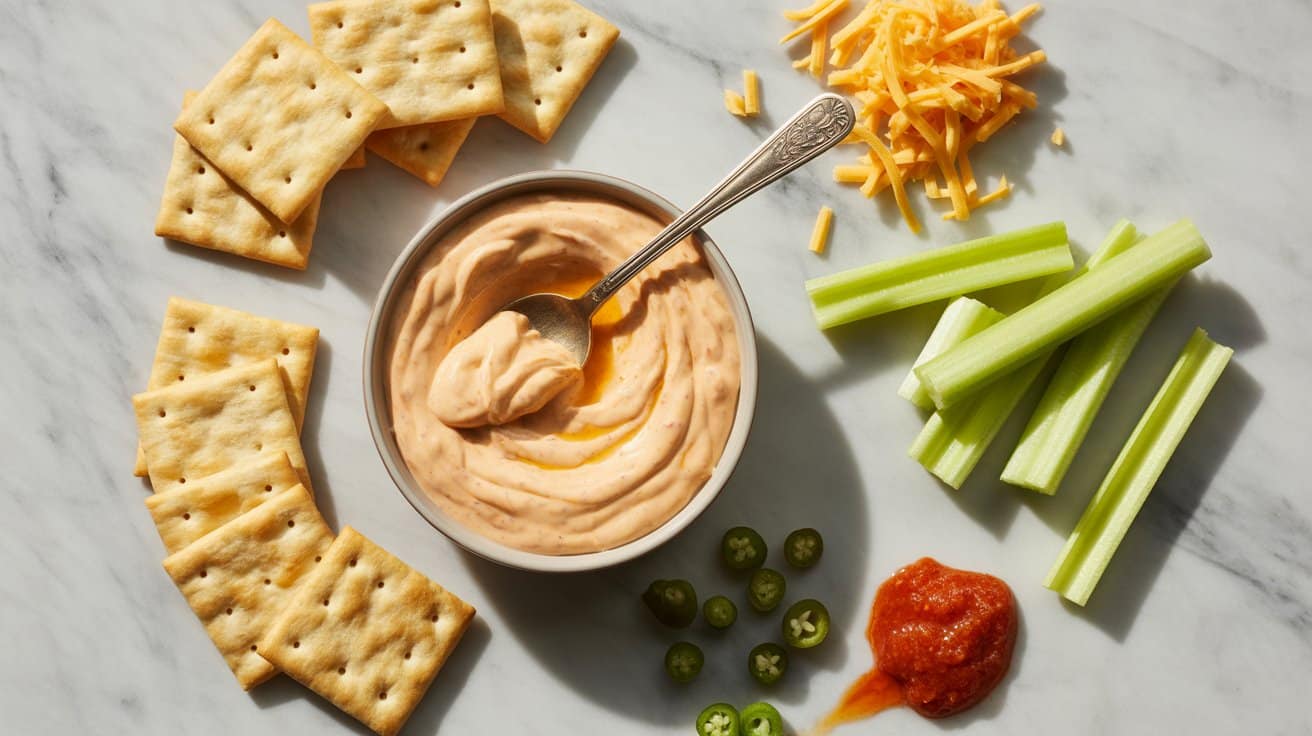
Pimento Cheese Dip is a Southern classic that brings together creamy, tangy, and slightly spicy flavors in a simple, spreadable form. This dip combines sharp cheddar cheese with smooth cream cheese and diced pimentos, creating a rich and flavorful snack that's ideal for crackers, fresh veggies, or sandwiches.
You'll find this cheese spread incredibly easy to whip up with just a few ingredients, and it's a crowd-pleaser at gatherings or for quick bites. The texture is both creamy and a bit chunky, making it a satisfying addition to any appetizer spread.
Why This Recipe Works
This Pimento Cheese Dip offers a classic balance of cheesy richness and a hint of tang from the pimentos, making it a versatile and approachable snack.
- Convenience - Requires minimal ingredients and no cooking, so you can prepare it quickly.
- Flavor balance - Combines sharp cheddar with the mild creaminess of cream cheese and the sweet tang of pimentos.
- Texture - Smooth spread with small chunks of pimento for an interesting bite.
- Appeal - Works well for casual get-togethers or family snacks and goes well with crackers or fresh vegetables.
Ingredient Swap Ideas
Adapting this recipe is simple if you want to adjust for dietary preferences or different flavors.
- Cheddar cheese - Use pepper jack or smoked gouda for a bit of a twist in flavor.
- Cream cheese - Swap for Greek yogurt or sour cream to lighten the dip and add tanginess.
- Pimentos - Replace with roasted red peppers for a milder, sweeter flavor and softer texture.
- Add-ons - Mix in chopped jalapeños or hot sauce for extra spice if you prefer some heat.
Ingredients
- 8 ounces sharp cheddar cheese - shredded for easy mixing.
- 4 ounces cream cheese - softened to room temperature for smooth blending.
- ¼ cup mayonnaise - adds creaminess and helps bind the dip together.
- ¼ cup pimentos - diced and drained to provide a mild, sweet pepper flavor.
- ½ teaspoon garlic powder - for subtle savory depth.
- ¼ teaspoon smoked paprika - adds a gentle smoky note.
- ¼ teaspoon salt - to enhance all the flavors.
- Freshly ground black pepper - a pinch to taste.
Instructions
- In a medium bowl, combine the softened cream cheese and mayonnaise. Use a hand mixer or a sturdy spoon to blend until smooth and creamy.
- Stir in the shredded cheddar cheese and diced pimentos, mixing evenly to distribute the ingredients.
- Add garlic powder, smoked paprika, salt, and black pepper. Mix thoroughly until all seasonings are well incorporated.
- Taste the dip and adjust seasoning if needed, adding more salt or pepper according to your preference.
- Cover the bowl and refrigerate the dip for at least 30 minutes to allow the flavors to meld. Serve chilled with crackers, sliced vegetables, or spread on sandwiches.
12. Halloumi and Vegetable Skewers

Halloumi and vegetable skewers bring together the satisfying chew of grilled cheese with the fresh, bright flavors of colorful vegetables. This recipe is straightforward, making it easy to prepare a tasty dish that's both filling and light.
The slightly salty halloumi goes well with the sweet bell peppers and tender zucchini, creating a balanced and enjoyable bite every time.
You can make these skewers on an indoor grill, which means you don't have to wait for warm weather to enjoy them. Plus, they come together quickly, making them a great choice for a weeknight meal or casual gatherings.
Why This Recipe Works
This recipe offers a simple way to combine fresh vegetables and halloumi for a satisfying, grilled dish that holds its shape and flavor well.
- Convenience - Quick preparation with minimal cleanup using an indoor grill or grill pan.
- Flavor balance - The salty, firm halloumi contrasts nicely with the sweetness and slight char of the vegetables.
- Texture - Firm, chewy cheese goes with the tender-crisp vegetables for a pleasing mouthfeel.
- Appeal - Vegetarian-friendly and colorful presentation makes it inviting for all ages and occasions.
Ingredient Swap Ideas
Swapping out ingredients can help tailor this recipe to fit different diets or flavor preferences while keeping the key qualities intact. Here are some simple alternatives to consider.
- Halloumi - Use firm tofu marinated in lemon juice and herbs for a dairy-free option.
- Bell Peppers - Substitute with cherry tomatoes or mushrooms to vary the vegetable mix.
- Zucchini - Try yellow squash or eggplant slices for different textures and tastes.
- Olive Oil - Use avocado oil or another mild oil if you prefer a different flavor.
Ingredients
- 8 ounces halloumi cheese - Cut into 1-inch cubes for grilling.
- 1 large red bell pepper - Deseeded and cut into 1-inch pieces.
- 1 large yellow bell pepper - Deseeded and cut into 1-inch pieces.
- 1 medium zucchini - Sliced into ½-inch thick rounds.
- 2 tablespoons extra-virgin olive oil - For brushing the skewers before grilling.
- 1 teaspoon dried oregano - Adds a herbal note to the vegetables and cheese.
- ½ teaspoon freshly ground black pepper - To season.
- Wooden or metal skewers - If using wooden, soak in water for 30 minutes to prevent burning.
Instructions
- Thread halloumi cubes, bell pepper pieces, and zucchini slices alternately onto the skewers to create a colorful pattern.
- Brush the assembled skewers lightly with olive oil on all sides. Sprinkle with dried oregano and black pepper for flavor.
- Heat an indoor grill or grill pan over medium-high heat until hot. Place the skewers on the grill and cook for about 3-4 minutes per side, turning to get nice grill marks and slightly softened vegetables.
- Remove skewers from the grill once the halloumi is golden and the vegetables are tender but still hold their shape.
- Serve warm as a main dish or alongside a fresh salad or grain bowl for a complete meal.
13. Baked Goat Cheese with Tomato Sauce
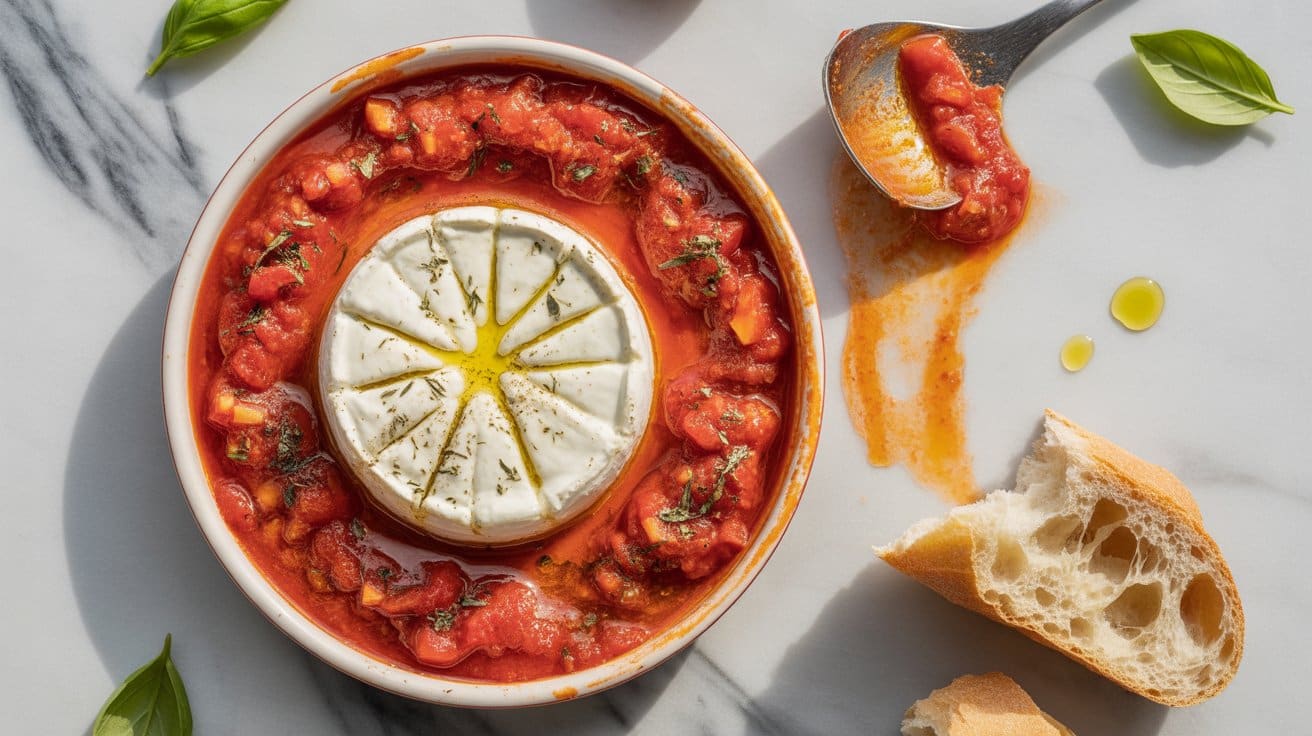
Baked goat cheese with tomato sauce is a warm, inviting dish that's perfect for sharing or enjoying as a simple meal. The creamy, tangy goat cheese softens beautifully in a rich, flavorful tomato sauce, creating a comforting contrast of textures and tastes.
This recipe comes together quickly and requires minimal ingredients, making it accessible for busy evenings or last-minute entertaining. Serve it with crusty bread to scoop up the sauce and cheese for a satisfying experience.
Why This Recipe Works
This recipe brings together creamy goat cheese and bright tomato sauce in a way that's both simple to prepare and packed with flavor. It works as a cozy appetizer or a light meal with very little fuss.
- Convenience - Quick to prepare with minimal ingredients and hands-on time.
- Flavor balance - Combines the tanginess of goat cheese with the bright acidity of tomato sauce.
- Texture - Soft, spreadable cheese with a warm, slightly thickened sauce.
- Appeal - Elegant enough for guests but easy enough for weeknight dinners.
Ingredient Swap Ideas
Swapping ingredients is useful to adjust for dietary needs or preferences while still keeping the dish's essence intact. These alternatives allow the dish to be personalized without losing its appeal.
- Goat cheese - Use cream cheese or feta for a milder or saltier flavor.
- Tomato sauce - Replace with a jarred marinara or fresh crushed tomatoes for convenience or freshness.
- Herbs - Swap fresh basil with oregano or thyme depending on what's available.
- Bread for serving - Use gluten-free or whole grain bread to suit dietary restrictions.
Ingredients
- 4 ounces goat cheese - soft and fresh, at room temperature for easier spreading.
- 1 cup canned crushed tomatoes - choose good-quality tomatoes for rich flavor.
- 1 clove garlic - minced finely to infuse the sauce.
- 1 tablespoon olive oil - for sautéing the garlic and enriching the sauce.
- ½ teaspoon red pepper flakes - optional, for a touch of heat.
- 1 teaspoon fresh basil - chopped, for freshness and aroma.
- Salt and black pepper - to taste.
- Crusty bread - for serving, warmed or toasted.
Instructions
- Preheat your oven to 375°F (190°C). Lightly oil a small ovenproof dish to prevent sticking.
- Heat olive oil in a small pan over medium heat. Add the minced garlic and sauté for about 1 minute until fragrant without browning.
- Stir in the crushed tomatoes, red pepper flakes if using, salt, and pepper. Simmer gently for 5 minutes, allowing the sauce to thicken slightly. Remove from heat and stir in the chopped basil.
- Pour the tomato sauce evenly into the prepared dish. Drop spoonfuls of goat cheese over the sauce, spreading gently to cover the surface but leaving some sauce exposed.
- Bake in the preheated oven for 15 minutes or until the goat cheese is melted and slightly golden on top. Remove carefully from the oven and serve immediately with crusty bread for dipping.
14. Stuffed Mushrooms with Parmesan and Garlic
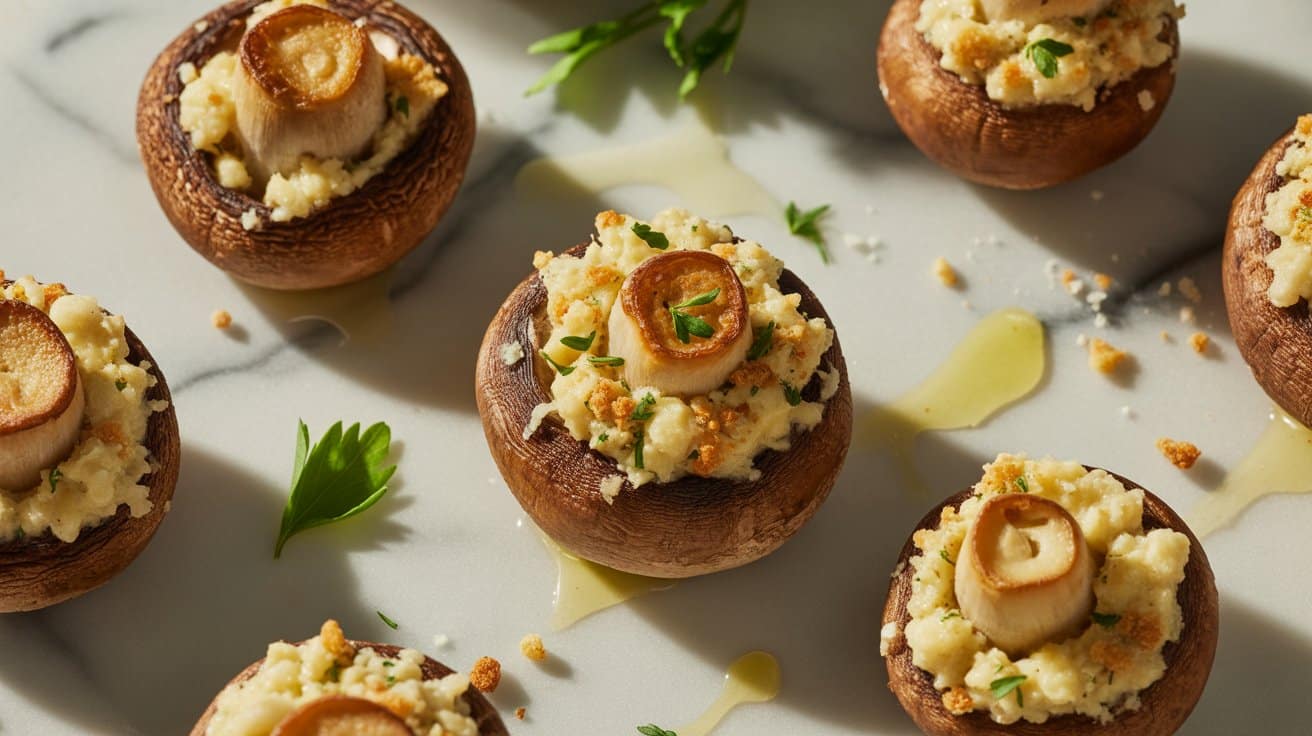
Stuffed mushrooms with Parmesan and garlic are a simple yet flavorful appetizer that suits many occasions. The earthy taste of button mushrooms combined with a cheesy, garlicky filling creates a satisfying bite that's always a crowd-pleaser.
You don't need complex ingredients or hours in the kitchen to make these. They bake quickly and offer a warm, savory snack or side that pairs well with a variety of main dishes.
Why This Recipe Works
This recipe stands out for its straightforward preparation, rich flavor, and appealing texture, making it a versatile choice for busy cooks and entertaining alike.
- Convenience - Requires minimal prep and cooks in under 30 minutes, great for last-minute plans.
- Flavor balance - Combines the sharpness of Parmesan with garlicky warmth and mushroom earthiness.
- Texture - Crunchy breadcrumb topping contrasts nicely with tender mushroom caps.
- Appeal - Works as an elegant appetizer or a filling side that the whole family can enjoy.
Ingredient Swap Ideas
Adjusting key ingredients can help fit dietary preferences or use what you have on hand without losing the core taste.
- Swap button mushrooms with cremini or baby portobello for a deeper flavor and meatier texture.
- Use gluten-free breadcrumbs or crushed nuts instead of regular breadcrumbs for gluten sensitivity.
- Replace Parmesan cheese with Pecorino Romano or a vegan Parmesan alternative if needed.
- Substitute fresh garlic with garlic powder in a pinch, adjusting the amount for flavor intensity.
Ingredients
- 20 button mushrooms - cleaned, stems removed and reserved for filling.
- ½ cup grated Parmesan cheese - finely grated for a smooth texture.
- 2 cloves garlic - minced to release their flavor.
- ⅓ cup breadcrumbs - plain or seasoned, for a crunchy topping.
- 2 tablespoons olive oil - plus extra for drizzling on mushrooms.
- 2 tablespoons fresh parsley - chopped for freshness and color.
- ¼ teaspoon salt - to enhance flavors.
- ¼ teaspoon black pepper - freshly ground for seasoning.
Instructions
- Preheat your oven to 375°F (190°C). Arrange mushroom caps on a baking sheet with the hollow side facing up.
- Chop the reserved mushroom stems finely. Heat olive oil in a skillet over medium heat and sauté the chopped stems with garlic until softened and fragrant, about 3-4 minutes.
- Remove from heat and stir in Parmesan, breadcrumbs, parsley, salt, and pepper. Mix well to combine the filling.
- Spoon the filling generously into each mushroom cap. Drizzle lightly with olive oil for extra richness and to help browning.
- Bake in the preheated oven for 18-20 minutes, until the mushrooms are tender and the tops are golden brown. Serve warm.
For a comforting pairing, serve cheese appetizers with creamy cauliflower sides like creamy cauliflower side dish ideas. For salty, grilled contrasts, try simple Halloumi accompaniments such as halloumi side dishes for grilling.

Andrew Gray is a seasoned food writer and blogger with a wealth of experience in the restaurant and catering industries. With a passion for all things delicious, Andrew has honed his culinary expertise through his work as a personal chef and caterer.
His love for food led him to venture into food writing, where he has contributed to various online publications, sharing his knowledge and insights on the culinary world. As the proud owner of CooksCrafter.com, Andrew covers a wide range of topics, including recipes, restaurant reviews, product recommendations, and culinary tips.
Through his website, he aims to inspire and educate fellow food enthusiasts, offering a comprehensive resource for all things food-related.