Discover a collection of 13 naturally sweetened dessert recipes that bring wholesome sweetness to your table, using sweeteners like dates, honey, and maple syrup. These treats rely on natural ingredients, avoiding refined sugars while still delivering delicious flavors the whole family can enjoy.
This selection covers a range of desserts, including baked goods like muffins and brownies, no-bake snacks, creamy puddings, and refreshing frozen treats. Each recipe highlights natural sweeteners such as dates, honey, maple syrup, and ripe fruit, making them gentle on the palate and nourishing for busy days or special moments.
These recipes work well together because they are straightforward to prepare and use simple ingredients found in most kitchens, typically relying on pantry staples like oats, nuts, and canned fruit. Their ease and minimal cleanup make them practical choices for everyday treats or sharing with friends and family.
1. Date-Sweetened Chocolate Brownies
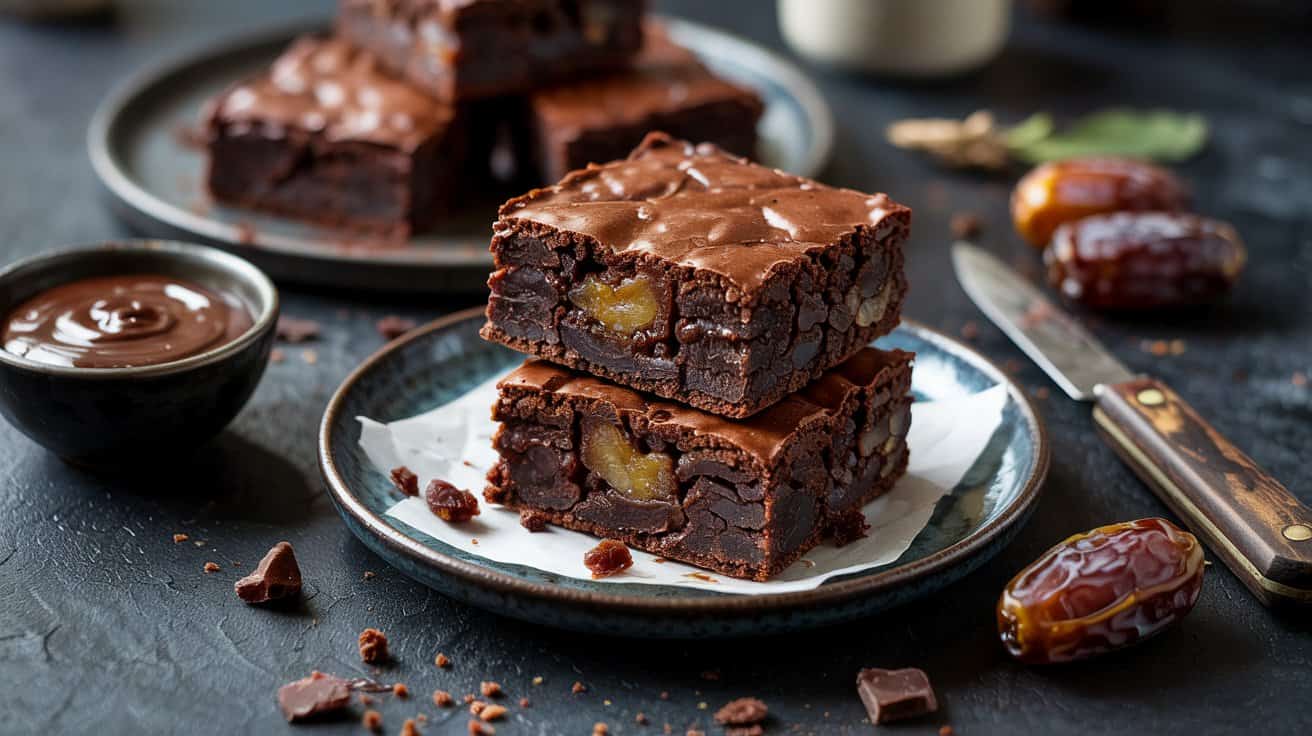
These brownies offer a rich chocolate experience without refined sugar, using blended dates as a natural sweetener (about 1 cup of pitted dates per batch), lending a deep caramel-like sweetness. The result is a fudgy, chewy texture with a deep cocoa flavor that feels indulgent yet wholesome.
They come together with simple ingredients and straightforward steps, making them a great choice for busy cooks who want a healthier treat and similar easy air-fryer chocolate chip alternatives for baking.
Why This Recipe Works
This recipe delivers a healthier twist on a classic dessert while keeping the texture and flavor indulgent by swapping refined sugar for whole-food sweeteners like dates or maple syrup.
- Natural Sweetness - Dates provide a rich, natural sweetness without added refined sugars, and for lighter alternatives consider refreshing honey-based dessert ideas.
- Texture - The brownies remain moist and chewy with a fudgy center and slightly crisp top.
- Ease of Preparation - The ingredients blend quickly and bake in one pan for minimal cleanup.
- Family-Friendly - These brownies appeal to all ages with classic chocolate flavor in a cleaner form.
Ingredient Swap Ideas
Swapping ingredients can help tailor this recipe to suit dietary needs or preferences while keeping the fundamental brownie qualities intact; see easy small-batch cupcake ideas.
- Dates - Use dried figs or raisins blended with a splash of water if dates are unavailable.
- Gluten-Free Flour - Substitute with almond flour or a gluten-free baking blend (use a 1:1 gluten-free baking blend in most recipes) for gluten sensitivities, which yields a tender, slightly nutty crumb.
- Cocoa Powder - Swap regular cocoa with Dutch-processed cocoa for a smoother, less bitter taste.
- Butter - Replace with coconut oil or vegan butter for a dairy-free option.
Ingredients
- 1 cup pitted dates - Use soft Medjool dates for natural sweetness and easy blending.
- ½ cup unsalted butter - Melted for richness and moisture.
- 2 large eggs - Provide structure and bind ingredients together.
- ¾ cup all-purpose flour - For the base texture of the brownies.
- ½ cup unsweetened cocoa powder - Delivers the chocolate flavor.
- ¼ teaspoon salt - Enhances the overall taste.
- 1 teaspoon vanilla extract - improves the chocolate flavor.
- ½ teaspoon baking powder - Helps the brownies rise slightly.
Instructions
- Preheat the oven to 350°F (175°C). Grease or line an 8x8-inch baking pan with parchment paper.
- Blend the pitted dates in a food processor until they form a smooth paste. Set aside.
- In a mixing bowl, whisk together the melted butter and eggs until combined. Stir in the date paste and vanilla extract.
- In a separate bowl, sift together the flour, cocoa powder, salt, and baking powder. Gradually add the dry mixture to the wet ingredients, folding gently until just combined.
- Pour the batter into the prepared pan, spreading evenly. Bake for 20 to 25 minutes, or until a toothpick inserted in the center comes out with moist crumbs. Let cool before slicing and serving.
2. Banana Oatmeal Muffins
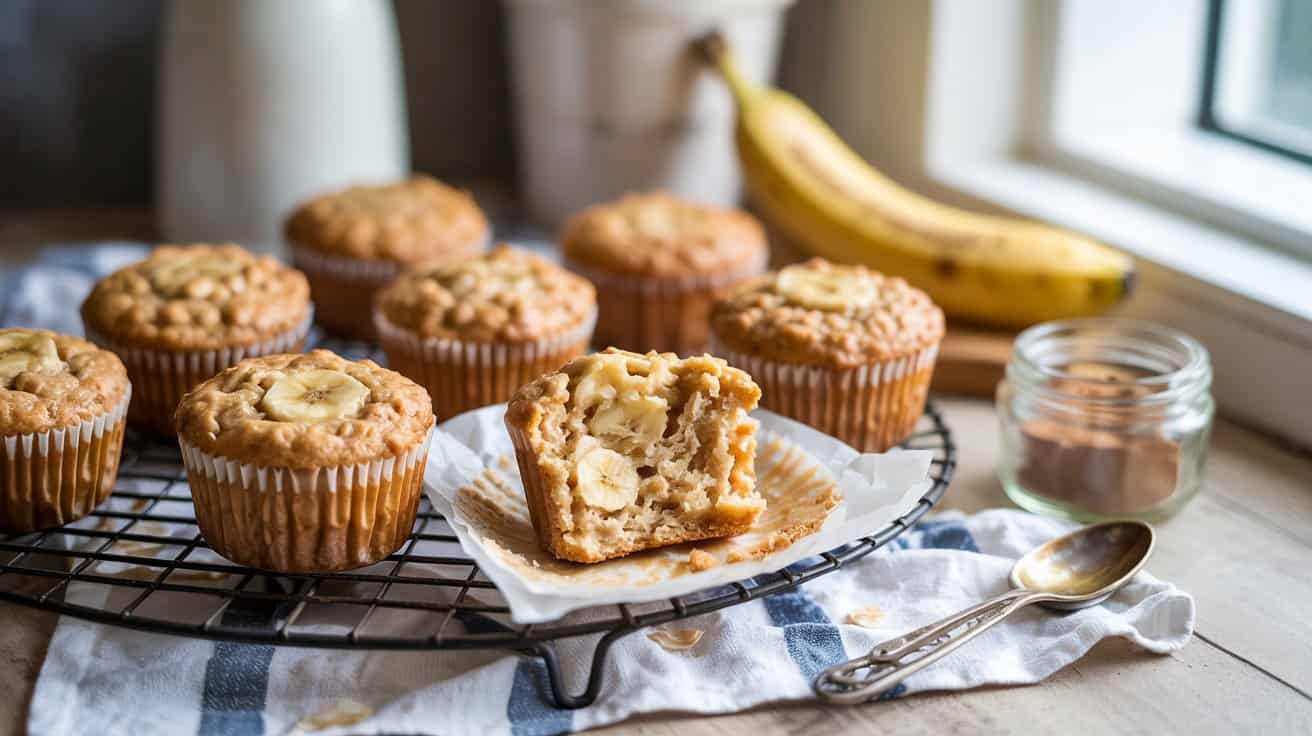
These banana oatmeal muffins bring together the natural sweetness of ripe bananas (use 2-3 mashed ripe bananas) and the wholesome texture of oats for a comforting treat, creating a fiber-rich breakfast option. They have a soft, tender crumb and just enough moisture to keep them from feeling dry, making them a great choice for a quick breakfast or a satisfying snack between meals.
If you're looking for a way to use overripe bananas and want something that feels nourishing without being heavy, this recipe fits that need perfectly and other delicious banana muffin ideas.
For savory recipes that call for banana peppers, consider banana pepper substitutes for savory recipes that work well in pickles and sandwiches.
Why This Recipe Works
This recipe delivers a straightforward, wholesome muffin with familiar flavors and a texture that strikes a balance between soft and hearty.
- Convenience - Quick to mix and bake with simple pantry staples and ripe bananas.
- Flavor balance - Naturally sweetened by bananas, with a mild oat flavor that's never overpowering.
- Texture - Moist crumb from the bananas combined with chewy oatmeal bits.
- Appeal - Family-friendly snack that works well for kids and adults alike.
Ingredient Swap Ideas
Adjusting ingredients gives these muffins flexibility for different dietary needs or taste preferences. These swaps keep the core flavors while allowing for customization.
- Oats - Use gluten-free oats to make this recipe suitable for gluten intolerance.
- Flour - Substitute all-purpose flour with whole wheat flour for a nuttier flavor and added fiber.
- Sweetener - Replace brown sugar with maple syrup or honey if you prefer a liquid natural sweetener.
- Fat - Use melted coconut oil instead of vegetable oil for a subtle coconut hint and dairy-free fat source.
Ingredients
- 1 cup rolled oats - Adds texture and heartiness to the muffins.
- 1 cup all-purpose flour - Provides structure to the batter.
- ½ cup brown sugar - Gives subtle molasses flavor and sweetness.
- 1 teaspoon baking powder - Helps the muffins rise.
- ½ teaspoon baking soda - Assists with leavening and neutralizes acidity.
- ¼ teaspoon salt - Enhances overall flavor.
- 2 ripe bananas, mashed - Natural sweetness and moisture.
- ⅓ cup vegetable oil - Keeps muffins moist and tender.
- 1 large egg - Binds the ingredients together.
- 1 teaspoon vanilla extract - Adds depth of flavor.
- ½ cup milk - Adjusts batter consistency and adds moisture.
Instructions
- Preheat your oven to 350°F (175°C) and line a muffin tin with paper liners or grease it lightly.
- In a large bowl, combine the rolled oats, flour, brown sugar, baking powder, baking soda, and salt. Stir well to mix evenly.
- In a separate bowl, whisk together the mashed bananas, vegetable oil, egg, vanilla extract, and milk until smooth.
- Pour the wet ingredients into the dry ingredients and stir just until combined. Avoid overmixing to keep the muffins tender.
- Divide the batter evenly among the muffin cups, filling them about ¾ full. Bake for 18 to 22 minutes or until a toothpick inserted in the center comes out clean.
- Let the muffins cool in the pan for about 5 minutes before transferring to a wire rack to cool completely.
These banana oatmeal muffins hold up well stored in an airtight container for a few days, making them a practical choice for busy mornings or an anytime snack.
3. Maple-Sweetened Apple Crisp

Maple-Sweetened Apple Crisp is a comforting dessert that brings together tender, warmly spiced apples (preferably tart varieties like Granny Smith or Braeburn) and a crunchy oat and nut topping. Sweetened solely with pure maple syrup, this apple crisp offers a natural sweetness that goes well with the fruit's tartness.
It's straightforward to prepare, making it a great choice for a weeknight treat or a gathering with friends and family.
The contrast between the soft apple filling and the crisp, nutty topping creates a satisfying texture combination. Baking it fills your home with inviting aromas of cinnamon and maple, adding to the experience before you even take your first bite.
If a recipe calls for apple cider vinegar, try apple cider vinegar substitutes for baking like lemon juice or white wine vinegar in a 1:1 swap.
Why This Recipe Works
This recipe provides a wholesome twist on a classic dessert by using maple syrup as the only sweetener, showing natural flavors. It delivers a balance of sweet and spiced notes, while offering a simple preparation that fits nicely into busy schedules.
- Natural sweetness - Uses pure maple syrup instead of refined sugar, offering a richer flavor and better nutrition.
- Texture contrast - Combines tender baked apples with a crunchy oat and nut topping for an enjoyable bite.
- Simple preparation - Requires common ingredients and minimal steps, allowing you to make it with ease.
- Family-friendly appeal - Suitable for a range of tastes, providing a dessert that everyone can appreciate.
Ingredient Swap Ideas
Adjusting certain ingredients can help accommodate dietary preferences or what's available in your pantry, while keeping the overall dish just as delicious.
- Maple syrup - Substitute with honey or agave syrup if you prefer a different natural sweetener.
- Rolled oats - Use gluten-free oats to make the crisp suitable for a gluten-sensitive diet.
- Nuts - Replace walnuts or pecans with sliced almonds or pumpkin seeds for a different crunch and flavor.
- Butter - Swap with coconut oil or a dairy-free margarine to make the topping vegan-friendly.
Ingredients
- 6 medium apples - peeled, cored, and sliced (choose a mix of tart and sweet varieties like Granny Smith and Fuji).
- 2 tablespoons fresh lemon juice - to prevent browning and add brightness.
- ½ teaspoon ground cinnamon - for warm spice flavor.
- ¼ teaspoon ground nutmeg - adds a subtle earthy note.
- ¼ teaspoon salt - enhances overall flavor.
- ¼ cup pure maple syrup - natural sweetener for both filling and topping.
- 1 cup rolled oats - forms the base of the crunchy topping.
- ⅓ cup chopped walnuts or pecans - adds texture and nutty taste.
- ¼ cup whole wheat flour - for structure in the crumble topping.
- ¼ cup unsalted butter - cold and cut into small pieces, binds the topping together.
Instructions
- Preheat your oven to 350°F (175°C) and lightly grease a 9-inch baking dish. Toss the sliced apples with lemon juice, cinnamon, nutmeg, salt, and half of the maple syrup in a large bowl until well combined. Spread the apple mixture evenly in the prepared dish.
- In a separate bowl, mix rolled oats, chopped nuts, and flour. Add the cold butter pieces and use your fingers or a pastry cutter to blend until the mixture resembles coarse crumbs. Stir in the remaining maple syrup to bind the topping lightly.
- Sprinkle the oat and nut crumble evenly over the apples, covering them completely. Place the baking dish on the middle rack of the oven.
- Bake for 40 to 45 minutes, or until the topping is golden brown and the apples are bubbling and tender when pierced with a fork.
- Remove from the oven and let it cool slightly before serving. This apple crisp pairs well with a scoop of vanilla ice cream or a dollop of Greek yogurt for added creaminess.
4. No-Bake Coconut Energy Balls
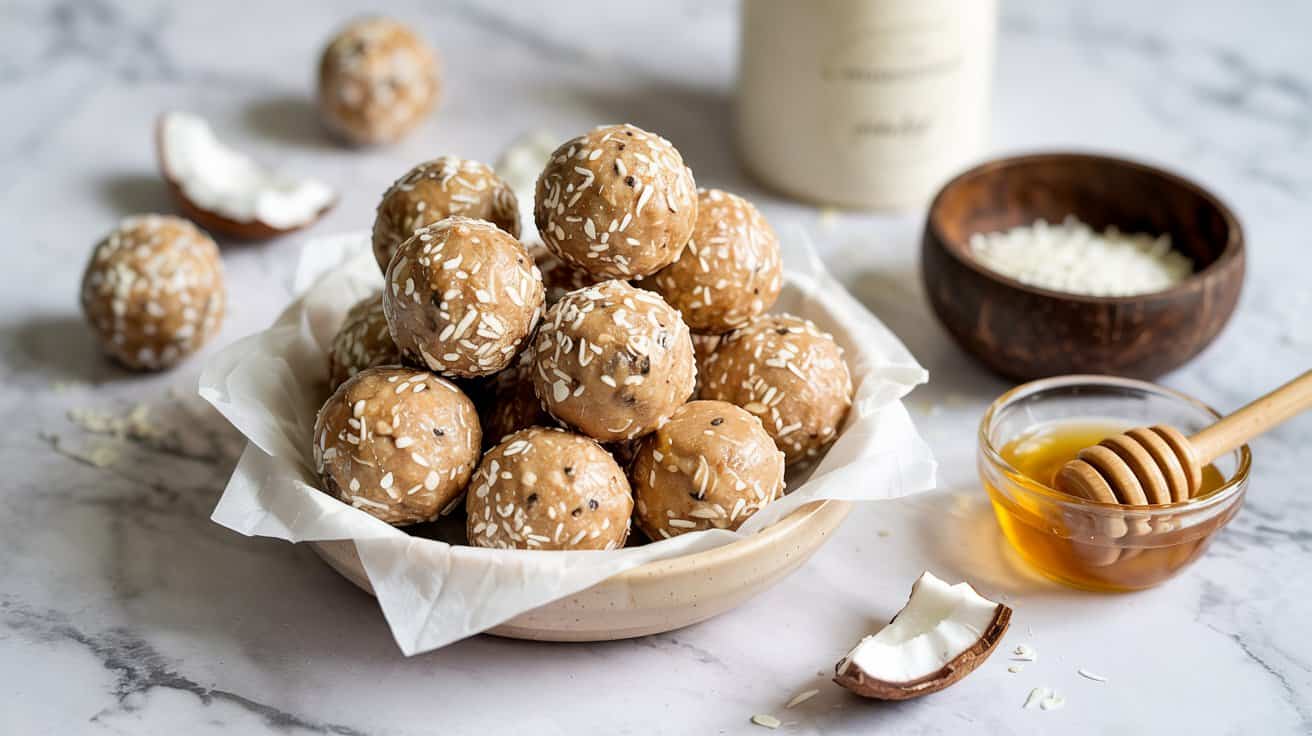
These no-bake coconut energy balls make a simple, wholesome snack that fits easily into a busy day. They combine natural sweetness from dates with the rich texture of shredded coconut and nuts, offering a satisfying bite without any baking required.
The chewy, slightly crunchy texture alongside a hint of vanilla makes them a perfect grab-and-go option for a quick energy boost or a light snack between meals.
Why This Recipe Works
This recipe shines because of its straightforward preparation and balanced flavors, making it a practical addition to your snack repertoire.
- Convenience - Ready in minutes with no oven needed, making it ideal for quick preparation.
- Natural sweetness - Dates provide a pleasant, healthy sweetness without refined sugar.
- Texture - Combines chewy dates with the crunch from nuts and soft coconut for a satisfying bite.
- Portability - Easy to pack and carry, perfect for on-the-go snacking or lunchboxes.
Ingredient Swap Ideas
Changing a few ingredients can make the energy balls work better for your personal taste or dietary needs. Here are some swaps to keep the recipe flexible without losing what makes it great.
- Nuts - Substitute almonds with walnuts, cashews, or pecans for variety in flavor and texture.
- Coconut - Use unsweetened shredded coconut or replace it with finely ground oats if you prefer less coconut taste.
- Sweetener - Swap dates with dried figs or raisins for a different natural sweetness.
- Flavor - Add a pinch of cinnamon or cocoa powder for an extra flavor twist.
Ingredients
- 1 cup Medjool dates - Pitted and chopped for easier blending.
- ½ cup shredded coconut - Unsweetened for a natural coconut flavor.
- ½ cup raw almonds - Roughly chopped to add crunch.
- 1 teaspoon vanilla extract - To improve the overall flavor.
- ¼ teaspoon salt - Balances the sweetness and brings out flavors.
Instructions
- Place the chopped dates, shredded coconut, and almonds into a food processor. Pulse several times to combine and break down the nuts into small pieces.
- Add the vanilla extract and salt, then pulse again until the mixture starts to stick together but still holds some texture.
- Remove the mixture from the processor and use your hands to form it into small 1-inch balls.
- If the mixture is too crumbly, add a teaspoon of water and mix until it comes together. If too sticky, add a bit more shredded coconut.
- Store the energy balls in an airtight container in the refrigerator for up to a week. Enjoy them chilled or at room temperature.
5. Honey Greek Yogurt & Berry Parfait
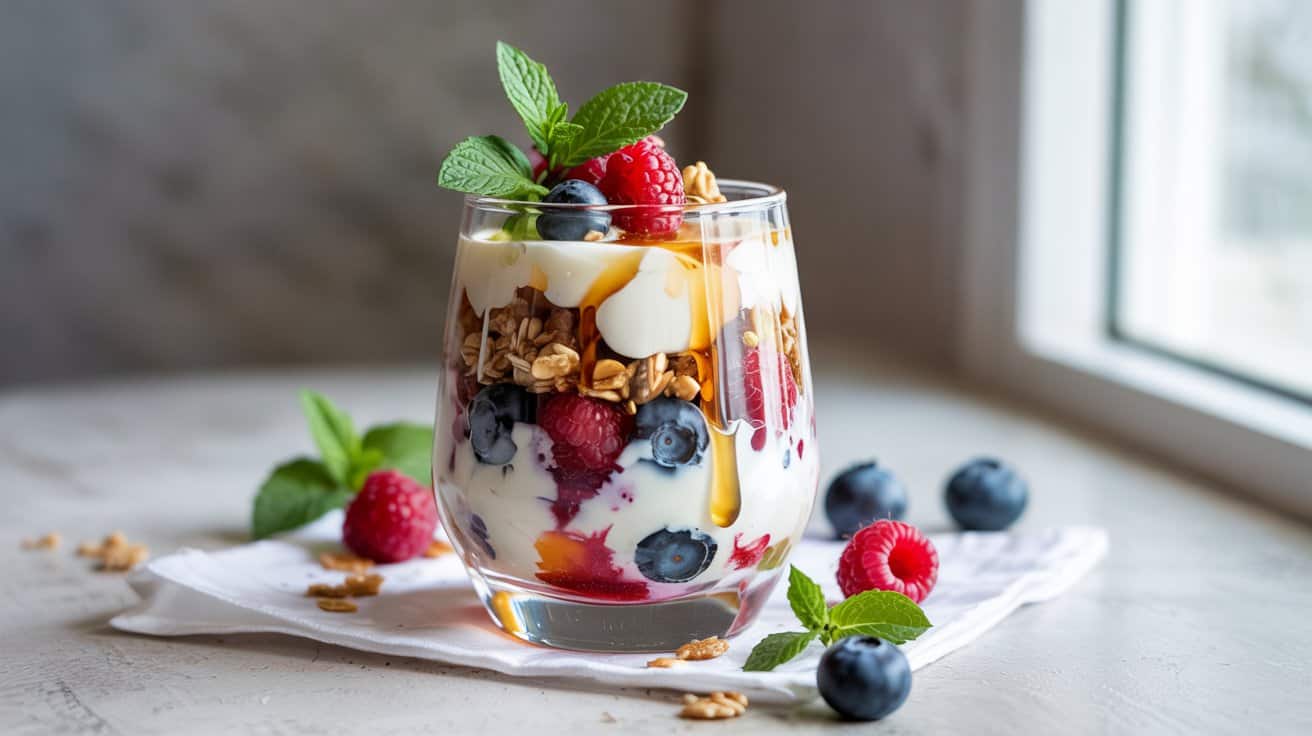
This Honey Greek Yogurt & Berry Parfait is a refreshing and wholesome treat that comes together quickly. It combines the creamy texture of plain Greek yogurt with the natural sweetness of fresh berries, finished with a subtle drizzle of honey to gently improve the flavors.
This parfait works well as a healthy breakfast, a light dessert, or a satisfying snack. The layers create a pleasing mix of tart, sweet, and creamy sensations that make each spoonful enjoyable.
Why This Recipe Works
This parfait blends simple, nutritious ingredients with minimal prep time to create a dish that feels both nourishing and indulgent. Its versatility and inviting presentation add to its appeal.
- Convenience - Assembles in minutes with no cooking required.
- Flavor balance - Combines tangy yogurt with sweet berries and honey for a balanced taste.
- Texture - Offers creamy, smooth yogurt with juicy, slightly firm berry bites.
- Appeal - Suitable for all ages and easy to adapt for various occasions.
Ingredient Swap Ideas
Making ingredient swaps allows you to tailor the parfait to different dietary preferences or what's available in your kitchen, without losing its heart.
- Dairy-free option - Replace Greek yogurt with coconut or almond milk yogurt.
- Alternative sweeteners - Use maple syrup or agave nectar instead of honey.
- Fruit variations - Substitute or add in fruits like sliced peaches, mango, or kiwi.
- Add crunch - Include granola or toasted nuts for extra texture and flavor.
Ingredients
- 1 cup plain Greek yogurt - Thick and creamy yogurt providing protein and tang.
- 1 cup mixed fresh berries - A combination of strawberries, blueberries, raspberries, or blackberries.
- 2 tablespoons honey - Natural sweetener to drizzle over the layers.
- Optional: granola or chopped nuts - For adding a crunchy topping if desired.
Instructions
- Rinse and gently pat dry the fresh berries. If needed, cut larger berries, like strawberries, into bite-sized pieces.
- In a clear glass or bowl, spoon about one-third of the Greek yogurt to create the first layer.
- Add a layer of the mixed fresh berries over the yogurt. Drizzle lightly with honey.
- Repeat the layering with another third of the yogurt and berries, followed by another drizzle of honey.
- Finish with the remaining yogurt layer, top with the last of the berries, and a final drizzle of honey. Add granola or chopped nuts on top if using. Serve immediately or chill for up to an hour before enjoying.
6. Ripe Mango Sorbet with Lime

This ripe mango sorbet is a refreshing way to cool down with a naturally sweet and tangy frozen treat. The fresh mangoes bring a bright flavor that goes well with a hint of lime juice, making it simple and satisfying.
The texture is smooth and icy, perfect for a quick dessert or a palate cleanser. Since it relies on the natural sweetness of the fruit, it's a light option that's easy to make at home with minimal ingredients.
Why This Recipe Works
This sorbet combines ease and flavor in a straightforward recipe that highlights ripe mangoes without added sugar.
- Convenience - Requires just a blender and freezer, with no cooking or special equipment.
- Flavor balance - Sweet mangoes are brightened with fresh lime juice for a crisp finish.
- Texture - Silky smooth sorbet that melts pleasantly on the tongue.
- Appeal - A healthy, naturally sweet dessert that kids and adults enjoy alike.
Ingredient Swap Ideas
Swapping a few ingredients can help adjust the recipe for dietary preferences or different flavors while keeping the essence of this sorbet intact.
- Mango alternatives - Use frozen peaches or pineapple for a different tropical flavor.
- Citrus options - Replace lime juice with lemon or orange juice for a softer tang.
- Sweetener choices - Add a spoonful of honey or agave syrup if your mangoes are less ripe and less sweet.
- Dairy addition - Stir in a little coconut milk for extra creaminess without taking away the refreshing quality.
Ingredients
- 3 large ripe mangoes peeled and chopped
- 2 tablespoons fresh lime juice about 1 lime
- ¼ cup water to help blend
- Optional: 1 tablespoon honey or agave syrup if extra sweetness is needed
Instructions
- Place the chopped mangoes, lime juice, and water in a blender. Blend until very smooth and creamy, scraping down the sides if needed.
- Taste the mixture and add honey or agave syrup if you prefer a sweeter sorbet. Blend again briefly to combine.
- Pour the mango mixture into a shallow freezer-safe dish. Cover loosely with plastic wrap or a lid.
- Freeze for about 1 hour, then stir the sorbet with a fork to break up any ice crystals. Repeat this stirring every 30 minutes for 2 to 3 hours until the sorbet is firm but scoopable.
- Serve immediately or keep frozen until ready to enjoy, letting it sit at room temperature for a few minutes before scooping for easier serving.
7. Almond Flour Snickerdoodles with Coconut Sugar

These almond flour snickerdoodles bring a soft, chewy texture that feels comforting and a little indulgent without the usual refined ingredients. Using coconut sugar adds a subtle caramel note while cinnamon offers warmth and spice that fills the kitchen with a cozy aroma.
This recipe stays simple and straightforward, making it easy to pull together even on a busy day. The cookies turn out tender with just the right balance of sweetness and spice, perfect for a snack or a light dessert.
Why This Recipe Works
This recipe combines wholesome ingredients to deliver a healthier take on classic snickerdoodles without sacrificing flavor or texture. It's approachable and satisfying for most home bakers seeking a lower-carb sweet treat.
- Convenience - Uses pantry staples and almond flour for quick mixing and baking.
- Flavor balance - Warm cinnamon blends smoothly with the natural sweetness of coconut sugar.
- Texture - Soft and chewy crumb from almond flour gives these cookies a tender bite.
- Appeal - Family-friendly and suitable for those who prefer grain-free or refined sugar-free options.
Ingredient Swap Ideas
Swapping ingredients here can help you customize these cookies based on dietary preferences or what's on hand. These alternatives keep the main flavors and texture intact.
- Almond flour - Substitute with cashew or hazelnut flour for a mild nutty taste.
- Coconut sugar - Use light brown sugar or maple sugar for a similar caramel depth.
- Butter - Replace with coconut oil or vegan margarine to make the recipe dairy-free.
- Egg - Use a flax egg (1 tablespoon ground flaxseed + 3 tablespoons water) if avoiding eggs.
Ingredients
- 2 ½ cups almond flour - finely ground, helps create a tender base for the cookies.
- ½ teaspoon baking soda - for leavening, gives a slight rise to the dough.
- ¼ teaspoon salt - balances the sweetness and enhances flavor.
- ½ cup coconut sugar - provides natural sweetness with a rich, caramel-like taste.
- 1 teaspoon ground cinnamon - adds classic snickerdoodle warmth and spice.
- ½ cup unsalted butter - softened, contributes richness and chewiness.
- 1 large egg - binds the dough and helps with texture.
- 1 teaspoon vanilla extract - enhances flavor depth and aroma.
Instructions
- Preheat your oven to 350°F (175°C) and line a baking sheet with parchment paper. This prevents sticking and browning on the bottom.
- In a medium bowl, whisk together almond flour, baking soda, salt, ¼ cup of the coconut sugar, and ground cinnamon. Set aside.
- In a separate large bowl, cream softened butter with the remaining ¼ cup coconut sugar until smooth. Beat in the egg and vanilla extract until fully combined.
- Gradually add the dry ingredients into the wet mixture, stirring until a soft dough forms. Avoid overmixing to keep the texture tender.
- Form the dough into 1-inch balls and roll each in a small bowl of extra cinnamon and coconut sugar mixture. Place them on the prepared baking sheet about 2 inches apart.
- Bake for 10 to 12 minutes, or until the edges turn lightly golden but the centers remain soft. Remove from the oven and let cookies cool on the sheet for 5 minutes before transferring to a wire rack.
These almond flour snickerdoodles are best enjoyed within a few days stored in an airtight container.
8. Chia Seed Pudding with Maple Syrup and Vanilla
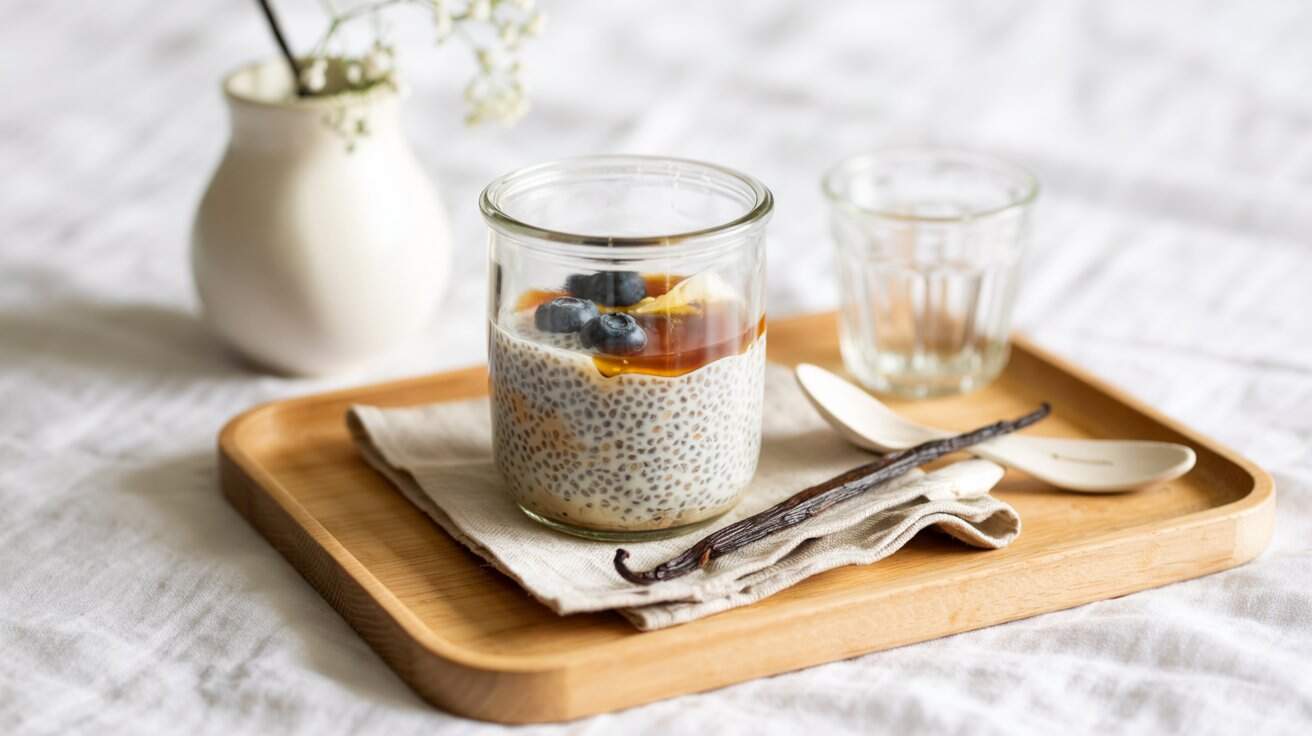
Chia seed pudding is a simple, nourishing dish that fits easily into a busy lifestyle. This version uses creamy vanilla and a touch of maple syrup to bring natural sweetness without overwhelming the delicate chia flavor.
The texture is silky and smooth with a bit of gentle crunch from the chia seeds, making it a satisfying breakfast or light dessert. You only need a few minutes to mix the ingredients, then let the pudding set overnight for convenience and enhanced flavors.
Why This Recipe Works
This chia seed pudding is a wholesome, versatile choice with a great balance of taste and texture.
- Convenience - Quick to prepare and sets overnight, saving time in the morning.
- Flavor balance - Mild sweetness from maple syrup goes with the vanilla-infused creamy base.
- Texture - Silky and smooth pudding with subtle crunch from chia seeds.
- Healthy appeal - Packed with nutrients like fiber and omega-3 fatty acids, supporting a balanced diet.
Ingredient Swap Ideas
Adapting this chia pudding allows you to cater to different dietary preferences or adjust flavors slightly.
- Milk alternatives - Use almond, oat, or coconut milk for a dairy-free or different flavor.
- Sweeteners - Replace maple syrup with honey or agave syrup depending on taste or dietary needs.
- Vanilla options - Substitute vanilla extract with vanilla bean paste or vanilla powder for a richer aroma.
- Add-ins - Stir in fresh berries, chopped nuts, or shredded coconut to vary texture and taste.
Ingredients
- 2 tablespoons chia seeds - Nutrient-rich seeds that thicken the pudding.
- 1 cup milk of choice - Provides creaminess and liquid to hydrate chia seeds.
- 2 tablespoons pure maple syrup - Adds gentle, natural sweetness.
- 1 teaspoon vanilla extract - Infuses the pudding with warm vanilla flavor.
- Pinch of salt - Balances the sweetness and enhances flavor.
Instructions
- In a mixing bowl or jar, combine the chia seeds, milk, maple syrup, vanilla extract, and a pinch of salt. Stir thoroughly to distribute the seeds evenly throughout the liquid.
- Let the mixture sit for 5 minutes, then stir again to break up any clumps of chia seeds and ensure smooth texture.
- Cover the bowl or jar and refrigerate it overnight or for at least 4 hours. This allows the chia seeds to absorb the liquid and form the pudding consistency.
- Before serving, stir the pudding once more. Add toppings like fresh fruit or nuts if you like, then enjoy chilled.
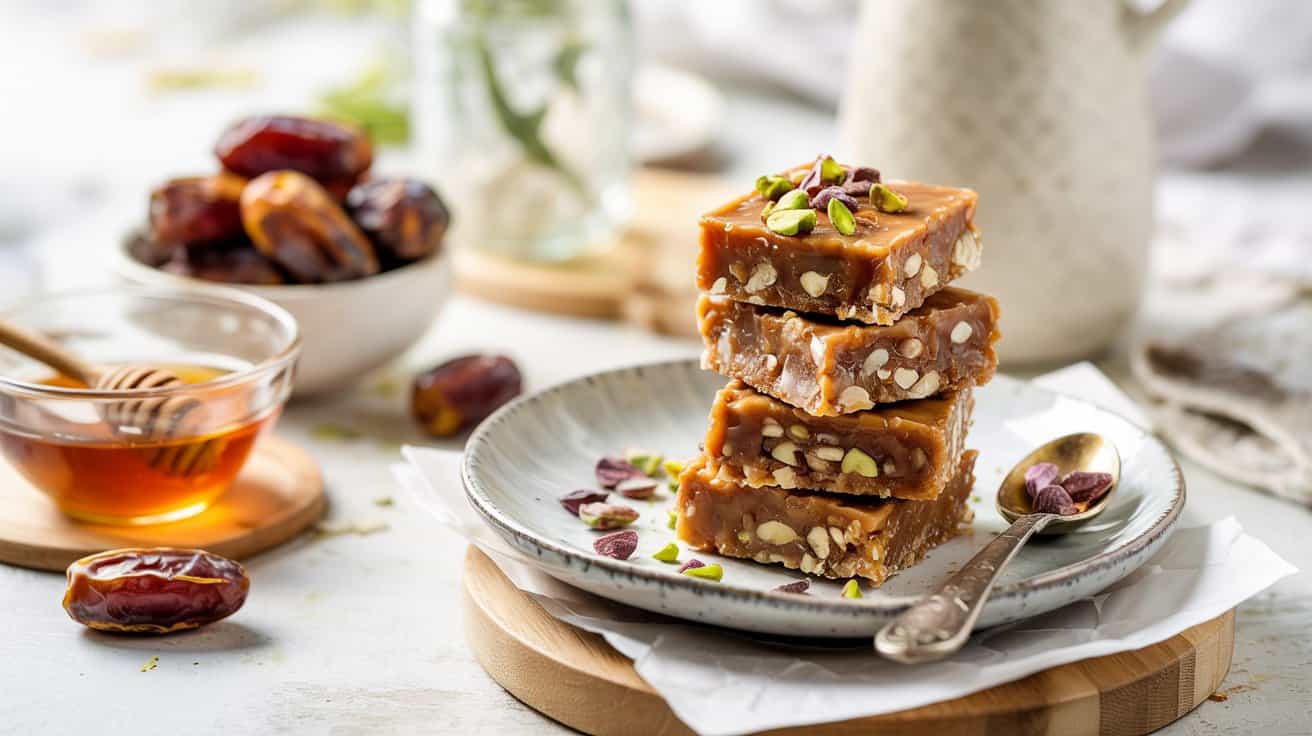
9. Peanut Butter Date Bars
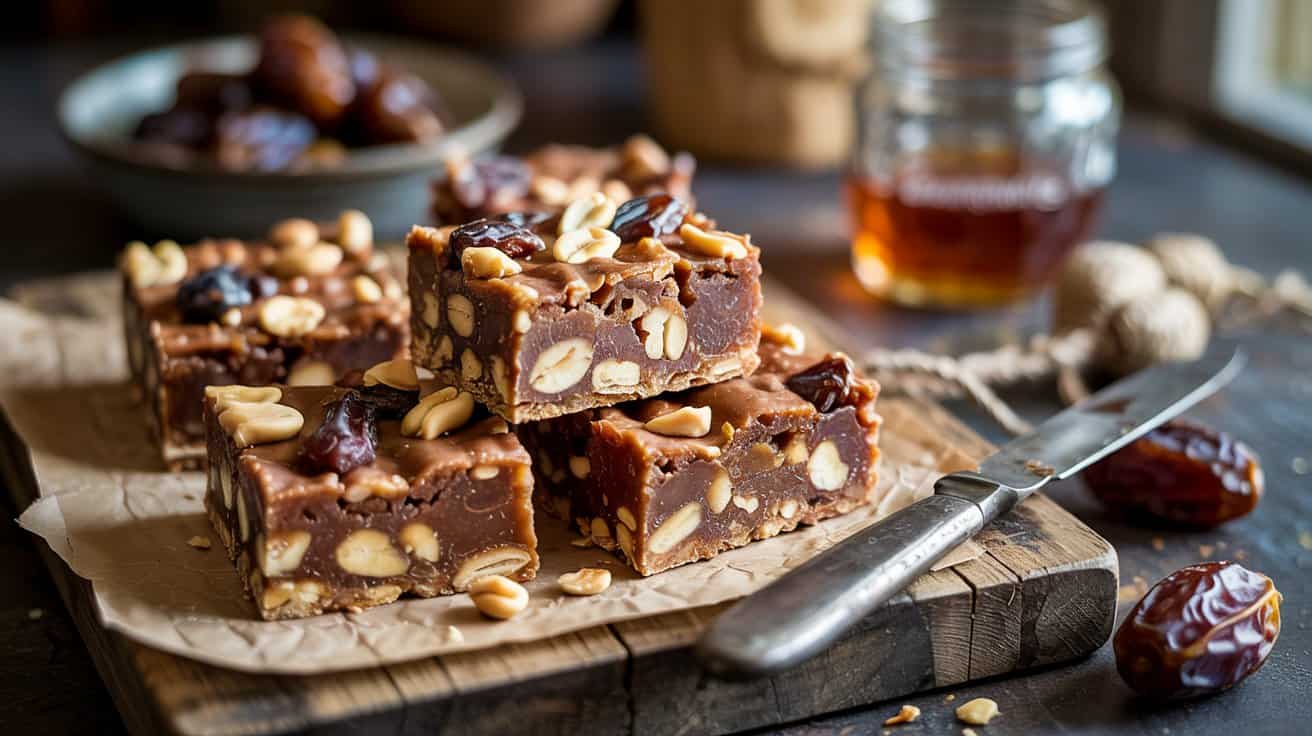
These Peanut Butter Date Bars combine the natural sweetness of dates with the creamy richness of peanut butter to create a no-bake treat that's both satisfying and wholesome. With oats adding a pleasant chewiness, this recipe is a simple way to make a nutritious snack that feels indulgent without relying on refined sugars.
You can prepare this recipe quickly, and the bars hold together nicely, making them easy to slice and grab on the go. They're ideal for a busy day or as a healthier option to keep in your pantry.
Why This Recipe Works
This recipe brings together the right mix of flavors and textures while staying straightforward and fuss-free. It keeps well and offers a nourishing snack without complicated steps or ingredients.
- Convenience - No baking required, just mix and chill for a hassle-free treat.
- Flavor balance - The sweetness of dates goes well with the creamy, slightly salty peanut butter.
- Texture - Chewy oats combined with sticky dates create a satisfying bar texture.
- Family-friendly - These bars are appealing to kids and adults looking for healthier snacks.
Ingredient Swap Ideas
Changing up certain ingredients can help you customize these bars for different dietary needs or flavor preferences without losing their essence.
- Nut butters - Swap peanut butter with almond or cashew butter for a different nutty flavor.
- Oats - Use gluten-free rolled oats if you need a gluten-free option.
- Sweetener - If you prefer a less sweet bar, reduce the dates slightly or add a small amount of unsweetened shredded coconut.
- Add-ins - Mix in chopped nuts, seeds, or dark chocolate chips to add variety and texture.
Ingredients
- 1 cup pitted dates - Soft and sticky, provide natural sweetness and binding.
- ½ cup creamy peanut butter - Adds richness and smooth texture to the bars.
- 1 ½ cups rolled oats - Offer bulk and chewiness to the mixture.
- ¼ teaspoon salt - Balances flavors and enhances the sweetness.
- 1 teaspoon vanilla extract - Adds depth and warmth to the overall flavor.
Instructions
- Place the dates in a food processor and pulse until they form a sticky, cohesive paste. If the dates are dry, soak them in warm water for 10 minutes beforehand, then drain well.
- Transfer the date paste to a bowl. Add the peanut butter, salt, and vanilla extract, then stir until fully combined and smooth.
- Gently fold in the rolled oats until all the ingredients are evenly mixed. The mixture should hold together when pressed.
- Line an 8x8-inch baking pan with parchment paper. Press the mixture firmly and evenly into the pan.
- Refrigerate for at least 1 hour until set. Once firm, remove from the pan and cut into bars or squares. Store the bars in an airtight container in the refrigerator for up to one week.
10. Baked Pears with Honey and Walnuts
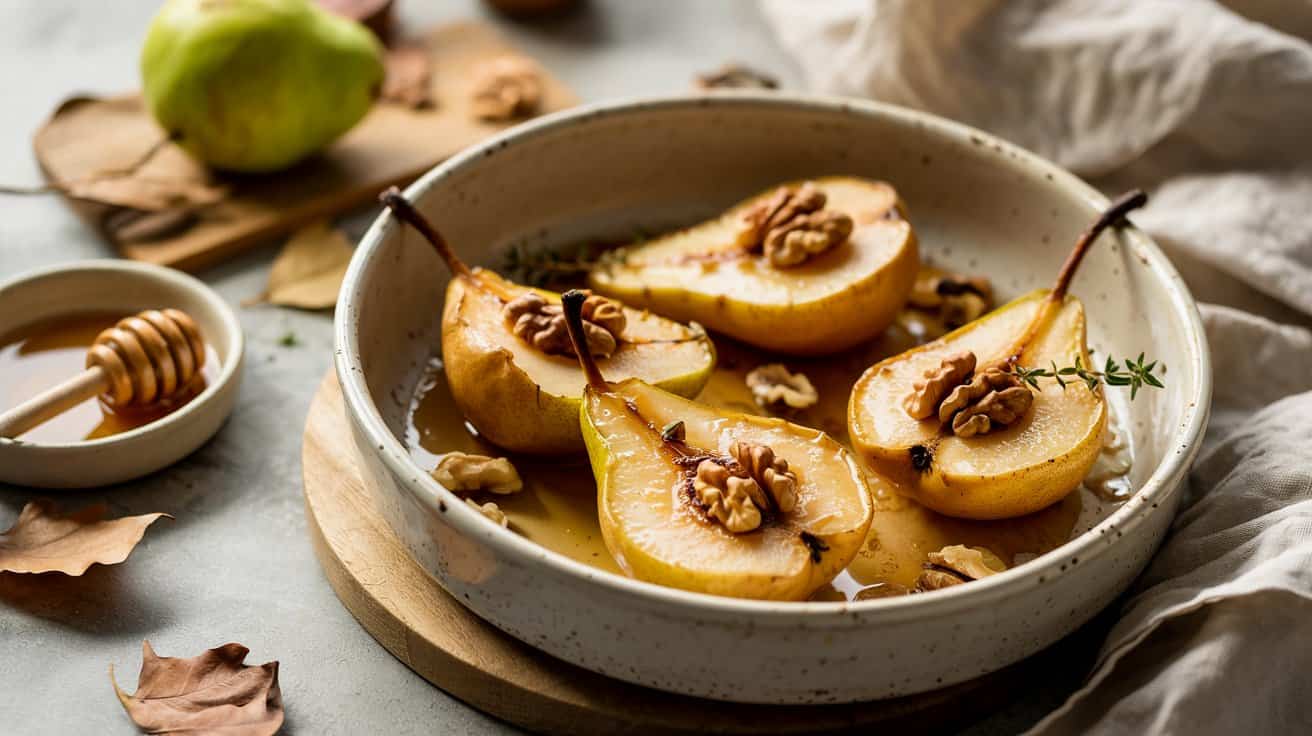
Baked pears with honey and walnuts make a naturally sweet and satisfying dessert that's simple to prepare. The warm pears become tender and release their juices, which combine beautifully with the earthy crunch of walnuts and the floral sweetness of honey.
This dish balances soft and crisp textures along with subtle nutty and fruity flavors. It's an elegant way to enjoy seasonal fruit without much fuss or many ingredients.
Why This Recipe Works
This recipe brings together easy preparation and a light but flavorful finish. Its warm textures and balanced sweetness make it suitable for any meal's end.
- Convenience - Requires minimal prep and just a short baking time.
- Flavor balance - Combines natural pear sweetness with nutty and honey notes.
- Texture - Soft, baked fruit contrasts with crunchy walnuts.
- Appeal - Makes a healthy, gluten-free dessert with an elegant look.
Ingredient Swap Ideas
Making swaps in this recipe is straightforward and helps cater to different preferences or what you have on hand. These substitutions keep the dish delicious and maintain its core character.
- Walnuts - Replace with pecans or almonds for a different nutty flavor.
- Honey - Use maple syrup or agave nectar as a vegan-friendly alternative.
- Pears - Try Bosc or Anjou pears; firm apples like Fuji can also work if baked a little longer.
- Spices - Add cinnamon or nutmeg for a warm spice note that goes with the fruit.
Ingredients
- 4 ripe pears - peeled, halved, and cored.
- ½ cup walnuts - chopped roughly for crunch.
- 3 tablespoons honey - to drizzle over the pears.
- 1 teaspoon lemon juice - to prevent browning and add a hint of tartness.
- ½ teaspoon ground cinnamon - optional, for extra warmth and flavor.
- Pinch of salt - to improve the natural sweetness of the pears.
Instructions
- Preheat your oven to 350°F (175°C). Arrange the pear halves cut-side up in a baking dish.
- Drizzle each pear half with lemon juice, then sprinkle with ground cinnamon and a pinch of salt.
- Top the pears evenly with the chopped walnuts.
- Drizzle honey over each pear half and nuts.
- Bake in the oven for about 25 to 30 minutes, until the pears are soft and tender but not mushy. Remove from the oven and let them cool slightly before serving.
Serve warm on their own or with a small scoop of vanilla yogurt or ice cream for added creaminess.
11. Carrot Cake Energy Bites (naturally sweetened)
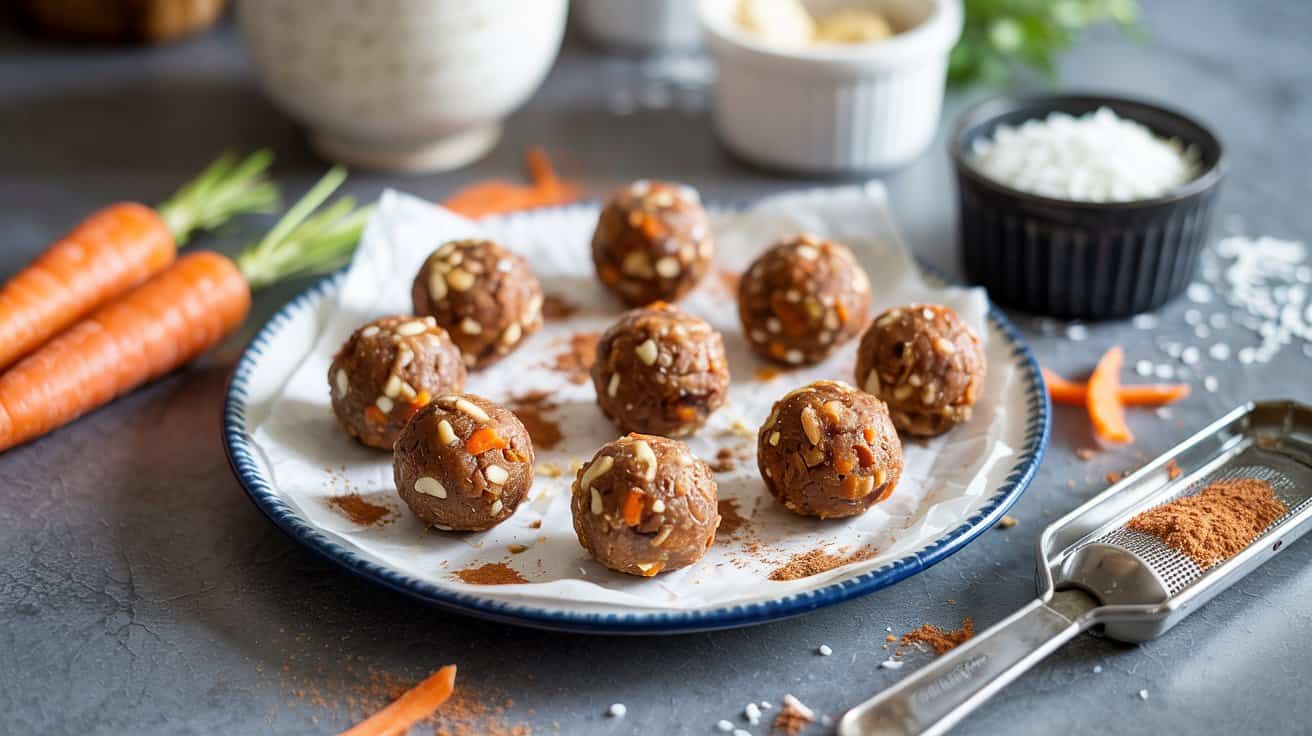
Carrot cake and energy bites combine to make a snack that's both satisfying and nourishing. These little bites bring together the sweetness of dates with the warm spices of cinnamon and nutmeg, capturing the essence of carrot cake without any added sugar.
They're chewy and flavorful, with a hint of crunch that comes from finely shredded carrots and nuts. You can whip them up in no time, making them a handy on-the-go snack or a quick treat to have on hand for busy days.
Why This Recipe Works
This recipe offers a wholesome way to enjoy a carrot cake-inspired treat packed with natural sweetness and nutrients. It's simple to prepare and easy to keep around for whenever a snack craving hits.
- Convenience - No baking required and ready in minutes for quick snacks.
- Flavor balance - Combines sweetness, warm spices, and a fresh carrot texture.
- Texture - Chewy and soft bites with a slight crunch from nuts and carrots.
- Appeal - Family-friendly, making them a great snack for all ages.
Ingredient Swap Ideas
Swapping ingredients can help this recipe fit different dietary needs or taste preferences without losing its core charm. You can tweak it a bit depending on what you have available or your personal cravings.
- Nuts - Replace walnuts with pecans or almonds for a different crunch.
- Sweetener - Use dried figs or raisins instead of dates for natural sweetness.
- Spices - Add ginger or allspice to improve the warm spice blend.
- Carrots - Swap shredded carrot for finely grated zucchini for a milder flavor.
Ingredients
- 1 cup pitted dates - Provides natural sweetness and binds the bites.
- 1 cup finely shredded carrot - Adds fresh flavor and moisture.
- 1 cup rolled oats - Forms the base and adds chewiness.
- ½ cup walnuts, chopped - Offers crunch and healthy fats.
- 1 teaspoon ground cinnamon - Brings warmth and classic carrot cake flavor.
- ¼ teaspoon ground nutmeg - Adds subtle spice depth.
- ¼ teaspoon sea salt - Enhances overall flavor.
Instructions
- Place the pitted dates in a food processor and pulse until they form a sticky paste.
- Add the shredded carrot, rolled oats, walnuts, cinnamon, nutmeg, and salt to the food processor. Pulse several times until the mixture comes together but still has some texture.
- Scoop out tablespoon-sized portions and roll them into balls using your hands. If the mixture feels too dry, add a few drops of water to help it stick.
- Arrange the bites on a baking sheet or plate and refrigerate for at least 30 minutes to firm up.
- Store in an airtight container in the fridge for up to one week or freeze for longer keeping.
These bites make a wholesome snack you can grab anytime, with no added sugar and all the comforting flavors of carrot cake.
12. Blueberry Almond Crumble Bars
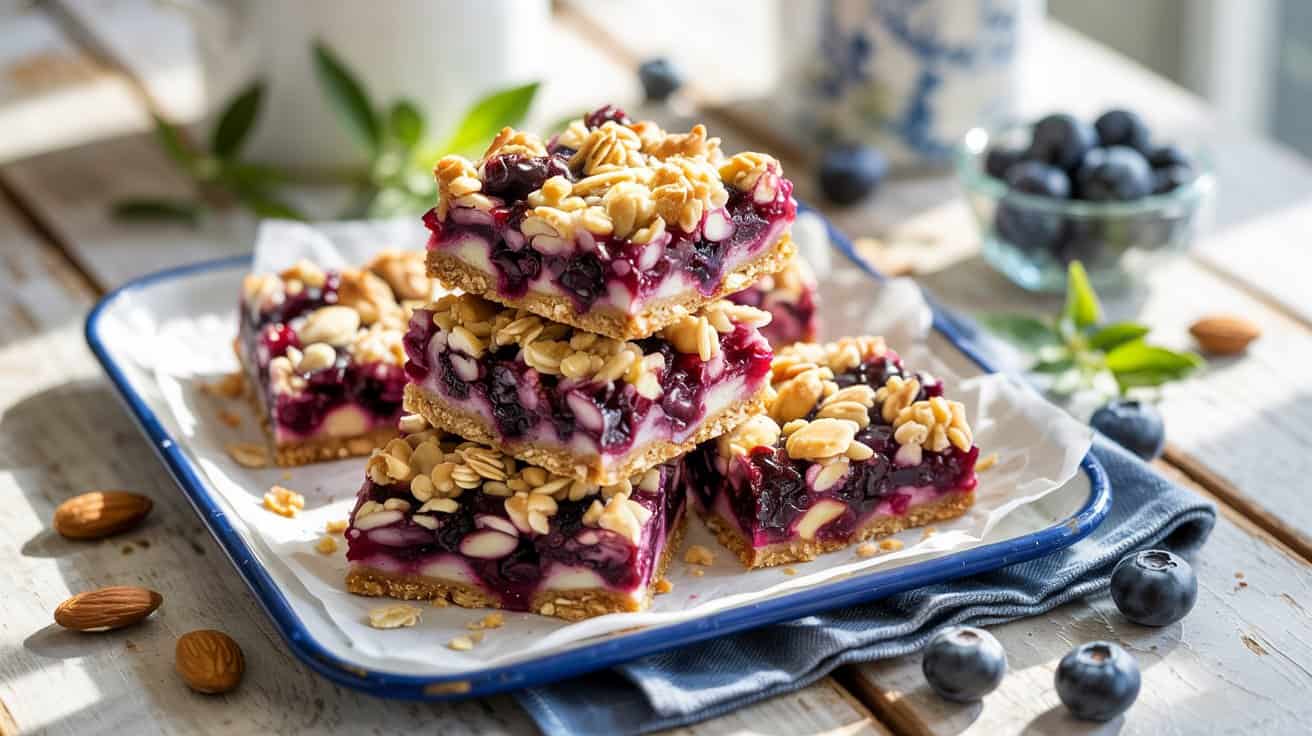
Blueberry Almond Crumble Bars bring together juicy berries with a tender almond-flavored base and a crunchy, crumbly topping. This recipe offers a wonderful balance of sweet and nutty flavors, while the maple syrup adds some soft sweetness without overwhelming the fresh fruit.
These bars are straightforward to prepare, making them an excellent choice for a wholesome snack or a light dessert. The combination of textures-from soft and fruity to crisp and crumbly-makes every bite enjoyable and satisfying.
Why This Recipe Works
This recipe brings sweetness and nuttiness together in a simple but flavorful way that's easy to prepare and share.
- Convenience - Comes together with minimal mixing and only one baking pan needed.
- Flavor balance - Combines the tartness of blueberries with the delicate nutty aroma of almonds.
- Texture - Features a tender base and a crunchy almond crumble topping for contrast.
- Appeal - Suitable for casual gatherings or an everyday treat that's nourishing and tasty.
Ingredient Swap Ideas
Swapping ingredients can help tailor the bars to your preferences or dietary needs without losing the character of the recipe.
- Use frozen blueberries when fresh ones aren't in season; just thaw and drain excess liquid.
- Replace almond flour with oat flour for a different texture and to avoid nuts if needed.
- Substitute maple syrup with honey if you prefer a slightly different natural sweetener.
- Swap butter for coconut oil to keep this recipe dairy-free while maintaining richness.
Ingredients
- 1 ½ cups almond flour - Finely ground almond flour gives the base and topping a nutty flavor.
- ½ cup rolled oats - Adds texture to the crumble topping.
- ¼ cup maple syrup - Sweetens the bars naturally.
- ¼ cup unsalted butter - Melted to bind the base and topping layers.
- ¼ teaspoon salt - Enhances the overall flavor.
- 1 cup fresh blueberries - Adds juicy sweetness and bright color.
- 1 teaspoon lemon zest - Brightens the fruit filling for balance.
- 1 tablespoon lemon juice - Gives a touch of acidity to go with the berries.
- ½ teaspoon almond extract - Lifts the almond flavor throughout the bars.
Instructions
- Preheat the oven to 350°F (175°C) and line an 8-inch square baking pan with parchment paper, leaving some overhang for easy removal.
- In a medium bowl, combine almond flour, rolled oats, salt, and half the maple syrup. Stir in melted butter and almond extract until the mixture becomes crumbly but holds together when pressed.
- Press half of the crumble mixture firmly into the bottom of the prepared pan to form the base layer.
- In a small bowl, toss the blueberries with lemon zest and lemon juice, then spread evenly over the base layer. Drizzle a little maple syrup over the berries if you want extra sweetness.
- Crumble the remaining almond flour mixture over the blueberries, covering them completely. Bake for 30 to 35 minutes until the topping is golden and the edges are slightly crisp.
- Let the bars cool completely in the pan before slicing into squares. This step helps them set and hold together well.
Serve these bars chilled or at room temperature for a fresh, nutty snack that's both wholesome and delicious.
13. Frozen Banana “Nice Cream”
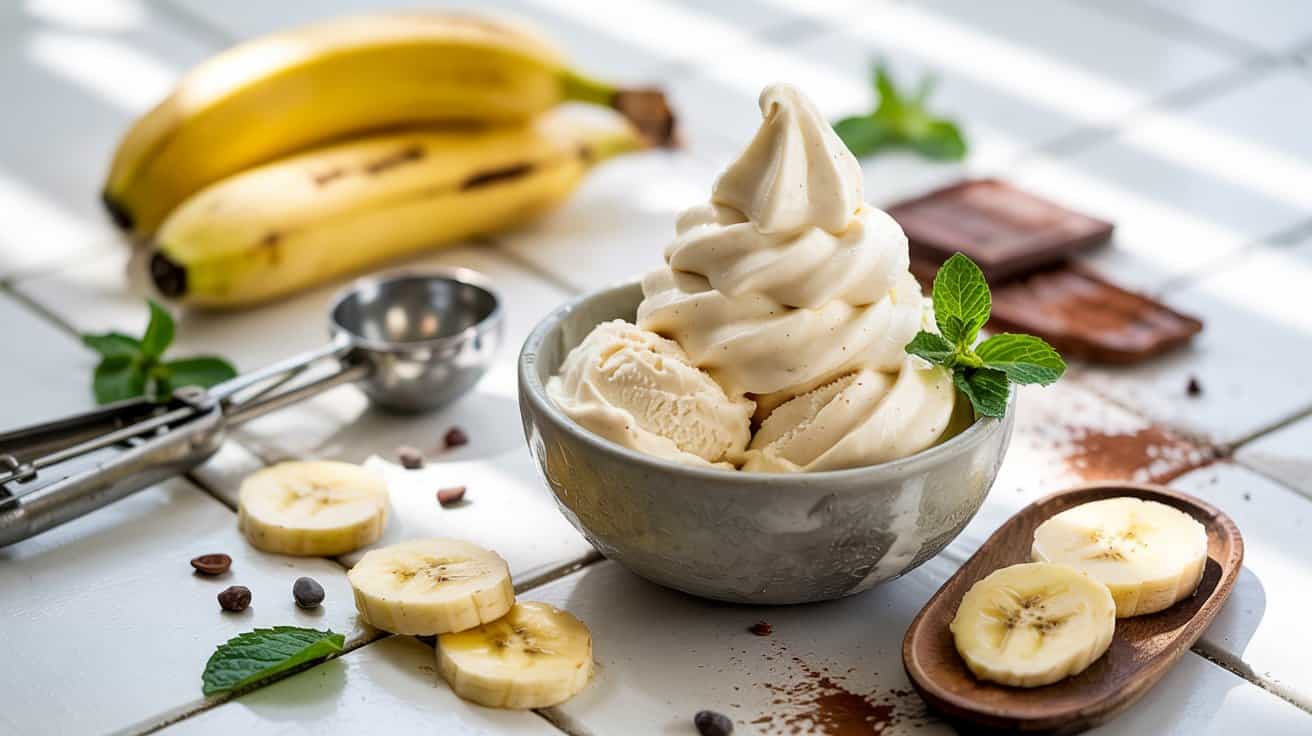
Frozen banana "nice cream" is a simple, creamy treat you can make using just frozen bananas and a blender. It captures the sweetness and rich texture of ice cream without any dairy or added sugar, making it a wholesome alternative for a quick dessert or snack.
You can enjoy it plain or add flavors like vanilla or cocoa powder to change things up. The smooth consistency and natural sweetness make it a crowd-pleaser that's also easy to prepare with minimal ingredients.
Why This Recipe Works
This recipe offers a healthy, refreshing option that comes together quickly with ingredients you likely have on hand. It's a great way to enjoy a cold, satisfying treat without compromising nutrition.
- Convenience - Made entirely from frozen bananas with no need for an ice cream machine.
- Flavor balance - Naturally sweet and creamy with options to customize flavor.
- Texture - Silky smooth and soft, mimicking traditional ice cream.
- Appeal - Suitable for all ages and dietary preferences, including dairy-free and vegan.
Ingredient Swap Ideas
Ingredient swaps let you adjust this recipe to suit personal preferences or dietary restrictions without losing its essence. They can add variety or boost nutrition easily.
- Bananas - Use ripe frozen mango chunks for a tropical twist.
- Flavoring - Swap vanilla extract with almond extract for a nutty note.
- Add-ins - Mix in peanut butter or almond butter to deepen flavor and add protein.
- Sweetener - If bananas aren't quite sweet enough, add a drizzle of maple syrup or honey.
Ingredients
- 4 large ripe bananas - peeled and sliced, then frozen.
- 1 teaspoon pure vanilla extract - optional, for extra flavor.
- 1 tablespoon unsweetened cocoa powder - optional, if you want chocolate nice cream.
- Pinch of salt - enhances flavor.
Instructions
- Place frozen banana slices in a high-speed blender or food processor. Blend until the bananas start to break down and become creamy.
- Scrape down the sides as needed, continuing to blend until smooth and spreadable, about 2 to 3 minutes.
- Add vanilla extract, cocoa powder, and a pinch of salt if using, then blend again to combine evenly.
- Serve immediately for soft-serve texture or transfer to an airtight container and freeze for 1 hour if you prefer a firmer consistency.
- Scoop into bowls and enjoy as is, or top with fresh fruit, nuts, or dark chocolate chips for extra texture.
For creamy recipes that call for condensed dairy, consider sweetened condensed milk substitutes for adding flavor that can keep desserts rich without refined sugar. If you want chocolate-forward drinks that double as a treat, explore chocolate smoothie recipes for dessert that feel indulgent and naturally sweet.

Andrew Gray is a seasoned food writer and blogger with a wealth of experience in the restaurant and catering industries. With a passion for all things delicious, Andrew has honed his culinary expertise through his work as a personal chef and caterer.
His love for food led him to venture into food writing, where he has contributed to various online publications, sharing his knowledge and insights on the culinary world. As the proud owner of CooksCrafter.com, Andrew covers a wide range of topics, including recipes, restaurant reviews, product recommendations, and culinary tips.
Through his website, he aims to inspire and educate fellow food enthusiasts, offering a comprehensive resource for all things food-related.