Short Answer
Potluck desserts that survive the heat are the baked ones with no cream, custard or cheese inside, which can sit on a buffet table.
- Chilled or frozen desserts need a cooler at 40°F or below.
- Perishable desserts come out for no more than 2 hours, or 1 hour above 90°F.
- Bring one sturdy dessert and one cold one.
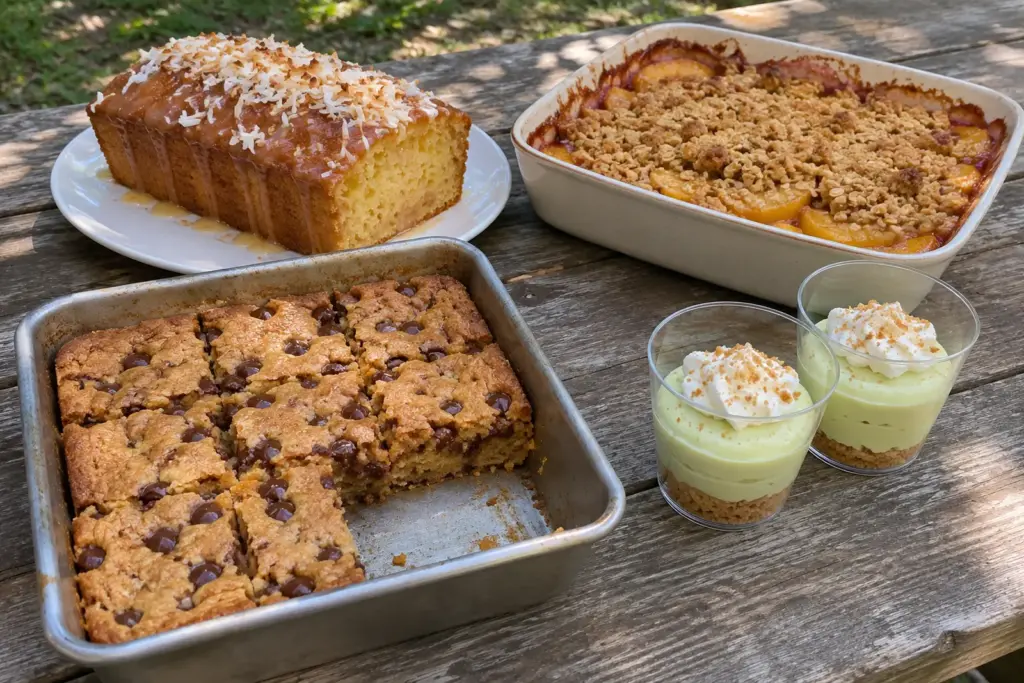
These twelve dessert recipes for warm weather pass the heat test in different ways. Five baked ones (blondies, pecan bars, rum cake, peach cobbler and berry crisp) sit on a buffet table, two chocolate-topped bars do best in the shade, and lemon bars, cheesecake bites, parfaits and two frozen treats need a cooler. Each recipe says what it needs after it leaves your kitchen.
1 Which Potluck Desserts Can Sit Out and Which Need a Cooler?
Cream cheese, whipped cream, sour cream, milk puddings and egg custards are perishable, so the federal rule covers the desserts that contain them. FSIS says to keep them at 40°F or below and to throw them out after 2 hours at room temperature, or 1 hour once the air is above 90°F.
Four of the recipes fall under that rule: the lemon blueberry bars, the cheesecake bites, the key lime parfaits and the frozen yogurt bark. Butter, coconut oil and chocolate cause a different problem, because they soften on a warm table long before anything spoils.
The other five are baked batters or baked fruit under a crumb, with no cream, custard or cheese, so you can put them straight on the table. The closest USDA FoodKeeper entries, homemade muffins and fruit pies, allow 3 to 7 days and 1 to 2 days at room temperature, which is far longer than any party lasts. The twelve fall into four groups by what each one needs on arrival.
| Dessert | What it needs at the party | Time in the recipe |
|---|---|---|
| Almond Flour Chocolate Chip Blondies | Table only | 25 to 30 minutes of baking |
| Salted Honey and Toasted Pecan Bars | Table only | 8 minutes of toasting, 20 to 25 minutes of baking |
| Pineapple Coconut Rum Cake | Table only | 50 to 60 minutes of baking |
| Cinnamon Sugar Roasted Peach Cobbler | Table only | 15 minutes of roasting, 25 to 30 minutes of baking |
| Berry Oatmeal Crisp | Table only | 35 to 40 minutes of baking |
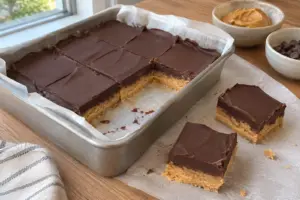
| No-Bake Peanut Butter Chocolate Bars | Shade or cooler, because the chocolate softens | At least 2 hours of chilling |
| Chocolate Dipped Rice Krispies Treats | Shade or cooler, because the chocolate softens | About 10 minutes of setting, then the chocolate |
| Lemon Blueberry Shortbread Bars | Cooler, 2-hour limit | 18 to 20 minutes for the crust, 20 to 25 for the filling |
| Salted Caramel Pretzel Cheesecake Bites | Cooler, 2-hour limit | At least 30 minutes of chilling |
| Key Lime Pie Parfaits | Cooler, 2-hour limit | At least 2 hours of chilling |
| Frozen Yogurt Fruit Bark | Cooler with frozen packs, 2-hour limit | At least 4 hours of freezing |
| Frozen Banana Bites with Dark Chocolate and Nuts | Cooler with frozen packs | 1 hour of freezing, then 30 minutes more |
If you have no cooler, bring the blondies, pecan bars, rum cake, cobbler or crisp. If you do have one, add a cold dessert, and a table with both groups gives guests a choice between a bar they can eat standing up and a spoon dessert.
A table also reads better with contrast, so pair a chewy bar such as the blondies or pecan bars with a fruit dessert such as the cobbler or crisp, and the table has two different textures. Two desserts that cover chocolate and fruit leave few guests without something they like.
2 What Goes Wrong with Desserts on a Hot Table?
Heat damages a dessert in five different ways, and each recipe sits in its group because of the way that applies to it. You fix each one differently.
- Spoilage in cream, custard and cheese. The lemon bars, cheesecake bites, parfaits and yogurt bark hold eggs or dairy, so the 2-hour clock applies. They leave your kitchen at 40°F or below and travel in a cooler.
- Soft butter and chocolate. A peanut butter bar with a chocolate top and a pan of chocolate-dipped Rice Krispies treats stay safe but slump and stick together. Shade, a short rest in the cooler and parchment between the layers solve it.
- Fillings that only set cold. These cheesecake bites have no eggs and no gelatin, so the cream cheese and whipped cream hold their shape only while cold. Serve those bites in small batches from the cooler.
- Crusts that go soft. Graham crumbs and a pretzel base drink moisture from the filling and the caramel as they sit. Add the crumbs and the caramel at the party.
- Melting. Frozen bark and banana bites go soft within minutes outdoors. They ride in a cooler with frozen gel packs and come out a few pieces at a time.
3 Which Desserts Hold Up on a Buffet Table?
The blondies, pecan bars, rum cake, cobbler and crisp are all baked until set and have no cream, custard or cheese in them, so the 2-hour limit for perishables does not drive your plan. They give the table different things: chew from the blondies and pecan bars, syrup-soaked moisture from the rum cake, and warm fruit from the cobbler and the crisp.
You can bake the blondies, pecan bars and rum cake a day ahead, but you should bake the cobbler and the crisp the morning of the party.
Almond Flour Chocolate Chip Blondies
Almond flour carries a lot of its own fat, so these blondies bake into a dense, chewy bar that stays moist on a table, and the chips sit inside the crumb where they cannot smear across your fingers. The flour is also gluten-free, which covers the guest who skips wheat as long as your baking powder and chocolate chips say gluten-free on their labels.
- 2 ½ cups finely ground almond flour
- ½ teaspoon baking powder
- ¼ teaspoon salt
- ⅓ cup unsalted butter, melted
- ½ cup light brown sugar
- 1 large egg
- 1 teaspoon pure vanilla extract
- ¾ cup semi-sweet chocolate chips
- Heat the oven to 350°F and line an 8x8-inch pan with parchment, leaving an overhang on two sides.
- Whisk the almond flour, baking powder and salt in one bowl. In a larger bowl, stir the melted butter into the brown sugar until smooth, then add the egg and vanilla.
- Fold the dry mix into the wet until just combined, fold in the chocolate chips and spread the batter flat with a spatula.
- Bake 25 to 30 minutes, until the top is set and a toothpick near the center comes out with a few moist crumbs.
- Cool completely in the pan, lift the bars out by the parchment and cut squares.
Chocolate chips cause trouble at the knife, because a warm chip drags across the bar and leaves streaks. Let the pan cool all the way, chill it briefly if your kitchen is warm and wipe the knife between cuts for 16 clean 2-inch squares.
- Oat flour or a gluten-free all-purpose blend gives a milder bar, but both take up liquid differently from almond flour, so you should start checking the center at 25 minutes.
- Melted coconut oil replaces the butter for a dairy-free pan, and dark chocolate chunks or white chips change the sweetness.
- Coconut sugar or maple syrup can replace the brown sugar, and the maple version bakes wetter, so bake until the center is set.
A baked batter with no custard layer needs no cooler. The nearest FoodKeeper entry, homemade muffins, lists 3 to 7 days at room temperature, so an airtight container is all your trip requires. If the center is still wet when you lift the parchment, the pan came out too early and the bars will fall apart under the knife, so go by the toothpick cue.
Salted Honey and Toasted Pecan Bars
Toast the pecans first, 8 minutes on a baking sheet at 350°F with one stir halfway, and chop them only after they cool. The toasting dries the nuts so they stay crisp against the chewy base, and it gives the bars a nutty edge that plain brown sugar and honey lack.
These bars are a blondie-style batter with flour, one egg, honey and brown sugar. They lack the loose, custardy filling that puts pecan pie on the short list at 2 hours at room temperature in FoodKeeper, so they sit on the table with the other baked bars. Pecans go from toasted to bitter within a minute or two once they darken, so take the sheet out as soon as you smell them.
- 1 cup pecans, toasted and roughly chopped
- ¾ cup all-purpose flour
- ½ teaspoon salt
- ¼ teaspoon baking soda
- ½ cup unsalted butter, melted
- ⅓ cup honey
- ½ cup brown sugar
- 1 large egg
- 1 teaspoon vanilla extract
- Toast the pecans, let them cool and chop them. Keep the oven at 350°F and line an 8-inch square pan with parchment, leaving an overhang.
- Whisk the flour, salt and baking soda together.
- Stir the melted butter, honey and brown sugar until smooth, beat in the egg and vanilla, then add the dry mix until just combined and fold in the pecans.
- Spread the mixture in the pan and bake 20 to 25 minutes, until the edges are golden and a toothpick in the center comes out mostly clean. Cool completely before slicing.
Walnuts or almonds replace the pecans one for one, and maple syrup replaces the honey with a different flavor. Oat flour or almond flour makes the pan gluten-free but changes the crumb. Smoked or flavored salt on top gives the bars a savory edge, and you should write tree nuts on a label for anyone at the table with allergies.
Tip
Honey makes the bars chewy, so cutting them warm gives ragged edges, and baking them the day before gives the slab time to firm up for clean slices.
Pineapple Coconut Rum Cake (Dense and Moist)
A loaf cake with a rum syrup soaked in while it is warm is one of the safest desserts to bring to a hot party. It has a firm crumb, no frosting and no cream, and the syrup keeps every slice moist, so it neither dries out nor slumps. You also get a better cake the next day, because the syrup keeps spreading through the crumb overnight.
- 1 cup all-purpose flour
- 1 teaspoon baking powder
- ¼ teaspoon salt
- ½ cup unsalted butter, softened
- 1 cup granulated sugar
- 2 large eggs
- ½ cup canned crushed pineapple with its juice
- ½ cup coconut milk
- 1 teaspoon vanilla extract
- ¼ cup dark rum for the batter
- For the syrup: 1 cup powdered sugar, ¼ cup water and ¼ cup dark rum
- ½ cup shredded sweetened coconut, toasted in a dry pan until golden
- Heat the oven to 325°F and grease and flour a 9x5-inch loaf pan. Sift the flour, baking powder and salt together.
- Cream the butter and sugar until light and fluffy, then beat in the eggs one at a time.
- Mix in the pineapple with its juice, the coconut milk, the vanilla and ¼ cup rum, then fold in the dry ingredients until just incorporated.
- Pour the batter into the pan and bake 50 to 60 minutes, until a toothpick in the center comes out clean. While it bakes, stir the powdered sugar, water and ¼ cup rum in a small saucepan over medium heat until the sugar dissolves, then take it off the heat.
- Cool the cake in the pan for 10 minutes, poke holes all over the top with a skewer and pour the warm syrup over slowly so it soaks in.
- Cool completely before you unmold it, then scatter the toasted coconut on top.
The cake holds ½ cup of rum in all, and the syrup is heated but never baked, so not all of the alcohol cooks out. Tell the host it contains rum if children or guests who avoid alcohol will be eating.
Pineapple juice or coconut water replaces the rum in the batter and the syrup in equal amounts, and apple juice and white grape juice also work as non-alcoholic rum swaps at the same amount. Crushed fresh pineapple, with its juice, makes a slightly less sweet crumb than canned. Vegan butter handles the dairy, since the coconut milk is already dairy-free, and a gluten-free flour blend covers wheat.
A bundt pan also works, but this amount of batter fills a loaf pan to a better height. Bake in the pan you plan to carry, sprinkle the coconut at the party so it stays crisp and cut the slices there. Unmold only a fully cooled cake, because the syrup turns sticky and a warm cake tears on its way out of the pan.
Cinnamon Sugar Roasted Peach Cobbler (Baked)
Peaches that roast for 15 minutes before the topping goes on keep this dessert from turning into a puddle. The fruit gives up its juice in the oven first, and the crumb lands on peaches that have already softened, so the topping bakes crisp.
- 5 cups fresh peaches, peeled and cut into wedges
- ¼ cup granulated sugar
- 1 teaspoon ground cinnamon
- 1 tablespoon fresh lemon juice
- For the topping: 1 cup all-purpose flour, ½ cup granulated sugar, ¼ cup brown sugar, ½ teaspoon ground cinnamon and ¼ teaspoon salt
- 6 tablespoons cold unsalted butter, cut into small pieces
- Heat the oven to 375°F. Toss the peaches with ¼ cup sugar, 1 teaspoon cinnamon and the lemon juice, spread them in a 9-inch square baking dish and roast 15 minutes.
- While the peaches roast, mix the flour, ½ cup sugar, brown sugar, ½ teaspoon cinnamon and salt, then rub in the cold butter with your fingers or a pastry cutter until the mixture looks like coarse crumbs.
- Pull the dish out, sprinkle the topping over the hot peaches and bake 25 to 30 minutes more, until the topping is golden and crisp.
- Cool about 15 minutes before serving.
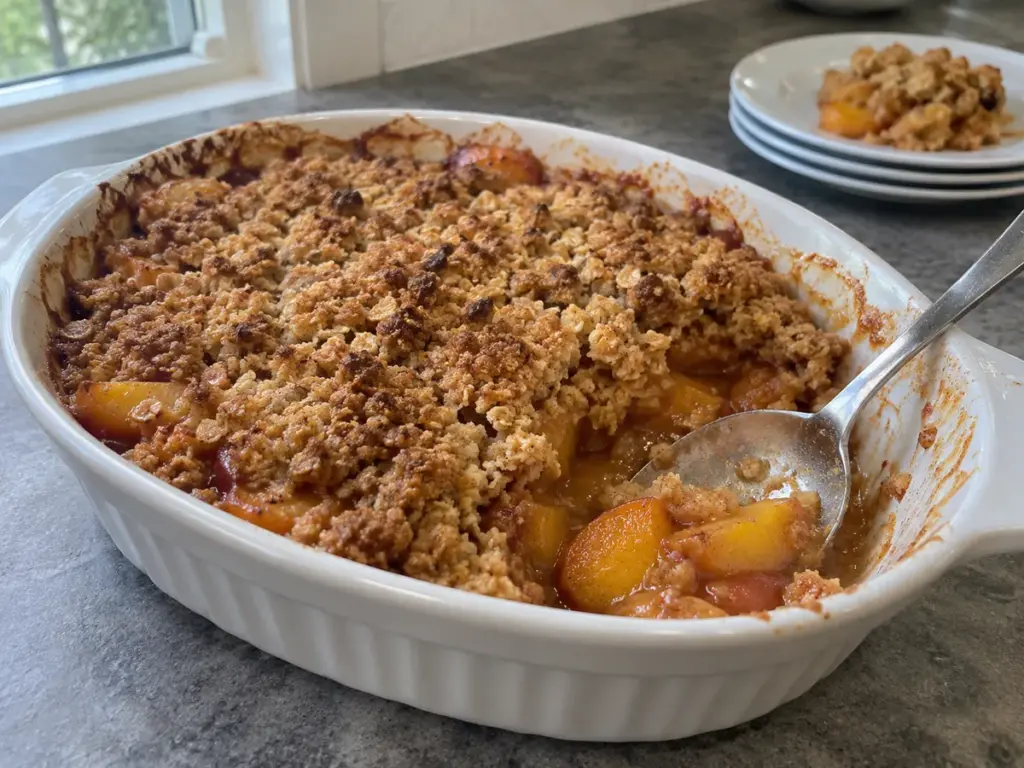
The topping here is a flour-and-butter crumble, and oats give a nuttier crunch, which a peach crisp with an oat topping delivers from the same fruit. Peaches that give slightly at the stem end soften fully in the roast, while hard ones stay firm, and a quick dip in boiling water followed by cold water loosens the skins.
Nectarines or plums replace the peaches when they are out of season, brown sugar gives the topping deeper caramel notes than cinnamon sugar does, and coconut oil or vegan butter handles the dairy while keeping the crumb.
FoodKeeper lists fruit pies, the closest entry, at 1 to 2 days at room temperature, so a cobbler you bake that morning is fine on the table all afternoon. Serve ice cream only if it rides in the cooler, because it will be soup within minutes on a warm table. Bake the cobbler the morning of the party, since the crumb softens as it sits overnight under the juice.
Berry Oatmeal Crisp (Baked)
Five cups of berries under a thick oat topping is the easiest dessert here to scale up for a crowd, because the method stays the same in a larger dish. The oats bake into a crunchy lid, and the berry filling stays jammy, which makes the crisp equally good warm from the oven or cooled on a table.
- 5 cups mixed berries, fresh or frozen, such as strawberries, blueberries and raspberries
- 1 tablespoon lemon juice
- 1 cup old-fashioned rolled oats
- ½ cup all-purpose flour
- ½ cup brown sugar
- 1 teaspoon ground cinnamon
- ¼ teaspoon salt
- ½ cup (1 stick) cold unsalted butter, cut into small pieces
- Heat the oven to 350°F and lightly grease a 9-inch square baking dish.
- Toss the berries with the lemon juice and spread them in the dish.
- Stir the oats, flour, brown sugar, cinnamon and salt together, then work in the cold butter with your fingers until the mixture forms coarse crumbs.
- Scatter the topping over the berries, covering them completely, and bake 35 to 40 minutes, until the topping is golden and the filling bubbles around the edges.
Cold butter keeps the topping crumbly, because butter that has warmed melts into a paste and the topping bakes flat. Frozen berries go into the dish straight from the freezer. They release more juice, so judge the doneness by the bubbling edges and a deep golden topping.
- Gluten-free oats cover guests who avoid gluten.
- Maple syrup replaces the brown sugar with a different sweetness.
- Coconut oil replaces the butter for a dairy-free crisp.
If plums cost less than berries where you shop, a plum and cardamom crisp swaps the cinnamon for cardamom under the same kind of oat-and-butter topping. Like the cobbler, this crisp is a fruit dessert with no cream in it, so it holds on the table the same way, and you should bake it the same day, because an oat topping loses crunch as it sits overnight under the fruit.
4 Which Desserts Stay Safe but Go Soft in the Heat?
Neither the peanut butter bars nor the Rice Krispies treats need the 2-hour rule, but the chocolate and butter in them give way on a warm afternoon. Both do best in the shade or in the cooler, and you can firm either pan up at the party by setting it back in the cooler for 15 minutes.
No-Bake Peanut Butter Chocolate Bars
These bars skip the oven, which helps on a hot day, and the filling is peanut butter, powdered sugar and butter, so nothing in the pan spoils on the table. FoodKeeper says butter may sit at room temperature for 1 to 2 days. What gives way is the texture. The base and the chocolate top both soften as the air warms up, so keep the pan chilled until you cut it and slice just before serving.
- 1 ½ cups peanut butter, creamy or crunchy
- 1 cup powdered sugar
- ½ cup unsalted butter, melted
- 1 teaspoon vanilla extract
- 1 cup semi-sweet chocolate chips
- 1 tablespoon coconut oil
- Stir the peanut butter, powdered sugar, melted butter and vanilla in a medium bowl into a thick, firm dough.
- Press the dough evenly into an 8x8-inch pan lined with parchment, packing the surface smooth.
- Microwave the chocolate chips with the coconut oil in 30-second bursts, stirring between each, until smooth.
- Pour the chocolate over the base, spread it with a spatula and draw a fork through it for a drizzled pattern if you like.
- Chill at least 2 hours, until the bars are completely firm, then slice into squares.
The coconut oil is what lets the chocolate set with a snap and cut cleanly, so do not leave it out. A natural peanut butter that separates leaves the dough oily and soft, so a no-stir brand gives a firmer base. Run a knife under hot water, wipe it dry and cut the cold pan in one pass for each line, since a hot, dry blade glides through the chocolate.
- Almond or cashew butter replaces the peanut butter for peanut allergies, though a tree nut allergy rules both out, and any dish with nut butter deserves a label on the table.
- Dark chocolate at 70% cacao makes the top less sweet, and vegan butter turns the base dairy-free as long as the chocolate chips are dairy-free too.
- Crushed pretzels or toasted oats pressed into the base add crunch.
Make the pan the night before so it has hours to set, and keep leftovers refrigerated, where the bars firm up again.
Chocolate Dipped Rice Krispies Treats
Dip only the tops of the bars, and the chocolate stays a thin layer that sets in minutes and does not leave a puddle at the bottom of a lidded container. The bars themselves hold up well, because marshmallow and cereal do not spoil, and the weak point is again the chocolate, which smears when the bars touch each other in your warm car.
- 6 cups Rice Krispies cereal
- 4 cups mini marshmallows
- 3 tablespoons unsalted butter
- 1 cup semi-sweet chocolate chips
- 1 teaspoon vegetable oil
- Grease a 9x13-inch pan or line it with parchment.
- Melt the butter in a large pot over low heat, add the marshmallows and stir constantly until smooth, then remove the pot from the heat right away.
- Fold in the cereal until it is evenly coated, press the mixture firmly and evenly into the pan with a buttered spatula and let it set for about 10 minutes.
- Melt the chocolate chips with the oil in a microwave-safe bowl in 20-second bursts, stirring after each, until smooth and shiny.
- Cut the bars into squares, dip the top of each one in the chocolate or spoon it over, and set them on wax paper until the chocolate hardens.
A buttered spatula or a sheet of wax paper keeps the sticky mixture from tearing, and a firm press is what stops the bars from crumbling when you cut them. Low heat and a pot pulled off the burner as soon as the marshmallows melt keep the treats soft, since a marshmallow mixture cooked hot sets hard.
Chill the dipped bars on a tray for 10 to 15 minutes to harden the chocolate before you stack them with parchment between the layers. If the bag runs short, make a smaller pan with the marshmallows you have, because a marshmallow creme swap does not set firmly once it cools and leaves soft bars.
- Vegan marshmallows replace the gelatin ones.
- Gluten-free crisped rice cereal keeps the pan gluten-free.
- Dairy-free chocolate chips and coconut oil replace the butter and the chocolate.
- Milk or dark chocolate both work as the dip.
Make the bars a day ahead in an airtight container and dip them the morning you leave.
5 Which Desserts Need a Cooler?
A cream cheese filling, a sour cream pudding and an egg custard all share one fate on a warm table: they warm into the range where bacteria grow, and the 2-hour clock starts. The FoodSafety.gov chart for custard, cheese-filled and chiffon pies and cheesecake says to throw them out once they have been above 40°F for more than 2 hours. The lemon bars, cheesecake bites and parfaits travel cold, and you should bring them out in small amounts.
Lemon Blueberry Shortbread Bars
The shortbread crust is sturdy, but the lemon layer on top is a baked egg custard with 3 eggs, so these bars belong in the cooler. Bake the filling to 160°F in the center, the number FoodSafety.gov lists for egg dishes. A filling that merely looks set may be short of it. At 160°F the filling may still move a little when you nudge the pan, and it firms up fully as it cools.
- For the crust: 1 cup unsalted butter, softened, ½ cup granulated sugar, 2 cups all-purpose flour and ¼ teaspoon salt
- For the filling: 1 cup granulated sugar, 2 tablespoons all-purpose flour, 3 large eggs, ⅓ cup fresh lemon juice and the zest of 2 lemons
- 1 ½ cups fresh blueberries, divided
- Heat the oven to 350°F and line a 9x13-inch pan with parchment, leaving an overhang on the sides.
- Cream the butter with ½ cup sugar until fluffy, add the 2 cups flour and the salt and mix until the dough just comes together. Press it evenly into the pan and bake 18 to 20 minutes, until the edges are lightly golden.
- While the crust bakes, whisk 1 cup sugar, 2 tablespoons flour, the eggs, lemon juice and zest until smooth, then fold in 1 cup of the blueberries.
- Pour the filling over the warm crust, scatter the remaining ½ cup blueberries on top and bake 20 to 25 minutes more, until the center reads 160°F on an instant-read thermometer. Give it a few more minutes if it reads lower.
- Cool completely in the pan on a wire rack, chill, then lift the slab out by the parchment and cut.
Pour the filling over the crust while it is still warm, and chill the slab before cutting, because cold lemon filling slices into clean squares and a warm one smears. The zest carries most of the lemon aroma, so do not skip it when juice is short.
Pack the squares in a lidded container with parchment between layers, and carry them in the cooler. Bake the slab the day before so it chills overnight. Refrigerated, it keeps 3 to 4 days, the window FSIS gives for leftovers.
- Vegan butter makes the crust dairy-free, though the filling still has eggs, and a gluten-free baking blend makes the pan gluten-free.
- Lime juice and zest replace the lemon, and raspberries or blackberries replace the blueberries.
Salted Caramel Pretzel Cheesecake Bites (No-Bake)
These bites have no eggs and no gelatin holding them up, so it is the cream cheese and whipped cream that firm up only in the cold. That makes these bites the most heat-sensitive dessert in the cooler group, and they should stay chilled until the minute they are eaten. Pack the caramel and the flaky salt separately and add them at the party, because wet caramel softens a pretzel crust quickly.
- 1 ½ cups pretzels, finely crushed
- 5 tablespoons unsalted butter, melted
- 8 ounces cream cheese, softened
- ⅓ cup powdered sugar
- 1 teaspoon vanilla extract
- ¼ cup heavy cream, whipped lightly
- ½ cup salted caramel sauce
- A pinch of flaky sea salt
- Stir the crushed pretzels into the melted butter until the mixture looks like wet sand, press it into mini muffin liners or a small tray and chill it while you make the filling.
- Beat the softened cream cheese with the powdered sugar and vanilla until smooth and creamy.
- Fold in the lightly whipped cream until it disappears into the filling.
- Spoon or pipe the filling over the chilled crusts, smooth the tops and refrigerate at least 30 minutes, until the bites are firm.
- Drizzle the caramel over each bite and add a pinch of flaky salt just before serving.
Crush the pretzels fine so the crust packs and holds together, and soften the cream cheese completely before beating it, because cold lumps never smooth out. Stop whipping the cream at soft peaks, since over-whipped cream turns grainy when you fold it into the filling.
- Gluten-free pretzels make the base gluten-free, and vegan cream cheese replaces the dairy one.
- Maple syrup in place of the powdered sugar adds liquid and loosens the filling, so keep these bites cold, and date caramel replaces the store-bought sauce for a naturally sweetened topping.
- If the pretzels run out, salted crackers crushed fine keep the salty crunch against the caramel.
The same cream cheese base takes mini chocolate chips in place of caramel in no-bake chocolate chip cheesecake bites, and that version needs the same cooler. Thirty minutes of chilling sets the bites, and a night in the refrigerator gives the cleanest bite.
Key Lime Pie Parfaits (Chilled in Cups)
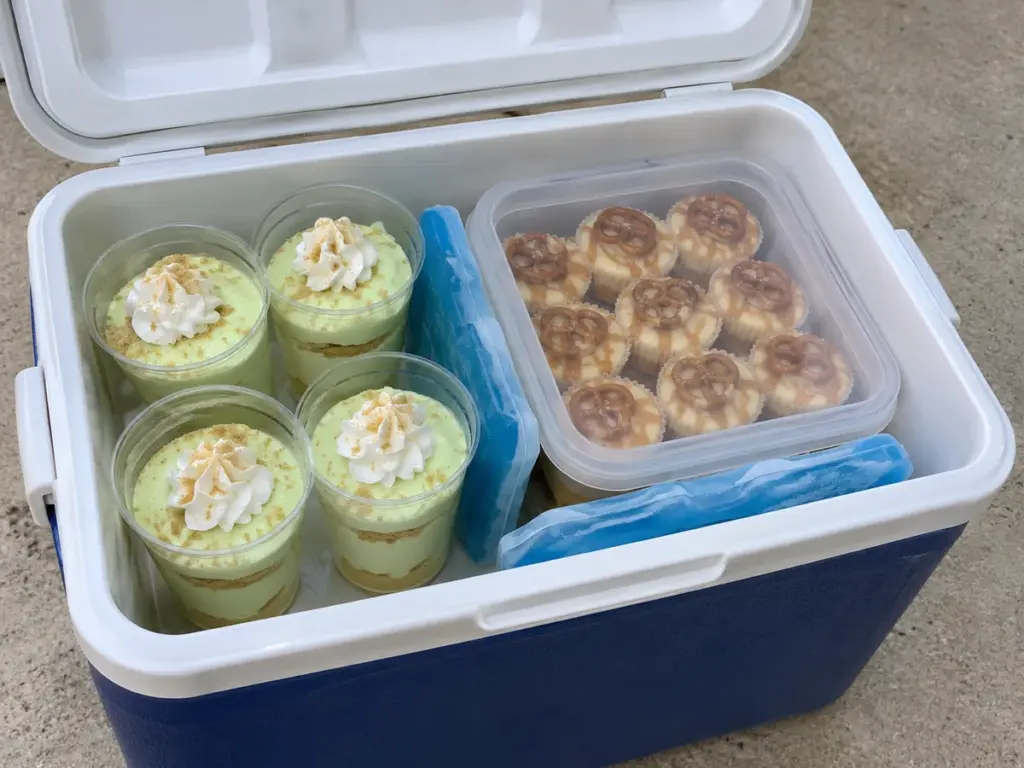
Serving in individual cups removes the need for a serving spoon and a cutting board, which makes parfaits the easiest cold dessert to carry. The filling holds sour cream, milk and sweetened condensed milk, all dairy, so the cups ride in the cooler and come out a few at a time.
- 1 small package (3 ounces) lime gelatin mix
- 1 package (3.4 ounces) instant vanilla pudding mix
- 2 cups cold milk, with ½ cup warmed for the gelatin
- 1 cup sour cream
- 1 (14-ounce) can sweetened condensed milk
- ¼ cup fresh key lime juice
- 1 ½ cups graham cracker crumbs
- ¼ cup unsalted butter, melted
- Whipped cream for topping, optional
- Warm ½ cup of the milk until steaming, whisk in the gelatin mix until no grains remain and let it cool a few minutes. Whisk in the pudding mix and the remaining 1 ½ cups cold milk until smooth and let it stand about 5 minutes to thicken.
- Stir in the sour cream, sweetened condensed milk and key lime juice until creamy.
- Mix the graham cracker crumbs with the melted butter until they hold together when pressed.
- Spoon a layer of crumbs into each clear cup, add a layer of lime filling and repeat, ending with filling on top.
- Chill at least 2 hours, until the layers set, and top with whipped cream just before serving.
Gelatin dissolves only in hot liquid, which is why the first step warms part of the milk, and that step keeps the filling smooth. Stir the pudding only until smooth, since the instant mix thickens as it sits.
The crumbs drink moisture from the filling and go soft as the cups sit, so layer them thin, or carry the crumbs in a small jar and add them at the party if you want a crunch. Whipped cream is perishable too, so it goes on at the table from a container that rode in the cooler.
- For a dairy-free cup, replacing only the milk does not work, because the sour cream and condensed milk are dairy as well.
- Sweetened condensed coconut milk, which has to say sweetened on the label, replaces the can cup for cup, and gluten-free graham crackers keep the crunch layer.
- Regular lime juice or lemon juice replaces the key lime juice when you cannot find it.
If you would rather build on a cream cheese filling in jars, a key lime pie in a jar needs about 4 hours in the refrigerator, so you should start it earlier than these cups.
6 What About Frozen Desserts at a Potluck?
A frozen dessert is the least heat-proof item at any potluck. Frozen bark and frozen fruit bites go soft within minutes outdoors, so you should keep them in a cooler with frozen gel packs and bring out a few pieces at a time.
Wait until guests are ready for dessert before you open the cooler, and you will keep the pieces firm for longer. Dairy that thaws and stays above 40°F for more than 2 hours, or 1 hour above 90°F, goes in the trash.
Frozen Yogurt Fruit Bark
Yogurt bark works best as a spoon-free, hand-held cold treat for guests who want something light after a heavy meal. Greek yogurt freezes into a firm slab with a tangy flavor, and the granola underneath gives the broken pieces a base with some crunch. Serve it from the cooler a handful of pieces at a time, because it starts to thaw as soon as it comes out.
- 2 cups plain or vanilla Greek yogurt
- 1 cup granola
- 1 tablespoon honey or maple syrup, optional
- 1 cup mixed fresh fruit, chopped, such as berries, kiwi, mango or pomegranate seeds
- 1 teaspoon lemon zest, optional
- Line a baking sheet or shallow pan with parchment and spread the granola in a thin, even layer.
- Stir the yogurt with the honey or maple syrup, if you use it, and the lemon zest.
- Spread the yogurt over the granola, smoothing it to cover the base completely.
- Scatter the chopped fruit over the yogurt and press lightly so the pieces stick without sinking.
- Freeze at least 4 hours, until completely firm, then break the bark into pieces and serve right away or store in an airtight container in the freezer.
A thin layer freezes faster and breaks into cleaner shards, so spread the yogurt thin. Dry fruit pieces with a paper towel first, since wet fruit leaves ice crystals on the surface, and let the frozen slab soften for a minute before breaking it so it does not shatter.
Dairy-free coconut or almond yogurt makes the pan vegan, and crushed nuts or seed clusters replace the granola. Honey or maple syrup drizzled over the yogurt before the fruit goes on gives a sweeter bark. The bark can be made days before the party, because it stays in the freezer until you leave.
Frozen Banana Bites with Dark Chocolate and Nuts
Frozen banana slices give you a creamy center, and the dark chocolate shell cracks cleanly when you bite it. They freeze in about 90 minutes in all, so they suit a last-minute dessert. They melt quickly once they leave the freezer, and the chocolate shell softens first, so carry them frozen and serve a few at a time from the cooler.
- 2 large ripe bananas, peeled and sliced into ½-inch rounds
- 6 ounces dark chocolate, broken into small pieces or chips
- ¼ cup mixed nuts, chopped, such as almonds, walnuts or hazelnuts
- 1 teaspoon coconut oil, optional, for a smoother coating
- Line a baking sheet with parchment, arrange the banana slices in a single layer and freeze at least 1 hour, until firm.
- Melt the chocolate with the coconut oil in a heatproof bowl over simmering water or in short bursts in the microwave, stirring often, until smooth.
- Dip each frozen slice into the chocolate with a fork or skewer, coat it completely and let the excess drip off, then set it back on the parchment.
- Sprinkle chopped nuts over each bite while the chocolate is wet, then return the sheet to the freezer for 30 minutes, until the chocolate hardens.
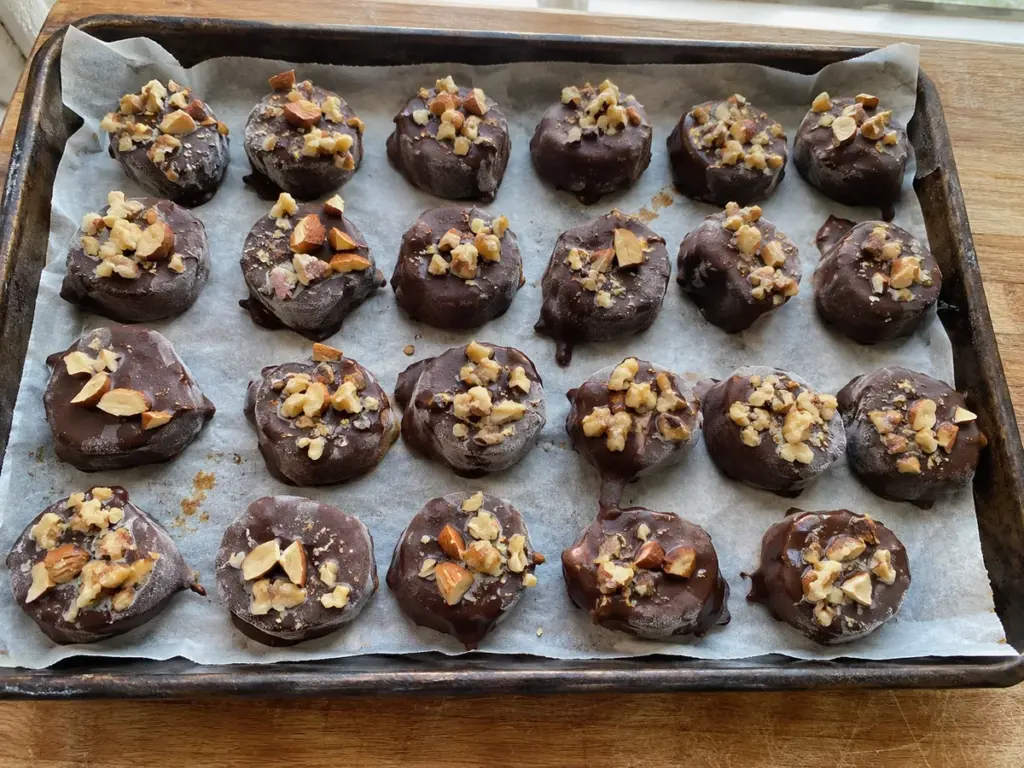
Bananas that are yellow with brown flecks taste sweetest, and the chocolate hides any darkening. Dip only banana slices that are still frozen hard, since a thawing slice slides off the fork and clouds the chocolate. Move the bites into an airtight container once they are firm, and keep them frozen until the party. FoodKeeper gives bananas 2 to 3 months in the freezer.
Frozen plantain slices give a less sweet, starchier bite, and milk chocolate or a vegan chocolate suit other guests. Pecans, pistachios or shredded coconut replace the almonds, walnuts or hazelnuts, and crushed freeze-dried berries or toasted pumpkin or sunflower seeds give a nut-free crunch.
7 Which Dessert Fits Your Potluck?
The right pick depends on the table you are walking into: whether there is a cooler, who is eating and how many people are coming. At 2-inch squares, an 8x8-inch pan makes 16 bars and a 9x13-inch pan makes 24, and a 9-inch square dish of cobbler or crisp serves 9 at 3 inches each.
| Your potluck | Bring | What to check |
|---|---|---|
| No cooler and a long afternoon | Rum cake or almond flour blondies | Both are baked, hold their shape and need no cooler, so cut them at the party. |
| A cooler with room for one cold dessert | Key lime pie parfaits | Individual cups need no cutting or serving spoon, as long as they stay at 40°F or below. |
| A guest who avoids gluten | Almond flour blondies | The batter has no wheat, but check the baking powder and chocolate chip labels. |
| A guest with a nut allergy | Berry oatmeal crisp, peach cobbler or lemon blueberry bars | None of these recipes has nuts, but read the labels of packaged ingredients for shared-equipment warnings. |
| A dairy-free table | Berry oatmeal crisp or peach cobbler | Coconut oil replaces the butter in each recipe, and neither has cream or cheese. |
| Children at the table | Rice Krispies treats or lemon blueberry bars | The rum cake carries ½ cup of rum, so leave it home or use the juice swap. |
| A big crowd and one oven | Lemon blueberry bars or Rice Krispies treats | A 9x13-inch pan of either makes 24 squares. |
| An outdoor table with no shade | Rum cake, pecan bars or blondies | Skip the frozen desserts and the chocolate-topped bars, which soften first. |
When two guests have conflicting needs, such as a nut allergy and a gluten-free guest, bring two desserts, and keep the serving utensils separate so crumbs do not cross over.
8 How Do You Carry Potluck Desserts So They Arrive Safe?
Cold desserts need to start the trip cold and finish it cold. A cooler keeps a temperature but does not chill warm food quickly, so the work happens the night before. Check what time you plan to leave, because your cold desserts should be in the cooler for the whole drive and not on the back seat while you finish packing.
- Chill the cold desserts overnight. Put the lemon bars, cheesecake bites and parfaits in the refrigerator in the lidded containers or cups they will travel in, and freeze the bark and banana bites solid.
- Pack with a cold source. FSIS says to keep cold food at 40°F or below with ice or frozen gel packs, so wedge gel packs between the containers and leave no loose space where a lid can slide.
- Keep the cooler shut and in the shade. Open it only to take dessert out, and add ice if it melts on a long drive.
- Set out a few pieces at a time. Leave the rest in the cooler and write down the time you put a dish out, so the 2-hour limit, or 1 hour above 90°F, is easy to track.
- Return leftovers fast. Put perishable leftovers back in the cooler within 2 hours, or 1 hour above 90°F, and throw out anything past that.
Each dessert has its own best container, and choosing it at home saves you a scramble at the party.
| Dessert | Carry it in | Finish at the party |
|---|---|---|
| Blondies, pecan bars | The baking pan, covered with foil or a lid | Lift out by the parchment and cut |
| Rum cake | The loaf pan, wrapped tightly | Scatter the toasted coconut and slice |
| Peach cobbler, berry crisp | The baking dish, covered | Serve warm or at room temperature |
| Peanut butter bars, Rice Krispies treats | A lidded container with parchment between layers | Slice the bars just before serving |
| Lemon blueberry bars | A lidded container with parchment, in the cooler | Cut cold into squares |
| Cheesecake bites | The mini muffin liners in a lidded container, in the cooler | Drizzle the caramel and add the salt |
| Key lime parfaits | Lidded cups, in the cooler | Add whipped cream or crumbs |
| Frozen yogurt bark, banana bites | A lidded container between frozen gel packs | Serve a few pieces at a time |
Frosting follows the same split. Cream cheese frosting and whipped cream frosting are perishable and ride in the cooler, while a baked-on syrup such as the one on the rum cake is part of the cake. Butter-based frosting and chocolate coatings soften in the heat before they spoil, so frost at the party or choose a recipe with the chocolate inside the batter, like the blondies.
Warning
A perishable dessert that has sat out longer than 2 hours, or 1 hour above 90°F, goes in the trash even if it looks and smells fine.
The sturdy desserts need less. Bake them in the pan you will carry, cover them with a lid or foil, and cut at the party so the squares keep their edges. Bring a serving utensil for each dish, and label any dessert with peanuts, tree nuts, wheat, milk or egg, since guests at a potluck cannot ask the cook.
Frequently Asked Questions
Yes, and several taste better for it. The rum cake improves overnight, the lemon bars need the night in the refrigerator to chill and the cheesecake bites taste cleanest after one, and the bark and banana bites keep frozen until the party. Build the parfaits the night before but add the crumbs, or the whipped cream topping, at the party.
Pick from the five baked desserts with no cream, custard or cheese: the blondies, pecan bars, rum cake, peach cobbler or berry crisp. Bake in the pan you will carry, cover it and keep it out of direct sun.
Cut into 2-inch squares, an 8x8-inch pan of blondies, pecan bars or peanut butter bars makes 16, and a 9x13-inch pan of lemon bars or Rice Krispies treats makes 24. The cobbler and the crisp each serve 9 from a 9-inch square dish.
The recipes for the lemon blueberry bars, peach cobbler, berry crisp, Rice Krispies treats, key lime parfaits and cheesecake bites contain no nuts. The blondies and the pecan bars use almond flour and pecans, the peanut butter bars use peanut butter, and the banana bites carry chopped nuts, so label those. Packaged ingredients can carry shared-equipment warnings, so read their labels too.
The baked ones can go in the freezer. FoodKeeper gives homemade muffins, the closest entry for blondies and pecan bars, 2 to 3 months, and fruit pies, the closest entry for the cobbler and the crisp, 8 months. FoodKeeper does not recommend freezing cream pies or pudding, the closest entries for a pudding parfait, so skip the freezer for the parfaits.
Choose a dessert with the chocolate baked inside the batter, like the blondies, and keep dipped or coated bars in the shade or the cooler until serving. Dip only the tops of bars, and set them in the refrigerator for 10 to 15 minutes before you stack them.
Sources
- USDA FSIS, Leftovers and Food Safety: perishable food out no more than 2 hours, or 1 hour above 90°F; leftovers 3 to 4 days
- USDA FSIS, "Danger Zone" (40°F to 140°F): keep cold food at 40°F or below
- FoodSafety.gov, Food Safety During Power Outage: cheesecake and custard, cheese-filled and chiffon pies discarded after more than 2 hours above 40°F
- FoodSafety.gov, Safe Minimum Internal Temperature Chart: egg dishes 160°F
- USDA FoodKeeper: homemade muffins, fruit pies, pecan pie, butter and bananas

Andrew Gray is a seasoned food writer and blogger with a wealth of experience in the restaurant and catering industries. With a passion for all things delicious, Andrew has honed his culinary expertise through his work as a personal chef and caterer.
His love for food led him to venture into food writing, where he has contributed to various online publications, sharing his knowledge and insights on the culinary world. As the proud owner of CooksCrafter.com, Andrew covers a wide range of topics, including recipes, restaurant reviews, product recommendations, and culinary tips.
Through his website, he aims to inspire and educate fellow food enthusiasts, offering a comprehensive resource for all things food-related.