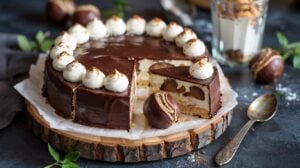
If you're looking to make a dessert that can serve plenty of people without fuss, this collection of 20 tray bake desserts offers just that. Each recipe is designed to be made in a single pan, making it simple to prepare and share - typically a rimmed sheet pan or a 9x13-inch baking dish - (a tray bake is a shallow, single-layer dessert baked in one pan, popular in British and home baking traditions).
This selection covers a wide range of flavors and textures, from rich brownies and buttery blondies to fruit-filled bars and spiced sheet cakes. Whether you prefer something chocolatey, fruity, or warmly spiced, these recipes bring something for every taste and occasion.
They focus on straightforward methods and familiar ingredients to deliver satisfying results every time.
These tray bakes are ideal for gatherings since they combine ease and great taste with minimal cleanup. Baking everything in one pan frees you from juggling multiple dishes while still providing enjoyable, crowd-pleasing desserts that store and transport well.
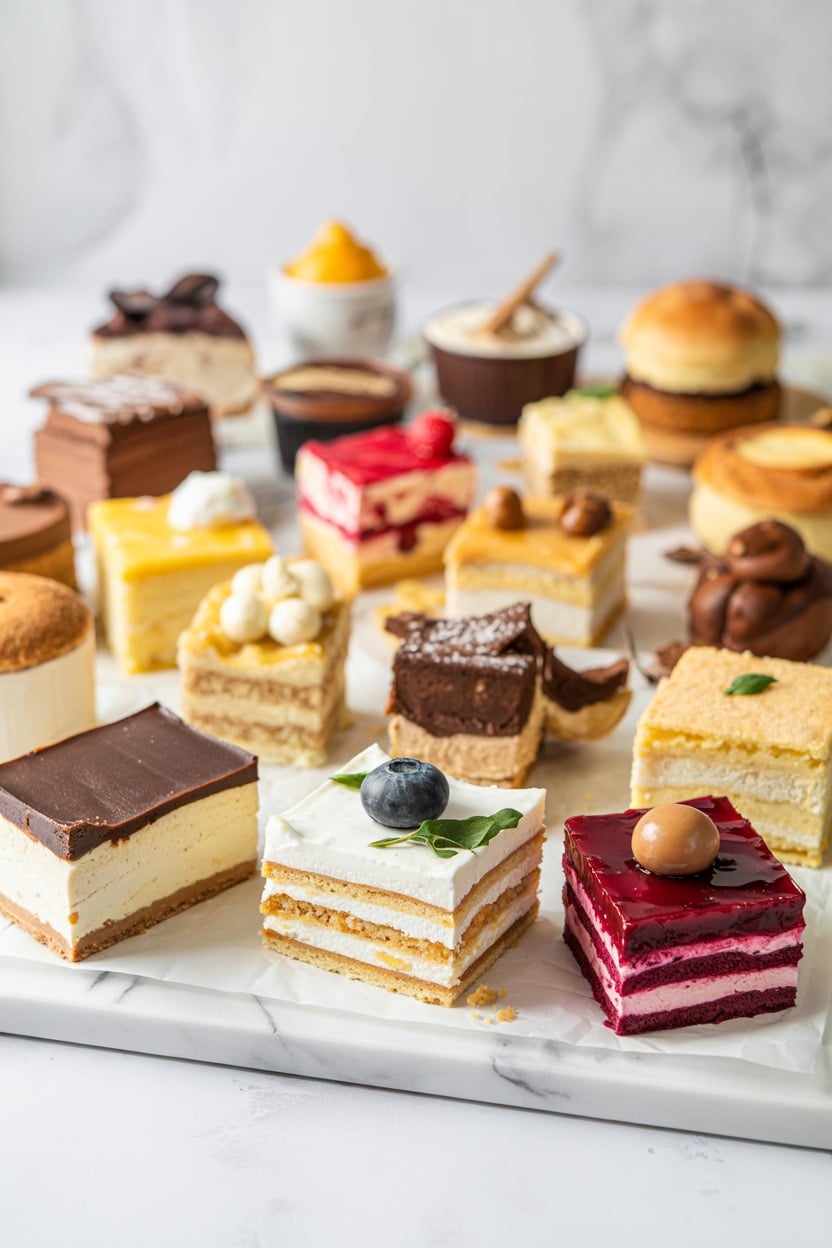
1. Classic Fudgy Brownies
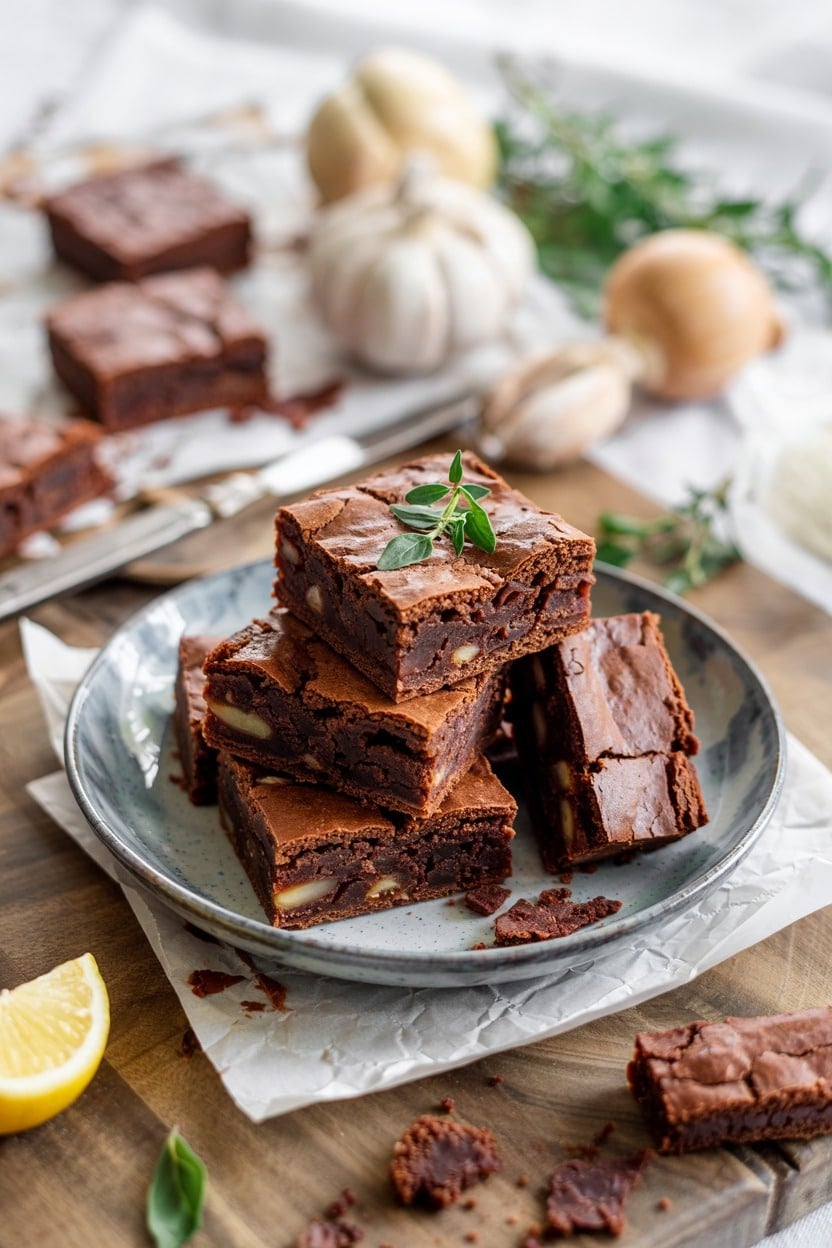
Classic fudgy brownies bring a rich, chocolatey experience with a chewy crust that makes every bite satisfying, originating in early 20th-century American baking. This recipe strikes the right balance between dense and moist, making it a go-to for cozy days or special treats.
The straightforward preparation means you can whip up a batch quickly even on a busy day, with ingredients that are easy to find, and it bakes in about 25-30 minutes at 350°F.
The brownies have a deep chocolate flavor that pairs beautifully with a glass of milk or a scoop of vanilla ice cream. Whether you're baking for family, friends, or yourself, these brownies deliver a timeless taste that never goes out of style.
If you prefer different fats, explore vegetable oil alternatives for brownies to match texture and flavor needs.
Why This Recipe Works
This brownie recipe offers a blend of simplicity and luscious texture that keeps it a firm favorite in any home cook’s repertoire. The result is a consistently satisfying dessert that scores high on both flavor and ease.- Convenience - Minimal ingredients and straightforward steps allow for quick batching and baking.
- Flavor balance - Has an intense chocolate taste that's rich without being overly sweet.
- Texture - Dense, fudgy interior with a slightly crisp, chewy top crust.
- Appeal - Well-loved by a wide range of ages, perfect for sharing at any occasion, and pairs well with honey-based desserts for lighter summer treats.
Ingredient Swap Ideas
If you want to adjust this recipe for dietary preferences or to experiment with flavors, ingredient swaps can make it more adaptable without losing the essence of these brownies.- Butter - Use coconut oil for a dairy-free alternative that still keeps a moist texture.
- All-purpose flour - Substitute with gluten-free flour blend to make the brownies gluten-free.
- Sugar - Replace granulated sugar with brown sugar for a deeper caramel-like sweetness, using an equal 1:1 swap.
- Eggs - Swap with flax eggs (1 tablespoon ground flaxseed + 3 tablespoons water per egg) to make them vegan-friendly.
Ingredients
- 1 cup (2 sticks) unsalted butter, melted
- 2 cups granulated sugar
- 4 large eggs
- 1 teaspoon pure vanilla extract
- ¾ cup unsweetened cocoa powder
- 1 cup all-purpose flour
- ½ teaspoon salt
- ½ teaspoon baking powder
Instructions
- Preheat your oven to 350°F (175°C). Grease a 9x13-inch baking pan or line it with parchment paper for easy removal.
- In a large bowl, combine melted butter and granulated sugar. Stir until fully combined and smooth.
- Beat in eggs one at a time, mixing well after each addition, then add vanilla extract.
- Sift together cocoa powder, flour, salt, and baking powder; gradually fold dry ingredients into the wet mixture until just combined.
- Pour batter into the prepared pan, spreading evenly. Bake for 25 to 30 minutes or until a toothpick inserted in the center comes out with a few moist crumbs.
- Allow brownies to cool completely before cutting into squares to maintain the fudgy texture.
- Serve plain or with your choice of toppings such as nuts, chocolate chips, or a dusting of powdered sugar.
2. Salted Caramel Blondies
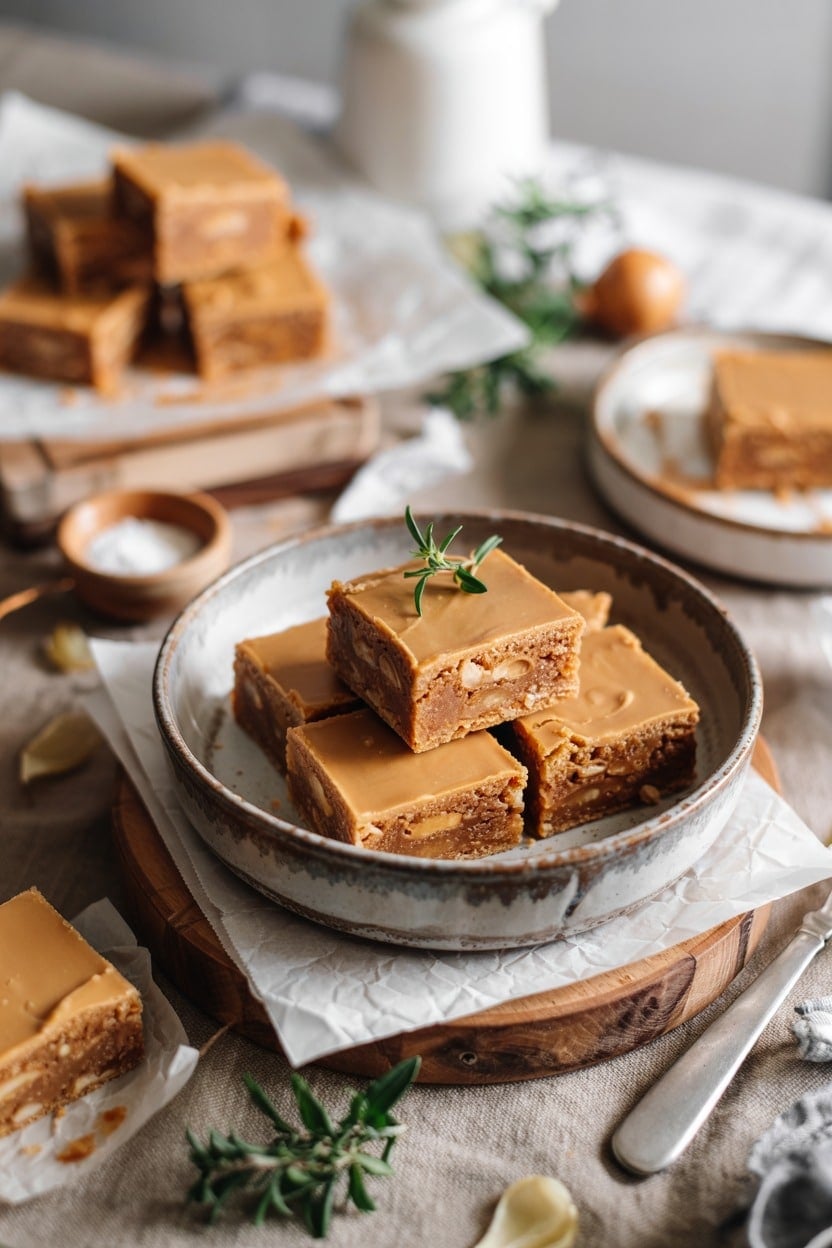
Salted caramel blondies offer a wonderful mix of buttery sweetness with a touch of sea salt that cuts through the richness, with ribbons of caramel creating a gooey, glossy center, often finished with flaky sea salt such as Maldon for texture. These bars are moist and tender with chewy edges, and the ribbons of homemade salted caramel add a luscious, gooey surprise in every bite.
They come together with straightforward ingredients and an uncomplicated method that doesn't require advanced baking skills, baking in a 9x13-inch pan at 350°F for about 22-28 minutes. This makes them an excellent treat to prepare for family gatherings or a cozy dessert any time.
Why This Recipe Works
Salted caramel blondies combine rich, comforting flavors with simple preparation to create a crowd-pleasing dessert. This recipe balances sweet and salty notes while delivering a tender texture that’s always appealing.- Convenience - Uses common pantry staples and straightforward steps for easy mixing and baking.
- Flavor balance - The salted caramel ribbons bring a perfect contrast to the buttery blondie base.
- Texture - Blondies remain tender yet slightly chewy, complemented by smooth caramel swirls.
- Appeal - Great for sharing and suitable for casual gatherings or special occasions.
Ingredient Swap Ideas
Adjusting ingredients can help fit this recipe to personal preferences or dietary needs without losing its essence. Swapping a few items keeps everything familiar while accommodating different tastes or restrictions.- Butter - Substitute with coconut oil for a dairy-free option that maintains richness.
- All-purpose flour - Use a gluten-free blend if avoiding gluten; results remain tender with slight texture differences.
- Granulated sugar - Replace with coconut sugar for a deeper, caramel-like sweetness and reduced refined sugar.
- Sea salt - Use flaky kosher salt or omit if very sensitive to salty flavors.
Ingredients
- 1 cup unsalted butter - softened to room temperature for easy mixing.
- 1 ¼ cups light brown sugar - packed, to add moisture and depth of flavor.
- 2 large eggs - at room temperature, to bind the batter.
- 2 teaspoons vanilla extract - for warm, aromatic notes.
- 2 cups all-purpose flour - sifted, to ensure a smooth batter.
- 1 teaspoon baking powder - for slight leavening and tenderness.
- ½ teaspoon salt - balances sweetness and enhances flavor.
- ½ cup granulated sugar - to caramelize.
- 3 tablespoons unsalted butter - adds richness and smoothness.
- ¼ cup heavy cream - for creamy texture.
- ½ teaspoon sea salt - sprinkled to bring out the caramel flavor.
Instructions
- Preheat your oven to 350°F (175°C). Line an 8x8-inch baking pan with parchment paper, leaving some overhang for easy removal.
- In a large bowl, cream the softened butter and brown sugar together until light and fluffy using a hand mixer or stand mixer. Add eggs one at a time, mixing well after each addition, then stir in the vanilla extract.
- In a separate bowl, whisk together flour, baking powder, and salt. Gradually add the dry ingredients to the wet mixture, stirring until just combined to avoid overmixing.
- For the salted caramel, heat granulated sugar over medium heat in a small saucepan, stirring continuously until it melts into a golden amber syrup. Remove from heat, add butter, and stir until melted. Slowly pour in the heavy cream while stirring, then mix in the sea salt. Let it cool slightly.
- Pour half of the blondie batter into the prepared pan. Drizzle half of the salted caramel over the batter, then spread the remaining blondie batter evenly on top. Swirl the remaining caramel through the top batter with a knife or skewer for a marbled effect.
- Bake for 30 to 35 minutes or until the edges are golden brown and a toothpick inserted into the center comes out with a few moist crumbs. Cool completely in the pan before lifting out and cutting into squares.
3. Lemon Drizzle Tray Bake
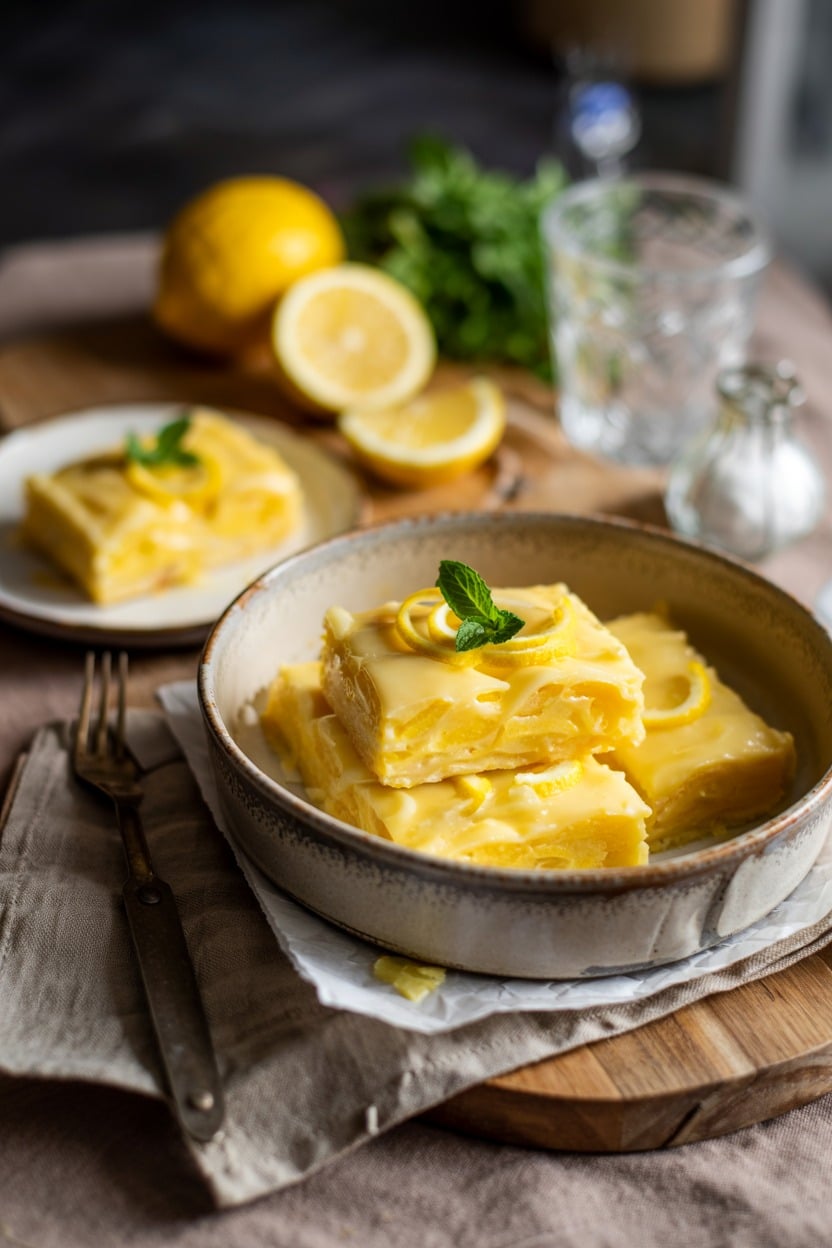
This lemon drizzle tray bake offers a bright, zesty flavor balanced by a moist, tender sponge. It's an easy recipe to prepare, requiring simple ingredients and minimal fuss, making it ideal for a quick homemade treat.
The sugary glaze on top adds just the right amount of sweetness and shine, using a simple 1:1 ratio of powdered sugar to lemon juice, giving the bake an inviting look and a delightful tangy finish.
The texture is light yet satisfying, with a crisped edge from baking in a tray, perfect for slicing into squares that hold together well. You can enjoy it as a snack with tea or serve it as a simple dessert after dinner.
If fresh lemon juice isn't available, try lemon juice alternatives for baking that preserve tartness in the glaze and batter.
Why This Recipe Works
This lemon drizzle tray bake combines simplicity with flavor and texture, making it a go-to recipe for busy home cooks.- Convenience - Requires basic pantry ingredients and straightforward steps, ideal for a quick bake.
- Flavor balance - The tartness of fresh lemon juice contrasts nicely with the sugary glaze.
- Texture - Light, moist sponge with a delicate, slightly crisp outer edge.
- Appeal - Bright, fresh flavor that appeals to all ages and occasions.
Ingredient Swap Ideas
Swapping ingredients in this recipe lets you tailor it to dietary needs or taste preferences without losing its essential qualities.- Use coconut oil instead of butter - Provides a dairy-free option with a subtle tropical note.
- Replace white sugar with coconut sugar or maple syrup - Offers a less refined, slightly richer sweetness.
- Try gluten-free flour blend - Makes the bake suitable for gluten intolerance while maintaining texture.
- Add poppy seeds or blueberries - Introduces extra texture and bursts of flavor for variation.
Ingredients
- 225 grams unsalted butter - Softened, for creaming.
- 225 grams caster sugar - Adds sweetness to the sponge.
- 4 medium eggs - At room temperature, to bind the mixture.
- 225 grams self-raising flour - Helps the cake rise tenderly.
- Zest of 2 large lemons - Provides fresh, aromatic citrus flavor.
- Juice of 2 large lemons - Used in the drizzle for tangy sweetness.
- 85 grams granulated sugar - For the lemon drizzle glaze.
Instructions
- Preheat the oven to 180°C (160°C fan) / 350°F and line a 20cm x 30cm (8x12 inch) baking tray with parchment paper.
- In a large bowl, cream the softened butter and caster sugar together until pale and fluffy using a handheld mixer or wooden spoon.
- Beat in the eggs one at a time, mixing well after each addition, then fold in the lemon zest.
- Sift the self-raising flour into the wet mixture, gently folding it in until just combined, taking care not to overmix.
- Pour the batter evenly into the prepared tray and smooth the top. Bake for 25 to 30 minutes until the sponge is golden and a skewer inserted comes out clean.
- While the cake is baking, mix the lemon juice and granulated sugar in a small bowl to create the drizzle.
- As soon as the cake comes out of the oven, prick the surface all over with a skewer or fork and pour the lemon drizzle evenly over the top, allowing it to soak in.
- Leave to cool completely in the tray, then cut into squares and serve.
4. Apple Cinnamon Crumble Bars
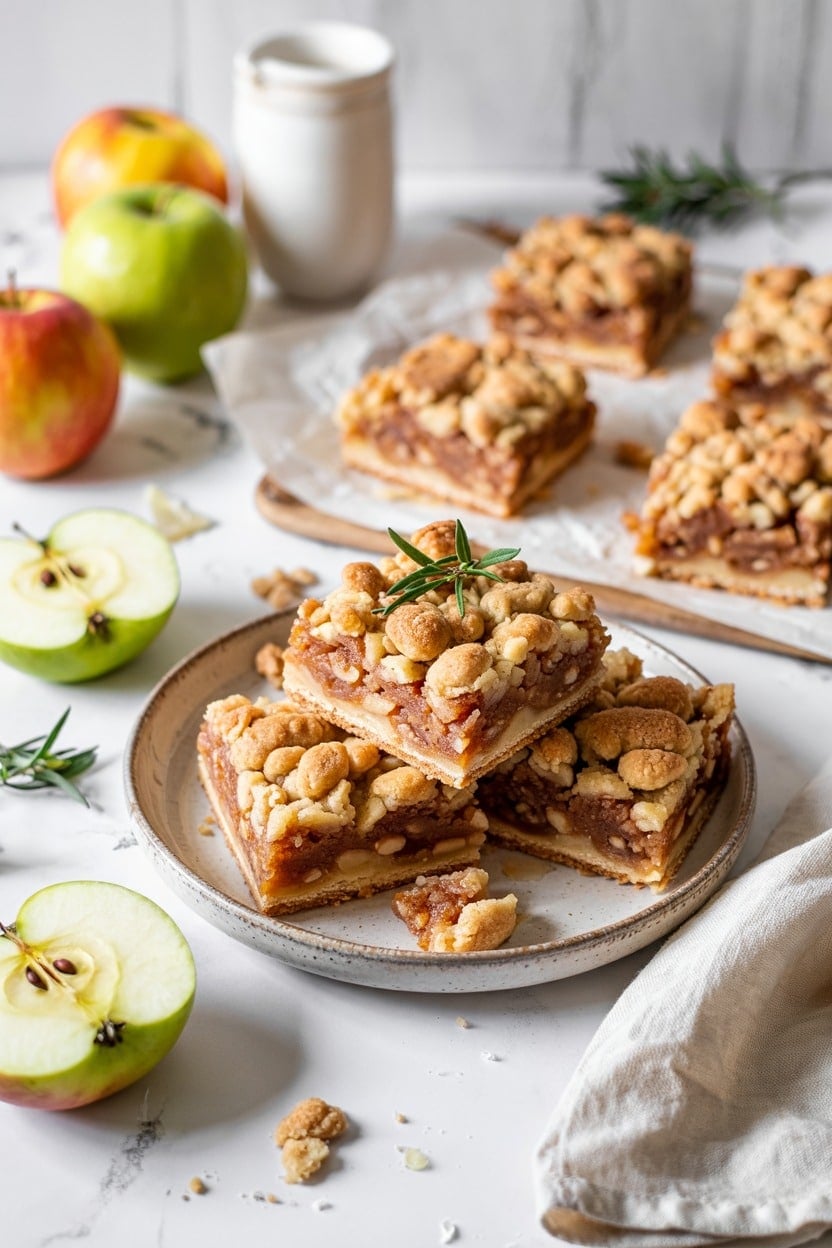
Apple cinnamon crumble bars bring together a warmly spiced apple filling and a golden, buttery crumble topping that's both tender and crisp. These bars are a fantastic way to enjoy the comforting flavors of fall any time of year.
They come together with straightforward techniques, making them a reliable choice for busy days or casual get-togethers. The balance of sweet apples and cinnamon with the rich crumble makes every bite satisfying without being too heavy.
Why This Recipe Works
These apple cinnamon crumble bars deliver warm flavors and a luscious texture with a simple, approachable method anyone can follow. They stand out as a versatile dessert that’s easy to customize and share.- Convenience - Simple to prepare with basic ingredients and can be made ahead.
- Flavor balance - Sweet apples paired with aromatic cinnamon create familiar, comforting notes.
- Texture - Buttery crumb topping contrasts with the tender, fruit-filled base.
- Appeal - Family-friendly and suitable for casual or festive occasions.
Ingredient Swap Ideas
Swapping a few ingredients can adjust the recipe to fit dietary preferences or alter the flavor profile while keeping the core texture and taste intact.- Apples - Use tart Granny Smith apples for a tangier filling or sweeter Fuji apples for mild sweetness.
- Butter - Replace with coconut oil or dairy-free margarine for a vegan option.
- Flour - Use whole wheat flour or a gluten-free baking blend instead of all-purpose flour for a healthier twist.
- Sugar - Swap white sugar for maple syrup or coconut sugar to add depth and reduce refined sugars.
Ingredients
- 3 cups peeled and chopped apples - Choose firm, crisp apples like Honeycrisp or Granny Smith.
- 1 teaspoon ground cinnamon - Adds warm spiced flavor to the apple filling.
- ¼ cup granulated sugar - Sweetens the apple mixture.
- 1 tablespoon lemon juice - Prevents apples from browning and adds subtle brightness.
- 1 ½ cups all-purpose flour - Forms the base and crumble topping.
- ½ cup granulated sugar - Used in the crust and crumble for sweetness.
- ¼ teaspoon salt - Enhances overall flavor.
- ¾ cup cold unsalted butter, cut into small pieces - Creates a tender, crumbly texture.
- ½ teaspoon baking powder - Helps lighten the crust slightly.
Instructions
- Preheat your oven to 350°F (175°C). Lightly grease a 9x9-inch square baking pan with butter or cooking spray.
- In a large bowl, combine chopped apples, 1 teaspoon cinnamon, ¼ cup sugar, and lemon juice. Toss well to coat and set aside to let the flavors meld.
- In a separate bowl, mix flour, ½ cup sugar, salt, and baking powder. Add the cold butter pieces and cut them into the dry ingredients using a pastry cutter or your fingers until the mixture resembles coarse crumbs.
- Press about two-thirds of the crumb mixture evenly into the prepared pan to form the crust. Spread the apple filling evenly over the crust layer.
- Sprinkle the remaining crumble over the apples. Bake for 40 to 45 minutes until the topping is golden brown and the apple filling is bubbling. Remove from the oven and let cool completely before slicing into bars.
5. Chocolate Chip Cookie Bars
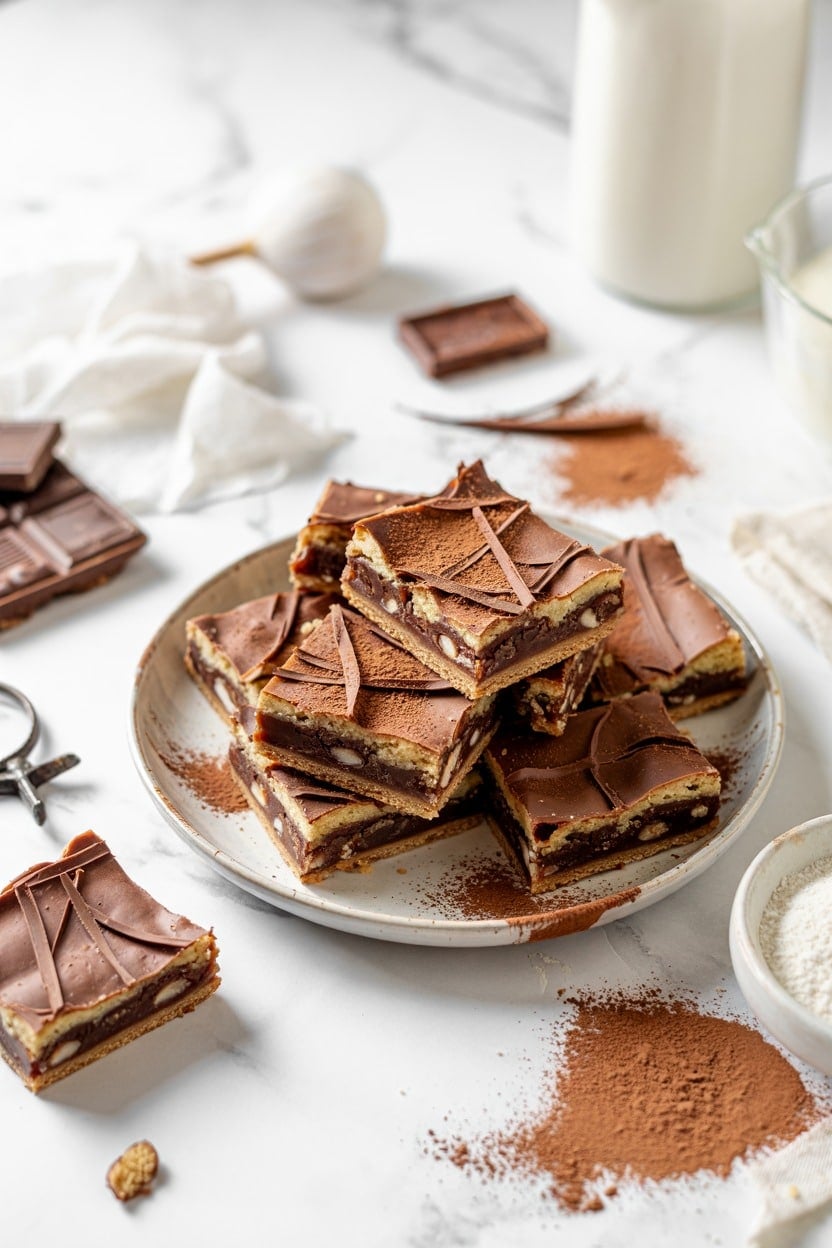
Chocolate chip cookie bars bring everything you like about a classic cookie into one easy-to-share tray. They bake up chewy on the inside with just the right amount of gooeyness, making every bite feel indulgent yet simple to prepare.
These bars cut cleanly, which means less mess and more time enjoying dessert.
This recipe fits well into busy schedules because you skip the step of forming individual cookies. All the rich, buttery flavor combined with melty chocolate chips comes together in just one pan, making these bars a reliable choice when you need a familiar and crowd-pleasing treat.
Why This Recipe Works
This recipe combines straightforward preparation with delicious results, making it a great option for any occasion.- Convenience - Prepare the whole batch in one pan without rolling or scooping dough for individual cookies.
- Texture - Chewy and slightly gooey, offering a satisfying contrast in every bite.
- Family-Friendly - Appeals to kids and adults alike with classic chocolate chip flavors.
- Easy to Portion - Bars cut neatly for simple serving and packing.
Ingredient Swap Ideas
Making a few ingredient swaps can tailor these bars to different tastes or dietary needs without losing the essence of the recipe.- Butter alternative - Use coconut oil or a plant-based spread for a dairy-free version.
- Chocolate chips - Swap semi-sweet chips for dark chocolate or white chocolate for a flavor twist.
- Flour choice - Try a gluten-free flour blend instead of all-purpose flour to make it gluten-free.
- Sugar substitute - Replace granulated sugar with coconut sugar or a sugar alternative to reduce refined sugar.
Ingredients
- 1 cup unsalted butter, melted and slightly cooled.
- 1 cup packed light brown sugar, for a rich, caramel-like sweetness.
- ½ cup granulated sugar, balances the brown sugar's depth.
- 2 large eggs, at room temperature to ensure smooth mixing.
- 2 teaspoons vanilla extract, adds a warm, fragrant note.
- 2 ¼ cups all-purpose flour, for structure and tenderness.
- 1 teaspoon baking soda, helps bars rise slightly and stay soft.
- ½ teaspoon salt, enhances flavor and balances sweetness.
- 2 cups semi-sweet chocolate chips, the star ingredient.
Instructions
- Preheat your oven to 350°F (175°C). Line a 9x13-inch baking pan with parchment paper or grease it lightly to prevent sticking.
- In a large bowl, whisk together the melted butter, brown sugar, and granulated sugar until smooth and combined. Add the eggs one at a time, mixing well after each addition. Stir in vanilla extract.
- In a separate bowl, combine the flour, baking soda, and salt. Gradually add the dry ingredients to the wet mixture, stirring just until incorporated. Avoid overmixing to keep the bars tender.
- Fold in the chocolate chips evenly through the dough. Spread the dough into the prepared pan, smoothing the top with a spatula.
- Bake for 25 to 30 minutes, until the edges turn golden and the center sets but remains soft. Allow the bars to cool completely in the pan before cutting into squares.
6. Raspberry Almond Tray Bake
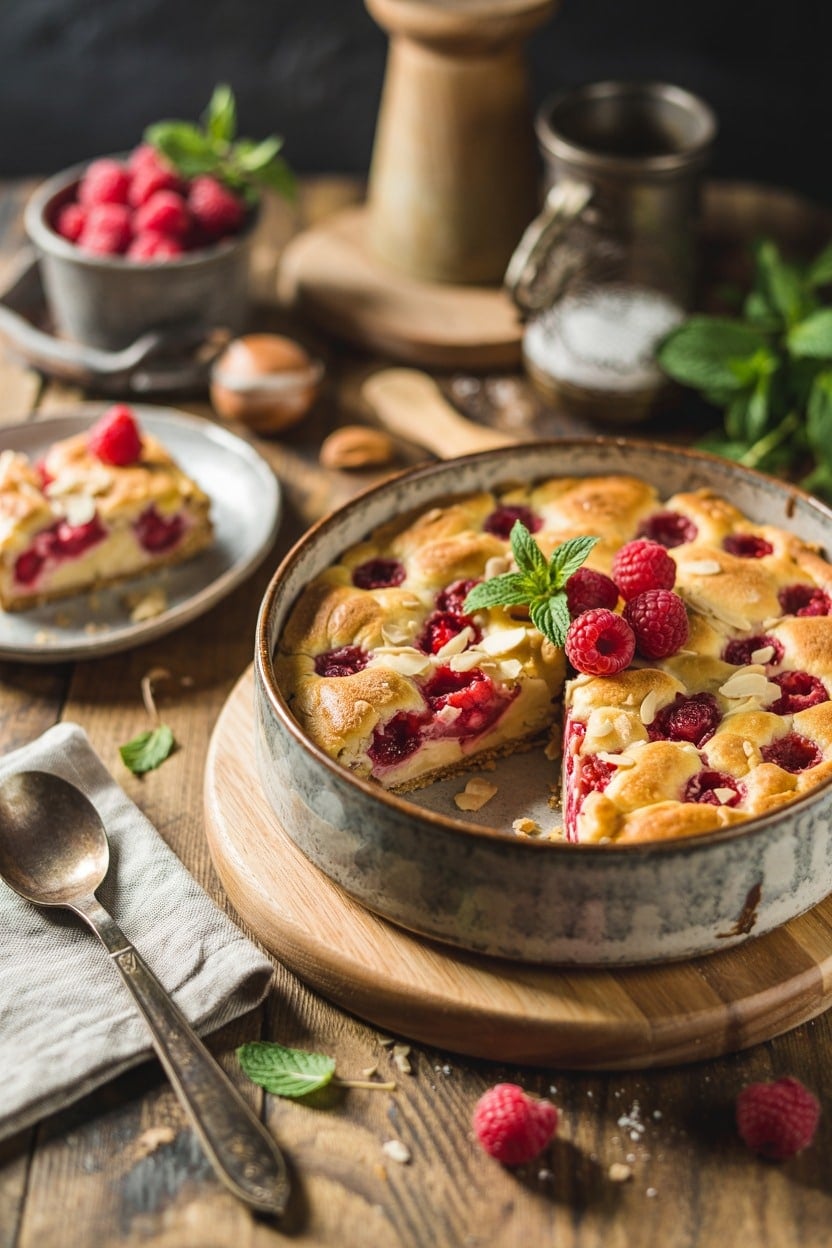
This Raspberry Almond Tray Bake brings together a nutty almond batter and the bright tartness of fresh raspberries for a balanced, flavorful treat. It's a simple bake that combines moist, tender crumb with bursts of juicy berries scattered throughout.
You can easily prepare this in one tray, making it an ideal option for a casual snack or a sweet addition to breakfast or afternoon tea. The natural sweetness of the raspberries plays well against the slightly crunchy almond topping, creating a lovely mix of textures.
Why This Recipe Works
This tray bake stands out for its straightforward preparation and delicious flavor that appeals to most palates. It’s a practical choice offering an inviting balance of fresh fruit and nutty goodness.- Convenience - Prepared in a single tray with quick mixing and minimal fuss.
- Flavor balance - The tart raspberries contrast nicely with the sweet, almond-flavored batter.
- Texture - Moist interior with a slightly crisp almond topping adds satisfying contrast.
- Appeal - Works well for casual gatherings or as a wholesome everyday treat.
Ingredient Swap Ideas
Making a few ingredient changes can help this tray bake suit your preferences or dietary needs without losing its character.- Almond Flour - Substitute with all-purpose flour for a more traditional texture, but keep some ground almonds for flavor.
- Raspberries - Try blueberries or blackberries as an alternative fruit option with a similar tartness.
- Butter - Use a plant-based spread for a dairy-free version.
- Honey - Replace with maple syrup or agave for a different natural sweetener choice.
Ingredients
- 2 cups all-purpose flour - Provides structure for the batter.
- 1 cup ground almonds (almond meal) - Adds nutty flavor and moistness.
- 1 ½ teaspoons baking powder - Helps the bake rise gently.
- ¼ teaspoon salt - Balances the sweetness.
- 1 cup unsalted butter, softened - Adds richness and tenderness.
- ¾ cup granulated sugar - Sweetens the batter evenly.
- 3 large eggs - Bind ingredients and contribute to texture.
- 1 teaspoon almond extract - Enhances the almond flavor.
- 1 cup fresh raspberries - Provides tartness and fresh fruit bursts.
- ½ cup sliced almonds - Sprinkled on top for crunch.
Instructions
- Preheat your oven to 350°F (175°C) and line a rectangular baking tray (about 9x13 inches) with parchment paper.
- In a bowl, whisk together the flour, ground almonds, baking powder, and salt until combined. Set aside.
- In a separate large bowl, beat the softened butter and sugar until pale and creamy. Add the eggs one at a time, mixing well after each addition. Stir in the almond extract.
- Gradually fold the dry ingredients into the wet, mixing gently until just combined. Spoon the batter evenly into the prepared tray. Scatter the fresh raspberries evenly over the surface and gently press them slightly into the batter.
- Sprinkle the sliced almonds evenly on top. Bake for 35 to 40 minutes, or until the top is golden brown and a toothpick inserted into the center comes out clean. Allow to cool before slicing into squares.
7. Peanut Butter Swirl Brownies
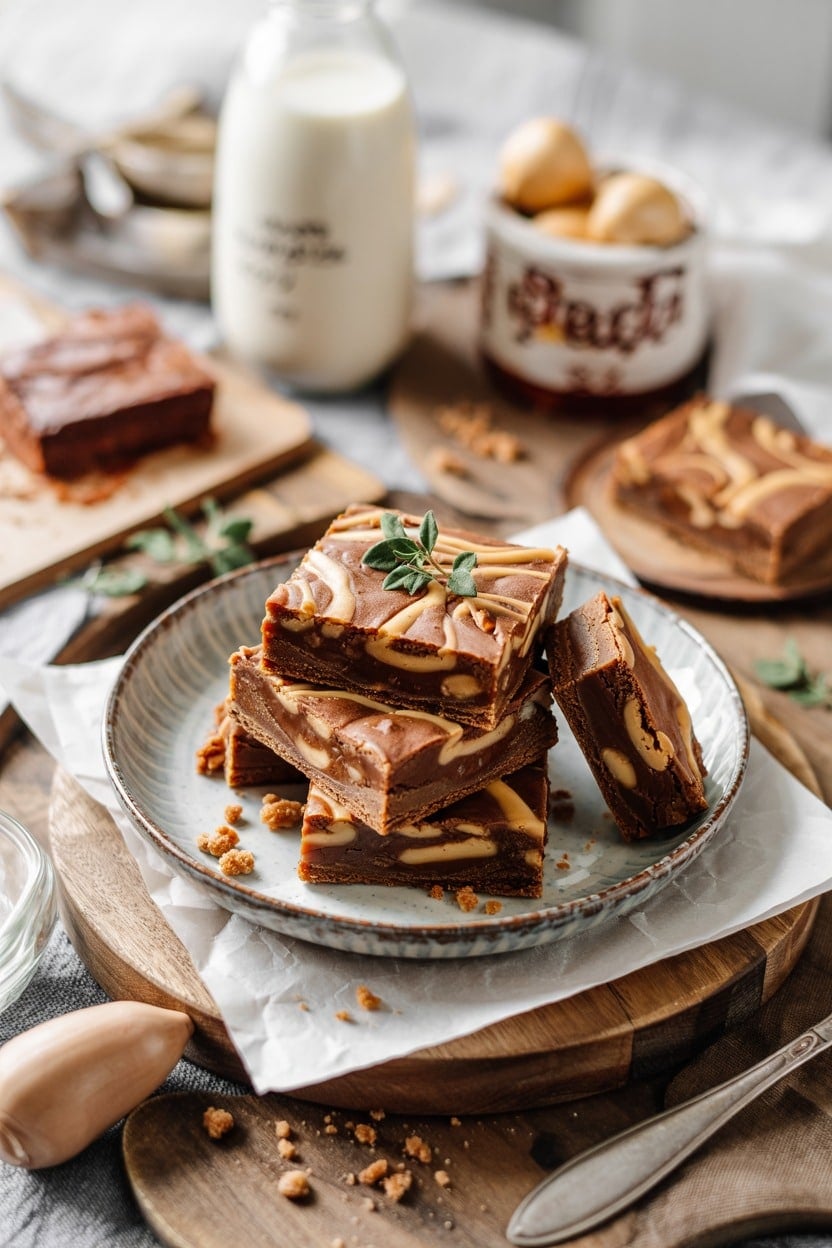
Peanut butter swirl brownies combine rich, fudgy chocolate with creamy ribbons of peanut butter, creating a wonderful pairing that feels indulgent without being overly complicated. These brownies offer a moist and dense texture with a nutty, slightly salty touch that balances the deep cocoa flavor beautifully.
This recipe fits perfectly for busy days when you want a homemade treat that can come together quickly. It's easy to prepare in one bowl, and the swirling technique adds a fun, attractive pattern without extra effort.
Why This Recipe Works
This brownie recipe delivers a satisfying chocolate and peanut butter flavor combo that’s both rich and comforting. It’s straightforward enough to make any day, yet special enough for sharing.- Convenience - One-bowl preparation and simple swirling make the process quick and mess-free.
- Flavor balance - The creamy peanut butter contrasts with bittersweet chocolate for a well-rounded taste.
- Texture - Fudgy brownies with smooth peanut butter swirled through provide a lovely combination.
- Appeal - A familiar and crowd-pleasing combo that works well for snacks, dessert, or gatherings.
Ingredient Swap Ideas
Swapping some ingredients can help you tailor the recipe to your needs or what you have on hand while keeping the essential flavors intact.- Peanut butter - Use almond or cashew butter instead for a different nutty flavor.
- Chocolate - Replace unsweetened cocoa powder with dark cocoa for more intensity.
- Sweetener - Substitute granulated sugar with coconut sugar or a sugar alternative to lower the glycemic impact.
- Flour - Use gluten-free all-purpose flour for a gluten-free version without changing the texture much.
Ingredients
- ½ cup (115g) unsalted butter - melted and cooled slightly.
- 1 cup (200g) granulated sugar - for sweetness.
- 2 large eggs - at room temperature.
- 1 teaspoon vanilla extract - to enhance flavor.
- ⅓ cup (35g) unsweetened cocoa powder - for rich chocolate taste.
- ½ cup (65g) all-purpose flour - provides structure.
- ¼ teaspoon salt - balances sweetness and enhances chocolate flavor.
- ¼ teaspoon baking powder - ensures a slightly fudgy but tender brownie.
- ½ cup (125g) creamy peanut butter - for swirling through the batter.
Instructions
- Preheat your oven to 350°F (175°C). Line an 8-inch square baking pan with parchment paper or lightly grease it to prevent sticking.
- In a large mixing bowl, whisk together the melted butter and sugar until combined. Add eggs one at a time, beating well after each addition, followed by the vanilla extract.
- Sift in the cocoa powder, flour, salt, and baking powder, then gently fold the dry ingredients into the wet until fully incorporated and smooth.
- Pour half of the brownie batter into the prepared pan and spread evenly. Dollop half of the peanut butter over the batter, then spoon the remaining brownie batter on top. Add the remaining peanut butter in small spoonfuls.
- Use a knife or skewer to swirl the peanut butter through the batter, creating a marbled effect. Bake for 25 to 30 minutes, or until the edges are set but the center still looks slightly fudgy when tested with a toothpick. Cool completely before cutting into squares and serving.
8. Matcha Green Tea Tray Bake
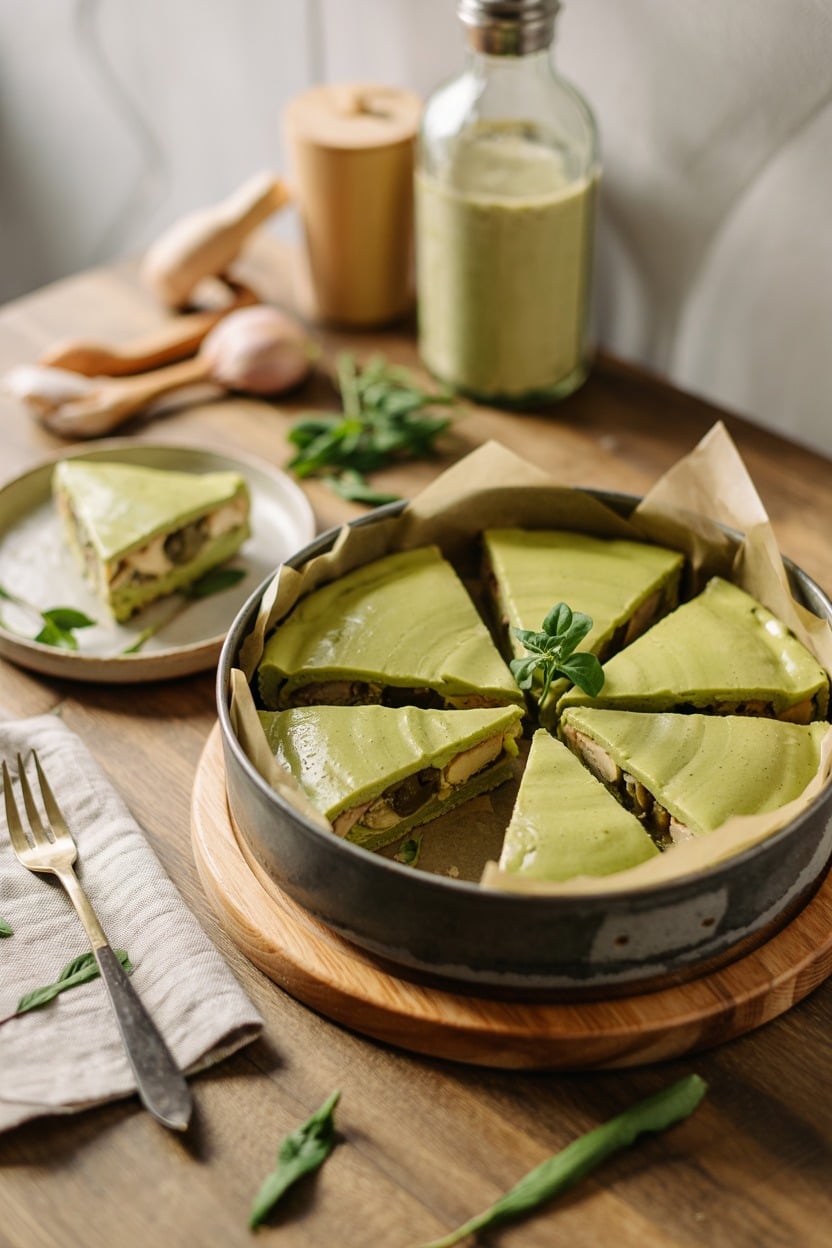
This tray bake combines the subtle earthiness of matcha green tea with a light sweetness that feels just right. The cake offers a tender crumb infused with vibrant matcha powder, giving it a fresh color and a unique flavor profile that's both calming and bright.
It's straightforward to prepare and works well as a snack or dessert. Baking it in a tray makes cutting and sharing easy, a practical choice for busy days or casual gatherings.
Why This Recipe Works
This Matcha Green Tea Tray Bake brings a fresh twist to everyday baking by blending easy prep with a distinctive flavor. It results in a cake that’s both visually appealing and gently sweet, making it a versatile treat.- Convenience - Simple mixing and baking in one tray reduce preparation time and cleanup.
- Flavor balance - The mild bitterness of matcha pairs well with subtle sweetness for a balanced taste.
- Texture - Soft and tender crumb with a slight moisture that keeps it pleasant to eat.
- Presentation - Vibrant green color makes it stand out on any dessert table or snack spread.
Ingredient Swap Ideas
Swapping ingredients can help customize this recipe for different dietary needs or flavor preferences. These changes keep the spirit of the tray bake intact while making it easier to enjoy in various settings.- All-purpose flour - Substitute with gluten-free flour blend to make a gluten-free version.
- Butter - Use coconut oil or a plant-based spread for a dairy-free alternative.
- Sugar - Replace with coconut sugar or maple syrup for a more natural sweetener.
- Eggs - Use flax eggs or chia eggs as a plant-based substitute to make it vegan-friendly.
Ingredients
- 1 cup all-purpose flour - Provides the base structure for the cake.
- 2 teaspoons matcha green tea powder - Adds earthy flavor and vibrant color.
- ½ teaspoon baking powder - Helps the cake rise for a light texture.
- ¼ teaspoon salt - Balances sweetness and enhances flavors.
- ¾ cup granulated sugar - Sweetens the cake without overpowering matcha.
- ½ cup unsalted butter, melted - Adds moisture and richness.
- 2 large eggs - Bind ingredients and contribute to the cake's tender crumb.
- ½ cup milk - Keeps the batter smooth and moist.
- 1 teaspoon vanilla extract - Enhances the overall flavor subtly.
Instructions
- Preheat your oven to 350°F (175°C) and grease an 8x8-inch baking tray or line it with parchment paper.
- In a large bowl, sift together the flour, matcha powder, baking powder, and salt. Set aside.
- In another bowl, whisk the sugar and melted butter until combined. Add the eggs one at a time, mixing well after each addition. Stir in the milk and vanilla extract.
- Gradually add the dry ingredients to the wet ingredients, folding gently until just combined. Avoid overmixing to keep the cake tender.
- Pour the batter into the prepared tray and smooth the top evenly. Bake for 25 to 30 minutes or until a toothpick inserted in the center comes out clean. Let it cool completely before slicing and serving.
9. Pumpkin Spice Sheet Cake
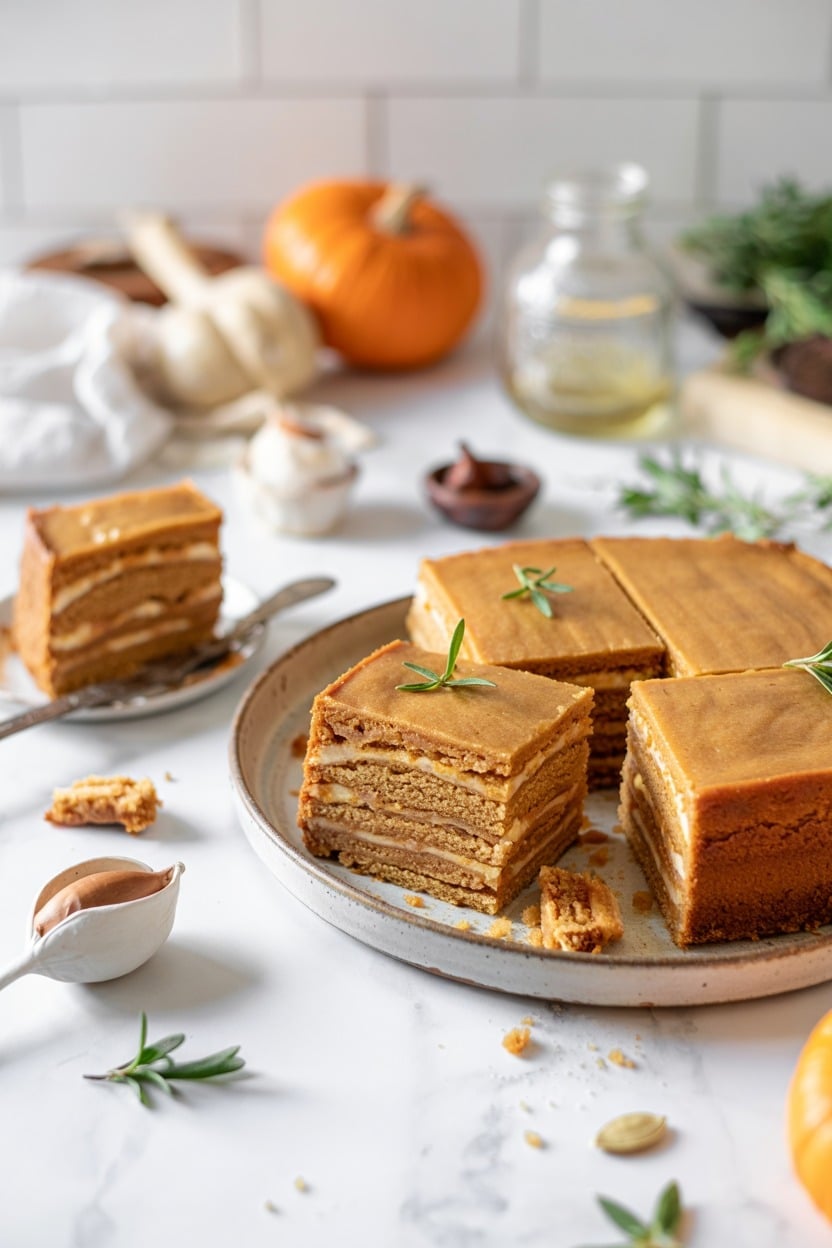
This pumpkin spice sheet cake combines warm autumn flavors with a tender, moist crumb that's perfect for any fall gathering or cozy dessert craving. The blend of cinnamon, nutmeg, and cloves gives the cake its signature spice, while the pumpkin adds moisture and richness.
Topped with a creamy cream cheese frosting, this cake offers a lovely balance between spice and sweetness. It's straightforward to prepare and can be made in one pan, making it ideal for busy days or last-minute guests.
Why This Recipe Works
This pumpkin spice sheet cake stands out for its simple preparation and comforting flavor profile that appeals to a wide range of tastes.- Convenience - Easy to mix in one bowl and bake in a single sheet pan for quick cleanup.
- Flavor balance - Warm spices blend seamlessly with pumpkin, complemented by smooth, tangy cream cheese frosting.
- Texture - Moist and tender crumb that stays soft even after a few days.
- Appeal - Classic fall dessert that suits family gatherings or casual celebrations effortlessly.
Ingredient Swap Ideas
Making ingredient swaps can help customize this pumpkin spice sheet cake to fit specific dietary needs or taste preferences without sacrificing the core flavors.- Pumpkin puree - Use canned or fresh pumpkin puree depending on what you have available for similar moisture and flavor.
- All-purpose flour - Substitute with gluten-free flour blend to make the cake gluten-free.
- Cream cheese frosting - Make a dairy-free frosting using vegan cream cheese and plant-based butter alternatives.
- Sweetener - Replace granulated sugar with coconut sugar or brown sugar for a deeper caramel note.
Ingredients
- 2 cups all-purpose flour - Provides structure for the cake.
- 1 ½ teaspoons baking powder - Helps the cake rise.
- 1 teaspoon baking soda - Aids in leavening and tender texture.
- 2 teaspoons ground cinnamon - Main spice for warmth and aroma.
- 1 teaspoon ground nutmeg - Adds depth to the spice blend.
- ½ teaspoon ground cloves - Contributes a subtle, spicy kick.
- ½ teaspoon salt - Balances sweetness and enhances flavor.
- 1 ½ cups granulated sugar - Sweetens the cake.
- 1 cup vegetable oil - Keeps the cake moist and tender.
- 4 large eggs - Binds the ingredients and provides structure.
- 1 cup canned pumpkin puree - Adds moisture and pumpkin flavor.
- 1 teaspoon vanilla extract - Enhances the overall taste.
- 8 ounces cream cheese, softened - Base for tangy, creamy frosting.
- ½ cup unsalted butter, softened - Adds richness and smooth texture.
- 3 to 4 cups powdered sugar - Sweetens and thickens the frosting.
- 1 teaspoon vanilla extract - Boosts flavor in the frosting.
Instructions
- Preheat your oven to 350°F (175°C). Grease and flour a 9x13-inch sheet pan to prevent sticking.
- In a large bowl, whisk together the all-purpose flour, baking powder, baking soda, cinnamon, nutmeg, cloves, and salt until fully combined.
- In a separate bowl, beat together the granulated sugar, vegetable oil, eggs, pumpkin puree, and vanilla extract until smooth and well blended.
- Gradually add the dry ingredients to the wet ingredients, stirring just until combined. Avoid overmixing to maintain a tender cake texture.
- Pour the batter into the prepared sheet pan and smooth the top evenly with a spatula. Bake for 30 to 35 minutes, or until a toothpick inserted in the center comes out clean. Let the cake cool completely in the pan before frosting.
- For the frosting, beat together cream cheese and softened butter until creamy and smooth. Slowly add powdered sugar until you reach your desired sweetness and consistency. Stir in vanilla extract.
- Spread the cream cheese frosting evenly over the cooled cake. Slice into squares and serve.
10. Cherry Chocolate Chunk Bars
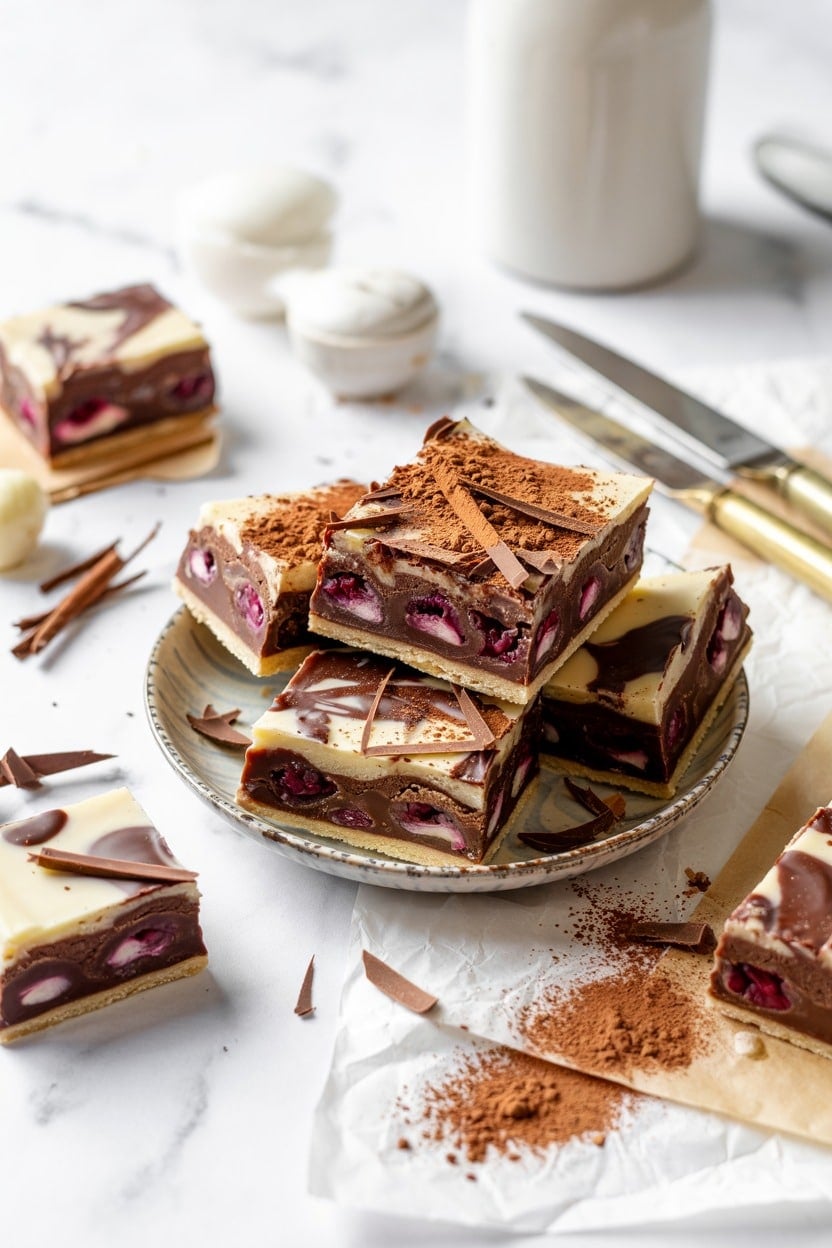
These Cherry Chocolate Chunk Bars combine juicy cherries with rich dark chocolate in a soft, buttery base. They bring together the tartness of cherries and the deep sweetness of chocolate, creating a treat that's both satisfying and easy to make.
You don't need many ingredients or complicated steps to get a batch of these bars ready. They're great for snack time, dessert, or even a casual gathering, offering a pleasant balance of fruity and chocolatey flavors.
Why This Recipe Works
This recipe provides a simple way to enjoy a delicious combination of flavors and textures without a long list of ingredients or complex preparation.- Convenience - The batter comes together quickly, and the bars bake in a single pan for easy cleanup.
- Flavor balance - Juicy cherries add a tangy contrast to the rich, slightly bittersweet chunks of dark chocolate.
- Texture - Soft, buttery bars with pockets of melted chocolate and bursts of cherry juice keep every bite interesting.
- Appeal - Suitable for seasonal treats or year-round enjoyment, these bars appeal to both kids and adults.
Ingredient Swap Ideas
Swapping a few ingredients allows these bars to fit different tastes or dietary preferences without losing their essence.- Use frozen cherries instead of fresh ones when cherries are out of season. Just thaw and drain them before using.
- Swap dark chocolate chunks for semi-sweet or milk chocolate if you prefer a sweeter flavor.
- Replace butter with coconut oil for a dairy-free variation that adds a subtle tropical note.
- Use almond flour or gluten-free flour blend in place of all-purpose flour to keep these bars gluten-free.
Ingredients
- ½ cup unsalted butter - softened to room temperature for easy mixing.
- 1 cup granulated sugar - to sweeten the bars just right.
- 1 large egg - beaten, to help bind the ingredients.
- 1 teaspoon vanilla extract - adds a warm, aromatic note.
- 1 ½ cups all-purpose flour - the base of the soft bar texture.
- ½ teaspoon baking powder - gives a slight lift and tenderness.
- ¼ teaspoon salt - enhances flavor balance.
- 1 cup fresh or thawed pitted cherries - halved or quartered, to distribute evenly.
- ¾ cup dark chocolate chunks - for pockets of melted chocolate throughout.
Instructions
- Preheat your oven to 350°F (175°C) and line an 8x8-inch baking pan with parchment paper, leaving some overhang for easy removal.
- Beat the softened butter and sugar together in a large bowl until light and creamy. Add the egg and vanilla extract, mixing just until combined.
- In a separate bowl, whisk together the flour, baking powder, and salt. Gradually add the dry ingredients to the wet mixture, stirring gently until fully incorporated.
- Fold in the cherries and chocolate chunks gently, making sure they're spread out evenly through the batter.
- Spread the batter evenly into the prepared pan and bake for 30 to 35 minutes. The bars should be golden around the edges and set in the center. Let them cool completely before cutting into squares.
11. Oatmeal Cranberry Tray Bake
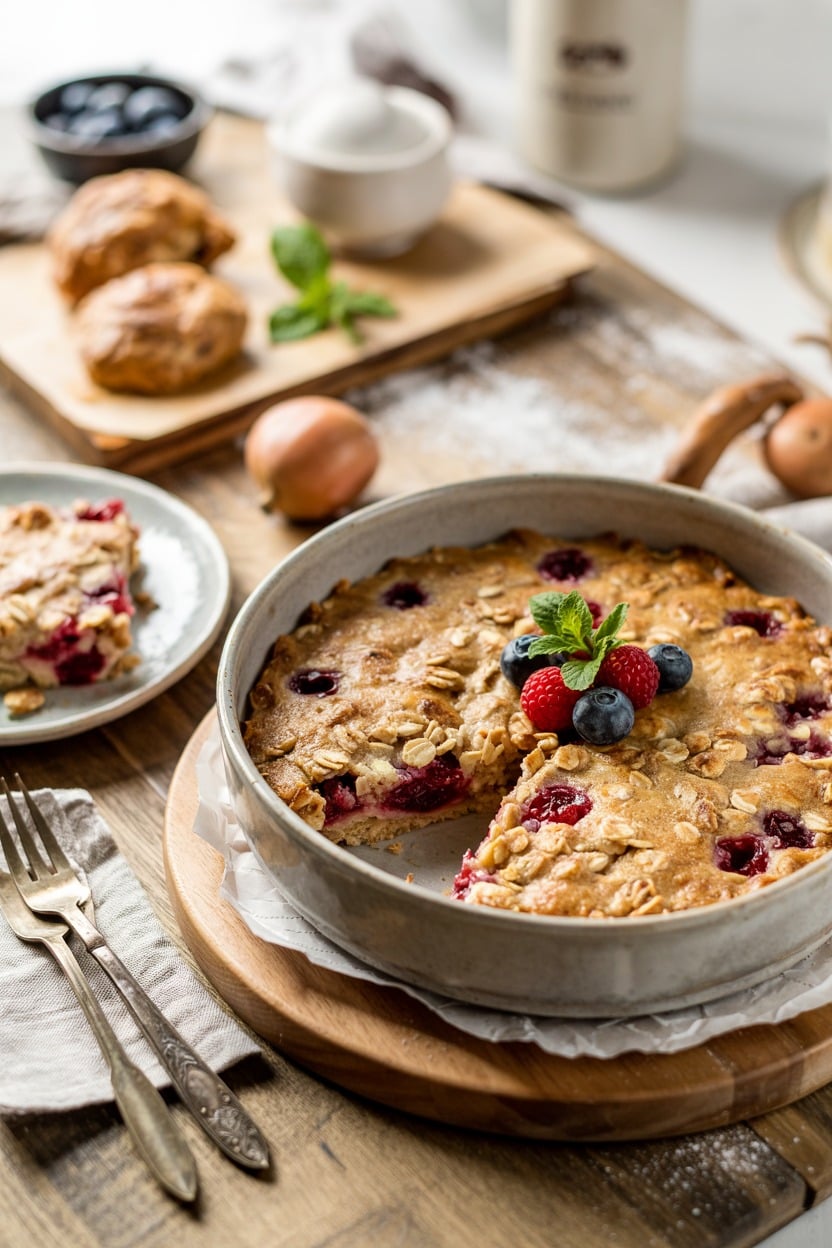
This oatmeal cranberry tray bake offers a wholesome, rustic texture paired with the bright, tart notes of cranberries. It comes together easily, making it ideal for a grab-and-go breakfast or a satisfying snack to keep you fueled throughout the day.
The cinnamon adds a warm, comforting spice, while the oats provide a hearty base that holds everything together with a nice, slightly chewy bite. It requires minimal prep and bakes evenly in a single tray, saving time and effort in cleanup.
Why This Recipe Works
This tray bake is both practical and flavorful, bringing together simple ingredients into a satisfying dish you can prepare ahead of time.- Convenience - One-bowl mixing and tray baking simplify preparation and cleanup.
- Flavor balance - Tart cranberries and warm cinnamon complement the nutty oats perfectly.
- Texture - The bake has a crispy top with a tender, chewy center.
- Versatility - Easy to slice and serve, suitable for breakfast or a healthy snack.
Ingredient Swap Ideas
Swapping ingredients can be helpful to meet different dietary preferences or to adjust the flavor profile while keeping the essence of this tray bake intact.- Cranberries - Replace dried cranberries with cherries or raisins for a different sweet-tart contrast.
- Oats - Use gluten-free oats to make this recipe suitable for gluten sensitivity.
- Sweetener - Substitute maple syrup with honey or brown sugar to change sweetness and depth.
- Add-ins - Incorporate chopped nuts like walnuts or pecans for added crunch and richness.
Ingredients
- 2 cups rolled oats - Use old-fashioned oats for a chewy, hearty texture.
- ½ cup dried cranberries - Adds tart, chewy bursts of flavor.
- ¼ cup brown sugar - Provides natural sweetness and moisture.
- 1 teaspoon ground cinnamon - Brings warm, aromatic spice to the bake.
- ½ teaspoon baking powder - Helps the tray bake rise slightly.
- ¼ teaspoon salt - Enhances all the other flavors.
- 1 ½ cups milk - Any kind will work, dairy or plant-based.
- 1 large egg - Binds ingredients together for structure.
- 2 tablespoons melted butter - Adds richness and keeps the bake moist.
- 1 teaspoon vanilla extract - Rounds out the flavors with a sweet note.
Instructions
- Preheat the oven to 350°F (175°C) and grease a 9x9-inch baking tray or line it with parchment paper.
- In a large bowl, combine the rolled oats, dried cranberries, brown sugar, ground cinnamon, baking powder, and salt. Mix well to evenly distribute.
- In a separate bowl, whisk together the milk, egg, melted butter, and vanilla extract until fully blended.
- Pour the wet ingredients into the dry mixture and stir until everything is just combined. Avoid overmixing to keep a tender texture.
- Transfer the batter to the prepared baking tray, spreading it evenly with a spatula. Bake for 30 to 35 minutes, or until the top is golden brown and a toothpick inserted into the center comes out clean.
12. Banana Walnut Sheet Cake
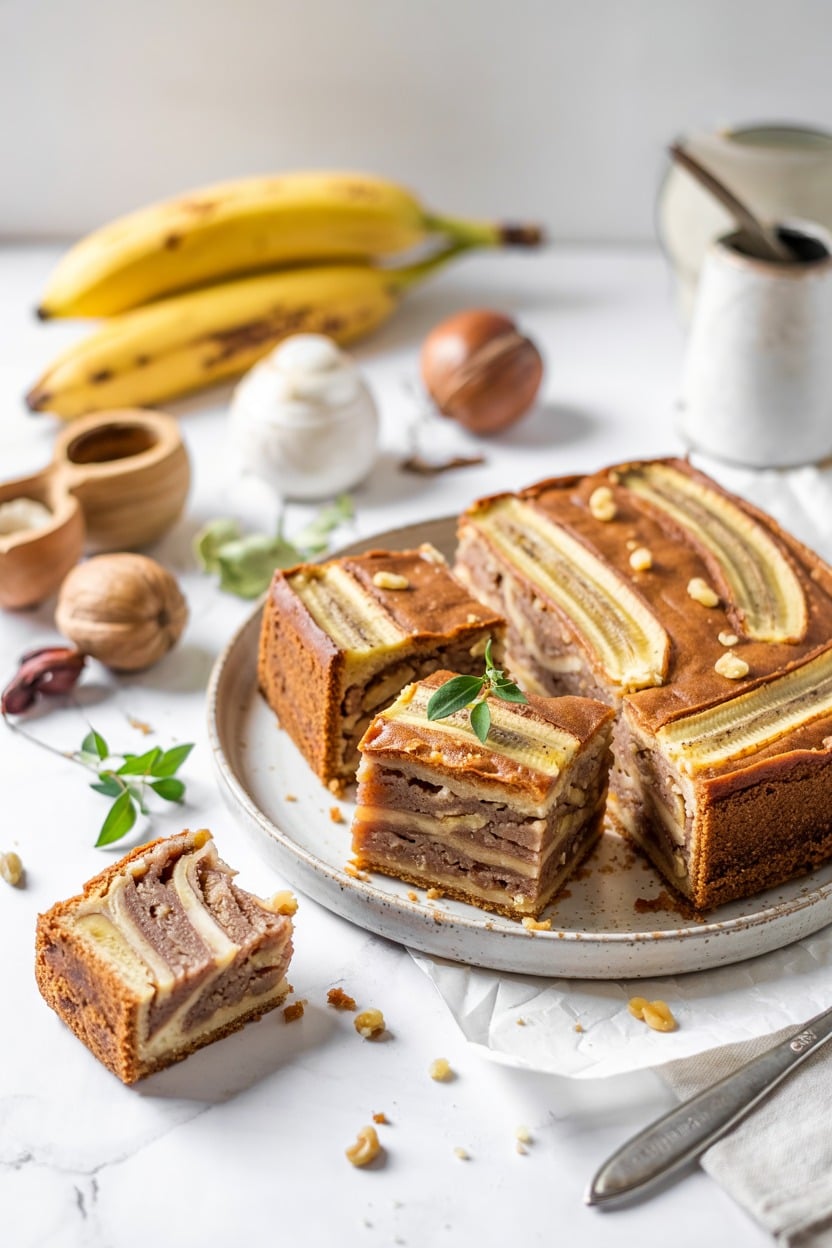
Banana Walnut Sheet Cake offers a wonderful blend of moist banana flavor with the satisfying crunch of walnuts throughout. It's a straightforward recipe that fills your kitchen with a lovely aroma and results in a tender cake that works perfectly for dessert, snack time, or even breakfast.
The caramel glaze on top adds a silky sweetness that enhances the natural richness of the bananas and balances the nuttiness. Preparing this cake from scratch is manageable, even during busy days when you want something comforting without complicated steps.
Why This Recipe Works
This Banana Walnut Sheet Cake is a crowd-pleaser that combines simple ingredients with rich, inviting flavors and textures.- Moist texture - The ripe bananas keep the cake soft and tender without being dense.
- Crunchy walnut pieces - Adding walnuts provides a delightful contrast in every bite.
- Sweet caramel glaze - The glaze adds a smooth, buttery finish that's not overpowering.
- Easy to make - This sheet cake is straightforward, requiring a single pan and common pantry staples.
Ingredient Swap Ideas
Adapting this recipe can cater to different dietary preferences or what’s available in your pantry without changing the cake’s character.- Use pecans or almonds instead of walnuts for a different nutty flavor and texture.
- Replace all-purpose flour with a gluten-free blend if you require a gluten-free option.
- Swap butter for coconut oil in the cake and glaze for a dairy-free, slightly tropical note.
- Use maple syrup or honey instead of brown sugar in the glaze to reduce refined sugar content.
Ingredients
- 2 cups mashed ripe bananas - About 4 medium bananas, peeled and mashed until smooth.
- 2 cups all-purpose flour - For the cake base, sifted for lightness.
- 1 cup granulated sugar - Adds sweetness to the cake batter.
- ½ cup packed brown sugar - Provides moisture and deeper flavor.
- 1 cup walnuts - Roughly chopped for texture and nutty taste.
- ½ cup unsalted butter - Softened, used for both the cake and glaze.
- 2 large eggs - To bind the ingredients and add richness.
- 1 teaspoon baking soda - Helps the cake rise.
- ¼ teaspoon salt - Enhances overall flavor balance.
- 1 teaspoon vanilla extract - For warm, aromatic notes.
- ½ cup packed brown sugar - Gives the glaze its sweet depth.
- ¼ cup unsalted butter - Adds richness and smoothness.
- 2 tablespoons milk - Creates the right texture for glazing.
- ½ teaspoon vanilla extract - Complements the banana and walnut flavors.
Instructions
- Preheat your oven to 350°F (175°C). Grease a 9x13-inch sheet pan and set it aside.
- In a large bowl, beat the softened butter and both sugars together until creamy. Add the eggs one at a time, mixing well after each addition. Stir in the mashed bananas and vanilla extract.
- In a separate bowl, whisk together the flour, baking soda, and salt. Gradually add this dry mixture to the banana batter, folding gently until just combined. Stir in the chopped walnuts.
- Pour the batter into the prepared pan, spreading it evenly. Bake for 35 to 40 minutes, or until a toothpick inserted in the center comes out clean. Remove from oven and let cool slightly.
- While the cake cools, prepare the caramel glaze by melting the butter, brown sugar, and milk together over medium heat. Bring to a simmer and cook for about 3 minutes until slightly thickened. Remove from heat and stir in vanilla extract. Pour the glaze evenly over the warm cake and allow it to set before slicing and serving.
13. Salted Pretzel Chocolate Bars
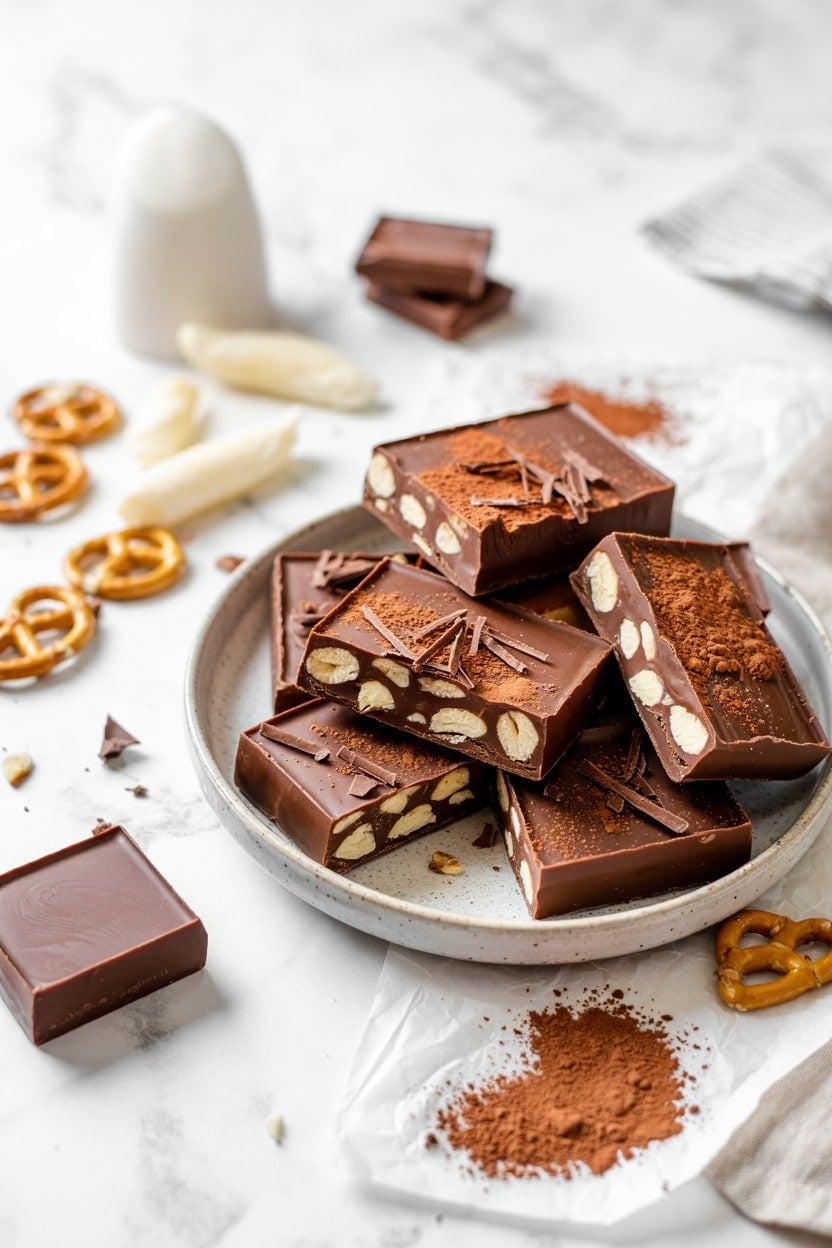
Salted Pretzel Chocolate Bars bring together a simple, satisfying combination of sweet and salty flavors that's hard to pass up. The rich smoothness of melted chocolate pairs beautifully with the crunchy texture and slightly salty taste of crushed pretzels, creating a treat that feels indulgent without being complicated to make.
This recipe is quick to prepare, requiring just a handful of ingredients and minimal steps. It's ideal for busy home cooks who want a reliable dessert to share with family or guests, offering a nice balance of textures and flavors that appeal to a wide range of tastes.
Why This Recipe Works
This recipe delivers a crowd-pleasing snack that balances ease with great flavor and texture. It offers a chance to create a homemade treat that feels special without demanding much time or skill.- Convenience - Quick assembly with simple ingredients makes it a straightforward option for any occasion.
- Flavor balance - Combines sweet chocolate with the savory crunch of salted pretzels for a satisfying contrast.
- Texture - Crisp pretzels add a pleasant crunch that complements the smooth chocolate base perfectly.
- Appeal - Family-friendly and visually inviting, these bars work well for casual get-togethers or packed snacks.
Ingredient Swap Ideas
Adjusting ingredients can help fit different dietary preferences or make use of what you have on hand while keeping the core flavors intact.- Chocolate - Swap semi-sweet chocolate for dark or milk chocolate depending on your sweetness preference.
- Pretzels - Use gluten-free pretzels if you need a gluten-free option without losing the salty crunch.
- Salt - For a milder flavor, reduce the amount of sea salt or try using smoked salt for a subtle twist.
- Add-ins - Incorporate nuts like chopped almonds or peanuts for extra texture if you want some variation.
Ingredients
- 2 cups semi-sweet chocolate chips - Melts smoothly to form the chocolate base.
- 2 cups pretzels, crushed - Provides a crunchy, salty topping.
- ½ teaspoon sea salt flakes - Enhances the flavor contrast with a touch of saltiness.
- 1 tablespoon unsalted butter - Helps create a glossy melt when combined with chocolate.
- Optional: ¼ cup chopped nuts - Adds extra crunch if desired.
Instructions
- Line an 8x8-inch baking pan with parchment paper, leaving some overhang for easy removal later.
- In a heatproof bowl, combine the semi-sweet chocolate chips and butter. Melt gently over a double boiler or in short bursts in the microwave, stirring frequently until smooth.
- Pour the melted chocolate into the prepared pan and spread evenly with a spatula.
- Sprinkle crushed pretzels evenly over the chocolate, pressing down gently to help them stick. Scatter sea salt flakes on top to enhance the salty contrast.
- Refrigerate the pan for at least 1 hour until the chocolate is firm. Once set, lift the bars out using the parchment paper and cut them into squares.
14. Peach and Almond Tray Bake
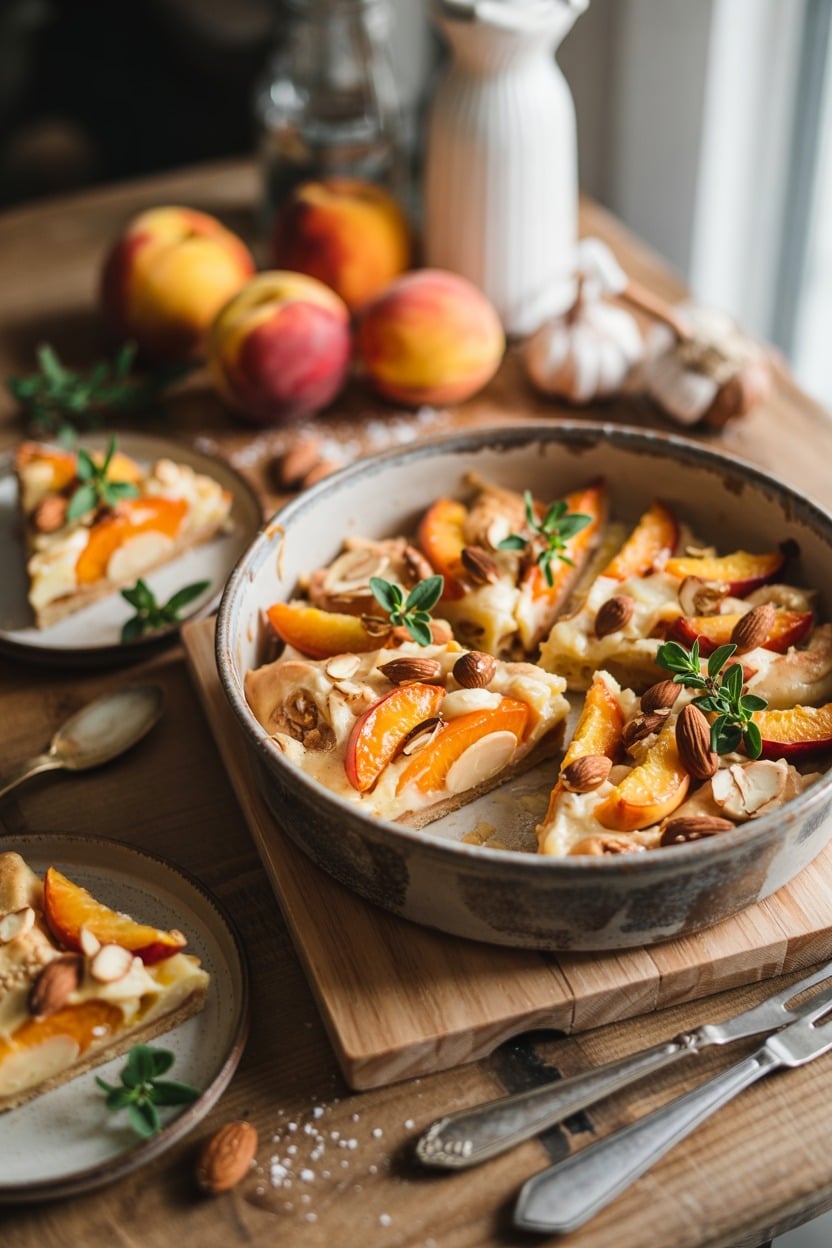
This peach and almond tray bake brings together the sweetness of ripe peaches with the rich, nutty flavor of almond flour and a silky frangipane layer. It's a simple yet impressive dessert that feels fresh and summery, making good use of seasonal peaches.
You can prepare this tray bake in one pan, which saves time and reduces washing up. The combination of juicy fruit and tender almond crumb offers a pleasing texture contrast with every bite.
Why This Recipe Works
This peach and almond tray bake is both straightforward to make and pleasing to the palate. The layers provide a satisfying mix of softness and slight crunch, with a balanced sweetness that’s never overwhelming.- Convenience - Made in a single tray, this dessert minimizes prep and cleaning.
- Flavor balance - Combines sweet peaches with nutty almond and buttery frangipane for a harmonious taste.
- Texture - Soft fruit atop a moist, crumbly almond base with a light frangipane topping.
- Appeal - Suitable for family gatherings or casual get-togethers, offering a fresh seasonal twist.
Ingredient Swap Ideas
Swapping ingredients can help you align the recipe with dietary preferences or what you have in your pantry while keeping its essence intact.- Almond flour - Substitute with ground hazelnuts or cashews for a different nutty flavor.
- Peaches - Use nectarines or plums if peaches aren't in season or to add a slightly tart contrast.
- Butter - Replace with coconut oil or vegan butter to make it dairy-free.
- Sugar - Try maple syrup or coconut sugar for a natural sweetener alternative.
Ingredients
- 4 ripe peaches - peeled, pitted, and sliced into wedges.
- 1 cup almond flour - finely ground almonds for the base and frangipane.
- ½ cup all-purpose flour - for structure in the frangipane layer.
- ½ cup granulated sugar - for sweetness in the frangipane.
- ½ cup unsalted butter - melted and slightly cooled.
- 2 large eggs - at room temperature.
- 1 teaspoon almond extract - enhances the nutty flavor.
- 1 teaspoon baking powder - helps the frangipane rise slightly.
- Pinch of salt - to balance sweetness.
- Powdered sugar - for dusting, optional.
Instructions
- Preheat your oven to 350°F (175°C). Lightly grease a 9x9-inch tray or similar baking dish.
- In a mixing bowl, combine the almond flour, all-purpose flour, sugar, baking powder, and salt. Stir in the melted butter and one egg until a smooth batter forms. Add almond extract and mix well.
- Spread half of the batter evenly across the bottom of the prepared tray. Arrange half of the peach slices on top of this layer.
- Pour the remaining batter over the peaches, smoothing it out, then layer the remaining peach slices on top.
- Beat the remaining egg lightly and brush it gently over the top peaches for a glossy finish. Bake for 35-40 minutes until golden brown and a toothpick inserted in the center comes out clean.
- Let the tray bake cool before dusting with powdered sugar if desired. Cut into squares and serve.
15. Coconut Lime Tray Bake
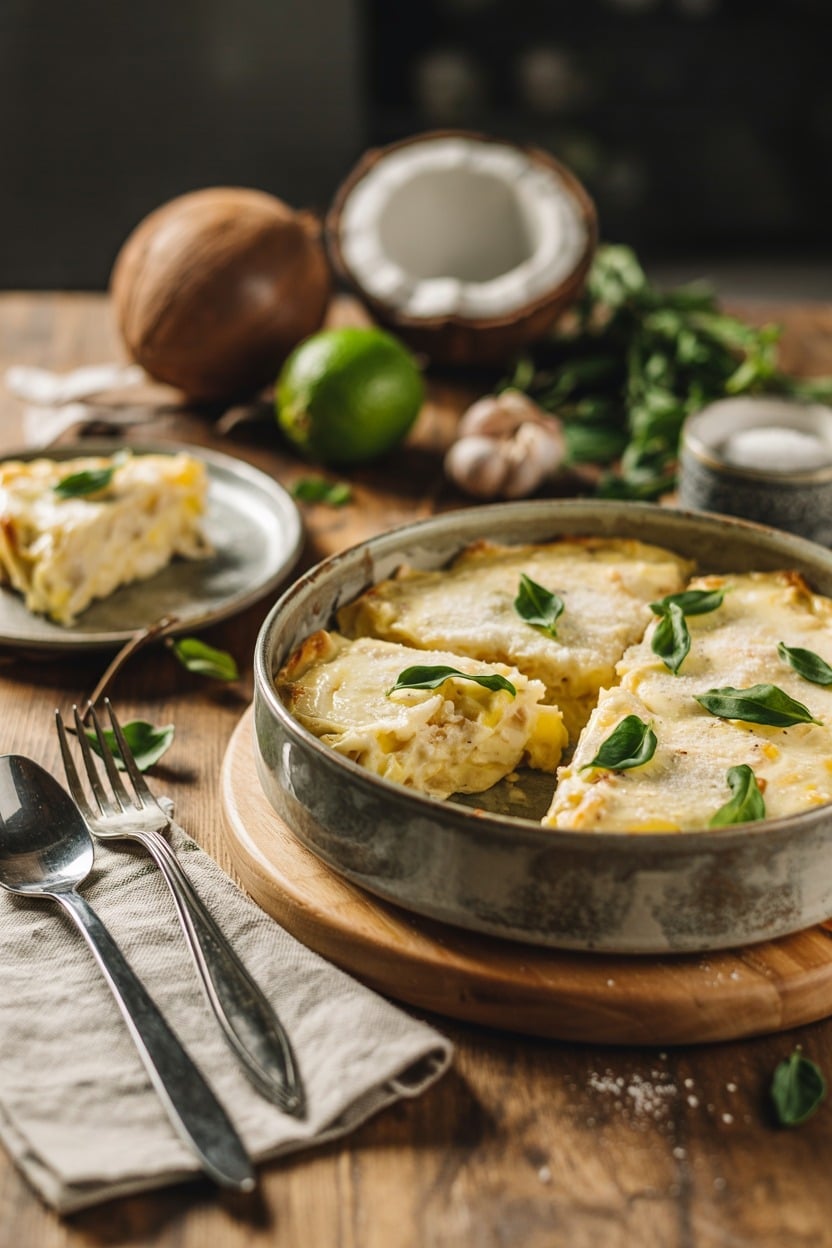
This Coconut Lime Tray Bake brings together a lovely blend of tropical flavors wrapped in a moist, tender crumb. The zingy lime cuts through the sweetness, while shredded coconut adds subtle texture and aroma, making every bite refreshing and satisfying.
It's straightforward to prepare and bakes evenly in a tray, making it a great treat for family gatherings, casual lunches, or afternoon tea. The combination of citrus and coconut feels bright but not overpowering, providing a pleasant balance to enjoy any time.
Why This Recipe Works
This tray bake balances tangy lime and mellow coconut in a simple recipe that’s quick to put together and bakes up beautifully.- Convenience - Uses basic ingredients and bakes in one pan, saving prep and cleanup time.
- Flavor balance - Combines zesty lime with sweet coconut for a fresh, tropical taste.
- Texture - Produces a moist, tender crumb with a delicate coconut bite throughout.
- Appeal - Offers a unique yet approachable dessert suitable for everyday treats or special occasions.
Ingredient Swap Ideas
Adjusting a few ingredients can make this tray bake better suited for your taste or dietary needs without losing its tropical charm.- Use dairy-free yogurt or coconut milk yogurt instead of plain yogurt to keep it vegan and enhance the coconut flavor.
- Swap all-purpose flour with gluten-free flour for a gluten-free version that still holds together nicely.
- Replace shredded coconut with desiccated coconut for a finer texture or toasted coconut for more crunch and a deeper flavor.
- Substitute lime juice with lemon juice if you want a slightly different citrus note that still complements the coconut well.
Ingredients
- 1 cup (200g) granulated sugar - For sweetness and structure.
- ½ cup (120ml) plain yogurt - Adds moisture and tenderness to the crumb.
- ½ cup (120ml) vegetable oil - Keeps the cake moist and soft.
- 3 large eggs - Bind and build the cake's structure.
- 1 ½ cups (190g) all-purpose flour - Forms the base of the crumb.
- 1 teaspoon baking powder - Helps the bake rise evenly.
- ½ teaspoon baking soda - Works with baking powder to lighten the texture.
- ½ teaspoon salt - Balances the sweetness.
- 1 cup (80g) shredded coconut - Provides tropical flavor and texture throughout.
- Zest of 2 limes - Adds bright, aromatic citrus notes.
- ⅓ cup (80ml) freshly squeezed lime juice - Gives a tangy lift to the batter.
Instructions
- Preheat your oven to 350°F (175°C). Line a rectangular baking tray (about 9x13 inches / 23x33 cm) with parchment paper.
- In a large bowl, whisk together sugar, yogurt, and vegetable oil until smooth and well combined. Beat in the eggs one at a time, incorporating each fully before adding the next.
- In a separate bowl, sift together flour, baking powder, baking soda, and salt. Gradually fold the dry ingredients into the wet mixture without overmixing.
- Stir in shredded coconut, lime zest, and lime juice until evenly distributed throughout the batter. Pour this into the prepared tray and smooth the surface.
- Bake for 30 to 35 minutes, or until a toothpick inserted in the center comes out clean. Allow to cool in the tray before slicing into squares. Serve slightly warm or at room temperature.
16. Red Velvet Sheet Cake
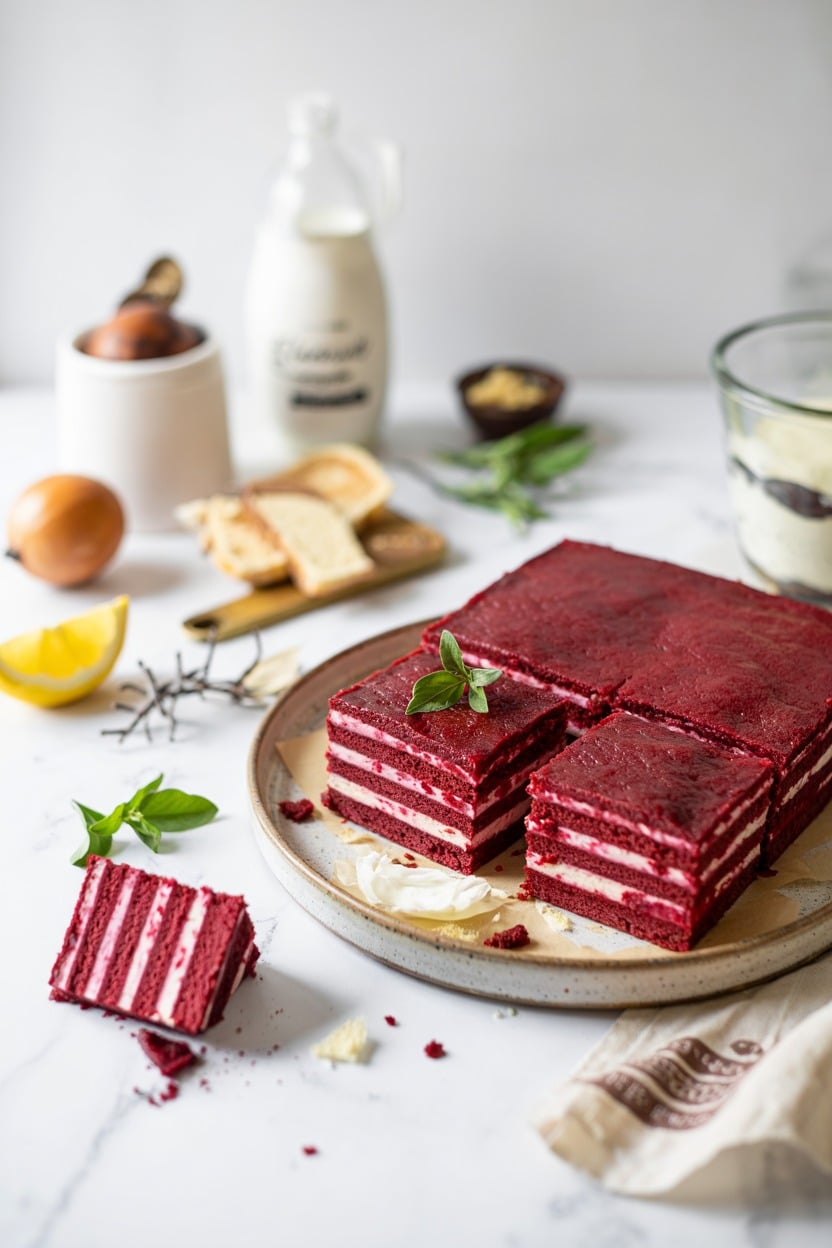
This Red Velvet Sheet Cake offers a rich and velvety texture that melts in your mouth with every bite. Its subtle cocoa flavor combines beautifully with a smooth, tangy cream cheese frosting, making it a classic dessert choice for various occasions.
The sheet cake format makes it easy to share with family and friends, and its simple preparation fits well into a busy schedule.
The bright red color paired with the creamy frosting creates a visually appealing treat that's sure to catch the eye. Baking this recipe results in a tender crumb and a moist cake that stays fresh for days.
Why This Recipe Works
This recipe brings together texture and flavor with straightforward steps that anyone can follow. It delivers a tasty dessert that looks impressive without complicated techniques.- Convenience - Made in a sheet pan, it's quick to bake and easy to slice into portions.
- Flavor balance - The mild cocoa taste and tangy cream cheese frosting complement each other nicely.
- Texture - The cake stays moist and tender, perfect for any season or gathering.
- Appeal - Bright red color and classic frosting make it suitable for celebrations or everyday treats.
Ingredient Swap Ideas
Adapting this recipe for different diets or preferences can make it accessible for everyone at your table. Swapping a few ingredients can still give you the same satisfying Red Velvet experience.- Dairy-free option - Replace buttermilk with almond milk mixed with lemon juice, and swap cream cheese with a dairy-free alternative for the frosting.
- Gluten-free version - Use a gluten-free all-purpose baking flour instead of regular flour.
- Sugar substitute - Swap granulated sugar with coconut sugar or a natural sweetener for a slightly different flavor.
- Oil alternative - Substitute vegetable oil with melted coconut oil for a subtle, nutty flavor.
Ingredients
- 2 ½ cups all-purpose flour - For the cake base, sifted to avoid lumps.
- 1 ½ cups granulated sugar - Provides the sweetness for the cake.
- 1 teaspoon baking soda - Helps the cake rise evenly.
- 1 teaspoon fine salt - Balances sweetness and enhances flavor.
- 1 tablespoon unsweetened cocoa powder - Gives classic red velvet its signature taste.
- 1 ½ cups vegetable oil - Keeps the cake moist and tender.
- 1 cup buttermilk - Adds acidity for tender texture.
- 2 large eggs - Bind ingredients together and add richness.
- 2 tablespoons red food coloring - Creates the vibrant red color the cake is known for.
- 1 teaspoon vanilla extract - Enhances overall flavor.
- 1 teaspoon white vinegar - Reacts with baking soda to help leaven the cake.
- 8 ounces cream cheese, softened - Key to the smooth, tangy frosting.
- ½ cup unsalted butter, softened - Adds richness and helps achieve a creamy texture.
- 4 cups powdered sugar, sifted - Sweetens and thickens the frosting.
- 1 teaspoon vanilla extract - Rounds out the frosting flavor.
Instructions
- Preheat your oven to 350°F (175°C). Grease and flour a 9x13-inch baking pan or line it with parchment paper for easy removal.
- In a large mixing bowl, whisk together the flour, sugar, baking soda, salt, and cocoa powder until fully combined.
- In a separate bowl, whisk the oil, buttermilk, eggs, red food coloring, vanilla extract, and white vinegar until smooth. Gradually add the wet ingredients to the dry one, mixing just until combined without overmixing.
- Pour the batter evenly into the prepared pan and bake for 30 to 35 minutes. Check doneness by inserting a toothpick into the center-it should come out clean or with a few moist crumbs. Let the cake cool completely in the pan on a wire rack.
- To make the frosting, beat the softened cream cheese and butter together until creamy. Gradually add the powdered sugar and vanilla extract, mixing until smooth and spreadable.
- Once the cake has cooled, spread the cream cheese frosting evenly over the top. Slice into squares and serve.
17. Sticky Toffee Pudding Tray Bake
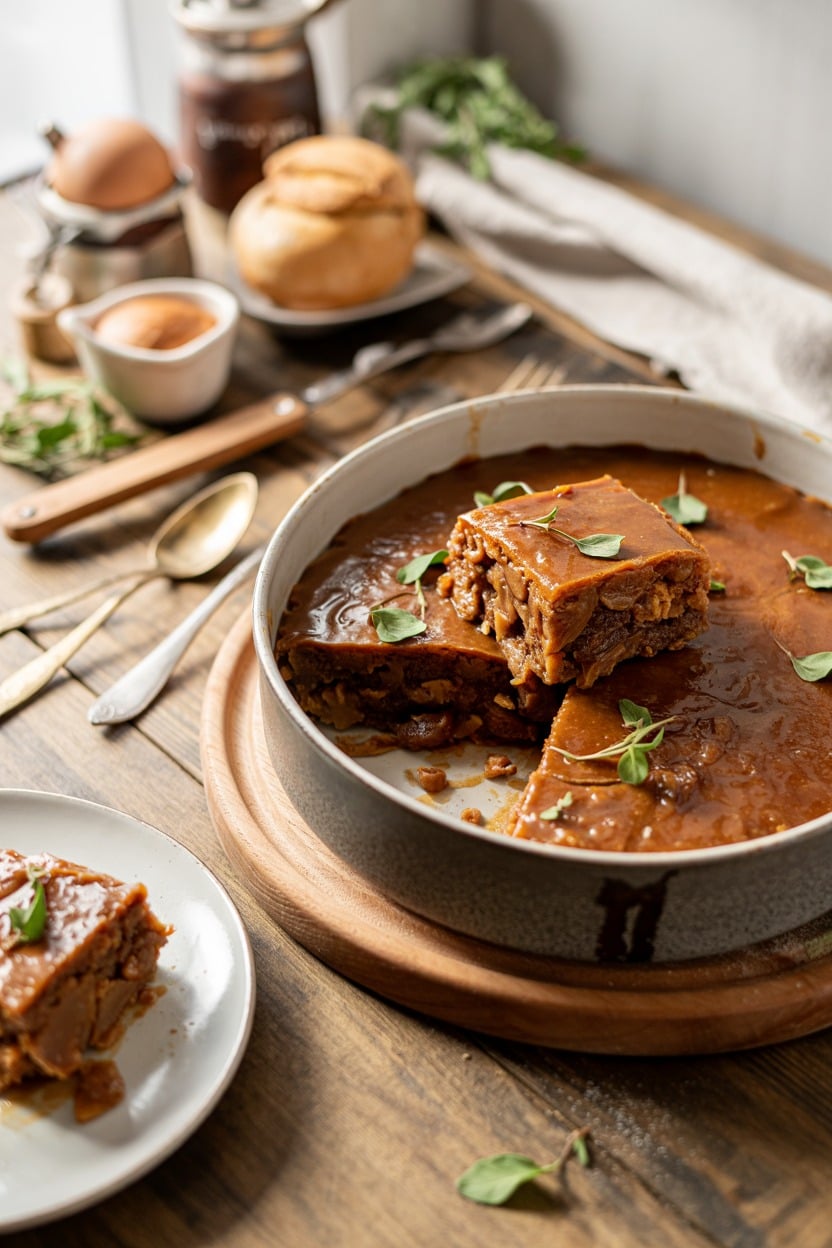
This sticky toffee pudding tray bake brings all the cozy flavors of the traditional dessert into a simpler, more shareable form. With a moist date sponge soaked in rich, warm toffee sauce, it's especially suited to chillier days when you want something comforting and indulgent without too much fuss.
The tray bake format makes it an ideal choice for feeding a group or making ahead for later. This dessert balances deep caramel notes with a soft, tender crumb that's satisfying but not overly sweet.
Why This Recipe Works
This tray bake combines simplicity with rich flavor and a texture that keeps everyone coming back for more. It’s designed to be easy, hearty, and accessible for everyday baking.- Convenience - Prepared in one pan with straightforward steps and minimal mess.
- Flavor balance - Combines the sweetness of dates with a warm, buttery toffee sauce.
- Texture - Soft, cakey sponge with a sticky, syrupy topping.
- Appeal - A crowd-pleasing dessert that works well for family dinners or gatherings.
Ingredient Swap Ideas
Adapting this recipe helps fit different dietary choices or what you happen to have on hand, without losing its essence.- Dates - Use dried figs or prunes for a similar sticky, fruity effect.
- Butter - Swap with dairy-free margarine or coconut oil for a vegan version.
- Brown sugar - Use coconut sugar or maple syrup to change the flavor profile.
- Flour - Substitute with gluten-free flour blends if needed for gluten sensitivity.
Ingredients
- 250 grams pitted dates - chopped into small pieces to blend into the sponge.
- 300 ml boiling water - poured over dates to soften and intensify flavor.
- 1 teaspoon baking soda - added to the date mix for lightness.
- 100 grams unsalted butter - softened for the sponge and sauce.
- 175 grams light brown sugar - provides caramel depth in both cake and sauce.
- 2 large eggs - beaten, binding the sponge.
- 200 grams self-raising flour - forms the base of the sponge texture.
- 1 teaspoon vanilla extract - enhances sweet notes.
- 125 grams unsalted butter - melted to create a glossy sauce.
- 200 grams light brown sugar - for richness in the sauce.
- 250 ml double cream - adds creaminess and moisture to the sauce.
Instructions
- Preheat the oven to 180°C (160°C fan) and grease a 20 x 30 cm (8 x 12 inch) baking tray. Line it with parchment paper.
- Place chopped dates in a heatproof bowl and pour over the boiling water. Stir in the baking soda and set aside to cool and soften while preparing the batter.
- Cream the butter and brown sugar together in a large bowl until light and fluffy. Beat in the eggs one at a time, followed by the vanilla extract.
- Fold the self-raising flour gently into the wet ingredients. Add the soaked date mixture (including the water) and stir until combined. Pour the batter into the prepared tray and smooth the surface.
- Bake for 30-35 minutes until the sponge is firm and a skewer comes out with just a few moist crumbs.
- While the cake bakes, prepare the toffee sauce by melting the butter, sugar, and cream together in a saucepan over medium heat. Stir constantly until thickened and glossy, then remove from heat.
- As soon as the tray bake comes out of the oven, prick the surface with a fork and pour the warm toffee sauce evenly over it. Allow it to soak in for at least 10 minutes before slicing.
18. Blueberry Crumb Bars
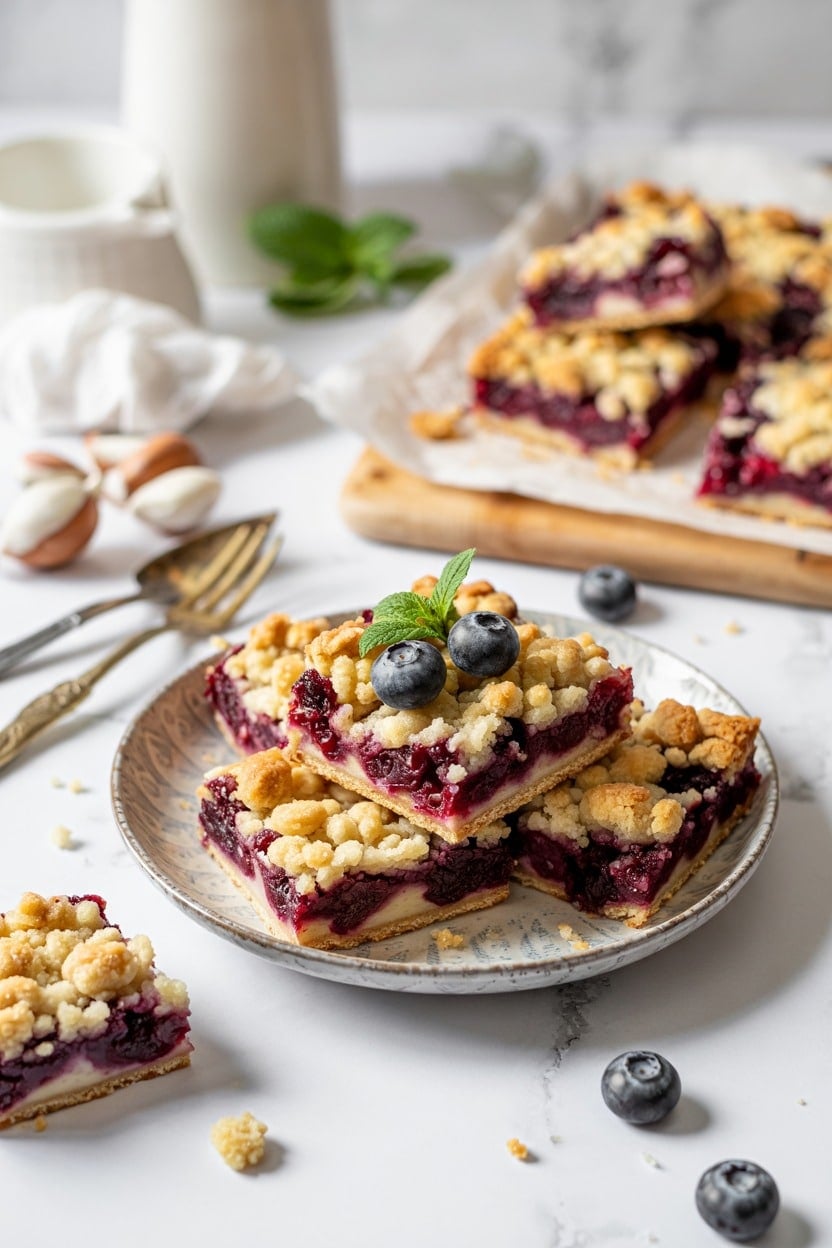
Blueberry crumb bars bring together juicy, fresh blueberries and a buttery crumb topping to create a sweet treat that's both satisfying and straightforward to make. The classic mix of tender fruit filling and a crisp, crumbly crust gives you a wonderful contrast in every bite.
This recipe fits well for busy days because it doesn't require complicated techniques or fancy equipment. You'll enjoy warm, fruity bars that work great as a snack, dessert, or even a breakfast pastry.
Why This Recipe Works
This recipe perfectly balances juicy fruit and a tender crumb topping, offering a homey and satisfying dessert that’s simple to prepare.- Convenience - Simple steps with easy-to-find ingredients make it ideal for quick baking sessions.
- Flavor balance - Sweet, tart blueberries paired with buttery, spiced crumb topping deliver bright and rich notes.
- Texture - The crisp, crumbly surface contrasts beautifully with the soft, juicy filling beneath.
- Appeal - These bars are great for sharing with family or bringing to gatherings, pleasing a wide range of tastes.
Ingredient Swap Ideas
Adjusting a few ingredients can help tailor the bars to fit different dietary preferences or ingredient availability without changing their overall character.- Blueberries - Swap fresh or frozen blueberries with raspberries or blackberries for a similar texture and tartness.
- Butter - Use coconut oil or a dairy-free margarine alternative to make the crumb topping vegan.
- Flour - Substitute all-purpose flour with a gluten-free flour blend for a gluten-free version.
- Sugar - Try coconut sugar or maple syrup in place of white sugar to add a deeper, natural sweetness.
Ingredients
- 1 cup fresh or frozen blueberries - Rinsed and drained if fresh, frozen works well without thawing.
- 1 cup granulated sugar - Divided, to sweeten the filling and crumb topping.
- 2 cups all-purpose flour - Provides the base for the crumbly crust and topping.
- ½ teaspoon baking powder - Helps create a light texture in the crumb.
- ¼ teaspoon salt - Balances the sweetness.
- 1 cup unsalted butter - Cold and cut into small cubes for the crumb topping and crust.
- 1 tablespoon lemon juice - Adds brightness to the blueberry filling.
- 1 teaspoon vanilla extract - Enhances the flavor depth.
- 1 tablespoon cornstarch - Thickens the blueberry filling to keep it from becoming too runny.
Instructions
- Preheat your oven to 350°F (175°C). Lightly grease or line a 9x9-inch baking pan with parchment paper, leaving some overhang to lift the bars easily after baking.
- In a medium bowl, combine 1 ½ cups flour, baking powder, salt, and ¾ cup sugar. Add cold butter cubes, then use a pastry cutter or your fingers to mix until the mixture resembles coarse crumbs.
- Press about two-thirds of the crumb mixture evenly into the bottom of the prepared pan to form the crust. Bake for 15 minutes until lightly golden.
- Meanwhile, mix blueberries with remaining ¼ cup sugar, cornstarch, lemon juice, and vanilla extract in a bowl. Stir gently to combine without crushing the berries.
- Once the crust is partially baked, spread the blueberry mixture evenly over it. Sprinkle the remaining crumb topping over the blueberries. Return the pan to the oven and bake for another 30-35 minutes until the topping is golden and the blueberry filling is bubbly. Let cool completely before slicing into bars.
19. Chocolate Hazelnut Torte Tray Bake
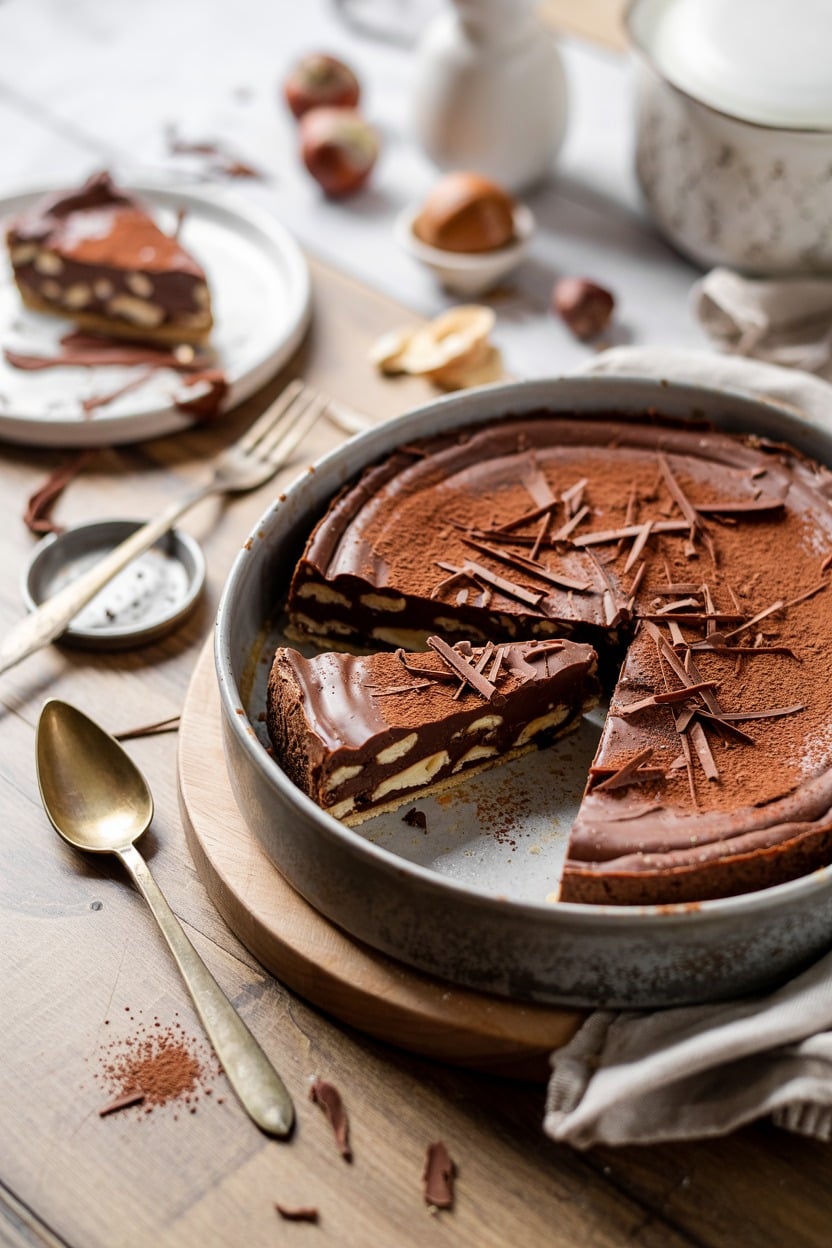
This Chocolate Hazelnut Torte Tray Bake is a rich and decadent dessert that combines the deep flavor of chocolate with the nutty crunch of hazelnuts. It's a great option for gatherings or when you want to treat yourself to a slice of something indulgent without a lot of complicated steps.
The layers create a beautiful texture contrast, with a moist chocolate base and a smooth hazelnut cream topping. Once baked, it holds well and can be sliced into neat, shareable portions, making it a convenient choice for dessert tables or coffee breaks.
Why This Recipe Works
This recipe delivers a crowd-pleasing dessert with straightforward preparation and a wonderful blend of flavors and textures.- Convenience - Easy to prepare in one tray with simple steps and ingredients.
- Flavor balance - Combines rich chocolate with the sweet nuttiness of hazelnuts.
- Texture - Features a moist cake base topped with a creamy and slightly crunchy hazelnut layer.
- Appeal - Elegant enough for special occasions yet simple for everyday treats.
Ingredient Swap Ideas
Swapping ingredients helps tailor this torte to your taste or dietary requirements while keeping the main flavor profile intact.- Hazelnuts - Substitute with toasted almonds or walnuts for a different nutty flavor.
- Dark chocolate - Use semi-sweet or milk chocolate if you prefer a sweeter torte.
- Butter - Replace with dairy-free margarine or coconut oil for a dairy-free option.
- Heavy cream - Use whipped coconut cream as a non-dairy alternative to the hazelnut topping.
Ingredients
- 200 grams dark chocolate - Chopped or in chips, for the cake base and topping.
- 150 grams unsalted butter - Softened, to add richness and moisture.
- 150 grams caster sugar - Provides sweetness without graininess.
- 4 large eggs - At room temperature, to bind the cake and add structure.
- 120 grams ground hazelnuts - Adds natural texture and flavor to the batter.
- 100 grams plain flour - For the cake structure, sifted.
- 1 teaspoon baking powder - Helps the cake rise evenly.
- 120 ml heavy cream - For preparing the hazelnut cream topping.
- 100 grams hazelnut spread (such as Nutella) - Mixed into the cream topping for hazelnut flavor and creaminess.
- 50 grams whole hazelnuts - Toasted and roughly chopped, for garnish and added crunch.
Instructions
- Preheat your oven to 180°C (350°F). Line a 9x13 inch (23x33 cm) baking tray with parchment paper, allowing some overhang for easy removal.
- Melt the dark chocolate and butter together gently, either over a double boiler or in short bursts in the microwave, stirring until smooth. Set aside to cool slightly.
- In a large bowl, whisk the eggs and caster sugar until pale and fluffy, about 3-4 minutes. Gently fold in the melted chocolate mixture.
- Combine the ground hazelnuts, flour, and baking powder in a separate bowl. Gradually fold this dry mix into the wet ingredients, being careful not to knock out too much air. Pour the batter into the prepared tray and level the surface with a spatula.
- Bake for 20-25 minutes or until the edges are set but the center is still slightly soft. Remove from the oven and allow to cool completely in the tray.
- For the topping, whip the heavy cream until it forms soft peaks. Gently fold in the hazelnut spread until smooth and combined. Spread this cream evenly over the cooled cake.
- Scatter the toasted chopped hazelnuts on top to finish. Chill the torte in the fridge for at least 1 hour to set before slicing and serving.
20. Carrot Cake Sheet Tray Bake
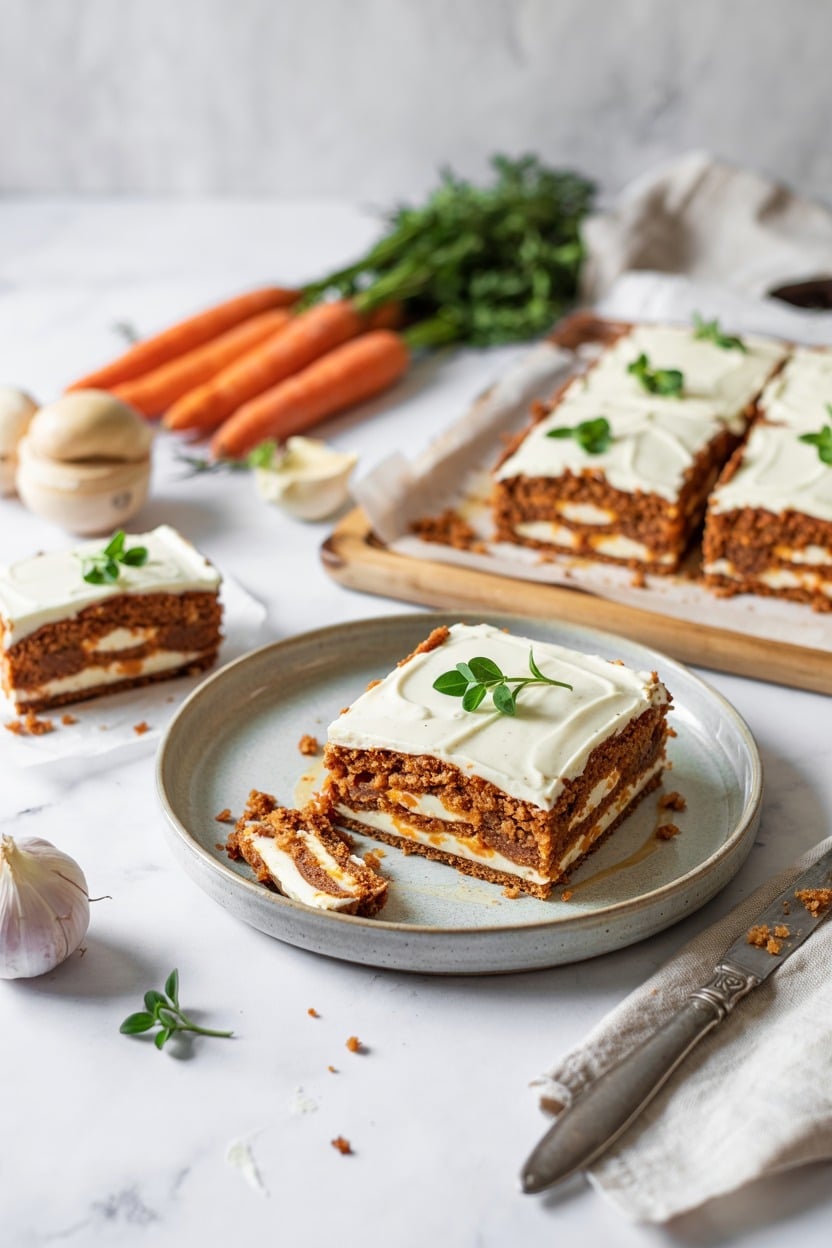
This carrot cake sheet tray bake is a great option when you want a crowd-pleasing dessert that's easy to prepare. It combines warm spices with the natural sweetness of grated carrots and pineapple, adding a moist texture and depth of flavor.
The cake is topped with a smooth cream cheese icing that balances the spices with a bit of tang. Baking it in a sheet tray makes serving straightforward, whether for casual family gatherings or special occasions.
Why This Recipe Works
This tray bake offers a straightforward way to enjoy a classic carrot cake with well-rounded flavors and textures.- Convenience - Baking in a sheet tray means simpler preparation and easy slicing for sharing.
- Flavor balance - The combination of warm spices, juicy pineapple, and creamy icing creates a harmonious blend.
- Texture - Moist cake with crunchy nuts adds a pleasing contrast in every bite.
- Appeal - It's a family-friendly choice that works well for both celebrations and everyday treats.
Ingredient Swap Ideas
Swapping some ingredients can help adapt this recipe based on dietary requirements or preferences without losing what makes it special.- Nuts - Use walnuts, pecans, or even almonds depending on what you have or prefer.
- Pineapple - Replace canned pineapple with crushed applesauce for a milder fruitiness.
- Sweetener - Substitute white sugar with coconut sugar or brown sugar for a richer flavor.
- Dairy - Use vegan cream cheese and plant-based butter alternatives to make the icing dairy-free.
Ingredients
- 2 cups grated carrots - Use fresh carrots, finely grated for moisture and sweetness.
- 1 cup crushed pineapple - Well-drained to avoid excess liquid.
- 1 ½ cups all-purpose flour - Provides structure for the cake.
- 1 teaspoon baking powder - Helps the cake rise.
- 1 teaspoon baking soda - Adds lightness.
- 1 ½ teaspoons ground cinnamon - Adds warm spice.
- ½ teaspoon ground nutmeg - Compliments the cinnamon with depth.
- ½ teaspoon salt - Enhances all flavors.
- 3 large eggs - Binds the ingredients together.
- 1 cup granulated sugar - Sweetens the batter.
- ½ cup brown sugar - Adds moisture and caramel notes.
- ¾ cup vegetable oil - Keeps the cake tender.
- 1 teaspoon vanilla extract - Adds fragrant sweetness.
- 1 cup chopped walnuts - Adds crunch and nuttiness.
- 8 ounces cream cheese, softened - Creates a creamy, tangy topping.
- ½ cup unsalted butter, softened - Adds richness.
- 3 cups powdered sugar - Sweetens and thickens the icing.
- 1 teaspoon vanilla extract - Enhances flavor.
Instructions
- Preheat your oven to 350°F (175°C). Line a 9x13-inch sheet tray with parchment paper or lightly grease it.
- In a large bowl, whisk together the flour, baking powder, baking soda, cinnamon, nutmeg, and salt until combined.
- In another bowl, beat the eggs with granulated sugar and brown sugar until smooth. Add the oil and vanilla extract, mixing well.
- Stir the dry ingredients into the wet mixture gradually. Fold in the grated carrots, crushed pineapple, and chopped walnuts until evenly distributed.
- Pour the batter into the prepared sheet tray and smooth the surface with a spatula. Bake for 35 to 40 minutes, or until a toothpick inserted in the center comes out clean. Let it cool completely before icing.
- Beat the cream cheese and butter until smooth and creamy. Gradually add powdered sugar and vanilla extract, mixing well to achieve a spreadable consistency. Spread over the cooled cake evenly.
For chilled, fuss-free dessert options consider the collection of no-bake bar recipes for quick snacks. If you want more single-pan ideas for gatherings, see the selection of sheet pan dessert ideas for easy sharing.

Andrew Gray is a seasoned food writer and blogger with a wealth of experience in the restaurant and catering industries. With a passion for all things delicious, Andrew has honed his culinary expertise through his work as a personal chef and caterer.
His love for food led him to venture into food writing, where he has contributed to various online publications, sharing his knowledge and insights on the culinary world. As the proud owner of CooksCrafter.com, Andrew covers a wide range of topics, including recipes, restaurant reviews, product recommendations, and culinary tips.
Through his website, he aims to inspire and educate fellow food enthusiasts, offering a comprehensive resource for all things food-related.