Short Answer
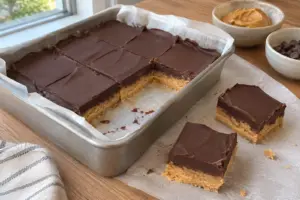
These 14 easy no-bake chocolate desserts set in the fridge or the freezer with no oven, and six of them are ready after 1 hour of chilling or less.
- Make the chocolate coconut energy bites or the avocado mousse when you want chocolate in 30 minutes.
- Make the Oreo cheesecake when you can start 4 hours ahead.
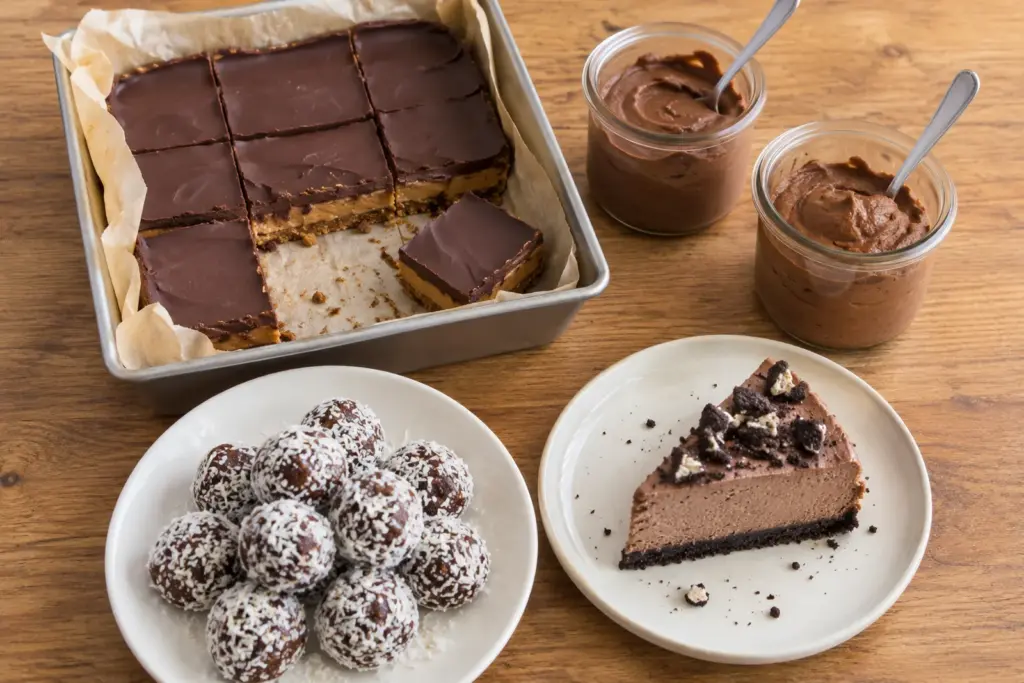
A no-bake dessert has no oven to hide mistakes, so you have to melt, mix and chill the chocolate correctly. These dessert recipes run from a 1-minute stovetop boil to a freezer pie that needs 4 hours, and the same few chocolate rules apply to all of them.
1 What Makes a Dessert No-Bake?
A no-bake chocolate dessert sets by chilling, freezing or a short boil on the stovetop, and none of these 14 goes in an oven. Only two recipes use the stove: the peanut butter cookies boil for 1 minute, and the walnut fudge simmers for 2 minutes. When chocolate feels too heavy for a hot day, fruit-based summer desserts need no stove either.
None of these desserts uses raw eggs or raw flour.
Warning
The FDA says that processing raw grains into flour does not kill harmful bacteria and that cooking is the only way to be sure foods made with flour and raw eggs are safe, so you should never taste a no-bake mixture that contains either one raw.
Structure here comes from cream cheese, whipped cream, melted chocolate, nut butter, dates and chia seeds.
2 How Do You Melt and Mix Chocolate for No-Bake Desserts?
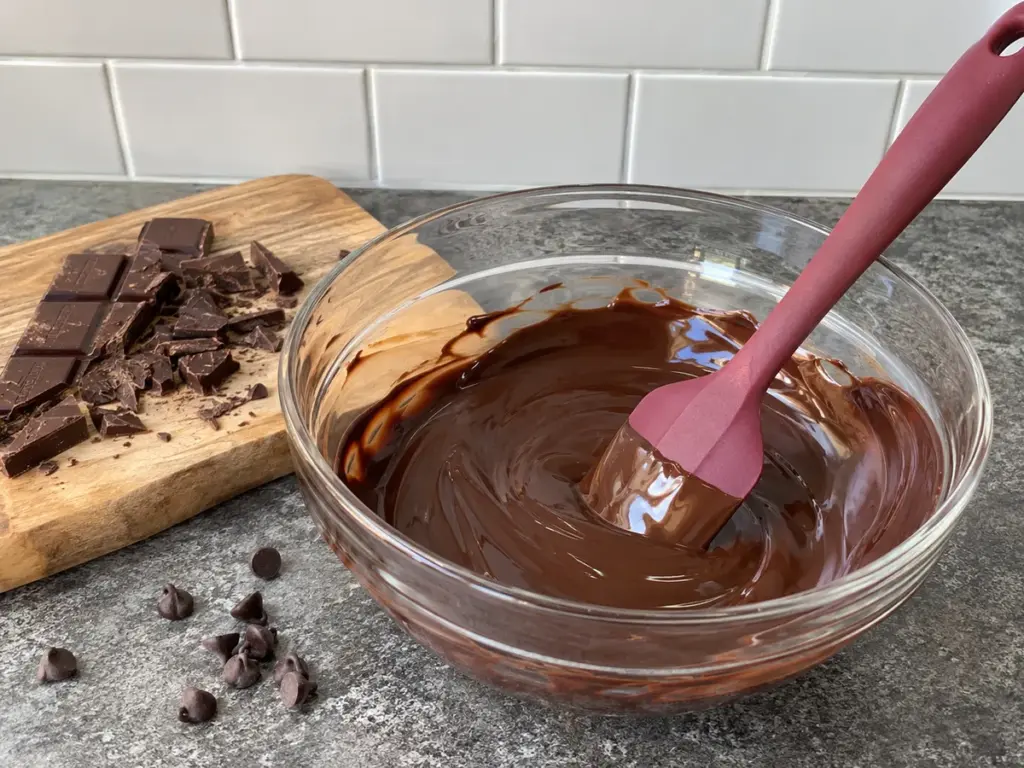
Melted chocolate cannot take a little water, and a few drops of water ruin it while a cup of liquid does not. In a King Arthur Baking experiment, as little as ½ teaspoon of water turned 2 ounces of 62% chocolate into a thick, grainy mass.
A splash from a wet spatula or steam from a double boiler does the same job, so melt your chocolate in a dry bowl in the microwave, in short bursts, and stir between each one.
3 Why Does Chocolate Seize, and How Do You Fix It?
Water pulls the sugar and cocoa particles together into a paste. King Arthur lists the smallest amount of liquid that keeps melted chocolate smooth: 1 tablespoon per 2 ounces of semisweet, 1 ½ tablespoons for 60 to 70% chocolate and 2 tablespoons for unsweetened. When you melt 6 ounces of semisweet in 1 cup of hot coffee, as the mocha pie below does, you are far above that line, so it stays smooth.
Warning
If your melted chocolate turns thick and grainy, whisk in cool water a little at a time until it loosens. King Arthur says rescued chocolate still works for fillings and icings but cannot be tempered, so use it in the mocha pie and melt a fresh batch for the mint bites.
4 Do You Need to Temper Chocolate?
You do not need tempered chocolate for any of these desserts. Tempered chocolate is heated and cooled in steps so it sets with a snappy, shiny shell, and King Arthur ties the step to coating truffles and shortbread. In a fudge, a filling or a cream cheese mixture, the chocolate is blended with butter, cream or cream cheese, so snap and shine do not matter.
The mint bites are the one dessert here with a plain chocolate shell, which sets softer and duller than a tempered one, so keep them in the fridge.
5 Which Chocolate and Cocoa Should You Buy?
- Chocolate chips contain stabilizers that help them keep their shape, and King Arthur notes that solid chocolate usually lacks them. Chips work in every recipe here, but a chopped bar usually has no stabilizers, which suits the fudge and the vegan tart. A chopped bar is also one of the swaps for chocolate chips.
- The unsweetened cocoa in the mousse, bites, brownies, cookies, chia pudding and icebox cake can be natural or Dutch-process. King Arthur says the two differ in acidity, which matters when a recipe also uses baking soda or baking powder, and none of these does. Dutch-process cocoa looks darker and natural cocoa tastes a little more acidic, so use the tin you own.
- For whipped cream desserts, you want cartons labeled heavy cream or heavy whipping cream. The FDA sets 36% milkfat as the minimum for heavy cream, while light whipping cream runs from 30% to under 36%. Whip the cream cold in a cold bowl, and stop at stiff peaks for a cheesecake or at soft peaks when the cream has to spread over cookies.
6 Which No-Bake Chocolate Dessert Should You Make?
A dessert that needs 4 hours cannot be ready for tonight, so plan around the clock before the flavor. Start with the time you have: six are ready within an hour, three need about 2 hours and five need 4 hours or a night.
| Shortest chill | Desserts | How they set | Equipment beyond a bowl |
|---|---|---|---|
| 30 minutes | Energy bites, avocado mousse, peanut butter cookies | Fridge | Blender or food processor for the mousse, saucepan for the cookies |
| 45 minutes | Mint chocolate bites | 15 minutes in the freezer, then 30 in the fridge | Mixer, microwave |
| 1 hour | Date and walnut brownies, pudding parfaits | Fridge | Food processor for the brownies, serving cups for the parfaits |
| 2 hours | Peanut butter bars, walnut fudge, chia pudding | Fridge | 8-inch square pan for the bars and fudge; microwave, saucepan, jar or bowl |
| 4 hours | Oreo cheesecake, Nutella tart, vegan tart, mocha pie | Fridge, except the mocha pie, which freezes | Mixer for all four; food processor for the vegan tart crust; 9-inch springform, tart or pie pan |
| Overnight | Chocolate banana icebox cake | Fridge | Mixer, loaf pan or dish |
The energy bites and the chia pudding need neither a mixer nor a stove, so you can start them on a whim. The cheesecake, the Nutella tart, the vegan tart, the mocha pie and the icebox cake all want a mixer and a long chill, which makes them the desserts to make the day before a dinner party.
7 Which Chocolate Desserts Are Ready Within the Hour?
The energy bites, mousse, cookies, mint bites, date brownies and parfaits need at most an hour in the fridge, and you use the stove only for the cookies.
1. Chocolate Coconut Energy Bites
Everything goes in one bowl with no mixer, and honey is the only binder the shredded coconut and rolled oats need. A 1-inch ball is firm after 30 minutes in the fridge, the shortest chill on the page, shared with the mousse and the cookies.
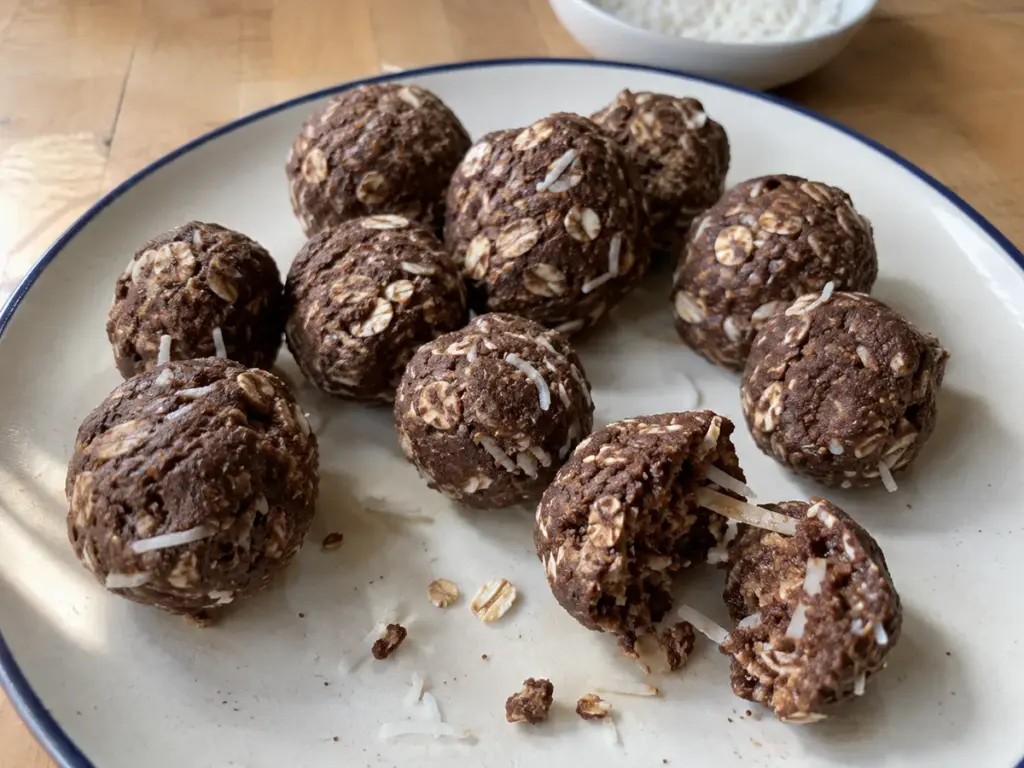
Roll every ball to the same 1-inch size so the bites firm at the same rate, and put parchment between layers in the container so they do not stick.
Honey only just coats 1 ¾ cups of dry ingredients, so if the mixture crumbles when you squeeze it, stir in water a teaspoon at a time until it holds. Honey carries one safety rule: the CDC says children younger than 12 months should not eat it because it can cause botulism.
Ingredients
- 1 cup unsweetened shredded coconut
- ½ cup rolled oats
- ¼ cup unsweetened cocoa powder
- ¼ cup honey
- 1 teaspoon vanilla extract
- Pinch of salt
Instructions
- Mix the dry ingredients. Combine the coconut, oats, cocoa and salt in a medium bowl.
- Add the honey. Stir in the honey and vanilla until the mixture is sticky and holds together when squeezed.
- Roll. Shape 1-inch balls and set them on a parchment-lined tray.
- Chill. Refrigerate at least 30 minutes until firm, then keep them covered in the fridge for 3 to 4 days.
Swaps
- Maple syrup replaces the honey in the same ¼ cup for a vegan bite or when a baby will be at the table. It is thinner than honey and binds less, so the balls come out softer, and a spoonful of the nut or seed butter below helps them hold.
- Carob powder takes the cocoa's place for a caffeine-free bite, starting with the same ¼ cup. It tastes milder than cocoa, so taste the mix before you roll, and use the same swap in the avocado mousse.
- Toast the coconut in a dry skillet for a deeper, nuttier flavor, and cool it completely first, because warm coconut softens the honey.
- When honey alone leaves the mix crumbly, a spoonful of peanut or almond butter binds it and adds richness. Use sunflower seed butter instead on a nut-free table.
2. Chocolate Avocado Mousse
Choose avocados that give under gentle thumb pressure, because a hard one leaves flecks in the blender no matter how long you run it. A ripe avocado supplies the fat that cream and egg yolks give a classic mousse, so this one is dairy-free and egg-free, and the cocoa covers the avocado flavor.
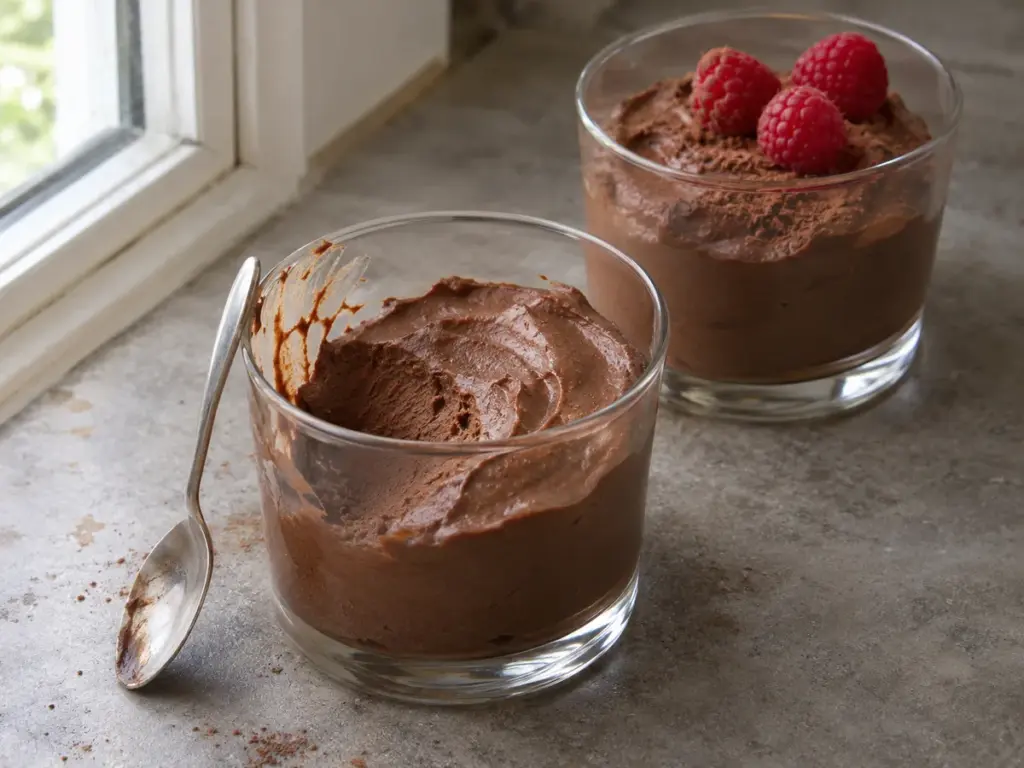
Scrape down the sides halfway through blending, and press plastic wrap onto the surface before you chill it so the top does not brown. Chocolate-dipped strawberries or vanilla shortbread give a bowl of avocado mousse something crisp, and the sides that go with chocolate mousse include more of them.
Ripe avocados keep 3 to 4 days in the refrigerator, according to USDA FoodKeeper, so this is the dessert to make when your ripe ones are about to turn.
Ingredients
- 2 ripe avocados, peeled and pitted
- ¼ cup unsweetened cocoa powder
- ¼ cup maple syrup
- 1 teaspoon vanilla extract
- Pinch of salt
Instructions
- Blend. Put the avocados, cocoa, maple syrup, vanilla and salt in a food processor or blender and run it until completely smooth.
- Scrape. Stop once or twice to scrape down the sides so no green streaks remain.
- Portion. Spoon the mousse into individual dishes or one large bowl.
- Chill. Refrigerate at least 30 minutes, then top with berries, chopped nuts or a dusting of cocoa.
Swaps
- Silken tofu replaces the avocado when the green tint or the flavor bothers you, and it gives a lighter, milder mousse. Start with the same weight as the avocados, then taste before you chill, and add maple syrup a spoonful at a time, because cocoa tastes bitter until the sweetness catches up.
- Ripe bananas blend into a lighter, fruitier mousse than avocado, because they hold far less fat. Start with the same weight as the avocados, then taste, and cut back the maple syrup if the mousse is already sweet.
- Agave nectar can stand in for the maple syrup, added a spoonful at a time while you taste.
3. Chocolate Peanut Butter No-Bake Cookies
These are the only cookies on the page that start on the stove. Butter, sugar, milk and cocoa come to a boil, and the boil cooks the sugar syrup far enough that it firms up as it cools, which is why the cookies set without an oven.
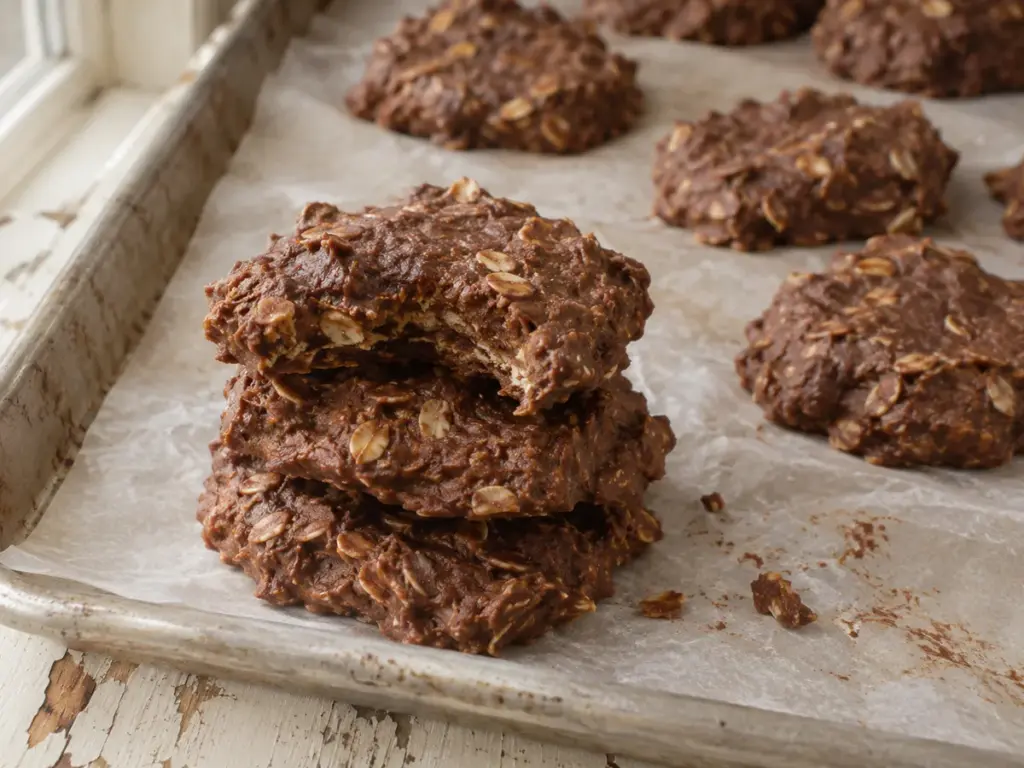
Count the 1 minute from the moment bubbles cover the surface. A shorter boil leaves cookies soft and sticky, and a much longer one makes them dry and crumbly. Stir in the peanut butter and vanilla off the heat, then add the oats at once, because the mixture stiffens as it cools. If you want a mocha batch, it follows the same 1-minute boil with espresso powder, as in the mocha espresso oatmeal cookies.
Drop equal spoonfuls onto a tray that fits in your fridge, so the whole batch goes in without moving each cookie.
Once firm, stack the cookies with paper between layers so they do not stick together in the container.
Ingredients
- ½ cup unsalted butter
- 2 cups granulated sugar
- ½ cup milk
- ¼ cup unsweetened cocoa powder
- ½ cup peanut butter
- 3 cups rolled oats
- 2 teaspoons vanilla extract
Instructions
- Melt and mix. Melt the butter in a medium saucepan over medium heat, then stir in the sugar, milk and cocoa.
- Boil. Bring it to a boil, stirring constantly, and boil for exactly 1 minute.
- Add the flavor. Take the pan off the heat and stir in the peanut butter and vanilla until smooth.
- Add the oats. Stir in the oats until every flake is coated.
- Drop. Scoop spoonfuls onto wax paper or parchment and flatten them slightly.
- Chill. Refrigerate at least 30 minutes, until the cookies are firm to the touch.
Swaps
- Almond butter replaces the peanut butter in the same ½ cup and goes in off the heat at the same step, so the method does not change. It is a tree nut, so it does not suit a nut-free table.
- Quick oats in place of rolled oats make a softer, finer cookie.
- Almond or soy milk replaces the ½ cup of milk when that is what you have, but the butter still means the cookies contain dairy.
- Keep the granulated sugar. The 1-minute boil turns it into the syrup that firms the cookies as it cools, and a liquid sweetener such as maple syrup adds moisture instead and tends to leave them soft.
4. No-Bake Mint Chocolate Bites
A cream cheese and powdered sugar center flavored with peppermint is rolled into 1-inch balls and dipped in chocolate, which makes a cool, truffle-style bite with no cooking. Peppermint extract is strong, so measure the ½ teaspoon exactly and taste the filling before you roll.
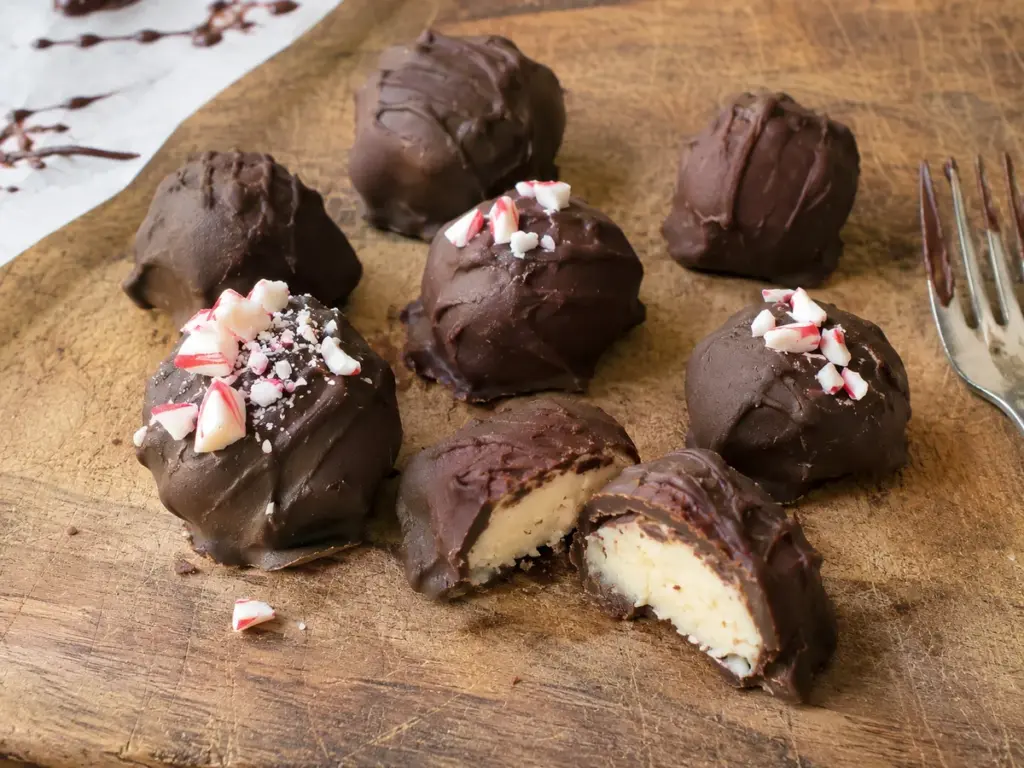
Freeze the rolled centers for 15 minutes before dipping so the cream cheese holds its shape in warm chocolate. Melt the chips in the microwave in short bursts, since steam from a double boiler can seize them, and dry every tool you use first.
If the filling is too soft to roll, chill the bowl for a few minutes before you add more powdered sugar, and stop once it holds a 1-inch ball.
Dip with a fork, tap off the extra chocolate on the side of the bowl, and set each bite back on the lined sheet so the shell sets smooth.
Ingredients
- 1 cup semisweet chocolate chips
- 4 ounces cream cheese, softened
- ½ teaspoon peppermint extract
- 1 cup powdered sugar
- 1 tablespoon unsalted butter, softened
- Optional garnish: crushed peppermint candy or mini chocolate chips
Instructions
- Make the filling. Beat the cream cheese and butter until smooth, then mix in the peppermint extract.
- Thicken it. Blend in the powdered sugar gradually until the filling is thick enough to shape by hand.
- Roll and freeze. Roll 1-inch balls onto a lined baking sheet and freeze them for 15 minutes.
- Melt the chocolate. Heat the chips in the microwave in short bursts, stirring until smooth.
- Dip. Coat each chilled ball in chocolate, return it to the sheet and add the garnish before the shell sets.
- Chill. Refrigerate at least 30 minutes, until the shells are firm.
Swaps
- Spearmint extract gives a milder flavor than peppermint, but it is strong too, so taste the filling before you roll.
- Dark chocolate chips make a less sweet shell around a filling that already holds 1 cup of powdered sugar. Milk chips make it sweeter still, and King Arthur's ganache guide has milk chocolate making a softer ganache because it holds more sugar, so expect a softer shell.
- Crushed peppermint candy or finely chopped nuts pressed on before the shell sets add crunch. Leave the nuts off for a nut-free plate.
5. No-Bake Date and Walnut Chocolate Brownies
Dates sweeten and bind these squares, so no added sugar, flour or egg goes in, and walnuts supply the crumb and the fat. The result is dense and chewy like a fudgy brownie, and you need only a food processor and 1 hour in the fridge.
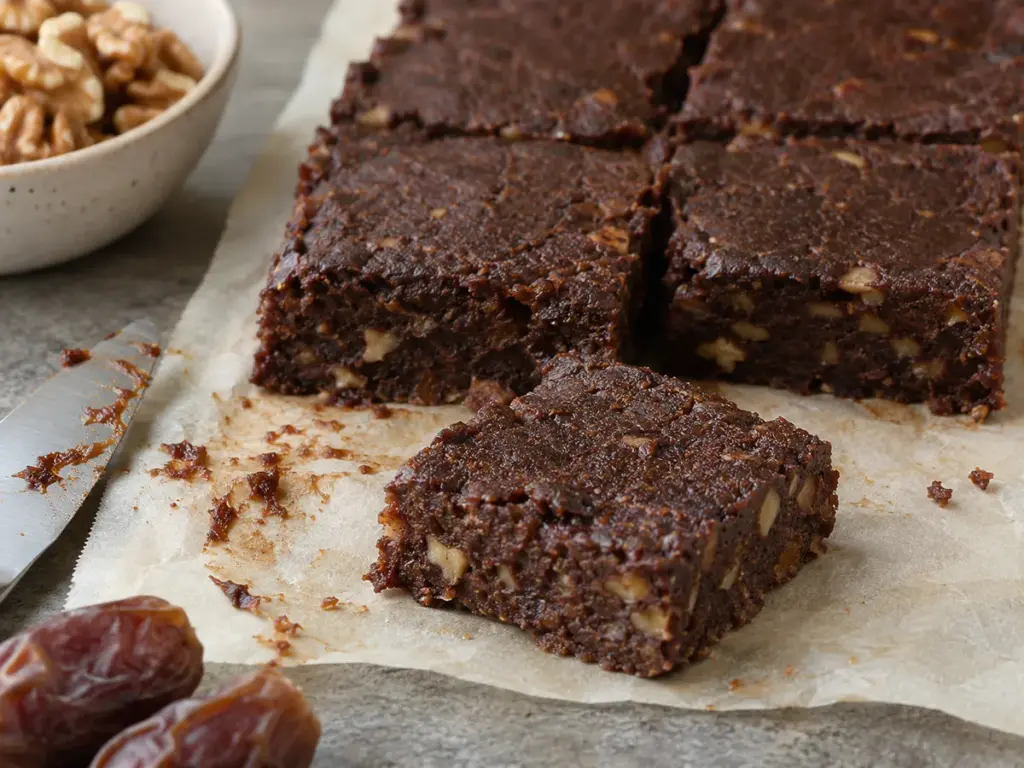
Pulse the walnuts into small crumbs before the dates go in, because a food processor turns nuts into paste quickly. If the dates feel hard, soak them in warm water and drain them first, or the dough will have chewy flecks. The dough should hold together when pinched, and pressing it firmly into a parchment-lined pan keeps the squares from crumbling when you cut them.
Keep walnuts cold. Keep them in the fridge or freezer until you use them: USDA FoodKeeper lists shelled walnuts at 9 to 12 months refrigerated and 24 months frozen. The same goes for the walnut fudge (item 8).
Ingredients (for a small square pan)
- 1 ½ cups pitted dates
- 1 cup raw walnuts
- ⅓ cup unsweetened cocoa powder
- 1 teaspoon vanilla extract
- Pinch of salt
- 2 tablespoons water
Instructions
- Crumb the walnuts. Pulse the walnuts in a food processor until they form small crumbs but not powder.
- Make the dough. Add the dates, cocoa, vanilla, salt and water, and pulse until the mixture sticks together like a sticky dough.
- Press. Line a small square pan with parchment and press the dough in evenly with your hands or the back of a spoon.
- Chill. Refrigerate at least 1 hour, lift the slab out by the parchment and cut it into small squares.
- Store. Keep the squares in an airtight container in the fridge for 3 to 4 days, or freeze them for longer.
Swaps
- Dried figs give a similar natural sweetness and stickiness in place of the dates. Start with the same amount and soak them like hard dates.
- Almonds or pecans replace the walnuts, pulsed to the same small crumbs.
- Raw cacao powder can stand in for the cocoa in the same ⅓ cup, so taste the dough before you press it into the pan.
- Unsweetened shredded coconut or chia seeds mixed in after the dough forms add texture.
6. No-Bake Chocolate Pudding Parfaits
Assemble these when guests are already on the way, because pudding, whipped cream and cookie crumbs are the whole recipe. You can use 2 cups of chilled prepared chocolate pudding, whether it comes from cups or from a mix you made earlier.
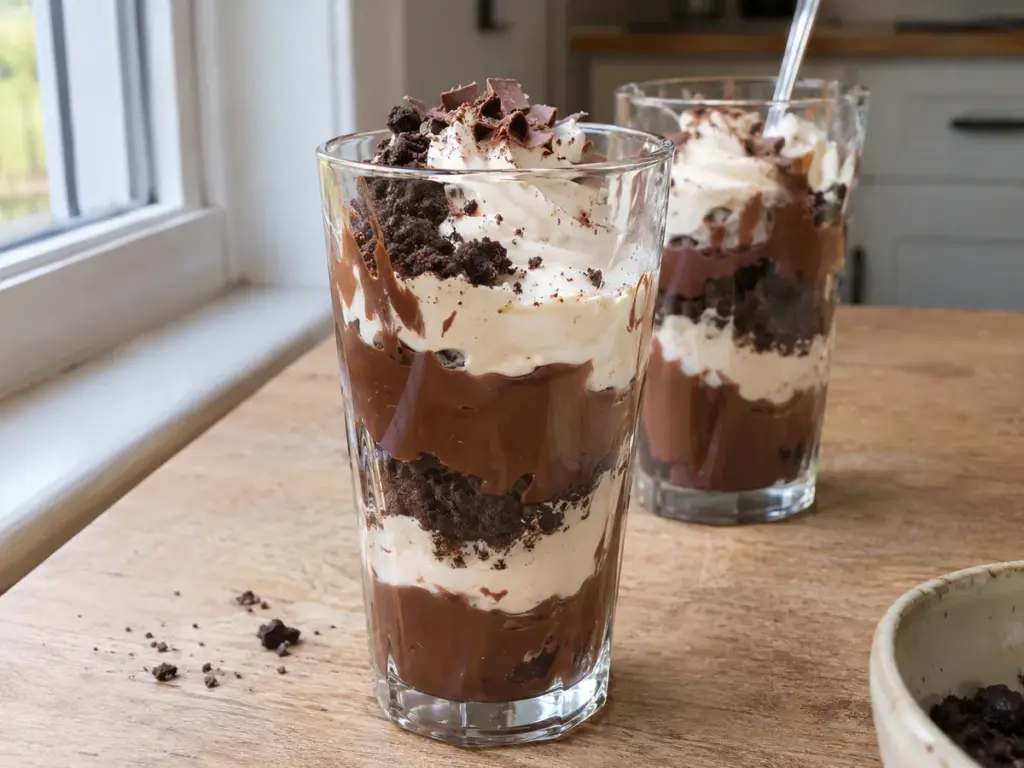
The crumbs soften as they sit against the pudding, so keep a spoonful aside and scatter it on top just before serving if you want crunch. Clear glasses show the stripes, and a parfait built with opened store-bought pudding goes by that pudding's own clock, which USDA FoodKeeper puts at 2 days after opening. A parfait made with pudding from a mix follows the 3 to 4 day leftovers rule in the storage section.
For clean stripes against the glass, pipe the pudding and the cream from a zip-top bag with a corner cut off instead of spooning them in.
Ingredients
- 2 cups prepared chocolate pudding, chilled
- 1 ½ cups whipped cream, freshly whipped or store-bought
- 1 cup chocolate cookie or chocolate sandwich cookie crumbs, finely crushed
- Optional garnish: shaved chocolate, mini chocolate chips or fresh berries
Instructions
- Start with pudding. Spoon pudding into serving cups or glasses until each is about one-third full.
- Add crumbs. Scatter an even layer of cookie crumbs over the pudding.
- Add cream. Top the crumbs with whipped cream and smooth it gently.
- Repeat. Layer pudding, crumbs and cream again until the cups are full, ending with cream.
- Chill. Refrigerate at least 1 hour, then garnish just before serving.
Swaps
- Sliced strawberries or raspberries between the layers cut through the richness.
- Chocolate graham cracker crumbs are less sweet than chocolate sandwich cookie crumbs, which carry a cream filling.
- Crushed almonds or pecans replace the crumbs for crunch without wheat. They are not nut-free.
8 Which Chocolate Desserts Set in a Couple of Hours?
The peanut butter bars, the walnut fudge and the chia pudding are ready after 2 hours in the fridge, and each one cuts or spoons into neat portions.
7. No-Bake Chocolate Peanut Butter Bars
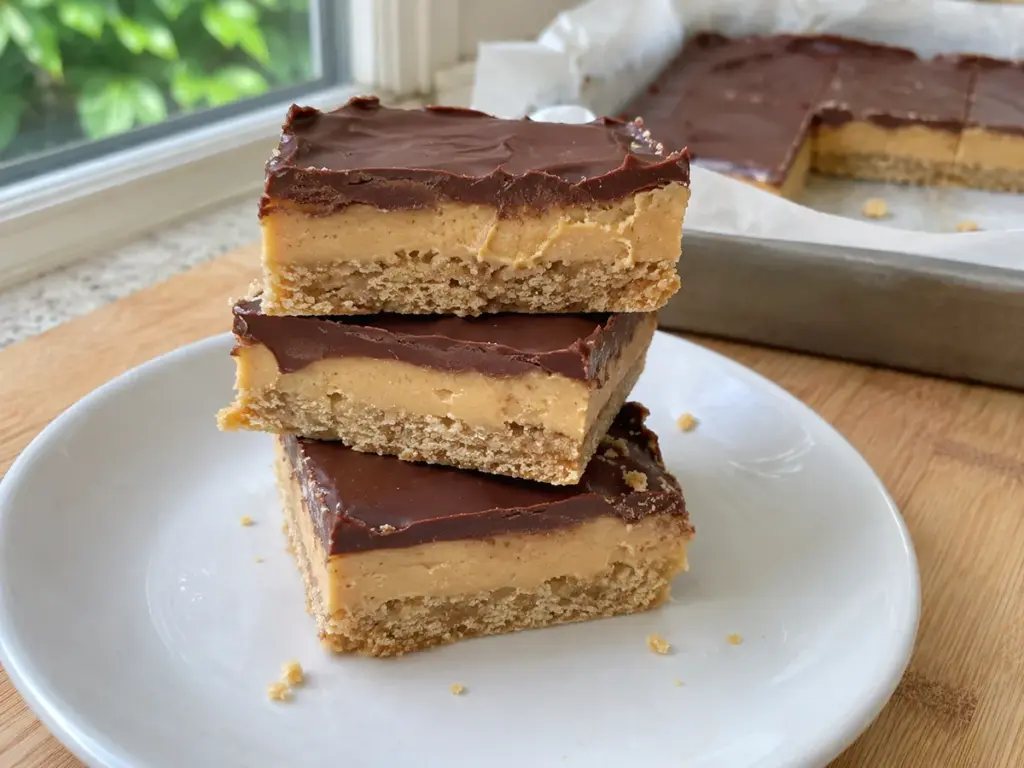
Three layers set in the fridge: buttery cookie crumbs, a peanut butter and powdered sugar layer that firms like a candy filling, and a thin chocolate top. The base can use digestive biscuits, the British tea biscuit, and you can replace them with graham cracker crumbs in the same 1 ½ cups. Rolled oats give a chewier base, as in no-bake chocolate oatmeal bars.
Melt the chips with the tablespoon of butter in 30-second microwave bursts, stirring between each, so the chocolate stays glossy and does not scorch. Lift the slab out by the parchment and let it stand a few minutes, then cut with a sharp knife wiped between cuts so the chocolate top does not shatter.
Ingredients (for an 8-inch square pan)
- 1 ½ cups graham cracker or digestive biscuit crumbs
- ¾ cup unsalted butter, melted
- 1 cup creamy peanut butter
- 1 cup powdered sugar
- 1 ½ cups milk chocolate chips
- 1 tablespoon unsalted butter
Instructions
- Line the pan. Line an 8-inch square pan with parchment, leaving an overhang to lift the bars out.
- Press the base. Mix the crumbs with the ¾ cup melted butter and press the mixture firmly into the bottom of the pan.
- Spread the peanut butter layer. Stir the peanut butter and powdered sugar until smooth and spread it evenly over the base.
- Top with chocolate. Melt the chips with 1 tablespoon of butter in 30-second bursts, stirring between each, then spread the chocolate over the peanut butter.
- Chill. Refrigerate at least 2 hours, until the top is set and firm, then lift out and cut into squares.
Swaps
- Coconut oil can replace the butter in the base, but it sets harder in the cold and milk chocolate chips still contain milk, so pick dairy-free chips too.
- Stir natural peanut butter well before measuring, because the oil that floats on top makes the layer greasy and soft.
- Almond or cashew butter replaces the peanut butter for a different nut flavor.
- Flaky sea salt pressed into the chocolate before it sets balances the sweet filling.
- Dark chocolate chips or a chopped 70% bar give the top a less sweet finish than milk chocolate chips.
8. No-Bake Chocolate Walnut Fudge
Butter, sugar and milk simmer for 2 minutes, the chocolate goes in off the heat, and the fridge does the rest. This is a soft fudge, since butter and cocoa butter harden when cold, and it softens at room temperature, so you should cut it straight from the fridge and set out only what you will serve.
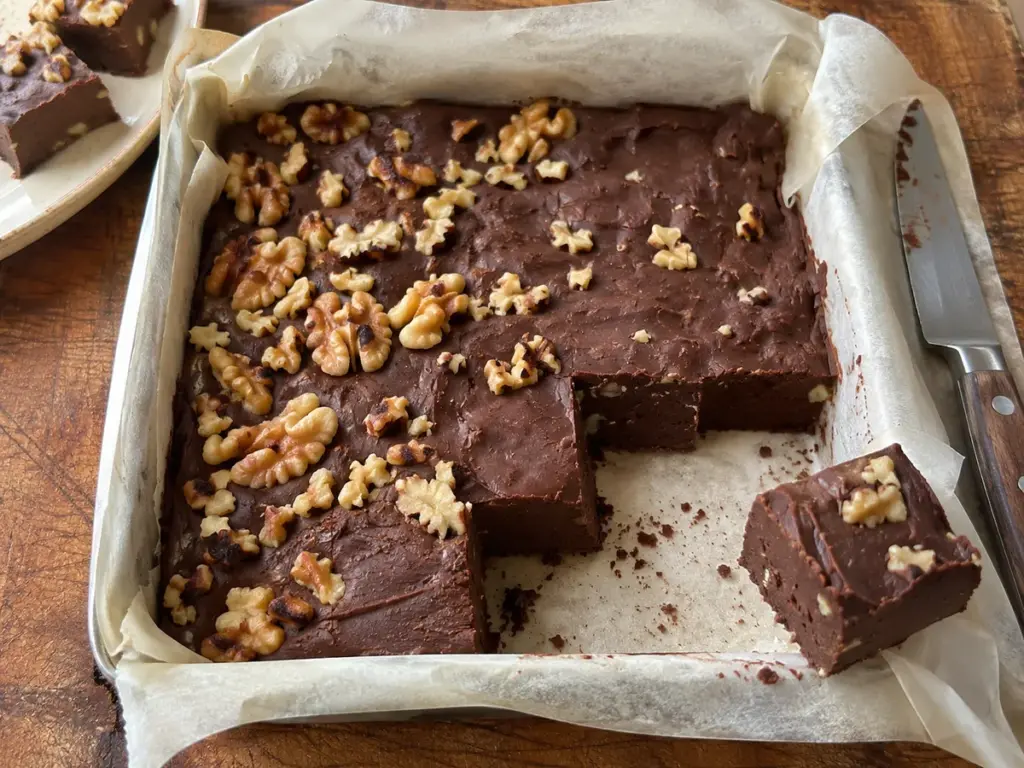
Chips usually carry stabilizers and a chopped dark chocolate bar usually does not, so the bar is the better fit here, though chips work. Toast the walnuts in a dry skillet until they smell nutty so they stay crunchy when you bite into the soft fudge, and stir the chocolate in right after the simmer so it melts without scorching on the pan.
Ingredients (for an 8-inch square pan)
- 1 cup dark chocolate chips or chopped dark chocolate
- ½ cup unsalted butter, softened
- 1 cup granulated sugar
- ¼ cup whole milk
- 1 teaspoon vanilla extract
- 1 cup walnuts, toasted and roughly chopped
Instructions
- Line the pan. Line an 8-inch square pan with parchment, leaving an overhang.
- Simmer. Heat the butter, sugar and milk over medium heat until the mixture just starts to boil, then lower the heat and simmer for 2 minutes, stirring constantly.
- Add the chocolate. Take the pan off the heat, stir in the chocolate until smooth, then mix in the vanilla.
- Fold in the walnuts. Stir in the toasted walnuts, pour the fudge into the pan and spread it level.
- Chill. Refrigerate at least 2 hours, until firm, then lift it out and cut into squares.
Swaps
- Pecans or almonds replace the walnuts, toasted the same way in a dry skillet.
- Coconut oil replaces the butter for a dairy-free fudge, starting with the same ½ cup, but the milk and the chocolate need dairy-free versions too.
- Semisweet chocolate makes a sweeter fudge than dark, and bittersweet makes a darker, less sweet one. Stay with those three, because milk chocolate makes a softer ganache (King Arthur's ganache guide) and this fudge already softens at room temperature.
- Dried cranberries or shredded coconut folded in with the walnuts vary the flavor.
9. Chocolate Chia Seed Pudding
Chia seeds soak up the milk and swell into a gel, so you need no cooking, no gelatin and no whisking past the first minute. Two hours in the fridge gives a soft pudding, and overnight gives a thicker one.
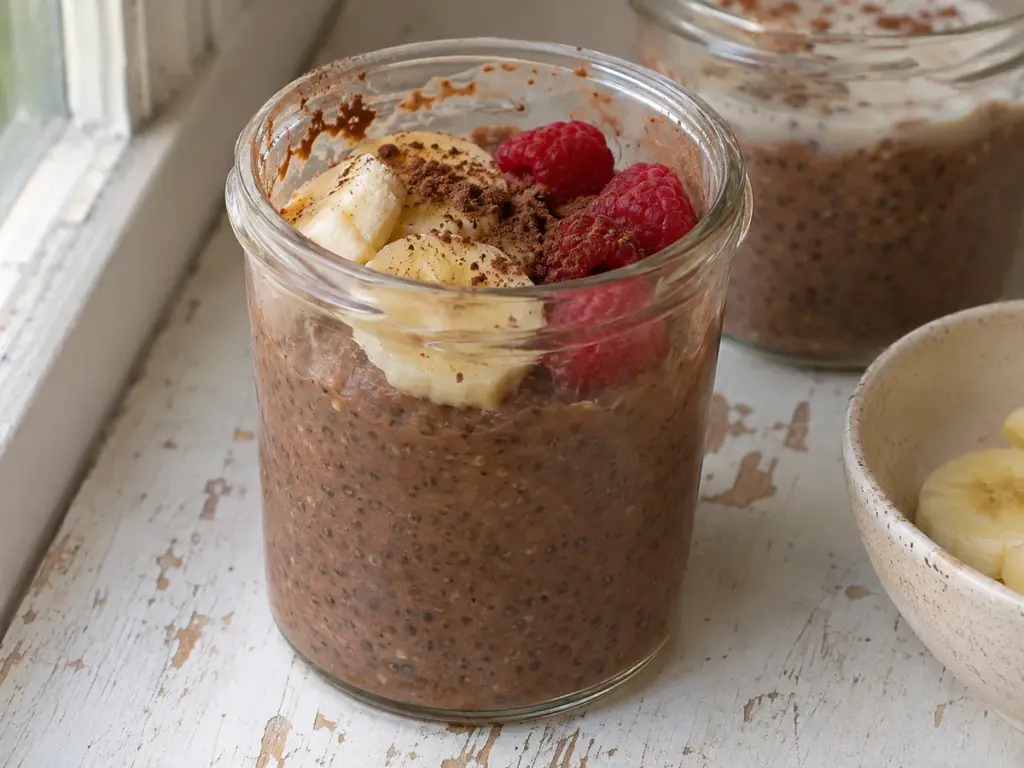
Whisk the cocoa and sweetener into the almond milk until no dry cocoa floats, then stir in the seeds, and stir again after a few minutes so your seeds do not settle into one clump. Chocolate almond milk is already sweetened, so use the 1 to 2 teaspoons of extra sweetener only after tasting, or choose plain almond milk and add the sweetener yourself for a less sweet pudding.
A pinch of salt or cinnamon deepens the chocolate flavor.
If the pudding is still watery after the chill, stir again and give it more time. If it is too thick, loosen it with a spoonful of milk. Layered in jars with banana or berries, it works as a breakfast too.
Ingredients
- 1 cup chocolate almond milk
- ¼ cup chia seeds
- 1 tablespoon unsweetened cocoa powder
- 1 to 2 teaspoons maple syrup, honey or other sweetener
- ½ teaspoon vanilla extract
Instructions
- Whisk. Whisk the almond milk, cocoa, sweetener and vanilla in a bowl or jar until smooth.
- Add the chia. Stir in the chia seeds so they are evenly spread through the liquid.
- Chill. Cover and refrigerate at least 2 hours, or overnight for a thicker set.
- Stir and serve. Stir well to break up any clumps, adjust the sweetness, and top with berries, sliced banana, nuts or chocolate chips.
- Store. Keep leftovers in an airtight container in the fridge for 3 to 4 days.
Swaps
- Chocolate oat or soy milk replaces the chocolate almond milk in the same 1 cup when the pudding must be free of tree nuts. Plain oat or soy milk leaves out the chocolate and sweetener the recipe's milk supplies, so start with 2 tablespoons of cocoa and 1 tablespoon of maple syrup, then taste.
- White chia seeds in place of black give a paler pudding with lighter flecks, and the method stays the same.
9 Which Chocolate Desserts Need a Long Chill?
The cheesecake, Nutella tart, vegan tart, mocha pie and icebox cake need 4 hours or a night, so you will want to make them the day before you serve them.
10. No-Bake Oreo Chocolate Cheesecake
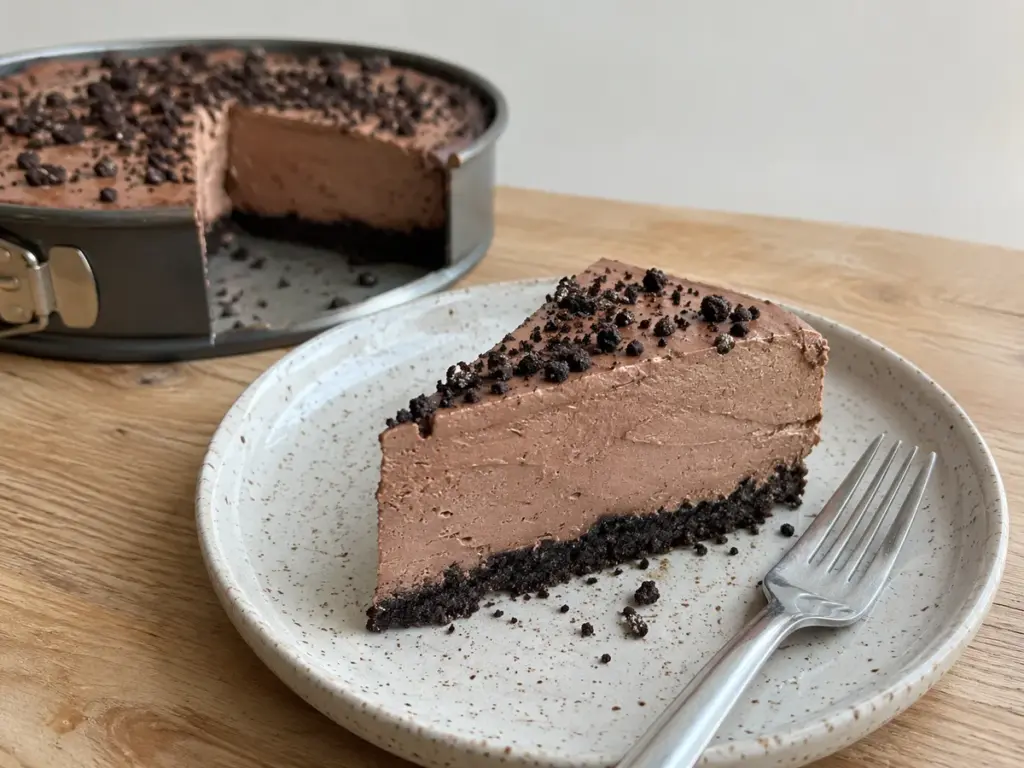
Crush 20 whole Oreos, filling included, and bind them with 5 tablespoons of melted butter for the crust. The filling gets its body from cream cheese and whipped cream, with no eggs involved, so nothing in it needs baking to be safe.
Soft cream cheese beats smooth, while cold cream cheese leaves lumps that never fully blend. Let the melted chocolate cool until it feels barely warm before it goes into the cream cheese, because hot chocolate melts the whipped cream you fold in next. Four hours sets the filling and a night makes the cleanest slices, cut with a knife dipped in hot water and wiped dry between cuts.
Use block cream cheese, because whipped tub versions add air and set softer.
A round of parchment under the crust makes the base easy to lift off the pan. If the crust sticks to the ring, run a thin knife around the inside before you open the latch. Cacao nibs or chopped chocolate on top add crunch.
Ingredients (for a 9-inch springform pan)
- 20 Oreo cookies
- 5 tablespoons unsalted butter, melted
- 16 ounces cream cheese, softened
- 1 cup powdered sugar
- 1 cup heavy cream
- 4 ounces semisweet chocolate, melted and slightly cooled
- 1 teaspoon vanilla extract
Instructions
- Make the crust. Crush the Oreos, mix them with the melted butter, press the mixture firmly into a 9-inch springform pan and chill it while you make the filling.
- Beat the base. Beat the softened cream cheese with the powdered sugar until smooth.
- Add the chocolate. Mix in the cooled melted chocolate and vanilla until fully combined.
- Fold in the cream. Whip the cream to stiff peaks and fold it into the chocolate mixture until light and even.
- Chill. Spread the filling over the crust, cover it and refrigerate at least 4 hours or overnight.
- Serve. Release the springform ring, slice, and top with extra crushed Oreos or chocolate shavings.
Swaps
- Milk chocolate in place of the 4 ounces of semisweet gives a sweeter, milder filling and likely a softer set, because King Arthur's ganache guide uses less cream with milk chocolate than with semisweet. Give the cheesecake the full night in the fridge before you slice it.
11. No-Bake Nutella Tart
Go easy on the sugar here: chocolate-hazelnut spread already holds sugar, cocoa and hazelnuts, so this cream cheese filling needs only ½ cup of powdered sugar. Whipped cream folded in at the end lightens it into a mousse-like filling over a cookie crust.
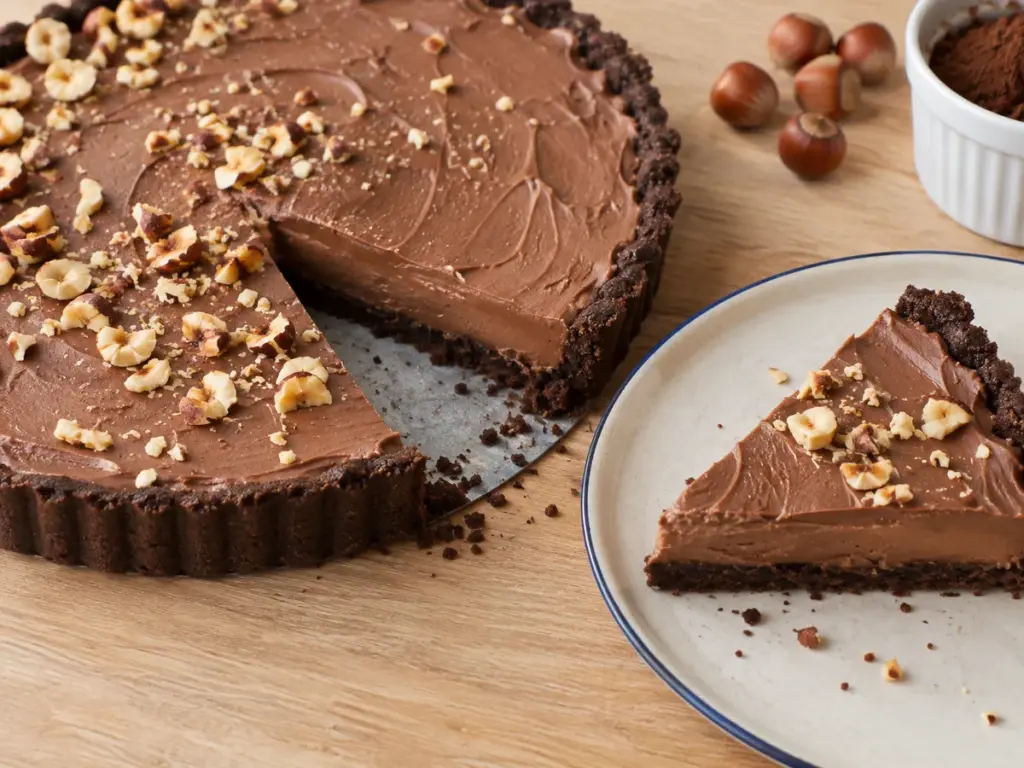
Mix the crumbs with the 5 tablespoons of butter until they look like wet sand, then press them up the sides of the tart pan with the bottom of a measuring cup so the filling has a wall to rest against. Whip the cold cream in a chilled bowl and fold it in until no streaks remain. After 4 hours a sharp knife wiped clean between slices cuts neat wedges.
Keep the powdered sugar, since a liquid sweetener such as maple syrup can thin the filling.
If your tart pan has a removable bottom, stand it on a can and let the ring drop away before you slice.
Toast the chopped hazelnuts in a dry skillet until fragrant, and let them cool before you sprinkle them on, because toasted nuts taste stronger than raw ones.
Ingredients (for a 9-inch tart pan)
- 1 ½ cups finely crushed chocolate cookies or graham crackers
- 5 tablespoons unsalted butter, melted
- 1 cup Nutella
- 8 ounces cream cheese, softened
- ½ cup powdered sugar, sifted
- ¾ cup cold heavy cream
- 1 teaspoon vanilla extract
- 2 tablespoons chopped hazelnuts, optional
Instructions
- Make the crust. Stir the crushed cookies and melted butter until the mixture resembles wet sand, press it into the bottom and slightly up the sides of a 9-inch tart pan, and chill it.
- Beat the filling. Beat the cream cheese until smooth, then mix in the Nutella and powdered sugar until silky.
- Whip the cream. In a chilled bowl, whip the cold cream with the vanilla to stiff peaks.
- Fold. Fold the whipped cream into the Nutella mixture until no streaks remain.
- Chill. Spread the filling over the crust, cover the tart and refrigerate at least 4 hours or overnight.
- Serve. Sprinkle with chopped hazelnuts and slice with a knife cleaned between cuts.
Swaps
- Fresh berries or a pinch of flaky sea salt replace the chopped hazelnuts on top, although the tart still contains hazelnuts through the Nutella.
12. Vegan No-Bake Chocolate Tart
Whip the coconut cream as you would dairy cream, because its fat is solid when cold, and melted dark chocolate sets that foam into a firm, ganache-style filling. The crust of almonds, walnuts, cashews and dates holds together only when it is packed tightly into the pan.
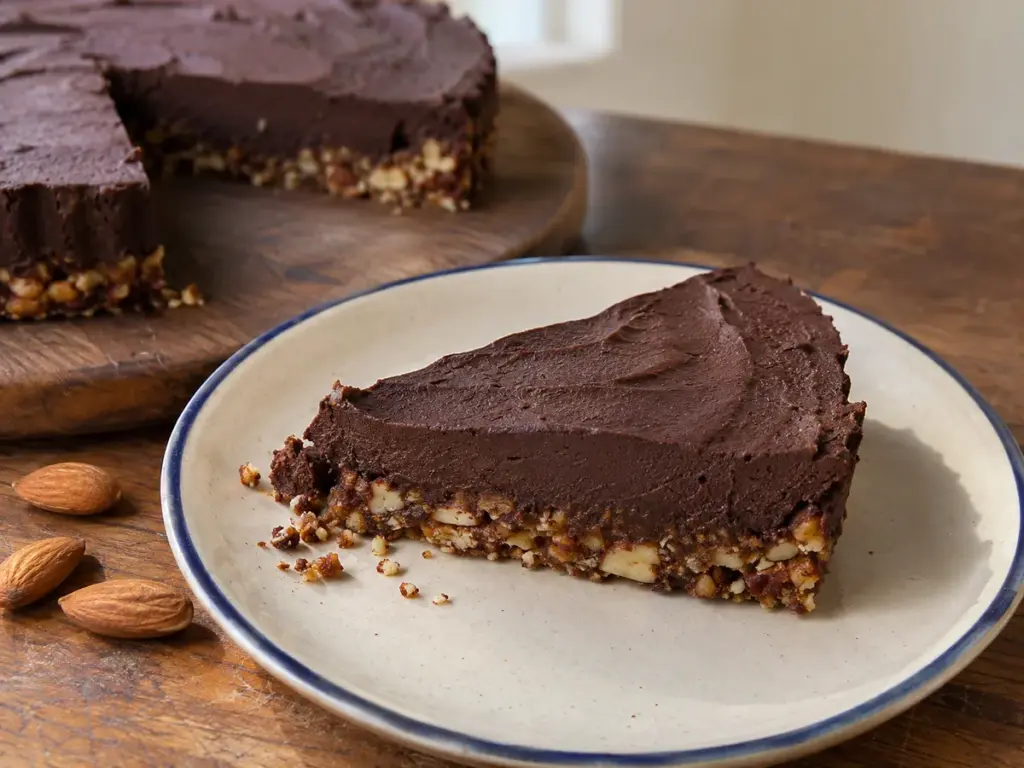
Chill the can until it is cold all the way through, then scoop only the thick, solid cream from the top, because the thin liquid beneath it will not whip. Let the melted chocolate cool until barely warm before folding it in so the foam does not collapse. Check the dark chocolate label for milk, since many dark bars contain milk ingredients.
Slice the tart cold, straight from the fridge, because the coconut-cream filling softens as it warms.
If the whipped cream stays loose, chill the bowl and beaters and whip again, since the chocolate firms the filling as it chills.
Ingredients (for a tart pan)
- 1 ½ cups mixed nuts (almonds, walnuts and cashews), roughly chopped
- ½ cup pitted dates, soaked if hard
- 2 tablespoons maple syrup
- ¼ teaspoon salt
- 1 ½ cups canned coconut cream, chilled, thick part only
- 8 ounces vegan dark chocolate, chopped
- 1 teaspoon vanilla extract
- Pinch of salt
Instructions
- Make the crust. Pulse the nuts, dates, maple syrup and ¼ teaspoon salt in a food processor until the mixture sticks together when pressed, then press it firmly into the tart pan and refrigerate it.
- Melt the chocolate. Melt the dark chocolate in the microwave in short bursts, stirring often, and let it cool slightly.
- Whip the cream. Whip the chilled coconut cream with a hand mixer for a few minutes until light and fluffy.
- Fold. Fold the melted chocolate, vanilla and a pinch of salt into the coconut cream until smooth.
- Chill. Pour the filling over the crust, smooth the top, cover and refrigerate at least 4 hours, until set.
- Store. Keep leftovers well covered in the fridge for 3 to 4 days.
Swaps
- Full-fat canned coconut milk works when coconut cream is hard to find: chill the can, scoop the thick top and leave the liquid behind. Only part of a can is thick, so start with two cans and open a third if the thick cream measures under 1 ½ cups.
- USDA FoodKeeper gives opened canned coconut milk 4 days in the refrigerator and 3 months in the freezer, so freeze what the tart does not use.
- Pecans, walnuts or almonds can make up the whole crust in place of the mix, pulsed until it sticks together when pressed.
- Agave nectar replaces the 2 tablespoons of maple syrup in the crust, because the dates do the binding.
- Vegan semisweet or bittersweet chocolate replaces the dark chocolate: semisweet tastes sweeter and bittersweet stronger. The chocolate is what firms the coconut cream, so stay with chocolate labeled semisweet or darker.
13. Frozen Mocha Chocolate Pie
Stir the chopped chocolate into the hot coffee, and the amount of liquid is what makes it work: 6 ounces of chopped semisweet chocolate in 1 cup of hot coffee is far above King Arthur's minimum of 1 tablespoon of liquid per 2 ounces, so the chocolate melts smooth. Cream cheese and whipped cream turn the cooled mixture into a mousse that freezes sliceable.
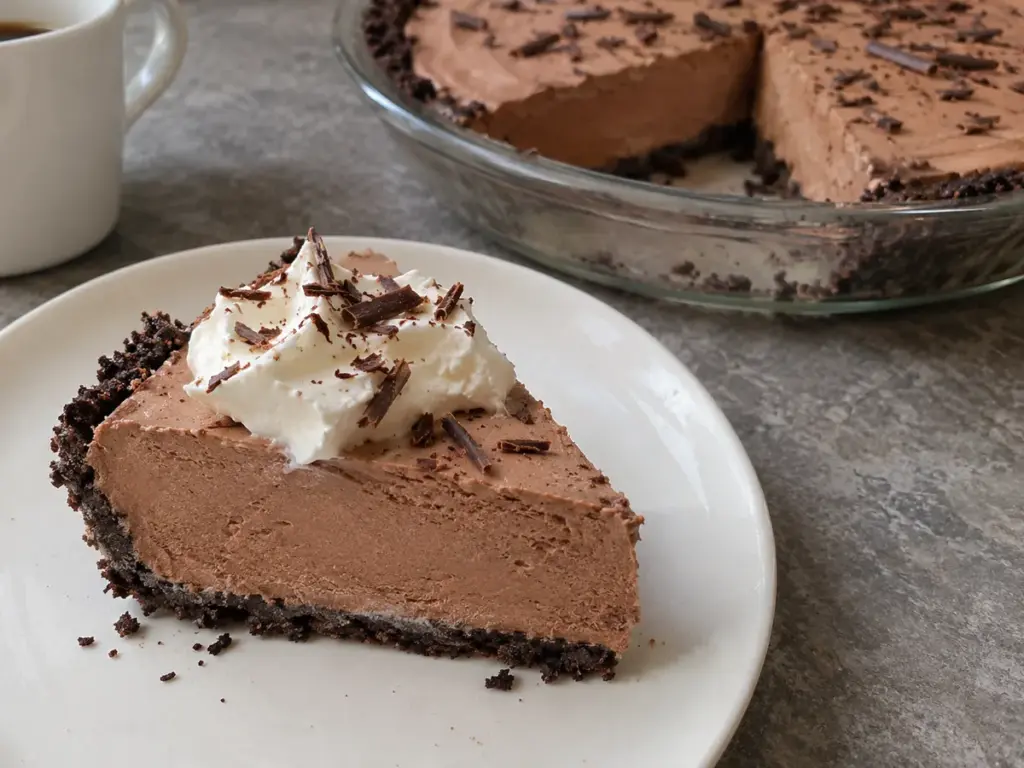
Let the chocolate coffee cool to lukewarm before it goes into the cream cheese, or it will deflate the whipped cream you fold in last. Freeze the pie at least 4 hours, then leave it at room temperature for 10 minutes before slicing, with the knife dipped in hot water between cuts. A filling that sets by chilling alone, such as the ganache layer in a chocolate peanut butter pie, slices straight from the fridge.
Top slices with chocolate shavings or a dollop of whipped cream just before serving.
Ingredients (for a 9-inch pie pan)
- 1 ½ cups chocolate cookie crumbs
- 6 tablespoons unsalted butter, melted
- 6 ounces semisweet chocolate, chopped
- 1 cup strong hot brewed coffee or espresso
- 1 cup granulated sugar
- 1 ½ cups cold heavy cream
- 8 ounces cream cheese, softened
- 1 teaspoon vanilla extract
- 1 teaspoon instant coffee granules, optional
Instructions
- Make the crust. Mix the cookie crumbs with the melted butter, press the mixture into the bottom and up the sides of a 9-inch pie pan, and chill it in the freezer.
- Melt the chocolate. Stir the chopped chocolate into the hot coffee until smooth and let it cool slightly.
- Beat the base. Beat the cream cheese with the sugar, vanilla and instant coffee until creamy, then beat in the chocolate coffee gradually.
- Fold in the cream. Whip the cold cream to stiff peaks and fold it into the chocolate mixture until fully combined.
- Freeze. Pour the filling into the crust, smooth the top and freeze at least 4 hours or overnight, until firm.
- Slice. Let the pie stand at room temperature for about 10 minutes, then slice.
Swaps
- Instant coffee replaces the brewed coffee or espresso: stir the granules into 1 cup of hot water at the package's strength for a cup of coffee. Keep the full cup, because that liquid keeps the 6 ounces of chocolate smooth.
- Dark chocolate in place of semisweet gives a richer, less sweet pie. King Arthur's minimum rises to 1 ½ tablespoons of liquid per 2 ounces for 60 to 70% chocolate, still far below the 1 cup of coffee here.
14. Chocolate Banana Icebox Cake
Stack chocolate cookies, cocoa whipped cream and banana slices in layers, and the moisture in the cream softens the cookies overnight until the whole dish cuts like cake.
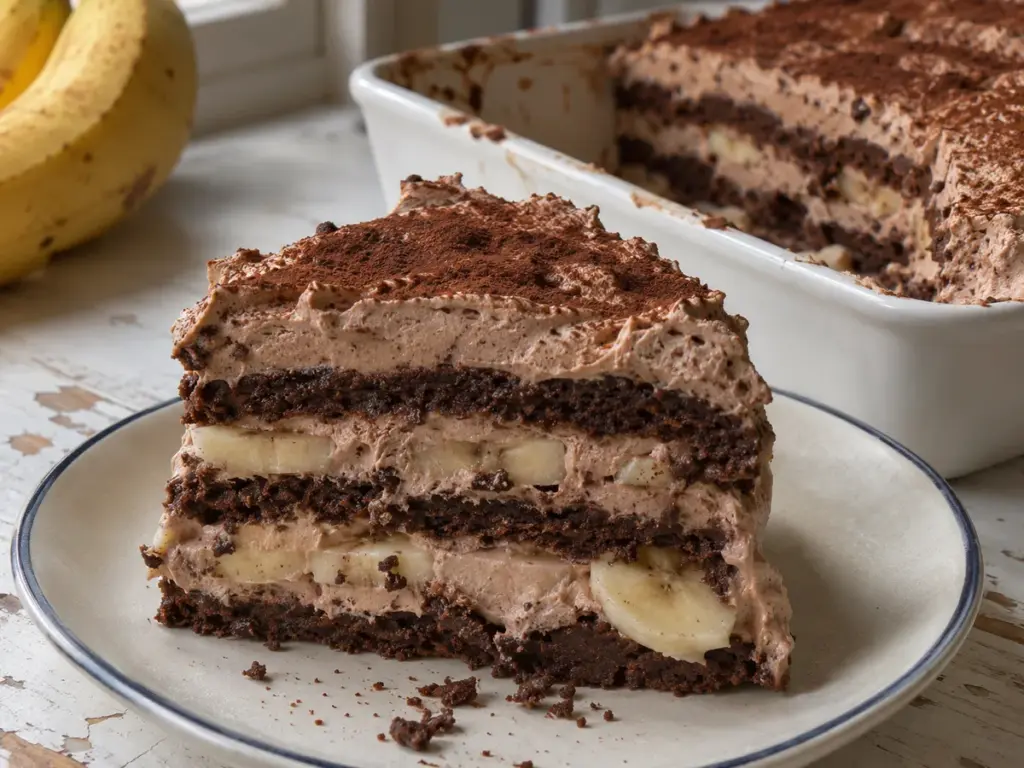
Chocolate wafer cookies lay flat in a loaf pan, so 24 to 30 of them make 3 or 4 layers. Slice the bananas into ¼-inch rounds just before you layer, and cover each banana layer completely with cream so the slices do not sit exposed to air and brown. Whip the cream with the cocoa, powdered sugar and vanilla only to soft peaks so it spreads without tearing the cookies.
Bananas that are yellow with a few brown specks slice cleanly and taste sweet, while very ripe ones turn to mush between the layers.
If the cookies still feel hard after the chill, give the cake a few more hours, since the cream is what softens them.
Ingredients (for a loaf pan or serving dish)
- 24 to 30 chocolate wafer cookies, enough for 3 to 4 layers
- 3 medium bananas, peeled and sliced into ¼-inch rounds
- 1 ½ cups cold heavy cream
- ¼ cup powdered sugar
- 2 tablespoons unsweetened cocoa powder, sifted
- 1 teaspoon vanilla extract
Instructions
- Whip the cream. Whip the cream with the powdered sugar, cocoa and vanilla in a large bowl until soft peaks form.
- Lay the cookies. Cover the bottom of the dish with a single layer of cookies.
- Add bananas and cream. Top the cookies with banana slices, then spread a generous layer of the chocolate cream over them.
- Repeat. Layer cookies, bananas and cream until everything is used, finishing with cream.
- Chill overnight. Cover the dish and refrigerate overnight, until the cookies have softened into cake.
- Slice. Cut with a sharp knife and serve cold.
Swaps
- Sliced strawberries replace the bananas and do not brown. Sliced peaches also work, but they brown like bananas, so cover each layer completely with cream.
- Chocolate sandwich cookies in place of the wafers make a sweeter cake, because the cookies carry a cream filling, in the style of an Oreo icebox cake. Choose them when you want sweet and the wafers when you want the cocoa cream to lead.
- Softened cream cheese or mascarpone beaten with a little powdered sugar and spread under the cocoa cream adds a richer layer.
10 How Do You Fix a No-Bake Dessert That Is Runny or Crumbly?
Cream fillings and crusts fail in a few predictable ways, and each one has a quick fix. Chill time and cream temperature cause most of them.
| Problem | Likely cause | Fix |
|---|---|---|
| Filling is runny | Cream under-whipped, or chocolate still warm | Chill longer; next time whip stiffer and cool the chocolate |
| Filling has lumps | Cream cheese was cold | Beat the cream cheese alone until smooth first |
| Crust crumbles when cut | Crumbs pressed loosely | Press hard with a measuring cup; chill the crust |
11 How Do You Serve and Carry No-Bake Chocolate Desserts?
- Cut into squares for a crowd: the peanut butter bars, walnut fudge and date brownies.
- Individual cups or jars: the mousse, parfaits and chia pudding.
- Make the day before: the cheesecake, tarts, mocha pie and icebox cake.
The 2-hour rule in the storage section applies at the table too. For a buffet or picnic, put out one plate at a time and keep the rest in the fridge or a cooler, and the cream-based desserts need that most.
12 Can You Make No-Bake Chocolate Desserts Dairy-Free, Gluten-Free or Nut-Free?
Most of these desserts adapt with one or two swaps, and a few already fit. Read the label on every chocolate bar, cookie, nut butter and hazelnut spread, because chocolate, cookies and spreads often contain milk, wheat or nut traces.
- Dairy-free: the avocado mousse, the energy bites, the date and walnut brownies and the vegan tart need no dairy as written, and the chia pudding is dairy-free with a plant-based milk.
- For the cheesecake, mocha pie and mint bites, start with plant-based cream cheese in the same weight, and for the cheesecake and the pie start with whipped coconut cream in place of whipped heavy cream.
- The Nutella tart is not a dairy-free option, because Nutella lists skim milk among its ingredients. For the parfaits, use a plant-based pudding and whipped coconut cream.
- Gluten-free: use rolled oats labeled gluten-free in the cookies and bites, and gluten-free cookies or crackers for the crumbs in the peanut butter bars, cheesecake, Nutella tart, mocha pie, icebox cake and parfaits. The avocado mousse, date brownies, vegan tart, fudge and chia pudding have no flour or cookie in them.
- Nut-free: sunflower seed butter replaces peanut butter in the bars and the cookies, starting with the same amount. The Nutella tart, vegan tart, date brownies and walnut fudge are built on nuts, so choose the avocado mousse, the energy bites, the cookies made with sunflower seed butter, the parfaits, the icebox cake or the chia pudding made with chocolate oat or soy milk for a nut-free table.
13 How Long Do No-Bake Chocolate Desserts Keep?
Warning
Refrigerate any dessert made with cream cheese, whipped cream, pudding or avocado within 2 hours of serving, or within 1 hour when the room is above 90°F, because these desserts spoil like any other perishable food.
FSIS says most leftovers keep 3 to 4 days in the refrigerator and 3 to 4 months in the freezer, and that is the number to use for the cheesecake, tarts, bars, fudge, cookies, energy bites, mint bites, brownies, chia pudding, icebox cake and avocado mousse (keep the plastic wrap pressed on the surface of the mousse).
Eat parfaits made with opened store-bought pudding within 2 days, since they go by the pudding; parfaits made with pudding from a mix take the 3 to 4 days. If you freeze slices of the mocha pie or the cheesecake, wrap them tightly first, and serve all of these desserts cold.
Do not freeze the parfaits or the avocado mousse. USDA FoodKeeper lists both pudding and avocados as not recommended for the freezer, so keep those in the fridge only.
Sources
- King Arthur Baking: things bakers know, yes you can mix chocolate and water
- King Arthur Baking: tempering chocolate
- King Arthur Baking: how to make ganache
- King Arthur Baking: how to chop chocolate
- King Arthur Baking: Dutch-process vs natural cocoa
- FDA: handling flour safely
- FDA, 21 CFR 131.150: heavy cream
- FDA, 21 CFR 131.157: light whipping cream
- USDA FSIS: leftovers and food safety
- USDA FoodKeeper
- CDC: foods and drinks to avoid or limit for infants and toddlers

Andrew Gray is a seasoned food writer and blogger with a wealth of experience in the restaurant and catering industries. With a passion for all things delicious, Andrew has honed his culinary expertise through his work as a personal chef and caterer.
His love for food led him to venture into food writing, where he has contributed to various online publications, sharing his knowledge and insights on the culinary world. As the proud owner of CooksCrafter.com, Andrew covers a wide range of topics, including recipes, restaurant reviews, product recommendations, and culinary tips.
Through his website, he aims to inspire and educate fellow food enthusiasts, offering a comprehensive resource for all things food-related.