Short Answer
Bake sale desserts sell best when they hold up at room temperature, wrap one piece at a time and survive a car ride, and chocolate chip cookies, brownies and Rice Krispie Treats do all three.
- Lemon bars, frosted cupcakes, cream cheese carrot cake squares and chocolate peanut butter bars need a cooler.
- Every package needs its allergens named.
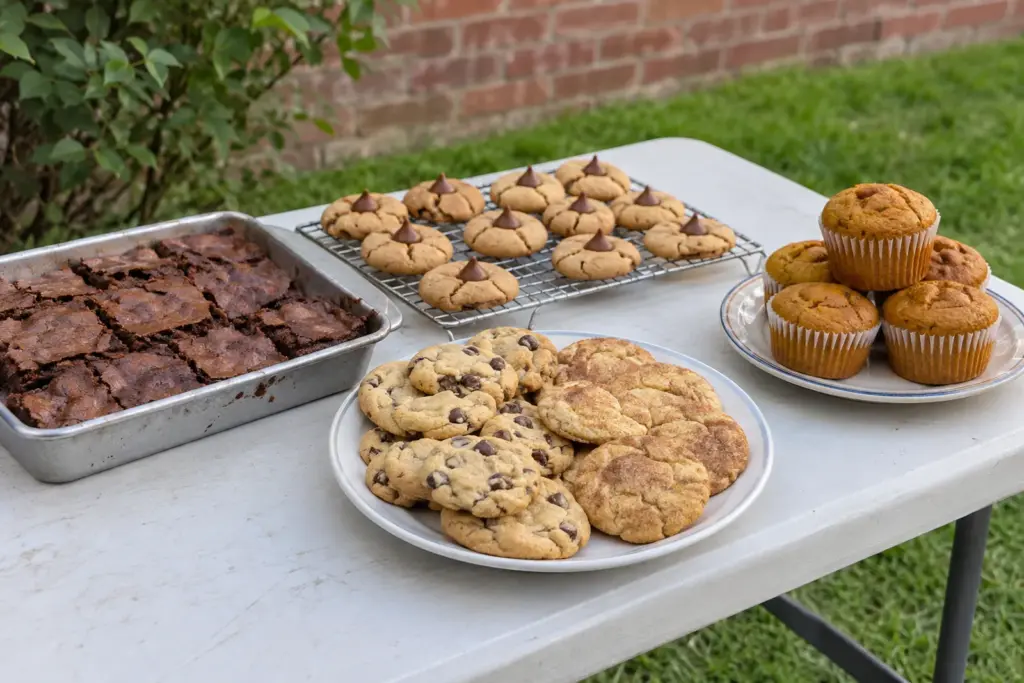
A bake sale buyer picks up one piece at a time, so a recipe earns its place by scooping or cutting into single pieces that wrap easily. These 13 dessert recipes cover cookies, bars, cupcakes, muffins and squares, from a 9x13 pan that cuts into 24 brownies to a 12-cup pan of cupcakes.
1 Which Bake Sale Desserts Travel Best?
Three questions sort these 13 desserts: will it stay firm on your table for a few hours, can you scoop or cut it into single pieces, and does a boxful survive the drive. Nine pass all three, so build the table around those nine and add a cold dessert only when you can keep it cold until a buyer picks it up.
The other four need a cooler:
- The lemon bars have a moist egg filling.
- The funfetti cupcakes and carrot cake squares carry butter or cream cheese frosting.
- The chocolate peanut butter bars have a butter-and-chocolate layer that softens in heat.
Time is the reason. USDA FSIS says perishable food goes back in the fridge within 2 hours, or within 1 hour when the air is above 90°F, and your table at a school fair or a parking-lot sale can easily run past that.
Minnesota's agriculture department also lists scratch frosting made with butter or cream cheese among the foods that need temperature control for safety. That frosting is why the cupcakes and carrot squares sit in their own group below, along with the lemon bars and the peanut butter bars.
Two of the 13 need no oven at all, the chocolate peanut butter bars and the Rice Krispie Treats, which helps when you share one oven with other bakers. The four cookies baked at 375°F and the seven bakes at 350°F can follow each other through the same oven with only a dial change.
| Dessert | Oven and time | Shape | Table temperature | Allergens from its recipe |
|---|---|---|---|---|
| Chocolate Chip, Snickerdoodle and Sugar Cookies | 375°F, 8 to 11 min | Rounded tablespoons, 1 ½-inch balls or cut-outs rolled ¼ inch | Room temperature (sugar cookies once the icing is dry) | Wheat, milk, egg |
| Oatmeal Raisin Cookies | 350°F, 10 to 12 min | Rounded tablespoons | Room temperature | Wheat, milk, egg |
| Peanut Butter Blossoms | 375°F, 8 to 10 min | 1-inch balls | Room temperature | Peanuts, wheat, milk, egg |
| Fudgy Brownies and Blondies with Walnuts | 350°F, 25 to 30 min | 9x13 pan, 24 pieces each | Room temperature | Wheat, milk, egg; tree nuts (walnuts) in the blondies |
| Pumpkin Bread Muffins | 350°F, 18 to 22 min | Muffin tin, paper liners | Room temperature | Wheat, milk, egg; tree nuts if you add them |
| Rice Krispie Treats | No oven, 30 min to cool | 9x13 pan, 24 squares | Room temperature | Milk; read the cereal label |
| Lemon Bars, Funfetti Cupcakes and Carrot Cake Squares | 350°F: lemon bars 38 to 45 min in two bakes, cupcakes 18 to 20 min, carrot squares 35 to 40 min | 9x13 pan for the bars and squares, 12-cup pan for the cupcakes | Cooler | Wheat, milk, egg; tree nuts in the carrot squares if you add them |
| Chocolate Peanut Butter Bars | No oven, 2 hours in the fridge | 9x9 pan, 16 squares | Cooler | Peanuts, wheat (graham crumbs), milk |
Chocolate chips, chocolate candies, sprinkles, graham crackers and cereal differ by brand, so read their labels and add anything they declare, such as soy, to your sign.
2 Which Cookies Hold Up Best on a Bake Sale Table?
Cookies ask the least of your table: no cooler, no cutting and, in four of the five, no frosting that smears. Let every sheet cool completely before the cookies go into a bag, because a warm cookie fogs the plastic with steam and turns soft and sticky by the time it sells.
Use one scoop or spoon size for every cookie on a sheet, because cookies of equal size finish together and a mix of big and small ones leaves the small ones overdone.
1. Classic Chocolate Chip Cookies
Start with butter that is soft but still cool to the touch, which holds this dough in shape long enough for the edges to set. Butter that has turned shiny and greasy spreads the cookies into thin, crisp discs that break in a bag.
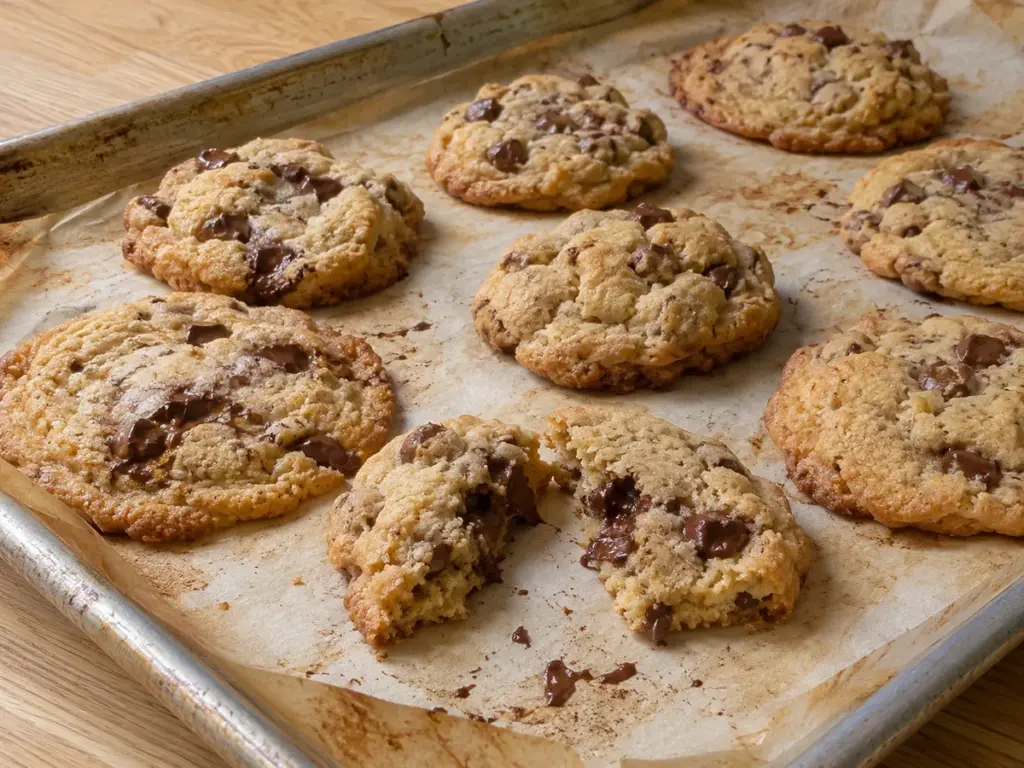
The dough pairs ¾ cup of granulated sugar with ¾ cup of packed brown sugar, and the molasses in the brown sugar keeps the centers chewy after the cookies cool.
Pull the sheet when you see light brown edges and soft-looking centers, at 9 to 11 minutes, because the hot pan finishes the baking.
A hot baking sheet melts the butter before the edges set and the cookies spread thin, so cool the sheet between batches or alternate two sheets.
Ingredients
- 2 ¼ cups all-purpose flour
- 1 teaspoon baking soda
- ½ teaspoon salt
- 1 cup unsalted butter, softened
- ¾ cup granulated sugar
- ¾ cup packed brown sugar
- 1 teaspoon vanilla extract
- 2 large eggs
- 2 cups semi-sweet chocolate chips
Instructions
- Heat and line. Heat the oven to 375°F (190°C) and line baking sheets with parchment paper or silicone mats.
- Mix the dry ingredients. Whisk the flour, baking soda and salt in a medium bowl.
- Cream the butter. Beat the butter with both sugars until light and fluffy, add the vanilla, then beat in the eggs one at a time.
- Combine. Stir in the dry mixture just until it disappears, then fold in the chocolate chips.
- Bake. Drop rounded tablespoons of dough 2 inches apart and bake 9 to 11 minutes. Cool a few minutes on the sheet, then move the cookies to a wire rack.
Swaps
- Chopped bar chocolate or chocolate chunks replace the chips 1:1 by volume and leave melted pockets in every cookie.
- Dark chocolate chips taste less sweet next to the ¾ cup of brown sugar, while white chocolate chips make a sweeter cookie that still contains milk. Read each bag for milk, soy and nut warnings.
2. Snickerdoodle Cookies
A snickerdoodle's tang comes from 2 teaspoons of cream of tartar, an acid that reacts with the baking soda to lift the dough and leave the center soft. The dough has no vanilla, so the flavor you taste rests on 2 teaspoons of cinnamon rolled into the sugar coat.
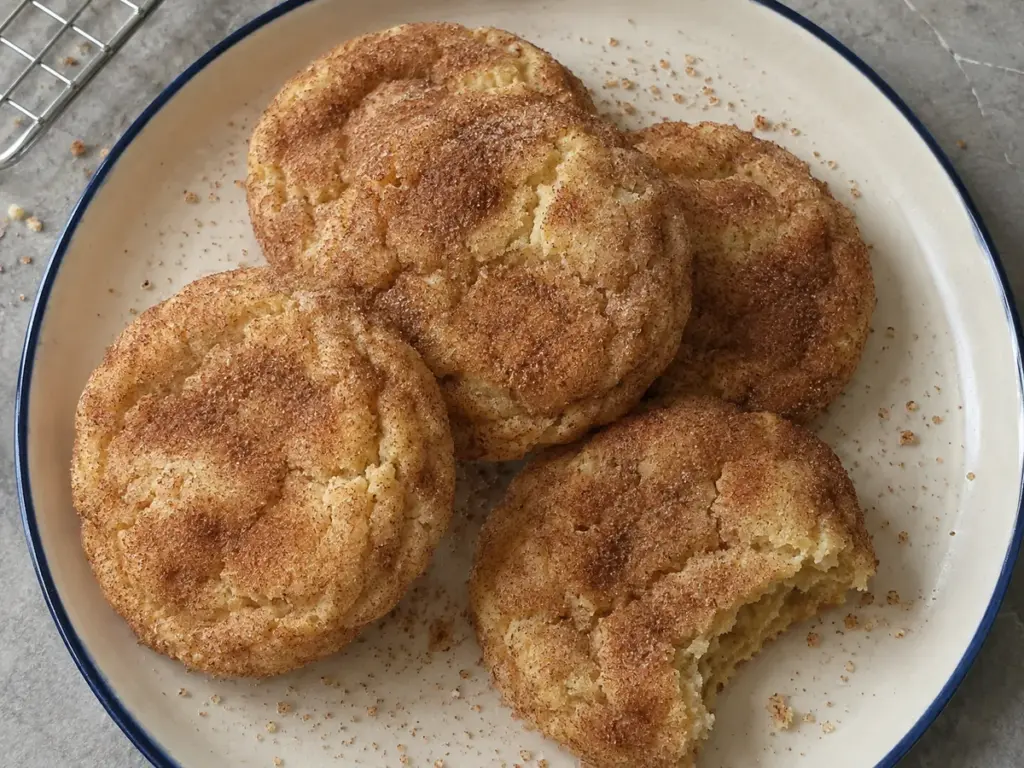
Roll each 1 ½-inch ball through the cinnamon sugar before it hits the sheet. The dry coat stays put, so you can bag these without the smearing an iced cookie causes. They are done at 8 to 10 minutes, when the edges are set and lightly golden, and the tops crackle as they cool.
Pull the sheet while the centers still look slightly underdone, because the cookies finish setting on the hot pan and an overbaked one loses its soft center.
Ingredients
- 1 cup unsalted butter, softened
- 1 ½ cups granulated sugar, divided (1 ¼ cups for the dough, ¼ cup for the coating)
- 2 large eggs
- 2 ¾ cups all-purpose flour
- 2 teaspoons cream of tartar
- 1 teaspoon baking soda
- ¼ teaspoon salt
- 2 teaspoons ground cinnamon
Instructions
- Heat and line. Heat the oven to 375°F (190°C) and line two baking sheets with parchment paper.
- Cream the butter. Beat the butter with 1 ¼ cups of the sugar until light and fluffy, then beat in the eggs one at a time.
- Add the dry ingredients. Whisk the flour, cream of tartar, baking soda and salt, then stir them into the butter mixture until combined.
- Coat. Mix the remaining ¼ cup of sugar with the cinnamon, shape the dough into 1 ½-inch balls and roll each one in the mixture.
- Bake. Set the balls 2 inches apart and bake 8 to 10 minutes. Cool 2 minutes on the sheet before moving the cookies to a wire rack.
3. Oatmeal Raisin Cookies
Old-fashioned rolled oats belong here, because their thick flakes keep a chewy bite where finer instant oats melt into the dough. Three cups of oats against 1 ½ cups of flour make an oat-heavy dough, and it stays chewy only if you pull the cookies at 10 to 12 minutes while the centers are still soft. Five minutes on the sheet then firms them enough to move.
Hard, dry raisins pull moisture out of the dough, so soak them in hot water for a few minutes, drain them and pat them dry before they go in.
Ingredients
- 1 cup unsalted butter, softened
- 1 cup packed brown sugar
- ½ cup granulated sugar
- 2 large eggs
- 1 teaspoon vanilla extract
- 1 ½ cups all-purpose flour
- 1 teaspoon baking soda
- ½ teaspoon salt
- 1 teaspoon ground cinnamon
- 3 cups old-fashioned rolled oats
- 1 cup raisins
Instructions
- Heat and line. Heat the oven to 350°F (175°C) and line baking sheets with parchment paper or silicone mats.
- Cream the butter. Beat the butter with both sugars until smooth and fluffy, beat in the eggs one at a time, then add the vanilla.
- Add the dry ingredients. Whisk the flour, baking soda, salt and cinnamon, then stir them in until just combined.
- Fold in the oats. Fold in the oats and raisins until they are spread evenly.
- Bake. Drop rounded tablespoons of dough 2 inches apart and bake 10 to 12 minutes. Cool 5 minutes on the sheet, then move the cookies to wire racks.
Swaps
- Raisins split a crowd, so stir dried cranberries or chocolate chips into half of this dough for a second flavor without a second recipe. Cranberries taste tart, and chips bring milk onto the label check.
- Whole wheat flour can replace up to half of the 1 ½ cups of flour, measured by volume. King Arthur lists up to half as the optimum for cookies, and the more you swap, the more the cookie changes.
- Any gluten-free version needs rolled oats labeled gluten-free, because ordinary oats can pick up wheat during processing.
4. Peanut Butter Blossoms
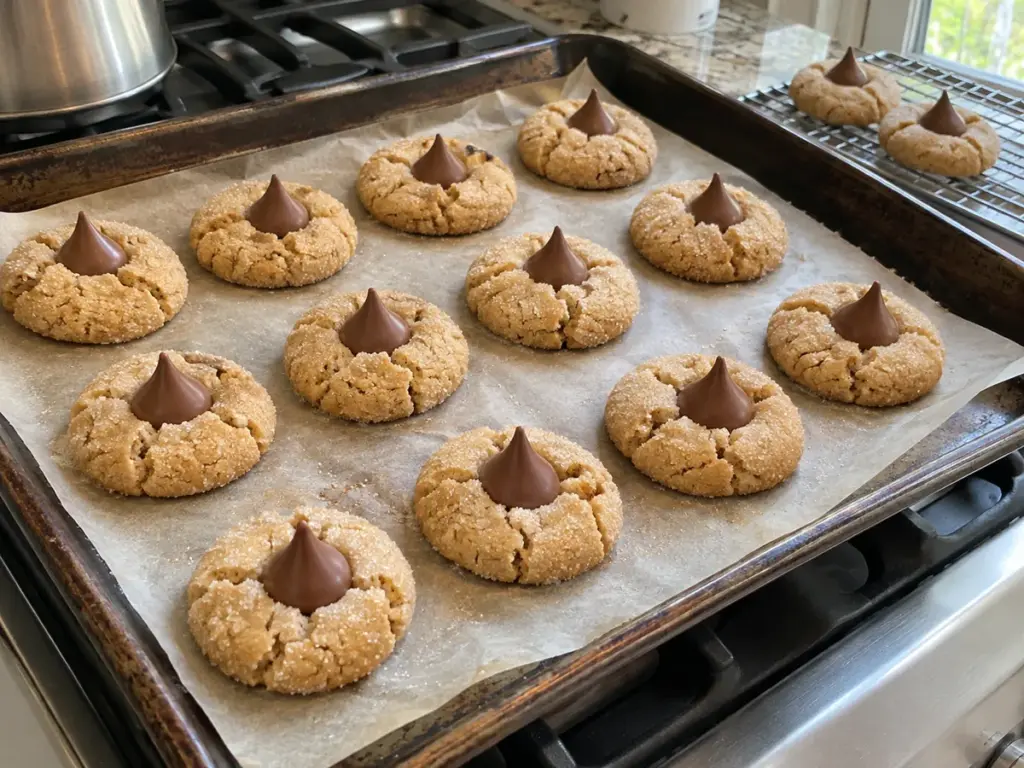
Press the chocolate candy into each cookie the moment the sheet comes out of the oven, while the cookie is still soft, because a cooled cookie cracks into pieces under the candy.
You roll the dough into 1-inch balls and then through granulated sugar for the crackled, sparkly top, and 8 to 10 minutes sets the edges while the centers stay soft.
Unwrap every candy before the first sheet goes into the oven, and line them up beside the stove.
Ingredients
- ½ cup unsalted butter, softened
- ½ cup granulated sugar
- ½ cup packed light brown sugar
- ½ cup creamy peanut butter
- 1 large egg
- 1 ¼ cups all-purpose flour
- ¾ teaspoon baking soda
- ½ teaspoon baking powder
- ¼ teaspoon salt
- About ¼ cup granulated sugar for rolling
- 48 unwrapped chocolate candy kisses, one per cookie
Instructions
- Heat and line. Heat the oven to 375°F (190°C) and line baking sheets with parchment paper.
- Mix the dough. Beat the butter, both sugars and the peanut butter until creamy, then mix in the egg.
- Add the dry ingredients. Whisk the flour, baking soda, baking powder and salt, then blend them in until just combined.
- Shape. Roll the dough into 1-inch balls, roll each ball in granulated sugar and set them 2 inches apart.
- Bake and press. Bake 8 to 10 minutes, press one candy into each center right away, and cool 5 minutes on the pan before moving the cookies to a wire rack.
Swaps
- Peanut butter is the allergen here, and a school that bans peanuts can still sell this cookie made with sunflower seed butter, which swaps in at the same amount, as long as the candy's label also checks out.
- SunButter's FAQ says baking soda can turn cookies made with its seed butter green, that the color is harmless, and that less baking soda or a little lemon juice prevents it, so bake one test tray before the sale.
- A square of dark chocolate pressed into each warm cookie in place of the candy makes a less sweet cookie. Check its label for milk and peanut warnings.
5. Sugar Cookies with Icing
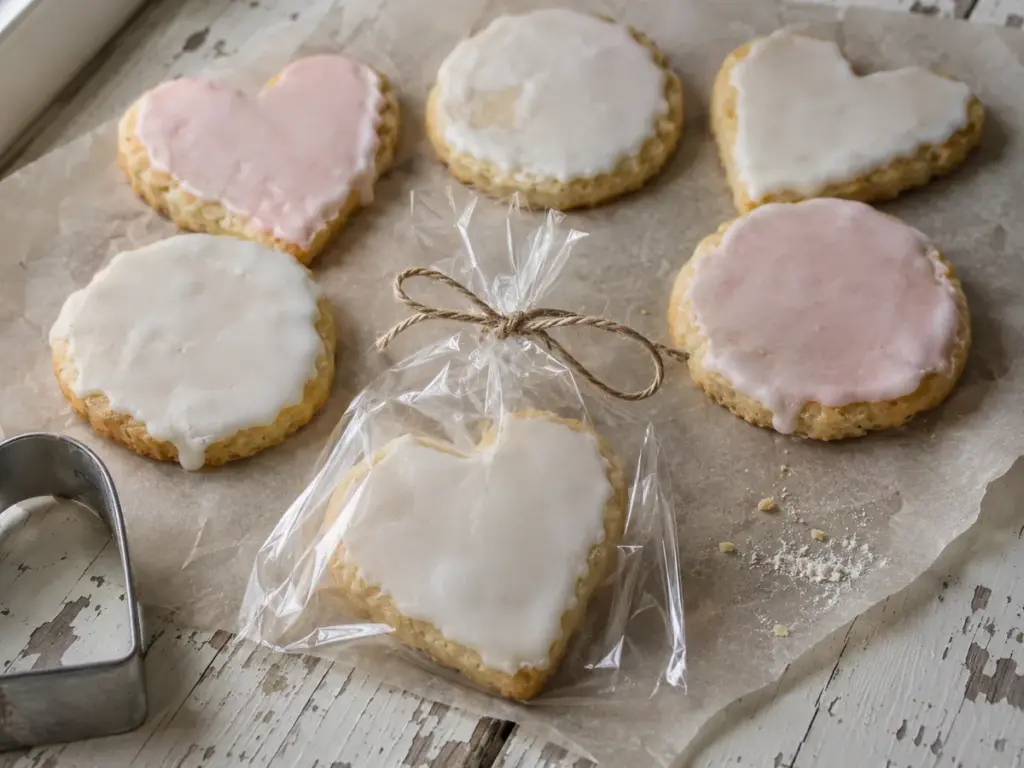
Cutout dough that goes straight from the mixer to the counter sticks to your pin and spreads in the oven, so chill it until firm before rolling. Roll it to ¼ inch, because King Arthur Baking says that thickness gives sturdy cut-out cookies, where ⅛ inch gives fragile ones. The same source warns that extra flour worked into the dough makes cookies tough.
A light dusting on the counter is plenty.
Bake 8 to 10 minutes, until the edges just turn golden. The icing is ¾ cup of powdered sugar stirred with 2 tablespoons of milk, and you should let each cookie stand until the icing is dry to the touch before it goes into a bag, or the icing sticks to the plastic.
King Arthur rolls cut-out dough between sheets of parchment or waxed paper, because extra flour worked in while rolling can make cookies tough.
Ingredients
- 2 ¾ cups all-purpose flour
- 1 teaspoon baking soda
- ½ teaspoon baking powder
- 1 cup unsalted butter, softened
- 1 ½ cups granulated sugar
- 1 large egg
- 1 teaspoon vanilla extract
- For the icing: ¾ cup powdered sugar, 2 tablespoons milk and food coloring, optional
Instructions
- Heat and line. Heat the oven to 375°F (190°C) and line baking sheets with parchment paper.
- Mix the dry ingredients. Whisk the flour, baking soda and baking powder.
- Make the dough. Beat the butter and sugar until creamy, mix in the egg and vanilla, then stir in the dry ingredients until the dough forms, without overmixing.
- Chill and cut. Chill the dough until firm, roll it on a lightly floured surface to ¼ inch and cut out shapes.
- Bake. Bake 8 to 10 minutes, until the edges just turn golden. Cool a few minutes on the sheet, then move the cookies to a wire rack.
- Ice. Stir the powdered sugar with the milk until spreadable, tint it if you like, spread or pipe it on the cooled cookies and let it set.
Swaps
- Any plant milk stirs into the icing in place of the dairy milk, so the icing is dairy-free. The butter in the cookie still has to change for a fully dairy-free cookie.
3 Which Bars and Muffins Keep Without a Cooler?
A pan of bars is the cleanest math when you are the seller, because one batch and one knife turn a 9x13 pan into 24 squares of equal size. Cookie dough pressed into that same pan skips the scooping and bakes as chocolate chip cookie bars.
Line the pan with parchment that hangs over two sides, loosen any edge the paper does not cover with a knife, and lift the cooled slab onto a board. King Arthur's parchment sling guide says slices come out neater on a cutting board than in the pan.
6. Fudgy Brownies
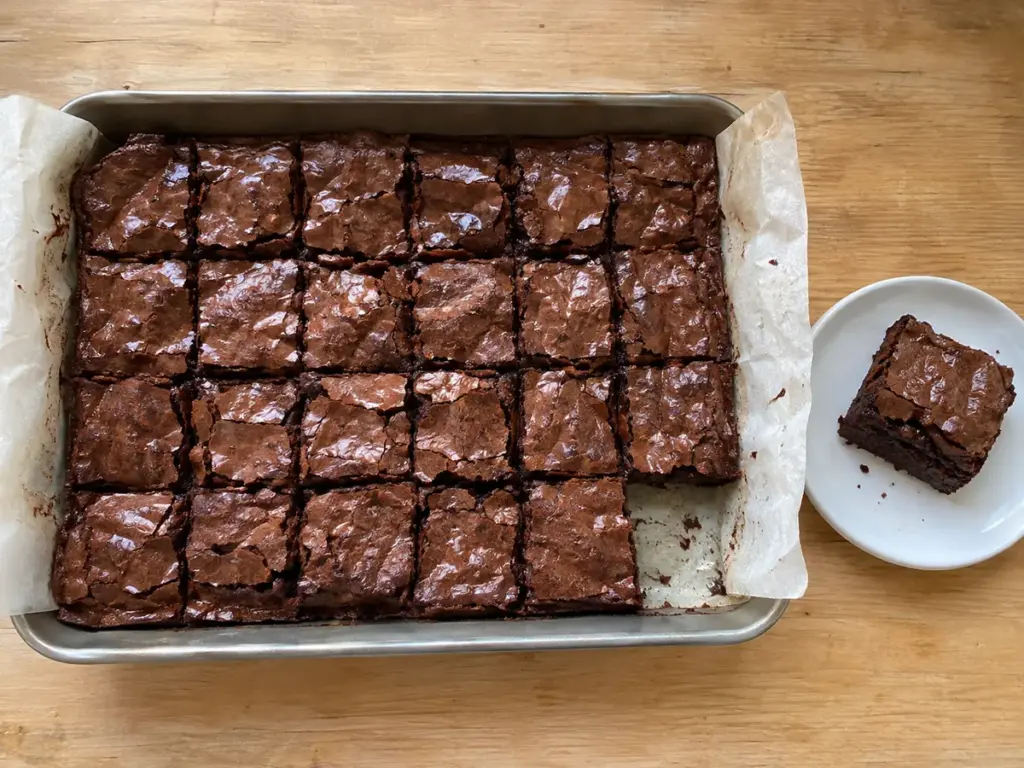
This batter uses 1 cup of melted butter and 1 cup of flour. By King Arthur's weights that is about 227 g of butter against 120 g of flour, so fat outweighs flour almost two to one, and that proportion is why your squares bake dense and fudgy instead of cakey.
Whisk the butter and the 2 cups of sugar together before the eggs go in, because sugar that dissolves in the warm butter rises to the top as the thin, shiny crust.
Fold the dry ingredients in only until you see no streaks, and take the pan out at 25 to 30 minutes, when the edges are set and the center still looks slightly soft. A warm brownie cuts into smears, so cool the pan completely, lift the slab out by the parchment and wipe the knife between cuts.
A 9x13 pan cut 4 squares by 6 gives pieces of about 2 ¼ by 2 inches, which fit a small bag or a square of parchment.
Ingredients (for 24 squares)
- 1 cup (2 sticks) unsalted butter, melted
- 2 cups granulated sugar
- 4 large eggs
- 1 teaspoon vanilla extract
- 1 cup all-purpose flour
- ¾ cup unsweetened cocoa powder
- ½ teaspoon salt
- ½ teaspoon baking powder
Instructions
- Heat and line. Heat the oven to 350°F (175°C) and line a 9x13-inch pan with parchment, or grease it lightly.
- Mix the wet ingredients. Whisk the melted butter and sugar, beat in the eggs one at a time, then stir in the vanilla.
- Fold in the dry ingredients. Sift the flour, cocoa, salt and baking powder over the bowl and fold them in until just combined.
- Bake. Pour the batter into the pan, smooth the top and bake 25 to 30 minutes.
- Cool and cut. Cool completely in the pan, then cut 24 squares.
Swaps
- Start by replacing ½ cup of the 2 cups of granulated sugar with brown sugar and bake one test pan. King Arthur says brown sugar gives more flavor and a softer texture, and it gives no ratio for this swap, so ½ cup is a starting amount chosen here.
7. Blondies with Walnuts
The walnuts are part of the base recipe here, so the blondies are the one dessert on the table whose standard version carries a tree nut, and the sign needs that allergen.
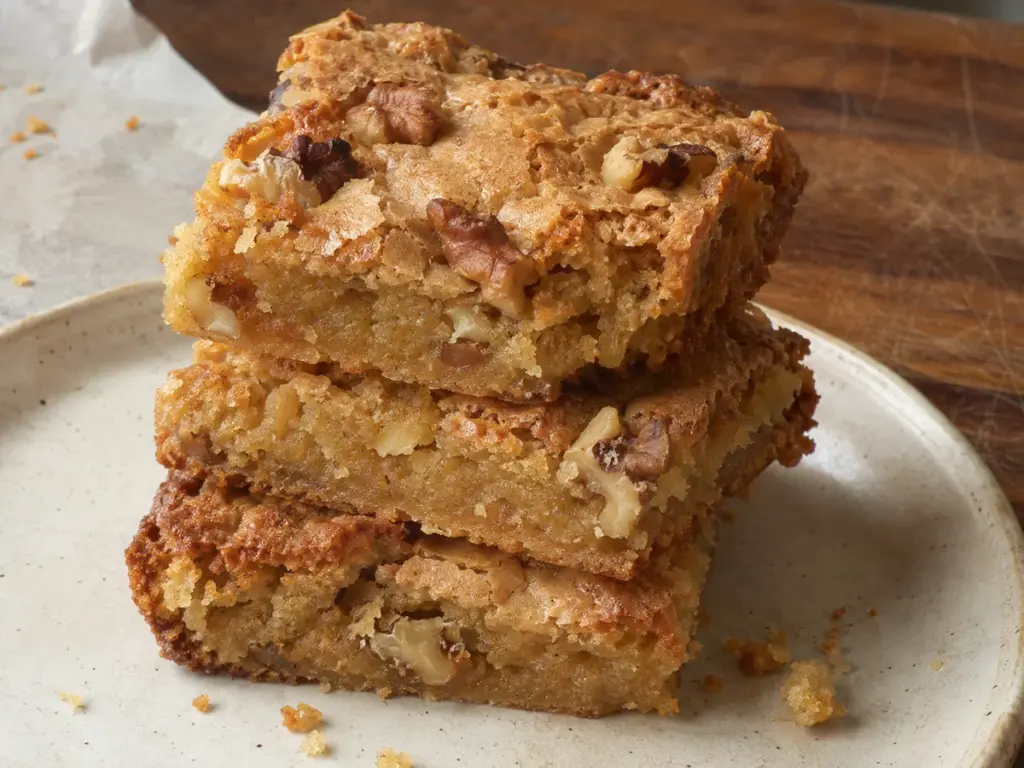
Two cups of packed brown sugar against 2 cups of flour give the chew and the caramel flavor, and walnuts toasted first add crunch to it. Bake 25 to 30 minutes, until the edges are golden and a toothpick near the center comes out with moist crumbs.
A clean toothpick means your bars are overbaked and will dry out in the bag.
Ingredients (for 24 bars)
- 1 cup unsalted butter, softened
- 2 cups packed light brown sugar
- 2 large eggs
- 2 teaspoons vanilla extract
- 2 cups all-purpose flour
- 1 teaspoon baking powder
- ½ teaspoon salt
- 1 cup walnuts, roughly chopped and toasted
Instructions
- Heat and line. Heat the oven to 350°F (175°C) and line a 9x13-inch pan with parchment, leaving an overhang for lifting.
- Cream the butter. Beat the butter and brown sugar until smooth and slightly fluffy, beat in the eggs one at a time, then stir in the vanilla.
- Add the dry ingredients. Whisk the flour, baking powder and salt, then stir them in just until combined.
- Fold in the walnuts. Fold in the walnuts and spread the batter into the pan.
- Bake. Bake 25 to 30 minutes, until the edges are golden and a toothpick near the center has moist crumbs.
- Cool and cut. Cool completely in the pan, lift the slab out and cut 24 bars.
Swaps
- Pecans or almonds take the place of the walnuts in the same amount, and every one of them keeps the tree nut warning on your sign.
- Leave the walnuts out and the same batter is a plain, walnut-free blondie that needs no tree nut line.
8. Rice Krispie Treats
Melt the 3 tablespoons of butter over low heat, because high heat scorches the marshmallows and your bars set hard. Then stir in one 10-ounce package of marshmallows (about 5 ½ cups of miniature ones) until smooth and fold in 6 cups of cereal, the amounts in Kellogg's own recipe.
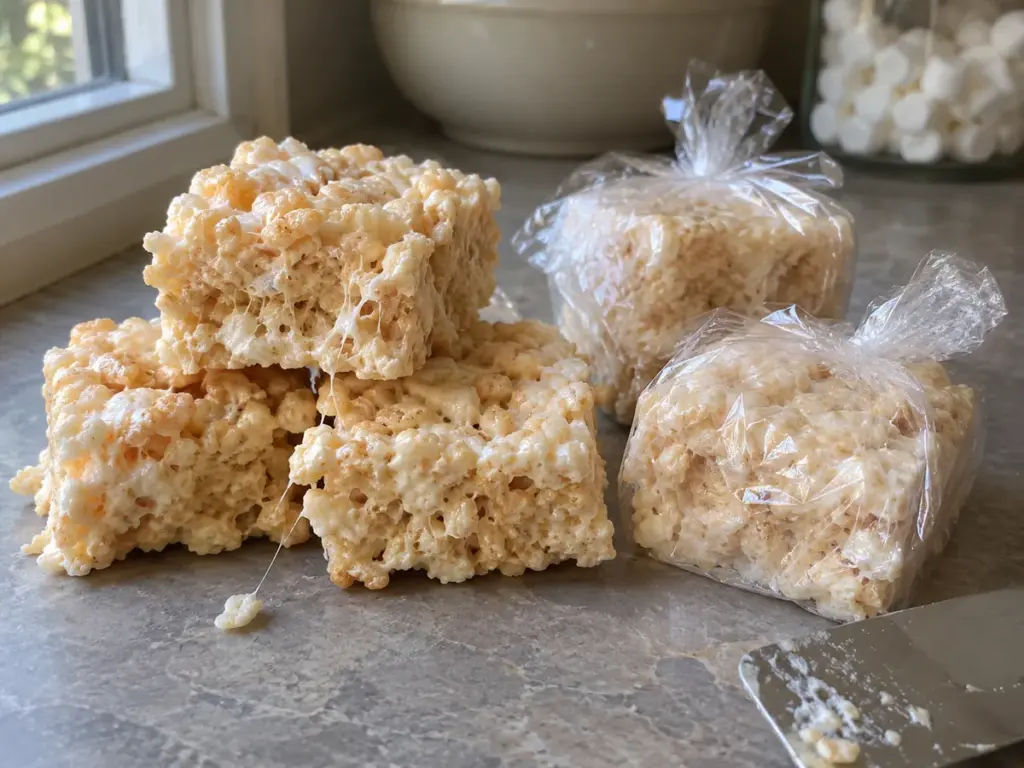
Fold the cereal in gently and press the mixture into the pan with a buttered spatula, lightly, because hard pressing crushes the cereal and packs the bars dense.
Kellogg's recipe cuts the cooled pan into 2-inch squares and asks for fresh marshmallows.
Ingredients (for 24 squares)
- 3 tablespoons unsalted butter
- 1 package (10 ounces) miniature marshmallows, about 5 ½ cups
- 6 cups crispy rice cereal
- ½ teaspoon vanilla extract, optional
Instructions
- Melt. Melt the butter over low heat in a large saucepan, add the marshmallows and stir constantly until smooth, then take the pan off the heat.
- Flavor. Stir in the vanilla, if you are using it.
- Fold. Fold in the cereal until every piece is coated.
- Press. Press the mixture into a greased 9x13-inch pan with a greased spatula or a sheet of wax paper.
- Cool and cut. Cool 30 minutes at room temperature and cut 24 squares.
Swaps
- The same recipe lets a 7-ounce jar of marshmallow creme replace the marshmallows.
- Buyers who avoid gelatin need marshmallows labeled vegan, since ordinary ones usually contain it.
- Kellogg's does not recommend diet, reduced-calorie or tub margarine in place of the butter, so a dairy-free batch needs a test pan before the sale.
- Mini chocolate chips melt into streaks in a hot mixture, so stir them in only after the cereal is coated and the pan has cooled for a minute. Any add-in changes the label, so read each package again.
9. Pumpkin Bread Muffins
Read the can before you buy it. Plain canned pumpkin puree belongs in this batter, while pumpkin pie filling comes with sugar and spices already added and would throw off the sweetness and the 1 teaspoon of cinnamon, ½ teaspoon of nutmeg and ¼ teaspoon of cloves.
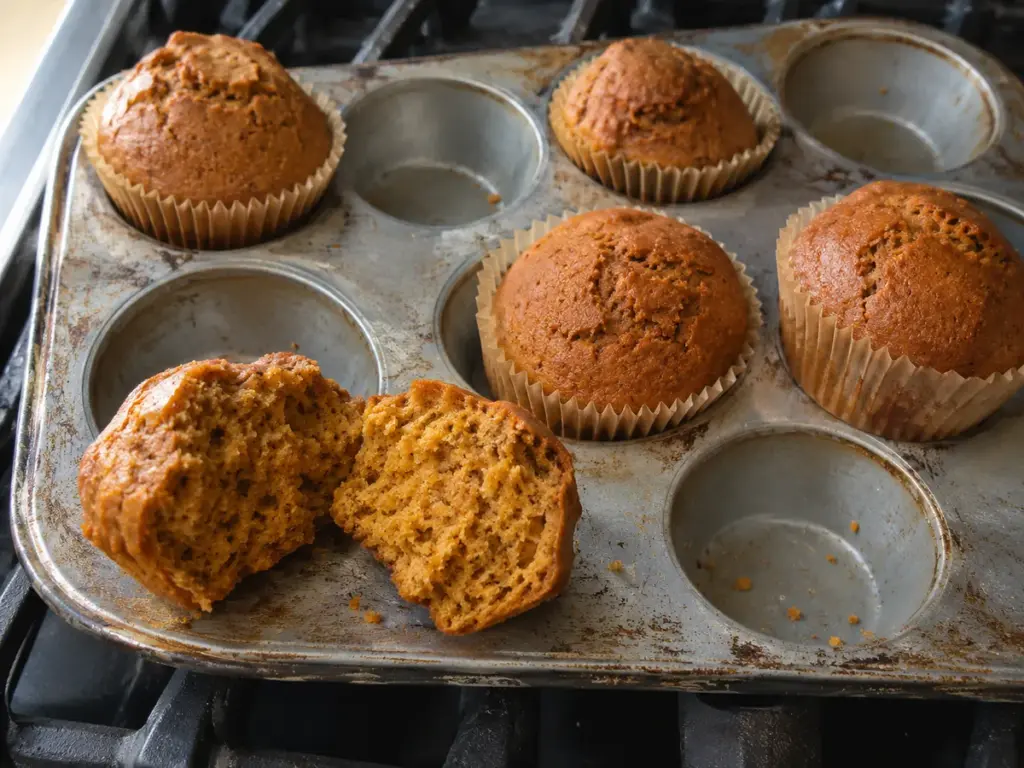
Melted butter and 1 ½ cups of puree keep the crumb moist with no frosting at all. The paper liner holds each muffin, so you can stack them in a box with nothing to smear.
Stir only until the flour disappears, because beating the batter after the flour goes in makes the muffins tough. Then fill each cup two-thirds full and bake 18 to 22 minutes.
Ingredients
- 1 ¾ cups all-purpose flour
- 1 teaspoon baking soda
- ½ teaspoon baking powder
- ½ teaspoon salt
- 1 teaspoon ground cinnamon
- ½ teaspoon ground nutmeg
- ¼ teaspoon ground cloves
- ½ cup unsalted butter, melted
- 1 cup packed brown sugar
- 2 large eggs
- 1 teaspoon vanilla extract
- 1 ½ cups canned pumpkin puree
- Optional: ½ cup chopped walnuts or pecans
Instructions
- Heat and line. Heat the oven to 350°F (175°C) and line a muffin tin with paper liners, or grease it well.
- Mix the dry ingredients. Whisk the flour, baking soda, baking powder, salt, cinnamon, nutmeg and cloves.
- Mix the wet ingredients. Stir the melted butter into the brown sugar, beat in the eggs one at a time, then stir in the vanilla and the pumpkin puree.
- Combine. Add the dry ingredients gradually, stirring just until combined, and fold in the nuts if you use them.
- Bake. Fill the cups two-thirds full and bake 18 to 22 minutes, until a toothpick comes out clean. Cool 5 minutes in the pan, then move the muffins to a wire rack.
Swaps
- Plain sweet potato or butternut squash puree can stand in for the pumpkin when it is smooth and as thick as canned pumpkin. Cook the squash until soft, mash it, and drain off any liquid before you measure 1 ½ cups.
- Vegetable oil in place of the melted butter keeps the crumb moist and makes the batch dairy-free, so the sign keeps egg and wheat, plus the optional nuts if you add them.
4 Which Bake Sale Desserts Need a Cooler?
Lemon bars, funfetti cupcakes, carrot cake squares and chocolate peanut butter bars sell well, and each is the first to go soft or spoil on a warm table. Keep them in a cooler with ice packs and set out a few at a time, so none of them sits on your table for long.
Warning
Count the clock from the moment a lemon bar, cupcake, carrot square or peanut butter bar leaves the cooler. FSIS puts the limit for perishable food at 2 hours, or 1 hour when the air is above 90°F, and food that stayed out longer goes in the trash.
A cooler only protects the lemon bars, cupcakes, carrot squares and peanut butter bars while it stays at 40°F or below, the bottom of the FSIS danger zone. Set a small thermometer inside the cooler so you know it is holding.
10. Lemon Bars
Pour the filling over the crust while the crust is still hot from its first bake, which keeps the base from turning soggy under the liquid. It then bakes another 20 to 25 minutes, until you see a center that is mostly set and slightly firm to the touch.
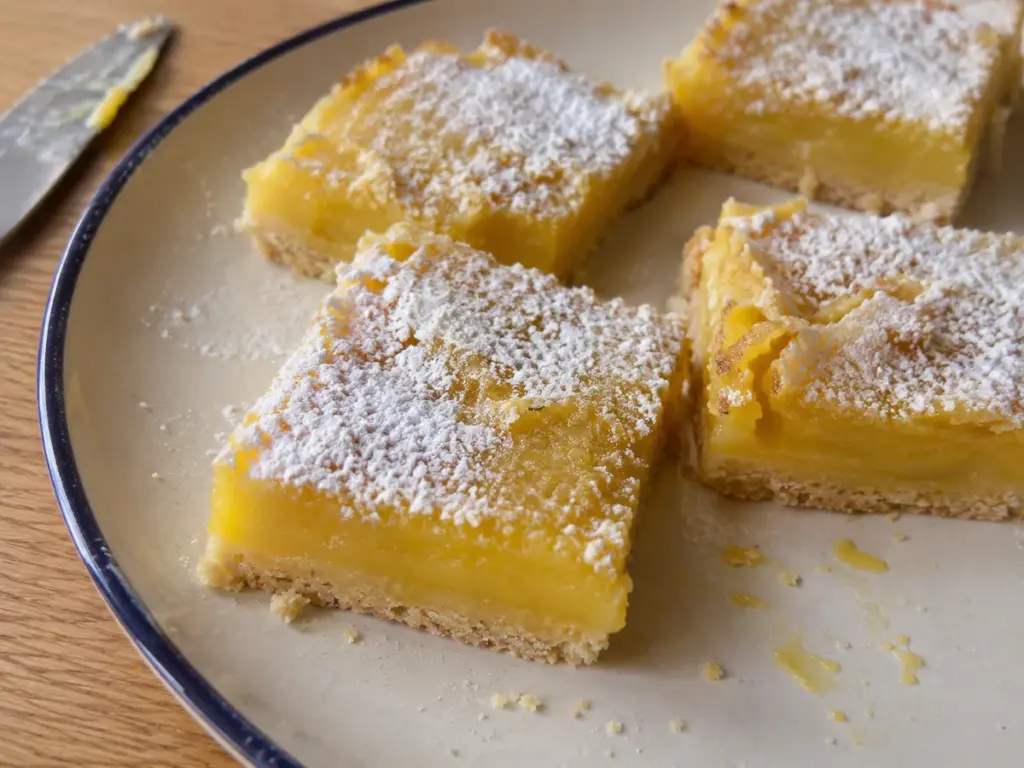
The filling is mostly eggs, sugar and lemon juice, and an egg-set filling is a perishable food, so these bars ride in the cooler. Fresh juice gives the sharp flavor.
Chill the pan fully, lift the slab out by the parchment and cut 24 squares with a knife wiped clean between cuts.
King Arthur's lemon squares get their confectioners' sugar just before serving, so dust the bars at the table.
That recipe refrigerates leftovers for 3 to 4 days.
Ingredients (for 24 bars)
For the crust
- 1 cup unsalted butter, softened
- ½ cup granulated sugar
- 2 cups all-purpose flour
- ¼ teaspoon salt
For the filling
- 4 large eggs
- 1 ½ cups granulated sugar
- ¼ cup all-purpose flour
- ½ cup fresh lemon juice
- Zest of 2 lemons
Instructions
- Heat and line. Heat the oven to 350°F (175°C) and line a 9x13-inch pan with parchment, leaving an overhang.
- Bake the crust. Beat the butter with ½ cup of sugar, add the flour and salt until the dough just comes together, press it into the pan and bake 18 to 20 minutes, until lightly golden.
- Whisk the filling. While the crust bakes, whisk the eggs, 1 ½ cups of sugar, the flour, lemon juice and zest until smooth.
- Bake again. Pour the filling over the hot crust and bake 20 to 25 minutes more, until it is mostly set and slightly firm.
- Cool and chill. Cool completely in the pan, lift the bars out with the parchment, cut 24 squares and keep them cold.
Swaps
- Lime juice replaces the lemon juice 1:1 and turns these into lime bars, so change the name on your sign.
- King Arthur's recipe suggests, as an option, stirring the grated rind of 1 lemon into the crust dough.
11. Funfetti Cupcakes with Vanilla Frosting
Alternate the dry ingredients and the milk, beginning and ending with the dry, so the butter batter takes up the milk without curdling.
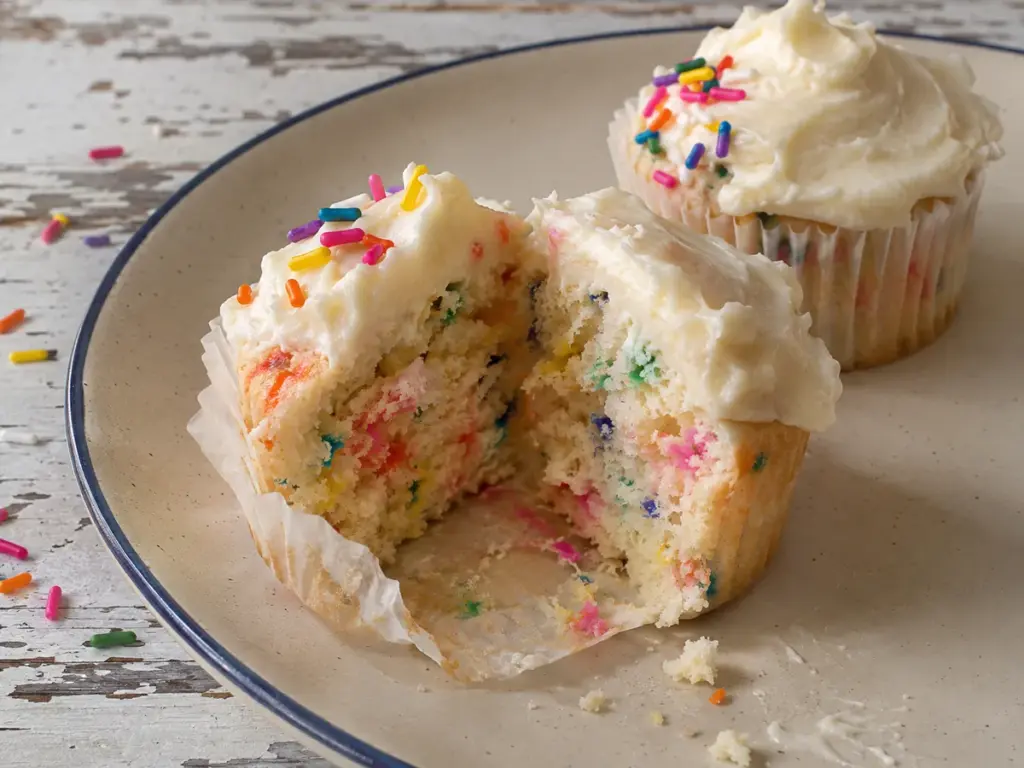
Frost only cupcakes that you have cooled completely, since a warm cake melts the butter in the frosting. The frosting beats 1 cup of butter with 3 cups of powdered sugar and 2 teaspoons of vanilla, then takes milk a little at a time, 2 to 4 tablespoons in all, until it spreads.
Chill the frosted cupcakes until the frosting firms, then box them in a carrier tall enough to clear the swirl.
Ingredients (for 12 cupcakes)
For the cupcakes
- 1 ¼ cups all-purpose flour
- 1 teaspoon baking powder
- ¼ teaspoon salt
- ½ cup unsalted butter, softened
- ¾ cup granulated sugar
- 2 large eggs
- 2 teaspoons vanilla extract
- ½ cup whole milk
- ½ cup rainbow sprinkles (jimmies)
For the frosting
- 1 cup unsalted butter, softened
- 3 cups powdered sugar
- 2 teaspoons vanilla extract
- 2 to 4 tablespoons whole milk
Instructions
- Heat and line. Heat the oven to 350°F (175°C) and line a 12-cup muffin pan with cupcake liners.
- Mix the dry ingredients. Whisk the flour, baking powder and salt in a medium bowl.
- Cream the butter. Beat the butter and sugar until light and fluffy, beat in the eggs one at a time, then stir in the vanilla.
- Combine. Add the dry ingredients and the milk in alternating additions, beginning and ending with the dry, mix just until combined and fold in the sprinkles.
- Bake. Fill the liners two-thirds full and bake 18 to 20 minutes, until a toothpick comes out clean. Cool completely.
- Frost. Beat the butter until creamy, add the powdered sugar, vanilla and 2 tablespoons of milk, beat until smooth, add more milk as needed to spread, and frost with a spatula or piping bag.
Swaps
- Round nonpareils, the tiny dyed sugar beads, tend to bleed into wet batter and streak your cupcakes. Stir jimmies, the thin rod-shaped sprinkles, into the batter instead, ½ cup in all, and keep the nonpareils for the top.
- Natural-color sprinkles can replace the ½ cup of rainbow sprinkles. Brands differ, so read the label for milk, soy and other allergens.
12. Cream Cheese Frosted Carrot Cake Squares
Grate the carrots on the fine holes of a box grater, 2 cups in all, so the shreds melt into the crumb and no long strands show in your squares. Cool the cake completely before the frosting goes on, because cream cheese frosting loosens on a warm cake and slides off.
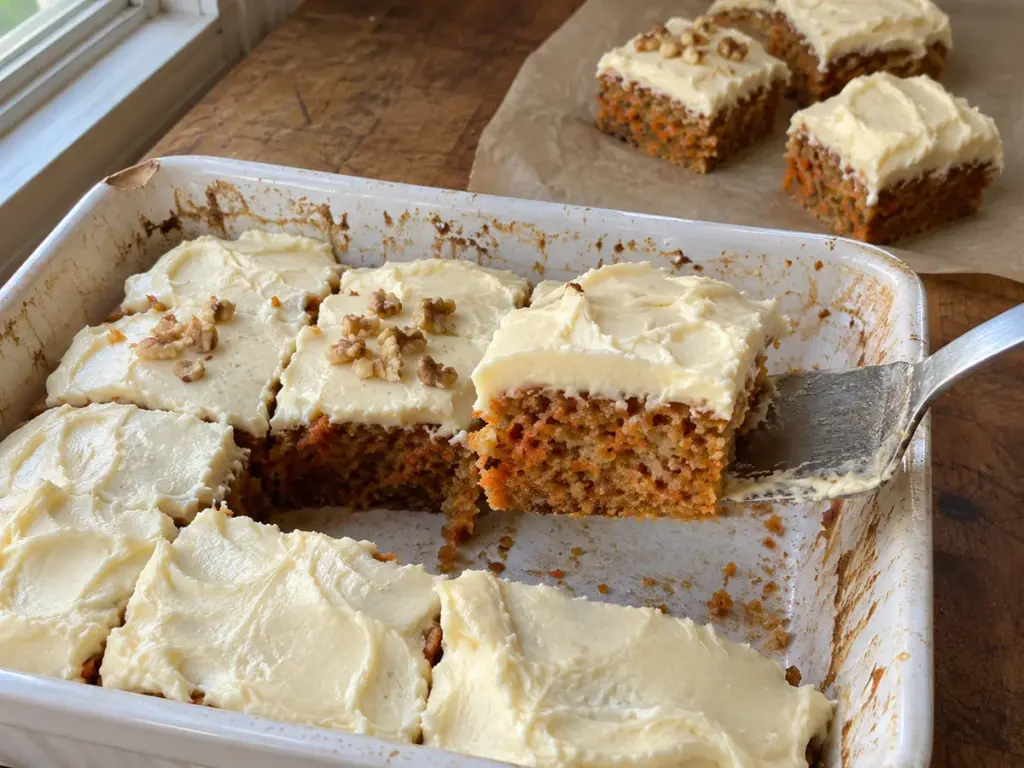
The frosting beats 8 ounces of softened cream cheese with ¼ cup of butter, 2 cups of powdered sugar and 1 teaspoon of vanilla. Keep the frosted pan in the fridge until the sale and cut it cold.
Leftovers keep 3 to 4 days in the fridge, the FSIS limit for refrigerated leftovers. A cream cheese frosted carrot sheet cake follows the same cold rule.
Wrap each square while the frosting is firm, so the wrap does not drag it off.
Ingredients (for 24 squares)
For the cake
- 2 cups all-purpose flour
- 1 ½ teaspoons baking powder
- ½ teaspoon baking soda
- 1 teaspoon ground cinnamon
- ½ teaspoon ground nutmeg
- ¼ teaspoon salt
- 1 cup granulated sugar
- ½ cup packed brown sugar
- 3 large eggs
- 1 cup vegetable oil
- 2 cups finely grated carrots
- Optional: ½ cup chopped walnuts or pecans
For the cream cheese frosting
- 8 ounces cream cheese, softened
- ¼ cup unsalted butter, softened
- 2 cups powdered sugar
- 1 teaspoon vanilla extract
Instructions
- Heat and prepare. Heat the oven to 350°F (175°C) and grease and flour a 9x13-inch pan.
- Mix the dry ingredients. Whisk the flour, baking powder, baking soda, cinnamon, nutmeg and salt.
- Mix the wet ingredients. Beat both sugars, the eggs and the oil until smooth, then stir in the carrots and the nuts, if you use them.
- Combine and bake. Fold the dry ingredients into the wet mixture until just combined, spread the batter in the pan and bake 35 to 40 minutes, until a toothpick comes out clean. Cool completely.
- Frost. Beat the cream cheese and butter until smooth, add the powdered sugar and vanilla and beat until fluffy, then spread it over the cooled cake.
- Chill and cut. Chill the pan until the frosting is firm and cut 24 squares.
Swaps
- A dairy-free cream cheese with plant-based butter covers the frosting for buyers who avoid milk, and the pan then still rides in the cooler.
13. Chocolate Peanut Butter Bars
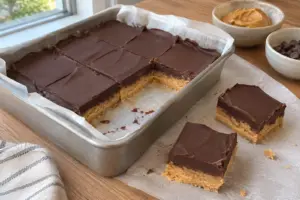
You need no oven here, which suits a baker with a hot kitchen or no oven time left. The base is 1 cup of peanut butter, ½ cup of butter, 2 cups of powdered sugar and 1 ½ cups of graham cracker crumbs, pressed into a 9x9 pan, and 1 ½ cups of melted chocolate chips with 1 tablespoon of vegetable oil spread over it and set with a shine.
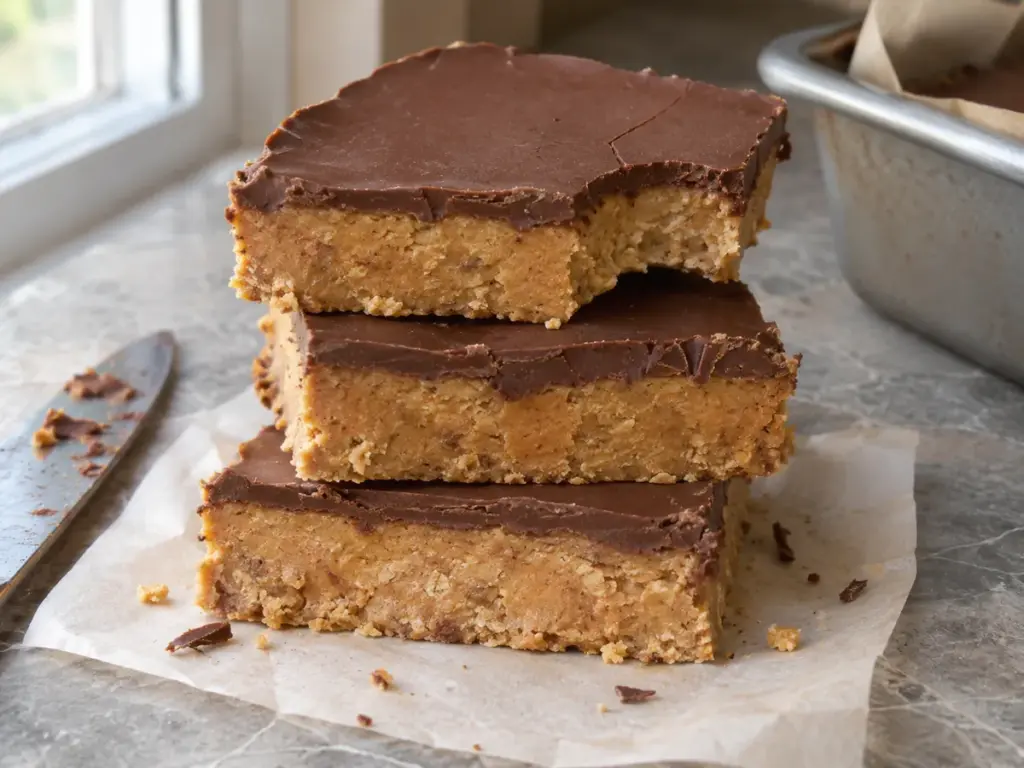
Butter and chocolate soften on a warm table, so keep the pan in the fridge until the sale. Let it stand a few minutes before you cut, because chocolate cut straight from the fridge cracks, and wipe the knife between cuts for 16 clean squares.
Peanuts and the wheat in the graham crumbs both go on the sign.
Ingredients (for 16 squares)
- 1 cup creamy peanut butter, unsweetened or lightly salted
- ½ cup unsalted butter, softened
- 2 cups powdered sugar
- 1 ½ cups graham cracker crumbs
- 1 ½ cups semi-sweet chocolate chips
- 1 tablespoon vegetable oil
Instructions
- Mix the base. Stir the peanut butter and butter until smooth.
- Add the sugar and crumbs. Stir in the powdered sugar and graham crumbs until the mixture is thick and holds together.
- Press. Press it firmly and evenly into a greased or parchment-lined 9x9-inch pan.
- Melt the chocolate. Microwave the chocolate chips and oil in 30-second bursts, stirring after each, until smooth.
- Top and chill. Spread the chocolate over the base and refrigerate at least 2 hours, until firm.
Swaps
- Almond or cashew butter can replace the peanut butter, but the warning then moves from peanuts to tree nuts, and sunflower seed butter removes both.
- Crushed cookies take the place of graham crumbs: start with the recipe's amount of crumbs, then add a spoonful at a time until the base holds together. For a gluten-free pan, crush a cookie whose package says gluten-free.
- Milk or dark chocolate chips can replace the semi-sweet chips in the 1 ½ cups. Milk chocolate makes the topping sweeter and dark makes it less sweet, and the tablespoon of oil stays so the layer sets glossy. Check each bag for allergens.
5 Which Bake Sale Frostings Need Refrigeration?
Cream cheese frosting needs the cooler. Iowa State University Extension says frosting made with cream cheese, whipped cream or eggs requires refrigeration, and its 4-H fair rules keep homemade cream cheese frosting off the exhibit table. That is why the carrot cake squares ride in the cooler.
Butter frosting is less clear. Iowa State publishes one buttercream with lab results:
- 1 cup of butter and 4 cups of powdered sugar
- ¼ teaspoon of salt and 1 teaspoon of vanilla
- 2 tablespoons of pasteurized milk
That recipe came out above 65% soluble solids and below 0.85 water activity, the numbers a frosting needs before it can go without refrigeration. The same page warns that not every buttercream meets those numbers, and that a changed recipe needs its own lab analysis.
The funfetti frosting here uses 1 cup of butter, 3 cups of powdered sugar and 2 to 4 tablespoons of milk, so it differs from Iowa State's recipe, and keeping those cupcakes cold is the safe call.
If your table has no cooler, choose from the nine room-temperature desserts and ask the sale organizer what homemade frostings the rules allow before you bake a frosted one.
6 How Do You Wrap and Carry Bake Sale Desserts?
Buyers decide by sight, so wrap each piece you sell in clear plastic where buyers can see it: a pair of cookies in a cellophane bag, a bar in a square of parchment or plastic wrap, a cupcake in a box with its own cell. Everything wraps after it has cooled completely, since a warm dessert steams inside the wrap.
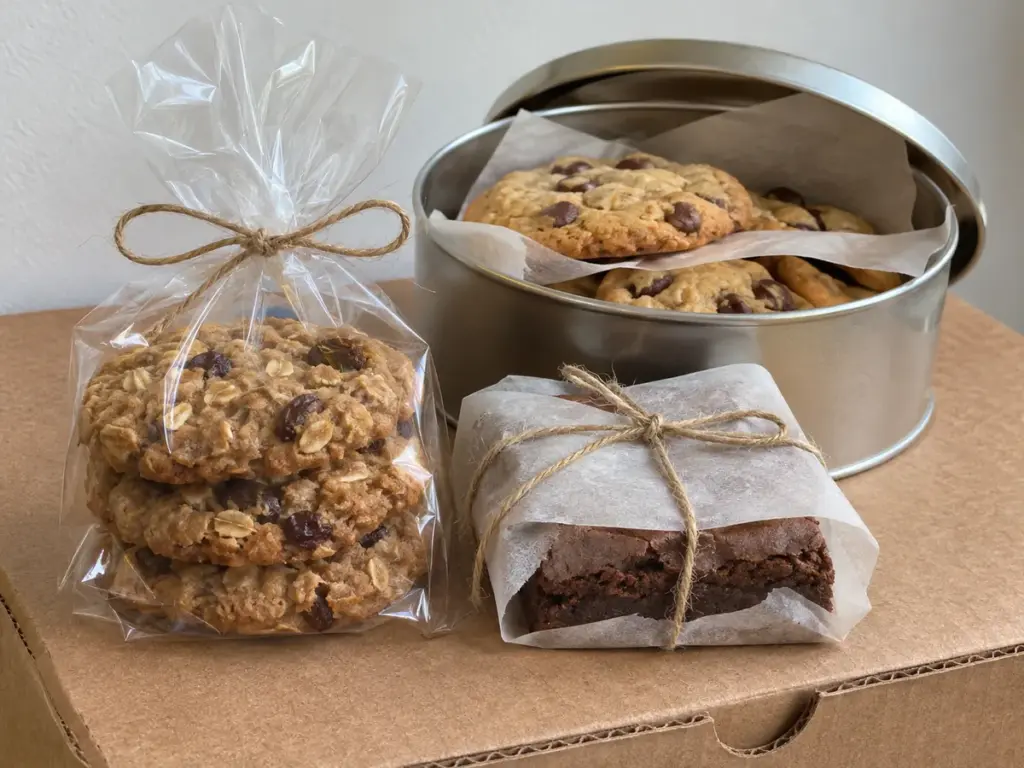
- Cookies travel in a rigid tin, one layer at a time, with parchment between the layers so the icing and cinnamon sugar do not scrape. Keep crisp cookies away from soft ones in the same tin, because a crisp cookie takes moisture from a soft one and goes soft.
- Bars are cut at home with a clean knife and wrapped one by one. A recipe written in centimetres, such as the 20 x 30 cm pan of this chocolate peanut butter swirl traybake, bakes in a pan of about 8 x 12 inches, so cut it the way that recipe says instead of using the 24 squares of a 9x13 pan.
- Cupcakes ride in a carrier with a cell for each one, because a loose frosted top sticks to the lid.
- Lemon bars, cupcakes, carrot squares and peanut butter bars stay in the cooler on ice packs until a buyer picks one.
7 Which Allergens Go on a Bake Sale Sign?
The FDA names nine major food allergens: milk, eggs, fish, crustacean shellfish, tree nuts, peanuts, wheat, soybeans and sesame. None of these 13 recipes uses fish, shellfish or sesame, so your sign for the whole table runs to milk, eggs, wheat, peanuts and tree nuts, plus soy wherever a brand label you checked declares it.
- Milk is in all 13, through butter, milk or cream cheese.
- Eggs are in 11 of the 13, everything except the peanut butter bars and the Rice Krispie Treats.
- Wheat is in every dessert that uses flour or graham crumbs, which is every one except the Rice Krispie Treats, where the cereal label decides.
- Peanuts are in the peanut butter blossoms and the chocolate peanut butter bars.
- Tree nuts are in the blondies as walnuts, and in the pumpkin muffins and carrot squares whenever you add the optional nuts.
A school with a nut ban can still use 10 of the 13 recipes, everything except the peanut butter blossoms, the walnut blondies and the chocolate peanut butter bars, as long as you leave out the optional nuts in the pumpkin muffins and carrot squares. Chips, candies and sprinkles often carry "may contain nuts" warnings, so read those labels too.
The card for the blondies names wheat, milk, egg and tree nuts (walnuts), and the card for the Rice Krispie Treats names milk plus whatever the cereal and marshmallow labels declare. Tape each card to the tray or the individual wrap, so the allergen list travels with the dessert.
The FDA's own label format puts a "Contains" line next to the ingredient list, with the example "Contains Wheat, Milk, and Soy". Put that line on your sign and every allergen sits where a buyer looks first.
Tip
Write each sign by dessert, name the walnuts or other nuts instead of writing "nuts", and say so when a bowl, pan or mixer that held peanut butter was used for another dessert. School and state rules on homemade food and labels differ, so ask the sale organizer what is required before you bake.
How Do You Avoid Cross-Contact?
Food Allergy Research & Education defines cross-contact as one food touching another so that their proteins mix, and it says that wiping crumbs off spatulas, cookie sheets and cutting boards is not enough.
- Wash equipment in hot, soapy water before you make any dessert you will label free of an allergen.
- Wash your hands with soap and water, because alcohol-based sanitizer does not remove the protein.
- Bake the allergen-free tray first when several desserts share your kitchen.
8 Can You Make These Dairy-Free, Egg-Free or Gluten-Free?
You can adapt most of the 13, but each change alters the dessert, so bake one small tray before you commit a full batch.
- Dairy-free buyers need the butter changed, because all 13 recipes contain butter, milk or cream cheese. Dairy-free stick margarine or coconut oil replaces butter in the cookies, bars and cupcakes; for the Rice Krispie treats, follow the margarine note in item 8.
- Egg-free buyers can have brownies made with ground flaxseed in water, which is 1 tablespoon of ground flaxseed stirred into 3 tablespoons of water for each egg. The brownie batter uses 4 eggs, so swap half of them first. The lemon bar filling is mostly egg and has no easy swap.
- Gluten-free buyers can have the cookies, brownies and blondies made with a gluten-free flour blend. The Rice Krispie Treats work with gluten-free crisped rice cereal once you have read its label. A cookie tray planned around gluten-free flour from the start, such as gluten-free chocolate chip cookies and snickerdoodles, is easier than converting these recipes.
King Arthur's egg guide lists flax eggs for cookies, brownies, bars and muffins but not for light, fluffy cakes, and it says the more eggs you replace, the bigger the change. That makes the one-egg peanut butter blossoms and sugar cookies the easiest cookies to make egg-free, and it leaves the funfetti cupcakes best as written.
A swapped ingredient leaves the equipment as it was, so your sign still names every allergen that touched the bowls, pans and mixer.
9 How Far Ahead Can You Bake Each Dessert?
You can finish cookies and muffins weeks before the sale, and Rice Krispie Treats are the ones that cannot wait.
| Dessert | How far ahead | Source |
|---|---|---|
| Chocolate chip, snickerdoodle, oatmeal raisin and peanut butter blossom cookies | Freeze cooled, baked cookies in a sealed container for 8 to 12 months at best quality, and thaw them still sealed so condensation forms on the wrapper, not the cookies | USDA FoodKeeper, cookies |
| Pumpkin muffins and unfrosted cupcakes | Freezer, 6 months at best quality | USDA FoodKeeper, commercial cakes and muffins |
| Rice Krispie Treats | Best the day they are made, 2 days airtight at room temperature, up to 6 weeks frozen | Kellogg's recipe |
| Carrot cake squares with cream cheese frosting | 3 to 4 days in the fridge | USDA FSIS, leftovers |
If you scoop chocolate chip or oatmeal raisin dough and freeze it as single cookie dough balls, they bake straight from the freezer, so your oven only runs on the morning of the sale.
FoodKeeper has no entry for homemade bars, so bake the brownies, blondies, lemon bars and peanut butter bars the day before the sale, wrap them once they are fully cool and keep the lemon bars and peanut butter bars cold.
Sources
- FDA: food allergies, what you need to know
- USDA FSIS: the danger zone, 40°F to 140°F
- USDA FSIS: leftovers and food safety
- Minnesota Department of Agriculture: unique foods processed at retail
- USDA FoodKeeper
- King Arthur Baking: how to substitute whole wheat for white flour
- King Arthur Baking: guide to substituting eggs
- King Arthur Baking: types of sugars and when to substitute
- Kellogg's: The Original Rice Krispies Treats recipe
- SunButter: FAQs
- King Arthur Baking: cut-out sugar cookies
- King Arthur Baking: ingredient weight chart
- Food Allergy Research & Education: avoiding cross-contact
- King Arthur Baking: baking with a parchment paper sling
- King Arthur Baking: lemon squares
- Iowa State University Extension: safe frosting for Iowa 4-H fairs

Andrew Gray is a seasoned food writer and blogger with a wealth of experience in the restaurant and catering industries. With a passion for all things delicious, Andrew has honed his culinary expertise through his work as a personal chef and caterer.
His love for food led him to venture into food writing, where he has contributed to various online publications, sharing his knowledge and insights on the culinary world. As the proud owner of CooksCrafter.com, Andrew covers a wide range of topics, including recipes, restaurant reviews, product recommendations, and culinary tips.
Through his website, he aims to inspire and educate fellow food enthusiasts, offering a comprehensive resource for all things food-related.